1
For More Information, Visit BMI Gaming | www.bmigaming.com | (800) 746-2255 | +1.561.391.7200
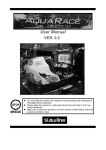
User Manual
VER. 0.2
For your safe and correct use, read this manual carefully and understand it
thoroughly before operation.
Please keep this manual in a safe place at all times and refer to it for any
future references.
Make sure to pass this manual on to future owners of Mini Rider2 when the
product is moved or sold.
For More Information, Visit BMI Gaming | www.bmigaming.com | (800) 746-2255 | +1.561.391.7200
BEFORE USING THE PRODUCT, BE SURE TO READ THE FOLLWING:
To maintain safety:
To ensure the safe operation of this product, be sure to read the following before usage.
The following instructions are intended for the users, operators and the personnel in charge of the operation
of the product. After carefully reading and sufficiently understanding the warning displays and cautions,
handle the product appropriately. Be sure to keep this manual close to the product or in a convenient place
for future reference.
Herein, explanations which require special attention are enclosed with dual lines. Depending on the
potentially hazardous degrees, the terms of DANGER, WARNING, CAUTION, etc. are used.
Be sure to understand the contents of the displays before the text.
Indicates that mishandling the
product by disregarding this
pictograph will cause severe injury
or death.
Indicates that mishandling the
product by disregarding this
caution will cause a slight
hazardous situation which can
result in personal injury and/or
material damage.
Indicates that mishandling the
product by disregarding this
warning will cause a potentially
hazardous situation which can
result in death or serious injury.
For safe usage of this product, the following pictographs are used:
Indicates “HANDLE WITH CARE.” In order to protect the human body and equipment, this
display is attached to places where the User Manual should be referred to.
Indicates a “Protective Earth Terminal.” Before operating the equipment, be sure to connect it
to the Ground.
(The step may be omitted for products in which a power cord with earth is used.)
● Perform work in accordance with the instructions herein stated.
Instructions for work are explained by paying attention to the aspect of accident prevention. Failing to
perform work as per the instructions can cause accidents. In the case where only those who have
technical expertise should perform the work to avoid hazardous situation, the instructions herein state
that the serviceman should perform such work.
● Be sure to turn off power before working on the machine.
To prevent electric shock, be sure to turn off power before starting the work in which the worker touches
the interior of the product. If the work is to be performed in the power-on status, the Instruction Manual
herein always states to that effect.
● Be sure to ground the Earth Terminal. (This is not required in the case where a power cord with earth
is used.)
This product equipped with the Earth Terminal. When installing the product, connect the Earth Terminal
to the “accurately grounded indoor earth terminal” by using an earth wire. Unless the product is
grounded appropriately, the user can be subject to electric shock. After performing repair, etc. for the
Control equipment, ensure that the Earth Wire is firmly connected to the Control equipment.
● Ensure that Power Supply used is equipped with an Earth Leakage Breaker.
This product does not incorporate the Earth Leakage Breaker. Using a power supply which is not
equipped with the Earth Leakage Breaker can cause a fire when earth leakage occurs.
1
SIMULINE INC..
For More Information, Visit BMI Gaming | www.bmigaming.com | (800) 746-2255 | +1.561.391.7200
● Specification changes (removal of equipment, conversion and addition) not designated by
Simuline are not allowed.
The parts of the product include warning labels for safety, covers for personal protection, etc. It is very
hazardous to operate the product by removing parts and or modifying the circuits. Should doors, lids and
protective parts be damaged or lost, refrain from operating the product, and contact where the product
was purchased from or the office herein stated. Simuline shall not be held responsible for any accidents,
compensation for damage to a third party, resulting from the specifications not designated by Simuline.
● Ensure that the product meets the requirements of appropriate Electrical Specification.
Before installing the product, check for Electrical Specifications. Simuline products have a nameplate on
which Electrical Specifications are described. Ensure that the product is compatible with the power
supply voltage and frequency requirements of the location. Using any Electrical Specifications different
from the designated Specifications can result in a fire and electric shock.
● Install and operate the product in places where appropriate lighting is available, allowing warning
labels to be clearly read.
To ensure safety for the customers, labels and printed instructions describing potentially hazardous
situation are applied to places where accidents can be caused. Ensure that where product is operated
has sufficient lighting allowing the warnings to be red. If any label is peeled off, apply it again immediately.
Please place an order with where the product was purchased from or the office herein stated.
● When handling the Monitor, be very careful. (Applies only to the product w/monitor)
Some of the monitor (TV) parts are subject to high tension voltage. Even after running off power, some
portions are still subject to high tension sometimes. Monitor repair and replacement should be performed
only be those technical personnel who have knowledge of electricity and technical expertise.
● Be sure to adjust the monitor (projector) properly. (Applies only to the product w/monitor)
Do not operate the product leaving on-screen flickering or blurring as it is. Using the product with the
monitor net properly adjusted may cause dizziness or a headache to an operator, a player, or the
customers.
● When transporting or reselling this product, be sure to attach this manual to the product.
In the case where commercially available monitors and printers are used in this product, only the
contents relating to this product are explained herein. Some commercially available equipment has
functions and reactions not stated in this manual. Read this manual together with the specific Instruction
Manual of such equipment.
Description herein contained may be subject to improvement changes without notice.
The contents described herein are full prepared with due care. However, should any question arise or
errors can be found, please contact Simuline.
2
SIMULINE INC..
For More Information, Visit BMI Gaming | www.bmigaming.com | (800) 746-2255 | +1.561.391.7200
◈ Table of contents ◈
INTRODUCTION TO THE MANUAL ................................................................................................................. 4
ABOUT WARRANTY ......................................................................................................................................... 5
1. HANDLING CAUTIONS ................................................................................................................................. 7
3. CAUTIONS: OPERATION............................................................................................................................ 10
4. SPECIFICATION .......................................................................................................................................... 12
5. PARTS .......................................................................................................................................................... 13
6. ACCESSORY ............................................................................................................................................... 18
7. INSTALLATION ASSEMBLY ....................................................................................................................... 19
8. SAFETY FEATURE ...................................................................................................................................... 37
9. CONTROL PANEL ....................................................................................................................................... 38
10. CONTENTS OF THE GAME ...................................................................................................................... 39
11. TEST MODE ............................................................................................................................................... 46
12. HOW TO PLAY THE GAME (GUIDES FOR RIDERS) .............................................................................. 54
13. SYSTEM OPERATION............................................................................................................................... 56
14. NETWORK PLAY ....................................................................................................................................... 58
15. MONITOR................................................................................................................................................... 62
16. REPAIR & MAINTENANCE ....................................................................................................................... 64
17. TROUBLESHOOTING ............................................................................................................................... 65
18. PARTS LIST ............................................................................................................................................... 68
3
SIMULINE INC..
For More Information, Visit BMI Gaming | www.bmigaming.com | (800) 746-2255 | +1.561.391.7200
Introduction to the Manual
Specifications noted in this manual may change without notice.
This manual contains all of the instructions regarding assembly, installation, and maintenance of
AQUARACE EXTREME
This manual is for the owner, manager and operators of the installation site.
This manual must be read thoroughly prior to the installation.
When the product is not working properly, do not attempt to perform any work to the machine unless you are
the trained site maintenance personnel or technician. Contact the service representative listed in this manual
for assistance.
If this manual is lost, contact the retailer or the service representative listed in this manual for a copy.
You will be able to find [IMPORTANT] sings throughout the manual where special attention is needed. This
sign does not concern any damage to property or human body.
When this sign is ignored, product will not perform its original performance or the product may
stop operating.
Simuline Inc.
461-28 Jeonmin-Dong, Yuseong-Gu,
Daejeon, 305-811 Korea
Tel: +82-(0)42-610-1010
Fax: +82-(0)42-862-0795
Email: [email protected]
Website : http:// www.simuline.com
4
SIMULINE INC..
For More Information, Visit BMI Gaming | www.bmigaming.com | (800) 746-2255 | +1.561.391.7200
About Warranty
This product is covered by a limited 1 year warranty.
Any malfunctions caused by the factory defects are covered by this warranty policy and will be repaired at
manufacturer’s expense. If you encounter any malfunction, stop the operation, disconnect the power, and
contact the retailer or the service representative listed in this manual.
Below are the cases not covered by the warranty. Any repairs will be charged to the owner or the operator.
1)
2)
3)
4)
5)
6)
7)
8)
Malfunctions caused by NATURAL DISASTER.
Malfunctions caused by WATER or BREAKAGE caused by FALL.
Malfunctions caused by MISHANDLING.
Malfunctions caused by NOT FOLLOWING THIS MANUAL AT ALL TIMES.
Malfunctions caused by UNAUTHORIZED MODIFICATIONS (including ADDITIONS).
Malfunctions caused by INTENTIONAL DAMAGE TO THE PRODUCT.
Malfunctions caused by NOT FOLLOWING THE MAINTENANCE ROUTINE.
Detail examination conducted by manufacturer’s engineer, regular maintenance, moving the -product, reinstallation.
9) Malfunctions caused by OTHER PRODUCTS. Malfunctions such as flickering of the screen caused by
MAGNETIC FIELDS, ELECTRICAL SIGNALS generated by near by products.
10) Parts classified as expendables
A – Switches, buttons
B – Any advertisement articles such as POP, banner and ETC.
※
The manufacturer is not responsible for the loss of income at the installed site caused by the
malfunctions of the product.
5
SIMULINE INC..
For More Information, Visit BMI Gaming | www.bmigaming.com | (800) 746-2255 | +1.561.391.7200
DEFINITION OF SERVICEMEN AND TECHNICIAN
Make sure all of the work to be done on this product is executed by Site Maintenance Personnel or
Technicians as noted in this manual. Any work that is not noted in this manual should not be
executed by anyone except for the trained(authorized) technicians. If this warning is not followed,
serious accidents such as electric shock or short circuit may occur.
Replacing any parts or maintenance work or any other work to the product must be done by the Site
Maintenance Personnel or Technicians. This manual strictly states that the work to the product must be done
by authorized personnel with professional knowledge. Definitions of the Site Maintenance Personnel and
Technicians are as follows.
● Site Maintenance Personnel :
Individuals with experience in maintaining amusement equipment, vending machines, etc., working
under the supervision of the owner/operator of this product to maintain machines within amusement
facilities or similar premises by carrying out everyday procedures such as assembly, maintenance
inspections, and replace of units/expendable parts.
-
Duties of Site Maintenance Personnel : Installation, maintenance, and replacing parts of the
amusement machines or automatic vending machines.
● Technicians :
Persons employed by amusement equipment manufacturers or involved in design, production, testing or
maintenance of amusement equipment. The individual should have either graduated from technical
school or hold similar qualifications in electrical/electronics/mechanical engineering.
-
Duties of Technicians : Installations of amusement machines. Repair or adjustments of the
electronics and parts.
6
SIMULINE INC..
For More Information, Visit BMI Gaming | www.bmigaming.com | (800) 746-2255 | +1.561.391.7200
1. HANDLING CAUTIONS
When installing, maintaining or handling the product, the following cautions should be observed in order to
enjoy the game safely.
Failure to follow the warnings listed below and in other parts of this manual may cause physical injuries or
damage to the machine.
● Before any installation or maintenance work, make sure to turn off the power. Failure to do so
may cause an electric shock or short-circuit. In case it is necessary to keep the power on for a
certain type of work, the manual will explicitly state so.
● Power cables/cords or grounding wires should not be exposed such as on a passage. The
exposure may cause physical injuries, possibly resulting in short-circuit or electric shock.
● Do not place any article on power cables/cords nor damage them, for it may cause a fire or
electric shock.
● Do not pull on the power cables/cords unnecessarily during or after installation. Damaged
cords may cause a fire or electric shock.
● Make sure to earth the product. Incorrect grounding may also cause an electric shock.
● Firmly connect IC boards and all connectors completely. Unstable connections may cause an
electric fire.
● Do not make any unauthorized changes or modifications to the product.
・ Doing so may cause fire or an electric shock. In some cases it can hurt and cause physical
injury to the user/operator or bystander.
・ The manufacturer and/or seller will not be liable for any accidents that occur on products that
have undergone unauthorized modifications or changes including but not limited to such
modifications and changes performed by a third party.
● Make sure to always execute the routine maintenance procedures specified in the manual.
● When cleaning the surface of the monitor, use a soft and dry cloth. Do not use chemicals such
as thinner or benzene.
● Static electricity in the human body can destroy electronic parts on IC boards. Make sure to
discharge any static electricity by measures such as setting hands to a grounded metal plate
before handling IC boards.
● There are some components/parts, which are not specially designed and manufactured for the
product. Please understand that in case the manufacturer of such components/parts
discontinues production or changes the specifications, it may not be possible to repair or
replace such products regardless of the warranted period.
7
SIMULINE INC..
For More Information, Visit BMI Gaming | www.bmigaming.com | (800) 746-2255 | +1.561.391.7200
2. INSTALLATION LOCATION CAUTIONS
The product is intended for indoor use. Therefore, do not install it outdoors.
Even when installed indoors, the following locations should be avoided. They may cause a fire,
electric shock or breakdown.
・ Places with raindrops or water leakage, or places with high humidity such as indoor swimming
pools or showers.
・ Places that have a high temperature such as places with direct sunlight or close to heating
sources.
・ Places near flammable gas, explosive chemical or dangerous substances.
・ Places that are dusty
・ Places with an incline.
・ Places with intense vibration
・ Places near anti-disaster facilities such as emergency exit or fire extinguisher
・ Any other place outside of the allowable temperature range (ambient temp.) of 5℃~30℃
℃.
RESTRICTIONS FOR USE
● Check your electric specifications.
Check whether the product conforms to the voltage, current and frequency provided at the
installation location. For the electric specifications, see the plate (label) attached on the
product.
If electric source outside of the specification is used, it can cause a fire or electric shock.
● Inside the installation location, a breaker and an earth connection for the product are required.
An independent electric source for the product should be provided to prevent fire or electric
shock.
● On the back side of the SCU, the power needed to operate the product is marked as singlephase AC 200V, 208V, 220V, 230V, and 240V. Prepare a compliant power source.
● Make sure to use the power with independent circuit breaker. Using any power source without
circuit breaker can cause a fire.
● Do not have many electrical cords connected to a single socket. Overload can cause the
generation of heat or a fire.
Electric Power Consumption
MAX. 14.73A (AC200V 50/60Hz)
14.43A (AC220V 50/60Hz)
11.38A (AC240V 50/60Hz)
8
SIMULINE INC..
For More Information, Visit BMI Gaming | www.bmigaming.com | (800) 746-2255 | +1.561.391.7200
OPERATIONAL FLOOR AREA
●
●
●
●
●
This product requires at least the space noted below for proper operation. This includes the
consideration for the space for pedestrians and maintenance. If not enough space is
provided, collisions and trouble may happen.
3334mm X 2171mm
In case any accident occurs while the product is operated on a floor area less than specified,
the manufacturer will not be responsible for any liability or reparations.
In case the product cannot fit through the entrance of a location, do not disassemble without
proper preparations. Disassemble only the parts as specified in this manual. Do not attempt a
disassembly procedure not described in this manual. Special tools and adjustment
procedures are required to disassemble/assemble much of the mechanical parts of the
product. Improper disassemble/assemble can lead to accident during disassembly/assembly
such as electrical shock and human injury. If the product does not fit through the entrance
even after the disassembly specified in this manual, contact the manufacturer/supplier or the
contact provided in this manual.
This product requires opening of at least 2900mm of width and 1400mm of height to pass
through. Do not tilt the product or subassemblies in an attempt to pass through small
entrances. This can cause accidents during the transportation. In addition, it can cause damage
or deformation to parts and result in accidents during operation.
9
SIMULINE INC..
For More Information, Visit BMI Gaming | www.bmigaming.com | (800) 746-2255 | +1.561.391.7200
3. CAUTIONS: OPERATION
For safe operation, please obey the following warnings and instructions.
CAUTIONS: OPERATION
Check the following cautions before working hours to prevent accidents.
● To prevent any player or other customers from headache or dizziness, the product should be
installed in a well-lighted place so that warning signs can be clearly read. Improper lighting can
cause unexpected problems such as contact between customers, collision, and other
undesirable situations.
● Adjust the monitor appropriately.
If monitor blinking is detected, do not leave it un-adjusted. Inappropriate monitor adjustment can
cause dizziness or headache to players and other customers.
● Prepare a resting facility for players to take a rest in case he (she) needs to rest due to conditions
such as motion sickness.
● Check whether the level adjusters are securely set to the ground. If not, the product is not
properly set and can result in an accident.
● Do not place any heavy article on the product. It can cause an accident if dropped and can also
damage components.
● Do not climb on the product. Accident can be caused from falling. If it is necessary to check the
top of the product, use a stepladder.
● Check whether any doors or cover sections are damaged or separated. It can cause electric
shock.
● Do not place the following articles on or inside the control panel, on top of the seat, on the top of
the product or in the vicinity of the product. Doing so may cause short-circuit, electric shock or
damage parts.
● Vase, pot, cup, water bucket, cosmetics and containers containing chemicals or water.
● Check the surroundings before turning the product on. Once it is turned on, the product is
automatically initialized. If anyone is too close to the product during initialization, collision with
the moving cabin can occur.
● For safe operation, make sure to execute a trial operation after power on. Since the cabin moves,
the product is equipped with safety devices. Please check whether these safety devices work
normally as follows.
· Does the seat belt secure the player properly?
· Is the seat belt free of damages or excessive wear?
· Does the motion stop automatically when the seat belt is loosened?
· Is the seat attached securely without looseness?
· Does the product stop the motion when the GAME STOP button is pressed?
· Does the product stop the motion when the sensors are tripped?
· Does the product stop the motion when the cabin sensor is tripped?
· Does the product stop the motion when the cabin door is opened?
● In addition to checking the safety devices, make sure that the product moves normally. Any
abnormal motion can cause accidents. Do not operate the product unless all abnormalities are
resolved.
· Does the product move smoothly?
· Is there any abnormal noise or sound when moving?
· Is there any abnormal vibration when moving?
● If an abnormality regarding the Cabin or the Actuator is found during inspection or operation,
stop the operation and contact the retailer or the service personnel listed in this manual. If the
operation does not stop even after an abnormal behavior of the product is found, serious
accidents/injury such as electric shock, short circuit, fire, and even death. For the maintenance
of the Cabin or the Actuator, please contact the service personnel listed in this manual. A
service person who is not authorized by the manufacturer should not carry out the service work
on this product. Serious accidents or injury may occur during the work. Also, serious
accidents or injury may occur to the passengers.
● To prevent any possible accidents, Fence must be installed properly and make sure the
movements of the cabin is within the Fence.
10
SIMULINE INC..
For More Information, Visit BMI Gaming | www.bmigaming.com | (800) 746-2255 | +1.561.391.7200
CAUTIONS : OPERATION (TO THE PLAYER)
To prevent accidents and/or unnecessary problems, alert players or customers to be aware of the following.
● Anyone who falls into one or more of the following should be prevented from playing the game.
It may cause an accident or injuries.
· Persons who need assistance when walking, and persons with high blood pressure or heart
disease.
· Persons who have experienced spasms/convulsions or motion sickness or unconsciousness’
after playing a TV video or similar game.
· Persons who have neck or backbone trouble.
· Pregnant women or persons who are intoxicated.
· Persons susceptible to vomiting from amusement rides.
· Persons that do not follow warning signs.
● Even persons who have never experienced discomfort due to phobic stimulation may
experience dizziness, nausea, and/or headaches from playing this game.
● If discomfort becomes severe, advice a player to consult a doctor.
● Do not place any heavy articles or beverages on top of the product. Accidents from the falling
articles and accidents due to electric shock can occur.
● Do not insert your finger or any foreign substances into any open parts or doors of the product.
It may cause electric shock or short-circuit.
● Do not lean on or climb on the product. It may cause accidents from falling and turnover of the
product.
● Do not pull out the power plug recklessly. It may cause short-circuit or electric shock.
● Person under the height of 90cm may not ride. Person with the height from 90cm to 120cm must
ride with a guardian or a parent.
● Person with the weight of 120kg and above may not ride. It may cause the product to
malfunction.
● Do not ride the product without the seatbelt fastened securely. The passenger can fall of the
ride. Passengers need to have the seatbelts fastened at all times.
● This product is a two-passenger ride. Do not seat more than 2 passengers.
● Do not let the passengers to have their children ride on their laps.
● Do not let people get too close to the moving cabin. It can cause collisions. Specially for little
children, use extra caution.
● Keep the feet inside the cabin at all times. If not, it can cause foot injuries.
● Remove objects such as bag straps or mufflers around the neck. Do not bring drinks into the
ride.
● Always watch the passengers and bystanders to prevent any possible trouble. They might act in
unexpected ways. Stop any dangerous behaviors for safety reasons.
11
SIMULINE INC..
For More Information, Visit BMI Gaming | www.bmigaming.com | (800) 746-2255 | +1.561.391.7200
4. Specification
■ Operation Area : 3320mm x 2175mm x 2272mm
■ Total Weight : ~750Kg
■ Maximum Power Consumption:
14.73A, 2467.7W (AC 200V, 50~60Hz)
14.43A, 2449.3W (AC 220V, 50~60Hz)
11.38A, 2301.6W (AC 240V, 50~60Hz)
■ Monitor : 46” LCD (Demo Display : 60” PDP)
■ Maximum Passenger weigh : Maximum 150kg / person
12
SIMULINE INC..
For More Information, Visit BMI Gaming | www.bmigaming.com | (800) 746-2255 | +1.561.391.7200
5. Parts
5-1. Cabin Parts
D
R
A
O
B
L
L
I
B
R
O
T
I
N
O
M
E
L
D
N
A
H
R
E
W
O
T
E
T
U
H
C
N
I
O
C
U
C
S
M
P
R
F
R
A
E
R
L
A
D
E
P
S
W
O
L
L
E
B
)
L
(
R
E
T
R
O
P
P
U
S
E
C
N
E
F
E
D
I
S
)
L
(
R
O
S
N
E
S
E
C
N
E
F
T
N
O
R
F
T
F
E
L
R
E
V
O
C
E
L
B
A
C
U
C
S
M
E
C
N
E
F
R
A
E
R
E
C
N
E
F
T
N
O
R
F
T
H
G
I
R
)
R
(
R
E
T
R
O
P
P
U
S
E
C
N
E
F
E
D
I
S
)
R
(
E
C
N
E
F
E
D
I
S
R
A
E
R )
R
(
R
O
S
N
E
S
SIMULINE INC..
13
For More Information, Visit BMI Gaming | www.bmigaming.com | (800) 746-2255 | +1.561.391.7200
SEAT
HANDLE
BASE FRAME
LINK JOINT
ROLL ACTUATOR
HEAVE ACTUATOR
Item
Description
MSCU
(Motion/System Control)
Composed of SCU, MCU, ACU and Transformer-Controls Motion System
Coinchute Tower
Composed of Coin Selector and Coin Vault.
The Coinchute Tower of this product has compatibility that various Coin
Frames can be installed.
Side Step
Passenger loading step
Billboard
Publications board
Fence
Keeps gallery away and guards the machine
Control Panel
Game controls
Motion Actuator
Mechanism
2 actuators and 2 joints for motion, anti-twist structure, links, and etc.
Area Sensor
Safety Sensor. When triggered, cabin stops the motion and resumes in
3 seconds after the obstruction is removed.
14
SIMULINE INC..
For More Information, Visit BMI Gaming | www.bmigaming.com | (800) 746-2255 | +1.561.391.7200
5-2. MSCU(Motion/System Control Unit)
SCU
Transformer
MCU
AC UNIT
< MSCU Front Panel >
Lan Cable
VGA Cable(DVI type)
RS232 Cable
Speaker Cable
Coin Tower Cable
Steetring Cable
< SYSTEM COMPUTOR >
System Computer
Motion BD
RS232 Cable
Can Cable
Amp Volume
< SCU Panel >
15
SIMULINE INC..
For More Information, Visit BMI Gaming | www.bmigaming.com | (800) 746-2255 | +1.561.391.7200
< MCU >
NO
< Transformer >
Item
Description
1
MSCU
Composed of SCU, MCU, ACU and Transformer-Controls Motion System
2
SCU (System Control
Unit)
Composed of System Computer and SCU Panel – Controls System
3
System Computer
Computer that controls the entire machine including H/W and S/W
4
MCU
(Motor Control Unit)
Composed of 2 Servo motor drivers that controls the operation of 2
Actuators for motion
5
Transformer
A transformer unit that can convert any country’s electricity to suite the
machine.
5-3. AC UNIT
Main Power Switch
Power Cable
< AC UNIT >
No
Item
1
Main Power Switch
2
Power Cable
Description
When pushed to ON(1) position, system powers up and the
cabin moves to initial position. When pushed to OFF(0) position,
entire system shuts down.
Power cable
16
SIMULINE INC..
For More Information, Visit BMI Gaming | www.bmigaming.com | (800) 746-2255 | +1.561.391.7200
5-4. Coinchute Tower & O.P Panel
Test Button should only be operated by an authorized personnel.
Test Button
Service Button
O.P Panel is located inside the Coinchute Tower Door.
NO
Item
Description
1
Choinchute Tower
Coinchute Tower is composed of Coin Frame and Coin Vault.
Coinchute Tower is designed to work with various types of Coin Frame.
2
Test Button
Used only when game settings need to be changed.
Goes into TEST mode when pressed during the Advertise Screen is
showing.
3
Service Button
When pushed, credit is added to the game.
Used to raise credit while operation.
17
SIMULINE INC..
For More Information, Visit BMI Gaming | www.bmigaming.com | (800) 746-2255 | +1.561.391.7200
6. Accessory
Part
Quantity
MSCU Box Key
3
Coinchute Tower Key
2
Manual
1
18
SIMULINE INC..
For More Information, Visit BMI Gaming | www.bmigaming.com | (800) 746-2255 | +1.561.391.7200
7. Installation Assembly
● This product has a complex structures and equipments. Please follow the instructions in this
manual at all times. Misses in assembly may cause electric shock or damages to the machine
and cannot guarantee normal operation in those cases.
● Make sure there are a crew of 4 or more is available for installation. This machine cannot be
assembled by one technician. If the installation is carried out by one person, accidents or
damages to the machine may occur.
● Make sure all of the connectors are connected to the proper positions firmly. Insecure
connections may cause malfunctions or electric shocks.
● Make sure that none of the cables and harnesses are damaged during installation. Damaged
cables and harnesses can cause electric shocks or short circuit.
● This installation must be carried out by the manager of the store or the service manager. If an
unqualified personnel installs this machine, accidents may occur. Also, if the installation
instructions in this manual is not followed fully, severe accidents may occur to both of the
passengers and workers. If there are no technicians or site maintenance personnel are available
for installation, please contact the office listed in this manual.
● Make sure that the required space is available for the installation. The space required for the
installation is noted in this manual. Insufficient installation space may cause accidents during
installation.
● Slanted floor, gaps, elevation difference must be avoided for installation. Cabin or frames may
tip over and cause sever accidents.
● Do not expose the power cable, earth line and etc where people might walk over them.
Damaged cables may cause electric shocks or short circuits. Use cable floor molds to protect
them.
● Do not cover the vent at the back side of the MSCU. It may cause overheating and possibly fire.
● Refer to [2. Installation Location Cautions] prior to the installation. If not enough space is
provided, bodily injuries including even death or damages to the product.
● When multiple number of technicians are working at the same time, use extreme caution to
prevent any possible collisions and accidents.
Use caution while working with molded parts. Too much pressure can damage the parts. This
may cause injuries.
19
SIMULINE INC..
For More Information, Visit BMI Gaming | www.bmigaming.com | (800) 746-2255 | +1.561.391.7200
Installation is executed in the following order
(1) Locating the product at the installation site
(2) SENSOR installation
(3) SIDE FENCE SUPPORTER installation
(4) REAR SIDE FENCE installation
(5) REAR FENCE installation
(6) SIDE STEP installation
(7) RIGHT FRONT FENCE installation
(8) COINCHUTE TOWER installation
(9) LEFT FRONT FENCE installation
(10) BILLBOARD Installation
(11) MSCU Installation
(12) Power Cable
20
SIMULINE INC..
For More Information, Visit BMI Gaming | www.bmigaming.com | (800) 746-2255 | +1.561.391.7200
Tools needed for Installation
Philips Screwdriver
24mm Spanner(M16)
10, 13, 17, 19, 24mm Ratchet(M6, M8, M10, M12, M16)
8mm(Ashai), 5/16(7.95mm(HAPP)) Mini-Socket Wrench – Coin Frame
Rachet Driver – MSCU Cable Cover
21
SIMULINE INC..
For More Information, Visit BMI Gaming | www.bmigaming.com | (800) 746-2255 | +1.561.391.7200
(1) Locating the product at the installation site
Make sure that all of the adjusters are firmly lowered to the floor before starting the work. If not,
the product can move out of place and cause accidens.
This product is equipped with 4 casters and 4 adjusters.
< Fig 7-1a>
①
②
③
Move the product to the installation location. When installing next to a wall, make sure there is enough
room for loading and unloading.
Adjust the adjusters so the product is level. When the installation location is decided, lower the adjusters all
the way to the floor. Lower the adjusters until the bottom of the caster is about 4mm from the floor.(Turing a
full circle of spanner makes Adjuster go up by 2 mm. So, after fixing Adjuster, please revolve it with a
spanner two times to two and half times.)
When satisfied with the adjustment, refer to Fig 7-1b and tighten the adjuster nut to fix the setting.
T
U
N
X
I
F
R
E
T
S
A
C
< Fig 7-1b>
22
SIMULINE INC..
For More Information, Visit BMI Gaming | www.bmigaming.com | (800) 746-2255 | +1.561.391.7200
(2) SENSOR installation
① The installment position of SENSOR is as follows. Please install it conferring the following figure.
< Fig 7-2a>
② It will be installed in SIDE FENCE SUPPORTER with four Hex Bolts (M6 x 20L). In installment, the
SENSOR CABLE under the SENSOR must be in advance placed outside through the pipe. Please, be
careful not to be confused with the direction of between the right and the left. The sensor attached with
REFLECTOR should be in the left.
< Fig 7-2b >
23
SIMULINE INC..
For More Information, Visit BMI Gaming | www.bmigaming.com | (800) 746-2255 | +1.561.391.7200
(3) SIDE FENCE SUPPORTER installation
SIDE FENCE SUPPORTER can be installed at the side of BASE FRAME with four Hex Bolts (M6 x 20L).
They must be installed at the both right and left sides of BASE FRAME. The upper side of REAR SIDE
SUPPORTER and that of BASE FRAME should be fixed in a parallel way. Three SENSOR Cables must be
connected and inserted inside. At this time, the cables must be connected with the ones with the same tags
so that REAR and RIGHT SENSOR CABLE may not be exchanged. Please remember that when you step
on REAR SIDE SUPPORTOR in the state of REAR SIDE FENCE not installed, it can be damaged.
< Fig 7-3 >
24
SIMULINE INC..
For More Information, Visit BMI Gaming | www.bmigaming.com | (800) 746-2255 | +1.561.391.7200
(4) REAR SIDE FENCE installation
①
REAR SIDE FENCE can be installed with eight Hex Bolts (M8 x 20L).
< Fig 7-4a >
②
It can be fixed by FIX NUT after lifting two Adjusters at the maximum level. Rear Side Fences must be
installed at the both right and left sides of BASE FRAME.
< Fig 7-4b >
25
SIMULINE INC..
For More Information, Visit BMI Gaming | www.bmigaming.com | (800) 746-2255 | +1.561.391.7200
(5) REAR FENCE installation
REAR FENCE will be installed in the tap hall at the backside of REAR SIDE FENCE with eight Hex Bolts (M8
x 20L). In case the level of the hall is not fit in, please rearrange the height of ADJUSTER in REAR SIDE
FENCE.
< Fig 7-5 >
(6) SIDE STEP installation
SIDE STEP in the side of BASE FRAME can be fixed with four Hex Bolts (M8 x 20L). They must be installed
at the both right and left sides of BASE FRAME
< Fig 7-6 >
26
SIMULINE INC..
For More Information, Visit BMI Gaming | www.bmigaming.com | (800) 746-2255 | +1.561.391.7200
(7) RIGHT FRONT FENCE installation
This can be installed at the right front of BASE FRAME with four Hex Bolts (M8 x 20L).
< Fig 7-7 >
(8) COINCHUTE TOWER installation
①
After you open SIDE DOOR of COINCHUTE TOWER, you must place the cable through a wiring hole.
< Fig 7-8a >
27
SIMULINE INC..
For More Information, Visit BMI Gaming | www.bmigaming.com | (800) 746-2255 | +1.561.391.7200
②
The CONNECTOR of the main body and that of COINCHUTE TOWER will be connected at the lower
end of SIDE DOOR. The EARTH CABLE of the main body must be thrusted toward COINCHUTE
TOWER, hooked on a BOLT, and fixed by a M4 NUT.
< Fig 7-8b >
③
COINCHUTE TOWER will be installed at the left side of BASE FRAME with four Hex Bolts (M8 x 20L).
< Fig 7-8c >
④
You can shut SIDE DOOR.
28
SIMULINE INC..
For More Information, Visit BMI Gaming | www.bmigaming.com | (800) 746-2255 | +1.561.391.7200
(9) LEFT FRONT FENCE installation
This can be installed at the left front of BASE FRAME with eight Hex Bolts (M8 x 20L).
< Fig 7-9 >
29
SIMULINE INC..
For More Information, Visit BMI Gaming | www.bmigaming.com | (800) 746-2255 | +1.561.391.7200
(10) BILLBOARD Installation
① After you push up the Billboard over the Monitor, you can hang it on CATCH CLIP, and fix it with four
Hex Bolts (M8 x 20L) conferring the following figure.
< Fig 7-10a >
② After opening the COVER at the backside of Billboard, you can connect LED POWER CABLE. And then
you can close the COVER.
< Fig 7-10b >
30
SIMULINE INC..
For More Information, Visit BMI Gaming | www.bmigaming.com | (800) 746-2255 | +1.561.391.7200
(11) MSCU Installation
① At first, MSCU CABLE COVER assembled at MUSC must be disjointed
< Fig 7-11a >
② After you connect it with two VIBROISOLATION Bolts, M10 x 25L in the front side of BASE FRAME, you
can push MUSC in a hole.
< Fig 7-11b >
③ The Connectors which are outside of the front of the main body and backside of MSCU should be
connected according to their shapes. After that, HANDLE UNIT USB CABLE, DVI CABLE can be
connected. After opening AC UNIT and SIDE COVER as in Fig 7-11c, Fig 7-11d, you can connect it with
the front side of BASE FRAME by VIBRISOLATION BOLT, M10 x 25L and M10 NUT. EARTH CABLE
can be connected as in Fig 7-11e.
31
SIMULINE INC..
For More Information, Visit BMI Gaming | www.bmigaming.com | (800) 746-2255 | +1.561.391.7200
< Fig 7-11c >
< Fig 7-11d>
< Fig 7-11e>
④ You can fix again the disjointed MSCU CABLE COVER by using RACHET DRVIER.
32
SIMULINE INC..
For More Information, Visit BMI Gaming | www.bmigaming.com | (800) 746-2255 | +1.561.391.7200
< Fig 7-11f >
⑤ Finally, you can install MSCU & BASE WIRE at the both right and left sides with HEX BOLT, M6 x 20L.
< Fig 7-11g >
33
SIMULINE INC..
For More Information, Visit BMI Gaming | www.bmigaming.com | (800) 746-2255 | +1.561.391.7200
(12) Power Cable
When connecting the cable for power, refer to [2. Installation Location Cautions] prior to any work.
Only use the power source with a circuit breaker. If the power source is not protected with a circuit
breaker, accidents such as power leakage and fire can occur.
Prepare a securely connected earth probe for the product and connect the product with earth line.
If the product is not earthed properly, electric shock, damages to the product, and malfunction may
occur.
Do not expose the power cable or the earth cable out in a place such as a walkway.
Electric shock or short circuit may occur if the cables are damaged.
Also, pedestrians may trip and fall. Cover the cables well with a cable molds or conceal the cables
so they cannot be seen.
Secure the main power cable with cable gland. If the cables are not secured properly, movements
of the product may cause electric shock to customers or malfunction of the product.
The power cable must be 10mm~14mm in diameter and
3 line cable(with 2 power lines and 1 earth line.)
Outer 8mm
When connecting the power cable or earth cable to the
Inner 4.5mm
product, use a type ‘O’ terminal as shown here.
The Power cable is not included.
34
SIMULINE INC..
For More Information, Visit BMI Gaming | www.bmigaming.com | (800) 746-2255 | +1.561.391.7200
① After checking MAIN POWER SWITCH is OFF (0), please unpasten CAP NUT at CABLE GLAND.
< Fig 7-12a >
② After uniting four TRUSS Screws, M4X10, please open AC UNIT COVER.
< Fig 7-12b >
③ As you are conferring the explanation on the attached sticker, you can connect SELECT terminal with
VOLTAGE SELECTION TERMINAL BLOCK and fix it with a BOLT.
SELECT
< Fig 7-12c >
35
SIMULINE INC..
For More Information, Visit BMI Gaming | www.bmigaming.com | (800) 746-2255 | +1.561.391.7200
④ After you push Electric Cable through Cable Gland Cap Nut, you can connect it with the main input
electrical terminal stand. After connecting the two lines of electrical Cable as in the following figure,
please connect a ground wire at the position with the sign of ground connection
. Please make
sure to have electrical Cable fixed firmly by revolving Cap Nut in Cable Grand in right direction.
< Fig 7-12d >
36
SIMULINE INC..
For More Information, Visit BMI Gaming | www.bmigaming.com | (800) 746-2255 | +1.561.391.7200
8. Safety feature
NO
Devise
1
Area Sensor
2
Motion Stop
Button
3
Seatbelt
4
Safety Fence
Appearance
Location
Exterior
(Cabin)
(3)
Motion stops when triggered.
Motion resumes 3 seconds
after the obstruction is
removed.
Seat
(2)
When pressed during play,
motion stops and the cabin is
lowered slowly to the initial
position.
Seat
(2)
Prepared for the safety of the
riders. When not fastened,
game starts without motion.
If un-fastened during play,
motion of the cabin stops and
resumes in 3 seconds after refastening.
Exterior
37
Description
Keeps gallery away to avoid
any collisions.
SIMULINE INC..
For More Information, Visit BMI Gaming | www.bmigaming.com | (800) 746-2255 | +1.561.391.7200
9. Control Panel
NO
Devise
Color
Description
1
Motion Stop
Red
It is Motion Stop Button.
If you press the button during the play, SEAT stops and
moves to a boarding place.
If you press the button when Boost is filled with blue color, it
is accelerated.
2
Booster
Blue
Whenever you pass through Check Point during the game,
the usable frequency increases. Up to 4 can be stored.
3
4
Start
Driver Change
Yellow
Put in a coin and press the button to start the game.
Green
It can change the wining driver of the game during the 2person play. If you push the button, “Player Change”
appears on the screen and the driver changes.
It can change monitor view.
Whenever you push the button, it changes into the first
person, the third person and SKY view.
5
View Change
Red
<The 1st person view>
38
<The 3rd person view>
<SKY View>
SIMULINE INC..
For More Information, Visit BMI Gaming | www.bmigaming.com | (800) 746-2255 | +1.561.391.7200
10. Contents of the game
Overview
AQUA RACE EXTREME is a boat racing game.
Since the SEAT moves, players can experience the speed of the boat and oceanic waves with excitement.
(1) ADVERTIZE (Customer waiting)
Put in a coin and press Start Button to start the game. You don’t have to put in a coin at a time of Free Play.
(2) Safe device description
It explains about safe devices including Motion Stop Button, Seatbelt and Sensor.
39
SIMULINE INC..
For More Information, Visit BMI Gaming | www.bmigaming.com | (800) 746-2255 | +1.561.391.7200
3) SELECT MODE (1) Screen
Select Single Driver or Dual Driver Mode.
▶Single Driver Mode: 1 person plays the game.
If 1 person plays the game, make sure to buckle the seatbelt on the vacant seat, too.
▶Dual Driver Mode: 2 drivers play the game alternatively to get to a Goal-in.
A driver that accelerates gets an upper hand first. Driver is replaced every 40 seconds,
and if
[Driver Change] is pressed, drivers can be replaced at any time.
Select a desired mode by turning the handle and accelerate to choose.
(4) SELECT MODE (2) Screen
▶Race Mode: It is possible to take part in AQUA RACE. Drivers compete against many other rivals to win.
▶Time Attack Mode: It is a time attack mode. Rivals do not appear.
Turn the handle to select a desired model and accelerate to choose.
40
SIMULINE INC..
For More Information, Visit BMI Gaming | www.bmigaming.com | (800) 746-2255 | +1.561.391.7200
(5) SELECT COURSE Screen
Select Resort or Aquapolis or Polynesia Stage.
The degree of difficulty and map differ according to a selected course.
▶Resort Stage – The degree of difficulty ★
▶Aquapolis Stage – The degree of difficulty ★★
▶Polynesia Stage – The degree of difficulty ★★★
Select a desired course by turning a handle and accelerate to choose.
(6) SELECT COURSE Screen
▶All Mighty Boat: It is Balance Boat. It is good at balancing and even beginners can operate it.
▶High Speed Boat: It is a high speed boat. Zero blast-offs and the speed lag behind.
▶Sprinter Boat : It is a moment acceleration boat. Despite excellent Zero blast-offs and acceleration, the
highest speed lags behind.
Turn the handle to select a desired course and accelerate to choose.
41
SIMULINE INC..
For More Information, Visit BMI Gaming | www.bmigaming.com | (800) 746-2255 | +1.561.391.7200
(7) Game Screen
Time Limit
Total Time
Position
Lap Time
Moving route
Check Point
Boost
Speed
Rival
Item
Description
Time Limit
There is Check Point that needs to go through within a certain time
during the game. Time Limit is set for check point passage. If the time
exceeds, the game is over, and if the check point is passed, time
increases and is indicated.
Position
It indicates the current position among rivals.
th
Ex)4/6 – Ranks 4 among 6 persons
Check Point
If Check Point is passed, Time increases and 1 boost appears.
If the boost is filled with blue color, press Booster Button for acceleration.
Boost(Accelerator)
Whenever Check Point is passed during the game, usable frequency
increases.
Up to 4 can be stored.
Rival
Rival▼ indicates there is one rival behind my boat.
Total Time
Total time (Game start ~ current)
Lap Time
It is time required to complete a course.
Moving route
It indicates a moving route during the game.
Speed
It indicates the current speed.
42
SIMULINE INC..
For More Information, Visit BMI Gaming | www.bmigaming.com | (800) 746-2255 | +1.561.391.7200
(8) RESULT Screen
If the game is completed, position is indicated on the Result Screen.
(9) GAME OVER Screen
After the game is over, Game Over Screen is indicated.
43
SIMULINE INC..
For More Information, Visit BMI Gaming | www.bmigaming.com | (800) 746-2255 | +1.561.391.7200
▶Game Error Screen
< Sensor Detection >
< Loose Seatbelt >
< Motion Stop Pressed >
44
SIMULINE INC..
For More Information, Visit BMI Gaming | www.bmigaming.com | (800) 746-2255 | +1.561.391.7200
< Wrong Route >
< Over Time >
< A course is completed without finishing the game – Only Lap Time 1 indicated>
45
SIMULINE INC..
For More Information, Visit BMI Gaming | www.bmigaming.com | (800) 746-2255 | +1.561.391.7200
11. Test Mode
Only Maintenance Personnel in the store can operate Test Button
TEST MODE can change game setup.
If you press Test Button inside Coinchute Tower on <ADVERTIZE (Customer Waiting)> screen, it enters
Test Mode.
< TEST MODE Main Screen >
▶ ITEM SELECT : Press View Change Button to select menu.
▶ DECIDE : Press START Button to determine selected button.
① MONITOR TEST
< Monitor Test Screen 1>
< Monitor Test Screen 2>
▶ NEXT : Press START Button.
▶ EXIT : Press TEST Button.
46
SIMULINE INC..
For More Information, Visit BMI Gaming | www.bmigaming.com | (800) 746-2255 | +1.561.391.7200
② I/O TEST
< I/O TEST Screen >
If I/O comes in with regard to COIN1, COIN2, Button, HANDLE, ACCELE, BRAKE, LAMP, SEATBELT and
SENSOR, ON is indicated.
▶ LAMP TEST : Press START Button.
▶ EXIT : Press TEST Button.
③ AJUSTMENT
< Screen 1 >
< Screen 2 >
Calibrate Accele and Brake in the left Seat (1 Player).
Step Accele and press Start Button to calibrate Accele Pedal.
Step Accele -> Press START ->Release it to adjust (min ~ max) value of Accele Pedal inside the program.
< Screen 3 >
< Screen 4 >
47
SIMULINE INC..
For More Information, Visit BMI Gaming | www.bmigaming.com | (800) 746-2255 | +1.561.391.7200
Step Brake and press START Button to calibrate Brake Pedal.
Step Brake -> Press START Button ->Release it to adjust (min ~ max) value of Brake Pedal inside the
program.
Calibrate Accele and Brake of the right Seat (2 Player)
It is calibrated in the same way as the left Seat(1Player).
< Screen 5 >
< Screen 6 >
< Screen 7 >
< Screen 8 >
48
SIMULINE INC..
For More Information, Visit BMI Gaming | www.bmigaming.com | (800) 746-2255 | +1.561.391.7200
④ SAVE BACKUP FILE
< SAVE BACKUPFILE Screen >
▶ SELECT : Press View Change to select menu.
▶ DECIDE : Press START Button to determine selected button.
If you want to save changed setup, press [YES], and if you do not want to save it, press [NO].
⑤ SOUND TEST
< SOUND TEST Screen >
▶ ITEM SELECT : Press View Change to select Menu.
▶ VALUE SELECT : Turn the handle to adjust Volume Value.
▶ EXIT : Press TEST Button.
Turn the handle to adjust desired Volume Value in the selected menu.
49
SIMULINE INC..
For More Information, Visit BMI Gaming | www.bmigaming.com | (800) 746-2255 | +1.561.391.7200
⑥ CONFIGURATION
< Configuration Screen >
▶ ITEM SELECT : Press View Change Button to select Menu.
▶ VALUE SELECT : Turn the handle to adjust Coin and Credit Values.
▶ EXIT : Press TEST Button.
Turn the handle right and left to determine desired values of Coin, Credit and Free Play, etc.
.
⑦ FACTORY SETTING
< Factory Setting Screen >
▶ SELECT : Press View Change Button to select Menu.
▶ DECIDE : Press START Button to determine selected menu.
▶ EXIT : Press TEST Button.
If you want to return to initial setting value, press [YES], and if you do not want to return, press [NO].
50
SIMULINE INC..
For More Information, Visit BMI Gaming | www.bmigaming.com | (800) 746-2255 | +1.561.391.7200
⑧ HI-SCORE RESET
< Hi – Score Screen >
▶ SELECT : Press View Change Button to select Menu.
▶ DECIDE : Press START Button to determine selected menu.
▶ EXIT : Press TEST Button.
If you want to reset HI-SCORE, press [YES], and if you do not want to reset it, press [NO].
⑨ NETWORK CONFIGURATION
< Network Configuration Screen >
▶ ITEM SELECT : Press View Change Button to select Menu.
▶ METHOD SELECT : Turn Handle to select Mode.
▶ EXIT : Press TEST Button.
Select Connection Method only at a time of communication play and then turn Handle to set it on.
It the network is connected, Connect State is indicated as Connect showing a connected player.
51
SIMULINE INC..
For More Information, Visit BMI Gaming | www.bmigaming.com | (800) 746-2255 | +1.561.391.7200
⑩ BOOKKEEPING
< Bookkeeping Screen >
▶ NEXT PAGE : Press View Change to move to the next page.
▶ DATE SELECT: Turn Handle to select Date.
▶ EXIT : Press TEST Button.
The following operation data are indicated.
● TOTAL UPTIME : Total operation time
● TOTAL PLAY FREQUENCY : Total number of plays
● COIN PLAY FREQUENCY : Total number of coin plays
● SERVICE PLAY FREQUENCY : Total number of service
● MAX PLAY TIME : Maximum play time
● MIN PLAY TIME : Minimum play time
● AVERAGE PLAY TIME : Average play time
● USED BOAT COUNT : Number of boats used
● MODE SELECT COUNT: Number of selected modes
52
plays
SIMULINE INC..
For More Information, Visit BMI Gaming | www.bmigaming.com | (800) 746-2255 | +1.561.391.7200
⑪ MOTION CONTROL BD INFORMATION
< Motion Control BD Screen >
▶ ITEM SELECT : Press View Change Button to select Menu.
▶ MODE SELECT : Select Mode with Handle or Booster Button.
▶ EXIT : Press TEST Button.
Select Connection Mode [ON] to connect Motion Control BD. Otherwise, select [OFF].
It indicates Version of Motion Control BD, Motor Driver Status and Can Communication Status.
If errors occur in Motion Control BD, the following Error Code is indicated.
Please refer to Error Code Table in P65, 17-2. Motion Control BD Error.
< [FF00] Motor Control BD Error Indication Screen >
53
SIMULINE INC..
For More Information, Visit BMI Gaming | www.bmigaming.com | (800) 746-2255 | +1.561.391.7200
12. How to play the game (Guides for riders)
After the game, if SEAT returns to the boarding position, release the seatbelt and get off the boat.
If you do not fasten your Seatbelt, SEAT does not move even though the game starts.
Make sure to fasten your seat belt.
1. Check if Seat is in the boarding position.
< Advertize Screen >
2. Put in a coin. <Game Start Screen > appears.
< Game Start Screen >
3. Board Seat.
4. Fasten your seatbelt for safety.
※ Fasten the seat belt on the empty seat in case of a single-game. The seat moves only when the seat
belts both in the left and the right are fastened.
5. Press START Button.
<Safety Device Description Screen > appears before the game starts.
< Safety Device Description Screen >
54
SIMULINE INC..
For More Information, Visit BMI Gaming | www.bmigaming.com | (800) 746-2255 | +1.561.391.7200
6. Turn the handle to select desired mode, course and boat according to the screen and step Accele to
determine it.
7. Aquarace Extreme Game Screen starts and Seat moves.
8. If the game is finished, result is indicated, and <Game Over Screen> appears.
< Result Screen >
< Game Over Screen >
9. If the game is finished, Seat moves to a boarding position. Release the seatbelt after the seat completely
stops.
55
SIMULINE INC..
For More Information, Visit BMI Gaming | www.bmigaming.com | (800) 746-2255 | +1.561.391.7200
13. System operation
● If the power is turned on, SEAT slowly moves to the boarding position, so make sure that there is
nobody around SEAT before turning it on.
● If the power is turned off, SEAT slowly moves to the initial position, so make sure that there is
nobody around SEAT before turning it off.
● Do not turn the power OFF (0) -ON (1) consecutively. If you want to reset, turn it off and wait for
at least 1 minute to turn it on. Otherwise, a motor controller and a motor within MCU might be
damaged.
● It is AC220V within the machine. Never dissemble or repair the machine without approval.
● Never dissemble or repair the machine without approval from MSCU.
13-1. System operation (Power ON)
Turn Main Power Switch ON (1) to operate the system.
If MSCU is turned on to make a sound in about 5 seconds, SEAT descends to move in the right direction. If it
is completed, “Cabin Initialize” appears on the monitor in 3 to 4 minutes, and SEAT moves to the boarding
position. If it is completed and the system is prepared, <Advertize Screen> appears.
< Advertize Screen >
13-2. System End (Power OFF)
Turn Main Power Switch OFF (0) on the side of MSCU. If Switch is OFF (0), the entire system is finished. (At
that time SEAT might be slanted.)
56
SIMULINE INC..
For More Information, Visit BMI Gaming | www.bmigaming.com | (800) 746-2255 | +1.561.391.7200
13-3. Emergency stop
If Main Power Switch is turned OFF (0), the entire system power will be turned off, so if
emergency stop is required, press Stop Button in the left and the right of Control Panel to attempt
emergency stop. Only when it fails, turn Main Power Switch OFF (0).
If you are to conduct emergency stop, press Stop Button in the right and the left of Control Panel.
If emergency stop is not implemented with the operation, turn Main Power Switch OFF (0).
①
[STOP BUTTON]
It is pressed when an emergent situation takes place while SEAT is moving.
Ex) ◆ If a rider feel anxious
◆ If a rider wants to get off the cabin
◆ If emergency stop is required
If the button is pressed during the play, SEAT stops moving and then slowly moves to the boarding position.
②
[Main Power Switch OFF(0)]
If emergency stop is not implemented with Stop Button, Main Power Switch is turned OFF (0).
57
SIMULINE INC..
For More Information, Visit BMI Gaming | www.bmigaming.com | (800) 746-2255 | +1.561.391.7200
14. Network Play
Network Play is optional.
You can do network play with two to four when these products are connected through LAN CABLE.
When more than two machines are forwarded at the same time, HUB is built in at the machinery with the
earliest SERIAL number. You can do network play using this game machine as a MAIN.
● Please be sure to do the work after the electric switch is off. If not, it can cause an accident of
electric shock or short circuit.
● Please be careful that the distribution wires should not be damaged because it can also cause
an accident of electric shock or short circuit.
● Please do not touch the parts except the designated areas, which can be the cause of an
accident of electric shock or short circuit.
● Please leave the work for maintenance men or service men. If any unqualified man does this
work, it can cause an accident of electric shock.
● For communication play, you need enough electricity for the game players connected. Please
check up the needed amount of electric current of each game player clarified in this booklet, and
be sure to procure it.
The distance of SIDE STEP of communication game machines must be kept 500mm as in the following
figure when they are installed.
58
SIMULINE INC..
For More Information, Visit BMI Gaming | www.bmigaming.com | (800) 746-2255 | +1.561.391.7200
14-1. Connection of LAN CABLE
In order to do network play, more than two game machines must be connected through LAN CABLE. HUB is
built in at the game machine with the earliest SERIAL number. This player must be used as a MAIN.
① The source of electricity of all the game machine must be cut off.
② Please open the SIDE COVER of each MSCU.
< Fig 14-1a >
③ LAN PORT can be seen like the following figure if you open SIDE COVER.
< Fig 14-1b >
59
SIMULINE INC..
For More Information, Visit BMI Gaming | www.bmigaming.com | (800) 746-2255 | +1.561.391.7200
④ Please connect LAN CABLE with each game player conferring the following figure according to the
number of network game machines. The game machine written as MAIN is the machine with the
earliest SERIAL number.
EX1) When two game players are used for Communication Play
→ One end of CONNECTOR must be connected with LAN PORT ① of main machine, and the other end of it
must be connected with LAN PORT ① of the other game machine.
EX2) When three game players are used for Communication Play
→ Two LAN CABLEs can be connected as in the figure.
EX3) When four game machines are used for Network Play
→ Three LAN CABLEs can be connected as in the figure.
60
SIMULINE INC..
For More Information, Visit BMI Gaming | www.bmigaming.com | (800) 746-2255 | +1.561.391.7200
14-2. Setting up of Network Play
In order to do network play, the game machines must be set up for network play.
①
②
③
The source of electricity of all the game machines to be used for network play should be turn on.
Please push the TEST button on ADVERTIZE SCREEN of each game machine, and the Test Mode will
be on. (※ The TEST button is placed inside of the DOOR in Coinchute Tower.)
Please select [NETWORK CONFIGURATION] in the main screen of TEST MODE.
< Main screen of TEST MODE >
④
Please select the menu of [CONNECTION METHOD] in the screen of [NETWORK CONFIGURATION].
The unique ID must be assigned for each player.
Please select the menu of [CONNECTION METHOD] in the screen of [NETWORK CONFIGURATION].
You can assign each ID for each Game machine.
▶ ID of the Main Game Player: You can assign “PLAYER 1” for the ID as revolving the HANDLE.
(NOTICE! The ID of the Main Game Player must be assigned as “PLAYER 1.”)
ID of the other Game Players: You can assign “PLAYER 2” to “PLAYER 4” for the IDs as revolving the
HANDLE.
< Main screen of NETWORK CONFIGURATION >
⑤
If you push SAVE AND RESTART CONNECTION, the changed setting will be saved and the connection
of NETWORK of the players will be started. If the connection is completed, the state of “CONNECT” for
the assigned ID will appear on the CONNECT STATE screen.
※ If you do not want to do Network Play anymore, please change the setting into the original state and push
the button of SAVE AND RESTART CONNETION to be saved.
61
SIMULINE INC..
For More Information, Visit BMI Gaming | www.bmigaming.com | (800) 746-2255 | +1.561.391.7200
15. Monitor
15-1. Monitor handling
Read the followings before handling the monitor and make sure to comply with it.
Precautions are as follows.
If it is ignored, it might
cause death or serious
wound.
If it is ignored, it might cause
wound or property loss.
It aims to prohibit
touching.
Pull the connector or plug.
● If you install or disassemble the monitor or if you insert an external connector, make sure to pull
the power cable. If not, it might cause an electric shock or an accident.
● Do not modify the monitor without approval. If modification causes a mechanical trouble, the
manufacture is not responsible for it.
● High voltage.
● Since high voltage occurs inside the monitor, it is extremely dangerous, so do not touch the
inside the monitor. If metal or paper is inserted into the monitor, turn off the power. It might
cause a mechanical trouble or a fire.
62
SIMULINE INC..
For More Information, Visit BMI Gaming | www.bmigaming.com | (800) 746-2255 | +1.561.391.7200
15-2. How to adjust the monitor
● Since the monitor is pre-set before delivery, do not unnecessarily adjust it. It is dangerous to
handle a monitor with high voltage. If the adjustment is wrong, it might cause troubles such as
maladjustment of Sink in the monitor and poor images.
● Make a proper adjustment of the monitor. Do not leave the monitor blinking or distorted. An
inappropriate monitor might cause a headache or dizziness to players or other customers.
● Do not touch the monitor in other places than designated. It might cause an electric shock or an
accident.
Check the position of the monitor adjuster. It is in the back of the monitor.
<
<Fig. 15-2a. Monitor Adjuster >
■ BRIGHTNESS: It adjusts the level of brightness of the screen.
■ CONTRAST: It adjusts the level of contrast of the screen.
■ SHARPNESS: It adjusts the level of sharpness of the screen.
■ H-POSITION: It adjusts the screen in a horizontal position.
■ V-POSITION: It adjusts the screen in a vertical position.
■ PHASE: It adjusts Clock Phase of the screen.
■ FREQUENCY: It adjusts the frequency of the screen.
63
SIMULINE INC..
For More Information, Visit BMI Gaming | www.bmigaming.com | (800) 746-2255 | +1.561.391.7200
16. Repair & maintenance
● Make sure to implement items in a regular checkpoint for safe use of the product.
If an accident occurs due to negligence, the manufacturer and the seller are not responsible for
any loss including the responsibility of compensation for damages even on the third persons.
Make sure to check power cable connection once a year.
● Make sure to ask the seller to check the device once a year. If a regular check-up is not
conducted, it might cause an accident.
● If the device is used for a long time, a short-circuiting or overheating might occur. Check if any
burn occurs.
● Make sure that a store maintenance personnel repairs and maintains the device. Make sure to
comply with the guidelines with regard to procedures and safety.
● Turn off power distribution brake to check the device. If not, it might cause accidents on account
of sudden operation of the seat or electronic shock.
Make sure to check the followings on a regular basis for the purpose of safety.
Control Panel is touched by a player. Make sure to clean it so that a player can enjoy the game comfortably.
■ Regular checkpoint
Description
External frame
Check of the landing of Adjuster
FRP surface
Cleaning
Monitor
Check adjustment
Coin Selector
Coin input test
Coin Selector Cleaning
Time
Everyday
At an appropriate
time
1 month
or transport
1 month
3 months
Electronic or Electric
parts
Power cable
At an appropriate
time
1 year
At an appropriate
time
1 year
1 year
Check, Cleaning
Seat surface
Cleaning
Operation part
Maintenance
Grease Input
Safety device
Check Seatbelt
Check Stop Button
Check Area Sensor
Warning sticker
Check if it is broken or comes off
Fittings
Check if it is loosed or cracked
Everyday
Noise or vibration at a
time of operation
Check if it makes noises or vibrates at a time
of operation
Everyday
Check
64
Everyday
Everyday
Everyday
Every week
SIMULINE INC..
For More Information, Visit BMI Gaming | www.bmigaming.com | (800) 746-2255 | +1.561.391.7200
17. Troubleshooting
17-1. Troubleshooting Table
Trouble
IF it is not turned
on
If the system
does not function
normally
If the SEAT does
not move
Checkpoint
Countermeasure
Check if Main Power Switch is turned OFF(0)
Turn Main Power Switch ON (1).
Check if power cable is pulled
Check power cable and connect it
Check if there is any error message on the
monitor in the cabin
Turn Main Power Switch OFF (0) and reset the
system in one minute. If it does not start,
contact the manufacturer or the seller.
Check if Area Sensor responds.
(YELLOW LED OFF)
Remove obstacles.
(YELLOW LED ON)
Check if Area Sensor responds without any
obstacle (YELLOW LED OFF)
Check if Area Sensor is appropriately installed
17-2. Motion Control BD Error
If any problem occurs in Motion Control BD, the following error message appears on the monitor.
< Motion Control BD Error Indication Screen >
① Press TEST Button inside the door of Coinchute Tower to enter Test Mode.
② Select Motion Control BD Information on the Test Mode main screen
< TEST Mode Main Screen >
65
SIMULINE INC..
For More Information, Visit BMI Gaming | www.bmigaming.com | (800) 746-2255 | +1.561.391.7200
③
Check Error Code next to Status of Motor Driver (1) and (2) on the Motion Control BD Information
Screen.
< [FF00] Error Screen >
Refer to the following error message table.
■ Motor Control BD Error Message Table
Error Code
Cause
FFOO
It occurs when Encoder Connector
on Motor Drive BD is pulled (J11)
FFFF
FFC7
It occurs when Motor Drive BD
does not receive Encoder
information
F800
Motor Drive BD +12V Relay
K5•K8 contact problem
FFFE
90AE
9086
It occurs when Actuator Limit
Sensor cannot be found
It occurs the moment it moves as
Actuator 1 & 2 is turned on
(It occurs when Motor의 Z(Zero)
Pulse cannot be found without
motor phase information)
Countermeasure
[Check Encoder Connector]
Check if Motor Drive BD Encoder Connector on MCU is
connected or if Connector cable is not damaged.(J11)
[Check 5V SMPS output power]
1. Check if the voltage between DGND and +5V is
DC5.0V~5.2V.
2. If it is normal (1) but if the same problem is repeated,
contact the manufacturer or the seller.
If SMPS (RD-65A) +12V output voltage is normal,
measure +12V power in Motor Drive BD J7 Connector.
If there is no +12V power, check connection Harness.
1. Check Actuator Limit Sensor Joint and Connector.
2.If it is normal (1) but if FFFE Error is repeated in
specific Motor Drive BD, contact the manufacturer or the
seller to replace the Motor Drive BD.
1. If it is turned on when it is slanted, the error might
occur.
Correct the problem before resetting the system.
2.If there is a problem in Actuator Limit Sensor(Bottom
Sensor) Joint, the error might occur.
66
SIMULINE INC..
For More Information, Visit BMI Gaming | www.bmigaming.com | (800) 746-2255 | +1.561.391.7200
Error Code
8C3
Cause
It occurs in Motor Drive BD IPM
10C3
90C3
Over Current Protection Error
40C3
DOC3
Over Voltage Protection Error
Countermeasure
1. Check Motor Drive BD AC Power
Check if input power is in AC200V to AC230V.
2. Check if Fan in Motor Drive BD Heatsink normally
functions.
3. If it is normal in the item 1 and 2, and if the same
error occurs in the specific Motor Drive BD, contact the
manufacturer or the seller to replace Motor Drive BD.
1.Main Trans output voltage
Check if 220R and 220T are in 210V to 230V.
2. If Actuator Grease Up is insufficient, the error might
occur.
Check Grease, and if it is not sufficient, Grease it Up.
3.If it is normal in the item 1 and 2, and if the same error
is repeated in specific Drive BD, contact the
manufacturer to replace Motor Drive BD.
1. Check if Main Tran output voltage (220R, 220T) is in
210V~230V.
2. Check input power source to see if it turns 240V or
higher momentarily.
3.If it is normal in the item 1 and 2, and if the same error
is repeated in the specific Motor Drive, contact the
manufacturer or the seller to replace Motor Drive BD.
67
SIMULINE INC..
For More Information, Visit BMI Gaming | www.bmigaming.com | (800) 746-2255 | +1.561.391.7200
18. Parts List
68
SIMULINE INC..
For More Information, Visit BMI Gaming | www.bmigaming.com | (800) 746-2255 | +1.561.391.7200
0. Top Ass’y PBR (PBR-0000)
203
16
203
8
202
8
201
8
7
203
8
202
8
201
8
202
16
201
16
9
12
13
201
4
202
4
203
4
5
208
4
209
4
201
4
1
210
4
202
4
203
4
10
207
2
206
2
205
2
204
2
2
8
4
203
8
202
8
201
8
6
203
4
202
4
201
4
202
8
201
8
208
4
203
4
203
8
209
4
202
4
210
4
201
4
3
11
210
4
209
4
208
4
14
A
Detail "A"
ITEM No.
DESCRIPTION
PART No.
1
ASSY BILLBOAD
PBR-0200
2
ASSY MSCU
PBR-0300
3
ASSY COIN CHUTE TOWER
PBR-0450
4
ASSY SENSOR(L)
PBR-0500
5
ASSY SENSOR(R)
PBR-0520
6
ASSY FRONT SIDE FENCE(L)
PBR-0540
7
ASSY FRONT SIDE FENCE(R)
PBR-0560
8
ASSY REAR FENCE
PBR-0600
9
ASSY REAR SIDE FENCE
PBR-0620
10
ASSY RIDE
PBR-1000
11
ASSY SUPPORT STEP(L)
PBR-0001
12
ASSY SUPPORT STEP(R)
PBR-0002
13
SIDE STEP
PBR-0003
14
MSCU & BASE WIRE
PBR-0004
201
HEX BOLT M8X20L
HB08-20HNB
202
SPRING WASHER M8
W-SP08HNB
203
FLAT WASHER M8
W-FL08HNB
204
VIBROISOLATION BOLT(M10X25L)
VB1025-4940
205
SPRING WASHER M10
W-SP10HNB
206
FLAT WASHER M10
W-FL10HNB
207
HEX NUT M10
N-HN10HNB
208
HEX BOLT M6X20L
HB06-25HNB
209
SPRING WASHER M6
W-SP06HNB
210
FLAT WASHER M6
W-FL06HNB
69
SIMULINE INC..
For More Information, Visit BMI Gaming | www.bmigaming.com | (800) 746-2255 | +1.561.391.7200
1. Ass’y Billboard (PBR-0200)
1
202
6
2
ITEM No.
204
6
101
6
201
6
102
6
203
24
4
5
205
4
3
DESCRIPTION
PART No.
1
ASSY BILLBOARD BOX BODY
PBR-0201
2
BILLBOARD LED BOARD PLATE
PBR-0202
3
BILLBOARD BOX CAP
PBR-0203
4
BILLBOARD ACRYL BOARD PLATE
PBR-0204
5
CTF WASHER
CTF-1002-KO
101
LED BD ESU-00-RA02P SIM
ESU-00-RA02P
201
LOW HEAD WRENCH SCREW M5X16L
LH05-016NSW
202
RUBBER WASHER(Ø19-Ø9-2T)
W-RB09NNB
203
ROUND SEMS SCREW M3X8L
SR03-008NNW
204
ROUND SEMS SCREW M4X8L
SR04-008NNW
205
TRUSS SCREW M4X12L
TR04-012NNB
70
SIMULINE INC..
For More Information, Visit BMI Gaming | www.bmigaming.com | (800) 746-2255 | +1.561.391.7200
2. Ass’y MSCU (PBR-0300)
15 203 204 205
2
2
2
10 101 201
2
202 204 205
4
4
4
2
1
205 204 203 103 11
4
4
4
205 204 203
2
2
2
4
5
205 204 202
2
2
2
201
12
6
201
8
3
209 208 207 102
4
4
4
12 201
4
7
201
4
8
105 106
13 104 206
4
14 201
5
201
8
9
ITEM No.
DESCRIPTION
PART No.
1
ASSY MSCU BOX
PBR-0320
2
ASSY SCU
PBR-0340
3
ASSY MCU
PBR-0360
4
ASSY AC UNIT
PBR-0380
5
ASSY LAN CONNECTOR
PBR-0400
6
ASSY UPPER COVER
PBR-0410
7
ASSY MCY COVER
PBR-0420
8
ASSY TRANS COVER
PBR-0430
9
MSCU CABLE COVER-1
PBR-0301
10
PC FIX BRKT-1
PBR-0302
11
HUB FIX BRKT
PBR-0303
12
MSCY SIDE COVER-1
PBR-0304
13
HINGE BRKT
PBR-0305
14
MSCU CABLE COVER-2
PBR-0306
15
PC FIX BRKT-2
PBR-0307
71
201
5
201
4
SIMULINE INC..
For More Information, Visit BMI Gaming | www.bmigaming.com | (800) 746-2255 | +1.561.391.7200
ITEM No.
DESCRIPTION
PART No.
101
PC
SYS-766G2-VS30
102
TANSFORMER BHTB-DS2K
EMU-40-R150M
103
SW HUB ESU-05-R048P SIM
ESU-05-R048P
104
HINGE (Model: h4050bk)
HINGE
105
HINGE (Model: KI-SD24 LEFT)
HINGE
106
HINGE (Model: KI-SD24 RIGHT)
HINGE
201
TRUSS SCREW M4X8L
TR04-08NNB
202
WING SCREW M4X20L
WB04-020NNB
203
FLANGE NUT M4
N-FN04NSN
204
FLAT WASHER M4 (LARGE)
W-FL04NNB
205
SPRING WASHER M4
W-SP04NNB
206
FLUSH SCREW M5X12L
FS05-012NNW
207
HEX BOLT M6X20L
HB06-020HNB
208
SPRING WASHER M6
W-SP06HNB
209
FLAT WASHER M6
W-FL06HNB
72
SIMULINE INC..
For More Information, Visit BMI Gaming | www.bmigaming.com | (800) 746-2255 | +1.561.391.7200
3. Ass’y Coinchute Tower (PBR-0450)
206
4
6
7
2
205
4
204
2
1
204
4
101
4
3
203 202 201
8
8
8
5
ITEM No.
DESCRIPTION
PART No.
1
ASSY TOWER SIDE DOOR
PBR-0460
2
ASSY SWITCH PANNEL
PBR-0470
3
ASSY COIN PLATE
PBR-0480
4
COIN CHUTE TOWER BOX
PBR-0451
5
RUBBER PAD
MET-03-025P
6
DENOMI PLATE
PBR-0452
7
EDY COVER
PBR-0453
102
42-0756-07(7-digit meter)/DC05V [HAPPS]
ECB-05-024P
201
WRENCH SCREW M6X20L
WR06-020HNB
202
FLAT WASHER M6 (LARGE)
W-FL06HNB
203
SPRING WASHER M6
W-SP06HNB
204
TRUSS SCREW M4X8L
TR04-008NNB
205
FLANGE NUT M4
FH-04NSN
206
ROUND HEAD WRENCH SCREW M4X12L
RW04-012NNB
73
SIMULINE INC..
For More Information, Visit BMI Gaming | www.bmigaming.com | (800) 746-2255 | +1.561.391.7200
4. Ass’y Sensor(L) (PBR-0500)
201
2
3
4
101
201
2
202
2
203
4
Section A-A
A
203
3
2
102
2
5
A
1
ITEM No.
DESCRIPTION
PART No.
1
SENSOR FRAME (L)
PBR-0501
2
SENSOR COVER - L
PBR-0502
3
SENSOR ADJUST BRAKET-L
PBR-0503
4
FOOT SENSOR FIX BRKT
PBR-0504
5
REFLECTOR SUPPORT PLATE
PBR-0505
101
PRK 25B[LEUZE]
ESU-05-R046P
102
MECHATEM REFLECTOR [KEO SAMG]
ESU-05-R047P
201
ROUND SEMS SCREW M3X8L
SR03-008NNB
202
ROUND SEMS SCREW M3X20L
SR03-020NNB
203
ROUND SEMS SCREW M4X8L
TR04-008NNB
74
SIMULINE INC..
For More Information, Visit BMI Gaming | www.bmigaming.com | (800) 746-2255 | +1.561.391.7200
5. Ass’y Sensor(R) (PBR-0520)
201
2
201
2
3
203
3
5
4
101
2
2
202
4
201
4
Section A-A
A
A
1
ITEM No.
DESCRIPTION
PART No.
1
SENSOR FRAME (R)
PBR-0521
2
SENSOR COVER - R
PBR-0522
3
SENSOR ADJUST BRAKET-L
PBR-0523
4
FOOT SENSOR FIX BRKT
PBR-0524
5
SENSOR ADJUST BRAKET-R
PBR-0525
101
PRK 25B[LEUZE]
ESU-05-R046P
201
ROUND SEMS SCREW M3X8L
SR03-08NNB
202
ROUND SEMS SCREW M3X20L
SR03-020NNB
203
TRUSS SCREW M4X8L
TR04-008NNB
75
SIMULINE INC..
For More Information, Visit BMI Gaming | www.bmigaming.com | (800) 746-2255 | +1.561.391.7200
6. Ass’y Front Side Fence(L) (PBR-0540)
1
201
4
101
2
2
ITEM No.
DESCRIPTION
PART No.
1
FRONT SIDE FENCE FRAME
PBR-0541
2
REFLECTOR SUPPORT PLATE
PBR-0505
101
MECHATEM REFLECTOR [KEO SAMG]
ESU-05-R047P
201
TRUSS SCREW M4X8L
TR04-008NNB
76
SIMULINE INC..
For More Information, Visit BMI Gaming | www.bmigaming.com | (800) 746-2255 | +1.561.391.7200
7. Ass’y Front Side Fence(R) (PBR-0560)
203
6
202
6
204
4
201
6
2
101
3
1
ITEM No.
DESCRIPTION
PART No.
1
MIRROR FRAME - R
PBR-0561
2
FRONT SIDE FENCE PC
PBR-0562
3
REFLECTOR SUPPORT PLATE
PBR-0505
101
MECHATEM REFLECTOR [KEO SAMG]
ESU-05-R047P
201
TRUSS SCREW M4X8L
TR04-008NNB
202
FLUSH SCREW M5X12L
FL05-012NNB
203
RACK WASHER M5
W-LC05NNB
204
RUBBER WASHER
W-RB05NNB
77
SIMULINE INC..
For More Information, Visit BMI Gaming | www.bmigaming.com | (800) 746-2255 | +1.561.391.7200
8. Ass’y Rear Fence (PBR-0600)
1
203
12
202
12
201
12
2
ITEM No.
DESCRIPTION
PART No.
1
REAR FENCE FRAME
PBR-0601
2
REAR FENCE PC
PBR-0602
201
FLUSH SCREW M5X12L
FL05-012NNB
202
RACK WASHER M5
W-LC05NNB
203
RUBBER WASHER
W-RB05NNB
78
SIMULINE INC..
For More Information, Visit BMI Gaming | www.bmigaming.com | (800) 746-2255 | +1.561.391.7200
9. Ass’y Rear Side Fence (PBR-0620)
1
101
2
203
12
202
12
201
12
2
ITEM No.
DESCRIPTION
PART No.
1
REAR SIDE FENCE FRAME
PBR-0621
2
REAR SIDE FENCE PC
PBR-0622
101
LEVEL FOOT A-VS-10(M10-80L)
A-VS-10
201
FLUSH SCREW M5X12L
FL05-012NNB
202
RACK WASHER M5
W-LC05NNB
203
RUBBER WASHER
W-RB05NNB
79
SIMULINE INC..
For More Information, Visit BMI Gaming | www.bmigaming.com | (800) 746-2255 | +1.561.391.7200
10. Ass’y Cockpit (PBR-1000)
3
4
1
B
204
8
204
4
20
14
Section A-A
5
10
208
12
209
24
210
24
211
12
204
12
204
24
12
21
2
13
210
16
A
209
16
208
16
204
12
204
12
6
A
24
15
204
12
210
16
203
4
207
2
9
202
4
206
1
201
4
205
1
18
8
204
10
16
204
8
17
19
204
12
204
12
7
23
208
10
209
10
209
16
208
16
11
210
10
ITEM No.
DESCRIPTION
PART No.
1
ASSY RIDE
PBR-2000
2
ASSY BASE
PBR-3000
3
ASSY MONITOR
PBR-4000
4
ASSY HANDLE BODY
PBR-4500
5
ASSY RIDE BODY
PBR-4800
6
ASSY LINK JOINT
PBR-5000
7
ASSY ROLL ACTUATOR
PBR-5200
8
ASSY BALL JOINT
PBR-5400
9
BASE BELLOWS
PBR-1001
10
MONITOR BELLOWS
PBR-1002
11
MONITOR FIX BRKT
PBR-1003
12
B-FRONT SIDE BRKT-1
PBR-1004
13
B-C REAR SIDE BRKT-1
PBR-1005
14
B-FRONT SIDE BRKT-2
PBR-1006
15
B-C FRONT BRKT
PBR-1007
16
C FRONT SIDE BRKT-1
PBR-1008
17
C MIDDLE SIDE BRKT
PBR-1009
18
B-C REAR SIDE BRKT-2(L)
PBR-1010
19
B-C REAR SIDE BRKT-2(R)
PBR-1011
20
C-FRONT SIDE BRKT
PBR-1012
21
B-C REAR BRKT
PBR-1013
22
B-C REAR BRKT-7
PBR-1014
80
Ditail "B" (S4:1)
SIMULINE INC..
For More Information, Visit BMI Gaming | www.bmigaming.com | (800) 746-2255 | +1.561.391.7200
ITEM No.
DESCRIPTION
PART No.
23
BELLOWS RUBBER BAND
PBR-1012
24
BELLOWS SIDE COVER
PBR-1013
201
HEX BOLT M10X30L
HB10-30HNB
202
SPRING WASHER M10
W-SP10HNB
203
FLAT WASHER M10
W-FL10HNB
204
TRUSS SCREW M5X12L
TR05-012NNB
205
SPRING WASHER M16
W-SP16HNB
206
FLAT WASHER M16
W-FL16HNB
207
HEX NUT M16
N-HN16HNB
208
HEX BOLT M8X25L
HB08-25HNB
209
SPRING WASHER M8
W-SP08HNB
210
FLAT WASHER M8
W-FL08HNB
211
HEX BOLT M8X45L
HB08-45HNB
81
SIMULINE INC..