1
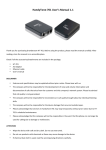
GrandStream HandyTone-286
Configuration Instructions
Step 1: Connect your HandyTone-286
1. Connect the ATA to your network as shown below. For more information on how to connect
the HandyTone, please see your User Manual.
Step 2: Reset the HandyTone to Factory Defaults
Note that this will clear all custom settings from the phone; if you wish to retain these for later
reference, please make a note of them (for example, by printing the configuration page, or
saving a copy of it to disk). See sections 2 and 3 for instructions on logging in to the
configuration page.
To reset the phone, you will need the phone's 12-digit hardware address, also known as a
MAC address. This should be printed on a sticker on the bottom of the phone; alternatively, it
may be retrieved from the phone's Web configuration page. Note down the MAC address,
as it will need to be entered into the phone.
The MAC address may contain the letters A-F as well as digits 0-9. To enter these letters into
the phone, a special encoding is used, as follows:
0
1
2
3
4
5
6
7
8
9
A
B
C
D
E
F
press the 0 button once
press the 1 button once
press the 2 button once
press the 3 button once
press the 4 button once
press the 5 button once
press the 6 button once
press the 7 button once
press the 8 button once
press the 9 button once
press the 2 button two times
press the 2 button three times
press the 2 button four times
press the 3 button two times
press the 3 button three times
press the 3 button four times
To actually perform the reset, connect a telephone handset to the ATA, dial "***" followed by
"99" and the MAC address as described, then wait for 15 seconds and hang up. During this
time, a short buzzing sound may be heard, indicating that settings are being reset. Once the
phone is hung up, the ATA will restart with factory defaults.
Step 3: Confirm the ATA has been set to DHCP mode, or assign a
Static IP Address to the HandyTone.
1. To set the ATA to DHCP mode, connect a telephone handset to the ATA, dial "***", then
"01". The voice prompt will say either “Static IP Mode”, or “Dynamic IP Mode” – press “9”
on the telephone keypad to toggle between these two options.
2. If you select Static IP mode, you will also need to configure the Subnet, Gateway and
DNS Server IP Addresses. These can be set through Options 02 (IP Address), 03
(Subnet IP Address), 04 (Gateway IP Address) and 05 (DNS Server IP Address). These
are set as follows:
a. Dial “***” from the handset connected to the ATA
b. At the voice prompt, dial the Option number (for example, 02)
c. The current IP Address for this option will be read out.
d. To enter a new IP, dial the new 12-digit IP Address (example: to enter
192.168.10.10, dial “1 9 2 1 6 8 0 1 0 0 1 0”
e. Once all 12 digits have been entered, the ATA will save them automatically.
Step 4: Log into the HandyTone web interface
1. Enter the IP Address of the ATA into your web browser
(Example: http://192.168.10.10)
a. If you do not know the IP Address of the ATA:
b. Connect a telephone handset to the ATA, dial "***", then "02". Note down the
IP address spoken out and enter it into the address bar of a Web browser,
disregarding leading zeroes. Eg, if the address displayed is
"010.034.238.006", enter this as "http://10.24.238.6/".
c. If the IP Address is read out as “0.0.0.0”, and the ATA is set to DHCP mode,
then this means that the device was unable to acquire and IP Address via
DHCP. Unplug the ATA and wait 2 minutes before trying again. If the IP
Address is still not assigned, you may need to contact your network
administrator before proceeding.
2. Log in to the "Welcome to Grandstream HandyTone 286" page. The default
password is "admin".
Step 5: Configure the ATA
1. Change the following settings:
SIP Server:
SIP User ID:
Authenticate ID:
Authenticate Password:
Name:
sip.freshtel.net
<your Firefly number>
<your Firefly number>
<your Firefly password>
<your name>
2. Change the following settings:
Preferred Vocoder: choice 1:
choice 2:
choice 3:
choice 4:
choice 5:
choice 6:
choice 7:
iLBC frame size:
User ID is phone number:
Register Expiration:
No Key Entry Timeout:
G.729A/B
iLBC
PCMU
PCMA
G.726-32
G.728
G.723.1
30ms
Yes
3
4
3. Change the following settings:
NAT Traversal:
Send DTMF:
FXS Impedance:
NTP Server:
Time Zone:
Daylight Savings Time:
Yes, STUN server is:
stun.freshtel.net
via RTP (RFC2833)
600 Ohm
<in North America>
CTR21
<for most of Europe>
New Zealand #2
<for the UK>
Australia/New Zealand
<for AU and NZ>
<or another setting, as required>
time.nist.gov
GMT+10 <or as appropriate>
<set as appropriate>
4. Click the Update button, then click on the "Click to view your changes" link, then click the
Reboot button. Once your ATA reboots, you should be ready to place and receive calls with
Freshtel.
Dialing:
To dial a PSTN number, dial like you would with a normal phone. Eg 61390000000
To dial a Firefly number or voicemail, prefix a star to the number. Eg *80001234, *123