1
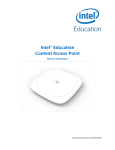
Intel® Education Content Access Point User Manual Document Number: 331819-001EN All information provided here is subject to change without notice. Contact your Intel representative to obtain the latest Intel product specifications and roadmaps. No license (express or implied, by estoppel or otherwise) to any intellectual property rights is granted by this document. Copies of documents that have an order number and are referenced in this document may be obtained by calling 1-800-548-4725 or by visiting http://www.intel.com/design/literature.htm. Intel, the Intel logo, and Kno are trademarks of Intel Corporation in the U.S. and/or other countries. * Other brands and names may be claimed as the property of others. Copyright © 2015 Intel Corporation. All rights reserved. Intel® Education Content Access Point User Manual 2 January 2015 Document Number: 331819-001EN Contents 1 Overview ............................................................................................................................................................. 7 2 Getting Started for Admins ............................................................................................................................. 8 2.1 2.2 2.3 2.4 2.5 2.6 2.7 2.8 2.9 3 Access Content and Lessons (Student Guide) .......................................................................................... 15 3.1 3.2 3.3 3.4 4 Connect to the Intel® Education Content Access Point ..................................................................................................... 15 Lesson and content ............................................................................................................................................................................ 15 Open lessons and content files .................................................................................................................................................... 16 Search for content and lessons .................................................................................................................................................... 17 Content and Lesson Management (Teacher Guide) ................................................................................. 18 4.1 4.2 4.3 4.4 4.5 5 Package contents ................................................................................................................................................................................... 8 Supported operating systems, browsers, and languages.................................................................................................... 8 Get to know the device ........................................................................................................................................................................ 9 2.3.1 LEDs ........................................................................................................................................................................................ 10 2.3.2 Buttons .................................................................................................................................................................................. 10 2.3.3 Ports........................................................................................................................................................................................ 10 Device placement location .............................................................................................................................................................. 11 Mounting ................................................................................................................................................................................................. 11 Setup ......................................................................................................................................................................................................... 11 Log on as admin for the first time................................................................................................................................................ 12 Run the setup wizard ......................................................................................................................................................................... 13 Upload content..................................................................................................................................................................................... 14 Log on as a teacher ............................................................................................................................................................................. 18 Upload and manage content in the library .............................................................................................................................. 19 4.2.1 Create and manage categories ................................................................................................................................... 19 4.2.2 Upload content .................................................................................................................................................................. 20 4.2.3 Open content ...................................................................................................................................................................... 23 4.2.4 Feature and unfeature content .................................................................................................................................. 23 4.2.5 Hide and show content and library from students ........................................................................................... 24 4.2.6 Delete content.................................................................................................................................................................... 25 4.2.7 Edit details of content .................................................................................................................................................... 26 Create and manage lessons............................................................................................................................................................ 26 4.3.1 Create a lesson name...................................................................................................................................................... 26 4.3.2 Add content to a lesson ................................................................................................................................................. 27 4.3.3 Show contents within a lesson ................................................................................................................................... 28 4.3.4 Remove content from a lesson .................................................................................................................................. 28 4.3.5 Edit a lesson name ........................................................................................................................................................... 29 4.3.6 Feature and unfeature a lesson ................................................................................................................................. 30 4.3.7 Delete a lesson ................................................................................................................................................................... 30 Search for content and lessons .................................................................................................................................................... 31 Device settings ...................................................................................................................................................................................... 32 4.5.1 Disable and enable Internet ........................................................................................................................................ 32 4.5.2 Change teacher’s password ......................................................................................................................................... 32 4.5.3 Change the wireless name (SSID) of the device ................................................................................................. 32 Advanced Admin Guide ................................................................................................................................. 33 5.1 5.2 5.3 Log on as admin ................................................................................................................................................................................... 33 Setup wizard .......................................................................................................................................................................................... 33 Status information .............................................................................................................................................................................. 34 January 2015 Document Number: 331819-001EN Intel® Education Content Access Point User Manual 3 5.4 5.5 5.6 General settings ................................................................................................................................................................................... 34 Date and time ........................................................................................................................................................................................ 35 Wireless settings .................................................................................................................................................................................. 36 5.6.1 Wireless access point ..................................................................................................................................................... 36 5.6.2 Access control list............................................................................................................................................................. 36 5.7 LAN settings ........................................................................................................................................................................................... 38 5.7.1 IP address ............................................................................................................................................................................. 38 5.7.2 DHCP Server ........................................................................................................................................................................ 38 5.8 WAN settings ......................................................................................................................................................................................... 39 5.8.1 Ethernet-based WAN ...................................................................................................................................................... 39 5.8.2 Cellular-based WAN ........................................................................................................................................................ 39 5.9 Firewall settings ................................................................................................................................................................................... 41 5.10 Account settings .................................................................................................................................................................................. 41 5.10.1 Admin account ................................................................................................................................................................... 41 5.10.2 Teacher account ................................................................................................................................................................ 41 5.11 Device management .......................................................................................................................................................................... 42 5.11.1 Update firmware ............................................................................................................................................................... 42 5.11.2 Manage preloaded content database ..................................................................................................................... 43 5.11.3 Backup and restore the configuration settings .................................................................................................. 44 5.11.4 Reboot the device............................................................................................................................................................. 45 5.11.5 Reset to factory defaults ............................................................................................................................................... 45 6 Troubleshooting and Support ...................................................................................................................... 46 7 Technical Specifications ................................................................................................................................ 47 Figures Figure 1: Figure 2: Figure 3: Figure 4: Figure 5: Figure 6: Figure 7: Figure 8: Figure 9: Figure 10: Figure 11: Figure 12: Figure 13: Figure 14: Figure 15: Figure 16: Figure 17: Figure 18: Figure 19: Figure 20: Figure 21: Figure 22: Figure 23: Intel® Education Content Access Point – Top view ................................................................................................... 9 Intel® Education Content Access Point – Bottom and ports view ...................................................................... 9 Intel® Education Content Access Point – Inside view .............................................................................................. 9 Mounting diagram ................................................................................................................................................................. 11 Connect the cables ............................................................................................................................................................... 11 Power button ........................................................................................................................................................................... 12 Admin - Wirelessly connect to the Intel® Education Content Access Point ............................................... 12 Admin setup wizard.............................................................................................................................................................. 13 Admin - Upload content .................................................................................................................................................... 14 Student - Wirelessly connect to an Intel® Education Content Access Point .............................................. 15 Student - Home, lessons, library page ........................................................................................................................ 15 Student - Open lesson and content ............................................................................................................................. 16 Student - Search for lessons and content ................................................................................................................. 17 Teacher - Wirelessly connect to Intel® Education Content Access Point .................................................... 18 Teacher login ........................................................................................................................................................................... 18 Library - Preloaded content and My uploaded content ...................................................................................... 19 Teacher - Create categories ............................................................................................................................................. 19 Teacher - Add, edit, and delete categories and subcategories ........................................................................ 20 Teacher - Upload content ................................................................................................................................................. 20 Teacher – Upload content, add metadata information ....................................................................................... 21 Teacher – USB import ......................................................................................................................................................... 22 Teacher - Select items to import from USB .............................................................................................................. 22 Teacher - Feature/unfeature content .......................................................................................................................... 23 Intel® Education Content Access Point User Manual 4 January 2015 Document Number: 331819-001EN Figure 24: Figure 25: Figure 26: Figure 27: Figure 28: Figure 29: Figure 30: Figure 31: Figure 32: Figure 33: Figure 34: Figure 35: Figure 36: Figure 37: Figure 38: Figure 39: Figure 40: Figure 41: Figure 42: Figure 43: Figure 44: Figure 45: Figure 46: Figure 47: Figure 48: Teacher - Hide content ....................................................................................................................................................... 24 Teacher - Hide library from students ........................................................................................................................... 25 Teacher - Delete content ................................................................................................................................................... 25 Teacher - Create lesson...................................................................................................................................................... 26 Teacher - Add content to lesson with drag-and-drop ......................................................................................... 27 Teacher - Add content to lesson using dropdown list......................................................................................... 28 Teacher - Remove content from lesson ..................................................................................................................... 29 Teacher - Edit lesson name .............................................................................................................................................. 29 Teacher - Feature/unfeature lesson ............................................................................................................................. 30 Teacher - Delete lesson ...................................................................................................................................................... 30 Teacher - Search for lessons and content ................................................................................................................. 31 Teacher - Manage device settings ................................................................................................................................. 32 Teacher - Change device settings .................................................................................................................................. 32 Admin - Setup wizard .......................................................................................................................................................... 33 Admin - General settings ................................................................................................................................................... 34 Admin - Date and time settings ...................................................................................................................................... 35 Admin - Wireless settings and access control list .................................................................................................. 37 Admin - LAN settings ........................................................................................................................................................... 38 Admin - WAN settings ......................................................................................................................................................... 40 Admin - Firewall settings ................................................................................................................................................... 41 Admin - Account settings .................................................................................................................................................. 42 Admin - Device management - Firmware update .................................................................................................. 43 Admin - Device management - Preloaded content database .......................................................................... 44 Admin - Device management - Configuration file ................................................................................................. 44 Admin - Device management - Reboot and reset .................................................................................................. 45 Tables Table 1: Table 2: Table 3: Table 4: Table 5: System LED status ................................................................................................................................................................ 10 3G/4G/LTE LED status ........................................................................................................................................................ 10 WAN Ethernet LED status .................................................................................................................................................. 10 Power button ........................................................................................................................................................................... 10 Factory reset button............................................................................................................................................................. 10 January 2015 Document Number: 331819-001EN Intel® Education Content Access Point User Manual 5 Revision History Revision Description Date 001 Initial release. January 2015 Intel® Education Content Access Point User Manual 6 January 2015 Document Number: 331819-001EN Overview 1 Overview The Intel® Education Content Access Point is a wireless access point with an optional digital content distribution system, which provides an easy-to-use interface and storage unit that can be loaded with educational materials that students can access without requiring access to the Internet. Networking features Wireless access point supporting Wi-Fi IEEE 802.11 b/g/n (2.4 GHz) and IEEE 802.11 a/n/ac (5 GHz) with WEP, WPA, and WPA2 encryption. Supports wired Gigabit Ethernet and 3G/4G/LTE mobile WAN connectivity, with intelligent failover if one connection type is unavailable. Allows admin and teacher to turn Internet access on and off easily without complicated settings. Firewall that can block attacks such as Portscan, SYN flood, and Echo Storm. Up to 50 concurrent wireless clients running CLM solutions such as Mythware and NetSupport. Captive portal capability automatically directs users to the primary website on the device when wireless connection is established. Built-in DHCP server, MAC address filtering (whitelist, blacklist) of clients, and ability to limit number of connected clients. Content management and distribution features Supports most file formats (PDF, HTML, JPG, MP3, ZIP, etc.), even apps/executables. Supports single-file or bulk-file upload of content. Contains two content spaces: − “Preloaded Content” which can be populated by the LOEM, reseller, MOE, content publisher, or the factory and cannot be erased or modified by teachers or by device factory reset. − “My Uploaded Content” which can be populated and managed (including erasure) by teachers. Supports IMS content packaging standard. Content can be tagged and categorized according to pedagogical structure. Content can be organized into lessons. Content and lessons can be featured so it’s easier for students to see what is most relevant. Teachers can restrict (hide) access to content from students. The device’s content management system allows students easy access to content without any complicated login. Other features Designed with simple and intuitive user interface making it easy to use, configure, and manage. Elegant, compact, lightweight, and portable - designed to be mounted and unmounted easily so it can be transported to and fro without a tool. Ability to save and restore configuration settings. Can be mass-provisioned (firmware update, configuration settings, content upload, factory reset). Includes a USB 3.0 interface to allow faster upload of content and firmware updates. Contains a 5-hour battery for uninterrupted use and mobile usage. January 2015 Document Number: 331819-001EN Intel® Education Content Access Point User Manual 7 Getting Started for Admins 2 Getting Started for Admins 2.1 Package contents 2.2 Intel® Education Content Access Point Power supply Mounting kit Quick Start Guide for Admin, Teacher, and Student Supported operating systems, browsers, and languages Operating systems: − Windows* 7 − Windows 8 and higher − Android* 4.2 and higher Internet browsers: − Internet Explorer* 9 and higher − Chrome* v35 and higher − Firefox* v30 and higher − Android native browser Languages: − English − Spanish (Latin American and European) − Portuguese (Brazilian and European) − French − Arabic − Turkish Intel® Education Content Access Point User Manual 8 January 2015 Document Number: 331819-001EN Getting Started for Admins 2.3 Figure 1: Get to know the device Intel® Education Content Access Point – Top view 1 2 3 4 Figure 2: Intel® Education Content Access Point – Bottom and ports view 6 5 7 8 11 10 Figure 3: 9 Intel® Education Content Access Point – Inside view 12 13 14 January 2015 Document Number: 331819-001EN Intel® Education Content Access Point User Manual 9 Getting Started for Admins 1 System LED status 8 WAN Ethernet port 2 3G/4G/LTE LED status 9 WAN Ethernet link LED status 3 Power button 10 WAN Ethernet activity LED status 4 Factory reset button 11 USB 3.0 port 5 Wall-mount holes 12 Hard drive 6 Wi-Fi MAC (WFM), Ethernet (LNM) MAC address label 13 3G/4G/LTE micro-SIM slot 7 Power plug 14 Battery 2.3.1 LEDs Table 1: System LED status Device state Color Description Off None The device is powered off Fast pulsing then solid Blue The device is powered on and booting up Slow pulsing (“breathing”) Blue The device has booted and is functioning normally Slow pulsing Blue and orange Battery low Solid Orange System error/warning Table 2: 3G/4G/LTE LED status Device state Color Description Off None 3G/4G/LTE off On Blue 3G/4G/LTE on Blinking Blue No signal Table 3: WAN Ethernet LED status LED Color Description Activity Off No activity Green Receive Orange Transmit Off No link Green Link Device state Action Result Off Press and hold for 2 seconds Turns on On Press once Turns off Link 2.3.2 Buttons Table 4: Power button Table 5: Factory reset button Device state Action Result On Press and hold for 5 seconds System LED flashes and device goes through reset process 2.3.3 Ports The device has three ports: WAN Gigabit Ethernet USB 3.0 (USB 2.0 compatible) Micro-SIM slot (accessible by removing bottom cover) Intel® Education Content Access Point User Manual 10 January 2015 Document Number: 331819-001EN Getting Started for Admins 2.4 Device placement location For best signal strength, put the Intel® Education Content Access Point: 2.5 In an open area. High off the floor. Away from magnetic and large metal objects. At least 3 feet (1 meter) from client devices. Mounting The Intel® Education Content Access Point comes with a mounting kit. To mount it, follow this diagram (Figure 4). Figure 4: 2.6 1. Mounting diagram Setup Connect the Intel® Education Content Access Point to a network (WAN) with an Ethernet cable. (See Figure 5.) TIP! For 3G/4G/LTE cellular-based WAN connection, see 5.8.2 (Cellular-based WAN). 2. Figure 5: 3. Connect the power supply. Connect the cables Power up the device by pressing and holding the power button for two seconds. (See Figure 6.) January 2015 Document Number: 331819-001EN Intel® Education Content Access Point User Manual 11 Getting Started for Admins Figure 6: 2.7 Power button Log on as admin for the first time Wirelessly connect to the device using its default SSID. The default SSID is WRTD-303N_xxxxxx, where “xxxxxx” is the last six digits of the Wi-Fi MAC address (WFM), which is printed on the bottom of the device. (See Figure 2 item 6.) For example, for a device with a WFM of F835DD85457A, the wireless SSID is WRTD-303N_85457A. (See Figure 7.) Launch a browser and go to http://my.admin (or http://192.168.88.1:8080). Enter username admin and password admin. Change the admin default password when prompted. Figure 7: Admin - Wirelessly connect to the Intel® Education Content Access Point Intel® Education Content Access Point User Manual 12 January 2015 Document Number: 331819-001EN Getting Started for Admins 2.8 Run the setup wizard Click Setup Wizard. (See Figure 8.) Follow the steps in the wizard to set up the following: a. b. c. d. e. f. Connection access type Date and time Wireless settings LAN settings A teacher account WAN and 3G/4G/LTE settings Click Save to save and implement the changes. Figure 8: Admin setup wizard January 2015 Document Number: 331819-001EN Intel® Education Content Access Point User Manual 13 Getting Started for Admins 2.9 Upload content TIP! See Section 5.11.2 (Manage preloaded content database) for advanced methods of uploading content. CAUTION: Uploading to the Preloaded Content database will erase existing teacher-uploaded content in the My Uploaded Content space. The device will reboot as part of the content upload process. This will temporarily disrupt network and content access for users, who will see a “503 – Service Not Available” message during the process. To upload content, do the following: Create a package containing the content to upload: a. b. c. d. Zip the content into a file called content_xyz.zip (also known as the package), where “xyz” can be any combination of letters and numbers (for example, content_123.zip, content_abc.zip, content_a1b2c3.zip, etc.). Do not include subfolders. Do not encrypt or password-protect the zipped file. Total size must not exceed 2 GB. Upload through the Admin console: a. b. Go to Device Management > Preloaded Content Database. (See Figure 9.) Specify the location of the package (a local computer or a storage device connected to the USB port in the Intel® Education Content Access Point). TIP! If you are uploading from a USB drive connected directly to the device, put the package in the root directory and plug in the drive. The package file will display after you refresh the admin screen. c. Figure 9: Click Upload. Admin - Upload content Intel® Education Content Access Point User Manual 14 January 2015 Document Number: 331819-001EN Access Content and Lessons (Student Guide) 3 Access Content and Lessons (Student Guide) The Intel® Education Content Access Point contains educational content and lessons created by the teacher. “Content” is an individual file, whereas “a lesson” may consist of one or more content files. 3.1 Connect to the Intel® Education Content Access Point Wirelessly connect to the device. (See Figure 10.) Enter password if required. Launch a browser and go to http://my.content. Figure 10: 3.2 Student - Wirelessly connect to an Intel® Education Content Access Point Lesson and content A lesson is a collection of one or more content files. Featured lessons and content are shown in the Home page. To see all lessons, go to the Lessons page. To see all content, go to the Library page if it’s made accessible. (See Figure 11.) Figure 11: Student - Home, lessons, library page January 2015 Document Number: 331819-001EN Intel® Education Content Access Point User Manual 15 Access Content and Lessons (Student Guide) 3.3 Open lessons and content files To open a lesson, click it. To open a content file, click it and it will appear in a new browser tab. If the browser cannot open the file, it will download it to the default Downloads location. Use an appropriate application to open the file. (See Figure 12.) Figure 12: Student - Open lesson and content Intel® Education Content Access Point User Manual 16 January 2015 Document Number: 331819-001EN Access Content and Lessons (Student Guide) 3.4 Search for content and lessons To search for content, go to the Home or Library page. (See Figure 13.) a. b. Enter keywords in the Search field. A keyword can be a tag, a description, or the name of a content file. Another way to search in the Library page is by filtering based on a category or a tag. i. ii. To filter by category, expand the desired category under the Filter by Category area. To filter by tag, click the desired tag under the Filter by Tag area. To search for lessons, go to the Lessons page and enter the lesson name in the Search field. Figure 13: Student - Search for lessons and content January 2015 Document Number: 331819-001EN Intel® Education Content Access Point User Manual 17 Content and Lesson Management (Teacher Guide) 4 Content and Lesson Management (Teacher Guide) The Intel® Education Content Access Point contains a web application called the Intel® Education Content Hub, which allows you to upload and store educational content locally. It supports most common file formats, such as PDF, Word*, Excel*, PowerPoint*, HTML, e-pub, audio and video formats, etc. Teachers and administrators can upload files to the Library of the Content Hub. Teachers can use the files in the Library to create lessons, which students can then access. Here is a typical workflow for teachers, with detailed instructions for each task in the sections that follow. 4.1 Log on as a teacher. Upload and manage content in the library. Create and manage lessons. Feature content and lessons. Search for content and lessons. Perform other administrative tasks: − Disable Internet access. − Change password. − Change the wireless name of the device. Log on as a teacher To perform teacher-specific tasks, such as uploading content or creating lessons, you must log on as a teacher. Wirelessly connect to the device. (See Figure 14.) Enter password if required. Launch browser and go to http://my.content. Figure 14: Teacher - Wirelessly connect to Intel® Education Content Access Point Click Teacher Login ( ). (See Figure 15.) Enter your username and password. Figure 15: Teacher login Intel® Education Content Access Point User Manual 18 January 2015 Document Number: 331819-001EN Content and Lesson Management (Teacher Guide) 4.2 Upload and manage content in the library The Library is the place where you upload, store, and manage content files. It contains two content spaces (See Figure 16): Preloaded Content, which can be populated by the LOEM, reseller, MOE, content publisher, or factory, and which cannot be erased or modified by teachers. My Uploaded Content, which can be populated and managed (including erasing) by teachers. Figure 16: 4.2.1 Library - Preloaded content and My uploaded content Create and manage categories Before uploading content, it is useful (but not necessary) to create categories and subcategories so you can categorize the content appropriately. This makes it easier for searching. An example of a category and subcategories is as follows: Math (primary category) − Addition (subcategory) Integers (subcategory) Decimals (subcategory) − Subtraction (subcategory) − Multiplication (subcategory) − Division (subcategory) To create categories and subcategories, do the following: Click Manage ( ). (See Figure 17.) Select Categories. Figure 17: Teacher - Create categories Click Add New Primary Category. Enter a category name. Click the checkmark ( ) button to add it. Once a category is created, you can add subcategories. Click the plus ( category. Repeat steps 4 and 5. January 2015 Document Number: 331819-001EN ) button associated with each Intel® Education Content Access Point User Manual 19 Content and Lesson Management (Teacher Guide) TIP! Note that categories assigned to Preloaded Content cannot be changed or deleted. To rename a category, do the following: Click the pencil ( ) button associated with it. (See Figure 18.) Change the name. Click the checkmark ( ) button to save it. To delete a category, do the following: Click the trashcan ( Figure 18: 4.2.2 ) button associated with it. (See Figure 18.) Teacher - Add, edit, and delete categories and subcategories Upload content Go to the Library ( ) page. (See Figure 19.) Click Upload Content ( Figure 19: ). Teacher - Upload content Click Browse and select one or more files. (See Figure 20.) Modify the title (if desired). Add a brief description about the content. Intel® Education Content Access Point User Manual 20 January 2015 Document Number: 331819-001EN Content and Lesson Management (Teacher Guide) Add one or more tags. Tags are words used to describe content, making it easier for searching. For example: science, physics, and lab exercise. TIP! Existing tags can be managed (rename and delete) by clicking Manage ( that tags assigned to Preloaded Content cannot be changed or deleted. ) and selecting Tags. Note TIP! To add more tags to an existing content, click the Edit Content Information ( with the content. ) button associated Assign it a category. Click Upload. Uploaded content will appear in the My Uploaded Content tab. Figure 20: Teacher – Upload content, add metadata information To upload through the device’s USB port, do the following: Plug the USB drive with the content into the USB port of the device. Click Manage ( ). (See Figure 21.) Select USB Import. January 2015 Document Number: 331819-001EN Intel® Education Content Access Point User Manual 21 Content and Lesson Management (Teacher Guide) Figure 21: Teacher – USB import Checkmark the content to upload. (See Figure 22.) Figure 22: Teacher - Select items to import from USB Modify the title (if desired). Add a brief description about the content. Intel® Education Content Access Point User Manual 22 January 2015 Document Number: 331819-001EN Content and Lesson Management (Teacher Guide) Add one or more tags. Tags are words used to describe a content file – making it easier for searching. For example: science, physics, and lab exercise. TIP! Existing tags can be managed (rename and delete) by clicking Manage ( that tags assigned to Preloaded Content cannot be changed or deleted. ) and selecting Tags. Note TIP! To add more tags to an existing content file, click the Edit Content Information ( associated with the content. ) button Assign the content file to a category. Click Import. Uploaded content will appear in the My Uploaded Content tab. 4.2.3 Open content Some content can be opened by the browser and shown in a new tab. If the browser cannot open the file, it will download it to the default Downloads location. Use an appropriate application to open the file. Go to the Library ( ) page. Click either the Preloaded Content tab or the My Uploaded Content tab. Click the name of the content to open. 4.2.4 Feature and unfeature content To highlight content for students to focus on, feature it. Featured content will appear in the Home page. Go to the Library ( ) page. (See Figure 23.) Click either the Preloaded Content tab or the My Uploaded Content tab. Locate the content to feature/unfeature. To feature a content file, click the star ( ) button. The star will turn yellow, and the content will appear under the Featured Content section in the Home page. To unfeature a content file, click the yellow star button associated with it. The star will turn gray. TIP! A teacher may unfeature a featured content file from the Home page. Figure 23: Teacher - Feature/unfeature content January 2015 Document Number: 331819-001EN Intel® Education Content Access Point User Manual 23 Content and Lesson Management (Teacher Guide) 4.2.5 Hide and show content and library from students Individual content can be hidden so students cannot access it. Go to the Library ( ) page. (See Figure 24.) Click either the Preloaded Content tab or the My Uploaded Content tab. Locate the content to hide/show. To hide a content file, click the eye ( able to access the content file. ) button. A slash will appear over the eye, and students will not be To show a content file, click the eye with the slash ( be able to access the content file. ) button. The slash will disappear, and students will TIP! A teacher may hide/show a featured content file from the Home page. Figure 24: Teacher - Hide content To hide/show all content (the entire Library) from students: Go to the Library ( ) page. (See Figure 25.) Locate the Allow student access to library? widget (bottom left). To hide the Library, click No. To show the Library, click Yes. Intel® Education Content Access Point User Manual 24 January 2015 Document Number: 331819-001EN Content and Lesson Management (Teacher Guide) Figure 25: 4.2.6 Teacher - Hide library from students Delete content Go to the Library ( ) page. (See Figure 26.) Click the My Uploaded Content tab. TIP! Teachers cannot delete content files in the Preloaded Content area. Checkmark the content to be deleted and click Delete ( Figure 26: ). Teacher - Delete content January 2015 Document Number: 331819-001EN Intel® Education Content Access Point User Manual 25 Content and Lesson Management (Teacher Guide) 4.2.7 Edit details of content Go to the Library ( ) page. Click the My Uploaded Content tab. TIP! Teachers cannot modify details in the Preloaded Content area. Locate the content to edit details. Click the pencil ( ) button. Edit the details as desired. Click Save to save changes. TIP! A teacher may edit the details of a featured content file in My Uploaded Content from the Home page. 4.3 Create and manage lessons A lesson is collection of one or more content files that teachers create for students. The Lessons page is where lessons are created, viewed, and managed (delete, feature, edit). 4.3.1 Create a lesson name Go to the Lessons ( ) page. (See Figure 27.) Click Create a New Lesson. Enter the name of the lesson when the pop-up appears. Click Create. Figure 27: Teacher - Create lesson Intel® Education Content Access Point User Manual 26 January 2015 Document Number: 331819-001EN Content and Lesson Management (Teacher Guide) 4.3.2 Add content to a lesson There are two ways to add content to a lesson. Method #1: a. b. c. d. Figure 28: Go to the Lessons ( ) page. (See Figure 28.) Click the plus ( ) button under the lesson. The lesson name will show up in the Library page with an empty box on the left side. Click either the Preloaded Content tab or the My Uploaded Content tab. Drag and drop each content item into the lesson box. Teacher - Add content to lesson with drag-and-drop Method #2: a. b. c. d. e. f. Go to the Library ( ) page. (See Figure 29.) Click either the Preloaded Content tab or the My Uploaded Content tab. Checkmark the desired content. Click Add to Lesson and a dropdown list of lessons will appear. Select the lesson name. Click the checkmark ( ) button to add. January 2015 Document Number: 331819-001EN Intel® Education Content Access Point User Manual 27 Content and Lesson Management (Teacher Guide) Figure 29: 4.3.3 Teacher - Add content to lesson using dropdown list Show contents within a lesson Go to the Lessons ( ) page. Click the lesson to reveal content within. 4.3.4 Remove content from a lesson Go to the Lessons ( ) page. (See Figure 30.) Click the lesson to reveal content. Checkmark the desired content to remove. Click Remove From Lesson ( Intel® Education Content Access Point User Manual 28 ). January 2015 Document Number: 331819-001EN Content and Lesson Management (Teacher Guide) Figure 30: 4.3.5 Teacher - Remove content from lesson Edit a lesson name Go to the Lessons ( Click the pencil ( ) page. (See Figure 31.) ) button. Change the lesson name. Click the checkmark ( ) button to save. TIP! A teacher can also rename a featured lesson from the Home page. Figure 31: Teacher - Edit lesson name January 2015 Document Number: 331819-001EN Intel® Education Content Access Point User Manual 29 Content and Lesson Management (Teacher Guide) 4.3.6 Feature and unfeature a lesson To highlight lessons that students should focus on, feature it. Featured lessons will appear in the Home page. Go to the Lessons ( ) page. (See Figure 32.) Locate the lesson to feature/unfeature. To feature a lesson, click the star ( ) button under the lesson and it will turn yellow. The lesson will now appear under the Featured Lessons section in the Home page. To unfeature a lesson, click the yellow star button under the lesson and it will turn gray. TIP! A teacher can also unfeature a featured lesson from the Home page. Figure 32: 4.3.7 Teacher - Feature/unfeature lesson Delete a lesson Go to the Lessons ( ) page. (See Figure 33.) Checkmark the desired lessons to be deleted. Click Delete ( Figure 33: ). Teacher - Delete lesson Intel® Education Content Access Point User Manual 30 January 2015 Document Number: 331819-001EN Content and Lesson Management (Teacher Guide) 4.4 Search for content and lessons To search for content, go to the Home or Library page. (See Figure 34.) a. b. Enter the search keywords in the Search field. The keyword can be a tag, a description, or content file name. Another way to search in the Library page is by filtering based on a category or a tag. i. ii. To filter by category, expand the desired category under the Filter by Category area. To filter by tag, click the desired tag under the Filter by Tag area. To search for lessons, go to the Lessons page and enter the lesson name in the Search field. Figure 34: Teacher - Search for lessons and content January 2015 Document Number: 331819-001EN Intel® Education Content Access Point User Manual 31 Content and Lesson Management (Teacher Guide) 4.5 Device settings In Device Settings, a teacher can change the following settings: Disable and enable Internet access. Change teacher’s password. Change the wireless name (SSID) of the device. Click Manage ( ). (See Figure 35.) Select Device Settings. Figure 35: Teacher - Manage device settings Figure 36: Teacher - Change device settings 4.5.1 Disable and enable Internet Sometimes it may be necessary to temporarily disable the Internet connection during class time to prevent distractions. (See Figure 36.) To disable the Internet connection, set Allow Internet access via this device? to No. To enable the Internet connection, set Allow Internet access via this device? to Yes. 4.5.2 Change teacher’s password Click Change. (See Figure 36.) Enter the old and new passwords, and confirm the new password. Click Update. 4.5.3 Change the wireless name (SSID) of the device Click Change. (See Figure 36.) Enter the new SSID name. Click the checkmark ( ) button for the change to take effect. Reconnect using the new wireless name (SSID). Intel® Education Content Access Point User Manual 32 January 2015 Document Number: 331819-001EN Advanced Admin Guide 5 Advanced Admin Guide This section provides detailed instructions on how to configure the Intel® Education Content Access Point device. This is intended for IT administrators with advanced networking knowledge. 5.1 Log on as admin Wirelessly connect to the device. Launch a browser and go to http://my.admin (or http://192.168.88.1:8080). Enter the admin username and password. TIP! The factory default admin username/password is admin/admin. 5.2 Setup wizard To set up the Intel® Education Content Access Point quickly, use the guided Setup Wizard. (See Figure 37.) Click Setup Wizard and configure the following: a. b. c. d. e. f. Network mode Date and time Wireless settings LAN settings Set teacher account username and password WAN and 3G/4G/LTE settings Click Save. Figure 37: Admin - Setup wizard January 2015 Document Number: 331819-001EN Intel® Education Content Access Point User Manual 33 Advanced Admin Guide 5.3 Status information You can get status information from the Dashboard and Wireless Status pages. 5.4 The Dashboard page shows overall system status. The Wireless Status page shows the list of connected clients. General settings The network mode determines whether or not users can access the Internet through the Intel® Education Content Access Point. If enabled, the captive portal mode automatically redirects a client’s browser to the Content Hub website when a Wi-Fi connection is established. (See Figure 38.) Select a network mode: No Internet access. The device will only be used for classroom content sharing. Users cannot access the Internet through this device. Full Internet access. Allow users to access the Internet through this device. Set Captive Portal mode. When set to ON, the user’s browser is redirected to the primary website when a wireless connection is established with the device. Click Save. Figure 38: Admin - General settings Intel® Education Content Access Point User Manual 34 January 2015 Document Number: 331819-001EN Advanced Admin Guide 5.5 Date and time Configure the date and time of the Intel® Education Content Access Point. (See Figure 39.) Choose an appropriate time zone from the Time Zone list. Select one of two ways to set the date and time: a. b. To manually set the date and time, select Manually Set System Time and enter appropriate values. To automatically synchronize the date and time with predefined NTP servers, select Dynamically Set System Time (the default). To use a different NTP server, select Custom NTP Servers and enter the NTP server. Click Save. Figure 39: Admin - Date and time settings January 2015 Document Number: 331819-001EN Intel® Education Content Access Point User Manual 35 Advanced Admin Guide 5.6 Wireless settings Configure the wireless access point and an access control list. (See Figure 40.) 5.6.1 Wireless access point Enter the SSID Name. The default SSID is WRTD-303N_xxxxxx, where “xxxxxx” is the last six digits of the Wi-Fi MAC address (WFM), which is printed on the bottom of the device. For example, for a device with a WFM of F835DD85457A, the wireless SSID is WRTD-303N_85457A. Select the Wireless Mode. Default is 802.11 b/g/n mixed – 2.4 GHz. Select the Wireless Channel. Default is Auto, which means the optimal channel is determined. Select the Bandwidth Channel. Default is 20 MHz. TIP! 40/20 MHz is for 802.11 n/ac and 80/40/20 MHz is for 802.11ac only. Select the Extension Channel direction (lower or upper) for the channel bonding. TIP! This option is not configurable if the Wireless Channel is set to Auto and Bandwidth Channel is 20 MHz. Set Anti-Interference Mode. Default is Off. To improve wireless performance in a noisy environment, set this mode to On. Select Security Mode. a. b. Default is Open. If WEP is selected, configure the following: c. Authentication Type: Select the authentication type. Default Transmission Key: Set selected key as the default key to use. WEP Key Type: Select the encryption type. Passphrase: Enter a passphrase and click the Generate button, which will generate the four WEP keys below. If WPA/WPA2 is selected, configure the following: Encryption Type: Select the data encryption algorithm. Passphrase: Enter the passphrase. Click Save. 5.6.2 Access control list Set the maximum number of clients that can connect simultaneously with User Limit. Default is 0, which means no limit. Access control configuration: a. b. c. d. By default, No MAC Filtering is selected. To whitelist (allow): Select Allow only the following MAC addresses to connect. To blacklist (don’t allow): Select Prevent the following MAC address to connect. Enter each MAC address in the MAC Address field and click Add. Click Save. Intel® Education Content Access Point User Manual 36 January 2015 Document Number: 331819-001EN Advanced Admin Guide Figure 40: Admin - Wireless settings and access control list January 2015 Document Number: 331819-001EN Intel® Education Content Access Point User Manual 37 Advanced Admin Guide 5.7 LAN settings Set the IP address (LAN side) and DHCP server configuration of the Intel® Education Content Access Point. (See Figure 41.) 5.7.1 IP address Enter the desired IP Address. The default IP address is 192.168.88.1. Enter the desired Netmask. The default netmask is 255.255.255.0. Click Save. 5.7.2 DHCP Server To enable the DHCP server, set the DHCP Mode to DHCP Server. Enter the IP address range with Start IP and End IP. Enter the Lease Time of an IP address. Enter the primary DNS server IP address in the DNS Server1 field and an alternate in the DNS Server2 field. Enter the Domain Name. Enter the Default Gateway. Click Save. Figure 41: Admin - LAN settings Intel® Education Content Access Point User Manual 38 January 2015 Document Number: 331819-001EN Advanced Admin Guide 5.8 WAN settings The Intel® Education Content Access Point provides two types of WAN connections: Ethernet-based through the Ethernet port and cellular-based when a micro-SIM card is installed. By default, the Ethernet connection is the primary connection if both are enabled. If the Ethernet connection fails, it will switch over to the cellular connection automatically and switch back once restored. 5.8.1 Ethernet-based WAN Go to WAN Settings. (See Figure 42.) Select the IP address assignment type: a. b. Use DHCP Client if an IP address is automatically assigned. Use Static IP if a static IP address must be entered. Set the MTU size. a. b. By default, this value is automatically set to 1500 bytes. To set a specific value, select Manual and enter the value in the MTU Value field. TIP! MTU (maximum transmission unit) defines the largest size an IP packet can be. Set the DNS server source. a. b. By default, this is set to Get Dynamically from ISP, which means the service provider automatically sets this information. To use a different DNS server, set it to Use these DNS Servers. Then enter the primary DNS server IP address in the DNS Server1 field and an alternate in the DNS Server2 field. Set MAC source address. a. b. By default, the factory-assigned MAC address of the Ethernet WAN port is used to identify it. To assign a custom MAC address, select Use the following MAC address and enter the new MAC address in the MAC Address field below. Click Save. 5.8.2 Cellular-based WAN TIP! Recommended tools: Phillips screwdriver and small flathead screwdriver. Install a micro-SIM card. a. b. c. d. e. f. g. h. i. j. k. Turn off the device, and disconnect the Ethernet and power cables. Turn the device over to access the bottom cover. Remove the four rubber screw-hole plugs. Loosen and remove the four screws. Lift off the bottom cover. Disconnect the battery cable. (Note the orientation of the connector for later reattachment.) Open the micro-SIM card slot by pushing the metal cover in the direction of the arrow and lifting it up. Install the micro-SIM card. Match the notched corner of the micro-SIM card with the notch of the slot. You will need a micro-SIM adapter if you are using a nano-SIM card. Reassemble the device. Reconnect the Ethernet and power cables. Power the device by pressing and holding the power button for two seconds. Go to WAN Settings. (See Figure 42.) January 2015 Document Number: 331819-001EN Intel® Education Content Access Point User Manual 39 Advanced Admin Guide Figure 42: Admin - WAN settings Set 3G/4G/LTE to ON. Enter the PIN code (if applicable). Click Save. Intel® Education Content Access Point User Manual 40 January 2015 Document Number: 331819-001EN Advanced Admin Guide 5.9 Firewall settings The firewall, which is enabled by default, protects against Portscan, SYN flooding, and Echo storm attacks. It also blocks pings against the WAN interface. To disable the firewall, do the following: Go to Firewall Settings. (See Figure 43.) Click OFF. Figure 43: Admin - Firewall settings 5.10 Account settings You can manage the admin and the teacher account information here. 5.10.1 Admin account Go to Account Settings. (See Figure 44.) Enter the Admin’s username. Enter the Admin’s password and confirm it. The Admin’s password must be at least 8 characters long (16 max), and must contain at least one capitalized character and at least one numeral. Click Save for the changes to take effect. 5.10.2 Teacher account Go to Account Settings. (See Figure 44.) Enter the teacher’s username. Enter the teacher’s password. Click Save. TIP! To reset the teacher account to factory default, click Reset account to factory default. This will set the teacher account username to “teacher” with the password “teacher”. January 2015 Document Number: 331819-001EN Intel® Education Content Access Point User Manual 41 Advanced Admin Guide Reboot the device for the changes to take effect. Figure 44: Admin - Account settings 5.11 Device management 5.11.1 Update firmware CAUTION: The device will reboot as part of the firmware update process. This will temporarily disrupt network and content access for users. Go to Device Management > Firmware Update. (See Figure 45.) Select the method of supplying the firmware file. a. b. Upload the file from the local computer. Use a USB flash drive. For this method, format a USB flash drive (NTFS or FAT32), put the file on it, plug it into the USB port of the device, and refresh the Device Management page. The file will appear following “Update firmware from USB port”. Note: The firmware update file’s extension must be “.tgz”. If the browser changed the file’s extension during the download process, change it back to “.tgz”. Click Update. Wait a couple of minutes for the upgrade to complete. Verify that the upgrade was successful by logging on and checking the firmware version on the Dashboard. Intel® Education Content Access Point User Manual 42 January 2015 Document Number: 331819-001EN Advanced Admin Guide Figure 45: Admin - Device management - Firmware update 5.11.2 Manage preloaded content database CAUTION: Uploading to and updating the Preloaded Content database will erase existing teacher-uploaded content in the My Uploaded Content space. The device will reboot as part of the content upload process. This will temporarily disrupt network and content access for users, who will see a “503 – Service Not Available” message during the process. There are two ways to upload content to the Preloaded Content database. The first is through the web-based Admin console. This method only allows one upload at a time, and the file size is limited to no more than 2 GB. The second is through the network shared drive on the device. This allows upload of one or more files at a time and supports larger than 2 GB file size. Uploaded content will appear in the Preloaded Content tab of the Content Hub Library. Create a package containing the content to upload: a. b. c. d. Zip the content into a file called content_xyz.zip (also known as the package), where “xyz” can be any combination of letters and numbers (for example, content_123.zip, content_abc.zip, content_a1b2c3.zip, etc.). Do not include subfolders. Do not encrypt or password-protect the zipped file. Total size must not exceed 2 GB. (This limit is for upload through Admin console only.) Upload through the Admin console: a. b. Go to Device Management > Preloaded Content Database. (See Figure 46.) Specify the location of the package (a local computer or a storage device connected to the USB port in the Intel® Education Content Access Point). TIP! If you are uploading from a USB drive connected directly to the device, put the package in the root directory and plug in the drive. The package file will display after you refresh the admin screen. c. Click Upload. To upload one or more packages through the network shared drive: a. b. c. d. e. Connect to the network share on the device at \\192.168.88.1\preloaded. Enter the admin username and password. Copy all the packages to the shared drive. Go to Device Management > Preloaded Content Database. (See Figure 46.) Click Update. To delete a package from the database: a. b. c. Connect to the network share on the device at \\192.168.88.1\preloaded. Enter the admin username and password. Delete the package. January 2015 Document Number: 331819-001EN Intel® Education Content Access Point User Manual 43 Advanced Admin Guide d. e. Go to Management > Preloaded Content Database. (See Figure 46.) Click Update. To erase the entire Preloaded Content database: a. b. Figure 46: Go to Device Management > Preloaded Content Database. (See Figure 46.) Click Erase. Admin - Device management - Preloaded content database 5.11.3 Backup and restore the configuration settings Once the device has been configured properly, it’s a good idea to save the settings for future uses such as replicating the settings to multiple devices, restoring settings in case of corruption, etc. CAUTION: The device will reboot as part of the configuration setting restoration process. This will temporarily disrupt network and content access for users. Go to Device Management > Configuration File. (See Figure 47.) To back up settings, click Export. This will generate a “configure.xml” file and save it to the browser’s default Downloads location. To restore settings, click Browse and select a “configure.xml” file. Click Apply. Figure 47: Admin - Device management - Configuration file Intel® Education Content Access Point User Manual 44 January 2015 Document Number: 331819-001EN Advanced Admin Guide 5.11.4 Reboot the device There are two ways to reboot the device: Through the Admin console (preferred method): Go to Device Management > Reboot & Reset. (See Figure 48.) Click Reboot. Hard reboot (use this method only if the device is not responding through the Admin console): Press and hold the power button for two seconds and it should turn off. Press and hold the power button again for two seconds to power on. 5.11.5 Reset to factory defaults There are two ways to perform a factory reset. CAUTION: This action will reset the Admin and teacher accounts. Preloaded content will persist. Teacher-uploaded content (My Uploaded Content) will be erased. Through Admin console: Go to Device Management > Reboot & Reset. (See Figure 48.) Click Reset to Factory Defaults. Factory reset button: Locate the pinhole button next to the power button. Press and hold the button for five seconds then release. The system LED will flash rapidly, indicating the factory reset process. Figure 48: Admin - Device management - Reboot and reset January 2015 Document Number: 331819-001EN Intel® Education Content Access Point User Manual 45 Troubleshooting and Support 6 Troubleshooting and Support No Internet access through Ethernet connection. Confirm the physical Ethernet WAN connection works. Confirm the network mode is set to Full Internet access in the Admin console > General Settings. Confirm the WAN settings are configured properly in the Admin console > WAN Settings. No Internet access through 3G/4G/LTE connection. Confirm the SIM card is activated and there’s an adequate data plan. Confirm the SIM card is installed properly (gold pins face down and notch oriented in the right direction). Confirm the network mode is set to Full Internet access in the Admin console > General Settings. Confirm 3G/4G/LTE is set to ON and saved in the Admin console > WAN Settings. Confirm 3G/4G/LTE LED status is on and is solid blue. “503 – Service Not Available” message when accessing http://my.content. There are two possible scenarios for the “503 – Service Not Available” message. Content was recently uploaded and is being added to the database. a. Wait for a couple of minutes; wait a little longer if it was a large upload. Malformatted or encrypted content was uploaded to the server. a. b. Make sure there aren’t any subfolders in the “content_xyz.zip” file. Reload the content. Uploaded package (content_xyz.zip) does not show up in Preloaded Content space. The content package might be malformatted or encrypted. Make sure the content within the package is not in subfolders, but at the top level. Make sure the package is not encrypted. Connect to network share drive at \\192.168.88.1\preloaded and remove the bad package. Properly create the package. See Section 5.11.2 (Manage preloaded content database) for details. Reload. System unresponsive and admin cannot log on to reboot. Press and hold the power button until the device powers off. Power back on. Where to get latest firmware? Contact the supplier of the Intel® Education Content Access Point. Firmware update failed. Confirm the firmware update file’s extension is “.tgz”. If the browser changed the file’s extension during the download process, change it back to “.tgz”. Whom should I contact for additional technical support? Contact the supplier of the Intel® Education Content Access Point. Intel® Education Content Access Point User Manual 46 January 2015 Document Number: 331819-001EN Technical Specifications 7 Technical Specifications CPU Intel® Atom™ processor E3815 (1.46 GHz, 512K cache) Operating system Ubuntu* 12.04 LTS Memory 2 GB DDR3L-1066 Storage 8 GB eMMC (built-in) 2.5 in. 500 GB (optional) Wi-Fi LAN connectivity IEEE 802.11 b/g/n (2.4 GHz) or IEEE 802.11 a/n/ac (5 GHz) WAN connectivity Wired Gigabit Ethernet 3G/4G/LTE mobile broadband LED System status 3G/4G/LTE mobile WAN connectivity Port Gigabit Ethernet USB 3.0 (USB 2.0 compatible) Micro-SIM slot Button Power Factory reset Battery Lithium-ion polymer 7.4 V, 4050 mAh (up to 5 hours) Power supply AC input: 100 to 240 V DC output: 12 V / 2 A Frequency: 50 to 60 Hz, single phase Physical specs Dimensions: 190 × 190 × 30 mm Weight: 607 g Environmental specs Operating temperature: 32 to 95⁰F (0 to 35⁰C) Relative operating humidity: 20 to 80% (noncondensing) Storage temperature: 14 to 140⁰F (-10 to 60⁰C) Relative storage humidity: 10 to 90% Regulatory FCC ID: MXF-WRTD303N, complies with part 15 of the FCC rules CE January 2015 Document Number: 331819-001EN Intel® Education Content Access Point User Manual 47