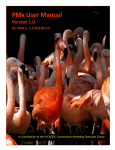
1
Finch and Softbill Save Program User’s Manual Finch and Softbill Save (FSS) is a Conservation Program Established by the National Finch and Softbill Society (NFSS) for the preservation of finch and softbill species in captivity in the United States an d Canada. For more information, please visit the NFSS website at www.nfss.org. The Finch and Softbill Save Program can be found at www.nfss-fss.org. Finch and Softbill Save Program User’s Manual April 12, 2010 Table of Contents Important Note ............................................................................................................................................. 3 Introduction .................................................................................................................................................. 4 Getting Started.............................................................................................................................................. 5 Joining FSS ................................................................................................................................................. 5 Join NFSS (if you are not already a member) ........................................................................................ 5 Create Your FSS Account ....................................................................................................................... 5 Initialize Account ................................................................................................................................... 5 Logging In .................................................................................................................................................. 7 Logging Out ............................................................................................................................................... 8 Password Recovery ................................................................................................................................... 8 Change Password ...................................................................................................................................... 8 Change Account/Privacy Settings ............................................................................................................. 8 Working with Bird Data................................................................................................................................. 9 Adding Data for an Individual Bird ............................................................................................................ 9 Species ................................................................................................................................................ 10 Band Number ...................................................................................................................................... 11 Source ................................................................................................................................................. 12 Sex ....................................................................................................................................................... 13 Acquired Year ...................................................................................................................................... 13 Display Owner ID................................................................................................................................. 13 Comment to Display in Studbook ....................................................................................................... 13 Personal Comments ............................................................................................................................ 14 Adding a Species Profile .......................................................................................................................... 14 Husbandry Practices............................................................................................................................ 14 Observations ....................................................................................................................................... 16 Managing Your Bird List .......................................................................................................................... 17 Manage Bird ............................................................................................................................................ 18 Editing Bird Data ..................................................................................................................................... 19 Viewing a Pedigree.................................................................................................................................. 20 Working With Clutch Data .......................................................................................................................... 23 Adding Data for a Clutch ......................................................................................................................... 23 2 Finch and Softbill Save Program User’s Manual April 12, 2010 Parentage ............................................................................................................................................ 24 Clutch Statistics ................................................................................................................................... 24 Husbandry Conditions ......................................................................................................................... 25 Clutch Dates ........................................................................................................................................ 25 Band This Clutch.................................................................................................................................. 26 Managing Your Clutch List ...................................................................................................................... 27 Editing a Clutch ....................................................................................................................................... 27 Editing the Species Profile....................................................................................................................... 28 Using the Studbook ..................................................................................................................................... 29 The FSS Community .................................................................................................................................... 31 FSS Breeder List....................................................................................................................................... 31 Sorting Participants ............................................................................................................................. 31 Filtering by Species ............................................................................................................................. 32 FSS Breeder Profile.................................................................................................................................. 32 Sending a Message from the Breeder Profile ..................................................................................... 32 Viewing a Species Profile from the Breeder Profile ............................................................................ 32 Marketplace ............................................................................................................................................ 34 My Sale List ......................................................................................................................................... 34 Browse Sale List................................................................................................................................... 35 Wanted Lists........................................................................................................................................ 36 Messages................................................................................................................................................. 37 Reading a Message ............................................................................................................................. 37 Replying to a Message ........................................................................................................................ 37 Deleting a Message ............................................................................................................................. 38 Composing a Message ........................................................................................................................ 38 Important Note When working with database applications, it is important NOT to use your browser’s Back button to navigate pages. Only navigate a database application using the interface provided on the web page. Using the Back button can be unpredictable and may cause data just entered but not yet saved to be lost and may cause you to navigate to places in the application that you did not intend. 3 Finch and Softbill Save Program User’s Manual April 12, 2010 Introduction Finch and Softbill Save (FSS) was developed by the National Finch and Softbill Society (NFSS) in an attempt to preserve the species of finches and softbills kept in US and Canadian aviculture. Our hobby has relied on the presence of imports of various species to stock our bird rooms and provide us with new bloodlines and genetic diversity. The future of imports is uncertain, and if imports cease, these species will be lost to aviculture unless an organized effort to preserve them is implemented. FSS serves breeders by collecting data that helps fanciers find new bloodlines and by collecting and sharing first hand information on the keeping of these species as well as by collecting and analyzing breeding results from participating breeders. Initially, this was done through extensive paperwork that needed to be filled out by members, mailed in to the program administrators, and then compiled by administrators. Because this paperwork was overwhelming to both participants and administrators, the program struggled. In the beginning, program guidelines were restrictive to guarantee the integrity of the data. However, these restrictions resulted in low participation, and over time, the guidelines were loosened in order to increase the opportunity to participate. Because the paperwork was the biggest hurdle to both participation and administration, it was decided that the program could best succeed if it was put online, in the form of a web-based database application. The development of this software would not only allay the burden of the paperwork and compilation of the data, it would offer an immediate benefit to participants by providing organized access to their data as well as the data collected by others, by respecting the wishes of those who wish to remain anonymous while sharing personal data of those who wish to network, by providing an anonymous means of contacting each other without releasing personal information, by creating a studbook and pedigree system that can track a bird’s ancestry, and by providing analyses of a variety of statistics that may lead to important information about how we breed these birds and what has proven successful. For such a program to succeed, participation is needed at all levels. Thus, participants may contribute at the level they choose, as long as they band their birds with a numbered band (closed bands are recommended but open bands are acceptable) and they validate their data at the required intervals. Because data on a closed-banded bird with a traceable number is more reliable than data from a bird with an open band, the program encourages closed banding whenever possible. The FSS program can be found at www.nfss-fss.org. There is no fee to join, but one must be an NFSS member to participate. Participation is entirely voluntary. The data collected is the property of the NFSS and the NFSS is not responsible for lost or stolen data. Participants should keep their own copy of their data (either by printing relevant information or by maintaining their own record system). The NFSS reserves the right to terminate the program at any time. 4 Finch and Softbill Save Program User’s Manual April 12, 2010 Getting Started Joining FSS Join NFSS (if you are not already a member) To join FSS, you must first be a member of the NFSS. (Visit www.nfss.org to join). Once a member, you will be assigned an NFSS number. Your NFSS number is usually printed above your name on your Journal, along with your expiration date. Contact the NFSS membership director if you have difficulty locating your NFSS number (see the NFSS website for contact information). Create Your FSS Account Go to www.nfss-fss.org to create an FSS Account. Click on the Join Finch and Softbill Save link at the bottom of the Log In box (Figure 1) to bring up the registration page. The registration page (Figure 2) will ask for your NFSS Number, First Name, Last Name, Zip Code, and E-mail Address, and will prompt you to create and confirm a password for your FSS account. When you have entered this information, click Join FSS. Figure 1. Click the “Join Finch and Softbill Save” link on the login box to bring up the registration page The system will then confirm that your NFSS membership is current based on the information that you provided, and if it is current, it will take you to a screen to initialize your account settings – including your membership information and your privacy settings. If your membership is not current or the information provided does not match your membership information, or an account already exists for the NFSS number you provided, you will receive an error message and the account will not be created. If Figure 2. FSS Registration Page you have any questions about any error messages you receive, please use the Contact FSS link on the main menu (left hand side of the page) to contact the FSS Director for more information. Initialize Account Once your account has been successfully created, you will be taken to a page where you can initialize your membership information and your privacy settings (Figure 3). This page will also display your new Finch and Softbill Save ID. Your FSS ID is how you will be identified to others in the program. You will not be able to access the program until you save your membership information and your privacy settings. If you exit without saving, the next time you log in, this page will be displayed again. 5 Finch and Softbill Save Program User’s Manual April 12, 2010 Membership Information The Membership Information consists of your contact information. Fields marked with an asterisk are required. This information will not be displayed to other users unless you uncheck the Privacy Setting for that item on the right hand side. Privacy Settings You can hide as much or as little of your personal information as you desire. If you wish to remain completely anonymous, but would still like to receive inquiries and private system messages from other users regarding your birds, check all of the privacy settings except the FSS ID. In addition to hiding your personal information, you can also hide your FSS ID. If you hide this ID, your birds will be listed in the studbook without a visible reference back to you, and other users of the system will not be able to contact you through the internal messaging system (system administrators may still have access to your FSS ID). It is not recommended that you hide your FSS ID unless you do not want to use the system to network. Membership Type Users of the system are classified as either FSS Memberships or NFSS-Only Memberships. FSS Memberships have access to all user portions of the website and can take advantage of all the benefits of the FSS program as long as they keep their data current. NFSS-Only Memberships are not allowed to enter any bird data and are restricted to using designated areas where they may provide a service that is of use to FSS participants, such as updating sale lists. If you wish to participate in the FSS Program, leave this checkbox unchecked. If you only want to access limited areas of the website so that you can provide a service such as a sale list, check this checkbox. NFSS-Only areas of the website are not yet implemented. Comments This area allows you to enter a brief comment about yourself that will be shared with others who click on your FSS ID. Once you have saved your membership information and privacy settings, you will gain access to the FSS website. You can update this information at any time by clicking on the Settings menu item on the main menu (left hand side of the page). 6 Finch and Softbill Save Program User’s Manual April 12, 2010 Figure 3. Membership Information and Settings. You must provide the required information and save this data in order to proceed to the FSS program. You can change your settings at any time by logging in and selecting Settings from the Main Menu on the left hand side of the page. Logging In Once you have created your account, you can log in at any time at www.nfss-fss.org. Just enter your NFSS number and the password you created, then click the Log In Button (see Figure 1). If you click the 7 Finch and Softbill Save Program User’s Manual April 12, 2010 Remember Me button, the next time you visit the site, you will be taken directly to the application without being required to log in. Manually logging out will disable this feature until you select it again. Do not check this box if you are using a public computer. Logging Out There is a link to log out on every page at the top right hand corner. Password Recovery In the event you should lose your password, you can use the Forgot Your Password box (Figure 4) on the Login page (www.nfss-fss.org) to have the system generate a new password and mail it to the e-mail address registered in your account. You can then log in with the new password and change your password using the Change Password box. Change Password If you would like to change your password, you can do so using the Change Your Password box (Figure 5) on the Settings page (click Settings in the menu after logging in to your account). Figure 4. Enter your NFSS Number and click submit to have a new password generated for your account and to have it e-mailed to the address registered in your account. To change your password, you must enter your old password, then enter the new password you would like to use, then enter it a second time to confirm it. Click the Change Password button to change your password. Change Account/Privacy Settings You can change your account/privacy settings that were entered when you initialized your Figure 5. Change Your Password Box located on the account at any time. To change the settings, click Settings page. on the Settings menu item when logged in. This will bring up a form identical to the one you used to initialize your settings. Make any necessary changes, then click on the Save button to save your changes. 8 Finch and Softbill Save Program User’s Manual April 12, 2010 Working with Bird Data Adding Data for an Individual Bird Bird data can be added in one of two ways. Data for an individual bird can be entered directly, or data for a clutch of birds can be added as an active clutch progresses. See WORKING WITH CLUTCH DATA for information about adding birds as a clutch. A bird should be added as an Individual Bird if it was acquired by you (bred by someone else or as an import) or if they were bred by you in a previous breeding season but were not entered into FSS at that time. NOTE: Birds should be entered as a Clutch if they were bred by you in the current breeding season. Adding birds as a clutch provides the program with information about the conditions under which they were bred. This information is used in the yearly analyses and is the preferred method for entering newly banded chicks. NOTE: A bird can also be added to your bird list if an existing bird record is transferred to you by another FSS member (eg, one FSS member sells/trades a bird to another FSS member). This transfer of records allows the bird data to be retained as the bird changes hands. Birds that have been transferred out of the program can also be reacquired by any FSS member if the closed band number or FSS ID for the bird is known. The transfer of bird records from one owner to another will be implemented in the next update of the software. To add bird data for an individual bird, go to the My Birds page by clicking on My Birds in the Data section of the menu to the left. If you have never entered a bird before, you will see an empty tabbed folder (Figure 6). Figure 6. The My Birds list before you have entered any bird data. To add your first bird, click the Add Bird button beneath the empty drop down list box. This will create a new tabbed page with the Add Bird form (Figure 7). 9 Finch and Softbill Save Program User’s Manual April 12, 2010 Figure 7. Form used to enter data for a new bird. Species To select the species of the bird to be added, first select the bird Type (Finch or Softbill) from the Type drop down list. Next, select the region of origin of the species from the Region drop-down list. Last, select the Species from the Species drop-down List. Be sure to check the taxonomic name to ensure you are entering the proper species, as common names can be confusing. The Select Species control offers a few options to make selecting a species easier. You can choose to list all species in the database, or you can choose to just select from the species you have data entered for 10 Finch and Softbill Save Program User’s Manual April 12, 2010 in the database. You can also choose to view the common name first or the taxonomic name first (useful when both names do not fit in the drop down list). Band Number All birds entered into FSS must have a band number. Because closed bands help preserve the integrity of the data, FSS encourages the closed banding of birds whenever possible. However, because this is not always possible and is never possible when working with imported birds, FSS also accepts any open band with an identification number. Closed band numbers must be unique. You cannot enter a new bird with a closed band number that has already been entered into the database. You will get an error message if you attempt to do so. If the bird you are trying to enter has already been entered into the system, then you can either have the owner transfer the bird record to you (Functionality coming) or you can search for the bird record among birds that are not currently claimed by an owner and claim it as your own (Functionality coming). You cannot reuse a closed band from a bird that has died or lost its band. Open band numbers do not have to be unique – although they should be unique among your birds so that you can accurately identify each bird in your flock. Enter a closed band number exactly as it appears on the band. If a number is preceded by zeroes on the band, enter the zeroes in the band number. If a band does not include one of the components in the identification that is printed on the band, leave that field blank (eg, don’t enter a size if no size is printed on the band even if you know what that size is). The components of a closed band usually consist of the following: Club/Breeder Initials This is the letter code that is printed on the band. For NFSS bands, this is the code NFS. Year This is the year the band was issued and not necessarily the year the bird was banded. The year frequently appears as a two-digit number printed sideways on the band. Enter the year exactly as it appears on the band, including any preceding zeroes. Size This is the size of the band. Size is usually represented by a letter code on the band, the lower the letter, the smaller the band. Do not enter a size if no size is printed on the band Number This is the unique identifying number printed on the band. It is usually a 3-5 digit number. Enter the number exactly as it appears on the band, including preceding zeroes. Open bands may not include all fields shown above – in fact, they may be nothing more than a number. 11 Finch and Softbill Save Program User’s Manual April 12, 2010 Source The source of the bird can either be Domestic (bred in captivity), Import (wild caught), or Unknown. Select the appropriate source from the drop down list, or select Unknown if you don’t have that information. If the bird has been domestically bred, additional controls will appear on the form (Figure 8). Figure 8. Additional controls for entering domestic bird information. Parent1/Parent2 You can select a parent bird from the list of birds you own of this species. You cannot select a parent bird that is not owned by you. If you do not own the parents, you can request the owner of the parent bird lend you the parent bird record so that you can enter it as a parent bird (alternatively, you can lend someone your bird so that they can enter parent bird information for you). Loan functionality is coming in the next release. Parent birds are listed by their band number. Raised By You can indicate whether this bird was raised by its parents, foster parents, a host species, handfed or unknown. Bred-From Population Bred-From Population is the bird population that this bird was bred in. The choices are Pair (a single pair of this species was in the enclosure and there can be no question of parentage), Colony (3 or more birds of this species were in the enclosure), or Unknown. Note that you can indicate Pair if the pair was in an enclosure with its own just fledged offspring that are too young to reproduce. If the offspring might be capable of reproducing, you should indicate Colony instead. This information is important to the studbook because in a Colony situation, even if you know which two birds built a nest, incubated the eggs, and fed the chicks, you can never be sure that another male did not mate with the hen or that another female did not lay an egg in the nest. Birds bred in a pair situation have definitive parentage and that information can be helpful. 12 Finch and Softbill Save Program User’s Manual April 12, 2010 Bred by Me Check this box if you are the breeder of this bird. Hide Breeder ID Check this box if you are the breeder but you do not want the system to display your FSS ID as the breeder of this bird in the studbook. Hatch Date Uncheck the Unknown checkbox if you know the hatch date, or if you know at least the hatch year. When you uncheck the checkbox, a calendar will appear. Select the hatch date on the calendar. If you do not know the exact date, but you know the month, you can just enter the hatch date as the 1st of that month. If you do not know the day or the month, but you know the year, enter the hatch date as the 1st of January of that year. It is very helpful to have the hatch year in the database as this can be used to compute life spans and age of maximum fertility and such in the analyses. Very little is done with the month and day, except when this information is entered for a clutch as it helps us to estimate average days to hatch and average days to fledge. Thus, please provide a hatch date even if all you know is the year, as that information can be extremely useful. Sex Please select from Cock, Hen, or Unsexed. It is understood that sex identification in monomorphic species is subject to error. Acquired Year Enter the year you acquired this bird. If you do not know, please estimate. Display Owner ID Uncheck this box if you wish to hide your FSS ID as the owner of this bird. You may wish to do this if this bird is an extremely rare/expensive species and you are concerned about theft or other invasions of your privacy. This allows you to hide your identification from this bird, while displaying it for other more common birds. NOTE: If you have set your privacy settings to hide your FSSID, your ID will not be displayed as the owner or breeder of any bird in the studbook. Doing so will limit the ability of others in the FSS program to network with you. Comment to Display in Studbook You can enter a comment to be displayed in the studbook entry. Please keep this content brief and relevant to the studbook data. For example, if this bird was raised by a trio of birds and the father can be one of two birds, you can provide this information along with the IDs of the potential parents in the comment. You could also provide information about genetic traits in that bird that might be passed on to offspring. 13 Finch and Softbill Save Program User’s Manual April 12, 2010 Personal Comments Please keep this information brief. Only the owner of the bird can view the personal comments. This field will appear in your bird list, so you can use it to provide identification information to help you keep track of which bird is which. Or you can use this field to provide any information that you find useful when you view the bird data. For example, you may want to use the personal comments to indicate which enclosure this bird is currently housed in. You may want to indicate what colored bands are on the bird. You may want to indicate a line designation that you use to track your own lines in your records. Or you may want to note mate preferences for that bird. Once you have entered all the information for this bird, click the Add New Bird button to add this bird to the database. If you decide that you do not want to add this bird at this time, you can cancel out of the form using the Cancel button or clicking on the [x] button on the top right corner of the tab page. Adding or Canceling will close the Add Bird Tab Page. Adding a Species Profile The first time you add a bird of a given species, you will be directed to add a Species Profile for that species. A Species Profile tab page will appear with a form in which profile information can be entered. Once you have created this profile, you will not be prompted to create it again. This form is too long to be displayed on one screen and thus there is no picture included. The Species Profile form is split into two sections: Husbandry Practices and Observations About This Species. Husbandry Practices are the things you do when breeding this species. Observations are notes about breeding characteristics and behavior. When you enter your practices, enter the most common practices, even if it is not uncommon to vary from those practices. You can provide additional comments to clarify variations in your practices. Husbandry Practices Raised By You may select from Parent (the birds own parents raise it), Foster (you move the chicks/eggs from the parents and give them to another pair to raise), Hand-Raised (you hand-feed the chicks yourself), or Host (the parents are a parasitic species [eg, Whydahs] and lay the eggs in the nest of a host species). If you select Foster or Host, you will be prompted to select the Foster Species or Host Species that is used most often. You can provide any additional comments in a free form text box to explain your practices in more detail or explain exceptions. 14 Finch and Softbill Save Program User’s Manual April 12, 2010 Enclosure You may select from the following: Cage – 3 ft long or less, not walk-in. Flight – Greater than 3 ft long, not walk-in. Small Aviary – 4 ft long or less, walk-in. Medium Aviary – Between 4 and 10 ft long, walk-in. Large Aviary – Greater than 10 ft long, walk-in. You may optionally provide the exact measurements of your normal breeding enclosure. The Enclosure Population can be selected from the following: Pair – the enclosure includes only a single pair of this species. Mixed – the enclosure includes a single pair of this species and also birds of other species. Colony – the enclosure includes 3 or more birds of this species but no birds of other species. Mixed Colony – the enclosure includes 3 or more birds of this species and also birds of other species. NOTE: If the enclosure includes chicks from the last clutch but no other birds of the species, it may be designated as Pair or Mixed as long as the chicks from the last clutch are too young to breed. This is meant to account for the many species that will start the next clutch while still feeding the clutch that has just fledged. If there is any possibility that any of the chicks in the last clutch has reached breeding maturity, then the enclosure must be considered a colony. You must also indicate whether the enclosure is normally located Indoors/Outdoors, the Temperature Range of the enclosure when breeding, what types of Plants the enclosure includes (live, artificial, none), and the type of Lighting and Hours of Light provided. You may provide any additional comments about your typical breeding enclosure for this species. Diet You are asked to indicate whether your birds take Live Food when breeding, and if so, select from the types that you offer. You may provide additional comments about your practices for feeding live food. You are also asked to describe the following: Breeding Diet, Breeding Supplements, Resting Diet, and Resting Supplements. 15 Finch and Softbill Save Program User’s Manual April 12, 2010 Nests You are asked to select the type of nest you provide for this species. You may choose from the following: Bird Built, Dome, Open, Box, Tube, and Other. You can provide comments about the type of nest offered. You may list the materials you provide as nesting material and you are asked whether or not you typically perform nest checks on this species. Observations You are asked to provide the following information about the species. It is okay to leave text boxes blank if you do not have an answer yet. Please remember to update these descriptions as you gain more experience. Nest Building You are asked whether the hen, cock, or both is typically responsible for nest building. You may provide a description of a typical nest, including such details as shape, location, height, opening, facing direction, and cock nest as well as cock and hen behaviors when building a nest. Eggs You are asked to describe the eggs of this species. Indicate whether the cock, hen or both incubates the eggs if known. You may provide comments about the bird’s incubation behaviors. Mating/Courtship You are asked to describe the mating and courtship behaviors of this species. Chick Descriptions You are asked to describe a chick at hatch as well as a chick at fledge. You can edit the profile at any time from the Breeding Records page (see EDITING A SPECIES PROFILE for details). Participants are encouraged to review their profiles regularly to ensure they continue to be accurate as their experience grows. The Species Profiles can be viewed by other FSS participants so that they can research the practices that others employ. The Species Profiles are also used to supply default values to the Add Clutch form when you add a new clutch. If the Species Profile contains your common practices, you do not need to enter this information for every clutch – only for those clutches that were raised under different conditions. All species profiles can be viewed by all FSS users. However, if you do not want your identity associated with the species profile, you can check the Keep This Profile Anonymous check box at the end of the form. When you click Save, your profile information will be saved to the database, the Species Profile tab will be closed, and you will be returned to your My Birds list. You should now see the newly added bird in the bird list and the species for this bird should appear in the Species drop-down list. 16 Finch and Softbill Save Program User’s Manual April 12, 2010 Managing Your Bird List Once you have bird records entered into the database, you can browse your birds from the My Birds tabbed page (Figure 9) that is available by clicking on My Birds from the Data section of the menu. Figure 9. My Birds list The bird records are displayed by Species. Select the species to display from the Select Species drop down list. You can only select from the species that you have entered in the database. You can choose to display taxonomic name instead of common name by unchecking the Common Name check box. When you select a species, the list will repopulate with your birds of that species. By default, birds you have borrowed from other breeders and deceased birds are not displayed in the list. However, you can choose to display these birds by checking the appropriate check box in the top right corner of the tabbed page. The bird list includes the following information about each bird: FS ID, band number, closed band status, sex, breeder ID (if the breeder discloses this info), both parents’ FS ID, and the owner comment. Note that keeping the owner comment short makes for a nicer looking bird list. 17 Finch and Softbill Save Program User’s Manual April 12, 2010 To view/edit information about a bird in your list or about a parent of a bird in your list, you can click on the underlined FS ID. Note that if you do not own the parent bird, you cannot make changes to the bird record. To view information about the breeder of the bird, click on the underlined FSS ID for that breeder. Manage Bird When you click on a bird in your bird list, the Manage Bird tab will be displayed (Figure 10) and information about that bird and various management options will be displayed. Figure 10. Manage Bird tabbed page. The bird data summary displays the information entered for the bird as well as a summary of the clutches recorded for this bird. The clutch summary displays the clutch ID, the mate for that clutch, the hatch date and a list of the birds produced in that clutch, including the FS ID and band number for each chick. If you own the bird being displayed, an Edit button will be displayed to the right of the bird data summary. Click the Edit button if you wish to edit the bird information (See EDITING BIRD DATA). You can view the pedigree for this bird by clicking the View Pedigree button (See VIEWING A PEDIGREE ). You can transfer this bird to another FSS member or out of the FSS Program by clicking the Transfer button (Functionality not yet implemented). 18 Finch and Softbill Save Program User’s Manual April 12, 2010 You can delete this bird by clicking Delete if it has no clutches or offspring in the database, but this functionality is only provided to delete bird records that were created by mistake. Real life birds should never be deleted from the database. They should be transferred to the new FSS Owner or transferred out of the program if they are sold/traded/given to someone not in FSS. Birds that have died should be edited with the Death Date. They will then disappear from your bird list unless you opt to display deceased birds. When you are done with this bird, click the Done button or the [x] in the top right corner of the tab page to return to your bird list. Editing Bird Data Clicking the Edit Bird button from the Manage Bird page will bring up the Edit Bird tabbed page and the Edit Bird form (Figure 11). Figure 11. Edit Bird form 19 Finch and Softbill Save Program User’s Manual April 12, 2010 The Edit Bird form is identical to the Add Bird form (See ADDING AN INDIVIDUAL BIRD for instructions on how to fill out this form), except that it also allows you to enter a Death Date. To enter a Death Date, uncheck the alive check box and select the Death Date from the Calendar control. When you have made the necessary changes to the bird data, click the Save Changes button to save your changes to the database. If you wish to cancel your changes, click the Cancel button or the [x] button at the top right corner of the tabbed page. Viewing a Pedigree To view the pedigree for one of your birds, click on that bird in your My Birds list, then click on the View Pedigree button on the Manage Bird page (Figure 10). After clicking the View Pedigree button, you will be taken to the Pedigree chart for that bird (Figure 12). Figure 12. Pedigree The Pedigree displays the Bird ID and Band Number in the title and the species name below that. Hatch Date and Death Date appear to the left in the title pane and the Owner and Breeder ID are displayed to the right (if this information has been disclosed). The studbook comment appears at the top of the Pedigree page. The Pedigree is laid out like an NCAA bracket. The title bird is displayed in the center and highlighted in gold. Its parents are displayed to the immediate left and right. The parents of every other bird in the pedigree are displayed to the side of the bird. 20 Finch and Softbill Save Program User’s Manual April 12, 2010 The pedigree is capable of displaying up to 7 generations of birds. Hen band numbers are highlighted in pink. Cock band numbers are highlighted in light blue. Birds of unknown sex are not highlighted. Band numbers for the outermost generation are not displayed due to space constraints. If no parentage is available for a bird in the pedigree, the subsequent pedigree entries are grayed out and marked as “NA” (not available). Bird data for birds listed in the Pedigree can be displayed by clicking on the underlined FS-ID of that bird (Figure 13). This data is displayed beneath the pedigree and can be hidden again by clicking on the [Hide Details] link. Figure 13. Pedigree bird details. If the breeder and/or owner ID has been disclosed, any disclosed information about that user is also displayed. You may send an internal message to that user directly from the Pedigree. 21 Finch and Softbill Save Program User’s Manual April 12, 2010 When you are done viewing the Pedigree, click the Done button at the top of the pedigree to return to the Manage Bird page. Avoid using the browser’s Back button to return as this may result in unexpected behavior. 22 Finch and Softbill Save Program User’s Manual April 12, 2010 Working With Clutch Data Adding Data for a Clutch All birds bred by you in the current breeding season should be entered into the program by adding a clutch rather than by adding individual birds. When clutches are added, the system will collect information about each clutch that can be used to analyze breeding practices for the species and the associated results of those practices. It does not take much time for you to enter this information as long as your Species Profile is up-to-date, as this information will default to the settings in your species profile. You only need to change those settings when you do something different. Thus, it is important that you keep your Species Profiles up-to-date. Clutch statistics are also collected that can provide information about the species. These clutch statistics include counts of eggs/chicks as well as dates that important behaviors began. Of these clutch statistics, only Number of Fledglings and Date First Chick Hatched are required. However, the more information that you provide, the better the results of the analyses will be and the better information we will have about breeding these species. You can create a clutch record without these required fields (they will not be known when the clutch is started), but they must be filled in before the clutch can be marked as Completed. To add a new clutch, click on Breeding Records in the Data section of the menu. This will bring you to the My Clutches tab page (Figure 14). Figure 14. My Clutches tab page. Next, select the species of the new clutch using the Select Species drop-down list. You can only add a clutch if you already have the parent bird records in the database. If you do not have the parents in the database, add them according to the directions in the WORKING WITH BIRD DATA section. 23 Finch and Softbill Save Program User’s Manual April 12, 2010 Once you have selected the Clutch species, click Add Clutch to add a new clutch. The Add Clutch tab page will be displayed (Figure 15). You do not need to enter all of the information when first creating the clutch. You can create the clutch record and update the fields as the clutch progresses. Parentage The parent birds can be selected from your list of available birds of that species as well as birds on loan to you from other breeders. You can record what situation the clutch is being raised in by selecting the appropriate value from the Raised By drop-down list. The choices available include Parent (clutch is being raised by the parent birds), Foster (eggs or chicks are being fostered by another pair of birds), Handraised (birds are being raised by a human via hand feeding), Host (birds are being raised by another species because the parents are a parasitic species), and Unknown. If you select Foster or Host, a Species selection control will appear to the right and you will be prompted to select the appropriate foster/host species. Figure 15. Add Clutch Form Clutch Statistics Clutch Statistics include counts of Eggs Laid, Clear Eggs, Dead In Shell, Hatchlings, Tossed Chicks, and Fledglings. The only required field is Number of Fledglings. However, providing the rest of the information when available will contribute to the value of the Species Analyses performed by the administrators at set intervals. 24 Finch and Softbill Save Program User’s Manual April 12, 2010 Clutch Statistics are used for species analyses in determining information like average clutch size and likelihood of clear/dead-in-shell eggs and tossing. These statistics can also be analyzed in light of husbandry conditions to determine if there is any correlation between practices and these outcomes. Clutch Statistics can be updated as the clutch progresses. Number of Fledglings must be added before the clutch can be completed. Husbandry Conditions Husbandry Conditions include the Enclosure Type, the Enclosure Population, the Nest Type, Bred Indoor/Outdoor, Livefood provided, and whether or not you nest check. All of these values will default to the settings you supplied in the Species Profile and only need to be changed if you are doing something different for this clutch. Enclosure Type Choices include Cage, Flight, Small Aviary, Medium Aviary, and Large Aviary. Each of these choices is defined by size. The definitions can be viewed by clicking on the [View Definitions] link and can be hidden again when you are done. Cages and flights are considered “Not Walk-in” for our purposes and can be distinguished from each other by length. Aviaries are considered “Walk-in” and are also distinguished as Small/Medium/Large based on length. Enclosure Population Choices include Pair (single pair only in the enclosure), Mixed (single pair of this species, but other species present), Colony (three or more birds of this species present, but no other species present), or Mixed Colony (three or more birds of this species present, birds of other species also present). Note that when an enclosure consists of a single pair and fledglings from the previous clutch, this can be noted as Pair as long as the offspring are clearly too young to reproduce. The Bred From data stored with the bird record and displayed in the studbook is derived from this information. Pair or Mixed will result in “Pair” being stored in the bird record. Colony or Mixed Colony will result in “Colony” being stored in the bird record. Nest Type Choices include Bird-Built, Dome, Open (eg, canary nest), Box, Tube, and Other. Clutch Dates The following dates are collected by the system: First Egg Laid, Incubation Began, First Chick Hatched, and First Chick Fledged. Of these, only First Chick Hatched is required, but providing additional information will be useful to the analyses when they are known. The dates can be filled in as the clutch progresses, but Hatch Date must be filled in before birds in the clutch can be banded and before the clutch can be completed. If Hatch Date is unknown, it should be estimated based on the known dates. Clutch Dates are used in the analyses to determine average length of time for various stages of the breeding cycle. This information can be useful when nest checks are not possible and breeders are trying to guess at what is going on in the nest. 25 Finch and Softbill Save Program User’s Manual April 12, 2010 The Clutch Date fields can be used to store projected dates while the clutch is in progress, but you must remember to set them to actual dates or “Unknown” when the clutch is completed, so the analyses are not skewered by inaccurate data. Clicking the Edit button next to a date will bring up a Calendar control that you can use to set the date. Click the Unknown checkbox to set the date back to Unknown. Band This Clutch When you band the chicks in the clutch, you should enter the band numbers into the Band A Chick control. When you band a chick using the software, the software will generate a bird record for that chick and that bird will now appear in your My Birds List. To band a bird in the clutch, enter the Club/Breeder Initials printed on the band, the year printed on the band, the size printed on the band, and the number printed on the band into the respective components of the Band A Chick edit box. For closed bands, it is essential that you enter the values exactly as they appear on the band. This means including any leading zeroes present on the band. If any of this information is not printed on the band, leave that section blank. You can also hide your breeder ID and/or owner ID from any of the chick’s bird data records. Simply check the appropriate check box before you click Band A Chick. After you enter the band number, click the Band A Chick button. The new bird’s band number will now appear in the Chicks in this Clutch list. Closed bands must have a unique band number. You will not be able to band a chick with a closed band number that is already listed in the database. Thus, you should not reuse bands that have fallen off another bird or that came from a deceased bird if the original bird is listed in the FSS database with that band number. Open bands do not need to be unique. If you make an error when entering band numbers, you can remove the bird from the clutch by selecting it in the list and clicking on Remove. You can then re-enter the bird with correct information. If the clutch is complete, check the Clutch is Complete checkbox. This will tell the analyses routines that the data in the clutch record is final and will not be changing. Data from clutches that are not complete will not be included in the analyses because the data is not finalized. You must have entered a First Chick Hatched date as well as the Number of Fledglings in order to complete the clutch. When you are finished filling in the Add New Clutch form, click the Add New Clutch button at the bottom of the form to save the clutch to the database. Click the Cancel button or the [x] button at the top right corner of the tab page if you do not wish to save this clutch to the database. When you have added the clutch to the database, you will be returned to the My Clutches tab and your new clutch will be included in the list. 26 Finch and Softbill Save Program User’s Manual April 12, 2010 Managing Your Clutch List Once you have clutch records entered into the database, you can browse your clutches from the My Clutches tabbed page (Figure 16) that is accessed by clicking on Breeding Records from the Data section of the menu. Figure 16. My Clutches tab page. The clutch records are displayed by Species. Select the species to display from the Select Species drop down list. You can only select from the species that you have entered in the database. You can choose to display Taxonomic name instead of Common name by unchecking the Common Name check box. When you select a species, the list will repopulate with your clutches of that species. The clutch list includes the following information about each clutch: Clutch ID, both parents’ FS ID, Hatch Date, Fledge Date, Number of Eggs, Number Chicks Hatched, Number Chicks Fledged, and whether or not the clutch is in progress. To view/edit information about a clutch in your list or about a parent of a bird in your list, you can click on the underlined Clutch ID or Bird ID. Editing a Clutch When you click on a clutch in your clutch list, the Edit Clutch tab page will be displayed. The Edit Clutch form is identical to the Add Clutch form and operates in the same way, with one exception. The Edit Clutch form will give you the option to view chick data for birds that were banded in that clutch during a previous edit. To view chick data, simply select the chick from the list and click View Chick Data. 27 Finch and Softbill Save Program User’s Manual April 12, 2010 NOTE: Do not click View Chick Data if you have made changes to the clutch. You must save your changes first or they will be lost when the application takes you to the page displaying bird data for the chick. When you are done, click Save Changes to save your changes to the database, or click Cancel or the [x] button in the top right corner of the tab page to cancel your changes. You will be returned to the My Clutches tab where you can view your clutch list. Editing the Species Profile You can edit your Species Profiles at any time. To edit a species profile, click Breeding Records from the Data section of the menu. This will take you to the My Clutches tab page (Figure 16). Select the species whose profile you wish to review from the Select Species drop-down list. Click on the Species Profile button. A Species Profile tab page will be added, with the Species Profile loaded for the selected species. You can edit the profile the same way you entered data when it was originally created. Click Save or Cancel when done. 28 Finch and Softbill Save Program User’s Manual April 12, 2010 Using the Studbook A studbook is a log of all birds of a given species that were bred in a given year. Only domestically bred birds with known hatch dates will appear in the studbook. You can access the studbook for a species if you currently have birds of that species logged into the system and if you have joined the Species Group established by the Species Captain for that species. Contact the Species Captain to get added to the group. No one will be denied access to the Species Group as long as you are a member of FSS with birds of that species entered in the database. Membership in the Species Groups is important because they establish a community of breeders who are working together to maintain a species and they offer assistance from other breeders when you need direction you cannot get from a database. However, joining these groups is not mandatory for participating in FSS. Some participants may choose to enter bird data for birds they have bred, but not wish to concentrate on that species. In these cases, participants may choose not to participate in the groups. They can use all portions of the FSS software except for the studbook. NOTE: Currently anyone can view any studbook. The logic to restrict access will be added when the logic for the role of Species Captains has been added to the code. The Species Coordinator committee is working on defining the role of Species Captain at the moment. To access a studbook, Click on Studbook from the Data section of the menu. On the page that appears, select the species you wish to view the Studbook for, then select the year you wish to view. The studbook will load (Figure 17). Figure 17. The Studbook The studbook is ordered by hatch date. Each entry displays the following information: Bird’s FS-ID, Band Number, Hatch Date, Death Date, Breeder if disclosed (whether breeder name or ID is displayed depends on the breeder’s privacy setting), Owner if disclosed (owner ID or name depending on privacy setting), Sex, Bred From (Pair or Colony or blank if not known), and Parent ID and band number. If too many entries are in the studbook, the studbook will be paginated. You can navigate through the pages by clicking on a page number from the list of pages above the studbook. The current page number will be displayed in the right corner of the studbook title. 29 Finch and Softbill Save Program User’s Manual April 12, 2010 If more information on a particular bird in the studbook is desired, the pedigree for that bird can be referenced. Click on the Pedigree button in the studbook entry to display the pedigree for that bird. (See VIEWING A PEDIGREE for more information). 30 Finch and Softbill Save Program User’s Manual April 12, 2010 The FSS Community The FSS software provides more than a data repository for breeding records. It also provides a means to interact as a community. Of course, nothing can replace human interaction. That interaction is provided by the Species Groups established by the Species Captains. However, the software can do a lot to help keep us connected and to provide means for exchanging bloodlines. The Community component of the software consists of three functions: A log of breeders working with a specific species, a marketplace for posting for sale and wanted ads, and a messaging system for sending messages to other breeders while preserving anonymity. FSS Breeder List To display a list of FSS Breeders, click Breeders from the Community section of the menu. A list of FSS Participants will be displayed in the FSS Community tab page (Figure 18). By default, this list includes all participants who have disclosed their FSS ID. The personal information displayed is limited to the information that the participant chose to share when setting his or her privacy settings (accessible from the Settings menu item). Figure 18. FSS Participants list The FSS Participants List includes the FSS ID of the participant, his or her name (or Anonymous if name is not disclosed), the location information if disclosed, and whether or not this participant ships birds. If more than 20 participants are in the database, the results will be split into pages. You can navigate from one page to another by using the page links at the bottom of the list. Sorting Participants The participants can be sorted by FSS ID, Name, Location, or whether or not they ship by clicking on the heading name. Clicking again will sort in the opposite direction. 31 Finch and Softbill Save Program User’s Manual April 12, 2010 Filtering by Species The FSS Participants list can be filtered by species if you wish to locate breeders of a specific species. Check the Filter by Species checkbox. Select the desired species in the Select Species control and the list will be repopulated with breeders of that species who have disclosed their FSS ID (Figure 19). Figure 19. FSS Participants List filtered by Species FSS Breeder Profile Breeder profiles can be viewed for any participant who has disclosed their FSS ID. To view a breeder profile, select the breeder from the FSS Participants list (click Breeders in the Data section of the menu to access the list). A breeder profile tab page will be added with information about that breeder (Figure 20). The breeder profile will display the personal information disclosed by the breeder, along with a list of species that breeder has worked with under FSS. Sending a Message from the Breeder Profile Users can contact a breeder even if no e-mail address is disclosed by using the FSS Messaging system. The messaging system is not intended to replace e-mail, but is provided as a means for communicating when no e-mail is disclosed. Enter a subject and a message into the Send a Message control on the breeder profile and click the Send button to send it to the breeder. Viewing a Species Profile from the Breeder Profile Users can view the Species Profile for any species the breeder keeps if the breeder has not asked to keep the Species Profile anonymous. To view the Species Profile, select the species from the breeder’s Species List and click View Species Profile. A Species Profile tab page will be added, displaying the Species Profile created by the breeder for the selected species. If the breeder has chosen to keep the profile anonymous, it cannot be viewed from their list. 32 Finch and Softbill Save Program User’s Manual April 12, 2010 Click Done when you are done reviewing the Species Profile. The Species Profile tab page will be removed and you will be returned to the Breeder profile. Clicking Done from the Breeder Profile will return you to the FSS Participants List on the FSS Community tab page. Figure 20. Breeder Profile 33 Finch and Softbill Save Program User’s Manual April 12, 2010 Marketplace The Marketplace allows you to create a sale list and a wanted list or view the sale/wanted lists created by other breeders. To access the Marketplace, click Marketplace in the Community section of the menu. The Marketplace consists of four tabbed pages: My Sale List, Browse Sale Lists, My Wanted List, and Browse Wanted Lists. My Sale List When you click on the My Sale List tab in the Marketplace, your current sale list will be displayed (if one exists) and you will be able to modify it as needed (Figure 21). Figure 21. Updating My Sale List. Adding an Entry to your Sale List To add an entry to your sale list, select the species in the Select Species control. Enter the price you are asking and indicate if this is per pair or per bird. Select the source of the birds for sale from the Source drop-down list. Enter any additional comments about the birds for sale in the Comments text box. When done, click Update Sale List. The species entry will be added to your sale list. NOTE: if the species is already in the list, the existing entry will be replaced with the new entry. 34 Finch and Softbill Save Program User’s Manual April 12, 2010 Editing an Entry in your Sale List To edit an entry, select the species in the Select Species control OR click the Edit link next to the entry. The top portion of the form will populate with the current sale information for that species. Edit the information as desired and click Update Sale List to update the entry in the list. Removing an Entry from your Sale List To remove an entry from the Sale List, click the Delete link next to the entry to be deleted. Managing Sale List Expiration Sales Lists are good for one month from the time it is added/edited. After a month, your sales list will be marked as Expired and will no longer appear in the Browse Sale Lists tab. To renew your sale list, click Renew Sale List button. The expiration date for your sale list will appear at the top of the form. If you want to remove your sale list from the Browse Sale Lists tab but you do not want to clear the data in it, you can manually expire your list by clicking the Expire Sale List button found at the bottom of a sale list that has not already expired. If you want to delete your sale list, click the Clear Sale List button located at the bottom of the form. Browse Sale List Click the Browse Sale Lists tab to browse sale lists posted by other participants. Sales Lists can be viewed by Seller or by Species. View Seller Sale Lists To view sale lists by seller, select the View Seller Lists radio button. The Browse for Sale Lists form will be displayed (Figure 22). Select the seller in the drop down list. That seller’s disclosed contact information will be displayed along with his or her Sale List. Figure 22. Browse Sale Lists by seller 35 Finch and Softbill Save Program User’s Manual April 12, 2010 You can make an inquiry regarding the sale list directly from the sale list form by entering a subject and a message and clicking Send. A message will be sent to the seller using the FSS Messaging system. You can page from one seller list to another using the < Prev and Next > links above the list. View Species Sale List You can also view a list of all sale records for a selected species if you are looking for birds of a specific species. To view a sale list by Species, select the View Species Lists radio button. The Species Sale List form will appear (Figure 23). Figure 23. Browse Sale Lists By Species Select the species you are searching for in the Select Species control. A list of sellers offering the species for sale will appear. More information can be optained about the seller by clicking on the Info link for that entry. This will switch you back to the seller list with the seller information preloaded. Wanted Lists The wanted lists function in the same manner as the Sales lists except that price information is not listed (although a desired price can be posted in the comment section). 36 Finch and Softbill Save Program User’s Manual April 12, 2010 Messages FSS provides a messaging system to enable communication between breeders even when contact information is not disclosed. The internal messaging system is not meant to replace e-mail, but only to start a communication which then can be continued via other means if desired. Thus, the messaging interface is not very robust and just provides the bare basics to initiate this communication. Users are asked not to keep messages stored in their account, but to delete them after they have been read. If too many messages build up, the system may automatically delete older messages. To access your messages, click Messages from the Community section of the menu. The My Messages tab page will be displayed (Figure 24). Figure 24. My Messages Reading a Message To read a message, click on the Subject. The contents of the message will be displayed in the text box below the list. Replying to a Message To reply to a message, click on the Reply link above the message contents (message must be selected from the My Messages list) at the far left side. The Reply tab page will be loaded (Figure 25). Type your reply into the large text box and click Send to send the message. The Reply tab page will be closed and you will be returned to your My Messages tab page. 37 Finch and Softbill Save Program User’s Manual April 12, 2010 Figure 25. Replying to a message Deleting a Message To delete a message, select it from your My Messages list and click the Delete link above the message and to the right. Composing a Message To send a message to another FSS participant, click the Compose button located above the message list in the right corner. A Compose tab will be opened with the message form (Figure 26). Figure 26. Composing a new message 38 Finch and Softbill Save Program User’s Manual April 12, 2010 Select the recipient of the message from the To drop-down list. The recipient must disclose their FSS ID in order to be listed in the drop-down list. Enter the subject in the Subject text box. Enter the message in the large text box. Click Send to send your message. The message will be sent and the Compose tab page will be removed. You will be returned to your Message List. 39