1
EPIC 3 VOICE AMPLIFIER P/N 201275-01
FOR USE WITH SCOTT RESPIRATORS USING
SCOTT FULL FACEPIECES EQUIPPED WITH VOICEMITTERS
INSTALLATION AND OPERATION INSTRUCTIONS
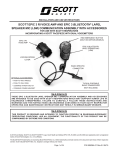
SPEAKER
COVER
POWER LED
POWER
BUTTON
D-SHAPED
MOUNT WITH
MICROPHONE PORT
FACE MOUNT
GASKET
LOCKING
LEVER
BATTERY
DOOR
FIGURE 1
WARNING
THE SCOTT EPIC 3 VOICE AMPLIFIER IS INTENDED TO BE USED WITH
SCOTT RESPIRATORS WHICH MAY SUPPORT HUMAN LIFE IN HAZARDOUS
ATMOSPHERES. FAILURE TO CAREFULLY READ, UNDERSTAND AND FOLLOW
THESE INSTRUCTIONS MAY RESULT IN SERIOUS INJURY OR DEATH.
© 2014 Scott Safety.
SCOTT, the SCOTT SAFETY Logo, Scott Health and Safety, EPIC 3, AV-2000, and AV-3000 are
registered and/or unregistered marks of Scott Technologies, Inc. or its affiliates.
Page 1 of 12
P/N 595263-01 Rev. F 08/14
This equipment is listed as intrinsically safe by CSA Group to UL Std. UL-913 for use in the following hazardous locations:
•
Class I, II, Division 1 Groups C, D, E, F and G T3C/T3A
This equipment is listed as intrinsically safe by CSA Group to CSA E60079-11 for Canada and UL
60079-11 for the USA for use in the following hazardous locations:
•
Ex ia IIB T3 (Canada)
•
Class I Zone 0 AEx ia IIB T3 (USA)
To maintain the Intrinsic Safety Listing, this equipment must be inspected regularly per the
Regular Operational Inspection procedures in this instruction. Do not tamper with or substitute
components in any manner. Use only batteries of the type indicated in the Battery Replacement
instructions. Open the battery compartments only in an area known to be free of flammable or
explosive hazards.
Substitution of Components May Impair Intrinsic Safety. To reduce the risk of ignition of a flammable
atmosphere, batteries must only be changed in an area known to be nonflammable. To reduce
the risk of explosion, do not mix old batteries with unused batteries, or mix batteries from different
manufacturers.
P/N 595263-01 Rev. F 08/14
Page 2 of 12
EPIC 3 VOICE AMPLIFIER P/N 201275-01
FOR USE WITH SCOTT RESPIRATORS USING
SCOTT FULL FACEPIECES EQUIPPED WITH VOICEMITTERS
GENERAL DESCRIPTION
The EPIC 3 VOICE AMPLIFIER communications accessory is designed for use with SCOTT Full
Facepieces equipped with voicemitters as part of a complete respirator. Use of this equipment
must be part of a complete respiratory protection program. The user must verify that the EPIC 3
VOICE AMPLIFIER is approved for use on the selected SCOTT respirator.
When attached to the facepiece voicemitter, the amplifier electronically amplifies sound coming
from the voicemitter. The voice amplifier assembly is equipped with a green LED light on the top
of the unit to indicate power ON as well as low battery. To conserve battery life, the EPIC 3 VOICE
AMPLIFIER assembly features an automatic power OFF feature that shuts off the power after
twenty minutes of inactivity.
A Mounting Bracket specific to the model of full facepiece in use is required to mount the EPIC 3
VOICE AMPLIFIER to the facepiece. The Mounting Bracket is available separately.
NOTE
FACEPIECE MOUNTING BRACKET IS REQUIRED TO MOUNT THE VOICE AMPLIFIER
ON THE SCOTT FULL FACEPIECE.
For proper performance, the VOICE AMPLIFIER must be programmed for the type of ACCESSORY BRACKET and Batteries being used. Refer to the PROGRAMMING MODE section of this
instruction for details of how to program and how to verify the programming of the unit.
WARNING
THE VOICE AMPLIFIER COMMUNICATIONS ACCESSORY MUST BE
PROGRAMMED FOR THE TYPE OF BATTERIES USED AS WELL AS FOR THE
TYPE OF AUDIO ACCESSORY BRACKET BEING USED. FAILURE TO VERIFY
THAT THE UNIT IS PROPERLY PROGRAMMED MAY RESULT IN REDUCED
PERFORMANCE WHICH COULD LEAD TO SERIOUS INJURY OR DEATH.
Inspect the Voice Amplifier as part of the REGULAR OPERATIONAL INSPECTION of the complete
respirator. If any damage is found, do not use the equipment.
WARNING
INSPECT THE AMPLIFIER FOR EXTERIOR DAMAGE. IF DAMAGE IS FOUND,
DO NOT USE THE AMPLIFIER. USE OF DAMAGED EQUIPMENT MAY CAUSE
A MALFUNCTION WHICH COULD RESULT IN SERIOUS INJURY OR DEATH.
Training is required before use of this equipment. Because the amplifier adds approximately seven
(7) ounces to the weight of the facepiece, the user may need to modify the donning procedures.
EPIC 3 VOICE AMPLIFIER Assembly, SCOTT P/N 201275-01, contains the
following:
QTY
DESCRIPTION
PART NUMBER
1
EPIC 3 VOICE AMPLIFIER
P/N 201141-01
1
Installation and Operation Instructions P/N 595263-01
QUESTIONS OR CONCERNS
If you have any questions or concerns regarding use of this equipment, contact your authorized
SCOTT distributor, or contact SCOTT at 1-800-247-7257 (or 704-291-8300 outside the continental
United States).
Page 3 of 12
P/N 595263-01 Rev. F 08/14
BATTERY INSTALLATION
WARNING
THE USE OF BATTERIES OTHER THAN THOSE LISTED BELOW OR
REPLACING BATTERIES IN AN AREA WHICH IS NOT KNOWN TO BE FREE
OF FLAMMABLE GASES AND VAPORS MAY CAUSE A FIRE OR EXPLOSION
AND MAY LEAD TO SERIOUS INJURY OR DEATH
The EPIC 3 VOICE AMPLIFIER accessory requires three AAA batteries installed in the microphone/
speaker unit. Use only three fresh batteries from the following lists.
Alkaline Batteries:
Rechargeable Batteries:
– Eveready Energizer1 Max E92
– Duracell Rechargeable (NiMH) DC2400
– Eveready Energizer Industrial EN92
2
– Duracell Copper Top MN2400
– Duracell Pro-Cell PC2400
– Rayovac3 824
Do not mix battery types, old and new batteries, or batteries from different manufacturers. When
using rechargeable batteries, verify that they are fully charged before use. Use of any other batteries
except those listed will void the intrinsic safety listing of the EPIC 3 VOICE AMPLIFIER accessory.
Install batteries as follows:
1. The area must be known to be nonflammable and safe before opening the battery door.
2. Use a #1 Phillips screwdriver to open the
battery door. Turn the battery door screw
counterclockwise. Lift open the hinged door.
NOTE
THE EPIC 3 VOICE AMPLIFIER IS SHIPPED
FROM THE FACTORY WITH ALKALINE
BATTERIES INSTALLED AND A BATTERY
ISOLATOR LABEL TO PREVENT BATTERY
DRAIN. REMOVE THE BATTERY ISOLATOR
LABEL BEFORE USE.
POLARITY
MARKED ON
HOUSING
HERE
FIGURE 2
3.
Inspect the contacts for corrosion or damage. If any discrepancy is found, do not use the
unit. Return to an authorized SCOTT repair center for service.
4. Insert the batteries into the battery compartment. Be sure to check orientation of + and polarity of batteries as marked on the outside of the battery compartment. See FIGURE 2.
5. Verify that the seal around the battery door is clean and undamaged.
6. Close the battery door.
7. Turn the screw clockwise to tighten until snug. Do not over tighten.
8. Press the POWER Button for one (1) second to turn the VOICE AMPLIFIER ON. The unit will
sound a sequence of four (4) ASCENDING tones to indicate the unit is ON and the GREEN
POWER LED will illuminate indicating the amplifier is ON. If the LED does not illuminate,
verify that ALL the batteries are fresh AND that they are properly installed. The unit may emit
a high pitched tone (feedback) as the Auto Gain function sets the optimum output.
If the green LED is FLASHING, the batteries are low and must be changed before use of the
voice amplifier.
9. To verify proper operation, speak into the microphone port in the D-shaped mount. The voice
should be heard amplified coming from the speaker.
10. To turn OFF the VOICE AMPLIFIER, press and HOLD the Power Button for three (3) seconds.
The unit will sound a sequence of two (2) DESCENDING tones to indicate the unit is OFF
and the LED will go OFF.
1
2
3
Energizer is a registered trademark of Eveready Battery Company, Inc., St. Louis, MO.
Duracell is a registered trademark of The Procter & Gamble Company, Cincinnati, OH.
Rayovac is a registered trademark of Spectrum Brands, Madison WI.
P/N 595263-01 Rev. F 08/14
Page 4 of 12
INSTALLATION OF THE VOICE AMPLIFIER
Install the appropriate mounting bracket onto the voicemitter according to the Mounting Bracket
Instructions supplied with the Mounting Bracket. Be sure the Mounting Bracket used is appropriate
for the specific model SCOTT Full Facepiece.
NOTE
THE EPIC 3 VOICE AMPLIFIER WILL NOT FIT ON OLDER SCOTT MOUNTING BRACKETS P/N 804636-01 FOR THE AV-2000, OR P/N 805787-01 OR P/N 805787-02 FOR THE
AV-3000.
WARNING
THE COMMUNICATIONS ACCESSORY MUST BE PROPERLY INSTALLED
SO THAT IT DOES NOT INTERFERE WITH THE OPERATION OR FIT OF THE
FACEPIECE IN ANY WAY. IMPROPER INSTALLATION MAY RESULT IN A
POOR FACEPIECE TO FACE FIT WHICH MAY EXPOSE THE USER OF THE
RESPIRATOR TO THE HAZARDOUS ATMOSPHERE LEADING TO SERIOUS
INJURY OR DEATH.
Install the EPIC 3 VOICE AMPLIFIER communications accessory as follows:
1. The amplifier is keyed so that it fits in the mounting bracket only one way.
2. Hold the Communications Accessory with the battery compartment door facing the top right
harness tab.
3. Align the D-shaped mount on the rear of the amplifier with the opening in the center of the
audio accessory bracket and press in.
4. While pressing the Accessory in towards the side of the facepiece rotate the Accessory 1/4
turn counter clockwise. The lock will make TWO (2) “clicks”. The second “click” will lock the
accessory into place. See FIGURE 3.
ROTATE COUNTER CLOCKWISE TO LOCK
LOCKED
POSITION
FIGURE 3
5.
To verify that the Communications Accessory is properly locked, try to rotate the accessory
clockwise WITHOUT lifting up on the Locking Lever. If the Accessory will not turn, it is properly
locked.
6. A screw is provided in the Locking Lever to prevent accidental removal. Use a Phillips
screwdriver to tighten the screw snug. Do not over tighten.
WARNING
WHEN INSTALLING THE COMMUNICATIONS ACCESSORY, VERIFY THAT
THE LATCH IS FULLY ENGAGED AFTER THE SECOND “CLICK.” USE THE
LOCKING LEVER SCREW TO SECURE. FAILURE TO VERIFY PROPER
INSTALLATION MAY RESULT IN LOSS OF THE COMMUNICATIONS
ACCESSORY WHICH COULD LEAD TO SERIOUS INJURY OR DEATH.
Page 5 of 12
P/N 595263-01 Rev. F 08/14
PROGRAMMING MODE
The EPIC 3 VOICE AMPLIFIER communications accessory is designed for use with a SCOTT Full
Facepiece equipped with voicemitters and a compatible SCOTT AUDIO ACCESSORY BRACKET.
The AUDIO ACCESSORY BRACKETS are available as either OPEN or CLOSED front depending
on the approved facepiece being used. In addition, the VOICE AMPLIFIER may be powered by
approved batteries that are either Alkaline or Rechargeable NiMH.
For proper performance, the VOICE AMPLIFIER must be programmed for the type of ACCESSORY
BRACKET and Batteries being used.
WARNING
THE VOICE AMPLIFIER COMMUNICATIONS ACCESSORY MUST BE
PROGRAMMED FOR THE TYPE OF BATTERIES USED AS WELL AS FOR THE
TYPE OF AUDIO ACCESSORY BRACKET BEING USED. FAILURE TO VERIFY
THAT THE UNIT IS PROPERLY PROGRAMMED MAY RESULT IN REDUCED
PERFORMANCE WHICH COULD LEAD TO SERIOUS INJURY OR DEATH.
Each EPIC 3 VOICE AMPLIFIER is programmed at the factory for use with Alkaline batteries on
a SCOTT AV-3000 HT Facepiece equipped with the OPEN AUDIO ACCESSORY BRACKET,
SCOTT P/N 201210-XX.
If the EPIC 3 VOICE AMPLIFIER is to be used with either a CLOSED style bracket such as
a SCOTT AV-3000 (P/N 200715-XX), AV-2000 (P/N 200716-XX), or with Rechargeable NiMH
Batteries, the unit must be reprogrammed for proper performance with the chosen configuration.
OPEN
BRACKET
CLOSED
BRACKET
FIGURE 4
To change the programming of the EPIC 3 VOICE AMPLIFIER, proceed as follows:
1. Use a #1 Phillips screwdriver to open the battery door. Turn the battery door screw
counterclockwise. Lift open the hinged door.
2. While holding down the POWER Button, close the battery door. Continue holding the POWER
Button until the POWER LED lights ORANGE.
3. Press POWER Button again for one (1) full second. A long audible tone will indicate that the
unit is now in Programming Mode. The LED on the amplifier will then light according to the
current setting. (See chart on next page).
NOTE
IF NO ACTIVITY IS DETECTED FOR THIRTY (30) SECONDS, THE UNIT WILL TIME OUT
AND TURN ITSELF OFF.
4.
To toggle between settings, Press and hold the POWER Button for one (1) full second.
Each configuration will appear in turn. (See chart on next page)
NOTE
IF POWER BUTTON IS HELD LESS THAN ONE (1) FULL SECOND WHILE TOGGLING
BETWEEN SETTINGS, THE UNIT WILL TURN OFF AND STEPS 1 – 4 WILL NEED TO
BE REPEATED.
P/N 595263-01 Rev. F 08/14
Page 6 of 12
POWER LED
SOLID GREEN
FLASHING GREEN
SOLID ORANGE
FLASHING ORANGE
TONE
One (1) TONE
Two (2) TONES
Three (3) TONES
Four (4) TONES
BRACKETBATTERY
TYPE OPEN
CLOSED
OPEN
CLOSED
TYPE
Alkaline
Alkaline
NiMH
NiMH
5.
When you reach the configuration you need, SAVE the setting by pressing and holding the
POWER Button for three (3) seconds. The POWER LED will glow GREEN and the unit will
emit an ascending tone to indicate a successful SAVE. Once saved, release the POWER
Button and the unit will turn OFF. If the LED light turns RED the programming was not saved.
Repeat steps 1 – 5 until you have a successful SAVE.
6. Turn the battery door screw clockwise to tighten until snug. Do not over tighten.
7. Install the VOICE AMPLIFIER on the facepiece to be used and perform the REGULAR
OPERATIONAL INSPECTION as described in this instruction. If any operational problems
are found that may relate to the programming, remove the VOICE AMPLIFIER from the
facepiece and repeat the programming as instructed above to verify that the proper changes
are saved. If the programming is verified and the unit still does not operate properly, remove
the unit from service and tag for repair.
REGULAR OPERATIONAL INSPECTION
Regularly inspect the EPIC 3 VOICE AMPLIFIER and mounting bracket as follows:
EQUIPMENT INSPECTION
1.
Inspect the Mounting Bracket for damaged, missing, or loose components. Verify that the
Mounting Bracket is firmly attached to the facepiece according to the Mounting Bracket
Instructions.
2. Inspect the VOICE AMPLIFIER housing for damage such as cracks, chips, discoloration,
corrosion, missing or loose parts, or burned or melted components.
3. Verify that all components are present and in working order including the locking lever,
POWER Button, LED, the face mount gasket, the speaker cover, and the D-shaped mount.
4. Open the battery door and inspect the battery contacts for corrosion or damage.
5. Verify that the seal around the battery door is clean and undamaged.
6. Close the battery door and turn the screw clockwise to tighten until snug. Do not over tighten.
7. Install the VOICE AMPLIFIER on the Mounting Bracket according to the INSTALLATION OF
THE VOICE AMPLIFIER section of this instruction and verify that it is secure.
OPERATIONAL INSPECTION
For proper performance, the VOICE AMPLIFIER must be programmed for the type of ACCESSORY BRACKET and Batteries being used. Refer to the PROGRAMMING MODE section of this
instruction for details.
1. Press the POWER Button for one (1) second to turn the VOICE AMPLIFIER ON. The unit will
sound a sequence of four (4) ASCENDING tones to indicate the unit is ON and the GREEN
POWER LED will illuminate indicating the amplifier is ON. If the LED does not illuminate,
verify that ALL the batteries are fresh AND that they are properly installed. The unit may emit
a high pitched tone (feedback) as the Auto Gain function sets the optimum output.
If the green LED is FLASHING, the batteries are low and must be changed before use of the
voice amplifier. Refer to the BATTERY INSTALLATION section of this instruction.
2. To verify proper operation, speak into the microphone port in the D-shaped mount. The voice
should be heard amplified coming from the speaker.
3. To turn OFF the VOICE AMPLIFIER, press and HOLD the Power button for three (3) seconds.
The unit will sound a sequence of two (2) DESCENDING tones to indicate the unit is OFF
and the LED will go OFF.
If any damage or discrepancy is found, do not use the unit. Remove the unit from service and tag
for return to an authorized SCOTT service center for repair or replacement.
Page 7 of 12
P/N 595263-01 Rev. F 08/14
USING THE VOICE AMPLIFIER
BEFORE DONNING THE FACEPIECE
1.
Inspect the VOICE AMPLIFIER housing for damage such as cracks, chips, discoloration,
corrosion, missing or loose parts, or burned or melted components.
WARNING
USE OF AN AMPLIFIER WITH A BROKEN OR DAMAGED CASE IN
FLAMMABLE OR EXPLOSIVE ATMOSPHERE MAY CAUSE A FIRE OR
EXPLOSION WHICH COULD RESULT IN SERIOUS INJURY OR DEATH.
2.
3.
4.
Inspect the Mounting Bracket for damaged, missing, or loose components. Verify that the
Mounting Bracket is firmly attached to the facepiece according to the Mounting Bracket
Instructions.
Verify that the VOICE AMPLIFIER is properly installed on the Mounting Bracket.
Verify the operation of the VOICE AMPLIFIER. To turn ON the VOICE AMPLIFIER, press the
POWER Button for one (1) second. The unit will sound a sequence of four (4) ASCENDING
tones to indicate the unit is ON and the GREEN POWER LED will illuminate indicating the
amplifier is ON. The unit may emit a high pitched tone (feedback) as the Auto Gain function
sets the optimum output.
If the LED fails to illuminate, OR if the green LED is FLASHING, DO NOT USE the VOICE
AMPLIFIER. Remove the unit from service. Refer to the BATTERY INSTALLATION section
of this instruction.
WARNING
ALWAYS VERIFY THAT THE GREEN LED IS ILLUMINATED AND NOT
FLASHING BEFORE USE OF THE VOICE AMPLIFIER. USE OF A DEFECTIVE
AMPLIFIER OR ONE WITH IMPROPERLY INSTALLED, LOW, OR DEAD
BATTERIES MAY RESULT IN SERIOUS INJURY OR DEATH.
FIGURE 5
P/N 595263-01 Rev. F 08/14
Page 8 of 12
USE OF THE RESPIRATOR WITH THE VOICE AMPLIFIER
1.
Don the facepiece according to the instructions provided with the complete respirator.
Always draw the facepiece firmly to the face to assure a proper seal. Because the VOICE
AMPLIFIER adds approximately six ounces to the weight of the facepiece, the user may
need to modify the donning procedures or repeat the facepiece fit testing to assure a
proper face to facepiece seal. If you cannot achieve a good facepiece fit with the VOICE
AMPLIFIER installed, do not use the respirator.
WARNING
FAILURE TO DON FACEPIECE PROPERLY AND ACHIEVE A GOOD FACE
TO FACEPIECE SEAL AS INSTRUCTED MAY EXPOSE THE USER TO THE
HAZARDOUS ATMOSPHERE THE RESPIRATOR IS INTENDED TO PROTECT
AGAINST AND RESULT IN SERIOUS INJURY OR DEATH.
2.
Because the VOICE AMPLIFIER is physically mounted on the respirator facepiece, use care
to prevent snags or impacts on the amplifier from dislodging the respirator facepiece and
exposing the respirator user to the hazardous atmosphere.
WARNING
WHEN USING A RESPIRATOR WITH A COMMUNICATIONS ACCESSORY
INSTALLED ON THE FACEPIECE, USE CARE TO AVOID SNAGGING THE
COMMUNICATIONS ACCESSORY. SNAGGING THE COMMUNICATIONS
ACCESSORY MAY RESULT IN THE FACEPIECE BEING PULLED FROM THE
USER’S FACE EXPOSING THE USER TO THE HAZARDOUS ATMOSPHERE
WHICH COULD CAUSE SERIOUS INJURY OR DEATH.
3.
Use the VOICE AMPLIFIER with a normal speaking voice. Yelling or speaking too loudly may
result in unintelligible voice transmission.
4. After approximately twenty (20) minutes of inactivity (no voice input) the EPIC 3 VOICE
AMPLIFIER will automatically turn itself OFF. To reactivate, press the POWER Button.
5. A set of batteries will power the amplifier for approximately:
50 hours with alkaline batteries
or
40 hours with rechargeable batteries.
The POWER LED on the unit will FLASH to indicate that the batteries are low when
approximately two hours of operating time remain. WHEN THE LED IS FLASHING,
CHANGE THE BATTERIES IMMEDIATELY. See the BATTERY INSTALLATION section of
this instruction.
LOW BATTERY ALERT
Total battery life is dependent on conditions of use. When approximately two hours of operating
time remain, the POWER LED beside the POWER Button will FLASH to indicate that the batteries
are low and the unit will sound a CHIRP every twenty (20) seconds. The rate of the FLASH and the
CHIRP will increase after one hour. WHEN THE LED IS FLASHING OR YOU HEAR THE CHIRP
SOUND, IMMEDIATELY LEAVE THE ATMOSPHERE REQUIRING RESPIRATORY PROTECTION
AND CHANGE THE BATTERIES. Refer to the BATTERY INSTALLATION section of this instruction.
If the unit is turned OFF when the batteries are low, there will be no ASCENDING tones the next
time the unit is turned ON.
WARNING
ALWAYS VERIFY THAT THE GREEN LED IS ILLUMINATED AND NOT
FLASHING BEFORE USE OF THE VOICE AMPLIFIER. USE OF A DEFECTIVE
AMPLIFIER OR ONE WITH IMPROPERLY INSTALLED, LOW, OR DEAD
BATTERIES MAY RESULT IN SERIOUS INJURY OR DEATH.
Page 9 of 12
P/N 595263-01 Rev. F 08/14
TERMINATION OF USE
To turn OFF the VOICE AMPLIFIER, press and HOLD the Power button for three (3) seconds.
The unit will sound a sequence of two (2) DESCENDING tones to indicate the unit is OFF and
the LED will go OFF.
REMOVING THE AMPLIFIER
1.
2.
3.
If the locking lever latch screw is used to retain the thumb latch, loosen the screw (it is captive
and will not fall out).
To remove the VOICE AMPLIFIER, press the locking spring lever outward with thumb and
rotate the amplifier 1/4 turn clockwise.
Lift outward to remove the VOICE AMPLIFIER from the facepiece.
P/N 595263-01 Rev. F 08/14
Page 10 of 12
MAINTENANCE
Except for cleaning and the replacement of the batteries, no attempt shall be made to do maintenance or repairs beyond the scope of this instruction manual without proper training.
CLEANING
1. For routine cleaning of the VOICE AMPLIFIER, use a cloth dampened with a solution of water
and a mild detergent. DO NOT IMMERSE THE VOICE AMPLIFIER for routine cleaning.
2. For more extensive cleaning situations, contact SCOTT or your SCOTT distributor for
recommendations.
3. If necessary for decontamination, the VOICE AMPLIFIER may receive the same
decontamination and cleaning procedures required for the complete respirator.
STORAGE
1.
2.
Remove depleted batteries and replace with fresh batteries in a timely manner. Depleted
batteries will cause damage if left in the Voice Amplifier for an extended period of time.
When storing the amplifier for an extended period of time, remove the batteries to prevent
damage to the battery terminals.
Page 11 of 12
P/N 595263-01 Rev. F 08/14
SCOTT SAFETY
Monroe Corporate Center
PO Box 569
Monroe, NC 28111
Telephone 1-800-247-7257
Fax (704) 291-8330
www.scottsafety.com
Printed in USA
P/N 595263-01 Rev. F 08/14
Page 12 of 12