1
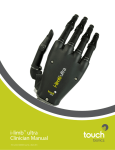
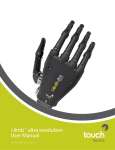
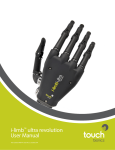
i-limb ultra
User Manual
TM
Part number: MA01069: Issue No. 2, March 2013
This document provides information for i-limb ultra users and should be used in conjunction with advice
from your clinical team.
This symbol signifies important information and is used throughout the manual.
A seperate USB datadrive is included with your kit that contains all relevant product manual.
Refer to www.touchbionics.com to ensure you have the latest copy of this document.
2
Table of Contents
1
i-limb ultra
1.1 Product Description
1.2 Know Your Prosthesis
2.1
Socket Interface and Control
2
Socket Interface
2.2
Battery Charging 3
biosim 3.1 biosim Overview
3.2 biosim Connecting
3.3 Navigating biosim
3.3.1 Features
3.3.2 Training
3.3.3 Hand Health Check
3.3.4 Exit
4
i-limb ultra Coverings
4.1 Cover Options
4.2 Donning an i-limb skin active cover
4.3 Doffing an i-limb skin active cover
4.4
Donning the i-limb skin natural cover
4.5
Doffing the i-limb skin natural cover
4.6
Wear and Care Guidelines for i-limb natural and custom covers
5
Support Information5.1
Troubleshooting
5.2
Frequently Asked Questions
5.3
Warnings and Precautions
6
User Information
6.1 User Details
7
Appendix
7.1 Technical Information
7.2 Component Compatibility
7.3
Warranty
Part number: MA01069: Issue No. 2, March 2013
3 of 35
1.0 i-limb ultra
1.1 Product Description
We are pleased that you and your clinical team have decided that
the i-limb ultra is the most appropriate prosthetic hand for your
needs. You may have discussed your functional goals with your
clinical team. This manual along with the training and support
of your clinical team should help you understand how the i-limb
ultra will help you accomplish these goals.
Each digit of the hand has its own motor. This allows the digits to
run until they meet the object being grasped, so the hand takes
the shape of that object (compliant grip). Fig. 1 is an example of a
hand holding a ball with compliant grip. The power for the hand
comes from a battery which has been built into the prosthesis
that your prosthetist has made especially for you. Initially you
and your clinical team will develop control of opening and closing
your hand. At this stage, you should be able to carry out a wide
range of functional daily activities using your i-limb ultra hand.
As you become more confident and adept you may begin to
expand the number of features that you use and therefore get
more from your i-limb ultra. It takes time and practice to gain
control and master the best way to do tasks with your prosthetic
hand. The pace at which individuals gain this control varies, but
we encourage you to be patient and seek training.
Your i-limb ultra is covered under the Touch Care program. The
duration of the program varies, please contact your clinician
regarding this program.
Part number: MA01069: Issue No. 2, March 2013
4 of 35
Figure 1.
1.2 Know Your Prosthesis
Figure 2.
Each i-limb ultra has a unique identifying number called the serial
number as depicted on the image to the right (fig. 2). This is an
important piece of information and we recommend that you
make a note of it on page 25 of this manual.
The i-limb ultra will not provide you with sensation and so
you will not be able to feel things such as heat and moisture.
The i-limb ultra cannot absorb any shock as your own body is able
to do.
If high degrees of force are applied, you may cause damage to
your i-limb ultra. If this does happen, then please contact your
clinical team who will contact Touch Bionics customer care team
to resolve the matter as quickly as possible.
To best protect the hand when carrying objects, the weight
should be distributed evenly across the digits as close to the base
of the digits as much as possible rather than out on the tips of
the digits. The image to the right (fig. 3) is an example of how to
correctly carry objects.
The i-limb ultra is like any other electrical device so do not
immerse in water and do not pour water over the device. When
you have to clean the covering then use a damp cloth to remove
any dirt.
If you have any specific questions about your hand then please
contact your clincial team or visit the Touch Bionics web site
www.touchbionics.com for the latest information and news.
Part number: MA01069: Issue No. 2, March 2013
5 of 35
Serial Number
Figure 3.
Motorized Digit
Knuckle
Palmar Fairing
Manual Thumb Rotator
On / Off Switch
Part number: MA01069: Issue No. 2, March 2013
6 of 35
2.0 Socket Interface
2.1 Socket Interface and Control
Figure 4. Electrode Options.
To fit the i-limb ultra you have had a socket especially made for
you by your clinical team. They will have made this to ensure it
is comfortable and fits directly onto your remaining limb. You
may experience some redness but this should not last for very
long after you remove the socket. If the socket is causing you
discomfort or affecting you using your i-limb ultra then we
recommend that you contact your clinician.
As part of the fitting process, your prosthetist selected the best
method for you to provide control of your device. This tells the
processor (the brains of the hand) whether you want the hand
to open or close. The most common control option is called an
electrode (fig. 4). To the right you will see two examples of the
type of electrode that may have been used to build your prothesis.
Electrodes pick up on the electrical activity that your body gives
off when you contract a muscle. While gaining good control may
take time and practice, your method of input should not cause
pain. Talk with your prosthetist if you do not understand how
your input control is working or if it is causing discomfort. There
are also other potential control options that your prosthetist may
have determined to be the best option for you. If so, they will
describe to you how that option works.
Part number: MA01069: Issue No. 2, March 2013
7 of 35
2.2 Battery Charging
As the i-limb ultra is powerd by a battery, you will need to charge
it. How often you need to charge it will depend on how much you
use the i-limb ultra each day. You do not have to worry about over
charging your battery.
First, remove the the socket from your arm and turn the hand off. The
on/off switch is pictured on the image to the right. Hand is off when
switch is in left position.
Only use the charger that was supplied with the your i-limb ultra.
If you intend to travel outside of your home country please ensure
you have a Touch Bionics charger that will work in the country to
which you are traveling. Additional chargers are available from Touch
Bionics. Please contact your clinician for details on how to obtain
them.
For customers residing in parts of Europe and the United States, the
charger pictured to the right (fig. 5) is used. The light display is either:
On/Off Switch
Figure 5.
Red – rapid charge
Green – fully charged
Charging time is approximately:
1,300 mAh battery- 90 minutes
2,000 mAh battery- 180 minutes
For customers residing in the UK, Australia and South Africa the
charger illustrated to the right (fig. 6) is used. The light display is as
follows:
Solid Amber – on standby
Slow flashing amber – pre-charge mode
Rapid flashing amber – Error
Slow flashing green – maintenance charge
Rapid flashing green – rapid charge
Solid green – fully charged
Figure 6.
Charging time from full discharge is approximately:
1,300 mAh battery 180 minutes
2,000 mAh battery 180 minutes
Note: If the green light is on when you first plug in your device, ensure
that the hand is off.
To charge, insert the charger lead connector into the charge port. A
“click” should be heard on connection.
Insert the charger into the power outlet.
To remove the charger lead connector from the i-limb ultra, grip the
connector and pull directly away from the port. Consult Warnings
and Precautions for additional information.
Part number: MA01069: Issue No. 2, March 2013
8 of 35
As an alternative to charging directly from domestic power, a car
charger is also available. Please contact your clinician to inquire
about car charger options.
DO NOT PULL THE CABLE TO REMOVE THE LEAD.
To ensure the i-limb ultra is continually functional,
charge at the end of each day.
Switch the hand OFF to preserve battery power
when not in use.
Replace the battery annually for optimal performance.
Contact your clinical team to order new batteries.
Part number: MA01069: Issue No. 2, March 2013
9 of 35
3.0 biosim
3.1 biosim Overview
biosim is a software program that wirelessly connects to i-limb
ultra using a Bluetooth® connection. You can use biosim to select the grip patterns and hand features
that you want to use, including the option to create your own
custom gestures. Built-in training modes are included to help
you achieve better results with your prosthesis. It also allows
you to view the signals that are being used to control the hand,
which can be useful if you are struggling with your control. Your prosthetist will also have a version of biosim to make
changes to how your i-limb ultra functions. To use the biosim software with the i-limb ultra device you will
need either an iPod® Touch supplied by Touch Bionics (preloaded with the biosim App), or a PC loaded with the biosim
software and used with the biosim Bluetooth handshake
receiver. PC requirements are as follows: Window XP, Windows Vista,
Windows 7, or Windows 8; Microsoft.NET framework v3.5; USB
port for Bluetooth® connector.
For users of biosim via iPod Touch, please consult the Quick
Start Guide provided (also downloadable from www.touchbionics.com).
Occasionally updates to the biosim software will be provided.
An automated notification will advise you when this is needed.
Follow the steps as advised in the notification.
3.2 biosim Connecting
biosim can be downloaded at http://www.touchbionics.com/
biosimdownload. Load biosim by clicking on the biosim icon
(fig. 7) which should be clearly visible on your computer’s desktop. The biosim handshake USB (fig. 8) must also be inserted
into a USB port to allow the Bluetooth® signal to be received by
the i-limb ultra prosthesis. The Handshake Bluetooth® receiver
will pick up signals within a 10 meter range (32 feet).
The opening welcome screen will load and the first numerical
icon “insert handshake” request will flash. On insertion of the
Bluetooth receiver (biosim USB handshake) the icon will be
constantly lit, the “handshake installed and ready” box will then
self-tick and the second icon “Turn device off, then back on” will
begin to flash. At this point the i-limb ultra device should be
turned off and then on. The third icon “Connecting to device”
will be constantly lit. The tab marked “connect” must now be
selected for the connection to be made, this may take up to 24
seconds.
Part number: MA01069: Issue No. 2, March 2013
10 of 35
Figure 7.
Figure 8.
If there is more than one i-limb device within range of the
Bluetooth® receiver then a box will appear listing all devices
by serial number. The correct i-limb ultra device can then be
selected from the list.
Part number: MA01069: Issue No. 2, March 2013
11 of 35
3.3 Navigating biosim
Once you are connected the home screen will now be displayed,
with four options as illustrated. This is the homepage and can be
accessed at any time from subsequent pages.
Features are where you will find the different grip patterns and
gestures the hand can perform. You can also change what grip
patterns are programmed from this page.
Training provides access to the training suite and a selection of
games to improve overall control.
Hand health check icon provides a quick and easy diagnostic
check of the hand to ensure it is working properly.
Exit icon draws the session to a close, exiting the program.
Part number: MA01069: Issue No. 2, March 2013
12 of 35
3.3.1 Features
Click on the features icon to enter the features.
The features are the actual movements of the
hand and triggers are the signals you give in
order to enter the feature.
Precision Pinch Grip Options
Precision pinch grip options are best for picking up small items between and the thumb and index finger. There are 4 options
available depending on how you want the other digits to perform while doing the pinch. The most popular is Thumb Precision
Pinch Closed. Many individuals choose the one that works best for them, but some will have more than one precision pinch
programmed depending on the activities they perform most often.
Feature
Picture Example
Standard Precision
Pinch Opened
Thumb Precision
Pinch Opened
Standard Precision Pinch Closed
Thumb Precision
Pinch Closed
Part number: MA01069: Issue No. 2, March 2013
Description
Use
Task Examples
Middle, ring and little
fingers remain fully
opened and switch off.
Both index finger and
thumb will move to
provide grip.
Allows for a wider opening than thumb precision.
Aids with visualization or for
pinching objects where the
non-active digits may get in
the way.
1. Returning cards or
money to wallet
2. Picking up napkins
3. Folding laundry
Middle, ring and little
fingers remain fully
opened and switch off.
Thumb automatically
moves to a partially
closed position. Only
index finger will move
to provide grip against
the fixed thumb.
Accuracy is improved when
picking up an object by allowing you to place the thumb
against the object to be
pinched. Only the index finger
moves to grasp the object.
Ideal for repetitive tasks.
1. Pick up pencil or slim,
long objects
2. Thread needle
3. Sort/Pick up medications
Middle, ring and little
fingers automatically
close and switch off.
Both index finger and
thumb will move to
provide grip
Will allow for better visualization in some tasks, especially
when the working surface is
not at eye level.
1. Slide small object
from shelf over head
2. Pick up small object
from floor
Middle, ring and little
fingers automatically
close and switch off.
Thumb automatically
moves to a partially
closed position. Only
index finger will move
to provide grip against
the fixed thumb.
Can improve accuracy for
picking an object by allowing you to place the thumb
against the object to be
pinched and only the index
finger moves to grasp the object. Ideal for repetitive tasks.
1. Pick up and open
sugar packet from a
coffee stand
2. Pick up coins
3. Can be used to pull
single trigger such as
with a drill
4. Alternative way to tie
shoes (also see “lateral
grip”)
13 of 35
Tripod Grip Options
Tripod Grip Options provide a grip where the thumb is meeting up with the index and middle digits. Typically the thumb is rotated
between the index and middle to provide more stability when gripping slightly larger objects than those with the precision pinch grips.
As a result of having a motor in each digit and the hand conforming to the shape of the object being held, the hand will automatically
form a tripod grip when the object is small enough to only be gripped between the thumb, index, and middle digits. The advantage
of using the tripod grip options is if you want the ring and small digits to stay either fully open or fully closed when gripping.
Feature
Picture Example
Description
Use
Task Examples
Ring and little fingers
remain fully opened
and switch off. Thumb,
index and middle
fingers will move to
provide grip
Allows for larger objects to
be grasped using the tripod
pinch. Can also improve positioning. May also decrease
compensation at shoulder for
tasks where closed digits get
in the way of the pinch.
1. Preparing food with
the fingers ring and
little finger clear, such
as slicing cucumber or
carrot
2. Holding cell phone
(would manually rotate
thumb laterally based
on size of phone or
setup custom grip)
Ring and little fingers
automatically close and
switch off. Thumb, index and middle fingers
will move to provide
grip.
Allows for the wider opening 1. Open bag of chips
2. Pull up socks
when using this feature with
larger objects. Tripod grip allows greater stability for larger
or round objects in comparision to precission pinch.
For smaller motion, but
increased accuracy. Tripod
grip allows greater stability
for larger or round objects
in comparision to precission
pinch. Can also decrease
elbow compensation when
seated.
1. Grab spices from
cupboard
Thumb 3 Jaw
Chuck (Tripod)
Opened
Ring and little fingers
remain fully opened
and switch off. Thumb
automatically moves
to a partially closed
position. Only index
and middle fingers
will move to provide
grip against the fixed
thumb.
Thumb 3 Jaw
Chuck (Tripod)
Closed
Ring and little fingers
automatically close
and switch off. Thumb
automatically moves
to a partially closed
position. Only index
and middle fingers
will move to provide
grip against the fixed
thumb.
Can improve stability and
control grasping larger objects. With thumb in a static
position, your ability to align
an object can improve particularly on small objects. Can
also decrease elbow compensation when seated.
1. Repetitive factory type work moving
pieces
2. Grasp pen for writing
3. Laundry
4. Pack bag
Standard 3 Jaw
Chuck (Tripod)
Opened
Standard 3 Jaw
Chuck (Tripod)
Closed
Part number: MA01069: Issue No. 2, March 2013
14 of 35
Additional Grip and Gesture Options
With these additional grip patterns and gestures, consider how often you perform different tasks and if having a program for that
activity would make it easier/faster for you to perform. Since each digit has its own motor, you can put pressure against any digit to
stop it from moving (called stalling the digit). Many of these additional grips can be performed by stalling one or more digits. If it is a
task that is not performed often (maybe using index point to press the “Shift” key on a keyboard) then you may prefer to just stall the
digit. However, if you frequently perform the task or want to go into the position without needing to put the hand against the table
or your other hand, then programming the grip may be the better option.
Feature
Picture Example
Description
Use
Task Examples
All four fingers remain
fully open and switch
off. Only the thumb
will move.
For longer dressing period
that will require more than
the 1.5 seconds of thumb park
quick or grasping light weight
flat objects. Can also use stalling out digits to complete,
putting pressure against
index to little and closing
thumb in to hand.
1. Put on jacket
2. Grasp flat objects,
such as a book or a
tablet computer or
clipboard
3. Allows readjustment
of the object opening letters or sorting
paperwork.
All four fingers fully
open and switch off.
For 1.5 seconds only
thumb will move,
after which the hand
automatically returns
to normal function.
Dressing or putting on a coat.
Can achieve this position by
using stall out capability of
digits against a table if do not
want to program.
1. Put on jacket or shirt
All four fingers fully
close and switch off.
Only thumb will move.
Holding onto plate, papers,
CD or other flat objects.
Improved stability with use of
the side of the index finger.
1. Hold plate while
serving food
2. Hold clipboard
3. Get card from ATM
5. Open ziplock bag
6. Tie Shoe Laces
Thumb, middle, ring
and little fingers fully
close and switch off.
Only the index finger
will move.
Used for pushing buttons,
typing on computer, or simply
pointing. Can be achieved
with stall out.
1. Keyboarding (hitting
shift key, CTRL, ALT,
DEL, general typing)
2. Push Button for
elevator
All digits automatically
move to a user defined
position with each
digit option as open or
closed.
Allows user to fully customize the hand. Many positions
can be obtained using stall
out if the user does not have
enough available triggers to
use this feature.
1. Boy scout salute
2. Peace sign
Digits move to user
defined position with
options for degree of
open or closed and
option to keep selected
digits “active”.
Can be used to fully customize for use of specific tool or
work or hobby. Multiple can
be set up as “favorites” on
iPod.
1. Click mouse
2. Hold trigger activated work type tool
Thumb Park
Continuous
Thumb Park Quick
Lateral Grip
Index Point
Customer Gesture
Custom Grip
Part number: MA01069: Issue No. 2, March 2013
15 of 35
Triggers
Your muscles create signals that you will use to control the i-limb ultra revolution. These signals are called triggers Four potential
triggers are available to activate features: Hold open, Co-contraction, Double impulse and Triple impulse.
1
Hold open: a prolonged open signal for the programmed amount of time, normally 2-3 seconds.
2
Co-contraction: Both the open and closed signals must be activated at the same time. Your clinical team may have a
recommendation on how to do this based on your control, such as imagining making a tight fist, flicking your fingers, or forcefully
straightening your arm.
3
Double impulse: two rapid open signals, separated by relaxation below the threshold. Impulses are very quick open signals. They
do not need to be strong, just fast like blinking your eyes. Your prosthetist will have pre-set this at the time of fitting. To activate a
double impulse the device needs to be fully opened prior to attempting activation.
4
Triple impulse: three rapid open signals, separated by relaxation below the threshold. Impulses are very quick open signals. They
do not need to be strong, just fast like blinking your eyes. Your prosthetist will have pre-set this at the time of fitting. To activate a
triple impulse the device needs to be fully opened prior to attempting activation.
Any of the above four potential triggers can be linked with any of the above features. Some users are able to perform activities of daily
life (ADL’s) without the use of any triggers. In many cases users initially set one or two triggers while familiarity and control is gained
when learning how the i-limb ultra works. If you have several features set up with different triggers and notice that you accidently jump
into a particular feature often, you may want to stop using that trigger until you can follow up with your prosthetist to determine why it
is happening inadvertently. Your clinical team may be able to make adjustments or training recommendations to improve your control.
Linking Triggers with Features
In order to link a trigger with a feature simply click on to the
desired feature (the feature will now be highlighted). Select
and click the desired trigger that you would like to link with the
highlighted feature. Both feature and trigger should now be
highlighted and the descriptive label will now appear under the
feature icon. The example illustration on the right indicates the
Index Point Feature linked to the Hold Open Trigger.
By clicking on any of the features on the features page the available
triggers and example sections will also appear. In order to preview
a feature simply highlight the feature and click on example to the
right of the screen. The section will then enlarge and provide a
demonstration of the feature. The hand image can be rotated to
improve visualization by holding the right mouse key and moving
the curser in the direction of the intended rotation. The left mouse
key will zoom in and out while the right mouse key will allow you
to drag the hand around on the screen to a different view point.
Part number: MA01069: Issue No. 2, March 2013
16 of 35
Additional Functioning
Toward the bottom right of the screen the additional Global
Options box can be used to give access to Vari-grip / pulsating
and natural hand mode.
1
Vari-grip/pulsating: this mode provides additional grip
force when the closed signal is sustained for the amount of
time selected (default 0.5 seconds). This can also be customized
between 250ms (0.25 seconds) to 3,000ms (3 seconds). Vari-grip
is excellent for tasks such as tying shoes, opening bags (ziplock,
chips, etc.), tearing paper or opening packages.
2
Natural Hand Mode: this mode allows you to select what
position you would like the hand to move to when it is not in
use. Once the hand is fully opened and you relax your signals
for the selected amount of time, the hand will move to a more
relaxed position. The timing for this position can be adjusted as
well as how far opened of closed each digit moves.
Part number: MA01069: Issue No. 2, March 2013
17 of 35
3.3.2 Training
The training suite contains a variety of short
exercises aimed at developing control of
the i-limb ultra device. The opening screen
highlights a series of exercises which can be
selected individually and in any order. Both
open and closed signals can be practiced by
selecting the appropriate box to the right. An
indication of difficulty is provided by the 5
point scale on each module.
Real time signals: This is graph that allows you to view the
signals you are providing to the hand. The red signals are your
open signals and the blue are closed signals. Press the play
button to start the graph and stop when finished. The dark lines
with arrows to the left show how strong your signals must be
before the hand starts to pay attention to them. To make the
hand run at full speed, the signals should be about half way up
the graph. Your signals may be too strong if they peak out at
the very top of the graph. Signals should also stay isolated between red or blue, if your signals cross over one another when
you do not intend them to you may lose control of the direction your hand is moving. If your signals are either too low or
too high or you are having difficulty controlling your hand and
should contact your prosthetist. The “done” button allows you
to return to the training page.
Strength: This is to help you focus on generating a strong
muscle signal from one muscle at a time. At the right of the
screen select either the open or close icon to work on that
signal. Press the start button and then give the signal you have
selected to try to get the ball above the line. See how many
times you can successfully get the ball to rise. You can view the
strength of your signals on the right by watching the red and
blue rise. Red is open and blue is closed. Press “stop” and “done”
when finished.
Speed Only: This is to help you generate quick muscle signals.
Quick signals help with giving quick impulses. Typically the
open signal is the one that needs to be quick. Work to make the
ball rise to the top of the hill as quick as possible.
Strength and Separation: This game is to help you give strong
signals that will not confuse the hand about the direction you
want to move in by staying isolated. Choose to work on either
open or close then press “start”. Only let the teeter-totter move
in the direction you have selected.
Part number: MA01069: Issue No. 2, March 2013
18 of 35
Co-contraction: Focuses on generating quick strong
simultaneous contractions with both muscles. Do not be
concerned with relaxing after the contraction. Press Start then
try to get both balls to reach the top of the hill at the same time
indicating both signals being activated. Mastering this will allow
you to be successful with the co-contraction trigger.
Hold Open: Focuses on generating a strong open muscle signal
and maintaining it at a high level for several seconds. Mastering
this exercise will enable use of the hold open trigger. After
pressing “start” remember to hold the open signal above the bar
for 2-3 seconds to be successful.
Speed and Separation: Focuses on generating quick, strong
muscle signals while isolating the opposing muscle. This exercise
lays the foundation for impulse control. Remember, impulses
are the very quick signals that can be used to change from one
grip pattern feature to another using a double or tripple impulse
trigger. The open signal should be focused on for this purpose.
3.3.3 Hand Health Check
The Hand Health Check screen provides a
quick and easy check of the hand. Click on
the “Run Hand Health Check” icon and the
health check will begin. There must be an
internet connection to run the Hand Health
Check.
Part number: MA01069: Issue No. 2, March 2013
19 of 35
The i-limb ultra device will then go through a series of movements as each digit is checked, the process will run for approximately 8 seconds and provide basic feedback on each step. If
there is a problem with your hand, please contact your clinician.
3.3.4 Exit
Use the Exit icon to fully exit biosim.
Part number: MA01069: Issue No. 2, March 2013
20 of 35
4.0 i-limb ultra Coverings
4.1 Cover Options
The cover of the i-limb ultra is very important. The i-limb ultra
hand should not be used without an approved cover that is well
maintained.
A number of options are available to cover the hand. All covers
require regular checks for wear and tear and some require routine
maintenance. Covers will need replacement depending on usage.
The i-limb skin active cover is designed for the i-limb ultra hand
and will fully cover the hand. The palm and inner surface of the
cover provide some frictional properties for slip resistance when
gripping. The back of the glove is smooth to allow the hand to
easily move through sleeves of clothing. You are eligible to receive replacement i-limb skin active covers if you are covered under the Touch Care program.
The i-limb skin natural cover is designed to be close to natural
human anatomy. A color swatch is available to select the closest
color match between your natural skin color and the color of your
i-limb skin natural cover. There are ten color options for the i-limb
skin natural cover, the glove may not be an exact match, but will
be very close.
For individuals who desire the most realistic covering option possible, i-limb skin match is available, which is a fully customized
silicone covering that is hand painted and exactly matches the
skin tone and features. Part number: MA01069: Issue No. 2, March 2013
21 of 35
4.2 Donning (putting on) the i-limb skin active Cover
1
Position the thumb of the i-limb ultra approximately
15mm (0.6 inches) from the i-limb ultra index finger.
2
Align the i-limb skin active cover with the digits and pull
the cover down over the digits. Gently pull up and over
the thumb, taking care not to cause any undue downward
pressure on the thumb.
3
Pull the i-limb skin active cover over the hand to the wrist.
4
Individually maneuver the fingers of the i-limb skin active
cover over the fingers until they are fully aligned.
Part number: MA01069: Issue No. 2, March 2013
22 of 35
4.3 Doffing (removing) the i-limb skin active Cover
1
Gently maneuver the i-limb skin active cover from the wrist
up and over the base of the thumb taking care not to cause
any undue downward pressure on the thumb.
2
Grip the fingertips of the i-limb skin active cover and gently
maneuver it upwards, over and off the i-limb ultra hand.
Part number: MA01069: Issue No. 2, March 2013
23 of 35
4.4 Donning (putting on) the i-limb skin natural Cover
It is highly recommended that you visit your
clinician to don and doff your i-limb skin natural
cover. If your clinician is not available, it is highly
recommended that you seek assistance.
1
Position the thumb of the hand opposite and facing the
forefinger (in the same position as the pinch grip). Put
pressure against the digits and provide a close signal until the
thumb is mostly closed, but allowing enough space for the
glove to slide between the hand and thumb. Then turn the
hand off.
2
Spray the Silicone outside of the covering generously with
the IPA (Isopropyl Alcohol) lubricant / cleaner supplied
(SA000174).
3
Roll the covering back on itself, from wrist to fingers until the
opening for the fingers is showing.
4
Push the bat provided into each of the fingers and thumb in
turn to straighten. This will help the covering slide onto the
extended i-limb ultra fingers.
Part number: MA01069: Issue No. 2, March 2013
24 of 35
5
Spray the Silicone into the opening at the wrist and on
the outside of the inverted cover generously with the IPA
lubricant / cleaner supplied.
6
Slide the covering onto the four fingers of the hand and work
it well down onto the fingers.
7
Place the thumb hole of the covering over the thumb tip and
work the covering over the fingers and the thumb together.
8
Once the covering is over the fingers and roughly half way
down the thumb, take a firm hold of the cover at the wrist end
and gently maneuver over the thumb and hand – take care
not to cause undue pressure on the thumb.
Note: When using the i-limb natural cover, adjustments should be made within biosim to ensure that speed is not sacrificed.
Contact your clinician or Touch Bionics with questions
regarding these adjustments.
Part number: MA01069: Issue No. 2, March 2013
25 of 35
4.5 Doffing (removing) the i-limb skin natural Cover
1
Put pressure against the digits and provide a close signal until
the thumb is mostly closed, but allowing enough space for
the glove to slide between the hand and thumb (0.6 inches).
Then turn the hand off.
2
Slide the covering gently up and over the thumb, up to the
base of the fingers.
3
Ensure the fingertips of the glove are loose. Remove the
covering entirely by gently drawing the fingers of the cover,
off the fingers of the i-limb ultra, one at a time.
Part number: MA01069: Issue No. 2, March 2013
26 of 35
4.6 Wear and Care Guidelines for i-limb
skin natural and custom covers
Care of the covers is very important in order to maintain its use
long-term. The following are some guidelines for wear and care.
Cleaning the Cover
Use warm water and plain soap regularly to clean the outside of
the cover. Using the correct soap is very important - plain Dawn®
or Ivory® brand liquid dish washing soaps are recommended.
Clean the cover with medical grade rubbing alcohol once a week
to help with disinfection. When cleaning you should not run the
hand under the water, but instead use a damp cloth with the
water and soap.
Some soaps contain additives such as oil, perfume,
hand lotion, glycerin or aloe and should be
avoided.
Accessing the Battery or Switch
If you need to access the charge port or switch, and it is covered
by a glove or sleeve, spray the outside with medical rubbing
alcohol to reduce friction, this will aid partial removal and will also
help prevent damage caused by friction.
Nails
The nails of the i-limb skin natural cover are made of silicone
and cannot be polished or painted as this will damage the cover.
Attaching acrylic nails will invalidate the warranty. If you have a custom high definition cover the nails may either
be silicone or acrylic. Acrylic fingernails may be polished as usual.
Use only non-acetone nail polish remover. Silicone nails should
not be polished.
Cleaning Precautions
Jewelry and Gloves
Oils and oily substances alone may not damage the cover.
However, oily substances attract and create an adherence of
dirt, grime and other chemicals which can lead to damage of the
cover if it is not washed and cleaned regularly as described above.
Many hair and body products contain oil and should only be used
when the prosthesis is not being worn. Exposure to oils and oily
substances may make the prosthesis look shiny. Do not use oil
control cleansers to manage the shine, these are abrasive and will
give the cover a tarnished appearance.
Jewelry is not recommended to be worn with Touch Bionics
covers. A silk or smooth fabric lined glove will be easily put on and
taken off the hand. Gloves should not have bleeding dyes when
damp or wet.
Body perspiration contains oils which can accumulate and
damage the prosthesis if not removed by appropriate cleaning.
Do not attempt to repair the i-limb skin natural, or custom cover.
If the cover is damaged, do not attempt to fix it. Contact your
prothetist. Damage can often be repaired, rendering the damage
almost undetectable. Cutting, gluing or alterating your cover may
make it irreparable and will invalidate the warranty.
Staining
Although the cover is made of a durable material, it is possible
for it to become stained. Some substances to avoid include blue
Woolite®, permanent markers, some pens and inks (newspaper
ink will not stain), unwashed blue jeans and fabrics, bleach,
chronic exposure to cigar and cigarette smoke, carbon paper
and ‘carbonless’ carbon paper, other products may also stain your
cover. The list provides examples of products that can damage
the cover, when using new products for the first time, use with
caution. If the cover is stained, washing quickly with warm water
and plain soap and then cleaning with alcohol is most likely to
remove the stain.
General Precautions
• The i-limb ultra hand must be used with an approved Touch
Bionics cover.
• Never put more than one cover on your i-limb ultra hand.
• Always use the correct size cover and the correct orientation
(left or right).
• Ensure the cover is fitted properly.
• Only use IPA provided as directed in the manual.
The i-limb ultra warranty may be invalid if used outside of the
recommendations.
Please consult the Cover Care Guide supplied for a complete
overview of cover wear and care guidelines.
Failure to keep the cover clean as instructed above will invalidate
the warranty on the cover.
If cleaning does not remove the stain, contact your clinician or
Touch Bionics for an evaluation and repair. Refer to the back page
for contact information.
Part number: MA01069: Issue No. 2, March 2013
27 of 35
5.0 Support Information
5.1 Troubleshooting
Problem
Action
Does not operate
Ensure the prosthesis is switched on
Ensure the battery is charged
Ensure the electrodes are making good contact with your skin
Ensure the hand is engaged at the wrist
Stops midway through an
action
Check that the i-limb ultra device is connected correctly
Difficult to operate
Ensure battery has good charge
Review with your clinical practitioner
Battery charge does not last
a full day
Fully charge the battery. This may take up to 2 hours
Digits open when a closed
signal is activated
Contact your prosthetist
Battery is not working
Ensure the battery charger is working correctly
Ensure that you are not holding a sustained signal to the device
Check that battery is charged
Part number: MA01069: Issue No. 2, March 2013
28 of 35
5.2 Frequently Asked Questions
Will I be able to move each digit individually?
No, while there are a number of customized grip patterns that will allow you to just
move certain digits for pinching an object or making a certain gesture, you will not
have individual control of each digit.
How should I hold a fork or knife?
There are several options of how to hold utensils. The more contact points on the
utensil, the more stability you will have with the utensil. Try rotating the thumb
out to the side to grasp the handle of the utensil between the thumb and side of
the index digit. To get different angles you can slide the utensil between different
digits such as the index and middle or middle and ring.
How long will it take to learn to use the i-limb
ultra?
It varies from person to person. You should anticipate a learning curve. You have
probably compensated to do activities without a prosthesis or learned to use a
different device in the past. You must now train to best utilize the i-limb ultra and
fully understand all the functional benefits. This process can take several months
before use of the device feels natural. If you are struggling with specific tasks, talk
to your clinical team or go to www.touchbionics.com to see if there are any videos
demonstrating the activity you are struggling to complete.
Can I use the i-limb ultra for sporting tasks?
Depending on the activity you are performing the i-limb ultra may not be the most
appropriate tool. Talk with your prosthetist about your goals and what device may
be best to help accomplish your goals.
My hand is beeping at me, what does that
mean?
Three beeps in a row is the low battery warning signal. You should charge your
hand soon after you hear this warning.
My battery does not seem to last all day, what
can I do?
If the battery used to last all day and no longer does, you should talk to your prosthetist. Sometimes your signals have gotten stronger resulting in greater usage. A
signal is present even when you are not using the hand that will drain the battery.
You could try turning the hand off when you are not using it to save battery life.
Your prosthetist may be able to discuss other options.
I had good control when I first got the hand,
but now it seems like I drop items more easily,
why is that?
The signals you are giving may have gotten stronger over time since you have been
using them more. Now even a small muscle contraction may make the hand move.
If you connect to biosim you may see your signals on the graph reach the top very
easily as opposed to in the past. Contact your prosthetist.
What if the device gets wet in the rain?
You should dry it off as soon as you can and always ensure your cover is free from
holes. You do not want water to get under the cover and sit on the electronics.
Treat the hand like you would a cell phone and protect it from water.
How should I clean it/how often?
You should clean your prosthesis and the cover over your i-limb ultra. Discuss
with your prosthetist the best method based on the material of your socket. Often
times a damp cloth with a dish soap without any lotions is used to clean the cover.
You can also use alcohol to clean any stains or prevent bacteria. After using the
restroom, you can wash your hands using a damp paper towel with the soap rather
than running the hand under the water.
What is the best way to tie my shoes?
Some people like to use the pinch mode where the index finger and thumb come
together, but often times individuals feel they get a better grip and better ability to
see the shoe lace if they pinch with the thumb against the side of the hand (called
a lateral pinch).
How can I put a coat on if my device is already
on?
Part number: MA01069: Issue No. 2, March 2013
To make the hand as slim line as possible, you can put pressure against the index,
middle, ring, and small finger while giving a close signal. This will bring the thumb
into the palm of the hand so it does not catch inside the coat sleeve. Some people
put the prosthetic hand through the sleeve first and use their other hand to move
up the coat sleeve to the hand to guide it down the sleeve without sticking. Others
will put a grocery bag or other slick material over the hand and then just slide on
the coat sleeve normally with the bag decreasing the friction making it easier.
29 of 35
5.3 Warnings and Precautions
i-limb ultra
Batteries
Do not use without an approved cover
Do not bend or exert excessive pressure on the battery
Do not use under water
Do not pierce the battery
Do not use to operate heavy / industrial machinery
Do not disassemble the battery
Do not use with machinery with moving parts that may cause
personal injury or damage
Do not expose to high temperatures
Users must comply with local regulations on the operation of
automobiles, aircraft, sailing vessels of any kind and any other
motorized vehicle or device
Do not alter battery terminal wires
Do not incinerate batteries
Do not short circuit the battery
Do not use for extreme activities that may cause injury to a natural
hand e.g. rock climbing
Do not store batteries inside a vehicle
Do not expose to excessive moisture, liquid, dust, vibration or
shock
Dispose of batteries in accordance with US, European or local
regulations
Do not expose to high temperatures
Only use the appropriate Touch Bionics charger to charge Touch
Bionics batteries
Do not expose to flames
CAUTION: If the battery has visibly ballooned or swollen:
Do not use or expose to explosive atmospheres
• discontinue the charging process immediately
Do not disassemble componentry or modify in any way
Maintenance, repairs and upgrades may only be performed by
qualified Touch Bionics technicians and technical partners
• disconnect the battery
• remove to a safe area
Do not use with a damaged cover
• leave and observe for 15 minutes
Damaged covers must be replaced or repaired by a qualified
Touch Bionics technician or technical partner
• replace the battery
Only approved Touch Bionics accessories and tooling may be
used with the i-limb ultra If utilizing an i-limb ultra multi-flex wrist, the hand should be
locked if carrying an object that is hot.
• do not re-use
• dispose of any leaking batteries in an appropriate manner
Failure to comply with the above guidelines will invalidate the warranty. If you experience technical problems
with the i-limb ultra and your clinical
team is not available, contact Touch
Bionics as follows:
Part number: MA01069: Issue No. 2, March 2013
30 of 35
North American Customers
(Canada, Mexico & US)
Tel:+1 855 MYiLIMB (694 5462)
UK & Non-North American Customers
Tel: +44 1506 438 556
Driving of Motor Vehicles
The i-limb ultra has the functional capability to assist a patient with driving a motor vehicle however due to factors
including the differences in world-wide driving regulations and the variations in the level of ability between patients
Touch Bionics is unable to provide definitive advice in respect of a patient with an i-limb device driving a motor vehicle.
Touch Bionics is aware that individuals have used the i-limb to drive a motor vehicle and our recommendations prior to a
patient doing so would include the following:
• contacting the driving authority in your home location to obtain and understand the local regulations;
• working with the appropriate authorities to have your car modified to meet the local regulations for your respective
disabilities as required;
• re-taking any mandatory driving test using your i-limb device to demonstrate your ability to operate a motor vehicle
safely if required by local regulations;
• contacting your insurance provider and advise them that you will be using the i-limb device to drive a motor vehicle;
• ensuring that the device has a fully charged battery. Please note that the i-limb device will emit a low battery signal
which will alert you if the battery requires to be charged;
• switching off the i-limb device. This is due to the possibility of involuntary muscle signals being generated; and
• moving the thumb into the lateral position to allow the i-limb to be removed from the steering wheel without opening
the hand.
It is entirely the patient’s responsibility to seek confirmation that they are physically and legally able to drive using the
device and to the fullest extent permitted by law Touch Bionics shall under no circumstances whatsoever be liable to the
patient or any other party as a result of or in connection with a patient with an i-limb device driving a motor vehicle.
Part number: MA01069: Issue No. 2, March 2013
31 of 35
6.0 User Information
6.1 User Details
Provision of the following basic information will enable easy identification if the prosthesis is returned to Touch Bionics customer
service.
User Name:
Fitting Date:
Hand Purchase Date:
Hand Serial Number:
Prosthetist Name & Contact Information:
Therapist Name & Contact Information:
Part number: MA01069: Issue No. 2, March 2013
32 of 35
7.0 Appendix
7.1 Technical Information
i-limb ultra
Voltage
7.4 V (nominal)
Max. Current
5A
Battery Capacity
Rechargeable lithium polymer; 7.4 V (nominal); 2,000 mAh capacity;
1,300 mAh capacity
Max hand load limit (static limit)
90kg/ 198lb
Finger carry load (static limit)
32kg/ 71lb
Time from open position to full power grip
1.2 seconds
Device Weight
Weight with quick disconnect wrist 469g (small) and 479g (regular)
Weight with Wrist Disarticulation unit 405g (small) and 418g (regular)
7.2 Component Compatibility
1. General Safety
1.1 The i-limb ultra device is an electrical device, which under certain circumstances could present an electrical shock hazard to the
user. Please read the accompanying user manual thoroughly and follow directions stated in the manual to assure maximum
safety during charging and operation.
1.2 EN 60601-1:2006
1.2.1 Protection against electrical shock – Class II
1.2.2 Degree of protection against electrical shock – Type BF provides additional protection against electric shock
1.2.3 Degree of protection against ingress of water (IEC 60529:2001) – IP40
1.2.4 Not suitable for use in the presence of flammable anesthetic mixture with air or with oxygen or nitrous oxide
1.3 EMI/EMC
1.3.1 Compliance against standard EN 60601-1-2:2007
1.4 Radio Spectrum Matters (ERM)/Bluetooth
1.4.1 Compliance against standard EN 301 489-1 V1.8.1
1.5 EN 301 489-3 Clause 7.1
1.5.1 EN55022: 2006
1.6 Radiation emissions, Enclosure
1.6.1 EN 301-489-1 Clause 8.2 - Pass (30MHz to 6,000MHz)
1.7 Zones of Use
1.7.1 Not recommended in zones 0, 1, 20 and 21
N.B. See www.touchbionics.com for further information on EMC testing carried out on products within this manual.
Part number: MA01069: Issue No. 2, March 2013
33 of 35
Refer to operating instructions
Class II equipment – provides double Isolation to protect
against electric shock
Degree of protection – IP40
IP40
Protection against penetration by solid particles with diameters
larger than 1 mm. No special protection against penetration by
water
Batch/Lot/ID Number
For i-limb devices:
Each device has a guaranteed unique id number example:
0001:2012
The unique serial number for i-limb ultra devices is a U with a 4
digit alpha / numeric number. The year of manufacture of the
device is then added.
WEEE Compliance
Catalogue number
Manufacturer
Keep Dry
1. Customer Service/Contact Information:
Touch Bionics, Unit 3 Ashwood Court,
Oakbank Park Way, Livingston EH53 0TH, UK
Tel: Customer Service: +44 (0) 1506 445 415
Tel: General Enquiries: +44 (0) 1506 438 556
Touch Bionics, 35 Hampden Road
Mansfield MA 02048, USA
Tel: +1 855 MY iLIMB (694 5462)
www.touchbionics.com
www.touchbionics.com
Part number: MA01069: Issue No. 2, March 2013
34 of 35
7.3 Warranty
Limited Warranty for i-limb ultra
Touch Bionics warrants that the i-limb ultra will conform to its specifications and be free of defects in material and/or workmanship
for twelve (12) to sixty (60) months (depending on package purchased ) from the date of Touch Bionics invoice for the i-limb
ultra. This Limited Warranty applies only to an i-limb ultra provided by Touch Bionics or an affiliate authorized by Touch Bionics to
provide the i-limb ultra. This Limited Warranty applies to all components including but not limited to fixtures, motors, bearings, and
electronics. This Limited Warranty is governed by UK law and is not transferrable.
Warranty:
Touch Bionics reserves the right to credit, repair or replace an “in-warranty” i-limb ultra as its option. If required, replacements will
be new products. The wearer shall report any defect claim to Touch Bionics directly or to the facility that provided the i-limb ultra
immediately upon discovering the defect, and, in any event, within the warranty period. The defective i-limb ultra must be returned
to Touch Bionics or any other Touch Bionics authorized representative. To find the nearest location, visit www.touchbionics.com or
call +1-855-MY-iLIMB (US & Canada), or +44 (0) 1506 438 556 (International). The unit must be in assembled condition and include
an approved covering when returned. The warranty is void if the i-limb ultra is subjected to abuse, neglect, alteration, modification,
improper repair and/or maintenance performed by anyone other than Touch Bionics or a Touch Bionics’ affiliate. Damage as the result
of normal wear and tear including the result of fatigue is not covered during the warranty period. Damage resulting from installation of
parts and accessories not compatible with the i-limb ultra by anyone other than Touch Bionics or an affiliate is not covered, including
use of non-Touch Bionics batteries. The warranty is void if damaged covers are not replaced or repaired in a timely manner by a Touch
Bionics cosmesis facility or another facility authorized by Touch Bionics, or if an approved cosmetic covering is not worn at all times
when the i-limb ultra is being worn.
This is the exclusive remedy under this warranty, any and all other remedies that may otherwise be applicable are excluded, including,
but not limited to, incidental or consequential damage or punitive damage to the maximum extent permitted by law. This is the only
warranty made by Touch Bionics on the i-limb ultra and components, and there are no warranties which extend beyond the description
herein. Any warranties that may otherwise be implied by law including, but not limited to, any implied warranty of merchantability or
fitness for a particular purpose are extended.
This Limited Warranty gives the consumer specific legal rights. The consumer may also have other legal rights which vary from country
to country, from state to state in the U.S, from province to province in Canada and from state to state in Mexico. Some countries and
states may not allow the exclusion or limitation of incidental or consequential damages or warranties, so the above limitations or
exclusions may not apply to you. If it is determined by a court of competent jurisdiction that a certain provision of this limited warranty
does not apply, such determination shall not affect any other provision of this limited warranty and all other provisions shall remain in
effect.
Part number: MA01069: Issue No. 2, March 2013
35 of 35
North American Customers
(Canada, Mexico & US)
Touch Bionics
35 Hampden Road
Mansfield MA 02048
USA
Tel: +1 855 MY iLIMB (694 5462)
International Customers
Touch Bionics
Unit 3, Ashwood Court
Oakbank Park Way
Livingston EH53 0TH
Scotland
Tel: +44 1506 438 556
Email: [email protected]
For address details and further information
please visit www.touchbionics.com
Third party products and brand names
may be trademarks or registered
trademarks of their respective owners
© Copyright 2013 Touch Bionics Inc. and Touch EMAS Ltd. All rights reserved.
Issue No. 2, March 2013
Part number: MA01069