1
Hull Roughness Gauge – Instruction manual - Page 16 of 18
9 SETTING COM PORTS
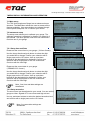
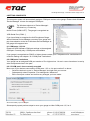
The computer system will automatically assign a COM port number to the gauge. Please check Windows
‘Device Manager’ to learn the assigned COM port.
Tip: Windows shortcut to ‘Device Manager’:
Windows key + Pause key
Unfold ‘Ports (COM & LPT)’. The gauge is recognized as:
‘USB Serial Port (COM…)’
If you have failed to recognize the Hull Roughness Gauge
within Windows Device Manager reconnect your gauge and
pay close attention to the list in Windows Device Manager as
the gauge will reappear here.
9.1 COM ports 1,2,3 & 4
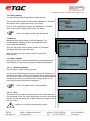
Please set HRG software COM port settings to the assigned
COM port. Currently only 4 COM ports are available.
If you gauge is recognized as COM 5 or higher please contact your IT department for a workaround or
continue reading next chapter ‘10.2 COM ports 5 and above’.
9.2 COM ports 5 and above
Your gauge has an assigned COM port number of 5 or higher since 1-4 are in use or have been in use by
other computer devices in the past.
9.2.1 If COM port 1-4 are currently occupied
Move one of your devices connected to COM ports 1,2,3 or 4 to port number 5 or above:
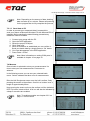
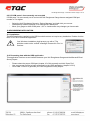
- Select the device to move in ‘Device Manager’ and right click your mouse.
- Subsequently select Properties / Port settings tab / Advanced
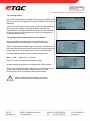
- Edit current port number and confirm any changes you have made.
Set current COM (1-4) to 5 or higher.
Subsequently repeat previous steps to move your gauge to either COM ports 1,2,3 or 4.