1
GE Healthcare
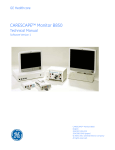
CARESCAPE Monitor B850
Technical Manual
Software Version 2
Hardware Version CPU-C1
All specifications subject to change without notice.
English
2062978-001 DVD
2062978-002 DVD, 510(k)
2062973-001 paper
14 March 2014
© 2013, 2014 General Electric Company. All rights reserved.
The information in this manual applies to the software and hardware versions listed on the first page of this manual. Due to
continuing product innovation, specifications in this manual are subject to change without notice.
Table of contents
Table of contents
1
About this manual
1
1.1
1.2
1.3
1
1
1
1
2
2
2
3
3
3
3
1.4
1.5
1.6
1.7
1.8
1.9
2
Safety information
2.1
2.2
2.3
3
Intended use of the manual . . . . . . . . . . . . . . . . . . . . . . . . . . . . . . . . . . . . . . . . . . . . . . . . . . . . . . . . . . .
Intended audience of the manual. . . . . . . . . . . . . . . . . . . . . . . . . . . . . . . . . . . . . . . . . . . . . . . . . . . . . .
Conventions used in this manual . . . . . . . . . . . . . . . . . . . . . . . . . . . . . . . . . . . . . . . . . . . . . . . . . . . . . .
1.3.1 Product naming conventions . . . . . . . . . . . . . . . . . . . . . . . . . . . . . . . . . . . . . . . . . . . . . . . . . . .
Illustrations and names . . . . . . . . . . . . . . . . . . . . . . . . . . . . . . . . . . . . . . . . . . . . . . . . . . . . . . . . . . . . . . .
Ordering manuals. . . . . . . . . . . . . . . . . . . . . . . . . . . . . . . . . . . . . . . . . . . . . . . . . . . . . . . . . . . . . . . . . . . . .
Related documents . . . . . . . . . . . . . . . . . . . . . . . . . . . . . . . . . . . . . . . . . . . . . . . . . . . . . . . . . . . . . . . . . . .
Trademarks . . . . . . . . . . . . . . . . . . . . . . . . . . . . . . . . . . . . . . . . . . . . . . . . . . . . . . . . . . . . . . . . . . . . . . . . . .
1.7.1 Third party trademarks . . . . . . . . . . . . . . . . . . . . . . . . . . . . . . . . . . . . . . . . . . . . . . . . . . . . . . . . .
Responsibility of the manufacturer. . . . . . . . . . . . . . . . . . . . . . . . . . . . . . . . . . . . . . . . . . . . . . . . . . . . .
Product availability. . . . . . . . . . . . . . . . . . . . . . . . . . . . . . . . . . . . . . . . . . . . . . . . . . . . . . . . . . . . . . . . . . . .
General safety statements . . . . . . . . . . . . . . . . . . . . . . . . . . . . . . . . . . . . . . . . . . . . . . . . . . . . . . . . . . . . 5
Safety message signal words . . . . . . . . . . . . . . . . . . . . . . . . . . . . . . . . . . . . . . . . . . . . . . . . . . . . . . . . . . 5
Safety symbols . . . . . . . . . . . . . . . . . . . . . . . . . . . . . . . . . . . . . . . . . . . . . . . . . . . . . . . . . . . . . . . . . . . . . . . 6
System overview
3.1
3.2
3.3
3.4
3.5
3.6
5
9
System introduction. . . . . . . . . . . . . . . . . . . . . . . . . . . . . . . . . . . . . . . . . . . . . . . . . . . . . . . . . . . . . . . . . . . 9
System components . . . . . . . . . . . . . . . . . . . . . . . . . . . . . . . . . . . . . . . . . . . . . . . . . . . . . . . . . . . . . . . . . . 9
3.2.1 CPU unit . . . . . . . . . . . . . . . . . . . . . . . . . . . . . . . . . . . . . . . . . . . . . . . . . . . . . . . . . . . . . . . . . . . . . . . 9
3.2.2 Software . . . . . . . . . . . . . . . . . . . . . . . . . . . . . . . . . . . . . . . . . . . . . . . . . . . . . . . . . . . . . . . . . . . . . . 10
3.2.3 Input devices. . . . . . . . . . . . . . . . . . . . . . . . . . . . . . . . . . . . . . . . . . . . . . . . . . . . . . . . . . . . . . . . . . 11
3.2.4 Module frames and Tram-Rac housing . . . . . . . . . . . . . . . . . . . . . . . . . . . . . . . . . . . . . . . . . 12
3.2.5 Acquisition modules . . . . . . . . . . . . . . . . . . . . . . . . . . . . . . . . . . . . . . . . . . . . . . . . . . . . . . . . . . . 13
3.2.6 CARESCAPE Network MC or S/5 Network. . . . . . . . . . . . . . . . . . . . . . . . . . . . . . . . . . . . . . . . 13
3.2.7 CARESCAPE Network IX . . . . . . . . . . . . . . . . . . . . . . . . . . . . . . . . . . . . . . . . . . . . . . . . . . . . . . . . 14
3.2.8 Unity Network ID connectivity device . . . . . . . . . . . . . . . . . . . . . . . . . . . . . . . . . . . . . . . . . . . 15
3.2.9 Displays . . . . . . . . . . . . . . . . . . . . . . . . . . . . . . . . . . . . . . . . . . . . . . . . . . . . . . . . . . . . . . . . . . . . . . 15
3.2.10 Printers and recorders . . . . . . . . . . . . . . . . . . . . . . . . . . . . . . . . . . . . . . . . . . . . . . . . . . . . . . . . . 16
3.2.11 Service Interface . . . . . . . . . . . . . . . . . . . . . . . . . . . . . . . . . . . . . . . . . . . . . . . . . . . . . . . . . . . . . . 17
Controls and connectors . . . . . . . . . . . . . . . . . . . . . . . . . . . . . . . . . . . . . . . . . . . . . . . . . . . . . . . . . . . . . 18
3.3.1 Front view . . . . . . . . . . . . . . . . . . . . . . . . . . . . . . . . . . . . . . . . . . . . . . . . . . . . . . . . . . . . . . . . . . . . 18
3.3.2 Rear views . . . . . . . . . . . . . . . . . . . . . . . . . . . . . . . . . . . . . . . . . . . . . . . . . . . . . . . . . . . . . . . . . . . . 19
Service information . . . . . . . . . . . . . . . . . . . . . . . . . . . . . . . . . . . . . . . . . . . . . . . . . . . . . . . . . . . . . . . . . . 20
3.4.1 Service requirements . . . . . . . . . . . . . . . . . . . . . . . . . . . . . . . . . . . . . . . . . . . . . . . . . . . . . . . . . . 20
3.4.2 Equipment identification. . . . . . . . . . . . . . . . . . . . . . . . . . . . . . . . . . . . . . . . . . . . . . . . . . . . . . . 21
Product security . . . . . . . . . . . . . . . . . . . . . . . . . . . . . . . . . . . . . . . . . . . . . . . . . . . . . . . . . . . . . . . . . . . . . 21
3.5.1 Security features . . . . . . . . . . . . . . . . . . . . . . . . . . . . . . . . . . . . . . . . . . . . . . . . . . . . . . . . . . . . . . 22
3.5.2 Security operations. . . . . . . . . . . . . . . . . . . . . . . . . . . . . . . . . . . . . . . . . . . . . . . . . . . . . . . . . . . . 23
3.5.3 Product change management . . . . . . . . . . . . . . . . . . . . . . . . . . . . . . . . . . . . . . . . . . . . . . . . . 24
3.5.4 Communication . . . . . . . . . . . . . . . . . . . . . . . . . . . . . . . . . . . . . . . . . . . . . . . . . . . . . . . . . . . . . . . 24
Equipment symbols . . . . . . . . . . . . . . . . . . . . . . . . . . . . . . . . . . . . . . . . . . . . . . . . . . . . . . . . . . . . . . . . . . 24
i
2062973-001
CARESCAPE Monitor B850
3.7
4
Using Webmin service interface
4.1
4.2
4.3
4.4
4.5
4.6
4.7
5
5.4
5.5
5.6
37
Local access to Webmin using the integrated browser on the patient monitor . . . . . . . . . . 37
Local access to Webmin with a service PC . . . . . . . . . . . . . . . . . . . . . . . . . . . . . . . . . . . . . . . . . . . . 38
Remote access to Webmin using a service PC over the IX Network . . . . . . . . . . . . . . . . . . . . . 39
Login to Webmin. . . . . . . . . . . . . . . . . . . . . . . . . . . . . . . . . . . . . . . . . . . . . . . . . . . . . . . . . . . . . . . . . . . . . 41
Webmin configuration modules . . . . . . . . . . . . . . . . . . . . . . . . . . . . . . . . . . . . . . . . . . . . . . . . . . . . . . 42
Webmin information modules . . . . . . . . . . . . . . . . . . . . . . . . . . . . . . . . . . . . . . . . . . . . . . . . . . . . . . . . 44
Webmin diagnostics modules . . . . . . . . . . . . . . . . . . . . . . . . . . . . . . . . . . . . . . . . . . . . . . . . . . . . . . . . 45
Pre-installation requirements
5.1
5.2
5.3
6
User interface symbols . . . . . . . . . . . . . . . . . . . . . . . . . . . . . . . . . . . . . . . . . . . . . . . . . . . . . . . . . . . . . . . 32
47
Unpacking. . . . . . . . . . . . . . . . . . . . . . . . . . . . . . . . . . . . . . . . . . . . . . . . . . . . . . . . . . . . . . . . . . . . . . . . . . . 47
Compatibility check . . . . . . . . . . . . . . . . . . . . . . . . . . . . . . . . . . . . . . . . . . . . . . . . . . . . . . . . . . . . . . . . . . 47
Network infrastructure . . . . . . . . . . . . . . . . . . . . . . . . . . . . . . . . . . . . . . . . . . . . . . . . . . . . . . . . . . . . . . . 48
5.3.1 MC Network. . . . . . . . . . . . . . . . . . . . . . . . . . . . . . . . . . . . . . . . . . . . . . . . . . . . . . . . . . . . . . . . . . . 48
5.3.2 S/5 Network. . . . . . . . . . . . . . . . . . . . . . . . . . . . . . . . . . . . . . . . . . . . . . . . . . . . . . . . . . . . . . . . . . . 48
5.3.3 IX Network . . . . . . . . . . . . . . . . . . . . . . . . . . . . . . . . . . . . . . . . . . . . . . . . . . . . . . . . . . . . . . . . . . . . 48
Installing the mounting hardware . . . . . . . . . . . . . . . . . . . . . . . . . . . . . . . . . . . . . . . . . . . . . . . . . . . . 49
Unity Network ID connectivity device installation . . . . . . . . . . . . . . . . . . . . . . . . . . . . . . . . . . . . . . 49
Power and environmental requirements . . . . . . . . . . . . . . . . . . . . . . . . . . . . . . . . . . . . . . . . . . . . . . 49
Hardware installation
51
6.1
Installing a battery into the PDM module . . . . . . . . . . . . . . . . . . . . . . . . . . . . . . . . . . . . . . . . . . . . . . 51
6.1.1 Testing the battery charge . . . . . . . . . . . . . . . . . . . . . . . . . . . . . . . . . . . . . . . . . . . . . . . . . . . . . 51
6.1.2 Installing the battery into the PDM module . . . . . . . . . . . . . . . . . . . . . . . . . . . . . . . . . . . . . 52
6.2 Mounting the patient monitor . . . . . . . . . . . . . . . . . . . . . . . . . . . . . . . . . . . . . . . . . . . . . . . . . . . . . . . . 53
6.2.1 CPU Flush Mount . . . . . . . . . . . . . . . . . . . . . . . . . . . . . . . . . . . . . . . . . . . . . . . . . . . . . . . . . . . . . . 53
6.3 Connecting displays. . . . . . . . . . . . . . . . . . . . . . . . . . . . . . . . . . . . . . . . . . . . . . . . . . . . . . . . . . . . . . . . . . 54
6.3.1 Connecting local displays . . . . . . . . . . . . . . . . . . . . . . . . . . . . . . . . . . . . . . . . . . . . . . . . . . . . . . 54
6.3.2 Connecting remote displays . . . . . . . . . . . . . . . . . . . . . . . . . . . . . . . . . . . . . . . . . . . . . . . . . . . 55
6.3.3 Securing the USB cable connections of the displays. . . . . . . . . . . . . . . . . . . . . . . . . . . . . 57
6.4 Installing module frames and modules. . . . . . . . . . . . . . . . . . . . . . . . . . . . . . . . . . . . . . . . . . . . . . . . 57
6.4.1 Connecting a F5 or F7 Frame to a B850 patient monitor. . . . . . . . . . . . . . . . . . . . . . . . . 58
6.4.2 Installing a PSM module to a F5 Frame . . . . . . . . . . . . . . . . . . . . . . . . . . . . . . . . . . . . . . . . . 59
6.4.3 Installing a PSM module to a F7 Frame . . . . . . . . . . . . . . . . . . . . . . . . . . . . . . . . . . . . . . . . . 59
6.4.4 Installing another module to a F5 or F7 Frame . . . . . . . . . . . . . . . . . . . . . . . . . . . . . . . . . . 60
6.4.5 Connecting a PDM module to a F5 Frame . . . . . . . . . . . . . . . . . . . . . . . . . . . . . . . . . . . . . . 60
6.4.6 Connecting a PDM module to the patient monitor. . . . . . . . . . . . . . . . . . . . . . . . . . . . . . . 61
6.4.7 Connecting a Tram-Rac housing to the patient monitor . . . . . . . . . . . . . . . . . . . . . . . . . 61
6.4.8 Installing a module to the Tram-Rac housing . . . . . . . . . . . . . . . . . . . . . . . . . . . . . . . . . . . 62
6.5 Connecting to the mains power . . . . . . . . . . . . . . . . . . . . . . . . . . . . . . . . . . . . . . . . . . . . . . . . . . . . . . 63
6.6 Connecting to the MC Network or the S/5 Network . . . . . . . . . . . . . . . . . . . . . . . . . . . . . . . . . . . . 64
6.7 Connecting to the IX Network. . . . . . . . . . . . . . . . . . . . . . . . . . . . . . . . . . . . . . . . . . . . . . . . . . . . . . . . . 64
6.8 Connecting M-port devices . . . . . . . . . . . . . . . . . . . . . . . . . . . . . . . . . . . . . . . . . . . . . . . . . . . . . . . . . . . 65
6.9 Connecting USB devices. . . . . . . . . . . . . . . . . . . . . . . . . . . . . . . . . . . . . . . . . . . . . . . . . . . . . . . . . . . . . . 65
6.10 Connecting iCollect and other data acquisition systems . . . . . . . . . . . . . . . . . . . . . . . . . . . . . . . 65
6.11 Connecting a local printer to the IX connector . . . . . . . . . . . . . . . . . . . . . . . . . . . . . . . . . . . . . . . . . 66
7
Configuration
ii
2062973-001
67
Table of contents
7.1
7.2
7.3
7.4
7.5
7.6
7.7
7.8
7.9
7.10
7.11
7.12
7.13
7.14
7.15
7.16
7.17
7.18
7.19
8
Adjusting display. . . . . . . . . . . . . . . . . . . . . . . . . . . . . . . . . . . . . . . . . . . . . . . . . . . . . . . . . . . . . . . . . . . . . 67
7.1.1 Adjusting the display brightness . . . . . . . . . . . . . . . . . . . . . . . . . . . . . . . . . . . . . . . . . . . . . . . 67
7.1.2 Calibrating a touchscreen . . . . . . . . . . . . . . . . . . . . . . . . . . . . . . . . . . . . . . . . . . . . . . . . . . . . . 67
Configuring the network . . . . . . . . . . . . . . . . . . . . . . . . . . . . . . . . . . . . . . . . . . . . . . . . . . . . . . . . . . . . . 67
7.2.1 Configuring hostname. . . . . . . . . . . . . . . . . . . . . . . . . . . . . . . . . . . . . . . . . . . . . . . . . . . . . . . . . 67
7.2.2 Selecting and configuring CARESCAPE Network . . . . . . . . . . . . . . . . . . . . . . . . . . . . . . . . . 68
7.2.3 Selecting and configuring S/5 Network . . . . . . . . . . . . . . . . . . . . . . . . . . . . . . . . . . . . . . . . . 68
Setting time and date . . . . . . . . . . . . . . . . . . . . . . . . . . . . . . . . . . . . . . . . . . . . . . . . . . . . . . . . . . . . . . . . 69
Setting unit and bed name . . . . . . . . . . . . . . . . . . . . . . . . . . . . . . . . . . . . . . . . . . . . . . . . . . . . . . . . . . . 70
Configuring printers. . . . . . . . . . . . . . . . . . . . . . . . . . . . . . . . . . . . . . . . . . . . . . . . . . . . . . . . . . . . . . . . . . 70
7.5.1 Installing a printer . . . . . . . . . . . . . . . . . . . . . . . . . . . . . . . . . . . . . . . . . . . . . . . . . . . . . . . . . . . . . 70
7.5.2 Deleting a printer. . . . . . . . . . . . . . . . . . . . . . . . . . . . . . . . . . . . . . . . . . . . . . . . . . . . . . . . . . . . . . 71
7.5.3 Printing a test page . . . . . . . . . . . . . . . . . . . . . . . . . . . . . . . . . . . . . . . . . . . . . . . . . . . . . . . . . . . 71
Configuring Citrix . . . . . . . . . . . . . . . . . . . . . . . . . . . . . . . . . . . . . . . . . . . . . . . . . . . . . . . . . . . . . . . . . . . . 71
Configuring MUSE/12SL . . . . . . . . . . . . . . . . . . . . . . . . . . . . . . . . . . . . . . . . . . . . . . . . . . . . . . . . . . . . . . 72
Admit settings . . . . . . . . . . . . . . . . . . . . . . . . . . . . . . . . . . . . . . . . . . . . . . . . . . . . . . . . . . . . . . . . . . . . . . . 73
7.8.1 Patient ID prefix . . . . . . . . . . . . . . . . . . . . . . . . . . . . . . . . . . . . . . . . . . . . . . . . . . . . . . . . . . . . . . . 73
7.8.2 Barcode settings . . . . . . . . . . . . . . . . . . . . . . . . . . . . . . . . . . . . . . . . . . . . . . . . . . . . . . . . . . . . . . 73
7.8.3 Configuring Length Delimited Parser information . . . . . . . . . . . . . . . . . . . . . . . . . . . . . . . 74
7.8.4 Configure character delimited parser information . . . . . . . . . . . . . . . . . . . . . . . . . . . . . . 76
7.8.5 Barcode data specifications . . . . . . . . . . . . . . . . . . . . . . . . . . . . . . . . . . . . . . . . . . . . . . . . . . . 78
Setting power frequency . . . . . . . . . . . . . . . . . . . . . . . . . . . . . . . . . . . . . . . . . . . . . . . . . . . . . . . . . . . . . 80
Selecting language and locale . . . . . . . . . . . . . . . . . . . . . . . . . . . . . . . . . . . . . . . . . . . . . . . . . . . . . . . . 80
Selecting national requirements . . . . . . . . . . . . . . . . . . . . . . . . . . . . . . . . . . . . . . . . . . . . . . . . . . . . . . 80
Configuring modules. . . . . . . . . . . . . . . . . . . . . . . . . . . . . . . . . . . . . . . . . . . . . . . . . . . . . . . . . . . . . . . . . 80
7.12.1 Module asset settings . . . . . . . . . . . . . . . . . . . . . . . . . . . . . . . . . . . . . . . . . . . . . . . . . . . . . . . . . 81
Setting the host asset number . . . . . . . . . . . . . . . . . . . . . . . . . . . . . . . . . . . . . . . . . . . . . . . . . . . . . . . . 81
Changing passwords. . . . . . . . . . . . . . . . . . . . . . . . . . . . . . . . . . . . . . . . . . . . . . . . . . . . . . . . . . . . . . . . . 81
Restarting the patient monitor. . . . . . . . . . . . . . . . . . . . . . . . . . . . . . . . . . . . . . . . . . . . . . . . . . . . . . . . 82
Setting up the remote service . . . . . . . . . . . . . . . . . . . . . . . . . . . . . . . . . . . . . . . . . . . . . . . . . . . . . . . . 82
7.16.1 Configuring the remote service . . . . . . . . . . . . . . . . . . . . . . . . . . . . . . . . . . . . . . . . . . . . . . . . 82
7.16.2 Enabling remote service agent/ connection . . . . . . . . . . . . . . . . . . . . . . . . . . . . . . . . . . . . 83
7.16.3 Testing the connectivity . . . . . . . . . . . . . . . . . . . . . . . . . . . . . . . . . . . . . . . . . . . . . . . . . . . . . . . 84
Transferring settings from one patient monitor to other patient monitors. . . . . . . . . . . . . . . 84
7.17.1 Saving settings . . . . . . . . . . . . . . . . . . . . . . . . . . . . . . . . . . . . . . . . . . . . . . . . . . . . . . . . . . . . . . . . 84
7.17.2 Loading settings . . . . . . . . . . . . . . . . . . . . . . . . . . . . . . . . . . . . . . . . . . . . . . . . . . . . . . . . . . . . . . 85
7.17.3 Activating settings. . . . . . . . . . . . . . . . . . . . . . . . . . . . . . . . . . . . . . . . . . . . . . . . . . . . . . . . . . . . . 85
7.17.4 Canceling pending settings activation . . . . . . . . . . . . . . . . . . . . . . . . . . . . . . . . . . . . . . . . . . 87
License management . . . . . . . . . . . . . . . . . . . . . . . . . . . . . . . . . . . . . . . . . . . . . . . . . . . . . . . . . . . . . . . . 88
7.18.1 Enabling and activating host software package. . . . . . . . . . . . . . . . . . . . . . . . . . . . . . . . . 88
7.18.2 Enabling and activating host software feature licenses. . . . . . . . . . . . . . . . . . . . . . . . . . 88
7.18.3 Uploading license file. . . . . . . . . . . . . . . . . . . . . . . . . . . . . . . . . . . . . . . . . . . . . . . . . . . . . . . . . . 88
Software management. . . . . . . . . . . . . . . . . . . . . . . . . . . . . . . . . . . . . . . . . . . . . . . . . . . . . . . . . . . . . . . 89
7.19.1 Transferring software. . . . . . . . . . . . . . . . . . . . . . . . . . . . . . . . . . . . . . . . . . . . . . . . . . . . . . . . . . 89
7.19.2 Activating the installed software . . . . . . . . . . . . . . . . . . . . . . . . . . . . . . . . . . . . . . . . . . . . . . . 89
7.19.3 Canceling pending host software activation . . . . . . . . . . . . . . . . . . . . . . . . . . . . . . . . . . . . 94
7.19.4 Erasing an inactive software version. . . . . . . . . . . . . . . . . . . . . . . . . . . . . . . . . . . . . . . . . . . . 95
Installation checkout
97
iii
2062973-001
CARESCAPE Monitor B850
8.1
8.2
8.3
9
Visual inspection. . . . . . . . . . . . . . . . . . . . . . . . . . . . . . . . . . . . . . . . . . . . . . . . . . . . . . . . . . . . . . . . . . . . . 97
Electrical safety tests. . . . . . . . . . . . . . . . . . . . . . . . . . . . . . . . . . . . . . . . . . . . . . . . . . . . . . . . . . . . . . . . . 97
8.2.1 Test setup. . . . . . . . . . . . . . . . . . . . . . . . . . . . . . . . . . . . . . . . . . . . . . . . . . . . . . . . . . . . . . . . . . . . . 97
8.2.2 Power outlet . . . . . . . . . . . . . . . . . . . . . . . . . . . . . . . . . . . . . . . . . . . . . . . . . . . . . . . . . . . . . . . . . . 98
8.2.3 Power cord and plug . . . . . . . . . . . . . . . . . . . . . . . . . . . . . . . . . . . . . . . . . . . . . . . . . . . . . . . . . . 98
8.2.4 Ground (earth) integrity . . . . . . . . . . . . . . . . . . . . . . . . . . . . . . . . . . . . . . . . . . . . . . . . . . . . . . . . 98
8.2.5 Earth leakage current test . . . . . . . . . . . . . . . . . . . . . . . . . . . . . . . . . . . . . . . . . . . . . . . . . . . . 100
8.2.6 Enclosure leakage current (touch current) test . . . . . . . . . . . . . . . . . . . . . . . . . . . . . . . . . 101
8.2.7 Patient leakage current tests – overview . . . . . . . . . . . . . . . . . . . . . . . . . . . . . . . . . . . . . . 103
8.2.8 Patient (source) leakage current tests . . . . . . . . . . . . . . . . . . . . . . . . . . . . . . . . . . . . . . . . . 104
8.2.9 Patient (sink) leakage current tests . . . . . . . . . . . . . . . . . . . . . . . . . . . . . . . . . . . . . . . . . . . . 105
8.2.10 Test completion . . . . . . . . . . . . . . . . . . . . . . . . . . . . . . . . . . . . . . . . . . . . . . . . . . . . . . . . . . . . . . 107
Functional check. . . . . . . . . . . . . . . . . . . . . . . . . . . . . . . . . . . . . . . . . . . . . . . . . . . . . . . . . . . . . . . . . . . . 107
8.3.1 Start-up. . . . . . . . . . . . . . . . . . . . . . . . . . . . . . . . . . . . . . . . . . . . . . . . . . . . . . . . . . . . . . . . . . . . . . 107
8.3.2 Display . . . . . . . . . . . . . . . . . . . . . . . . . . . . . . . . . . . . . . . . . . . . . . . . . . . . . . . . . . . . . . . . . . . . . . 107
8.3.3 Device Information . . . . . . . . . . . . . . . . . . . . . . . . . . . . . . . . . . . . . . . . . . . . . . . . . . . . . . . . . . . 107
8.3.4 Configuration Information . . . . . . . . . . . . . . . . . . . . . . . . . . . . . . . . . . . . . . . . . . . . . . . . . . . . 108
8.3.5 Keypad and remote . . . . . . . . . . . . . . . . . . . . . . . . . . . . . . . . . . . . . . . . . . . . . . . . . . . . . . . . . . 108
8.3.6 Mouse . . . . . . . . . . . . . . . . . . . . . . . . . . . . . . . . . . . . . . . . . . . . . . . . . . . . . . . . . . . . . . . . . . . . . . . 108
8.3.7 Alphanumeric keyboard . . . . . . . . . . . . . . . . . . . . . . . . . . . . . . . . . . . . . . . . . . . . . . . . . . . . . . 108
8.3.8 Barcode reader . . . . . . . . . . . . . . . . . . . . . . . . . . . . . . . . . . . . . . . . . . . . . . . . . . . . . . . . . . . . . . 109
8.3.9 MC Network and S/5 Network. . . . . . . . . . . . . . . . . . . . . . . . . . . . . . . . . . . . . . . . . . . . . . . . . 109
8.3.10 IX printers. . . . . . . . . . . . . . . . . . . . . . . . . . . . . . . . . . . . . . . . . . . . . . . . . . . . . . . . . . . . . . . . . . . . 110
8.3.11 iPanel connection . . . . . . . . . . . . . . . . . . . . . . . . . . . . . . . . . . . . . . . . . . . . . . . . . . . . . . . . . . . . 110
8.3.12 Insite with EXC . . . . . . . . . . . . . . . . . . . . . . . . . . . . . . . . . . . . . . . . . . . . . . . . . . . . . . . . . . . . . . . 110
8.3.13 Test completion . . . . . . . . . . . . . . . . . . . . . . . . . . . . . . . . . . . . . . . . . . . . . . . . . . . . . . . . . . . . . . 110
Theory of operation
9.1
9.2
111
System block diagram . . . . . . . . . . . . . . . . . . . . . . . . . . . . . . . . . . . . . . . . . . . . . . . . . . . . . . . . . . . . . . 111
Main components. . . . . . . . . . . . . . . . . . . . . . . . . . . . . . . . . . . . . . . . . . . . . . . . . . . . . . . . . . . . . . . . . . . 112
9.2.1 Power supply. . . . . . . . . . . . . . . . . . . . . . . . . . . . . . . . . . . . . . . . . . . . . . . . . . . . . . . . . . . . . . . . . 112
9.2.2 CPU processor board . . . . . . . . . . . . . . . . . . . . . . . . . . . . . . . . . . . . . . . . . . . . . . . . . . . . . . . . . 113
9.2.3 Speaker Assembly . . . . . . . . . . . . . . . . . . . . . . . . . . . . . . . . . . . . . . . . . . . . . . . . . . . . . . . . . . . . 113
9.2.4 Bottom Chassis, Top and Back Cover . . . . . . . . . . . . . . . . . . . . . . . . . . . . . . . . . . . . . . . . . . 114
9.2.5 User interface . . . . . . . . . . . . . . . . . . . . . . . . . . . . . . . . . . . . . . . . . . . . . . . . . . . . . . . . . . . . . . . . 114
9.2.6 External interfaces . . . . . . . . . . . . . . . . . . . . . . . . . . . . . . . . . . . . . . . . . . . . . . . . . . . . . . . . . . . 114
10 Maintenance and checkout
117
10.1 Visual inspection. . . . . . . . . . . . . . . . . . . . . . . . . . . . . . . . . . . . . . . . . . . . . . . . . . . . . . . . . . . . . . . . . . . . 118
10.2 Electrical safety checks . . . . . . . . . . . . . . . . . . . . . . . . . . . . . . . . . . . . . . . . . . . . . . . . . . . . . . . . . . . . . 118
10.3 Functional check. . . . . . . . . . . . . . . . . . . . . . . . . . . . . . . . . . . . . . . . . . . . . . . . . . . . . . . . . . . . . . . . . . . . 118
10.3.1 Start-up. . . . . . . . . . . . . . . . . . . . . . . . . . . . . . . . . . . . . . . . . . . . . . . . . . . . . . . . . . . . . . . . . . . . . . 118
10.3.2 Display . . . . . . . . . . . . . . . . . . . . . . . . . . . . . . . . . . . . . . . . . . . . . . . . . . . . . . . . . . . . . . . . . . . . . . 118
10.3.3 PSM / PDM identification. . . . . . . . . . . . . . . . . . . . . . . . . . . . . . . . . . . . . . . . . . . . . . . . . . . . . . 118
10.3.4 E-module identification . . . . . . . . . . . . . . . . . . . . . . . . . . . . . . . . . . . . . . . . . . . . . . . . . . . . . . . 118
10.3.5 Keypad and remote . . . . . . . . . . . . . . . . . . . . . . . . . . . . . . . . . . . . . . . . . . . . . . . . . . . . . . . . . . 119
10.3.6 Mouse . . . . . . . . . . . . . . . . . . . . . . . . . . . . . . . . . . . . . . . . . . . . . . . . . . . . . . . . . . . . . . . . . . . . . . . 119
10.3.7 Alphanumeric keyboard . . . . . . . . . . . . . . . . . . . . . . . . . . . . . . . . . . . . . . . . . . . . . . . . . . . . . . 119
10.3.8 Barcode reader . . . . . . . . . . . . . . . . . . . . . . . . . . . . . . . . . . . . . . . . . . . . . . . . . . . . . . . . . . . . . . 119
iv
2062973-001
Table of contents
10.3.9 MC Network and S/5 Network. . . . . . . . . . . . . . . . . . . . . . . . . . . . . . . . . . . . . . . . . . . . . . . . . 119
10.3.10 IX printers. . . . . . . . . . . . . . . . . . . . . . . . . . . . . . . . . . . . . . . . . . . . . . . . . . . . . . . . . . . . . . . . . . . 119
10.3.11 Insite with Exc. . . . . . . . . . . . . . . . . . . . . . . . . . . . . . . . . . . . . . . . . . . . . . . . . . . . . . . . . . . . . . . 119
10.3.12 Recorder . . . . . . . . . . . . . . . . . . . . . . . . . . . . . . . . . . . . . . . . . . . . . . . . . . . . . . . . . . . . . . . . . . . . 119
10.3.13 Test completion . . . . . . . . . . . . . . . . . . . . . . . . . . . . . . . . . . . . . . . . . . . . . . . . . . . . . . . . . . . . . 120
11 Troubleshooting
121
11.1 Visual inspection. . . . . . . . . . . . . . . . . . . . . . . . . . . . . . . . . . . . . . . . . . . . . . . . . . . . . . . . . . . . . . . . . . . . 121
11.2 Webmin - Information tab . . . . . . . . . . . . . . . . . . . . . . . . . . . . . . . . . . . . . . . . . . . . . . . . . . . . . . . . . . . 121
11.2.1 Configuration information . . . . . . . . . . . . . . . . . . . . . . . . . . . . . . . . . . . . . . . . . . . . . . . . . . . . 122
11.2.2 Device information . . . . . . . . . . . . . . . . . . . . . . . . . . . . . . . . . . . . . . . . . . . . . . . . . . . . . . . . . . . 123
11.3 Webmin - Diagnostics tab . . . . . . . . . . . . . . . . . . . . . . . . . . . . . . . . . . . . . . . . . . . . . . . . . . . . . . . . . . . 125
11.3.1 Hardware statistics. . . . . . . . . . . . . . . . . . . . . . . . . . . . . . . . . . . . . . . . . . . . . . . . . . . . . . . . . . . 125
11.3.2 Ping a TCP/IP network device . . . . . . . . . . . . . . . . . . . . . . . . . . . . . . . . . . . . . . . . . . . . . . . . . 126
11.3.3 Log files . . . . . . . . . . . . . . . . . . . . . . . . . . . . . . . . . . . . . . . . . . . . . . . . . . . . . . . . . . . . . . . . . . . . . 126
11.4 Error messages and codes . . . . . . . . . . . . . . . . . . . . . . . . . . . . . . . . . . . . . . . . . . . . . . . . . . . . . . . . . . 129
11.5 Problems and solutions . . . . . . . . . . . . . . . . . . . . . . . . . . . . . . . . . . . . . . . . . . . . . . . . . . . . . . . . . . . . . 132
11.5.1 Start-up failures . . . . . . . . . . . . . . . . . . . . . . . . . . . . . . . . . . . . . . . . . . . . . . . . . . . . . . . . . . . . . 132
11.5.2 User interface issues . . . . . . . . . . . . . . . . . . . . . . . . . . . . . . . . . . . . . . . . . . . . . . . . . . . . . . . . . 133
11.5.3 Incorrect system time . . . . . . . . . . . . . . . . . . . . . . . . . . . . . . . . . . . . . . . . . . . . . . . . . . . . . . . . 135
11.5.4 License issues. . . . . . . . . . . . . . . . . . . . . . . . . . . . . . . . . . . . . . . . . . . . . . . . . . . . . . . . . . . . . . . . 136
11.5.5 Acquisition module problems . . . . . . . . . . . . . . . . . . . . . . . . . . . . . . . . . . . . . . . . . . . . . . . . . 137
11.5.6 CARESCAPE Network communication issues . . . . . . . . . . . . . . . . . . . . . . . . . . . . . . . . . . . 138
11.5.7 S/5 Network communication issues . . . . . . . . . . . . . . . . . . . . . . . . . . . . . . . . . . . . . . . . . . . 141
12 Disassembly and reassembly
143
12.1 Disassembly guidelines . . . . . . . . . . . . . . . . . . . . . . . . . . . . . . . . . . . . . . . . . . . . . . . . . . . . . . . . . . . . . 143
12.1.1 ESD precautions. . . . . . . . . . . . . . . . . . . . . . . . . . . . . . . . . . . . . . . . . . . . . . . . . . . . . . . . . . . . . . 143
12.1.2 Reassembly precautions. . . . . . . . . . . . . . . . . . . . . . . . . . . . . . . . . . . . . . . . . . . . . . . . . . . . . . 143
12.1.3 Required tools. . . . . . . . . . . . . . . . . . . . . . . . . . . . . . . . . . . . . . . . . . . . . . . . . . . . . . . . . . . . . . . . 144
12.1.4 Before disassembly. . . . . . . . . . . . . . . . . . . . . . . . . . . . . . . . . . . . . . . . . . . . . . . . . . . . . . . . . . . 144
12.2 Unit disassembly. . . . . . . . . . . . . . . . . . . . . . . . . . . . . . . . . . . . . . . . . . . . . . . . . . . . . . . . . . . . . . . . . . . . 145
12.2.1 Opening the unit . . . . . . . . . . . . . . . . . . . . . . . . . . . . . . . . . . . . . . . . . . . . . . . . . . . . . . . . . . . . . 145
12.2.2 Replacing the processor board. . . . . . . . . . . . . . . . . . . . . . . . . . . . . . . . . . . . . . . . . . . . . . . . 146
12.2.3 Replacing the power supply. . . . . . . . . . . . . . . . . . . . . . . . . . . . . . . . . . . . . . . . . . . . . . . . . . . 147
12.2.4 Replacing the speaker . . . . . . . . . . . . . . . . . . . . . . . . . . . . . . . . . . . . . . . . . . . . . . . . . . . . . . . . 148
12.2.5 Replacing the CPU timekeeper battery . . . . . . . . . . . . . . . . . . . . . . . . . . . . . . . . . . . . . . . . 149
12.2.6 Replacing the labels . . . . . . . . . . . . . . . . . . . . . . . . . . . . . . . . . . . . . . . . . . . . . . . . . . . . . . . . . . 149
12.2.7 Replacing or installing the third video card . . . . . . . . . . . . . . . . . . . . . . . . . . . . . . . . . . . . 150
12.2.8 Replacing the front bezel . . . . . . . . . . . . . . . . . . . . . . . . . . . . . . . . . . . . . . . . . . . . . . . . . . . . . 150
13 Service parts
153
13.1 Ordering parts . . . . . . . . . . . . . . . . . . . . . . . . . . . . . . . . . . . . . . . . . . . . . . . . . . . . . . . . . . . . . . . . . . . . . . 153
13.2 List of FRUs . . . . . . . . . . . . . . . . . . . . . . . . . . . . . . . . . . . . . . . . . . . . . . . . . . . . . . . . . . . . . . . . . . . . . . . . . 153
13.3 Exploded view . . . . . . . . . . . . . . . . . . . . . . . . . . . . . . . . . . . . . . . . . . . . . . . . . . . . . . . . . . . . . . . . . . . . . . 154
Appendix A:
Installation check form
A-1
Appendix B:
Maintenance check form
B-1
v
2062973-001
CARESCAPE Monitor B850
Appendix C:
C.1
C.2
vi
2062973-001
Display
C-1
Disassembly and reassembly procedures . . . . . . . . . . . . . . . . . . . . . . . . . . . . . . . . . . . . . . . . . . . . . . 1
Service parts . . . . . . . . . . . . . . . . . . . . . . . . . . . . . . . . . . . . . . . . . . . . . . . . . . . . . . . . . . . . . . . . . . . . . . . . 10
About this manual
1
About this manual
1.1 Intended use of the manual
This manual contains instructions necessary to install, maintain and service the device to the
assembly level. Use it as a guide for installation, maintenance and repairs considered field
repairable.
Chapters 1 to 7 provide an overview of the CARESCAPE Monitor B850 patient monitoring
system and contains information needed for system installation.
Chapters 8 to 13 provide information for the planned and corrective maintenance of the
CARESCAPE Monitor B850 main unit.
Where necessary the manual identifies additional sources of relevant information and
technical assistance.
See the Module Frames and Modules Technical Manual for the planned and corrective
maintenance information about the parameter modules.
See the supplemental information manual for the technical specifications, default settings and
compatibility information, including electromagnetic compatibility.
See the user’s manual for the instructions necessary to operate the device safely in
accordance with its function and intended use.
1.2 Intended audience of the manual
This manual is intended for service representatives and technical personnel who install,
maintain, troubleshoot, or repair this device.
1.3 Conventions used in this manual
Within this manual, special styles and formats are used to distinguish between terms viewed
on screen, a button you must press, or a list of menu commands you must select:
•
For technical documentation purposes, the abbreviation GE is used for the legal entity
names, GE Medical Systems Information Technologies Inc. and GE Healthcare Finland Oy.
•
Names of hardware keys on the equipment, keypad, remote control, and modules are
written in bold typeface: Start Cancel.
•
Menu items are written in bold italic typeface: Monitor Setup.
•
Emphasized text is in italic typeface.
•
Menu options or control settings selected consecutively are separated by the > symbol:
Procedures > Cardiac Output.
•
The word “select” means choosing and confirming.
•
Messages (alarm messages, informative messages) displayed on the screen are written in
bold italic typeface: Learning.
•
Note statements provide application tips or other useful information.
1.3.1 Product naming conventions
In this manual, the CARESCAPE Monitor B850 is referred to as the patient monitor.
The following naming conventions are used to refer to different modules and module
categories:
1
2062973-001
CARESCAPE Monitor B850
PDM: Patient Data Module
PSM: Patient Side Module: E-PSM, E-PSMP, E-PSMW and E-PSMPW.
E-modules: all modules with prefix E-.
Hemodynamic E-modules: E-PRESTN, E-PRETN and E-RESTN.
Cardiac output and SvO2 E-modules: E-COP and E-COPSv.
Pressure and Temperature E-modules: E-P, E-PP and E-PT.
Continuous Cardiac Output Module: E-PiCCO
CARESCAPE respiratory modules: E-sCO, E-sCOV, E-sCAiO and E-sCAiOV.
Compact airway modules: E-CO, E-COV, E-COVX, E-CAiO, E-CAiOV and E-CAiOVX.
Single-width airway module: E-miniC
Specialty E-modules: E-NMT, E-EEG, E-BIS and E-ENTROPY
SpO2 E-modules: E-NSATX, E-MASIMO
TRAM: TRAM modules 451, 451M, 451N, 451N5, 851, 851M, 851N, 851N5
Tram-Rac: Single-parameter Tram-Rac modules measuring BP, SpO2, SpO2 Masimo.
Capnostat CO2 Dual CO2 .
The CARESCAPE Network MC is referred as MC network and the CARESCAPE Network IX as
IX network.
Menu naming varies within software packages:
Admit/ Discharge is also used in this manual for Start/End case menu (in OR and PACU
software).
1.4 Illustrations and names
This manual uses illustrations as examples only. Illustrations in this manual may not
necessarily reflect all system settings, features, configurations, or displayed data.
Names of persons, institutions, and places and related information are fictitious; any similarity
to actual persons, entities, or places is purely coincidental.
1.5 Ordering manuals
A paper copy of this manual will be provided upon request. Contact your local GE
representative and request the part number on the first page of the manual.
1.6 Related documents
2
2062973-001
the patient monitor’s user’s manual
the patient monitor’s supplemental information manual
Module Frames and Modules Technical Manual
CARESCAPE Modular Monitors Software Installation Instructions
CARESCAPE Network Configuration Guide
CARESCAPE Modular Monitors Mounting Solutions
TRAM and Tram-Rac Modules Supplemental Information manual
Unity Network Interface Device (ID) Operator's Manual
iCentral and iCentral Client Technical Reference Manual
About this manual
S/5 Network Installation Guide
iCollect user’s manual
User documentation for displays
NOTE: The referred documents above are subject to change without notice. Please contact
your local sales or service representative for possible updates.
1.7 Trademarks
Listed below are GE Medical Systems Information Technologies, Inc. and GE Healthcare Finland
Oy trademarks. All other product and company names contained herein are the property of
their respective owners.
GE, GE Monogram, and CARESCAPE are trademarks of General Electric Company.
iPanel is a trademark of General Electric Company or one of its subsidiaries.
MUSE, TRAM, Tram-Rac, Trim Knob, and UNITY NETWORK are trademarks of GE Medical
Systems, Information Technologies, Inc.
D-lite and Entropy are trademarks of GE Healthcare Finland Oy.
1.7.1 Third party trademarks
NELLCOR is a trademark of Covidien AG.
Covidien is a trademark of Covidien AG.
Masimo SET is a trademark of Masimo Corporation.
PiCCO is a trademark of Pulsion Medical Systems.
1.8 Responsibility of the manufacturer
GE is responsible for the effects on safety, reliability, and performance of the equipment only if:
•
Assembly operations, extensions, readjustments, modifications, servicing, or repairs are
carried out by authorized service personnel.
•
The electrical installation of the relevant room complies with the requirements of the
appropriate regulations.
•
The equipment is used in accordance with the instructions for use.
•
The equipment is installed, maintained and serviced in accordance with the instructions
provided in the related technical manuals.
1.9 Product availability
Some of the products mentioned in this manual may not be available in all countries. Please
consult your local representative for the availability.
3
2062973-001
CARESCAPE Monitor B850
For your notes:
4
2062973-001
Safety information
2
Safety information
2.1 General safety statements
See the user’s manual for a list of general safety statements.
This device is intended for use under the direct supervision of a licensed health care
practitioner.
Contact GE for information before connecting any devices to the equipment that are not
recommended in this manual.
Parts and accessories used must meet the requirements of the applicable IEC 60601 series
safety standards, and/or the system configuration must meet the requirements of the IEC
60601-1-1 medical electrical systems standard. Refer to the the patient monitor’s
supplemental information manual for compatible parts and accessories.
Periodically, and whenever the integrity of the product is in doubt, test all functions.
The use of accessory equipment not complying with the equivalent safety requirements of this
equipment may lead to a reduced level of safety of the resulting system. Consideration relating
to the choice shall include:
•
use of the accessory in the patient vicinity; and
•
evidence that the safety certification of the accessory has been performed in accordance
to the appropriate IEC 60601-1 and/or IEC 60601-1-1 harmonized national standard.
2.2 Safety message signal words
Safety message signal words designate the severity of a potential hazard.
Danger
Indicates a hazardous situation that, if not avoided, will result in death
or serious injury.
Warning
Indicates a hazardous situation that, if not avoided, could result in
death or serious injury.
Caution
Indicates a hazardous situation that, if not avoided, could result in
minor or moderate injury.
Notice
Indicates a hazardous situation not related to personal injury that, if
not avoided, could result in property damage.
5
2062973-001
CARESCAPE Monitor B850
2.3 Safety symbols
NOTE: The following safety-related symbols appear on one or more of the devices.
General warning.
This symbol is identified by a yellow background, black triangular band, and
a black symbol.
General caution sign. IEC 60601-1, 2005 edition
This symbol is identified by a white background, black triangular band, and
a black symbol.
ATTENTION: Consult accompanying documents. IEC 60601-1, 1988 edition.
This symbol is identified by a white background, black triangular band, and
a black exclamation mark.
Follow instructions for use.
This symbol is identified by a blue background and a white symbol.
Consult operating instructions. / Operating instructions.
DANGER - Shock hazard. Dangerous voltage. To reduce the risk of electric
shock, do not remove cover. Refer servicing to qualified service personnel.
This symbol is identified by a yellow background, black triangular band, and
a black symbol.
Electrostatic sensitive device. Connections should not be made to this
device unless ESD precautionary procedures are followed.
Non-ionizing electromagnetic radiation. Interference may occur in the
vicinity of this device.
Type BF (IEC 60601-1) protection against electric shock. Isolated (floating)
applied part suitable for intentional external and internal application to the
patient, excluding direct cardiac application.
Type BF (IEC 60601-1) defibrillator-proof protection against electric shock.
Isolated (floating) applied part suitable for intentional external and internal
application to the patient excluding direct cardiac application.
6
2062973-001
Safety information
Type CF (IEC 60601-1) protection against electric shock. Isolated (floating)
applied part suitable for intentional external and internal application to the
patient, including direct cardiac application.
Type CF (IEC 60601-1) defibrillator-proof protection against electric shock.
Isolated (floating) applied part suitable for intentional external and internal
application to the patient including direct cardiac application.
Safety ground. Remove power cord from the mains source by grasping the
plug. Do not pull on the cable.
7
2062973-001
CARESCAPE Monitor B850
For your notes:
8
2062973-001
System overview
3
System overview
3.1 System introduction
The CARESCAPE Monitor B850 is a modular monitoring solution for multiple care areas within a
professional healthcare facility. The patient monitor offers various hardware configurations,
software options and parameter module support to expand from basic hemodynamic
operations to demanding operating room applications.
The patient monitor is backwards compatible and upgradeable for the future.
3.2 System components
The patient monitoring system is typically composed of these main parts:
•
CPU unit
•
Software
•
Display
•
Input devices
•
Module Frames for E-series modules or Tram-Rac housing for TRAM and Tram-Rac
modules
•
Acquisition modules: Patient Data Module (PDM), Patient Side Module (PSM), E-PRESTN and
other E-modules, TRAM or Tram-Rac modules
•
Network
•
Printers and writers
•
Accessories and supplies (for example, ECG leadwires/cable sets, mounts)
The CARESCAPE Monitor B850 monitoring system components are introduced below.
3.2.1 CPU unit
The primary function of the patient monitor is to render a clinically meaningful display of
acquired patient data and allow the caregiver control (alarms, configuration, etc.) of the system
through the user interface. The CPU unit is the central processing unit for the patient
monitoring system and provides a link between parameter acquisition and input/output
devices. It also facilitates network communication and interface to several ancillary devices (for
example, printers, displays). The patient monitor works with multi parameter acquisition
devices.
9
2062973-001
CARESCAPE Monitor B850
In addition to the primary function to display patient data, the patient monitor software has a
service interface for performing device level service tasks such as configuration, maintenance
and troubleshooting. Refer to the the patient monitor’s supplemental information manual for
care area specific software and features.
3.2.2 Software
The patient monitor is highly configurable and provides many monitoring possibilities with a
flexible software licensing model.
The monitor supports care area specific software packages for OR, PACU, ICU, ED and NICU.
Each dedicated software package provides a comprehensive feature set for the different
monitoring needs and can be further extended with the optional feature licenses.
Software license model supports trial licensing and easy field upgrades with license key
activation.
10
2062973-001
System overview
3.2.3 Input devices
You can connect several USB input devices to the patient monitor, including alphanumeric
keyboard, mouse, remote control and barcode reader.
Refer to the patient monitor’s supplemental information manual for a list of compatible USB
input devices.
Keyboard
A washable, antibacterial keyboard is specified for
use with the monitor. It may be connected to the
monitor or display via one of the USB connectors.
The keyboard allows you to enter data without
using the touchscreen display.
Mouse
A standard mouse may be connected to the
monitor or display via one of the USB connectors.
The mouse allows you to select any on-screen
items without a Trim Knob control or a touchscreen
display.
Remote control
The remote control provides all patient monitor
controls on a portable component with a Trim Knob
control. The remote control is connected to the
patient monitor via one of the USB connectors.
Barcode reader
The barcode reader can be used to scan a
Technician ID and Patient Information from
barcodes when admitting patients.
11
2062973-001
CARESCAPE Monitor B850
3.2.4 Module frames and Tram-Rac housing
F5 and F7 E- module Frames provide an interface between the patient monitor and E-Modules.
The F5 Frame has five module slots that support all E-module acquisition modules. It supports
both PDM and PSM with a slide mount.
The F7 Frame has seven module slots, but it does not have a slide mount for the PDM or PSM.
The PSM module may be interfaced to the F5 or F7 Frame with a cable when the Module Bus
Adapter for PSM is used.
The Tram-Rac housing provides an interface between the patient monitor and a TRAM module
or a single parameter Tram-Rac module.
12
2062973-001
System overview
3.2.5 Acquisition modules
The patient monitor supports the following multiparameter hemodynamic modules: Patient
Data Module (PDM), Patient Side Module (PSM), E-PRESTN and TRAM modules.
PSM
PDM
E-PRESTN
TRAM
module
You can use different types of acquisition modules with the monitor. They provide connection
to the patient, process patient data signals, and send patient data signals to the monitor.
Refer to the patient monitor’s supplemental information manual for a list of compatible
acquisition devices and to the patient monitor’s user’s manual for a list of parameters each
module measures.
3.2.6 CARESCAPE Network MC or S/5 Network
The patient monitor is compatible both with the CARESCAPE Network MC and the S/5 Network
infrastructures.
13
2062973-001
CARESCAPE Monitor B850
Refer to the patient monitor’s supplemental information manual for a list of compatible
CARESCAPE and S/5 Network devices.
The MC Network establishes communication and allows patient data to be sent to an optional
CIC Pro Clinical Information Center (central station).
The S/5 Network establishes communication and allows patient data to be sent to an iCentral
(central station).
3.2.7 CARESCAPE Network IX
The patient monitor may be connected to the CARESCAPE Network IX.
The IX Network provides you access for example to the MUSE server for MUSE/12SL reports, to
Citrix server for iPanel connections and to the IX printers. It also enables centralized Webmin
access for service personnel from within the hospital and the InSite with ExC remote service
connectivity to GE’s support center.
Refer to the CARESCAPE Network Configuration Guide for details on configuring the
CARESCAPE Network.
The iPanel application, viewable from one of the monitor’s display screens, gives access to
desktops created by the hospital IT. These desktops provide patient information from other
systems that may be installed at the hospital [e.g., Centricity Clinical Information View
(Centricity CIV), MUSE Web, and Picture Archiving Communications System (PACS)]. Desktops
14
2062973-001
System overview
can be created with customer defined resolutions using the hospital-wide login and
identification process. The iPanel application is used through a Citrix thin client on the monitor
so no additional equipment is required at the bedside.
3.2.8 Unity Network ID connectivity device
The Unity Network ID connectivity device acquires digital data from up to eight peripheral
bedside devices (not necessarily manufactured by GE), processes this data and transmits the
formatted data to the patient monitor.
The supported interfaces include anesthesia machines, ventilators, gas analyzers, continuous
cardiac output devices, pulse oximeters, transcutaneous monitors and point-of-care blood gas
monitors.
Refer to the Unity Network Interface Device (ID) Operator's Manual and the patient monitor’s
supplemental information manual for a list of compatible peripheral devices and to the patient
monitor’s user’s manual for the peripheral device parameter data displayed on the patient
monitor.
3.2.9 Displays
The patient monitor supports up to three independently configurable displays.
The display is a 19” touchscreen LCD with an abbreviated keypad and a Trim Knob control. The
display provides both visual and audible alarms and connectivity to the USB input devices.
15
2062973-001
CARESCAPE Monitor B850
Refer to the patient monitor’s supplemental information manual for a list of compatible
displays.
3.2.10 Printers and recorders
The patient monitor can print to a recorder and to a laser printer.
Refer to the patient monitor’s supplemental information manual for a list of compatible
recorders and laser printers.
Laser printers
A laser printer can print for example waveforms, graphic and numeric trends, snapshots,
events history, parameter specific printouts, stored laboratory data and calculation results and
care reports. Refer to the patient monitor’s user’s manual for more information about printing.
The patient monitor supports printing:
•
to a laser printer that is connected to the patient monitor via the IX Network or directly to
the IX connector in the patient monitor.
•
to a laser printer that is connected to a CIC Pro Clinical Information Center on the MC
Network.
•
to a laser printer that is connected to an iCentral on the S/5 Network.
Recorders
A recorder may print text, waveforms and numeric trends.
The patient monitor supports printing:
•
16
2062973-001
to a PRN 50M recorder connected to another patient monitor, or to a CIC Pro Clinical
Information Center, on the MC Network.
System overview
3.2.11 Service Interface
Webmin is a browser-based interface that provides service and diagnostic functions for the
patient monitor. Using a web browser, the user can connect to Webmin to configure, diagnose
and retrieve system information. The user can access Webmin either locally on the patient
monitor or remotely over the IX Network.
Local access to Webmin
The user can access Webmin locally using the integrated browser on the patient monitor.
The other way to access Webmin locally is from a configured service PC that is connected to
the patient monitor with an Ethernet crossover cable.
Remote access to Webmin
The user also can access Webmin remotely using a configured service PC over the IX Network.
InSite with ExC
InSite with ExC provides a set of software applications to manage, diagnose and track systems
at customer sites by using the Internet for secure communications between the customers’
and GE’s firewalls. InSite with ExC consists of Enterprise Server, which resides at GE’s support
center, and Remote Service Agent that resides on a system at the customer site (or on a PC
controlling the system(s) at the customer site).
17
2062973-001
CARESCAPE Monitor B850
3.3 Controls and connectors
3.3.1 Front view
Display
6
7
8
Alarm light
18
2062973-001
(1)
Alarm light
(2)
Power on/standby button
(3)
Power indicators
(4)
Integrated keypad
(5)
Trim Knob control
(6)
Ambient light detector lens
(7)
Audio alarm paused/off area (blue)
(8)
Alarm light area (blue, yellow, or red)
System overview
CPU unit
(1)
Power indicator: Illuminates green when the power is turned on.
(2)
Four M-ports: for connecting the remote control, PRN 50-M recorder, remote alarm box
(remote nurse call), or a Unity Network Interface Device (ID) to the monitor.
3.3.2 Rear views
Display
1.
Power on/off switch
2.
Receptacle for power cord
3.
DVI-I connector
4.
Type A USB port
5.
Type B USB port
19
2062973-001
CARESCAPE Monitor B850
CPU unit
1.
Power on/off switch
2.
Power inlet connector
3.
Equipotential connector
4.
Four USB ports for connecting the touchscreen display, remote control, keyboard, mouse,
and barcode reader
5.
Two Ethernet network connectors for connecting the MC and IX networks. The MC
Network establishes communication and allows patient data to be sent to an optional CIC
Pro Clinical Information Center or CARESCAPE Central Station. The IX Network provides
access for example to the MUSE server, Citrix server, and IX printers.
6.
Two ePort/Tramnet connectors for connecting the PDM, E-module Frame, and Tram-Rac
housing
7.
Two serial RS232 connectors
8.
DVI-D 2 connector for one digital display
9.
Optional 3rd video display connector, DVI-I 3 supports a digital display and a cloned
analog display (iPanel application only).
10.
DVI-I 1 connector for a digital display and a cloned analog display.
3.4 Service information
3.4.1 Service requirements
Follow the service requirements listed below.
CAUTION
20
2062973-001
•
Refer equipment servicing to GE authorized service personnel only.
•
Any unauthorized attempt to repair equipment under warranty voids that warranty.
•
It is the user's responsibility to report the need for service to GE or to one of their
authorized agents.
•
Failure on the part of the responsible individual, hospital, or institution using this
equipment to implement a satisfactory maintenance schedule may cause undue
equipment failure and possible health hazards.
•
Regular maintenance, irrespective of usage, is essential to ensure that the equipment will
always be functional when required.
DISPOSAL - At the end of its service life, the product described in this manual,
as well as its accessories, must be disposed of in compliance with the
System overview
guidelines regulating the disposal of each product. If you have any questions
concerning disposal of a product, please contact GE or its representatives.
3.4.2 Equipment identification
Every GE device has a unique serial number for identification. The serial number is written in a
device label. The product code for CARESCAPE Monitor B850 is SKA.
### ## ## #### # #
A
B
C
D
E
F
Description
A
product code
B
year manufactured
C
fiscal week manufactured
D
production sequence number
E
manufacturing site
F
miscellaneous characteristic
The device plate is located on the outside of the patient monitor.
3.5 Product security
The patient monitoring software incorporates an assortment of security features designed to
allow a flexible approach to safe and secure implementation, focusing on the principles of
confidentiality, integrity, and availability. These features assist you in using the system in a
manner that protects patient privacy and security in your setting, and also addresses
expectations for the environment where the system will be used.
21
2062973-001
CARESCAPE Monitor B850
3.5.1 Security features
Access control
Access control is the overall mechanism used to determine and enforce the following:
•
Who has access
•
How individuals gain access
•
When access is permitted
•
What information may be accessed
Other than clinical and Webmin applications, access to other subsystems (for example BIOS) is
restricted. The clinical and Webmin application interfaces have a role-based access control (for
example, biomed and clinical). A user may log into these interfaces (for example, Webmin) to
perform operations that are limited to the generic user. See the user and technical manuals for
detailed information on available features.
Authentication
Authentication is the process of proving individual identity, and is a key element in an access
control system. In the clinical and Webmin applications, there are certain features that require
user authentication. To access these features, the user must log into the clinical and Webmin
applications with a valid username and password.
Authorization
Authorization is the process of granting and revoking access to information, and is another key
element in an access control system. Although primarily an administrative process that is
driven by an organization’s policies and procedures, the patient monitor contains features that
will help implement and enforce an organization’s method.
Both clinical and Webmin applications have an authorization mechanism to provide
information to the user.
Audit
The ability to record and examine system activity is crucial to a successful information security
program, as well as a regulatory requirement in most environments. The patient monitor stores
system and Webmin access logs.
Malicious software protection
Vigilant defense on many levels is required to keep systems free from compromise by
malicious software. Effective protection requires cooperation and partnership between GE and
our customers.
Based on the Linux Operating System, the patient monitor has a built-in firewall to allow
external communication to occur on a limited number of ports on the IX Network.
The following product features contribute to defense against malicious software:
•
System integrity checking
The patient monitor performs integrity checking on the root file system to detect any
changes to the file system contents. Any modification to the root file system contents will
generate an error to the patient monitoring software application. The patient monitoring
software will then display a technical alarm to the user.
•
Device design and configuration (hardening)
The patient monitor has been hardened through the restriction and removal of user
access to core operating system functionality. In addition, unneeded functionality has
been removed or restricted.
22
2062973-001
System overview
•
Antivirus software
To provide seamless real-time patient monitoring, the patient monitor does not have
antivirus software.
•
Security updates and patching processes
Security updates and patches cannot be applied to the CARESCAPE product without
going through GE’s vigorous software verification and validation process. Any software
update needs will be communicated by GE.
3.5.2 Security operations
Network security
GE requires that the MC port of the patient monitor be connected to a physically or virtually
dedicated CARESCAPE Network MC or S/5 Network, isolated from all other networks.
GE requires that the IX port of the patient monitor be connected to a physically or virtually
dedicated CARESCAPE Network IX with controlled connection to the organization’s general
purpose computing network. Traffic between the organization’s network and IX port of the
patient monitor must be limited to the following packet flows listed below.
Inbound
Source device Destination device
Protocol
Destination port Use
Any
icmp
N/A
ping
Customer
defined
tcp
10000
Webmin
Customer
defined
tcp
10001
Software
transfer
DHCP server
tcp
67, 68
DHCP
Patient monitor
Packets that are part of the communication initiated by authorized devices in the
organization’s network are allowed to go out of the IX Network (reflexive).
Outbound
Source device Destination Device
Any
Protocol Destination port Use
icmp
N/A
ping
us1-ws.service.gehealthcare. tcp
com
443
InSite with ExC
(Web Services)
us1-rd.service.gehealthcare.
com
tcp
443
InSite with ExC
(Remote Tunnel)
Citrix Server
tcp
1494
Citrix
Printer
tcp
631
Printing
MUSE
tcp
80
MUSE
Patient
monitor
Packets that are part of the communication initiated by the patient monitor are allowed into
the IX Network (reflexive).
23
2062973-001
CARESCAPE Monitor B850
3.5.3 Product change management
GE has rigorous software verification and validation processes. Any software update needs will
be communicated by GE. The patient monitoring system, including all aspects of software,
should be used as it was intended by GE.
3.5.4 Communication
For detailed product security information, go to one of the following Web addresses:
http://www.gehealthcare.com/usen/security
http://www.gehealthcare.com/usen/security/mds2.html
3.6 Equipment symbols
The following symbols appear on one or more of the devices.
Bell cancel. Audio off.
Audio pause. Temporary audio off.
General alarm.
Fuse. Replace with identical type and rating fuse.
Do not reuse.
Battery (monitor): The flashing orange symbol indicates that there is a
battery failure/missing battery.
Battery (monitor): The solid orange symbol indicates that the battery is being
charged.
Battery (monitor). The solid green symbol indicates that the monitor is being
used on battery power.
24
2062973-001
System overview
The following symbols appear on one or more of the devices.
Battery (monitor): The battery slot cover is open/closed.
Battery (monitor): Test button on the battery to check the battery charge
level.
Battery (monitor). Located on the battery slot cover.
Battery (PDM).
Communication. (PDM)
Power indicator. (PDM)
On/standby button.
Standby or power indicator.
Signal/power input.
Signal/power output.
Signal/power input/output (combined).
ON. Power connection to the mains.
25
2062973-001
CARESCAPE Monitor B850
The following symbols appear on one or more of the devices.
Power supply connector.
Power switch.
Display brightness controls.
Display speaker volume controls.
DVI connector. Video output connector for digital or analog source.
Color display connector port.
Color video input. Video input connector for digital or analog source.
Color video output, digital. Video output for analog source.
Color video output. Video output for digital source.
USB connector.
26
2062973-001
System overview
The following symbols appear on one or more of the devices.
Ethernet connectors
Serial interface.
Tram-Net and ePort connector for PDM module, E-module frame, Tram-Rac
housing, and TRAM modules.
Gas inlet.
Gas outlet.
Press to open.
Zero all. (PDM)
Degree of ingress protection.
Degree of protection against harmful ingress of water:
Components not marked with an IPXn code are rated as Ordinary (no
protection against fluid ingress). All other IPXn rated components have the
degree of protection per the ‘n’ rating.
Latex free.
D-lite/Pedi-lte: Add date.
27
2062973-001
CARESCAPE Monitor B850
The following symbols appear on one or more of the devices.
Home. Return to the main display.
Alternating current.
Green symbol on the B650 and B450 monitor front panel: the monitor is
being used on mains power.
Direct current.
Equipotentiality. Connect device to a potential equalization conductor.
Protective earth ground. Connectors grounded to the AC power source.
Defibrillator synchronization connectors.
(WLAN) Class 2 Identifier
Stacking limit by number.
Date of manufacture. This symbol indicates the date of manufacture of this
device. The first four digits identify the year and the last two digits identify
the month.
28
2062973-001
System overview
The following symbols appear on one or more of the devices.
Manufacturer name and address.
Batch or lot number.
Abbreviation for label part number.
Catalogue or orderable part number.
Device serial number.
Atmospheric pressure limitations.
Temperature limitations.
Humidity limitations.
Keep dry. Protect from rain.
Fragile. Handle with care.
This way up.
This symbol indicates that the waste of electrical and electronic equipment
must not be disposed as unsorted municipal waste and must be collected
separately. Please contact an authorized representative of the
manufacturer for information concerning the decommissioning of your
equipment.
Recycled materials or may be recycled.
29
2062973-001
CARESCAPE Monitor B850
The following symbols appear on one or more of the devices.
Recyclable Lithium-ion.
Mercury. This product consists of devices that may contain mercury, which
must be recycled or disposed of in accordance with local, state, or country
laws. (Within this system, the backlight lamps in the patient monitor display
contain mercury.)
European authorized representative.
European Union Declaration of Conformity.
Indicates that the product is certified for both the U.S. and Canadian
markets, to the applicable U.S. and Canadian standards.
FCC. USA only. Complies with applicable US government (Federal
Communications Commission) radio-frequency interference regulations.
Prescriptive Device. USA only. For sale by or on the order of a Physician.
Russia only. GOST-R mark.
Brazil only. INMETRO certificate.
30
2062973-001
System overview
The following symbols appear on one or more of the devices.
NOTE: The following symbols (required by China law only) are representative
of what you may see on your equipment.
The number in the symbol indicates the EFUP period in years, as explained
below. Check the symbol on your equipment for its EFUP period.
This symbol indicates the product contains hazardous materials in excess of
the limits established by the Chinese standard SJ/T11363-2006
Requirements for Concentration Limits for Certain Hazardous Substances in
Electronic Information Products. The number in the symbol is the
Environment-friendly User Period (EFUP), which indicates the period during
which the toxic or hazardous substances or elements contained in
electronic information products will not leak or mutate under normal
operating conditions so that the use of such electronic information products
will not result in any severe environmental pollution, any bodily injury or
damage to any assets. The unit of the period is “Year”.
In order to maintain the declared EFUP, the product shall be operated
normally according to the instructions and environmental conditions as
defined in the product manual, and periodic maintenance schedules
specified in Product Maintenance Procedures shall be followed strictly.
Consumables or certain parts may have their own label with an EFUP value
less than the product. Periodic replacement of those consumables or parts
to maintain the declared EFUP shall be done in accordance with the Product
Maintenance Procedures. This product must not be disposed of as unsorted
municipal waste, and must be collected separately and handled properly
after decommissioning.
This symbol indicates that this electronic information product does not
contain any toxic or hazardous substance or elements above the maximum
concentration value established by the Chinese standard SJ/T11363-2006,
and can be recycled after being discarded, and should not be casually
discarded.
Underwriters Laboratories product certification mark.
IC
CMIIT ID
Canada only. Industry Canada certification number indicates that this
product meets the applicable Industry Canada technical specifications.
China only. China Ministry of Industry and Information Technology
identification number for Radio Transmission Equipment Type Approval.
Australia only. The product complies with the applicable Australian standard
and establishes a traceable link between the equipment and the
manufacturer, importer or their agent responsible for compliance.
Japan only. Approved under Japan TELEC requirements.
31
2062973-001
CARESCAPE Monitor B850
The following symbols appear on one or more of the devices.
Brazil only. Approved under ANATEL (Agência Nacional de
Telecomunicações) requirements.
South Africa only. Approved under ICASA (Independent
Communications Authority of South Africa) requirements.
Korea only. Approved under KCC (Korea Communications
Commission) requirements.
3.7 User interface symbols
The following symbols appear in the software user interface
Alarm off indicator. Displays in the upper right corner of the parameter
window and in the Alarms Setup menu when physiological alarms for this
parameter are turned off.
The symbol is not displayed at the central station or on a remote bedside
monitor.
Alarm priority indicator: High (red). Indicates a high priority alarm.
Alarm priority indicator: Medium (yellow). Indicates a medium priority alarm.
Alarm priority indicator: Low (cyan). Indicates a low priority alarm.
Alarm volume icon. Adjust the minimum alarm tone volume.
Audio alarms off indicator - Displays in the upper left corner of the alarm
area when physiological audible alarms are turned off.
Audio alarms paused indicator with countdown timer - Indicates all audio
alarms are paused and the amount of time remaining for the alarm pause
period displays as a countdown timer.
Displays in the upper left corner of the screen.
Pause audio alarms - Selectable from the monitor’s main menu. Also an
indicator of a temporarily paused active audio alarm.
32
2062973-001
System overview
The following symbols appear in the software user interface
Low priority audio off alarm indicator, Displays in the upper left corner of the
alarm area.
Configuration warning. Displays when the priority setting for HR/PR
high/low, or SpO2 low has been set to low. Check the alarm configuration.
Displays in the upper left corner of the alarm area.
General warning sign. Displays when the priority setting for HR/PR
high/low, or SpO2 low has been set to low. Displays in the lower part of the
parameter menu’s Alarms tab, and in the Priority column of the selected
alarm in the Alarms Setup > Alarm Priorities.
Reminder volume icon. Adjust the volume of the tone that sounds every two
minutes when audio alarms are turned off.
Touch volume icon. Adjust the volume of the tone that sounds when a user
touches a touchscreen display.
Home icon. Close all menus/applications displayed on the patient monitor.
Locking setting indicator. Indicates this setting is locked and cannot be
adjusted.
Network connection indicator. Indicates the patient monitor is connected to
the Local Area Network (LAN).
Network connection indicator. Indicates the monitor is connected to the
Wireless Local Area Network (WLAN).
Network (WLAN) signal strength. The number of segments corresponds to
the signal strength: four segments indicate strong signal, one segment
weak signal.
Monitor battery is full.
Monitor battery (green). The higher the charge, the bigger the green bar
within the symbol. Numbers indicate the remaining run time.
33
2062973-001
CARESCAPE Monitor B850
The following symbols appear in the software user interface
Monitor battery (yellow). This symbol and a message indicating low battery
charge appear when there is less than 20 minutes of run time left.
Monitor battery (red). This symbol and a message indicating empty battery
appear when there is less than 5 minutes of run time left.
Monitor battery is charging. There is a white running bar inside the symbol.
Monitor battery failure indicator. Indicates a missing battery or a battery
failure.
PDM battery charging indicator. Indicates that the PDM battery is charging.
PDM battery gauge indicator. Indicates the charge level of the battery.
PDM battery failure indicator. Indicates the battery is not available for use.
Snapshot indicator. Indicates the event has an associated snapshot.
Beat volume icon. Adjust the volume of the QRS beep tone. Also the beat
source indicator. Displays next to the selected beat source.
Respiration indicator. Indicates a breath is detected by the impedance
respiration algorithm.
BIS and Entropy sensor impedance check indicator (gray). Displays for each
sensor as the impedance check is in progress.
34
2062973-001
System overview
The following symbols appear in the software user interface
BIS and Entropy sensor impedance check error indicator (red). Indicates the
specified sensor failed the impedance check.
BIS and Entropy sensor impedance check passed indicator. Indicates the
specified sensor passed the impedance check.
Completed NIBP volume icon. Adjust the volume of the tone that sounds
when an NIBP measurement result is available.
Manual NIBP icon. Start a manual NIBP measurement.
Nellcor OxiMax SatSeconds indicator. Indicates the amount of time the SpO2
saturation is outside the limits before alarms are generated.
SpO2 signal strength indicator. Indicates the signal strength, with three
asterisks indicating the strongest signal.
NMT Stimulus beep volume icon. Adjust the volume of the tone that sounds
when a stimulus pulse is generated.
Progress bar. Indicates the amount of time remaining until the next
automatic measurement.
35
2062973-001
CARESCAPE Monitor B850
For your notes
36
2062973-001
Using Webmin service interface
4
Using Webmin service interface
Webmin is a browser-based service interface that is used to configure the platform settings of
the patient monitor and to diagnose and retrieve system information for maintenance and
troubleshooting.
Local access to Webmin
You can access Webmin locally through the integrated browser on the patient monitor or from
a configured service PC that is connected to the IX port of the patient monitor with an Ethernet
crossover cable.
Remote Webmin
You can access Webmin remotely from a configured service PC that is connected to the patient
monitor over the IX Network.
Requirements for service PC
•
Network board with Ethernet port and TCP/IP network installed.
•
Internet Explorer V6 or later.
4.1 Local access to Webmin using the integrated browser
on the patient monitor
NOTE: A USB keyboard and mouse are needed to access the integrated Webmin browser.
1.
Select Monitor Setup > Service. The local browser opens and displays the Login to
Webmin dialog box.
37
2062973-001
CARESCAPE Monitor B850
2.
Continue to 4.4. Login to Webmin.
Closing Webmin
Select
to close Webmin and return to the main display.
4.2 Local access to Webmin with a service PC
You can access Webmin locally by connecting an Ethernet crossover cable between the
service PC and the IX connector of the patient monitor.
NOTE: If you disconnect the patient monitor from a live IX Network when a patient is admitted,
you will temporarily lose the services provided by the IX Network, e.g., access to the IX printers
and MUSE reports.
WARNING
Non-medical equipment does not provide the same level of protection
against electrical shock. Do not touch the patient and any part of
non-medical equipment at the same time. Some examples of non-medical
equipment are laser printers and non-medical computers.
1.
Connect a service PC to the IX connector on the patient monitor using a crossover cable.
2.
In patient monitor, select Monitor Setup > Service. The local browser opens and displays
the Login to Webmin dialog box.
3.
Record the IX IP address of the patient monitor:
IX IP address: ______________________
IX Netmask: ______________________
NOTE: If the IX IP address field is shown as 0.0.0.0., you need to configure the patient monitor’s
IX Network address first. Access Webmin using the integrated browser and configure a static IP
address for the IX Network.
4.
38
2062973-001
Configure the service PC’s IP address and subnet mask to the same network segment
with the patient monitor’s IX Network setting.
Using Webmin service interface
NOTE: For more information on how to configure the IP address, refer to the PC’s
documentation.
5.
Launch a web browser on the service PC.
6.
In the Address field, type https://[IX IP address]:10000 and press Enter.
NOTE: [IX IP address] is the IX Network IP address of the patient monitor.
The Login to Webmin dialog box displays.
7.
Continue to 4.4. Login to Webmin.
Closing Webmin
4.3
1.
Restore the patient monitor’s original IX Network configuration and service PC’s network
settings if they were changed.
2.
Disconnect the crossover cable from the patient monitor and from the service PC.
3.
Reconnect the patient monitor back to the IX Network if applicable.
Remote access to Webmin using a service PC over the
IX Network
1.
Connect a service PC to the IX Network using a standard network cable.
2.
In patient monitor, select Monitor Setup > Service. The local browser opens and displays
the Login to Webmin dialog box.
3.
Record the IX IP address of the patient monitor:
IX IP address: ______________________
39
2062973-001
CARESCAPE Monitor B850
IX Netmask: ______________________
4.
Configure the service PC’s IP address and subnet mask to the same network segment
with the patient monitor’s IX Network.
NOTE: For more information on how to configure the IP address, refer to the PC’s
documentation.
5.
Launch a web browser on the service PC.
6.
In the Address field, type https://[IX IP address]:10000 and press Enter.
NOTE: [IX IP address] is the IX Network IP address of the patient monitor.
The Login to Webmin dialog box displays.
7.
Continue to 4.4. Login to Webmin.
Closing Webmin:
40
2062973-001
1.
Restore the original network settings in the service PC.
2.
Disconnect the service PC from the live IX Network.
Using Webmin service interface
4.4 Login to Webmin
1.
In the Login to Webmin dialog box, type the username and password and select Login or
press Enter.
Username: biomed
Password: Change<space>Me
NOTE: Username and password are case sensitive.
NOTE: “Change Me” is the factory default password for the username “biomed”. Refer to
section 7.14. Changing passwords for details on how to change the default password.
The Webmin application opens and defaults to the Information tab.
Figure 1
Webmin user interface when accessed using the integrated browser
41
2062973-001
CARESCAPE Monitor B850
Figure 2
Webmin user interface when accessed using the service PC
4.5 Webmin configuration modules
The Webmin service interface includes the following configuration modules. Select Help for
additional information related to each Webmin module.
42
2062973-001
Using Webmin service interface
Webmin module
Use the module
Admit Settings
to configure Patient ID Prefix and barcode settings.
Citrix
to configure the Citrix client settings for the iPanel
software: server address, initial program, Citrix session
timeout, username, password, encryption level
Host Asset Settings
to enter a host asset number and to view the host serial
number.
Language
to select the language used in clinical user interface and
to select the keyboard locale setting for the
alphanumeric keyboard and the barcode reader.
Licenses
to enable and activate a software package, to enable
and activate software features and to upload and
activate a license file.
MUSE/12SL
to configure the host for sending and viewing 12SL
information.
Modules
to configure some acquisition module specific settings
after corrective maintenance, or for administrative
purposes. These settings are saved to the permanent
memory of the related acquisition module and the
settings travel with the module from one patient monitor
to another.
Refer to the Module Frames and Modules Technical
Manual for detailed information how to change these
settings.
National Requirements
to activate France specific defaults for the ECG HR
adjustment range and the reminder beep behavior.
Network
to select and configure the real-time network as the MC
Network (CARESCAPE Network) or S/5 Network. It also
allows the user to configure the IX Network settings.
Passwords
to change the passwords for the biomed and clinical
users.
Power frequency
to set the power line frequency.
Printers
to configure the patient monitor to print to up to 12 laser
printers connected on the IX Network. There are
sub-modules for installing a printer, deleting a printer
and for printing a test page.
Remote Service
to configure and control the Insite with Exc remote
service tool.
Restart
to shutdown and restart the patient monitor
automatically via Webmin.
NOTE: The patient must be discharged in order to enable
monitor restart via Webmin.
43
2062973-001
CARESCAPE Monitor B850
Webmin module
Use the module
Settings
to transfer platform and/or clinical settings from one
patient monitor to another, to take backup copies of the
settings to an external device and to restore the settings
from an external device.
Software Management
to update patient monitor and parameter module
software.
Time
to set the date and time settings.
Unit and bed name
to configure the care unit name and bed name for
patient monitors that are configured to connect to the
MC Network.
4.6 Webmin information modules
The Webmin information modules provide useful information about the patient monitor setup
especially for troubleshooting.
The Configuration Information module shows the current platform configuration of the patient
monitor and the connected peripheral devices.
The Device Information module shows the hardware and software information of the patient
monitor and the connected peripheral devices.
44
2062973-001
Using Webmin service interface
4.7 Webmin diagnostics modules
Access Webmin service interface to view hardware statistics, ping a network deviceand view or
download log files.
The Hardware Statistics module displays several internal voltages, temperatures and power
consumption.
Ping a TCP/IP network device- Use this Webmin feature to verify connectivity with a network
device on the MC Network and IX Network.
Log files - The patient monitor collects information about different system events and errors to
log files. These log files help troubleshooting problems in the patient monitor and the
connected peripheral devices.
45
2062973-001
CARESCAPE Monitor B850
For your notes:
46
2062973-001
Pre-installation requirements
5
Pre-installation requirements
This chapter specifies the pre-installation requirements for the patient monitor.
5.1 Unpacking
WARNING
CAUTION
1.
Confirm that the packing box is undamaged. If the box is damaged, contact the shipper.
2.
Open the top of the box and carefully unpack all components.
3.
Confirm that all components are undamaged. If any of the components is damaged,
contact the shipper.
4.
Confirm that all components are included. If any of the components is missing, contact
your GE Healthcare distributor.
EXCESSIVE LEAKAGE CURRENT - If the device has been transported or stored
outside operating temperature range allow it to stabilize back to operating
temperature range before removing it from the plastic bag.
PACKAGING DISPOSAL - Dispose of the packaging material, observing the
applicable waste control regulations.
5.2 Compatibility check
Verify the compatibility of all system components prior to the installation of the patient
monitor.
WARNING
WARNING
WARNING
WARNING
•
Refer to the patient monitor’s supplemental information manual for a list of compatible
displays and display cables.
•
Refer to the patient monitor’s supplemental information manual for a list of compatible
network and bedside devices.
•
Refer to the patient monitor’s supplemental information manual for a list of compatible
supplies and accessories.
•
Refer to the patient monitor’s supplemental information manual and Unity Network
Interface Device (ID) Operator's Manual to see compatible peripheral devices.
BEFORE INSTALLATION - Compatibility is critical to safe and effective use of
this device. Please contact your local sales or service representative prior to
installation to verify equipment compatibility.
INTERFACING OTHER EQUIPMENT - Connect only items that are specified as
part of the system and as compatible. For more information, see the
CARESCAPE Modular Monitors Supplemental Information Manual.
Before connecting an interfacing module to the device, verify compatibility.
Verify the connectivity of device interfaces before using the equipment.
Verify the compatibility of software versions before using the equipment.
Do not use identical measurement modules or modules that map a
measurement to the same channel or parameter window. If such modules
have been connected, remove the module that has been most recently
connected. You can also remove both modules and re-connect the new
module after five seconds.
47
2062973-001
CARESCAPE Monitor B850
WARNING
WARNING
The use of accessories, transducers and cables other than those specified
may result in increased emissions or decreased immunity performance of
the equipment or system.
For detailed instructions and information regarding supplies and
accessories, always refer to their own instructions for use.
5.3 Network infrastructure
Ensure that the applicable network infrastructure is in place prior to the installation of the
patient monitor.
Acquire the network configuration information from the hospital IT or the related project
documentation and installation files.
5.3.1 MC Network
•
The MC Network infrastructure shall be installed according to the CARESCAPE Network
Configuration Guide.
•
The installation site of the patient monitor shall have a wall jack and a network patch
cable for the MC Network.
•
Refer to the sections 7.2.2. Selecting and configuring CARESCAPE Network and 7.4. Setting
unit and bed name to see the configuration information you need to have available to
configure the patient monitor to the MC Network.
5.3.2 S/5 Network
•
The S/5 Network shall be installed according to the S/5 Network Installation Guide. Refer
to the iCentral and iCentral Client Service Manual for iCentral installation instructions.
•
The installation site of the patient monitor shall have a wall jack and a network patch
cable for the S/5 Network.
•
Refer to the section 7.2.3. Selecting and configuring S/5 Network to see the configuration
information you need to have available to configure the patient monitor to the wired S/5
Network.
5.3.3 IX Network
48
2062973-001
•
The IX Network infrastructure shall be installed according to the CARESCAPE Network
Configuration Guide.
•
The installation site of the patient monitor shall have a wall jack and a network patch
cable for the IX Network.
•
Refer to the section 7.2.2. Selecting and configuring CARESCAPE Network to see the
configuration information you need to have available to configure the patient monitor to
the IX Network.
•
Refer to the following sections for the information you need to have available for:
7.5. Configuring printers for IX printer configuration
7.6. Configuring Citrix
7.7. Configuring MUSE/12SL
7.16.1. Configuring the remote service for Insite with Exc configuration.
Pre-installation requirements
5.4 Installing the mounting hardware
Ensure that all the applicable/ required mounting hardware is properly installed prior to the
installation of the patient monitor:
•
Mounting hardware for the patient monitor, either for a stand-alone installation or for an
installation to an anesthesia machine or to a ventilator.
•
Mounting hardware for the module frames and TRAM-Racs
•
Mounting hardware for the PSM module
•
Mounting hardware for the PDM module
•
Mounting hardware for the displays
•
Mounting hardware for the Unity Network ID connectivity device
NOTE: Refer to the patient monitor’s supplemental information manual for compatible
mounting hardware for each system component above.
WARNING
Use only manufacturer specified mounts.
5.5 Unity Network ID connectivity device installation
The Unity Network ID connectivity device shall be properly installed, configured and tested
according to the Unity Network ID Connectivity Device Service Manual prior to connecting it to
the patient monitor.
Make sure that the Unity Network ID connectivity device is configured as follows:
•
IP address is 192.168.253.x, where x is a number between 2 and 254.
•
Netmask is 255.255.255.0
•
The location of the Unity Network ID is set to a value other than the default (XXXX-XXX).
For example, BAY3|UNID3+.
Refer to the Unity Network Interface Device (ID) Service Manual for instructions on checking
and changing the IP address.
5.6 Power and environmental requirements
Check the patient monitor’s supplemental information manual for power and environmental
requirements.
WARNING
CAUTION
Operation of the monitor outside the specified performance range may
cause inaccurate results.
Do not use or store equipment outside the specified temperature, humidity, or
altitude ranges.
Power requirements
•
WARNING
The installation site shall have hospital-grade grounded power outlets and power cords
for all system components.
EXCESSIVE LEAKAGE CURRENT - A display or printer that is a non-medical
grade device and is used within the patient environment, must always be
powered from an additional transformer providing at least basic isolation
(isolating or separating transformer). Using without an isolating
transformer could result in unacceptable enclosure leakage currents.
49
2062973-001
CARESCAPE Monitor B850
Environmental requirements
•
Install the patient monitor to a location that meets the specified environmental
requirements of operating temperature, humidity and atmospheric pressure.
•
Set up the device in a location which affords sufficient ventilation. The ventilation
openings of the device must not be obstructed.
EMI & RFI interference:
WARNING
CAUTION
CAUTION
Do not use the monitor in high electromagnetic fields (for example,
during magnetic resonance imaging).
EMC - Magnetic and electrical fields are capable of interfering with the proper
performance of the device. For this reason make sure that all external devices
operated in the vicinity of the monitor comply with the relevant EMC
requirements. X-ray equipment or MRI devices are a possible source of
interference as they may emit higher levels of electromagnetic radiation.
Changes or modifications to this device/system not expressly approved by GE
may cause EMC issues with this or other equipment. This device/system is
designed and tested to comply with applicable standards and regulations
regarding EMC and needs to be installed and put into service according to the
EMC information stated as follows: This device/system is suitable for use in all
establishments other than domestic and those directly connected to the public
low-voltage power supply network that supplies buildings used for domestic
purposes. Mains power should be that of a typical commercial or hospital
environment. Device is compliant to Class A.
Use of known RF sources, such as cell/portable phones, or other radio
frequency (RF) emitting equipment near the system may cause unexpected or
adverse operation of this device/system. Consult qualified personnel regarding
device/system configuration.
•
The patient monitor should be isolated from sources of strong electromagnetic and radio
frequency interference.
NOTE: Refer to the patient monitor’s supplemental information manual for more information.
50
2062973-001
Hardware installation
6
Hardware installation
CAUTION
WARNING
WARNING
WARNING
WARNING
WARNING
LOSS OF MONITORING - Leave space for circulation of air to prevent the
monitor from overheating. The manufacturer is not responsible for damage to
equipment caused by improperly vented cabinets, improper or faulty power, or
insufficient wall strength to support equipment mounted on such walls.
The parameter modules are not able to withstand unpacked drops from a
height of 1 m without damage. If a module is dropped, please service it
before taking it back into use.
After transferring or reinstalling the monitor, always check that it is
properly connected and all parts are securely attached.
SITE REQUIREMENTS - Do not route cables or tubing in a way that they may
present a stumbling hazard.
EXPLOSION - Do not use this equipment in the presence of flammable
anesthetics, vapors or liquids.
EXCESSIVE TOUCH CURRENT - To avoid excessive patient leakage current,
do not simultaneously touch the patient and the electrical connectors
located at the rear panel of the C1 CPU unit or within the module housing or
frames.
6.1 Installing a battery into the PDM module
The battery for the PDM module, if included, is shipped separately and need to be installed and
fully charged prior to taking into use.
WARNING
WARNING
WARNING
PHYSICAL INJURY- Make sure the battery is completely inserted and the
battery door is completely closed. Falling batteries could seriously or fatally
injure neonatal or other vulnerable patients.
EXPLOSION OR FIRE -Using non-recommended batteries could result in
injury/burns to the patients or users. Only use batteries recommended or
manufactured by GE.
EXPLOSION HAZARD - Do not incinerate a battery or store at high
temperatures. Serious injury or death could result.
NOTE: Refer to the Module Frames and Modules Technical Manual for information about PDM
battery maintenance.
6.1.1 Testing the battery charge
Before installing a battery, verify the battery’s state of charge. Press the green TEST button on
the battery. The number of charge level indicator LEDs that illuminate indicates the
approximate charge remaining in the battery.
Four LEDs illuminated: 75% – 100% of full-charge capacity.
Three LEDs illuminated: 50% – 74.9% of full-charge capacity.
Two LEDs illuminated: 25% – 49.9% of full-charge capacity.
51
2062973-001
CARESCAPE Monitor B850
One LED illuminated: 10% – 24.9% of full-charge capacity.
One LED flashing: < 10% of full-charge capacity remaining.
NOTE: Keep the PDM connected to the patient monitor and the patient monitor connected to
the AC mains until the PDM battery is fully charged.
6.1.2 Installing the battery into the PDM module
52
2062973-001
1.
Open the battery door by gently pulling on the battery door pull tab.
2.
Pull the battery tray out of the PDM using the battery tray strap.
3.
Insert the battery with the TEST button facing up and the arrow pointing into the PDM.
4.
Press the battery door closed until it seals the battery compartment.
Hardware installation
6.2 Mounting the patient monitor
The patient monitor has an integrated GCX mounting plate. This facilitates all mounting options
for the patient monitor. Refer to the CARESCAPE Modular Monitors Mounting Solutions to
identify the compatible mounting hardware for the patient monitor.
NOTE: The GE logo can be rotated for vertical mounting configurations.
6.2.1 CPU Flush Mount
For vertical mounting configurations, a flush mount is available. The flush mount lowers the
probability of the ingress of fluids into the assembly. The mount can be installed in two
orientations and should be placed to ensure the top surface of the patient monitor is protected.
For details, refer to the installation instructions included with the flush mount.
WARNING
WARNING
CAUTION
Never install equipment above the patient.
Use only manufacturer specified mounts.
The device/system should not be used adjacent to, or stacked with, other
equipment. Consult qualified personnel regarding device/system configuration.
53
2062973-001
CARESCAPE Monitor B850
6.3 Connecting displays
6.3.1 Connecting local displays
WARNING
WARNING
WARNING
To prevent liquids from entering the display casing, do not tilt the display
more than +/-15 degrees.
Using other displays than the patient monitor system specific ones may
result in loss of visual alarms and patient monitoring.
Do not connect a monochrome display to the monitor. Visual alarm
indicators may not appear properly.
NOTE: Refer to the patient monitor's supplemental information manual for a list of compatible
displays and display cables.
NOTE: If only one display is connected to the patient monitor, it must be connected to the DVI-I
1 connector. Additional displays can be connected to DVI-D 2 or DVI-I 3 connector. Cloned
displays can be connected only to DVI-I 1 and DVI-I 3 connectors using a video splitter.
NOTE: Ensure that you have the license for Dual Video / Triple Video, if applicable.
NOTE: Be sure that all cables are securely connected. To prevent accidental disconnection and
loss of display screen information, firmly tighten the DVI connector screws into the DVI
connector port.
NOTE: Refer to Configuration chapter for information about touchscreen calibration.
NOTE: Refer to the display's user manual for more information about the display adjustments
and other information about the displays.
NOTE: Proper function of serial or USB touchscreen displays is dependent on the usage of the
correct RS232 and USB ports on the patient monitor.
NOTE: A USB hub should not be used to connect the USB touchscreen to the patient monitor.
NOTE: All installations should be compliant with IEC 60601-1-1 and local electrical codes.
NOTE: The patient monitor with a non-medical grade display, which is IEC 60950-rated or
equivalent, meets UL and IEC specifications if a medical grade isolation transformer is used. If a
non-medical grade display is to be used, the configuration must meet the IEC 60601-1-1
standard. Refer to IEC 60601-1-1 for requirements if using non-medical grade displays in the
patient environment.
The primary display
The primary display can be either an analog or digital display. It can be either an USB or serial
touchscreen, or a non-touchscreen display.
You may optionally connect a cloned analog display to the DVI-I 1 port. Use a DVI-I to DVI-D
and VGA splitter to do so.
54
2062973-001
1.
Connect one end of the video cable to the DVI-I 1 connector in the rear of the patient
monitor. Connect the other end of the video cable to the display.
2.
If applicable, connect a USB or serial touchscreen cable to the USB 1 or RS-232 1
connector in the rear of the patient monitor. Connect the other end of the touchscreen
cable to the display.
Hardware installation
Display port 1
Display
Touchscreen interface
port
DVI-I 1
Display 1
USB1 or RS-232 1
Display 1 cloned
USB1 or RS-232 1
The secondary display
The secondary display must be a digital display. It can be either an USB or serial touchscreen,
or a non-touchscreen display. You cannot connect a cloned display to DVI-D 2 connector.
1.
Connect one end of the video cable to the DVI-D 2 connector in the rear of the patient
monitor. Connect the other end of the video cable to the display.
2.
If applicable, connect a USB or serial touchscreen cable to the USB 2 or RS-232 2
connector in the rear of the patient monitor. Connect the other end of the touchscreen
cable to the display.
Display port 2
Display
Touchscreen interface
port
DVI-D 2
Display 2
USB2 or RS-232 2
The third display
The optional third display can only be used to support the iPanel application. The patient
monitor must be equipped with an optional third video card.
The third display can be either an analog or digital display. It can be either an USB touchscreen,
or a non-touchscreen display.
You may optionally connect a cloned analog display to the DVI-I 3 port. Use a DVI-I to DVI-D
and VGA splitter to do so. The patient monitor does not support touchscreen interface for the
cloned third display.
Display port 3
Display
Touchscreen interface
port
DVI-I 3
Display 3
USB3
Display 3 cloned
No touchscreen interface
available
1.
Connect one end of the video cable to the DVI-I 3 connector in the rear of the patient
monitor. Connect the other end of the video cable to the display.
2.
If applicable, connect a USB touchscreen cable to the USB 3 connector in the rear of the
patient monitor. Connect the other end of the USB touchscreen cable to the display.
6.3.2 Connecting remote displays
NOTE: The instructions in this chapter applies to D15K and D19KT displays.
55
2062973-001
CARESCAPE Monitor B850
If complete isolation is not required, this method will provide the most cost effective means of
extending your display installation. This type of installation should not be used for connections
to non-medically used rooms according to IEC 60601-1-1.
Displays may be extended up to 15 meters from the patient monitor using the following cables:
•
15-meter DVI-I to DVI-I video cable (p/n 2042766-001).
•
5-meter USB extender (p/n 2042768-001)
•
Standard USB-A to USB-B cable, up to 5 meters.
In the following example, two 5-meter USB extenders, plus a standard 5-meter USB cable
extend the remote display up to 15 meters from the patient monitor.
Setup instructions for extended cable lengths:
NOTE: You can extend any of the 3 displays up to 15 metres. See Connecting local displays to
see to which USB and video port in the patient monitor the USB touchscreen cable and the
DVI-I cable should be connected to.
1.
Connect the Type A plug of the first USB extender to one of the downstream ports (Type A
USB port) on the back of the patient monitor.
2.
Connect the Type A plug of the second USB extender to the Type A receptacle on the first
USB extender.
3.
Connect the Type A plug of the standard USB cable to the Type A receptacle on the
second USB extender.
4.
Connect the Type B plug of the standard USB cable to the upstream port (Type B USB port)
on the bottom of the display.
5.
Connect one end of the video cable to the specific connector in the rear of the patient
monitor. Connect the other end of the video cable to the display.
NOTE: Make sure that all cables are securely connected.
56
2062973-001
Hardware installation
6.3.3 Securing the USB cable connections of the displays
1.
Secure the connected USB cables of all displays to the CPU unit. Use the existing retaining
clips attached to the patient monitor.
2.
Secure the USB cables connections to the displays according to the instruction included
in the display package.
6.4 Installing module frames and modules
The patient monitor provides support to connect multiple parameter modules at a time. The
ePort and Tramnet ports allow connection of E-Module Frame, Tram-Rac housing and PDM.
See the following table for possible configuration options. For detailed information on
compatibility, refer to the the patient monitor’s supplemental information manual
ePort 1/Tramnet 1 connected devices
PDM
PDM
ePort
2/Tramnet
2
connected
devices
Tram-Rac
housing
Tram-Rac
housing
(AC Mains
powered)
F5
Frame
F7
Frame
X
X
X
X
X
X
X
X
Tram-Rac
housing
X
Tram-Rac
housing
(AC Mains
powered)
X
F5 Frame
X
X
F7 Frame
X
X
X
X
In the table above:
X = supported
Shaded = not supported
57
2062973-001
CARESCAPE Monitor B850
Example: If a PDM is connected to ePort 2, you cannot connect a second PDM to ePort 1.
However, you can connect one of the following devices to ePort 1:
WARNING
WARNING
WARNING
•
Tram-Rac housing
•
Tram-Rac housing (AC Mains powered)
•
F5 Frame
•
F7 Frame
ELECTRIC SHOCK - Do not use the F7 Frame for standalone use. Ventilation
holes on the F7 E-module Frame will be covered only if installed within an
Aisys, Avance, or Aespire anesthesia machine.
Do not use identical measurement modules or modules that map a
measurement to the same channel or parameter window. If such modules
have been connected, remove the module that has been most recently
connected. You can also remove both modules and re-connect the new
module after five seconds.
SIMULTANEOUS CONNECTION OF TRAM AND PDM - The patient monitor
only supports patient monitoring from one primary ECG acquisition device
at a time. A Patient Data Module (PDM) and a TRAM module cannot be used
to monitor a patient at the same time.
NOTE: Refer to the the patient monitor’s supplemental information manual for a list of
compatible devices.
6.4.1 Connecting a F5 or F7 Frame to a B850 patient monitor
NOTE: To ensure proper grounding of the Frame, secure the cable connections by using a
screwdriver to fully seat all thumbscrews.
1.
58
2062973-001
Connect an F5 or F7 frame to ePort/Tramnet.
Hardware installation
6.4.2 Installing a PSM module to a F5 Frame
1.
Connect a PSM module by aligning it with the insertion guides on the outside of the frame.
Push the module into the frame until it stops.
2.
To remove the PSM module, pull the pull tab out and slide the module out of the guides.
6.4.3 Installing a PSM module to a F7 Frame
WARNING
PHYSICAL INJURY- Take care when mounting devices to an IV pole. If a
device is mounted too high the IV pole may become unbalanced and tip
over.
1.
Connect the PSM pole mount or frame mount cable to the back of the F7 Frame.
2.
Connect the PSM module to the mount.
59
2062973-001
CARESCAPE Monitor B850
6.4.4 Installing another module to a F5 or F7 Frame
WARNING
Ensure that the compact airway modules and CARESCAPE respiratory
modules are in vertical position when used. Tilting them may result in
erroneous readings.
1.
With the module properly oriented, align the module insertion guide slot with the insertion
guide.
2.
Push the module into the frame until it clicks.
3.
To remove a parameter module, grasp it firmly, press the release lever on bottom of
module, and pull out of the guides.
6.4.5 Connecting a PDM module to a F5 Frame
NOTE: When the PDM is used without a battery, it is necessary to allow additional time to power
up. Do not interrupt the startup sequence by unplugging the PDM.
1.
60
2062973-001
Align the PDM with the insertion guides on the outside of the frame. Push the module into
the frame until it stops.
Hardware installation
6.4.6 Connecting a PDM module to the patient monitor
WARNING
WARNING
PHYSICAL INJURY — Do not install the PDM above a patient. Make sure the
battery is completely inserted and the battery door is completely closed.
Falling batteries could seriously or fatally injure neonatal or other
vulnerable patients.
PHYSICAL INJURY — Do not install the PDM above a patient. Leaks from the
battery cells can occur under extreme conditions. The liquid is caustic to the
eyes and skin. If the liquid comes in contact with eyes or skin, flush with
clean water and seek medical attention.
NOTE: When the PDM is used without a battery, it is necessary to allow additional time to power
up. Do not interrupt the startup sequence by unplugging the PDM.
1.
Connect one end of the ePort cable to the PDM and the other end of the ePort cable to the
ePort/Tramnet connector on the patient monitor.
6.4.7 Connecting a Tram-Rac housing to the patient monitor
NOTE: When using more than one Tram-Rac housing, one of the Tram-Racs must have a power
supply.
NOTE: Make sure the Tram-Net cable has ferrite blocks on both ends.
1.
Install the ferrite blocks that came with the patient monitor to both ends of the Tram-Net
cables.
a.
Place one end of cable in the groove of the ferrite block, approximately 26 mm (1 in) from
the end of the cable
61
2062973-001
CARESCAPE Monitor B850
b.
Press the sides of the block together until you hear a click. Make sure both snap fingers
are fully engaged, and they are flush against the housing.
c.
d.
Repeat steps a and b for the other end of the cable.
Repeat steps a-c for all Tram-Net cables.
2.
Connect the Tram-Rac housing to an ePort/Tramnet connector with ferrite blocks on the
patient monitor.
6.4.8 Installing a module to the Tram-Rac housing
Connecting a module:
1.
Face the Tram-Rac housing and guide the back of the module into the appropriate
position.
2.
Gently push the module into the housing. You will hear a click when the module is fully
inserted.
Removing a module:
1.
Push the module into the Tram-Rac housing. This releases the module and makes it easier
to remove.
2.
Press and hold the release levers found on each side of the front of the module.
3.
Pull the module out about 15 cm (6 inches).
4.
Grasp the module firmly with both hands and remove it. Do not try to hold the module by
the release levers.
The release levers for TRAM modules are recessed in the side of the protruding front of the
module.
62
2062973-001
Hardware installation
6.5 Connecting to the mains power
WARNING
WARNING
WARNING
WARNING
CAUTION
Use only AC power cords recommended or manufactured by GE.
EXCESSIVE LEAKAGE CURRENT - To avoid summation of leakage currents
when interfacing the device with other equipment, the devices may only be
interconnected with each other or to parts of the system when it has been
determined by qualified biomedical personnel that there is no danger to the
patient, the operator, or the environment as a result. In those instances
where there is any element of doubt concerning the safety of the connected
devices, the user must contact the manufacturers concerned (or other
informed experts) for proper use. In all cases, safe and proper operation
should be verified with the applicable manufacturer's instructions for use,
and system standards IEC60601-1-1 must be complied with.
Do not under any circumstances remove the grounding conductor from the
power plug. Always check that power cord and plug are intact and
undamaged.
POWER SUPPLY — The device must be connected to a properly installed
power outlet with protective earth contacts only. If the integrity of the
protective earth conductor is in doubt, disconnect the monitor from the
power line. All devices of a system must be connected to the same power
supply circuit. Devices which are not connected to the same circuit must be
electrically isolated when operated.
POWER REQUIREMENTS - Before connecting the device to the power line,
check that the voltage and frequency ratings of the power line are the same as
those indicated on the device's label. If this is not the case, do not connect the
system to the power line until you adjust the device to match the power source.
63
2062973-001
CARESCAPE Monitor B850
In U.S.A., if the installation of this equipment will use 240V rather than 120V, the
source must be a center-tapped, 240V, single-phase circuit. This equipment is
suitable for connection to public mains as defined in CISPR 11.
If a non-medical grade display is used as a display within the patient environment it must
always be powered from an additional transformer providing at least basic isolation.
1.
Connect power cords to the mains power supply inlet and to a wall outlet on all system
components that require AC mains power input.
2.
Do not power on any devices.
NOTE: Be sure that all power cords are securely connected and that they are routed through
the retaining clips or cable clamps, as applicable.
6.6 Connecting to the MC Network or the S/5 Network
WARNING
WARNING
WARNING
MISSED ALARMS - Do not use with iCentral software with Versions 5.0.3 and
earlier or with Mobile Care Server with Version 5.2 and earlier.
INCORRECT CALCULATIONS - Using the System with the Aware Gateway
software version 1.4 or earlier could result in incorrect patient height and
weight information. This could lead to incorrect drug dose calculations,
hemodynamic calculations, or oxygenation calculations. Prior to installing
the System, please contact the GE Healthcare Aware Gateway HL7
Integration Engineering Team or your GE Healthcare service representative
to verify or update your Aware Gateway configuration.
EXCESSIVE LEAKAGE CURRENT - Only devices that are specified compliant
with IEC 60950-1 or IEC 60601-1 may be connected to the Ethernet MC or IX
ports.
The patient monitor can be connected either to the wired MC Network or S/5 Network.
•
Connect the MC Network or the S/5 Network patch cable to the network connector
labelled as “MC” in the rear panel of the patient monitor.
6.7 Connecting to the IX Network
•
64
2062973-001
Connect the IX Network patch cable to the network connector labelled as “IX” in the rear
panel of the patient monitor.
Hardware installation
6.8 Connecting M-port devices
WARNING
CAUTION
CAUTION
WARNING
Before connecting an interfacing module to the device, verify compatibility.
Verify the connectivity of device interfaces before using the equipment.
Verify the compatibility of software versions before using the equipment.
INSTALLATION - To avoid accidental ingress of liquids, always mount the Unity
Network Interface Device (ID) in a vertical position with the connectors at the
bottom.
The use of the wrong interface adapter may cause improper operation of the
supported peripheral device.
SINGLE PATIENT USE - All eight serial ports of the Unity Network Interface
Device (ID) must only be used on one patient.
Ensure that the Unity Network ID connectivity device is properly mounted, installed and
configured prior to connecting it to the patient monitor.
Connect the following interface devices to one of the four M-ports in the front of the patient
monitor:
•
Unity Network ID connectivity device
•
PRN 50-M writer
•
M-port keypad
•
Remote Alarm Box
To install and configure Remote Alarm Box (RAB) or Remote Alarm Box with Remote Light
(RAB RL), follow the instructions in Remote Alarm Box (RAB) and Remote Alarm Box with
Remote Light (RAB RL) Service Manual for Solar monitor.
NOTE: The remote alarm boxes will function when the patient monitor’s alarm tone is set
to either Legacy or IEC.
6.9 Connecting USB devices
Connect the following devices to the USB ports in the rear panel of the patient monitor or at the
bottom of a D15K or D19KT display:
•
Alphanumeric keyboard
•
Mouse
•
Remote control
•
Barcode reader
NOTE: Always use a GE-supplied barcode reader for the CARESCAPE monitors. The barcode
reader comes pre-configured and is ready to connect. Refer to the included installation
instructions for more details.
WARNING
Use only washable keyboard with at least IPX1 protection against ingress of
water.
6.10 Connecting iCollect and other data acquisition
systems
iCollect and other data acquisition systems can be connected to one of the USB connectors in
the rear/side panel of the patient monitor.
65
2062973-001
CARESCAPE Monitor B850
NOTE: Use the ATEN UC232A USB-to-serial Converter and PC serial interface cable to connect
iCollect and the other data acquisition systems to the patient monitor.
ϭƐƚh^ƚŽƐĞƌŝĂů
ĐŽŶǀĞƌƚĞƌ
WƐĞƌŝĂůŝŶƚĞƌĨĂĐĞ
ĐĂďůĞ͕ϴϴϭϭϲϳ
ϮŶĚh^ƚŽƐĞƌŝĂů
ĐŽŶǀĞƌƚĞƌ͕ŝĨ
ŶĞĞĚĞĚ
NOTE: Refer to the iCollect User's Manual for more information about the iCollect.
NOTE: Contact GE Healthcare Service to get more information about interfacing other data
acquisition systems to the patient monitor.
6.11 Connecting a local printer to the IX connector
You can connect a local laser printer directly to the patient monitor’s IX connector with a
crossover cable.
1.
Connect the Ethernet cable to the IX connector labelled as “IX” in the rear panel of the
patient monitor.
2.
Connect the other end of the Ethernet crossover cable to the connector in the laser
printer.
NOTE: If the local printer is used within the patient environment it must always be powered
from an additional transformer providing at least basic isolation.
NOTE: Refer to the printer manual on how to install and configure the printer. The printer shall
be configured to communicate in the same subnet with the patient monitor’s IX Network
settings.
WARNING
WARNING
66
2062973-001
EXCESSIVE LEAKAGE CURRENT - Laser printers are UL 60950/IEC 60950
certified equipment, which may not meet the leakage current requirements
of patient care equipment. This equipment must not be located in the
patient environment unless the medical system standard IEC 60601-1-1 is
followed. Do not connect a laser printer to a multiple socket outlet
supplying patient care equipment. The use of multiple socket outlet for a
system will result in an enclosure leakage current equal to the sum of all the
individual earth leakage currents of the system if there is an interruption of
the multiple socket outlet protective earth conductor.
Non-medical equipment does not provide the same level of protection
against electrical shock. Do not touch the patient and any part of
non-medical equipment at the same time. Some examples of non-medical
equipment are laser printers and non-medical computers.
Configuration
7
Configuration
The configuration of the patient monitor consists of platform configuration and clinical
configuration.
This chapter describes how to perform the platform configuration tasks needed to take the
patient monitor into use for the first time and the configuration tasks needed for administration
and maintenance thereafter.
For information on how to perform the clinical configuration, including care unit settings and
user profiles, refer to the patient monitor’s user’s manual.
7.1 Adjusting display
7.1.1 Adjusting the display brightness
NOTE: Refer to the the patient monitor’s user’s manual for information how to setup the
screens: Monitor Setup > Default Setup > Care Unit Settings > Screens.
If needed, adjust the picture on the display using the Auto Adjustment feature in the display's
OSD menu. Refer to the display's user documentation for details.
7.1.2 Calibrating a touchscreen
Calibrate the connected touchscreens, one by one, as follows:
1.
Select Monitor Setup > Service Calibrations.
2.
In the Enter Password dialog box, type the username and password and press Enter.
Username: biomed
Password: Change<space>Me
NOTE: Username and password are case sensitive.
NOTE: The factory default password for the username “biomed” is “Change Me”.
3.
In the Service / Calibrations menu, select Touch Screen.
4.
The Touch calibration screen opens.
5.
Touch the calibration mark or cross hair (+) in each corner of the screen, according to the
instructions shown on the screen.
NOTE: When you touch the cross hair in the upper left hand corner of the touch screen you are
calibrating, the other connected displays will turn blank until the calibration is completed.
7.2 Configuring the network
7.2.1 Configuring hostname
1.
Log in to Webmin
2.
Select Configuration > Network > Hostname.
The Hostname Configuration window opens.
The current hostname is shown in the Current Value column.
3.
Enter the new hostname in the Change Value to column.
NOTE: The hostname is a unique, 4 to 32 character long identifier of a patient monitor in
the network. Use alphanumeric characters A-Z, a-z, 0-9. The hostname may include also
characters “-” and “_”, but it can't start or end with these characters.
67
2062973-001
CARESCAPE Monitor B850
4.
Select Save.
The hostname configuration will take effect immediately.
7.2.2 Selecting and configuring CARESCAPE Network
To select CARESCAPE Network MC for the real-time network infrastructure:
1.
Log in to Webmin.
2.
Select Configuration > Network > Wired Interfaces.
The current network configuration is shown in the Present Configuration table.
3.
Below Select Network Type in the Network Configuration window, select the applicable
network type: CARESCAPE Network.
4.
Select Next to proceed on network configuration.
NOTE: When CARESCAPE Network is selected, the S/5 Network is disabled.
The patient monitor may be configured to the MC Network, or IX Network, or both.
Network connection(s)
Steps to be performed
MC Network only
5, (6) and 9
IX Network only
7, 8 and 9
Both MC and IX Network
5, (6), 7, 8 and 9
NOTE: The following IP addresses are reserved and not valid: 172.16.254.254, 172.16.255.255,
172.18.254.254, 172.18.255.255, 192.168.250.x, 192.168.252.x, 192.168.253.x, 192.168.254.1
and 192.168.254.2.
5.
In the Network Configuration window below MC Network.
a.
b.
c.
6.
If separate MC Network segments are connected together by a router, configure the
router information below the MC static route:
a.
b.
c.
7.
Enter a Static IP address.
Enter a valid Netmask level.
Select the applicable Speed & Duplex option.
Enter Destination Address.
Enter Destination Netmask.
Enter an MC Gateway.
Below IX Network, select DHCP or Manual Configuration.
If Manual Configuration is selected, enter the following information in the entry fields:
a.
b.
c.
d.
Enter a Static IP address.
Enter a valid Netmask level.
Enter a valid Default Gateway.
Enter valid DNS Server addresses if applicable.
8.
Select the applicable Speed & Duplex option.
9.
Select Save.
The network configurations will be saved and become active when the patient monitor is
restarted.
7.2.3 Selecting and configuring S/5 Network
To select S/5 Network for the real-time network infrastructure:
68
2062973-001
Configuration
1.
Log in to Webmin.
2.
Select Configuration > Network > Wired Interfaces.
The current network configuration is shown in the Present Configuration table.
3.
Below Select Network Type in the Network Configuration window, select the applicable
network type: S/5.
4.
Select Next to proceed on network configuration.
NOTE: When S/5 Network is selected, the CARESCAPE Network is disabled.
The patient monitor may be configured to the S/5 Network, or IX Network, or both.
Network connection(s)
Steps to be performed
S/5 Network only
1 and 4
IX Network only
2, 3 and 4
Both S/5 and IX Network
1, 2, 3 and 4
1.
In the Network Configuration window below S/5 Network, enter a Virtual ID.
NOTE: Valid values are within the range of 50000 to 55000, inclusive.
NOTE: The Virtual ID must be unique for each patient monitor connected to the S/5 Network.
2.
Below IX Network, select DHCP or Manual Configuration.
a.
b.
c.
d.
Enter a Static IP address.
Enter a valid Netmask level.
Enter a valid Default Gateway.
Enter valid DNS Server addresses if applicable.
3.
Select the applicable Speed & Duplex option.
4.
Select Save.
The S/5 virtual ID change will be applied immediately. All other network configurations will be
saved and become active after the patient monitor is restarted.
7.3 Setting time and date
NOTE: In the S/5 Network, the patient monitor’s date and time is automatically synchronized
with the date and time of the iCentral it is connected to. You can set the date and time locally
only if the patient monitor is not connected to the S/5 Network and the patient monitor is in a
discharged state.
CAUTION
NETWORK DEVICE TIME SYNCHRONIZATION — When adding a new device to
the CARESCAPE Network, the existing devices on the CARESCAPE Network will
synchronize to the new device’s time. To prevent potential time
synchronization issues, you should set the new device’s time to be as close as
possible to the time (within one minute or less) used by the existing GE devices
on the CARESCAPE Network.
1.
Log in to Webmin.
2.
Select Configuration > Time.
3.
In the Time Configuration window, in Configure Date and Time, update the following
fields as needed:
•
Date
69
2062973-001
CARESCAPE Monitor B850
4.
•
Month
•
Year
•
Hour:Minute
•
AM/PM
•
12/24 Hrs
In the Time Configuration window, in Configure Time Zone, select the appropriate UTC
Offset, if applicable.
NOTE: The time zone configuration only applies to communication with Citrix server.
5.
Select Save.
The manual time configuration takes effect immediately.
7.4 Setting unit and bed name
Configure the care unit name and bed name for patient monitors that are configured to
connect to the MC Network.
NOTE: The unit name shall be set the same with all the patient monitors and CARESCAPE CIC
Pro central stations that are connected to the same care unit in the MC Network. Bed name
shall be unique to each patient monitor in the same care unit.
NOTE: Unit and bed name selections are not available if network selection is S/5.
1.
Log in to Webmin.
2.
Select Configuration > Unit and Bed Name.
3.
In the Unit and Bed Name Configuration window, view or set the unit name and bed
name for the device.
NOTE: Use only capital letters A - Z, numbers, dash (-), asterisk (*) and space ( ). The unit name
may be up to seven characters long and bed name up to five characters long.
4.
Select Save.
The unit and bed name configuration takes effect immediately.
7.5 Configuring printers
You can configure the patient monitor to print to up to 12 laser printers connected on the IX
Network. Use the Webmin sub-modules to install or delete a printer and to print a test page.
NOTE: Ensure that you have the host name(s) or IP address(es) for all the connected IX printers
available. Configure the IX printers according to this information.
NOTE: Laser printers that are installed on central stations do not need to be configured using
Webmin. Refer to the user’s manual for details on configuring the printer.
NOTE: Refer to the CARESCAPE Modular Monitors Supplemental Information Manual for the list
of supported devices.
7.5.1 Installing a printer
70
2062973-001
1.
Log in to Webmin.
2.
Select Configuration > Printers.
3.
In the Sub-Modules for Printers menu, select Install Printer.
4.
Below Printer Configuration Information in the Install Printer window, provide the
following information:
Configuration
a.
b.
c.
d.
Select either the Hostname or IP Address radio button, as applicable.
In the Hostname or IP Address field, enter the printer Hostname or IP Address.
In the Printer Name field, enter the Printer Name.
Select Yes from the drop down list next to Test Page.
5.
Select Save.
6.
From the patient monitor, select Monitor Setup > Printing.
7.
Select the Devices > Setup.
8.
In the Printout menu, select what to print out (for example, Waveforms, Alarm
Waveforms, Numeric Trends, Reports).
9.
Below Location, select the radio button next to Network.
10.
From the drop down list next to Network Device, select the desired printer.
The change will take effect immediately.
7.5.2 Deleting a printer
NOTE: Before deleting a laser printer, check Monitor Setup > Printing > Devices > Status. If a
printout is assigned to the printer to be deleted, redirect the printout to another valid printer.
1.
Log in to Webmin.
2.
Select Configuration > Printers.
3.
In the Sub-Modules for Printers menu, select Delete Printer.
4.
In the Delete Printer window, select the printer to delete.
5.
Select Save.
The change will take effect immediately.
7.5.3 Printing a test page
1.
Log in to Webmin.
2.
Select Configuration > Printers.
3.
In the Sub-Modules for Printers menu, select Print Test Page.
4.
In the Print Test Page window, select the printer.
5.
Select Save.
7.6 Configuring Citrix
Configure the Citrix connection for iPanel software.
NOTE: GE is not responsible for installing or configuring the Citrix server.
NOTE: Contact hospital's IT Administrator or biomedical department to obtain values to the
following fields.
NOTE: Server address, initial program and Citrix session timeout are mandatory fields.
1.
Log in to Webmin.
2.
Select Configuration > Citrix.
3.
In the Citrix Configuration window, enter the applicable information in the following
fields:
71
2062973-001
CARESCAPE Monitor B850
Field name
Description and valid choices
Server Address
Blank, server IP address or server hostname,
up to 255 character long
Initial Program
Initial Citrix- published application that will be
launched, for example #MUSE. This field is
mandatory, if the server address has been
entered. The maximum length is 128
characters.
Citrix Session Timeout (in Minutes)
Valid values are between 0-99. Keeping the
session alive allows users to quickly return to
their last session, but locks a Citrix license.
Selecting "0" disables the timeout feature.
Username
Any valid Windows username. You can leave
this field empty to allow anonymous login.
The maximum length is 128 characters.
Password
Any valid Windows password. You can leave
this field empty to allow anonymous login.
The maximum length is 128 characters.
Confirm Password
The password and confirmed password must
be the same.
Encryption Level
Select one of the following encryption levels:
- "Basic"
- "RC5 (128 bit - Login Only)"
- "RC5 (40 bit)"
- "RC5 (56 bit)"
- "RC5 (128 bit)"
4.
Select Save.
All changes take effect immediately.
7.7 Configuring MUSE/12SL
NOTE: MUSE viewing is a licensed software feature. You can configure the MUSE/12SL settings
independent of the license status, but actual viewing of MUSE reports requires that the
MuseView license is enabled.
Settings to send 12SL data
72
2062973-001
1.
Log in to Webmin.
2.
Select Configuration > MUSE/12SL.
3.
In the MUSE/12SL window, enter the applicable information in the following fields:
-
Location ID
Identifies the location ID number (within the range 0 to 599)
associated with the patient monitor for searching the MUSE
system.
-
Site Number
Identifies the site number (within the range 1 to 254) associated
with the patient monitor for searching the MUSE system.
Configuration
4.
Select Save.
These settings take effect immediately after they are submitted.
Settings to view 12SL data
1.
Log in to Webmin.
2.
Select Configuration > MUSE/12SL.
3.
In the MUSE/12SL window, enter the following:
4.
-
MUSE Web Username
Username used to authenticate with the MUSE
Web to access 12-lead reports.
-
MUSE Web Password
Password used to authenticate with the MUSE
Web to access 12-lead reports.
-
Confirm Password
The password and the confirmed password must
be the same.
-
MUSE Web URL
Used to locate the MUSE Web system to access
12-lead reports. Enter the URL in a valid format.
Select Save.
These settings take effect immediately after they are submitted.
7.8 Admit settings
7.8.1 Patient ID prefix
The patient monitor will automatically generate a temporary, unique patient ID when a patient
with unknown ID is admitted to the patient monitor. The patient monitor will use this temporary
patient ID for all 12SL reports that are sent to MUSE until the patient is discharged from the
patient monitor, or his/her patient ID is changed. The temporary patient ID is generated from
the temporary patient ID prefix, care unit name, bed name, and current time.
The temporary patient ID prefix is a hospital defined prefix that is used as the first two
characters in a temporary patient ID to ensure its uniqueness inside the hospital.
1.
Log in to Webmin.
2.
Select Configuration > Admit Settings.
3.
In the Sub-Modules for Admit Settings menu, select Patient ID Prefix.
4.
In the Patient ID Prefix window, enter a 2-character prefix.
NOTE: Valid values are uppercase letters and numbers.
5.
Select Save.
All changes take effect immediately.
7.8.2 Barcode settings
Barcode settings must be configured if a barcode reader is used to input patient data to the
Admit/Discharge menu.
NOTE: Acquire detailed specification of the character-delimited or the length-delimited,
multi-field barcode that the hospital uses. This will configure the barcode parser correctly.
NOTE: Acquire sample barcodes, if possible, to verify the operation of the parser configuration.
NOTE: For details on barcode data requirements and restrictions, see section 7.8.5 Barcode
data specifications.
73
2062973-001
CARESCAPE Monitor B850
1.
Select the parser type.
a.
b.
c.
d.
2.
Log in to Webmin.
Select Configuration > Admit Settings.
In the Sub-Modules for Admit Settings window, select Barcode Settings.
Below Barcode Setup in the Barcode Settings window, select the applicable parser
type from the drop-down list:.
Parser type
Used with this type of barcode
No Parser
Simple barcode that contains one piece of
information, but no data control, so there is no
need for a parser.
Length Delimited Parser
Barcode that specifies the beginning position and
length of each field on the barcode.
Character Delimited Parser
Barcode that specifies a special character that
separates each field on the barcode.
Select Save.
If you selected No Parser, the barcode setting configuration is complete.
For a Length or Character Delimited Parser, follow the applicable instructions.
7.8.3 Configuring Length Delimited Parser information.
or
7.8.4 Configure character delimited parser information.
7.8.3 Configuring Length Delimited Parser information
Points to note
If you configure Age, you must either select the Age Unit item or one of the age units (e.g.,
Years, Months, Weeks, Days) below Fixed Option.
If you configure Height, you must either select the Height Unit item or one of the height
units (e.g., Feet, Inches, Meters, Centimeters, Millimeters) below Fixed Option.
If you configure Weight, you must either select the Weight Unit item or one of the weight
units (e.g., Kilograms, Grams, Micrograms, Pounds, Ounces) below Fixed Option.
For an example of admit/discharge configuration for a length delimited parser, see
Example of Length Delimited Parser information on page 75.
1.
In the Admit/Discharge Configuration window, enter the location and length information
for each data item.
If an item is not included in the barcode, type 0 in the item’s Position and Length fields, or
leave the Position and Length fields blank.
a.
b.
2.
In the Position column, type the beginning position of the field in the data string
(from 1 to 300).
In the Length column, type the number of characters (from 1 to 99) that the field
contains.
For Gender Format, select Fixed or Configured.
If you select Configured:
a.
b.
74
2062973-001
Type the character that identifies Male.
Type the character that identifies Female.
Configuration
3.
Below Fixed Option, select the applicable value:
Item
Item selection in the top part of
the screen
Fixed Option selection
Height Unit
Both Height and Height Unit
Non-Fixed.
Height only
Select value from drop down list.
Both Weight and Weight Unit
Non-Fixed.
Weight only
Select value from drop down list.
Both Age and Age Unit
Non-Fixed.
Age only
Select value from drop down list.
Weight Unit
Age Unit
4.
Scroll to the bottom of the window, and select Save.
All changes take effect immediately.
Example of Length Delimited Parser information
In this example, the barcode contains 10 items. The following table lists the starting position
and length of each item.
Item
Starting Position
Length
MRN
1
10
First Name
11
10
Last Name
21
15
Day of Birth
46
2
Month of Birth
48
2
Year of Birth
50
4
Age
36
5
Age Unit
41
5
Gender
54
1
Height
55
5
The following sample shows the corresponding entries in the Admit/Discharge Configuration
window.
75
2062973-001
CARESCAPE Monitor B850
7.8.4 Configure character delimited parser information
Points to note
76
2062973-001
If you configure Age, you must either select the Age Unit item or one of the age units (e.g.,
Years, Months, Weeks, Days) below Fixed Option.
If you configure Height, you must either select the Height Unit item or one of the height
units (e.g., Feet, Inches, Meters, Centimeters, Millimeters) below Fixed Option.
If you configure Weight, you must either select the Weight Unit item or one of the weight
units (e.g., Kilograms, Grams, Micrograms, Pounds, Ounces) below Fixed Option.
For an example of admit/discharge configuration for a length delimited parser, see
Example of character delimited parser information entry on page 77.
Configuration
1.
In the Position column of the Admit/Discharge Configuration window, enter the
sequence number of each item included in the barcode. Use incremental numbers from 1
(the left-most field) up to 16 (the right-most field).
If an item is not included in the barcode, leave the Position field blank for the item.
2.
Below Field Delimiter, in the Delimiter field, enter the special character that separates
the fields on the barcode.
NOTE: Allowed characters are ASCII characters 33-126.
NOTE: Forbidden characters are control characters (ASCII characters 0-31), the space
character (ASCII character 32), and ASCII characters 127 and above.
NOTE: If the character selected exists in any field in the barcode, it will be misinterpreted as a
field delimiter.
3.
Below Gender Code, enter the codes that identify Male and Female.
4.
Below Fixed Option, select the applicable value:
Item
Item selection in the top
part of the screen
Fixed Option selection
Height Unit
Both Height and Height Unit
Non-Fixed.
Height only
Select value from drop down list.
Both Weight and Weight Unit
Non-Fixed.
Weight only
Select value from drop down list.
Both Age and Age Unit
Non-Fixed.
Age only
Select value from drop down list.
Weight Unit
Age Unit
5.
Scroll to the bottom of the window, and select Save.
All changes take effect immediately.
Example of character delimited parser information entry
In the following example, the barcode contains 12 items and uses the pound sign (#) as a
delimiter.
Item
Sequence number of the item in the
barcode
MRN
4
First Name
5
Last Name
6
Day of Birth
1
Month of Birth
2
Year of Birth
3
Age
11
Age Unit
12
Gender
7
77
2062973-001
CARESCAPE Monitor B850
Item
Sequence number of the item in the
barcode
Height
8
Height Unit
9
Weight
10
The following sample shows the corresponding entries in the Admit/Discharge Configuration
window.
7.8.5 Barcode data specifications
Points to note
78
2062973-001
The maximum length of the entire barcode is 300.
Configuration
If the field value is longer than the maximum length indicated, the right-most characters
will be truncated when the value is displayed in the Admit/Discharge menu.
If a field contains a forbidden character, that character will be replaced with a space
when it is displayed in the Admit/Discharge menu.
Item
Maximum
length
Valid entries
Comments
MRN
99
Both letters and numbers
First Name
99
Last Name
99
Forbidden characters are those that are not
allowed by the patient monitor, including the
following characters:
! " # ¤ % & /( ) = ? ` @ £ $ € { [ ] } \ * ^ _ : ; | < >
Day of Birth
2
1-31
If Day of Birth is present in the barcode, then
Month of Birth and Year of Birth also need to
be present.
Month of Birth
2
1-12
If Month of Birth is present in the barcode,
then Day of Birth and Year of Birth also need
to be present.
Year of Birth
4
1880 to current year
If Year of Birth is present in the barcode, then
Day of Birth and Month of Birth also need to
be present.
Age
99
Numeric 9999.9999
Either a period or comma is accepted as a
decimal symbol.
Age Unit
99
A, Y, YR, YRS (years)
MO, MOS (months)
WK, WKS (weeks)
D, DAY, DYS (days)
Gender
1
Height
99
Numeric 9999.9999
Height Unit
99
FT (feet)
IN (inches)
M (meters)
CM (centimeters)
MM (millimeters)
Weight
99
Numeric 9999.9999
Weight Unit
99
KG, KGS (kilograms)
G, GM, GMS (grams)
MCG (micrograms)
OZ, OZS (ounces)
LB, LBS (pounds)
Visit Number
99
Both letters and numbers
Primary Physician
99
Referring Physician 99
If gender is configured (not fixed), this must
be 1 character.
Either a period or comma is accepted as a
decimal symbol.
Either a period or comma is accepted as a
decimal symbol.
Forbidden characters are those that are not
allowed by the patient monitor, including the
following characters:
! " # ¤ % & /( ) = ? ` @ £ $ € { [ ] } \ * ^ _ : ; | < >
79
2062973-001
CARESCAPE Monitor B850
7.9 Setting power frequency
WARNING
Incorrect power line frequency setting could adversely affect ECG and EEG
processing.
1.
Log in to Webmin.
2.
Select Configuration > Power Frequency.
3.
In the Power Frequency window, select the applicable power line frequency.
4.
Select Save.
The power frequency configuration takes effect immediately.
7.10 Selecting language and locale
Select the language used in clinical user interface and select the keyboard locale setting for the
alphanumeric keyboard and the barcode reader.
1.
Log in to Webmin.
2.
Select Configuration >Language.
3.
In the Language window, select the patient monitor language and keyboard language:
a.
b.
Select the patient monitor language from the drop-down list and select Save.
Select the keyboard locale from the drop-down list and select Save.
The language takes effect after the patient monitor is restarted. The keyboard locale takes
effect immediately after it is submitted.
7.11 Selecting national requirements
Activate France specific defaults for the ECG HR adjustment range and the reminder beep
behavior.
1.
Log in to Webmin.
2.
Select Configuration > National Requirements.
3.
In the National Requirement window, select the applicable option:
Value
Description
None
Select the normal defaults.
France
Enable the following country specific monitoring:
4.
-
Heart Rate high alarm limit maximum 230.
-
Reminder beep will sound every 2 minutes when alarms have
been silenced permanently.
Select Save.
The national requirements changes take effect immediately.
7.12 Configuring modules
You can configure some acquisition module specific settings. The settings are saved to the
permanent memory of the related acquisition module and the settings travel with the module
from one patient monitor to another.
These settings are pre-configured at factory, except the Assets Settings. You may need to
re-configure them after corrective maintenance, or for administration purposes.
80
2062973-001
Configuration
Refer to the Module Frames and Modules Technical Manual for detailed information on how to
change these settings.
Webmin
sub-module
Module
Description
Assets Settings
PDM
This setting allows you to view the customer
assigned asset number of the PDM.
Licensing
PDM
This setting allows you to manage the PDM
feature licenses.
ECG Filter
Configuration
PDM
This setting allows you to temporarily
disable the ECG filter of the PDM.
STP/TP/ST Settings
E-PRESTN, E-PRETN,
E-RESTN, E-PSM &
E-PSMP
This setting allows you configure the
STP/TP/ST setting after replacing the STP
board.
P/PT/PP Settings
E-P, E-PT & E-PP
This setting allows you to configure the
P/PT/PP setting after replacing the STP
board.
7.12.1 Module asset settings
NOTE: This configuration applies only to the PDM.
NOTE: The Device Serial Number field is view only and cannot be changed.
To set the device asset number of a PDM:
1.
Log in to Webmin.
2.
Select Configuration > Modules.
3.
In the Sub-Modules for Modules menu, select Assets Settings.
4.
In the Assets Settings window, enter the user-assigned asset number for the device in
the Change Value to column.
5.
Select Save.
The change will take effect immediately.
7.13 Setting the host asset number
Enter a host asset number and view the host serial number.
NOTE: The Host Serial Number field is view only and cannot be changed.
To set the host asset number:
1.
Log in to Webmin.
2.
Select Configuration > Host Asset Settings.
3.
In the Host Asset Settings window, enter the user-assigned host asset number (up to 32
ASCII characters long) in the Change Value to column.
4.
Select Save.
The host asset changes take effect immediately.
7.14 Changing passwords
You can change the passwords for the biomed and clinical users.
81
2062973-001
CARESCAPE Monitor B850
WARNING
Control of this user’s password is critical to ensure that Webmin on this
device is accessed only by trained and authorized personnel. Failure to limit
access of Webmin to trained and authorized personnel only may
compromise patient safety and/or system performance.
NOTE: Username and password are case sensitive. The allowed characters for "biomed" and
"clinical" passwords are: alpha [A-Z, a-z], numeric [0-9], and space. The password length shall
be between 8 and 16 characters.
NOTE: The user name "biomed" is common for the Webmin and Service Calibrations login
screens. A change to the "biomed" password will affect both service interfaces.
1.
Log in to Webmin.
2.
Select Configuration > Passwords.
3.
In the Edit User Password window, change the biomed or clinical user’s password as
required.
4.
Select Save.
The change will take effect immediately.
7.15 Restarting the patient monitor
You can use the Restart module in Webmin to restart the patient monitor after making
configuration changes that require a manual restart to come into effect. For example after
changing network or language settings, or adding activation codes for licenses.
NOTE: Loss of monitoring - This function is enabled only when the patient monitor is in a
discharged state. Before restarting the patient monitor, verify that the patient is discharged
from the patient monitor.
1.
Log in to Webmin.
2.
Select Configuration > Restart.
3.
In the Monitor Restart window, select Restart.
The patient monitor will shutdown and restart automatically.
7.16 Setting up the remote service
7.16.1 Configuring the remote service
To configure the Insite with Exc remote service tool.
82
2062973-001
1.
Log in to Webmin.
2.
Select Configuration > Remote Service.
3.
In the Sub-Modules for Remote Service menu, select Configuration.
Configuration
4.
In the Remote Service Configuration window, enter the applicable data:
HTTP Proxy Server Configuration
Item
Description
Address
-
If this site uses an HTTP proxy server, a These values are
specific site proxy server IP Address and determined by the
customer.
Port number are required for the
Remote Service communication to
work. Otherwise, select None.
-
If the HTTP proxy server requires user
authorization, a specific Username, and
Password is required. Otherwise, select
None.
Port
Username and
Password
Comments
Remote Service Configuration
Item
Description
Comments
System ID
Identifies the system to the GE back office
servers.
These values are read-only
and are unique.
Serial Number
Identifies the unit and is set at the time of
manufacture.
Enterprise URL
If required, designate the address of the GE
backoffice servers required to
communicate with the Remote Service
Agent.
This address should never
be changed unless explicit
instructions are given to do
so.
Enterprise Tunnel If required, designate the address of the GE
URL
backoffice servers required to
communicate with the tunneling agent.
Protocol
5.
Identifies the protocol used to
communicate with the enterprise servers.
This field is read-only and
cannot be changed.
Select Save.
The changes will take effect immediately.
7.16.2 Enabling remote service agent/ connection
After the server has been configured for remote serviceability, the remote service agent must
be enabled for use.
1.
Log in to Webmin.
2.
Select Configuration > Remote Service.
3.
In the Sub-Modules for Remote Service menu, select Control.
4.
In the Remote Service Control window, enable or disable the Service Agent by selecting
Enable or Disable.
5.
Select Save.
The changes will take effect immediately.
83
2062973-001
CARESCAPE Monitor B850
7.16.3 Testing the connectivity
NOTE: Connectivity test works only if the connection is enabled, that is the current state is
enabled/running.
1.
Log in to Webmin.
2.
Select Configuration > Remote Service.
3.
In the Sub-Modules for Remote Service menu, select Control.
4.
Below Test Connectivity in the Remote Service Control window, select Test to test the
connectivity to the remote service server.
5.
Verify that Connection to Enterprice URL and Connection to Tunnel URL both pass the
test.
6.
If one of the connection tests fail, check the failure description and fix the connectivity
issue. Re-test the connectivity.
7.17 Transferring settings from one patient monitor to
other patient monitors
You can transfer platform and/or clinical settings from one patient monitor to another, take
backup copies of the settings to an external device and restore the settings from an external
device.
1.
Complete the platform and/or clinical configuration in one patient monitor.
2.
Save the completed platform and/or clinical configuration settings to an external device
(section 7.17.1 Saving settings).
3.
Load the saved platform and/or clinical configuration settings from an external device to
the destination patient monitors (section 7.17.2 Loading settings).
4.
Activate the loaded platform and/or clinical configuration settings in the destination
patient monitors (section 7.17.3 Activating settings).
5.
Some platform settings can't be transferred from one patient monitor to another. See
section 7.17.3 Activating settings for details. Configure these unaffected settings
manually in the destination patient monitor following the instructions in sections 7.2
Configuring the network, 7.4 Setting unit and bed name, 7.13 Setting the host asset
number and 7.18 License management.
NOTE: Clinical settings are software package and profile specific. For example, you can transfer
clinical settings from a patient monitor with OR and PACU software only to other patient
monitors with OR and/or PACU software, not to patient monitors with ICU, NICU and ED
software.
7.17.1 Saving settings
NOTE: The patient monitor must not be configured to receive any alarm notifications from
other monitors when the settings are saved.
Before saving the settings to a patient monitor that is connected to the MC or S/5 Network,
make sure that the monitor is not receiving any alarm notifications from other monitors:
1.
Select Data&Pages > Other Patients > Receive Alarms.
2.
Check that Change All Notifications is set to Off.
Save the completed platform and/or clinical settings to a service PC or USB flash drive.
1.
84
2062973-001
Log in to Webmin.
Configuration
2.
Select Configuration > Settings.
3.
In the Sub-Modules for Settings menu, select Save.
4.
In the Save Settings window, select the radio button next to the type of settings you want
to save.
5.
Select Save.
6.
According to your Webmin access:
a.
If you are using Webmin on a service PC, you can save the settings file to any mass
storage device connected to the service PC:
In the File Download dialog box, select Save.
In the Save as dialog box, select the destination drive and folder and select Save.
NOTE: You may change the default filename, but do not change the file extension.
b.
If you are using Webmin locally through the integrated browser, you can save the settings
file to a USB flash drive that is connected to one of the patient monitor’s USB ports:
The Save As window will show you the name of the created settings file.
Select Save to save the settings file to the USB flash drive.
NOTE: You may change the default filename, but do not change the file extension.
NOTE: Do not disconnect the USB storage device until saving is complete.
7.17.2 Loading settings
Load the saved platform and/or clinical settings from a service PC or USB flash drive to the
patient monitor.
NOTE: The loaded settings will remain in an inactive state in the patient monitor until they are
purposely activated by the user (see section”7.17.3 Activating settings”).
1.
Log in to Webmin.
2.
Select Configuration > Settings.
3.
In the Sub-Modules for Settings menu, select Load.
4.
According to your Webmin access:
a.
If you are using Webmin on a service PC, you can load the settings file from any mass
storage device connected to the service PC:
b.
In the Load Settings window, enter the file name or select Browse to select a file
from the Choose File to Upload dialog box.
Select Upload to load the settings.
If you are using Webmin locally through the integrated browser, you can load the settings
file from a USB flash drive that is connected to one of the patient monitor’s USB ports:
The Load Settings window will show you the available settings files. Select the
settings file to be loaded.
Select Load Settings to load the selected settings file from the USB flash drive.
NOTE: Do not disconnect the USB storage device until loading is complete.
7.17.3 Activating settings
NOTE: Settings activation takes place only when the patient monitor is in a case reset / patient
discharged state. If you are going to activate settings immediately, verify that the patient
monitor is in a case reset / patient discharged state. You can alternatively initiate the setting
activation process with a delay during an active patient case, but the new settings will activate
only after the next case reset / patient discharged.
85
2062973-001
CARESCAPE Monitor B850
1.
Log in to Webmin.
2.
Select Configuration > Settings.
3.
In the Sub-Modules for Settings menu, select Activate.
4.
In the Activate Settings window, select the settings that you want to activate:
•
Select Cloned settings (clinical and platform) to activate both the clinical and
platform settings.
•
Select Cloned clinical settings to activate only loaded clinical settings.
•
Select Cloned platform settings to activate only loaded platform settings.
NOTE: Activation of the cloned clinical or platform settings will not effect the following
settings in the target patient monitor:
Network
Unit and Bed Name
Host Asset Settings
Licenses
Remember to configure the unaffected settings manually in the target patient monitor.
•
Select Factory default settings to restore all platform and clinical settings back to
the factory defaults.
•
Select US default clinical settings to restore all clinical and platform settings back
to the US specific factory defaults.
NOTE: Activation of the factory defaults and US factory defaults will leave the following
settings in the target patient monitor unaffected:
- Host Asset Settings
- Licenses
5.
86
2062973-001
In the Setting Activation, select whether you want the new settings to take effect
immediately or after the next case end / discharge:
Configuration
Select
To
NOTE
Immediately
Activate the new settings
Immediately.
The patient monitor must be in a
case reset / patient discharged state.
After next case end / Take the new settings in use
with a delay, after the next
discharge
case end / patient discharge.
This option allows you to initiate the
setting activation process with a
delay during an active patient case.
The new settings will activate only
after the next case end / patient
discharge.
6.
Select Activate to start the settings activation process.
•
If immediate settings activation was selected:
a.
b.
•
Wait until the settings activation is completed and the patient monitor has
performed an automatic restart.
Verify that the settings activation was successful and the patient monitor is running
the activated settings.
If after next case end / discharge settings activation was selected:
a.
b.
c.
d.
The patient monitor will show a message Settings activation on next
discharge/after next case end on the display until the next case end / patient
discharge. The patient monitoring can be continued normally until then.
Settings activation will start automatically after the next case end / patient
discharge, unless this process is canceled by the user.
Wait until the settings activation is completed and the patient monitor has
performed an automatic restart.
Verify that the settings activation was successful and the patient monitor is running
the activated settings.
7.17.4 Canceling pending settings activation
You can cancel pending settings activation anytime while the message Setting activation
after next case end / Setting activation after next discharge is shown on the display.
1.
Log in to Webmin.
2.
Select Configuration > Settings.
3.
In the Sub-Modules for Settings menu, select Activate.
4.
Select Cancel to cancel settings activation.
87
2062973-001
CARESCAPE Monitor B850
7.18 License management
You can upload a license file that contains all acquired licenses and activation codes.
Alternatively, you can enable and activate individual software packages and host software
feature licenses by entering the required activation code manually.
NOTE: Contact GE Healthcare to acquire activation codes for licenses.
7.18.1 Enabling and activating host software package
NOTE: You can have several software packages enabled, but only one of them can be selected
active at a time.
Enter an activation code to enable the software package.
1.
Log in to Webmin.
2.
Select Configuration > Licenses.
3.
In the Sub-Modules for Licenses window, select Software Package.
4.
Below Software Package in the Software Package window:
a.
b.
From the Status drop-down list, select ENABLED.
Enter a valid Activation Code for the new software version.
5.
Select Save.
6.
To activate a software package, select the desired radio button in the Active column.
7.
Select Save.
All license changes take effect after the next patient monitor restart.
NOTE: The software license for the active host software version is shown in the Software
Package window below the Active Software License. This license is typically entered before
activating a new host software version, see Software Management.
WARNING
If the software package is changed, all clinical settings will reset to factory
defaults.
7.18.2 Enabling and activating host software feature licenses
Feature licenses are available either as permanent or as trial licenses. Activation codes for trial
licenses are valid for 90-days.
Enter the activation code to enable a software feature.
1.
Log in to Webmin.
2.
Select Configuration > Licenses.
3.
In the Sub-Modules for Licenses menu, select Host Licensing.
4.
In the Host License window, enter the activation code by the appropriate OPTIONAL host
license feature.
NOTE: To activate an OPTIONAL-TRIAL license, enter the expiration date in addition to the
activation code.
5.
From the Status drop-down list, select ENABLED.
6.
Select Save.
All license changes take effect after the next patient monitor restart.
7.18.3 Uploading license file
Upload a valid license file as follows:
88
2062973-001
Configuration
1.
Log in to Webmin.
2.
Select Configuration > Licenses.
3.
In the Sub-Modules for Licenses window, select Upload License.
4.
According to your Webmin access:
a.
b.
If you are using Webmin on a service PC, you can upload the license file from any
mass storage device connected to the service PC. In the Upload Software Package
and Host License window, enter the file name of the license file or select Browse to
select a file using the Choose File to Upload dialog box.
If you are using Webmin locally through the integrated browser, you can upload the
license file from a USB flash drive that is connected to one of the patient monitor’s
USB ports. In the Upload Software Package and Host License window, select the
license file to be uploaded.
NOTE: Do not disconnect the USB storage device until downloading is complete.
5.
Select Upload to upload the license file.
6.
Verify that the information populated in the Software Package and Host License tables is
accurate.
All license changes take effect after the next patient monitor restart.
7.19 Software management
Software installation consists of two main steps: software transfer and software activation.
7.19.1 Transferring software
To begin software installation, you first transfer the new software into the inactive memory
partition of the patient monitor. Transfer software using the GE Healthcare Software Transfer
Utility that runs on a service PC. With this application, you can transfer new software from a
software CD to the patient monitors over the CARESCAPE Network IX (IX Network) or a
crossover cable. The new, transferred software is inactive in the patient monitor(s) until you
activate it. Alternatively you can use InSite ExC to transfer the software. You can transfer the
software in the background, without affecting normal patient monitoring.
NOTE: The software CD contains both the patient monitor software and the Software Transfer
Utility, the tool to install the software. Software transfer procedure is described in detail in the
CARESCAPE Modular Monitors Software Installation Instruction that is delivered together with
the software CD.
7.19.2 Activating the installed software
After transferring the new software to the patient monitors, take the transferred, inactive
software into use by activating it.
Before you start:
•
Verify the compatibility of the connected bedside and network devices with the new
software version. Refer to the latest version of the CARESCAPE Modular Monitors
Supplemental Information Manual for a list of compatible network and bedside devices.
•
Contact GE Healthcare to get the latest version of the user and service documentation
•
Contact GE Healthcare for any inquiries regarding the software CD and/or activation
code for the new host software version.
NOTE: Loss of monitoring - Software is activated only when the patient monitor is in a patient
discharged / case reset state. Normal patient monitoring is unavailable until the software
activation is completed. This may take up to 10 minutes.
89
2062973-001
CARESCAPE Monitor B850
NOTE: The existing clinical and platform settings of the patient monitor are saved and are not
affected by the activation of the new patient monitor software version. However, any new or
changed clinical and platform settings in the activated patient monitor software version have
their factory default values and may require manual configuration. For more information, refer
to the latest version of the CARESCAPE Modular Monitors Supplemental Information Manual.
Contact GE Healthcare for any inquiries regarding the software CD and/or activation code for
the new host software version.
90
2062973-001
1.
Log in to Webmin.
2.
Select Configuration > Software Management.
The Software Management window displays.
3.
In the Software List, select the software that you want to activate::
Software
Purpose of use
Host Software
Patient monitor software
UIC Software
for D15K and D19KT displays and USB Remote Controller
EMBC Software
for F5 and F7 Frames
PDM Software
CARESCAPE Patient Data Module
PiCCO Software
E-PiCCO Module.
sGAS Software
CARESCAPE Respiratory Modules, E-sCO, E-sCOV, E-sCAiO,
E-sCAiOV.
4.
Select Next.
The selected Software activation window appears.
5.
According to the software you are activating, proceed to:
•
Activating host software immediately
•
Activating host software after next case end / discharge
•
Activating module software
•
Activating EMBC or UIC software
Configuration
Activating host software immediately
Before you start:
•
Make sure the patient monitor is in a case reset / patient discharged state.
1.
In the Host Software window, verify that the software you are activating is listed as
Inactive in Current Software State.
2.
In Software License, if applicable, enter the Activation Code for the new software
version.
3.
In Software Activation, select Immediately.
4.
In Erase Inactive Software After Activation, select:
No
-
to keep the currently active software version as inactive software after
the new software version is activated successfully. This option lets you
restore the patient monitor to the previous software version later.
Yes
-
to erase the currently active software version permanently after the
new software version is activated successfully.
5.
Select Activate to start the host software activation.
6.
Confirm activation by selecting Yes in the Host Software window that opens.
The patient monitor shows a screen saver that informs about the ongoing software
activation:
91
2062973-001
CARESCAPE Monitor B850
Software activation in progress. Do not disconnect any measurement modules or
other peripheral devices, or shut down the monitor until the software activation is
complete. Activation may take up to 10 minutes. The device will automatically restart
once the software activation is complete.
7.
Wait until the software activation completes and the patient monitor restarts
automatically.
8.
Verify that the software activation is successful and the patient monitor runs the
activated software.
Activating host software after next case end / discharge
If you want to activate the new host software with a time delay, that is, after the next case end
/ patient discharge, follow this instruction. You can initiate the software activation process with
a delay during an active patient case.
92
2062973-001
1.
In the Host Software window, verify that the software that you activate is listed as
Inactive in Current Software State.
2.
In Software License, if applicable, enter the Activation Code for the new software
version.
3.
In Software Activation, select After next case end / discharge.
Configuration
4.
In Erase Inactive Software After Activation, select:
No
-
to keep the currently active software version as inactive software after
the new software version is activated successfully. This option lets you
restore the patient monitor to the previous software version later.
Yes
-
to erase the currently active software version permanently after the
new software version is successfully activated.
5.
Select Activate to start the software activation.
6.
Confirm activation by selecting Yes in the Host Software window that opens.
The patient monitor shows a message Software activation after next case end / after
next discharge on the display until the next case end or patient discharge. The patient
monitoring can be continued normally until then.
7.
Software activation will start automatically after the next case end / patient discharge,
unless this process is cancelled before it starts.
The patient monitor informs clinical users about pending software activation by showing the
message Software activation after next case end / after next discharge on the display.
The software activation starts automatically after the clinical user performs a patient
discharge / case end the next time. The patient monitor shows a screen saver that informs
about the ongoing software activation:
Software activation in progress. Do not disconnect any measurement modules or other
peripheral devices, or shut down the monitor until the software activation is complete.
Activation may take up to 10 minutes. The device will automatically restart once the
software activation is complete.
The clinical user must wait until the software activation is complete and the patient monitor
restarts automatically. If the patient monitor starts up normally and no error messages appear
on the display, the activation is successful.
Activating module software
Follow this instruction when you want to:
•
activate new sGAS software to a CARESCAPE Respiratory Module
•
activate new PDM software to a CARESCAPE Patient Data Module
•
activate new PiCCO software to a E-PiCCO Module.
Before you start:
•
Make sure that the patient monitor is in a case reset / patient discharge state.
•
Make sure that the target parameter module is connected to the patient monitor.
NOTE: Do not disconnect the parameter module, or shut down the patient monitor until the
software activation is completed and the parameter module has restarted.
To activate module software:
1.
In the PDM/sGAS/PiCCO Software window, in Current Software State, verify that the
software you want to activate is listed as Inactive.
2.
Select Activate to activate the inactive software.
3.
Confirm activation by selecting Yes in the Host Software window that opens.
The patient monitor will now start activating the module software. It will show a message
"PDM module removed", "Gas measurements removed", or "CO measurement removed"
on the patient monitor screen. This message will remain until the module software
activation is completed and the parameter module has restarted. This may take up to 15
93
2062973-001
CARESCAPE Monitor B850
minutes. Do not shut down the patient monitor or disconnect the parameter modules.
The parameter module restarts automatically after the software activation is complete.
4.
After the parameter module restarts, verify that the software activation is successful and
the parameter module runs the activated software.
Activating EMBC or UIC software
Follow this instruction when you want to:
•
activate new EMBC software to a F5 or F7 Frame
•
activate new UIC software to a D15KT, D19T or USB Remote Controller.
You can activate new software to several peripheral devices at a time.
Before you start:
•
Make sure that the patient monitor is in a case reset / patient discharged state.
•
Make sure that all the target peripheral devices are connected to the patient monitor.
NOTE: Do not disconnect any peripheral device, or shut down the patient monitor, until the
software activation is successfully completed.
To activate EMBC and UIC software:
1.
In the EMBC/UIC Software window, in Current Software State, verify that the software
you want to activate is listed as Inactive.
2.
Select the peripheral devices whose software you want to activate.
3.
Select Activate to start the software activation to the selected peripheral devices.
4.
Confirm activation by selecting Yes in the Host Software window that opens.
NOTE: Software activation may take up to 10 minutes.
5.
According to your Webmin access:
•
If you are using Webmin on a service PC:
a.
b.
•
If you are using Webmin locally via the integrated browser of the patient monitor and you
are activating:
a.
b.
6.
EMBC Software – Wait until the software activation completes and the E-Module
Frame (F5/F7) performs an automatic restart. The green On/Standby (Power) LED in
the F5/F7 frame turns off when the EMBC software activation is started and
illuminates again after the EMBC software activation is completed.
UIC Software - Wait until the software activation completes and the patient monitor
performs an automatic restart. It may take up to 10 minutes.
EMBC Software - Wait until the software activation completes and the E-Module
Frame (F5/F7) performs an automatic restart. The green On/Standby (Power) LED in
the F5/F7 frame turns off when the EMBC software activation is started and
illuminates again after the EMBC software activation is completed.
UIC Software - Select Refresh to start the activation, then select Refresh repeatedly
until the software activation progress bar shows 100%. Then wait until the software
activation completes and the patient monitor performs an automatic restart.
Verify that the software activation is successful and the peripheral devices run the
activated software.
7.19.3 Canceling pending host software activation
You can cancel a pending host software activation at any time while the message Software
activation after next discharge/after next case end is shown on the display.
1.
94
2062973-001
Log in to Webmin.
Configuration
2.
Select Configuration > Software Management.
The Software Management window opens.
3.
Select Host Software from the Software List and select Next.
4.
In the Host Software window, below Status, verify that the Software activation pending
is Yes.
5.
Select Cancel.
The pending software activation is cancelled and the patient monitor continues running the
current software version.
7.19.4 Erasing an inactive software version.
You can erase an inactive host software version from the patient monitor. Erasing can prevent
the activation of a wrong software version by mistake.
1.
Log in to Webmin.
2.
Select Configuration > Software Management.
The Software Management window opens.
3.
Select the software that you want to erase and select Next.
The selected software activation window appears.
4.
Select Erase to erase the inactive software.
95
2062973-001
CARESCAPE Monitor B850
For your notes
96
2062973-001
Installation checkout
8
Installation checkout
The purpose of the installation checkout procedure is to ensure that the system is properly
installed and configured for use.
Service personnel shall perform the following checkout procedure for the monitoring system
after the hardware installation and platform configuration is completed:
•
8.1. Visual inspection
•
8.2. Electrical safety tests
NOTE: The manufacturer has performed the electrical safety test for the patient monitor
and acquisition modules during final inspection. You do not have to perform the electrical
safety tests during installation checkout, if there is less than 12 months since the patient
monitor was manufactured. Check the manufacturing week and year from the device
plate (see section 3.4.2. Equipment identification).
•
8.3. Functional check
NOTE: Refer to chapter 10. Maintenance and checkout to see the recommended checkout
procedure after corrective and planned maintenance.
8.1 Visual inspection
Perform the following visual inspection to the installed monitoring system:
•
Carefully inspect the patient monitor and the connected peripheral devices for any
damage.
•
Verify that the patient monitor and the connected peripheral devices are properly
mounted with specified mounting solutions.
•
Verify that the cables between the patient monitor and the connected peripheral devices
are intact, properly connected and secured to the right connectors.
•
Verify that the power cord and USB cables are properly secured with the supplied
retaining clips.
•
Verify that all the network cables, both MC and IX Network, are intact and properly
connected to the right connectors.
•
Verify that ferrite blocks are installed on all Tram-Net cables.
•
Verify that the modules are properly connected and locked.
The cleaning precautions, requirements, procedures, and recommended cleaning solutions for
the patient monitor are described in the patient monitor’s user’s manual. For details about
cleaning, disinfecting and sterilizing the accessories, see the instructions for use in the
accessory package.
8.2 Electrical safety tests
Electrical safety tests provide a method of determining if potential electrical health hazards to
the patient or operator of the device exist.
8.2.1 Test setup
Test conditions
Perform electrical safety tests under normal ambient conditions of temperature, humidity and
pressure.
97
2062973-001
CARESCAPE Monitor B850
Test equipment
The test equipment required to perform electrical safety tests is listed below.
Tool
Part Number / Requirement
Safety Analyzer / Leakage Current Tester
Equivalent to the circuits shown.
Safety Test Body Kit 1)
P/N M1155870 or equivalent
1
Instead of the test bodies included in the safety test body kit, other applicable test bodies
with all pins connected together may be used.
Perform electrical safety tests using an electrical safety analyzer according to IEC 60601-1, UL
60601-1, EN 60601-1 or CSA C22.2 No. 601.1. The schematics in this section provide a general
understanding of the test equipment. Actual configuration of test equipment may vary. Refer to
the instructions delivered with the safety analyzer to perform each test.
The patient monitor being tested should be placed on an insulating surface.
NOTE: Before proceeding, make sure that all test equipment is properly calibrated, maintained
and functioning.
NOTE: GE recommends that the qualified personnel performing the tests should record the test
results of each electrical safety test, for example by using the installation / maintenance check
forms included in this manual.
System setup
These instructions are intended for every component in the system. Ensure that all system
components are properly connected to the patient monitor.
8.2.2 Power outlet
Verify that the power outlet is wired correctly according to the country’s electrical code
standard before starting the following electrical safety tests. The results of the following tests
will be inaccurate unless a properly wired power outlet is used.
8.2.3 Power cord and plug
Verify that the power cord being used with the patient monitor is good. To do this, check the
following:
•
WARNING
Inspect the power cord for wear or damage regularly. If damage is suspected, test for
continuity through each conductor of the power cord connector. Replace the power cord,
as necessary, with a regulatory approved cord for the country of use.
Use only AC power cords recommended or manufactured by GE.
8.2.4 Ground (earth) integrity
Listed below are two alternative methods for checking the ground (earth) integrity: “a) Ground
continuity test” and “b) Impedance of protective earth connection”. These tests determine
whether the device's exposed metal and power inlet's earth (ground) connection has a power
ground fault condition.
Perform either test a) or test b) in accordance to your local regulations.
NOTE: Refer to the instructions delivered with the safety analyzer to perform each test.
98
2062973-001
Installation checkout
a) Ground continuity test
The measuring device (MD) in the diagram below may be a digital multimeter or part of the
safety analyzer.
Acceptance criteria:
•
For equipment without a power supply cord, the impedance between the protective earth
terminal and any accessible metal part which is protectively earthed shall not exceed 0.1
ohms.
•
For equipment with a power supply cord, the impedance between the protective earth
pin in the mains plug and any accessible metal part which is protectively earthed shall
not exceed 0.2 ohms.
b) Impedance of protective earth connection
This test is normally only required as a manufacturing production test to receive safety agency
compliance. Some country agencies do require this test after field equipment repairs (i.e.,
Germany’s DIN VDE 0751 standards). Consult your country/local safety agency if in doubt.
Check compliance as follows:
1.
A current of 25A from a current source with a frequency of 50 or 60 Hz with a no-load
voltage not exceeding 6 V is passed for at least 5 seconds, but not more than 10 seconds,
through the protective earth terminal or the protective earth pin in the mains plug and
each accessible metal part which could become live in case of failure in basic insulation.
2.
The voltage drop between the parts described is measured and the impedance
determined from the current and voltage drop. It shall not exceed the values indicated.
When taking this measurement, flex the unit’s power cord along its length. There should
be no fluctuations in resistance.
Acceptance criteria:
•
For equipment without a power supply cord, the impedance between the protective earth
terminal and any accessible metal part which is protectively earthed shall not exceed 0.1
Ohms.
99
2062973-001
CARESCAPE Monitor B850
•
For equipment with a power supply cord, the impedance between the protective earth
pin in the mains plug and any accessible metal part which is protectively earthed shall
not exceed 0.2 Ohms.
8.2.5 Earth leakage current test
This test measures the current leakage flowing from the mains part through or across the
insulation into the protective earth conductor of the device under test.
Perform this test both in Normal Condition (NC) and in a Single Fault Condition (SFC), where one
of the supply conductors is open at a time. Perform the test with normal and reverse polarity.
NOTE: Refer to the instructions delivered with the safety analyzer to perform this test.
NOTE: *The measuring device (MD) represents the network and voltage measuring instrument
and its frequency characters according to IEC 60601-1.
1.
100
2062973-001
Configure the safety analyzer as follows (NC):
Polarity: NORMAL
Neutral: CLOSED
2.
Power on the device under test.
3.
Read and record the current leakage indicated on the safety tester.
4.
Configure the safety analyzer as follows (SFC):
Polarity: NORMAL
Neutral: OPEN
5.
Read and record the current leakage indicated on the safety tester.
6.
Configure the safety analyzer as follows (SFC):
Polarity: REVERSED
Neutral: OPEN
Installation checkout
7.
Read and record the current leakage indicated on the safety tester.
8.
Configure the safety analyzer as follows (NC):
Polarity: REVERSED
Neutral: CLOSED
9.
Read and record the current leakage indicated on the safety tester.
10.
Power off the device under test.
Acceptance criteria in Normal Condition (NC):
•
All readings shall be less than or equal to 300 A for installations that require compliance
to UL 60601-1 requirements.
•
All readings shall be less than or equal to 500 A for installations that require compliance
to EN 60601-1 / IEC 60601-1 requirements.
Acceptance criteria in Single Fault Condition (SFC) – one of the supply conductors open at a
time:
•
All readings shall be less than or equal to 1 mA.
8.2.6 Enclosure leakage current (touch current) test
This test measures current leakage through the exposed conductive parts on the device under
test.
Perform the test in Normal Condition (NC) and in two different Single Fault Conditions (SFC):
1) earth open and 2) one of the supply conductors open at a time. Perform the test with normal
and reverse polarity.
NOTE: Refer to the instructions delivered with the safety analyzer to perform this test.
NOTE: *The measuring device (MD) represents the network and voltage measuring instrument
and its frequency characters according to IEC 60601-1.
1.
Configure the safety analyzer as follows (NC):
Polarity: NORMAL
101
2062973-001
CARESCAPE Monitor B850
Neutral: CLOSED
Earth (GND): CLOSED
2.
Power on the device under test.
3.
Read and record the current leakage indicated on the safety tester.
4.
Configure the safety analyzer as follows (SFC):
Polarity: NORMAL
Neutral: OPEN
Earth (GND): CLOSED
5.
Read and record the current leakage indicated on the safety tester.
6.
Configure the safety analyzer as follows (SFC):
Polarity: NORMAL
Neutral: CLOSED
Earth (GND): OPEN
7.
Read and record the current leakage indicated on the safety tester.
8.
Configure the safety analyzer as follows (SFC):
Polarity: REVERSED
Neutral: CLOSED
Earth (GND): OPEN
9.
Read and record the current leakage indicated on the safety tester.
10.
Configure the safety analyzer as follows (SFC):
Polarity: REVERSED
Neutral: OPEN
Earth (GND): CLOSED
11.
Read and record the current leakage indicated on the safety tester.
12.
Configure the safety analyzer as follows (NC):
Polarity: REVERSED
Neutral: CLOSED
Earth (GND): CLOSED
13.
Read and record the current leakage indicated on the safety tester.
14.
Power off the device under test.
Acceptance criteria in Normal Condition (NC):
•
102
2062973-001
All readings shall be less than or equal to 100 A
Installation checkout
Acceptance criteria in Single Fault Condition (SFC) – earth open or one of the supply conductors
open at a time:
•
All readings shall be less than or equal to 300 A for installations that require compliance
to UL 60601-1 requirements.
•
All readings shall be less than or equal to 500 A for installations that require compliance
to EN 60601-1 / IEC 60601-1 requirements.
8.2.7 Patient leakage current tests – overview
The following table specifies the parameter modules and the related patient connectors to be
tested in the 8.2.8. Patient (source) leakage current tests and in the 8.2.9. Patient (sink) leakage
current tests.
Use the safety test body kit, P/N M1155870 (or equivalent), to perform patient leakage current
tests. This safety test body kit contains various patient connectors where all pins are shorted
out together. For information on which test body to use for each patient connector, refer to the
service instructions included in the safety test body kit.
NOTE: If not otherwise stated in the table below, each test body is connected directly to the
specified connector in the patient module.
Table 1
Patient connectors to be tested with each module
Module
Patient connector
E-PRESTN, E-PSMP, EPSMPW
ECG &
E-RESTN, E-PSM, EPSMW
ECG &
E-PRETN
ECG &
SpO2
SpO2
P1
E-P, E-PT
P3/P7
E-PP
P5
E-COP, E-COPSv
P4/P8
E-PiCCO
P8
E-NSATX, E-NSAT
SpO2
E-Masimo
SpO2
E-NMT
NMT
E-BIS
1. Connect the BISx Digital Signal Processing Unit with the Patient
Interface Cable (PIC+) to the E-BIS module.
2. Connect the specified test body to the PIC+ cable.
NOTE: The patient isolation is in the BISx Digital Signal Processing
Unit , not in the E-BIS module.
E-Entropy
1. Connect an Entropy sensor cable to the module.
2. Connect the specified test body to the Entropy sensor cable.
103
2062973-001
CARESCAPE Monitor B850
Module
Patient connector
E-EEG
1. Disconnect the N-EEG headbox from the E-EEG module.
2. Connect the test body directly to the E-EEG module.
PDM
ECG &
SpO2
TRAM Modules
ECG &
SpO2
SpO2, Masimo SpO2
SpO2
8.2.8 Patient (source) leakage current tests
This procedure measures the leakage current from an applied part connector of the device to
ground.
Perform the test in Normal Condition (NC) and in two different Single Fault Conditions (SFC):
1) earth open and 2) one of the supply conductors open at a time.
Perform test with normal and reverse polarity.
NOTE: Refer to the instructions delivered with the safety analyzer to perform this test.
NOTE: *The measuring device (MD) represents the network and voltage measuring instrument
and its frequency characters according to IEC 60601-1.
NOTE: Perform this test for all the connected parameter modules and patient connectors
specified in Table 1.
1.
104
2062973-001
Configure the safety analyzer as follows (NC):
Polarity: NORMAL
Neutral: CLOSED
Earth (GND): CLOSED
2.
Power on the device under test.
3.
Read and record the current leakage indicated on the safety tester.
4.
Configure the safety analyzer as follows (SFC):
Installation checkout
Polarity: NORMAL
Neutral: OPEN
Earth (GND): CLOSED
5.
Read and record the current leakage indicated on the safety tester.
6.
Configure the safety analyzer as follows (SFC):
Polarity: NORMAL
Neutral: CLOSED
Earth (GND): OPEN
7.
Read and record the current leakage indicated on the safety tester.
8.
Configure the safety analyzer as follows (SFC):
Polarity: REVERSED
Neutral: CLOSED
Earth (GND): OPEN
9.
Read and record the current leakage indicated on the safety tester.
10.
Configure the safety analyzer as follows (SFC):
Polarity: REVERSED
Neutral: OPEN
Earth (GND): CLOSED
11.
Read and record the current leakage indicated on the safety tester.
12.
Configure the safety analyzer as follows (NC):
Polarity: REVERSED
Neutral: CLOSED
Earth (GND): CLOSED
13.
Read and record the current leakage indicated on the safety tester.
14.
Power off the device under test.
15.
Repeat this test for all the connected parameter modules and patient connectors
specified in Table 1.
Acceptance criteria in Normal Condition (NC):
•
All readings shall be less than or equal to 10 A.
Acceptance criteria in Single Fault Condition (SFC) – earth open or one of the supply conductors
open at a time:
•
All readings shall be less than or equal to 50 A.
8.2.9 Patient (sink) leakage current tests
This procedure measures the leakage current from an applied part connector of the device to
ground. Perform the test in Normal Condition (NC) with normal and reverse polarity.
NOTE: Refer to the instructions delivered with the safety analyzer to perform this test.
105
2062973-001
CARESCAPE Monitor B850
NOTE: *The measuring device (MD) represents the network and voltage measuring instrument
and its frequency characters according to IEC 60601-1.
NOTE: **According to IEC-60601, the impedance to protect the circuitry and the person
performing the test, but low enough to accept currents higher than the allowable values of the
leakage current to be measured.
WARNING
SHOCK HAZARD - The following step causes high voltage at the test body.
Do not touch the test body.
NOTE: Perform this test for all the connected parameter modules and patient connectors
specified in Table 1.
1.
Configure the safety analyzer as follows:
Polarity: NORMAL
Neutral: CLOSED
GND: CLOSED
2.
Power on the device under test.
3.
Read and record the current leakage indicated on the safety tester.
4.
Configure the safety analyzer as follows:
Polarity: REVERSED
Neutral: CLOSED
GND: CLOSED
5.
Read and record the current leakage indicated on the safety tester.
6.
Power off the device under test.
7.
Repeat this test for all the connected parameter modules and patient connectors
specified in Table 1.
Acceptance criteria:
•
106
2062973-001
All readings shall be less than or equal to 50 A.
Installation checkout
8.2.10 Test completion
1.
Disconnect the safety analyzer from the power outlet.
2.
Disconnect the test equipment from the patient monitor.
3.
Disconnect the patient monitor’s power cord from the leakage tester.
4.
Mark this task as complete on the Appendix A. Installation check form.
8.3 Functional check
The purpose of this functional check is to ensure that the system is properly installed and
configured. Cover all peripheral devices that are connected to the patient monitor by
performing the applicable tests below. Skip the tests that are not applicable for the installed
patient monitor.
8.3.1 Start-up
1.
Turn on the patient monitor .
Verify that the patient monitor starts up normally:
The speaker gives an audible beep.
The normal monitoring screen appears and there are no error messages on the
screen.
8.3.2 Display
Picture quality
Perform this test for all the connected displays.
1.
Verify that all text is readable and all images are clear.
2.
Verify that the brightness is good. Adjust if necessary.
Touchscreen control
Perform this test for all connected touchscreen displays.
1.
Verify the operation and the calibration of a touchscreen by touching a corner of an
active parameter window. Verify that the related menu is opened.
2.
Select
to close any open menu and return to the main display.
Alarm light
1.
Create an active alarm and check that the alarm light illuminates.
8.3.3 Device Information
1.
Log in to Webmin.
2.
Select Information > Device Information.
3.
Verify the following:
4.
The connected parameter modules are identified.
The connected CARESCAPE Network ID interfaces are identified.
The connected USB input devices are identified.
Stay connected to Webmin.
107
2062973-001
CARESCAPE Monitor B850
8.3.4 Configuration Information
1.
Select Information > Configuration Information.
2.
Verify the following:
3.
The host Information is correct.
The active software package is correct.
The correct host licenses are enabled.
The correct PDM licenses are enabled.
Patient ID prefix is correctly configured.
Unit and Bed name are correctly configured.
S/5 printers are correctly configured.
IX printers and printer locations are correctly configured.
Remote service is correctly configured.
National requirements are correctly configured.
Network is correctly configured.
Power Line Frequency is correctly configured.
MUSE/12SL is correctly configured.
Citrix is correctly configured.
Log out Webmin.
8.3.5 Keypad and remote
Perform this test for all the connected displays with a keypad and for the optional remote
controller.
1.
Press any hard key in the keypad or remote and verify that the related menu is opened on
the screen or the related activity is started.
2.
Rotate the Trim Knob control in either direction to move from option to option on the
display until you have an active parameter window or main menu item highlighted. Press
the Trim Knob control once to select the highlighted option. Verify that the related menu
is opened on the screen or the related activity is started.
3.
Select
to close any open menu and return to the main display.
8.3.6 Mouse
Perform this test only if a mouse is connected to the patient monitor.
1.
Move the mouse until the pointer (arrow) is over an active parameter window or a main
menu item you wish to select and click the left mouse button once to select it.
2.
Select
to close the open menu and return to the main display.
8.3.7 Alphanumeric keyboard
Perform this test only if an alphanumeric keyboard is connected to the patient monitor.
108
2062973-001
1.
Select Data & Pages > Admit/Discharge (or Start / End Case).
2.
Select the Patient tab > Edit Name & MRN.
3.
Press Enter to highlight the Medical Record Number field.
Installation checkout
4.
Type some text into the Medical Record Number field using the connected alphanumeric
keyboard. Include some characters that are specific to the chosen keyboard locale to
verify that the keyboard language configuration is correct.
5.
Select
to close the open menu and return to the main display.
8.3.8 Barcode reader
Perform this test only if a barcode reader is connected to the patient monitor.
1.
Select Data & Pages > Admit/Discharge (or Start / End Case).
2.
Select the Patient tab.
3.
Scan a test barcode that is applicable to your system:
Parser Type
Test Procedure
Length Delimited or Character
Delimited Parser
4. Select Scan from Barcode.
5. Scan a known test barcode obtained from the hospital.
NOTE: The barcode data content must be known and in
compliance with the completed parser configuration.
6. Verify that the data content in the barcode is correctly
populated to the related fields in the Patient and the
Administr. Information tabs.
1.
2.
3.
4. Select Edit Name & MRN and press Enter to highlight
the Medical Record Number field.
5. Scan a sample barcode that only contains one piece of
information (e.g., a Serial Number barcode from a
module’s device label).
6. Verify that the data is correctly populated into the
Medical Record Number field.
No parser
1.
2.
3.
7. Select
to close the open menu and return to the main display.
8.3.9 MC Network and S/5 Network
Perform the following test only if the patient monitor is connected to a wired MC Network or S/5
Network.
NOTE: Make sure that at least one other patient monitor is on the network. The other patient
monitor must be in an admitted state and have an active ECG measurement with a simulator
signal.
1.
Check that a network symbol
screen.
is displayed in the upper right corner of the
2.
Select Data & Pages – Other Patients and select a patient from the list.
109
2062973-001
CARESCAPE Monitor B850
3.
Select View and verify that a window with parameters from another patient displays on
the left side of the screen.
4.
Select Close View to close the window.
8.3.10 IX printers
Perform the following test only if the patient monitor is connected to a printer in the IX Network
and you did not print a test page while you configured the IX printer.
1.
Log in to Webmin.
2.
Select Configuration > Printers > Print Test Page.
3.
Select the IX Printer to test.
4.
Select Save.
5.
Verify that the test page was printed to the selected printer.
6.
Repeat steps 3 to 5 for all connected IX printers.
8.3.11 iPanel connection
Perform the following test only if the Citrix / iPanel is configured and in use.
1.
Select Data & Pages > iPanel and verify that the initial program (configured in Webmin) is
launched correctly.
2.
Select
to exit the Citrix thin client.
8.3.12 Insite with EXC
Perform the following test only if remote service is configured and enabled, and you did not test
the connectivity already while you enabled it.
1.
Log in to Webmin
2.
Select Configuration > Remote Service.
3.
In the Sub-Modules for Remote Service menu, select Control.
4.
In the Remote Service Control window under Test Connectivity, select Test to test the
connectivity to the remote service server.
5.
Verify that Connection to Enterprise URL and Connection to Tunnel URL both "Pass" the
test.
If one of the connection tests fail, check the failure description given and fix the connectivity
issue. Re-test the connectivity.
8.3.13 Test completion
Discharge Patient or Reset Case to discard any changes made to the patient monitor
configuration during checkout.
•
110
2062973-001
Complete the Appendix A. Installation check form.
%DUFRGH5HDGHU
0RXVH
C
86%
'9,
86%
'9,
86%
'9,
9LGHR
$ODUPOLJKWDXGLRWRXFK
NH\SDG
9LGHR
$ODUPOLJKWDXGLRWRXFK
NH\SDG
9LGHR
$ODUPOLJKWDXGLRWRXFK
NH\SDG
86%'(9,&(6
PD\EHSOXJJHGLQWRDQ\
DYDLODEOH86%SRUW
/&'
86%
GLJLWDO
.H\ERDUG
5HPRWH&RQWURO
/&'
&ORQH
DQDORJ
/&'
GLJLWDO
86%
UG
2SWLRQDO
9LGHR5HT
/&'
GLJLWDO
86%
86%
'9,,
86%
'9,'
86%
'9,,
$&0$,16
32:(5
/DVHU3ULQWHU+RVSLWDO
,QIRUPDWLRQ6\VWHPHWF
&$5(6&$3(1HWZRUN,;
5HPRWH$ODUP
%R[
0SRUW
))UDPH2QO\
3603'0
6OLGH0RXQW
3'0FRQQHFWVYLD)
VOLGHPRXQWRUGLUHFWO\E\
FDEOHWR&38
3'0
&$5(6&$3(0RQLWRU%6\VWHP'LDJUDP
8SWR0HGLFDO'HYLFHV
8QLW\1HWZRUN,'
.H\SDG
0SRUW
0SRUW
3ULQWHU3510
0SRUW
0SRUW'(9,&(6
PD\EHSOXJJHGLQWRDQ\
DYDLODEOH0SRUW
2WKHU3DWLHQW0RQLWRUV
&HQWUDO6WDWLRQHWF
0RGXOH)UDPH
RU75$0
UDF2QH
0RGXOH)UDPH
&$5(6&$3(1HWZRUN0&
56
56
H3RUW7UDPQHW
H3RUW7UDPQHW
&388QLW
&&38
)(PRGXOH)UDPHLQFOXGHVVOLGHPRXQWIRU3603'0
)(PRGXOH)UDPH
75$0UDF7UDP0RGXOH2QO\
75$0UDF$
3DWLHQW'DWD0RGXOH3'0
8SWRVXSSRUWHG3DWLHQW0RGXOH+RXVLQJV
9
/&'
&ORQH
DQDORJ
8SWRVXSSRUWHG/&''LVSOD\V
Theory of operation
Theory of operation
9.1 System block diagram
111
2062973-001
CARESCAPE Monitor B850
The system block diagram describes the functional units of the CARESCAPE Monitor B850. The
following sections describe the operation and interaction of the different subsystems.
9.2 Main components
The CPU unit is housed in a single package. The main components of the CPU unit are:
•
Power supply
•
CPU processor board
•
3rd video board (optional)
•
Speaker assembly
•
Bottom chassis, Top cover, and Back cover
•
Front bezel
•
Light pipe assembly
9.2.1 Power supply
The Power supply connects to the CPU processor board with a 12 pin connector and provides a
5.1V and two separate 16.75V outputs.
Power entry module
The power entry module provides an AC input connector and a power on/off switch.
112
2062973-001
Theory of operation
9.2.2 CPU processor board
WŽǁĞƌ^ƵƉƉůLJ
$&3RZHU
6SHDNHU
3RZHU
KDUQHVV
6SHDNHUKDUQHVV
(WKHUQHW
86%
H73RUWV
6HULDO
%&&383URFHVVRU%RDUGZWZRYLGHRV
:LWKRSWLRQDO
3:$%&38&7+,5'9,'(2'9,,
'9,,
ZLWKUG9LGHR&DUG
'9,'
03RUWV
Main processor and memory:
•
The main processor manages the data processing of the patient monitor.
•
It has a non-volatile flash memory for the BIOS a volatile SDRAM memory for run time
code execution and temporary data storage.
•
A detachable, non-volatile flash memory, USB Disk On Module (uDOM), is used as the
permanent memory for application and service software, and to store clinical and
platform settings. The uDOM may hold two versions of the software in different partitions:
inactive and active.
System supervision:
•
Watchdog timers control the operation of the main processor.
•
The processor board has battery backed-up real-time clock to store system date and
time.
Video and audio system:
•
The processor board controls the generation of audible tones and displayed information
for analog and digital type displays.
Support for interfaces:
•
The processor board provides support for the communication channels to support M-Port
peripherals, ePort/Tramnet (eT-Ports) connected acquisition systems, the CARESCAPE or
S5 Network, USB devices and Serial Devices.
9.2.3 Speaker Assembly
The speaker is used for audible tones: beat tone and alarms.
113
2062973-001
CARESCAPE Monitor B850
9.2.4 Bottom Chassis, Top and Back Cover
The bottom chassis houses the processor board, power supply, speaker and light pipe
assembly. The bottom chassis provides the means for mounting the CPU unit to GCX or other
mechanical mounts. The light pipe assembly transmits light from a LED on the processor board
to the front panel of the CPU unit for presence of 5V DC.
9.2.5 User interface
The M-Port based keypad, USB touchscreen, USB remote control, USB keyboard or an USB
mouse provides the user interface for the patient monitor. The USB remote control is
connected to one of the USB ports at the CPU unit or at the display using a USB2.0 cable. The
keyboard and mouse are connected to the CPU unit using the USB connectors. The keypad
uses an M-Port on the front panel of the CPU unit.
•
A green LED illuminates on the front of panel of the CPU unit when the unit is powered.
•
A Service Monitor - Low Battery message is put on the display for a low lithium battery.
•
Power on/off switch is lit green when it is in ON condition and power is present.
9.2.6 External interfaces
M-Ports
Four M-Ports are provided on the front of the CPU unit for connecting the PRN50 and Unity ID.
Basic insulation (250 VAC) is provided to isolate the CPU unit from M-Port devices. Each M-Port
supports the 1-Wire, Serial (RS-232) and Ethernet Protocols. Each M-Port can supply 100mA at
4.75V minimum.
The connector used for the M-Ports is an 8-pin, RJ-45 type.
eT-Ports
Each eT-Port port can support either an ePort device or a Tramnet device. The pins of the
eT-Port connector are switched between the two protocols by use of relays. Pin 7 in this
connector is used as a Sense line to determine whether the connected device supports either
the Tramnet or Ethernet protocol.
The connector used for the eT-Ports is a DB-9 Female.
ePort Devices
Up to two ePort devices can be connected to the eT-Ports located on
the back of the CPU unit such as Module Frame and PDM.
Tram-net
Up to two Tram-net compatible devices can be connected to the
eT-Ports located on the back of the CPU unit so it can interface with
Tram-net devices such as the Tram-rac 4A.
Ethernet connections
Two Ethernet ports are located on the back of the CPU unit and they provide an ANSI/IEEE
802.3 10/100 BaseT Ethernet standard interface to the CARESCAPE Network/ S5 network and
Hospital Enterprise network. Basic insulation (250 VAC) is provided to isolate the CPU unit from
networked devices.
The connector used for the Ethernet ports is a dual 8-pin, RJ-45 type.
Video Outputs
A DVI-I and a DVI-D ports are located on the back of the CPU unit. An optional 3rd Video Card
(2020913-003) provides an additional interface to analog and digital displays.
Each DVI-I & DVI-D port has the following features:
•
114
2062973-001
DDC (Data Display Channel) support
Theory of operation
•
Resolution of 1024 x 768 x 60HZ.
DVI-I can drive displays in the following configurations:
•
Digital only, using DVI-D to DVI-D cable
•
Analog only using DVI-A or VGA cable
•
Both digital and analog, using the Y-split cable along with a DVI-D to DVI-D cable and a
DVI-A to VGA Cable. Note in this configuration image on both the analog and digital
display will be the same with same resolution i.e., 1024x768 @ 60Hz.
DVI-D can drive displays in the following configuration:
•
Digital only, using DVI-D to DVI-D cable
Serial port
Two RS-232C compatible serial ports are located on the back of the CPU unit to provide an
interface to a PC.
The connector used for the serial ports is a DB-9M.
USB 2.0
Four USB ports are located on the back of the CPU unit to provide an interface for a USB based
Remote Control Assembly, keyboard, mouse, Bar Code reader or a touch screen display.
115
2062973-001
CARESCAPE Monitor B850
For your notes:
116
2062973-001
Maintenance and checkout
10 Maintenance and checkout
This chapter specifies the checkout procedure and the maintenance activities to be performed
to the patient monitor after corrective maintenance and during annual planned maintenance.
WARNING
WARNING
Only perform maintenance procedures specifically described in the manual.
Planned maintenance should be carried out annually. Failure to implement
the recommended maintenance schedule may cause equipment failure and
possible health hazards.
NOTE: The manufacturer does not, in any manner, assume the responsibility for performing the
recommended maintenance schedule, unless an Equipment Maintenance Agreement exists.
The sole responsibility rests with the individuals, hospitals, or institutions utilizing the device.
NOTE: Refer to Module Frames and Modules Technical Manual for corrective and planned
maintenance checkout procedures of the parameter modules.
NOTE: Refer to the PDM section in the Module Frames and Modules Technical Manual for the
battery maintenance procedure of the PDM battery.
Corrective maintenance
Service personnel shall perform the following checkout procedure steps after any corrective
maintenance, before taking the monitor back into clinical use:
Required checkout procedure
Performed service activity
Visual
inspections
(section 10.1)
Electrical
safety test
(section 10.2)
Functional check
(section 10.3)
Yes
Yes
-
Yes
Yes
After detaching or replacing:
-
Power supply
-
CPU PCB assembly
-
Lithium -ion battery (timekeeper)
After detaching or replacing:
-
3rd video card
All steps
-
10.3.1 Start-up
-
10.3.2 Display
-
10.3.3 PSM / PDM
identification
After detaching or replacing:
-
Enclosure Kit
-
Hardware kit (or any part of this)
-
Speaker assembly
Yes
Yes
-
10.3.1 Start-up
Yes
No
-
10.3.1 Start-up
Yes
Yes
-
All steps
Yes
No
-
10.3.1 Start-up
-
10.3.5 Keypad and remote
After detaching or replacing:
-
Label kit
After detaching or replacing:
-
uDOM
After detaching or replacing:
-
M-Port keypad Kit
-
Remote Control Kit
117
2062973-001
CARESCAPE Monitor B850
Planned maintenance schedule
Service personnel shall perform the following checkout procedure every 12 months after
installation:
1.
Visual inspection (section 10.1)
2.
Electrical safety tests (section 10.2)
3.
Functional check (section 10.3, all steps)
Replace the CPU timekeeper battery every 5 years, or whenever the Service Monitor Error
Code 0xHOST1100 message is shown.
10.1 Visual inspection
Follow the procedure in section 8.1. Visual inspection.
10.2 Electrical safety checks
Electrical safety tests provide a method of determining if potential electrical health hazards to
the patient or operator of the device exist.
Perform the following electrical safety tests described in detail in chapter 8. Installation
checkout:
8.2.1. Test setup
8.2.2. Power outlet
8.2.3. Power cord and plug
8.2.4. Ground (earth) integrity
8.2.5. Earth leakage current test
8.2.6. Enclosure leakage current (touch current) test
Record the values of the tests on the Appendix B. Maintenance check form.
10.3 Functional check
10.3.1 Start-up
Follow the procedure in section 8.3.1. Start-up.
10.3.2 Display
Follow the procedure in section 8.3.2. Display.
10.3.3
PSM / PDM identification
1.
Configure the ECG1 waveform field and the NIBP parameter window to the patient
monitor screen with adequate priority. Connect a PSM or PDM module to the patient
monitor.
2.
Verify that the ECG waveform field, the NIBP parameter window and the related
information appear on the patient monitor screen.
10.3.4 E-module identification
1.
118
2062973-001
Log in to Webmin.
Maintenance and checkout
2.
Select Information > Device Information.
3.
Verify that the information about the connected module appears in the table named as
“Acquisition Information – E-Modules”.
NOTE: For some parameter modules, the table does not show the actual module information,
but the information of the individual subassemblies inside the module.
NOTE: You may need to refresh the Webmin screen if you have connected the module to the
patient monitor after entering the Device Information Webmin screen.
10.3.5 Keypad and remote
Follow the procedure in section 8.3.5. Keypad and remote.
10.3.6 Mouse
Follow the procedure in section 8.3.6. Mouse.
10.3.7 Alphanumeric keyboard
Follow the procedure in section 8.3.7. Alphanumeric keyboard.
10.3.8 Barcode reader
Follow the procedure in section 8.3.8. Barcode reader.
10.3.9 MC Network and S/5 Network
Follow the procedure in section 8.3.9. MC Network and S/5 Network.
10.3.10 IX printers
Follow the procedure in section 8.3.10. IX printers.
10.3.11 Insite with Exc
Follow the procedure in section 8.3.12. Insite with EXC
10.3.12 Recorder
1.
Select Monitor Setup > Printing > Devices > Setup and configure:
Printout: Waveforms
Location: Local
2.
Select Monitor Setup > Printing > Waveforms and configure:
Waveform 1: II
Waveform 2: V1
3.
Select Monitor Setup > Printing > Waveforms > Print Waveforms or the related soft key
in the main menu, or the Print Waveforms hard key in the keypad to start printing.
4.
Verify that the recorder starts printing. Let the recorder print for approximately 10
seconds and verify the following things from the printout:
119
2062973-001
CARESCAPE Monitor B850
The header line contains the date, time and some other applicable status and
configuration information.
The grid is clear.
The waveforms labels appear in the printout as configured.
Stop printing by selecting Monitor Setup > Printing > Waveforms > Stop Printing, or the
related soft key in the main menu.
10.3.13 Test completion
Select Discharge Patient or Reset Case to discard any changes made to the patient monitor
configuration during checkout.
•
120
2062973-001
Complete the Appendix B. Maintenance check form.
Troubleshooting
11 Troubleshooting
The problems and solutions in this section represent only a few of the faults that you may
encounter and are not intended to cover every possible problem that may occur.
This chapter focuses on troubleshooting technical problems. See the patient monitor’s user’s
manual for troubleshooting monitoring problems and clinical configuration issues.
If the problem remains, call technical support for service. To ensure accurate problem solving,
please be prepared to provide the following information:
•
Problem description and the troubleshooting done so far.
•
Configuration information (section 11.2.1)
•
Device information (section 11.2.2)
•
Service Logs (section 11.3.3)
•
Error messages displayed, if any.
•
Other information, as requested.
11.1 Visual inspection
Before beginning any detailed troubleshooting, complete a thorough visual inspection to be
sure that:
•
There is no physical damage.
•
All peripheral devices are connected properly.
•
The patient monitor and the connected peripheral devices are properly powered.
Also verify that the problem is not caused because of:
1.
Incompatibility issue. See the patient monitor’s supplemental information manual for the
list of compatible devices.
2.
Incorrect platform or clinical configuration. Refer to the chapter 7. Configuration in this
manual for details about platform configuration and the patient monitor’s user’s manual
for details about clinical configuration.
If loose parts or cable connections inside the patient monitor are suspected, disassemble the
patient monitor to a level needed to perform an internal visual check. Check that:
•
all screws are tightened properly
•
all cables are connected properly
•
there are no loose objects inside the patient monitor
NOTE: Perform the electrical safety test and the checkout procedure every time you have
disassembled the patient monitor.
11.2 Webmin - Information tab
Access Webmin service interface to view configuration information and device information.
121
2062973-001
CARESCAPE Monitor B850
11.2.1 Configuration information
The Configuration Information module shows the current platform configuration of the patient
monitor and the connected peripheral devices.
To view configuration information:
1.
Log in to the Webmin.
2.
Select the Information tab.
3.
Select Configuration Information.
4.
Scroll down the page to view the configuration information:
Configuration information
122
2062973-001
Host Information
•
PDM License Information
• License option, status, and number of licenses.
Active Software License
• Current monitor software license in use, status and
feature code.
Active Software Package
• Current software package in use.
Host License Information
• Each host license name, its current status (enabled,
disabled or trial), feature code, and the expiration date for
a trial license.
Default Clinical Settings
• Current default clinical settings.
Admit Settings
• Patient ID Prefix.
Citrix
• Server address, initial program, session timeout in
minutes, username and encryption level.
Active software version, Inactive software version, Host
serial number, Host asset number, MC Network IP
address, IX Network IP address, MAC address, S/5
Network virtual ID, CPU hardware version.
Troubleshooting
Configuration information
Unit and Bed Name
• Unit name and Bed name for CARESCAPE Network.
Acquisition Information
E-module
• STP/TP/ST configuration information and P/PT/PP
configuration information from E- modules.
S/5 Printers
• Printer name.
IX Printers
• Printer name, hostname or IP address.
Printer Location
Information
• Printout type (Alarm Waveforms, Numeric Trends,
Reports, and Waveforms) and Printer location.
Remote Service
• Proxy URL, Proxy port, Proxy username, Remote service
status, System ID, Serial number, Enterprises URL,
Enterprises tunnel URL, and Protocol.
Language
• Clinical user interface language.
National Requirement
• Setting for country specific alarms (None or France).
Network
• Active configuration information, including MAC address,
MC Network type (IP address, Netmask, Gateway,
Destination IP address, Destination netmask, and PHY
configuration), and IX Network type (IP address, Netmask,
Gateway, DNS server 1, DNS server 2, and PHY
configuration).
Power Line Frequency
• Current power line frequency setting in use.
MUSE/12SL
• Location ID, Site number, MUSE web username, and MUSE
web URL.
11.2.2 Device information
The Device Information module shows the hardware and software information of the patient
monitor and the connected peripheral devices.
To view Device information:
1.
Log in to the Webmin.
2.
Select the Information tab.
3.
Select Device Information.
4.
Scroll down the page to view the device information:
Device information
Host Information
•
Active Software License
• Current monitor software license in use, status and
feature code.
Active Software Package
• Current software package in use, status and feature
code.
Active software version, Inactive software version, Host
serial number, Host asset number, MC Network IP
address, IX Network IP address, MAC address, S/5
Network virtual ID, CPU hardware version.
123
2062973-001
CARESCAPE Monitor B850
Device information
Host License Information
• Each host license name, its current status (enabled,
disabled or trial), feature code, and the expiration date for
a trial license.
Acquisition Information
• PDM: Active software version, Main board revision, DAS
board revision, Serial number, Asset number, MAC
address, IP address, Power frequency, ECG filter.
Acquisition Information
• E-Module: Label, Software version, Control number, and
Serial number.
Acquisition Information
• E-Module Frame: Frame serial number, EMBC Serial
number, EMBC Software number, EMBC Software version,
and EMBC IP address.
Installed S/5 Printers
• Printer name.
Installed IX Printers
• Printer name, hostname or IP address.
Printer Location
Information
•
Printout type (Alarm Waveforms, Numeric Trends,
Reports, and Waveforms) and Printer location.
Acquisition Information Tram RAC
•
Software part number and version.
M-Port Information
•
Device name, software number and version, serial
number, port number, active state for each serial device
connected to the patient monitor, and connection type.
PDM License Information
•
License option, status, and number of licenses.
UNITY ID Information
•
Product ID, Unity Network ID software number and
version, Date, Time, Device name and software version of
each device connected.
USB Port Information
• Product name, Manufacturer, Vendor code, Product
ID, and Serial number.
124
2062973-001
Troubleshooting
11.3 Webmin - Diagnostics tab
Access Webmin service interface to view hardware statistics, ping a network device and view
or download log files.
11.3.1 Hardware statistics
The Hardware Statistics module displays several internal voltages and temperatures. A value is
displayed in red, if the current reading exceeds a pre-determined lower or upper limit, A value is
displayed either as “0” or as “--”, if it cannot be measured.
To access hardware statistics:
1.
Log in to Webmin.
2.
Select Diagnostics > Hardware Stats.
3.
Scroll down the page to view the following device information:
The controlled parameters are measured with A/D converters and temperature sensors in the
specified subsystem.
Measurement
Description
CPU Core Voltage (in mV)
Core Voltage of Intel '423 processor
VCC1.8
Operation voltage for Intel 945GME Graphics Memory
Controller Hub, Memory DDR2, LAN Controller and
Power Supply
VCC3.3
General operation voltage for IC components on CPU
processor board
AVCC
General operation voltage for IC components on CPU
processor board.
1.25 volts (in mV)
Operation voltage for Ethernet Switch, BCM5382M,
Power Supply
5VSB
General operation voltage for IC components on CPU
processor board
125
2062973-001
CARESCAPE Monitor B850
Measurement
Description
battery (in mV)
Lithium Battery Voltage for the Real Time Clock
Ambient temperature (in C)
Ambient temperature of the CPU unit measured by the
sensor in the main processor board
CPU temperature (in C)
An internal temperature of the CPU unit measured by
the sensor in the main processor
945 temperature (in C)
An internal temperature of the CPU unit measured by
the sensor in the Intel 945 Graphic controller chipset (1st
and 2rd display port) temperature
VideoCard temperature (in C)
An internal temperature of the CPU unit measured by
the sensor in the additional 3rd video board (optional)
11.3.2 Ping a TCP/IP network device
Use this Webmin feature to verify connectivity with a network device on the MC Network and IX
Network.
1.
Log in to Webmin.
2.
Select Diagnostics > Ping.
3.
In the Address to Ping field in the Ping Command window, type the IP address of a known
device on the network and select ping.
If you receive a reply, then you are able to connect to the device.
If you do not receive a reply, make sure that the patient monitor is connected to an active
network.
The patient monitor withstands a maximum packet loss of 5 packets per 1 million and
maximum latency of 250 ms without performance degradation.
11.3.3 Log files
The patient monitor collects information about different system events and errors to log files.
These log files help troubleshooting problems in the patient monitor and the connected
peripheral devices.
The following table describes the available log files and the type of information that they
collect.
126
2062973-001
Troubleshooting
Log file name
Contents
Webmin Action log
•
Webmin user authentication and access related information
(e.g., who accessed Webmin and when).
•
Webmin module settings changes (e.g., what was changed
and when).
•
Software transfer history information, including the type and
version of the transferred software, the origin and destination,
and the date and time the software transfer occurred.
•
Host software activation information, including the host type
and serial number, the type and version of the activated host
software, and the date and time the host software activation
occurred.
•
Module software activation information, including the module
type and serial number, the type and version of the activated
module software, and the date and time the module software
activation occurred.
•
Settings transfer history information, including the type of the
transferred settings, the origin and destination, and the date
and time the settings transfer occurred.
•
Log file transfer history information, including the type of log
that was transferred, the origin and destination, and the date
and time the log file transfer occurred.
•
Webmin related error messages (e.g., information about EPI
layer issues detected by Webmin).
•
•
Date and time when the EMBC log was last updated.
EMBC Frame logs
Modbus 0, 1, 2, and 3 information, including the following:
-
System information (e.g., Sysinfo -packet)
-
Log information (e.g., Loginfo -packet)
-
Module node connection/disconnection information (e.g.,
Module Node Log)
-
Module slot information (e.g., addresses and times in the
latest modbus frame)
-
Modbus frame statistics (e.g., total number of frames,
number of synchronization errors, number of lost frames,
number of unknown frames)
PDM log
All PDM errors and messages.
System log
•
OS events and errors, including operating system related
information, such as clinical application startup and recovery
information, power on self-test results, etc.
•
InSite with ExC events and errors, including InSite with ExC
agent related information.
127
2062973-001
CARESCAPE Monitor B850
Log file name
Contents
Clinical log
•
Clinical-related application events, including module
(parameter) connections/disconnections, case starts/ends,
cold starts, warm starts, etc.
•
Technical notes and errors displayed for clinical users,
including all host and module related technical errors (e.g.,
‘Failure in Agent ID’).
•
Clinical alarms, including clinical application related patient
alarms and their level (e.g., ‘FiO2 Low’).
•
Clinical user interactions, such as the host keystrokes and
touchscreen selections, menu setting changes, etc.
•
EPI layer related errors, including information about EPI layer
issues detected by the clinical application.
•
Host serial number and active software versions.
MPC860 Error Log
•
The errors that were logged within the code running on the
860 processor.
Tram log
•
Tram Module errors.
Downloading log files
1.
Log in to Webmin.
2.
Select Diagnostics > Download Logs.
3.
Select the log(s) you want to download.
4.
Select Download.
5.
According to your Webmin access:
a.
If you are using Webmin on a service PC, you can save the log file to any storage device
connected to the service PC:
•
In the File Download dialog box, select Save.
•
In the Save as dialog box, select the destination drive and folder and select Save.
NOTE: You may change the default filename, but do not change the file extension.
b.
If you are using Webmin locally through the integrated browser, you can save the settings
file to a USB flash drive that is connected to one of the patient monitor's USB ports:
•
The Download Logs window will show you the name of the created log file.
•
Select Download to save the log file to the USB flash drive.
NOTE: Do not disconnect the USB storage device until downloading is complete.
6.
Send this log file to GE Service for further investigation.
Viewing log files
1.
Log in to Webmin.
2.
Select Diagnostics > View Logfiles.
3.
Select the log file you want to view.
4.
Select the information you want to view.
•
128
2062973-001
For the Webmin Action Log, select the user, module, and timeframe and select
Search.
Troubleshooting
•
For the other types of logs, select the link associated with the information you want
to view.
Refer to the Module Frames and Modules Technical Manual for information about PDM battery.
11.4 Error messages and codes
The following error messages display in the message field if there is a problem with the patient
monitor.
Refer to the patient monitor’s user’s manual for a complete list of system messages. Refer to
Module Frames and Modules Technical Manual for a list of parameter module specific error
messages.
Message
Possible causes
Possible solutions
License expired
A trial license has expired.
Enable the license with a new
activation code, if needed.
Configuration
changes. Restart
required
Pending configuration
changes to platform settings
that require patient monitor
restart.
Power cycle the patient monitor.
Network down
No other network device
observed on the MC Network.
Verify that the patient monitor is
connected to an active network.
Disconnect the patient monitor that
Identical unit & bed A patient monitor with the
name noticed
identical unit and bed name is has the identical unit and bed name.
on the network.
or
Change the unit and bed name of the
duplicate patient monitor unit and bed
name.
Identical
IP address
noticed
A patient monitor with the
identical IP address is on the
network.
Disconnect the patient monitor that
has the identical IP address.
or
Change the IP address of the patient
monitor that has the duplicate IP
address.
129
2062973-001
CARESCAPE Monitor B850
Message
Possible causes
Possible solutions
Service Monitor
Error Code
0xHOST1001
One of the internal
temperature sensors indicate
the inside temperature of the
patient monitor is out of
specification. The message
stays on screen as long as the
error condition is valid.
If temperature is too high:
1. Turn off the patient monitor.
2. Let the patient monitor cool down.
3. Check that the ventilation holes are
not obstructed.
4. Ensure that the patient monitor is
installed to a location that meets
the specified environmental
requirements of operating
temperature.
5. Investigate the patient monitor
thoroughly for potential short
circuits and other electrical faults.
6. If possible, log in to Webmin and
select Diagnostics> Hardware
Stats to identify the root cause for
the error message.
If temperature is too low (or high):
If the patient monitor has been
transported or stored outside the
operating temperature range, allow it
to stabilize back to operating
temperature range before applying
power.
130
2062973-001
Service Monitor
Error Code
0xHOST1002
One of the internal supply
voltages is out of the
specification. The message
stays on screen as long as the
condition is valid.
Log in Webmin and select Diagnostics
> Hardware Stats to identify the supply
voltage that is below or above the
specification limit.
Service Monitor
Error Code
0xHOST1004
Disk usage exceeds 90%.
1. Back up the clinical and platform
settings and print the licensing
information page via Webmin.
2. Re-install software.
Service Monitor
Error Code
0xHOST1100
The CPU timekeeper battery
needs to be replaced.
Replace the CPU timekeeper battery.
Troubleshooting
Message
Possible causes
Possible solutions
External alarm
light disconnect.
Check USB
connection.
1. The USB cable between the
patient monitor and a display
is disconnected when the
patient monitor is on.
1. Reconnect the USB cable.
NOTE: Secure the connected USB cable
to the CPU unit. Use the existing
retaining clips attached to the CPU unit.
2. Display turned to standby
when the patient monitor is
on.
2. Turn on the display.
NOTE: Select Audio Pause to acknowledge the message, if the USB
cable is disconnected or a display turned off on purpose.
3. User interface board
communication failure.
3. UpdateUIC software or replace user
interface board.
Setting
activation after
next case end./
Setting
activation after
next discharge.
Service user has initiated a
delayed settings activation
that will automatically take
place after next case end. /
next discharge.
If required, the service user may cancel
the delayed setting activation. See
section 7.17.4. Canceling pending
settings activation
Software
activation after
next case end./
Software
activation after
next discharge.
Service user has initiated a
delayed software activation
that will automatically take
place after next case end /
next discharge.
If required, the service user may cancel
the delayed setting activation. See
section 7.19.3. Canceling pending host
software activation
Service Monitor
Activation Failed
Software activation failed.
Reactivate software. If that does not
help, reinstall the software and then
reactivate it.
Setting activation failed.
Reactivate settings.
•
One of the supply voltages
for the acquisition
modules is out of
specification.
Log in to Webmin and select
Diagnostics > Hardware Stats to
diagnose the problem. If there is a
faulty board, replace it.
•
An analog output voltage
is out of specification.
Module
voltage low
Application
error:
Webmin
The operating system informs Select Audio Pause to acknowledge
the message.
that the Webmin local
browser was terminated
abnormally.
Speaker failure
1. Speaker cable loose.
1. Connect the speaker cable.
2. Speaker failure.
3. Replace the speaker.
4. Processor board tone
generator or audio amplifier
failure.
5. Replace the processor board.
131
2062973-001
CARESCAPE Monitor B850
11.5 Problems and solutions
11.5.1 Start-up failures
Problem
Possible causes
Failure to turn on the patient Power cord is loose.
monitor.
Blown fuses.
Power cord is faulty.
Recommended actions
Ensure that the power cord is connected properly
to the wall outlet and to the patient monitor.
Check the status of the fuses and replace them, if
necessary.
-
Use only fuses with correct rating.
-
If the fuses are blown repeatedly, investigate
the patient monitor carefully for possible short
circuits.
Check the power cord for wear and damage and
replace if necessary.
The power outlet does not Check the power outlet being used:
meet specified
- Refer to the patient monitor’s supplemental
requirements.
information manual for power requirements.
The cable between the
power supply and the
processor board is loose
or faulty.
Check the power outlet being used, see section
8.2.2.
Check that the cable is intact and properly
connected to the power supply and the processor
board.
The power supply is faulty. Replace the power supply.
CPU processor board is
faulty.
Unable to turn on the patient 1. uDOM is missing or
loose.
monitor:
2.
uDOM
software is
- The patient monitor
corrupted.
starts, but the start-up
3. uDOM has
sequence does not
incompatible software.
advance beyond the GE
logo screen. Error
messages may appear to
the screen.
132
2062973-001
Replace the CPU processor board.
1) Ensure that the uDOM is properly connected and
aligned to the connector in the CPU board.
2) Replace uDOM. Contact GE service for support.
3) Ensure that the attached uDOM has correct and
compatible software. Contact GE service for
support.
Troubleshooting
11.5.2 User interface issues
Display
Problem
Possible cause
Recommended actions
The display is blank.
The video display has no power.
Verify that the display’s power indicator is
illuminated.
The patient monitor has no
power.
Verify that the power indicator on the
patient monitor is illuminated.
The video display is not properly Verify that the correct cable connects the
connected to the patient
video display to one of the two (or three)
monitor.
video ports on the patient monitor.
The quality of the display is not
good.
The display was turned off via
the Display On/Off button on
the keypad/remote control.
Press the Display On/Off button on the
keypad/remote control.
•
The cable is not connected
properly.
•
The video display is bad.
1. Check the connection between the
video display and the patient monitor.
If necessary, replace the video display
with a known good one.
2. If the problem is not corrected, replace
the processor board.
The power on/off switch on the The power supply is bad.
patient monitor does not
illuminate when it is toggled.
Replace the power supply.
Touchscreen
Problem
Possible cause
Recommended actions
Touchscreen operation
inaccurate.
Touchscreen not calibrated.
Calibrate touchscreen, see section 7.1.2.
Touchscreen inoperative.
Touchscreen USB cable loose
Connect the USB touchscreen cable to the
CPU unit or to the display.
NOTE: Secure the connected USB cable to
the CPU unit. Use the existing retaining
clips attached to the CPU unit.
Touchscreen USB cable
connected to the wrong USB
connector in the monitor.
Connect the touchscreen USB cable to the
correct connector.
Faulty touchscreen sensor.
Replace the display.
133
2062973-001
CARESCAPE Monitor B850
Keypad, Trim Knob, on/off switch and alarm light issues
Alphanumeric Keyboard and barcode scanner issues
Problem
Possible cause
Recommended action
Wrong character is displayed
when a key is pressed on
keyboard.
The keyboard locale is not
configured correctly.
Configure the keyboard locale correctly,
see 7.10.
Wrong character is displayed
when a barcode is read.
The keyboard locale is not
configured correctly.
Configure the keyboard locale correctly,
see 7.10.
The barcode reader’s language
configuration is incorrect.
Refer to the barcode reader manual.
Barcode reader parser
configuration is incorrect.
Configure the barcode settings, see 7.8.2.
The barcode reader is
incompatible with the parser
configuration (field lengths, field
types, delimeters, symbologies
etc.).
Check the barcode information content
and compare it to the current parser
configuration.
Barcode reader does not read a
multi-field barcode correctly.
(i.e., the information is not
populated correctly to the fields
in the Admit menu).
134
2062973-001
Troubleshooting
Speaker / audible alarm issues
Problem
Possible cause
Recommended action
Audible alarms are not
sounding.
Audible alarms are turned off
(See Alarms Setup > Audible &
Visual.)
Enable audible alarms.
Alarm volume is low.
Adjust alarm volume using Monitor Setup
> Sound Volumes.
The alarm limits are not set
correctly.
Make sure the alarms are enabled. Refer
to the patient monitor’s user’s manual for
correct alarm settings.
The patient is not being
monitored.
The alarm function remains disabled until
the patient is correctly admitted into the
system.
If a patient’s waveform and the
DISCHARGED message both display, refer
to the patient monitor’s user’s manual for
correct patient admitting instructions.
USB cable from display is not
connected to the patient
monitor.
Connect the USB cable to the patient
monitor.
The speakers are disconnected.
Check that the speakers are properly
connected.
Tone generator or audio
amplifier failure
Replace the processor board.
Speaker failure
Test if the speaker is functioning, using
Monitor Setup > Sound Volumes. Replace
the faulty speaker.
11.5.3 Incorrect system time
Problem
Possible cause
Recommended action
135
2062973-001
CARESCAPE Monitor B850
System time is incorrect when
patient monitor is not
connected to network.
CPU timekeeper battery empty
Replace CPU timekeeper battery.
Time not configured properly
Configure date and time, see 7.3.
System time is incorrect when Network device time
patient monitor is connected to synchronization error.
MC Network.
When adding a new device to the
CARESCAPE Network, the existing devices
on the CARESCAPE Network will
synchronize to the new device’s time. To
prevent potential time synchronization
issues, you should set the new device’s
time to be as close as possible to the time
(within one minute or less) used by the
existing GE devices on the CARESCAPE
Network.
System time is incorrect when iCentral time incorrect.
patient monitor is connected to
S/5 network.
Configure iCentral time master.
11.5.4 License issues
Problem
Possible cause
Unable to perform a function or a feature is not available.
136
2062973-001
A license has not been
purchased for the feature.
-
The trial license has expired
for the feature.
-
The license is not installed
properly.
Recommended action
See License management chapter.
Troubleshooting
1. Log in to Webmin > Configuration >
Unable to view a certain feature The software package in use
Licenses >Software Package.
although the license is enabled. does not include the feature in
2. Select the correct option and select
question. (For example,
Activate.
Anesthetic agent measurement
is not supported by ICU software
package).
Unable to upload a license file.
-
Log in to Webmin > Configuration >
The license file is for a patient Licenses.
monitor with a different serial - If you have printed license information,
select Software Package and Host
number.
Licensing.
The license file is corrupted.
The wrong software application The wrong software application
is displayed on the patient
is activated for the device.
monitor.
If you have a license file, select Upload
License.
1. To view the software package that is
currently activated, Log in to Webmin
> Configuration >Licenses > Host
Licensing.
2. Make sure that the desired software
application is displayed under
Currently Active Software Package.
3. If you need to activate a different
software package, access
Configuration > Licenses > Software
Package.
4. Select the correct option and select
Activate.
11.5.5 Acquisition module problems
Problem: an acquisition module does not work with the patient monitor.
Locate first whether the problem is in the patient monitor or in the acquisition module:
1.
Connect another, similar, known good module to the suspect patient monitor and check if
the module works normally:
“Yes” => The suspect module is most likely faulty. Refer to Module Frames and
Modules Technical Manual for troubleshooting instructions.
“No” => The problem is most likely in the patient monitor. Continue troubleshooting
the problem according to the related troubleshooting chart below.
OR
Connect the suspect acquisition module to another, similar, known good patient monitor and
check if the module works normally:
“Yes” => The problem is most likely in the patient monitor. Continue troubleshooting
the problem according to the related troubleshooting chart below.
“No” => The suspect module is most likely faulty. Refer to Module Frames and
Modules Technical Manual for troubleshooting instructions.
137
2062973-001
CARESCAPE Monitor B850
E-module issues
Possible cause
Recommended action
Incompatible module
Refer to the patient monitor’s supplemental information manual document
to see the list of compatible modules.
Faulty E-Module Frame
Replace E-Module Frame or repair it with existing service parts.
PDM module issues
Possible cause
Recommended action
The external ePort cable is loose
or defective.
Check that the external ePort cable is intact and properly connected to the
PDM module and to the ePort connector in the CPU unit.
11.5.6 CARESCAPE Network communication issues
Traffic types
Two main types of communication occurs in the CARESCAPE Network: Broadcast and Unicast.
•
Broadcast traffic is sent from one device to all devices on the network. Examples of
CARESCAPE broadcast traffic are device discovery, alarms, and time synchronization.
•
Unicast traffic is sent from one device to another specific device on the network. An
example of CARESCAPE unicast traffic is patient waveforms.
Flow
138
2062973-001
•
Upstream broadcast: The patient monitor sends broadcasts to other network devices.
•
Downstream broadcast: The patient monitor receives broadcasts from other network
devices.
Troubleshooting
139
2062973-001
CARESCAPE Monitor B850
Problem: No waveforms or parameters are displayed at the CIC Pro
center
([LW
67$57
\HV
&RQILJXUDWLRQLVVXH
6HOHFWWKH
DSSURSULDWHXQLWDQG
EHGQDPH
&DQ\RXQRZVHH
ZDYHIRUPV
SDUDPHWHUV"
QR
\HV
&DQ\RXVHOHFWWKH
SDWLHQWPRQLWRUDW
WKH&,&3URFHQWHU"
%URDGFDVWWUDIILFLVQRW
PDNLQJLWWRWKH&,&3UR
FHQWHU
QR
\HV
&,&3URFHQWHU
FRQQHFWLYLW\SUREOHP
*RWR$RQ
SDJH%
&DQ\RXVHOHFWWKH
SDWLHQWPRQLWRUDW
DQRWKHU&,&3UR
FHQWHU"
,VWKH&,&3URFHQWHULQ
WKHFRUUHFW&$5(6&$3(
1HWZRUN"
\HV
3OHDVHYHULI\&,&3UR
FHQWHUQHWZRUN
FRQILJXUDWLRQVHWWLQJVLQ
WKH&,&3UR6HUYLFH
0DQXDO
QR
&DQ\RXVHOHFW
DQRWKHUSDWLHQW
PRQLWRUWRYLHZIURP
WKLVSDWLHQWPRQLWRU"
\HV
([LW
\HV
&DQ\RXQRZVHH
ZDYHIRUPV
SDUDPHWHUV"
QR
*RWR$RQ
QH[WSDJH
140
2062973-001
([LW
1HWZRUNSUREOHP
%URDGFDVWWUDIILFLVJRLQJ
EHWZHHQWKHSDWLHQWPRQLWRUV
EXWQRWWRWKH&,&3URFHQWHUV
7KH&,&3URFHQWHUVPD\QRWEH
RQWKHVDPHQHWZRUNDVWKH
SDWLHQWPRQLWRUV
3OHDVHYHULI\FRQILJXUDWLRQ
VHWWLQJVFRQVXOWLQJWKHKRVSLWDO·V
,7GHSDUWPHQW
QR
*RWR$RQ
QH[WSDJH
&DQ\RXQRZVHH
ZDYHIRUPV
SDUDPHWHUV"
QR
*RWR$RQ
QH[WSDJH
Troubleshooting
$
%URDGFDVWWUDIILFLVQRWPDNLQJLWWKURXJK
/HDYHWKHSDWLHQWPRQLWRU
SOXJJHGLQ&DQ\RXSLQJWKH
SDWLHQWPRQLWRUIURPWKH&,&
3URFHQWHU"
1HWZRUNFRQILJXUDWLRQSUREOHP
\HV
,VWKHQHWZRUNVHWXSWRDOORZEURDGFDVWV"
3OHDVHYHULI\FRQILJXUDWLRQVHWWLQJVZLWKWKH
KRVSLWDO·V,7GHSDUWPHQW
QR
&DQ\RXSLQJRWKHU&,&3UR
FHQWHUVRUSDWLHQWPRQLWRUV
IURPWKH&,&3URFHQWHU"
1RWUDIILFLVPDNLQJLWWKURXJK
QR
3OHDVHYHULI\FRQILJXUDWLRQVHWWLQJVZLWKWKH
KRVSLWDO·V,7GHSDUWPHQW
\HV
&KHFN,3DGGUHVVHVRQWKH
SDWLHQWPRQLWRU$UHWKHSDWLHQW
PRQLWRUDQGWKH&,&3URFHQWHU
RQWKHVDPHQHWZRUN"
&RQILJXUDWLRQLVVXH
QR
&RUUHFW,3DGGUHVVLQJLVVXHV
\HV
8VHU(UURU
$UHWKH\SOXJJHGLQWR
&$5(6&$3(1HWZRUNMDFNV"
QR
3OXJLQWRFRUUHFWMDFNV
\HV
:LUHGQHWZRUNSUREOHP
3OHDVHYHULI\FRQILJXUDWLRQVHWWLQJVZLWKWKH
KRVSLWDO·V,7GHSDUWPHQW
11.5.7 S/5 Network communication issues
Check the following things before proceeding with any detailed network troubleshooting:
•
Check status of the network connection indicators, for reference see 3.7.
•
Check network compatibility. Refer to the patient monitor’s supplemental information
manual.
•
Check that each patient monitor has been assigned a unique Virtual ID key, see 7.2.3.
141
2062973-001
CARESCAPE Monitor B850
S/5 Network
Problem
Possible cause
Recommended action
Bedside monitor doesn’t
register to the Monitor Network
- all bedside monitors affected.
The problem is related to the
iCentral, or to the cabling
between the iCentral and the
hub/switch.
•
Proceed to the iCentral
troubleshooting.
•
Check the cabling between
the iCentral and the
hub/switch.
Bedside monitor doesn’t
register to the Monitor Network
– only one patient monitor or
some of the bedside monitors
affected.
The problem is related to the
bedside monitor, or to the
cabling between the bedside
monitor and the hub/switch.
•
Check the patient monitor(s)’
network configuration.
•
Check the cabling between
the bedside monitors and the
hub.
The problem is related to
network setup: the bedside
monitor(s) is/are missing from
the network setup.
•
Check the iCentral network
setup.
The problem is related to view
setup: the bedside monitor(s)
is/are missing from the view
setup.
•
Check the iCentral view setup.
142
2062973-001
Disassembly and reassembly
12 Disassembly and reassembly
12.1 Disassembly guidelines
Field repair of the patient monitor is limited to replacing Field Replaceable Units (FRUs). See
chapter 13. Service parts for a detailed list of available FRUs. Attempting a field repair on a
printed circuit board, or a factory sealed component or assembly could jeopardize the safe and
effective operation of the monitor.
NOTE: Only a qualified service technician should perform field replacement procedures.
NOTE: Perform the checkout procedure described in chapter 10. Maintenance and checkout
always after doing any disassembly of the patient monitor.
12.1.1 ESD precautions
All external connectors of the patient monitor are protected against electrostatic discharge
(ESD) damage. However during service of the patient monitor, exposed components and
assemblies inside the patient monitor are susceptible to ESD damage. Human hands, non-ESD
protected work stations or improperly grounded test equipment can cause ESD damage. The
following guidelines do not fully guarantee static-free workstation, but can greatly reduce the
potential for failure of any electronic assemblies being serviced:
WARNING
•
Discharge any static charge you may have built up before handling semiconductors or
assemblies containing semiconductors.
•
A grounded, antistatic wristband or heel strap should be worn at all times while handling
or repairing assemblies containing semiconductors.
•
Use properly grounded test equipment.
•
Use a static-free work surface while handling or working on assemblies containing
semiconductors.
•
Semiconductors and electronic assemblies should be stored only in antistatic bags or
boxes.
•
Handle all PCB assemblies by their edges.
•
Do not remove semiconductors or assemblies containing semiconductors from antistatic
containers until absolutely necessary.
•
Do not slide semiconductors or electrical/electronic assemblies across any surface.
•
Do not touch semiconductor leads unless absolutely necessary.
•
Do not flex or twist a circuit board.
Pins of connectors identified with the ESD warning symbol should not be
touched. Connections should not be made to these connectors unless
electrostatic discharge (ESD) precautions are used.
12.1.2 Reassembly precautions
Pay attention to the following precautions when reassembling the monitor:
•
Note the positions of any wires, cables or connectors. Mark them, if necessary, to ensure
their correct reassembly.
•
Save and set aside all hardware for reassembly.
143
2062973-001
CARESCAPE Monitor B850
•
GE recommends using the new fasteners (screws, washers, etc.) in the FRU kits rather
than reusing the old fasteners. Some fasteners are not intended to be re-used more than
three times.
•
Use only new screws when attaching parts into light metal parts. Before fastening a
screw, turn it counterclockwise until it drops into an existing thread pattern.
12.1.3 Required tools
WARNING
-
insulated crosshead screwdrivers (small and
medium)
-
antistatic ESD wristband
-
spanner size 5.5 mm
Due to possible high voltage present, use an insulated screwdriver at all
times.
12.1.4 Before disassembly
WARNING
WARNING
WARNING
WARNING
PATIENT MONITORING INTERRUPTION — Make sure a patient is not being
monitored while servicing the equipment.
DISCONNECTION FROM MAINS - When disconnecting the device from the
power line, remove the plug from the wall outlet first. Then you may
disconnect the power cord from the device. If you do not observe this
sequence, there is a risk of coming into contact with line voltage by
inserting metal objects, such as the pins of leadwires, into the sockets of the
power cord by mistake.
SAFETY GROUND - Remove power cord from the mains source by grasping
the plug. Do not pull on the cable.
ELECTRIC SHOCK - Always unplug the grounded cables when not in use.
Leaving them connected could result in an electric shock from the ground
contact in the other end.
1.
Turn the monitor off from the rear On/off switch.
2.
Disconnect the power cord first from the wall outlet and then from the CPU unit. Detach
the retaining clips for the power cord and USB cables.
NOTE: Remember to reattach the retaining clips for the power cord and USB cables after
reassembly.
144
2062973-001
Disassembly and reassembly
3.
Disconnect all external cables connected to the CPU unit.
4.
Detach the CPU unit from the mount if installed.
12.2 Unit disassembly
12.2.1 Opening the unit
If the monitor is opened, electrical safety tests must always be performed after the monitor is
reassembled. For more information, refer to the Corrective maintenance requirements in the
10. Maintenance and checkout chapter.
1.
Remove 4 screws on each side of the top cover. Remove the top cover.
145
2062973-001
CARESCAPE Monitor B850
2.
Remove 7 screws on the rear panel. Remove the rear panel.
12.2.2 Replacing the processor board
146
2062973-001
1.
Open the unit as described in steps 1 and 2 in Opening the unit.
2.
Disconnect the speaker cable connection, light pipe (pull gently from the receptacle on
the PCB), and power supply cable.
3.
If installed, remove the optional third DVI-I board:
a.
b.
Remove 4 screws and 4 standoffs.
Remove 2 jackscrews from the third DVI-I board.
Disassembly and reassembly
4.
Remove the 8 screws that hold the processor board to the chassis. Remove the processor
board.
5.
Replace the processor board.
6.
Remove the screw that holds the uDOM to the old processor board. Remove the uDOM
from the old processor board and reassemble it to the new processor board.
7.
Reassemble the patient monitor in the reverse order of disassembly.
12.2.3 Replacing the power supply
1.
Open the unit as described in step 1 and 2 in Opening the unit.
2.
Disconnect the speaker and power supply cables.
147
2062973-001
CARESCAPE Monitor B850
3.
Remove the 4 screws that hold the power supply to the chassis. Remove the power
supply.
4.
Replace the power supply.
5.
Reassemble the patient monitor in the reverse order of disassembly.
12.2.4 Replacing the speaker
148
2062973-001
1.
Open the unit as described in steps 1 and 2 in Opening the unit.
2.
Disconnect the speaker and power supply cables.
3.
Remove the 4 screws that hold the power supply to the chassis. Remove the power
supply.
4.
Remove the power supply PCB to access the speaker screws.
5.
Remove the 2 screws and washers, that hold the speaker to the front bezel. Remove the
speaker.
Disassembly and reassembly
6.
Replace the speaker.
7.
Reassemble the power supply PCB.
8.
Reassemble the patient monitor in the reverse order of disassembly.
12.2.5 Replacing the CPU timekeeper battery
Once the battery is replaced, the system loses its time and the time must be configured before
connecting the patient monitor to the network. For instructions on configuring the time, see 7.3.
Setting time and date.
1.
Open the unit as described in step 1 in Opening the unit.
2.
Remove the lithium ion battery from the bracket on the processor board.
3.
Replace the battery.
4.
Reassemble the patient monitor in the reverse order of disassembly.
12.2.6 Replacing the labels
The device labels are affixed permanently. Do not try to remove them by using solutions that
might cause damage. Affix new labels on top of the existing ones.
NOTE: Take care not to obstruct connector or screw openings when affixing labels.
149
2062973-001
CARESCAPE Monitor B850
12.2.7 Replacing or installing the third video card
1.
Open the unit as described in step 1 in Opening the unit.
2.
Remove the third DVI-I board.
a.
b.
Remove 4 screws and 4 standoffs.
Remove 2 jackscrews from the third DVI-I board.
3.
Replace the DVI-I board.
4.
Reassemble the patient monitor in the reverse order of disassembly.
12.2.8 Replacing the front bezel
150
2062973-001
1.
Open the unit as described in step 1 in Opening the unit.
2.
Remove 2 screws on front of bezel.
Disassembly and reassembly
3.
Disconnect light pipe from receptacle on PCB.
4.
Release 3 snap fingers to free bezel from front of chassis.
5.
Remove the bezel.
6.
Reassemble the patient monitor in the reverse order of disassembly.
151
2062973-001
CARESCAPE Monitor B850
For your notes:
152
2062973-001
Service parts
13 Service parts
NOTE: Perform the checkout procedure steps described in chapter 10. Maintenance and
checkout after you have replaced any service parts.
13.1 Ordering parts
To order parts, contact GE Healthcare. Contact information is available at
www.gehealthcare.com. Make sure you have all necessary information at hand.
13.2 List of FRUs
#
FRU/Item part FRU/Item description
number
FRU content
1
2067715-001
-
Includes power inlet module, harness that
connects to CPU board, and power supply
bracket.
-
Order hardware kit 2021440-006 if any
replacement screws are needed.
-
Includes CPU PCB assembly and CPU
timekeeper battery.
-
Excludes the USB Disk on Module (uDOM)
with software.
-
Order hardware kit 2021440-006 if any
replacement screws are needed
-
Includes front bezel, enclosure cover, back
panel, and back panel labels.
-
Order hardware kit 2021440-006 if any
replacement screws are needed
2
3
2021440-003
2021440-004
FRU, Power supply.
FRU, Processor PCB
FRU, Enclosure kit
4
2021440-005
FRU, Speaker assembly
-
Includes speaker with harness, 2 mounting
screws, washers and spacers
5
2021440-006
FRU, Hardware kit
-
Contains complete set of replacement
screws for all replaceable assemblies and
chassis EMI gaskets.
6
2067715-007 Label kit
-
Includes rating label and 2 connector labels.
7
2021440-008
FRU, CPU timekeeper battery (20 pcs)
-
CR2032 lithium battery
8
2021440-013
FRU, 3rd Video Card
-
Includes 3rd video card assembly, 4
mounting screws, 4 standoff screws and 2
jackscrews.
2021440-009
FRU, M-Port keypad kit
-
Includes all M-port Keypad assembly with
all language labels.
2021440-011
FRU, Remote control kit
-
Includes Remote controller assembly with
all language labels
153
2062973-001
CARESCAPE Monitor B850
13.3 Exploded view
3
5
8
2
7
1
6
3
3
4
3
154
2062973-001
Installation check form
APPENDIX A: Installation check form
CARESCAPE Monitor B850
Customer
Monitor
Service
Software version
Service engineer
Hardware version
S/N
B850-
Prior to testing verify all equipment is calibrated via “Cal” labeling and record Cal Due Dates
Measuring equipment / test gases used:
Equipment / tool / gas:
Manufacturer:
PASS = Test passed
Model/Type/Part No:
N.A. = Test not applicable
Serial Number/ID:
Cal Due Date:
FAIL = Test failed
PASS
FAIL
Visual inspection
Electrical safety tests
The manufacturing week and year of the device:
Is there less than 12 months since the device was manufactured?
Yes:
Yes: you do not have to perform the electrical safety tests. To continue the
installation check, mark the electrical safety test completion N.A. and
proceed to Functional check. If available, attach the original electrical safety
test results to this check form.
No:
No: continue to perform the electrical safety tests.
Power outlet is correctly wired.
Power cord and plug are undamaged and all conductors are properly connected.
Ground (earth) integrity
a.) Ground continuity test
b.) Impedance of protective earth
connection
Observed result
Acceptance
criteria
without power cord
0.1 ohms
with power cord
0.2 ohms
without power cord
0.1 ohms
with power cord
0.2 ohms
PASS N.A. FAIL
A- 1 (4)
2062973-001
CARESCAPE Monitor B850
Earth leakage current test
Enclosure leakage current (touch
current) test
Module type
Normal Condition (NC)
500 µA EN /IEC
300 µA UL
Single Fault Condition (SFC)
1 mA
Normal Condition (NC)
100 µA
Single Fault Condition (SFC)
500 µA EN /IEC
300 µA UL
S/N
Observed result
ECG
SpO2/
InvP
Acceptance PASS N.A. FAIL
criteria
Patient (source) leakage current tests, using a test body
Normal Condition (NC)
Polarity: NORMAL
10 µA
Single Fault Condition (SFC)
Ground closed (normal)
50 µA
Ground open (normal)
50 µA
Ground closed (reverse)
50 µA
Ground open (reverse)
50 µA
Polarity: Reserved
10 µA
Patient (sink) leakage current tests Polarity: NORMAL
50µA
Polarity: Reserved
50µA
Normal Condition (NC)
Module type
S/N
Observed result
Acceptance PASS N.A. FAIL
criteria
Patient (source) leakage current tests, using a test body
Normal Condition (NC)
Polarity: NORMAL
10 µA
Single Fault Condition (SFC)
Ground closed (normal)
50 µA
Ground open (normal)
50 µA
Ground closed (reverse)
50 µA
Ground open (reverse)
50 µA
Polarity: Reserved
10 µA
Patient (sink) leakage current tests Polarity: NORMAL
50µA
Polarity: Reserved
50µA
Normal Condition (NC)
Electrical Safety Test completion
A - 2 (4)
2062973-001
Installation check form
Functional check
PASS N.A. FAIL
PASS N.A. FAIL
Start-up
Display
Device Information
Configuration Information
Keypad and remote
Mouse
Alphanumeric keyboard
Barcode reader
MC Network and S/5 Network
IX printers
IX printers
iPanel connection
Insite with EXC
Test completion
Notes
Used service parts
Signature
Date
A- 3 (4)
2062973-001
CARESCAPE Monitor B850
A - 4 (4)
2062973-001
Maintenance check form
APPENDIX B: Maintenance check form
CARESCAPE Monitor B850
Customer
Monitor
S/N
Service
S/N
Service engineer
Software
Planned maintenance
Corrective maintenance
Module type
S/N
Prior to testing verify all equipment is calibrated via “Cal” labeling and record Cal Due Dates
Measuring equipment / test gases used:
Equipment / tool / gas:
Manufacturer:
PASS = Test passed
Model/Type/Part No:
N.A. = Test not applicable
Serial Number/ID:
Cal Due Date:
FAIL = Test failed
PASS
FAIL
Visual inspection
Electrical safety tests
Power outlet is correctly wired.
Power cord and plug are undamaged and all conductors are properly connected.
Ground (earth) integrity
Observed result
Acceptance
criteria
without power cord
0.1 ohms
with power cord
0.2 ohms
b.) Impedance of protective earth
connection
without power cord
0.1 ohms
with power cord
0.2 ohms
Earth leakage current test
Normal Condition (NC)
500 µA EN /IEC
300 µA UL
Single Fault Condition (SFC)
1 mA
Normal Condition (NC)
100 µA
Single Fault Condition (SFC)
500 µA EN /IEC
300 µA UL
a.) Ground continuity test
Enclosure leakage current (touch
current) test
PASS N.A. FAIL
Electrical Safety Test completion
B - 1 (2)
2062973-001
CARESCAPE Monitor B850
Functional check
PASS N.A. FAIL
PASS N.A. FAIL
Start-up
Display
PSM / PDM identification
E-module identification
Keypad and remote
Mouse
Alphanumeric keyboard
Barcode reader
MC Network and S/5 Network
IX printers
iPanel connection
Insite with EXC
Recorder
Test completion
Notes
Used service parts
Signature
B - 2 (2)
2062973-001
Date
Appendix C, Display
APPENDIX C: Display
C.1 Disassembly and reassembly procedures
Before you start, read the following general guidelines and make sure to follow them:
12.1. Disassembly guidelines
12.1.1. ESD precautions
12.1.2. Reassembly precautions
12.1.4. Before disassembly
Opening the unit
WARNING
WARNING
PATIENT MONITORING INTERRUPTION — Make sure a patient is not being
monitored.
Due to possible high voltage present, use an insulated screwdriver at all
times.
Whenever you open the unit, you need to perform the 8.2. Electrical safety tests.
1.
Turn the display power off at the rear power switch and disconnect all cables (USB,
display and AC power).
2.
Place the display as shown below to prevent damage to the main TRIM KNOB.
3.
Remove the side TRIM KNOB by gently pulling the TRIM KNOB.
C-1(10)
2062973-001
CARESCAPE Monitor B850
C-2(10)
2062973-001
4.
Remove all rear cover screws.
5.
Remove mounting bracket.
6.
Use a screwdriver to disassemble the alarm light cover.
Appendix C, Display
7.
Place the display as shown below to remove the rear cover.
8.
Remove the rear cover.
15-inch display
19-inch display
C-3(10)
2062973-001
CARESCAPE Monitor B850
Replacing the TRIM KNOB and rotary switch
1.
Open the display as described in Opening the unit on page C-1.
2.
Locate the rotary switch on the display.
15-inch display
3.
C-4(10)
2062973-001
19-inch display
Pull the speaker to separate it from the front cover. Temporarily place the speaker on top
of the metal enclosure.
Appendix C, Display
4.
Disassemble the connecting wire from the board.
5.
Pull the main TRIM KNOB.
C-5(10)
2062973-001
CARESCAPE Monitor B850
6.
Use a wrench to disassemble the rotary switch.
7.
Replace the rotary switch and the main TRIM KNOB.
8.
Reassemble the display in the reverse order of disassembly.
NOTE: The torque specification for tightening the screws and encoder washer/nut is 1.13
+ 0.11 Nm (10.0+1.0 lbf-in).
9.
C-6(10)
2062973-001
Complete the procedures in Recommended checkout on page C-9.
Appendix C, Display
Replacing the alarm light and alarm light enclosure
1.
Open the display as described in Opening the unit on page C-1.
2.
Locate the alarm light on the display.
3.
Pull the alarm light to separate it from the front cover.
C-7(10)
2062973-001
CARESCAPE Monitor B850
C-8(10)
2062973-001
4.
Disassemble the connecting wire from the board.
5.
Disassemble the protective cover from the alarm light to replace the alarm light board.
Appendix C, Display
6.
Replace the alarm light board and while reassembling the display, replace the alarm light
enclosure.
7.
Reassemble the display in the reverse order of disassembly.
NOTE: The torque specification for tightening the screws and encoder washer/nut is 1.13
+ 0.11 Nm (10.0+1.0 lbf-in).
8.
Complete the procedures in Recommended checkout on page C-9.
Recommended checkout
Perform the recommended checkout procedures for the applicable FRU.
FRU description
Functional checkout procedures
TRIM KNOB and rotary switch
8.2. Electrical safety tests
8.3.1 Start-up
8.3.2 Display
Recalibrate the touchscreen, if needed,
following the procedure in Calibrating a
touchscreen on page 67.
Alarm light and alarm light
enclosure
8.2. Electrical safety tests
8.3.1 Start-up
8.3.2 Display
Recalibrate the touchscreen, if needed,
following the procedure in Calibrating a
touchscreen on page 67.
C-9(10)
2062973-001
CARESCAPE Monitor B850
C.2 Service parts
NOTE: Perform the checkout procedure steps described in Recommended checkout on
page C-9 after you have replaced any service parts.
Ordering parts
To order parts, contact GE Healthcare. Contact information is available at
www.gehealthcare.com. Make sure you have all necessary information at hand.
List of FRUs
C-10(10)
2062973-001
FRU/Item part number
FRU/Item description
2042901-001
FRU Display 15-inch full keypad - ENG
2042901-002
FRU Display 15-inch full keypad - GER
2042901-003
FRU Display 15-inch full keypad - FRE
2042901-004
FRU Display 15-inch full keypad - SWE
2042901-005
FRU Display 15-inch full keypad - SPA
2042901-006
FRU Display 15-inch full keypad - ITA
2042901-007
FRU Display 15-inch full keypad - DUT
2042901-008
FRU Display 15-inch full keypad - DAN
2042901-009
FRU Display 15-inch full keypad - NOR
2042901-011
FRU Display 15-inch full keypad - POR
2042901-014
FRU Display 15-inch full keypad - HUN
2042901-015
FRU Display 15-inch full keypad - POL
2042901-016
FRU Display 15-inch full keypad - CZE
2042901-018
FRU Display 15-inch full keypad - FIN
2042909-001
FRU Display 19-inch with touch screen
2042975-001
FRU Remote alarm light PCB
2042976-001
FRU Display TRIM KNOB and switch
GE Healthcare Finland Oy
Kuortaneenkatu 2
FI-00510 Helsinki
FINLAND
Tel: +358 10 39411
Fax: +358 9 1463310
www.gehealthcare.com
www.gehealthcare.com
Headquarters
Asia Headquarters
GE Medical Systems
Information Technologies, Inc.
8200 West Tower Avenue
Milwaukee, WI 53223 USA
Tel:
+ 1 414 355 5000
1 800 558 5120 (US only)
Fax: + 1 414 355 3790
GE Medical Systems
Information Technologies Asia; GE (China) Co., Ltd.
No1 Huatuo Road,
Zhangjiang Hi-tech Park Pudong
Shanghai, P.R.China 201203
Tel:
+ 86 21 5257 4650
Fax: + 86 21 5208 2008