Transcript
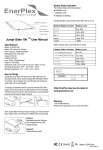
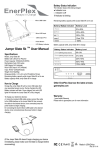
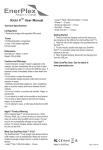
receive charge or discharge
3. Maximum stacking of the Jumpr Stack is 4 pieces.
4. When stacked the Jumpr Stack on the top will discharge first and
proceed down.
5. When stacked, connect your device to the bottom Jumpr Stack
to ensurefull discharge of all batteries
Battery Status Indication
The Indicator status while being charged
● Indicator is on
○ Indicator is off
※Indicator is blinking
Jumpr Stack 3 ™ User Manual
Specifications
Model: JU-STACK-3
Battery Cell: Li-polymer
Total Output Power: 5V/1950mAh (9.8Wh)
Battery Capacity: Li-Polymer 3.7V/3200mAh (11.84Wh)
Recharging Cycle: 500 cycles
Micro USB Input: DC 5V/0.4~2A(self-adapt)
Stack & Charging Input: 5V/0.4~2A(self-adapt)
Micro USB Cable Output: 5V/1A MAX
Lightning Cable Output: 5V/1A MAX
USB Output: 5V/1A MAX
Weight: 0.26lb (120g)
Dimension: 4.13 x 2.68 x 0.55 inch (105 x 68 x 14mm)
Operating temperature: 32°F~104°F(0°C~40°C)
Storage temperature: 14°F~122°F(-10°C~50°C)
How to Charge
Charge the Jumpr Stack 3 with a micro USB cable from any associated power source. During charging the LED Battery Indicator will
flash. Once charged, four solid LED lights will indicate the Jumpr
Stack 3 is fully charged.
Charge your devices
I.) Connect your device using the Jumpr Stack 3’s tethered Micro
USB Charging Cable. Your device will begin charging automatically.
II.) Connect your iPod/iPhone using the Jumpr Stack 3’s tethered
Lightning Charging Cable. Your device will begin charging
automatically.
III.) Connect your device with the USB Output using provided USB
charging cable. Your device will begin charging automatically.
Note: If the Jumpr Stack doesn’t being charging your devices
immediately, please make sure it is charged before reconnecting.
Stack n’ Charge
Stack n’ Charge
Jumpr Stack 3 comes with Stack n’ Charge function. You can stack
the Jumpr Stack series by aligning the Charging Pins
over the Magnetic Charging Connectors to charge multiple Jumpr
Stacks.
Stack n’ Discharge
Jumpr Stack 3 comes with Stack n’ Discharge function. You can
stack the powered on Jumpr Stack series by aligning the Charging
Pins over the Magnetic Charging Connectors to discharge multiple
Jumpr Stacks.
NOTES:
1. When the Jumpr Stack starts charging, the Power/Battery
Indicator Button starts blinking.
2. The Jumpr Stack must be stacked in the same direction to
Important Notes
1. If the Jumpr Stack 3 detects the output exceeds the limit, it will
automatically power off. Unplug your devices and press the Power/
Battery Indicator Button to resume.
2. If the total output current is too low( typical: 100mA) for more
than 4 minutes, Jumpr Stack 3 will power off automatically.
3. When the Jumpr Stack 3 is powered on, it will display the battery
remaining every 5 seconds.
4. When the Jumpr Stack 3 is going to out of power and is on, its
LED1 will quick blink around 10 seconds and then power off.
5. When the Jumpr Stack 3 is out of power, if try to power on, its
LED1 will quick blink around 10 seconds. Charge it before use.
6. For Power saving, power off the Jumpr Stack 3 if not in use.
(Press the “Power/Battery Indicator Button” for more than 3
seconds to power off)
7. If the Jumpr Stack 3 is not used for more than 1 month, it will
need to be charged to 85% before using. Re-charge every 6
months when not in use.
8. The Jumpr Stack 3 contains multiple magnets, please keep a
safe distance from the magnetism-sensitive products, such as
credit cards, pacemakers etc.
Other EnerPlex Gear:see the latest at
www.goenerplex.com
Warranty:
1 year limited Warranty
Please refer to goenerplex.com for more information
Made in USA/China
Rev. 9-2-14