1
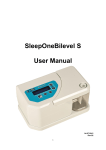
SleepOneBilevel ST User Manual 04.07.2012 Rev.02 INDEX INDEX.......................................................................... Error! Bookmark not defined. SYMBOL DEFINITIONS ............................................................................................. 3 IMPORTANT SAFEGUARDS ..................................................................................... 3 GENERAL INFORMATION ......................................................................................... 4 PARTS AND ACCESSORIES .................................................................................... 5 SYSTEM CONTENT................................................................................................... 5 ACCESSORIES .......................................................................................................... 5 ASSEMBLY OF SLEEPONE DEVICE ........................................................................ 6 INSTRUCTION FOR USE .......................................................................................... 7 MAINTENANCE AND CLEANING ............................................................................ 12 POSSIBLE PROBLEMS ........................................................................................... 13 SPECIFICATION ...................................................................................................... 15 2 SYMBOL DEFINITIONS Class II electrical protection– double Type BF equipment– applied part insulated Standby – turns the device on or off Next Item and adjust the settings on LCD display Setting Previous Item and adjust the settings on LCD display Ramp – Starts the ramp function Heat IPX1 Drip-Proof 100 – 240 Volts AC input 50/60 Hz Locked Unlocked Read user guide before operating IMPORTANT SAFEGUARDS When using electrical products basic safety precautions should always be followed. Read all instructions that is mentioned to this guide before using this device. Important information is highlighted by the following items. Danger Warning Caution Note Urgent safety information for hazards that will cause serious injury or death. Important safety information for hazards that might cause serious injury. Information for preventing damage to the product. Information to which you should pay special attention. READ THESE INSTRUCTIONS CAREFULLY BEFORE USING THIS DEVICE. KEEP THESE INSTRUCTIONS DANGER Electrical shock hazard, do not use device while bathing. Electrical shock hazard, do not immerse this device into water or any other liquid. Electrical shock hazard, do not attempt to open or remove the case. There are no user serviceable internal components. SleepOne should be used only with masks recommended by Kare Medical. SleepOne is not a life support device and may stop operating with certain device faults or with a power failure. To avoid electric shock, alwaysunplug power cord from outlet power source when performing cleaning. 3 Use only accessories recommended by Kare Medical Ltd Co. CAUTION–Never rinse or place the device in water. Never allow liquids to get into or around any of the ports, switches or air filter; doing so will result in device damage. If this occurs, discontinue use and remove the power cord from the power source. Allow the device to completely dry before use. CAUTION–Do not places the SleepOne device where it can be fallen downthe floor or where the power cord may create a trip hazard. CAUTION–Oxygen is a prescription gas and should only be administered under the supervision of a doctor. GENERAL INFORMATION SleepOne Bilevel is a device which is intended for use in treating Obstructive Sleep Apnea (OSA). Obstructive sleep apnea (OSA) is the most common category of sleep-disordered breathing. The muscle tone of the body ordinarily relaxes during sleep, and at the level of the throat the human airway is composed of collapsible walls of soft tissue which can obstruct breathing during sleep. It can be seen process of OSA on the following diagram. Cycle of Obstractive Sleep Apnea Individuals with low muscle tone and soft tissue around the airway (e.g., because of obesity) and structural functions that give rise to a narrowed airway are at high risk for obstructive sleep apnea. The elderly are more likely to have OSA than young people. Men are more typical sleep apnea sufferers than women and children, although it is not uncommon in the latter two. Bilevel device is intended to provide noninvasive pressure support for patients with respiratory insufficiency or obstructive sleep apnea.Device 'splints' the patient's airway open during sleep by means of a flow of pressurized air into the throat, Device applies Inspiratory Positive Airway Pressure(IPAP) during inhalation and Expiratory Positive Airway Pressure(EPAP) during exhalation 4 CONTRAINDICATION Positive airway pressure may be contraindicated in some patients with the following conditions: • Pneumothorax or pneumomediastinum • Pathologically low blood pressure, particularly if associated with intravascular volume depletion • Cerebrospinal fl uid leak, recent cranial surgery or trauma • Severe bullous lung disease • Dehydration. SleepOne Bilevel Devices SleepOne Bilevel device was initially used mainly by patients for the treatment of sleep apnea at home. Obstructive sleep apneaoccurs when the upper airway becomes narrow as the muscles relax naturally during sleep. This reduces oxygen in the blood and causes arousal from sleep. SleepOne BILEVEL device stops this phenomenon by delivering a stream of compressed air via a hose to a nasal pillow, nose mask or full-face mask, splinting the airway (keeping it open under air pressure) so that unobstructed breathing becomes possible, reducing and/or preventing apneas and hypopneas. PARTS AND ACCESSORIES SYSTEM CONTENTS 1. Sleep One Device 2. AC Cord 3. Carrying Case 4. Air Supply Tube 5. Standard filter pack(spare) 6. User Manual ACCESSORIES 1.Heater-Humidifier 2.CPAP Masks 5 Keypad/LCD Display Air Supply Port on Top 1 2 AC Connector USB Port Air Inlet Filter 5 3 4 Standby – turns the device on or off Setting Ramp – Starts the ramp function Previous Item and Adjust the Settings on LCD Display Next Item and Adjust the Settings on LCD Display 5 4 3 1 2 ASSEMBLY OF SLEEPONE DEVICE 1. Place the SleepOne on a stable surface. Ensure that the air inlet in the back of the device is not blocked by anything. NOTE– Never place the SleepOne device on a soft surface. 2. Insert the power cord into the back of the device. Make sure the power cord is fully inserted into the connector. Plug the other end of the power cord into the AC outlet. 3. Attach the air supply tubing to the air supply interface on the top of the device. 4. Prepare the mask by referring to the mask’s instruction guide. 5. Connect the air supply tubing to the mask. 6 INSTRUCTION FOR USE To begin operation, verify that your SleepOne is connected to a ‘power source. When plugged in, the LCD display should appear as noted. Off Put on your CPAP mask and press the ON/OFF button on the keypad to turn on airflow or put on your CPAP mask and take a few breaths to turn on airflow automatically. If the device does not automatically start after taking 2-3 breaths, Auto On function may have been disabled. If Auto ON is disabled, you must manually press the ON/OFF button to start and stop the device. The pressure in your mask will rise to the set pressure in a while. The display shows the actual mask pressure while the device is in use. Because this is the actual pressure, the device pressure reading may vary slightly as you breathe. Your display should appear as noted. Bilevel ST P: 3.0 H: Off If your SleepOne Bilevel systems include a humidifier, after heater has been enabled from the menu, heater controls and status are displayed as noted in the image. Bilevel ST P: 3.0 H :1 Press the ON/OFF button to turn the device off. You may also simply remove your mask. After a few seconds the device will display the message “Mask Off” If you do not put the mask on again the device will automatically turn off after a while. If the device does not turn off automatically, the Auto Off function may have been disabled. In this case you must manually turn the device off. LCD Display EX - > S P:5.0 Description bpm: 12 I/E 1:1.0 EX - > S leak:30 EV: ** Vol:800 This is the first real time info screen. In this screen breath state (EX for exhale, IN for inhale), breath for minute(bpm), measured mask pressure and I:E ratio is displayed . This is the second of the info screens. Upper left of the screen is the exhalation and inhalation event. (EX is exhalation, IN is inhalation). Mask leak is shown with label leak and tidal volume is shown with Vol label. If a sleep event is observed, it is shown at the down left of the screen as EV label. 7 EPAP 5.0 cmH2O This is a pressure setting which controls the pressure during exhale. This setting can not be adjusted by patient. Only clinicians are authorized to adjust this level. IPAP 10.0 cmH2O This is a pressure setting which controls the pressure during inhale. This setting can not be adjusted by patient. Only clinicians are authorized to adjust this level. EPAP Rounding 2 This is a setting which controls the comfort rounding when switching IPAP to EPAP.If menu is unlocked, press Settings button to activate it . Use the Up and Down button to adjust the settings . IPAP Rounding 2 This is a setting which controls the comfort rounding when switching EPAP to IPAP. If menu is unlocked, press Settings button to activate it . Use the Up and Down button to adjust the settings . Ins. Trigger 5 This is a setting which controls the patient flow during exhalation to trigger inspiration. If menu is unlocked, press Settings button to activate it . Use the Up and Down button to adjust the settings . Exp. Trigger %70 This is a setting which controls the patient flow during inhalation to trigger exhalation. If menu is unlocked, press Settings button to activate it. Use the Up and Down button to adjust the settings . I:E Ratio 1:1.5 (Only ST/T modes) This is a setting which affects the back up pressure cycle rate. This is the ratio of the inhale to exhale time and is expressed as I:X. a new exhale will be triggered by the Bilevel if the patient’s breathing is slower than this setting, also linked to Backup Rate. 1.5 s (1:1.0) (Only ST/T modes) This setting is used to adjust the inspiration time, proportional to backup rate. I:E Ratio is also shown. Backup Rate 6 This is a setting which affects the backup pressure cycle rate. A new breath will be triggered if the patient’s breathing is slower than this setting. Ins. Time 8 Tubing Length 1.8 m The standard tubing length is 1.8 meters however customer can adjust tubing length of 3.0 meters. If menu is unlocked, press Settings button to activate it. Use the Up and Down button to adjust the settings. Delay Time 0 minutes Selectable delay time setting. If menu is unlocked, press Settings button to activate it. Use the Up and Down button to adjust the settings. Delay Pressure 3.0 cmH2o This is a pressure setting which controls the operating EPAP during the delay time. If menu is unlocked, press Settings button to activate it. Use the Up and Down button to adjust the settings. Auto On Disabled Auto Off Disabled This option controls the Auto-ON function, which automatically starts the flow of air after breathing once or twice into the mask. If menu is unlocked, press Settings button to activate it. Use the Up and Down button to adjust the settings. This option controls the Auto-OFF function, which automatically stops the flow of air after taking off the mask. If menu is unlocked, press Settings button to activate it. Use the Up and Down button to adjust the settings. Firmware 5.0.0 Shows version of installed firmware. Heater Disabled This option controls the Heater functions if the heater. To Activate the Heater Menu, press Settings button. Use the Up and Down button to adjust the settings. Serial DB10-0000 Shows the serial number of the device Set Pressure 3.0 cmH2O This is a pressure setting which controls the operating pressure in CPAP mode. The following chart shows each Display you will scroll through using the Up or Down 9 buttons after pressing the Settings button on the keypad. Once the final Display is reached, pressing the Next button will return you to the first Display. Locks are setted by clinicians before patients start therapy. If the menu is unlocked , patient can edit some settings according to their comfort. Menu Display Adjusting Display Bilevel ST P: 3.0 cmH2O EX - > S P:5.0 H:OFF bpm: 12 I/E 1:1.0 EX - > S EV: ** leak:30 Vol:800 EPAP 5.0 cmH2O IPAP 10 cmH2O EPAP Rounding Bilevel S, ST and T Mode 2 IPAP Rounding 5 Exp. Trigger 2 Bilevel S, ST and T Modes 2 Ins. Trigger EPAP Rounding IPAP Rounding 2 Bilevel Mode Ins. Trigger 5 Bilevel ST and T Modes %80 Exp. Trigger %80 10 I:E Ratio 1:1.5 Ins Time 1.5s (1:1.0) Bilevel ST and T Modes Backup Rate 6 Tubing Length 1.8 m Tubing Length Delay Time 0 minutes Delay Time Delay Pressure 3.0 cmH2O Delay Pressure Auto On Disabled Auto On Auto Off Disabled Auto Off 1.8 m 0 minutes 3.0 cmH2O Disabled/Enabled Disabled/Enabled Firmware 1.0 07/07/2011 Heater Disabled Heater Disabled/Enabled Serial DB10-0000 11 Set Pressure 3.0 cmH2O Set Pressure 3.0 cmH2O PATIENT MESSAGES While Ramp Mode is active, this message is display every 5 minutes to let you know how much time is left in the delay. Delay Running 5 Minutes Left This message appears whenever a high airflow condition occurs. High airflow is normally due to a poor mask fit or a removed mask. If the high airflow condition persists for about 30 seconds, the device will automatically turn off (if AutoOFF function is enabled). Mask Off Error E00 If a device error message is displayed, refer to POSSIBLE PROBLEMS AND HOW TO SOLVE THEM for instructions. Check Mask Fit The leak of your mask is calculated simultaneously and if the amount of leak exceeds 200 liters/minute for more than 3 times , this notification is displayed on the screen unless the mask is properly fitted to your face. MAINTENANCE AND CLEANING DANGER Electric shock hazard – Do not attempt to open or remove the case; there are no userserviceable components inside. If service is required, contact your provider. WARNING If the operation of the device appears to get out of normal operation or begins to be heard unusual sounds, do not continue to use device and contact your provider company. If the device has been fallen down, verify functionality of the device. If the device does not function or the case is damaged, do not continue to use device and contact your provider company. If the device does not appear to be functioning properly refer to the possible problems and how to solve themsection for instructions. Standard Air-Inlet Filter–Check the filter every 10 days and clean it if necessary. Replace the filter every 6 months or sooner if it is damaged. CAUTION–Never rinse or place the device in water. Never allow liquids to get into or around any of the ports, switches or air filter. If this occurs, do not use the device. Contact your provider company for service. 12 Device Case Cleaning 1. Unplug the SleepOne from the power source. Use a clean dry cloth and mild detergents for cleaning the unit. 2. Allow the device to dry completely before plugging it into a power source. Filter Cleaning Air-Inlet Filter (Standard) 1. The air-inlet filter should be checked every 10 days and cleaned as necessary. The filter is located in the rear of the device. CAUTION–Proper filter function is important for the operation of the device and to protect the device from damage. 2. To clean, remove filter from the frame. 3. Wash the filter in a solution of warm water and mild detergent, and rinse with water. Allow the filter to dry completely. If the filter is damaged, contact your provider company for a replacement. 4. Ensure the filter is completely dry before installation and use. Tubing The air supply tubing should be cleaned daily. Remove the tubing from the device and mask. Use a mild detergent and water to clean the inside of the tubing. Rinse the tubing and allow to air dry. POSSIBLE PROBLEMS AND HOW TO SOLVE THEM If you are having problem with the operation of your SleepOne , please refer to the table below for a list of problems with possible reasons and solutions. If you are unable to resolve the problem by following, contact your provider. Possible Problem Reason 1. Device is not plugged in or the power cord is not Display shows firmly fitted to nothing. outlet power. 2. There is no outlet power. 1. The Auto-ON function has been disabled. 2. There is no SleepOne does not power to the device. start when breathing 3. Breath is not into the mask. deep enough for the Auto-ON function to detect. 4. The air supply Solution 1. Ensure that power cord is firmly fitted to the SleepOne and the power outlet. 2. Ensure outlet power is live 1. Use the ON/OFF button to start and stop the device. 2. Ensure that power cord is firmly fitted to the SleepOne and the power outlet. 3. Breathe deeper to start the SleepOne. 4. Make sure the air supply port plug is firmly fitted into the unit. 13 port plug is missing or not firmly fitted. The airflow has stopped suddenly during use. The display shows an error. Symptoms of OSA have recurred. Dryness of throat or nose. Condensation of water is collecting in the hose causing a gurgling noise. Air from flow generator seems to be too warm. 5. The humidifier chamber is not fully engaged into the cradle or is missing. 1. The Auto-OFF function has detected large airflow because of wrong placed mask. 2. During use you may breathe by mouth. An error has occurred in the device and requires servicing. 1. Air filter may be obstructed. 2. Sleep apnea condition has changed. Inadequate humidity. 1.Your humidification setting is too high. 2.The room temperature fluctuates from higher to lower levels through the night. 1. The air filter(s) is/are dirty. 2. The air inlet port is blocked. 3. The room temperature is too high. 4. The SleepOne is located near a heat 5. Slide the humidifier chamber fully into the slot. 1. Ensure you have a good mask fit; adjust the mask and headgear as needed. 2. Contact your provider company for a chin strap or different mask which will help prevent mouth breathing. If problem is not resolved with above solutions, disable Auto-OFF function. Contact your provider company for service. 1. Clean or replace the air filter and change the location of device against drapes and other dusty surfaces. 2. Contact your doctor. 1. Add Heated Humidifier. 2. Increase the heater setting on the humidifier. Reduce the humidifier heater setting and/or increase the temperature of the room. 1. Refer to the filter cleaning section for instructions on filter maintenance. 2. Unblock the air inlet. 3. Decrease the room temperature. 4. Locate the device away from the heat source so the air being drawn into the device is at room temperature. If the problem persists contact your provider company. 14 source. Nasal, sinus or ear pain, possibly with runny nose. You may have a reaction to air flow pressure. Do not continue to use and contact your doctor. Manufacturer: KARE MEDICAL LTD. CO. Adress: Ziya Gokalp Cad. 36/23 Yenisehir Ankara/TURKEY Ph: +90 312 435 08 18 Fax: +90 312 435 83 08 e-mail: [email protected] web: www.karemedical.eu 15 1984 SPECIFICATIONS Size............................................................................................. 18.1 x 15.5 x 11.7 cm Weight................................................................................................................. 1.25kg Electrical Requirements.......................................................................... 100-230 V AC Maximum Power Consumption..............................................................................50W Pressure Range........................................................................................3-35 cm H2O Operating Temperature Range..................................................................5°C to 40°C Operating Humidity Range.....................................................................0% to 95% RH Sound Level (tested per ISO 17510)..................................................................<30dB