1
Advanced Hand Dryer
Instructions Manual
Table of Contents
Product Dimensions
Product Dimensions
3
Product Features, Technical Specifications & Package Contents
4
Installation & Safety Guidelines
5
Installation Instructions
6
Operation Guidelines
8
Cleaning & Maintenance Guidelines
9
Warranty Details
10
2
3
Product Features, Technical Specifications
& Package Contents
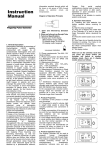
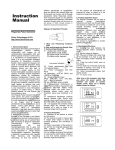
Product Features:
• Its contemporary, sleek, ergonomic design makes this an exceptionally stylish
dryer
• Heavy duty Stainless Steel casing gives excellent ongoing protection against
corrosion and vandalism
• The automatic ‘no touch’ operation ensures impeccable hygiene
• Users enjoy an ultra-fast drying time of just nine seconds!
• Maximum output comes at minimal power consumption to help reduce carbon
footprint
• No unnecessary energy wastage thanks to the automatic cut-off
• Reduced noise levels make this one of the quietest and most discrete dryers in
any class
• High brightness blue LED light indicator clearly indicates the drying zone
ensuring ease and effectiveness of use
• Easy to install and maintain
• Finishes available in Brushed Metal, Polished Chrome and Arctic White
Technical Specifications:
• Shell material: 304 Stainless Steel
• Standard finishes: Brushed Metal,
Chrome, White
• Rated voltage: AC 220-240V
• Rated frequency: 50 / 60 Hz
• Rated Power: 1,600W
• Installation: wall mounted
• Drying time: 9 Seconds
• Air speed: 85 M/s
• Noise output: 75dB
• Operation: infrared automatic ‘no
touch’
• Timing protection: 60 seconds auto
cut off
• Thermal protection: cut off above
70C
4
•
•
•
•
•
Drip Proof: IPX1
Unit dimensions: 325 W x 278 D x
171 H mm
Net weight: 6.0 kg
Warranty: 2 Years
Certification: CE, RoHs
Installation & Safety Guidelines
•
All electrical installation and repair work should be carried out by a qualified
electrician in accordance with current locals codes or regulations.
•
Do not attempt any disassembly or modification of the unit that is not expressly
stated in this manual.
•
Do not install when the product (power cable) is electrified.
•
Install securely in a location strong enough to support the weight of the unit.
•
Install the hand dryer on a smooth surface and in an area where people are not
likely to collide with the object once installed.
•
Do not scratch, damage, process, excessively bend, pull, twist or bundle the
power cable, and do not place heavy objects onto it or trap it.
•
Do not use in a hot location such as a shower room, where condensation may
form on the unit, or where water may splash directly at the unit.
•
Do not install this hand dryer above sources of water such as sinks or taps.
•
Do not install in locations where salt damage may occur, or where corrosive,
neutral, or reductive gases are present.
Package Contents:
• Hand dryer
• Wall mounting bracket
• Fixtures and fittings
• User manual and installation guide
5
Installation Instructions Advanced
Hand Dryer
Installation Instructions Advanced Hand Dryer
Installation Instructions Advanced Hand Dryer
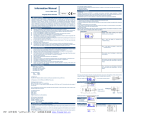
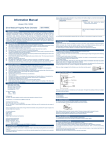
Installation Instructions
•
Remove the cover by unscrewing the
two retaining screws holding it in
position, using the supplied key.
•
Offer the hand dryer backplate up to
the mounting surface and mark the
four fixing points through the holes in
the backplate.
•
1)
•
•
•
Drill the four marked fixing holes and
insert the supplied wall plugs.
•
•
•
•
•
Remove the cover by unscrewing the
Remove the cover by unscrewing the
two retaining screws holding it in
two retaining screws holding it in
position, using the supplied key.
position, using the supplied key.
2)
2)
1) 2)
1)
Offer the hand dryer backplate up to
Offer the hand dryer backplate up to
the mounting surface and mark the
the mounting surface and mark the
four fixing points through the holes in
four fixing points through the holes in
the backplate.
the backplate.
Drill the four marked fixing holes and
Drill the four marked fixing holes and
insert the supplied wall plugs.
insert the supplied wall plugs.
Offer the dryer backplate up to the
Offer the dryer backplate up to the
wall, and insert the four fixing screws
wall, and insert the four fixing screws
through the backplate into the wall
through the backplate into the wall
plugs.
plugs.
Installation Instructions Advanced Hand Dryer
•
•
Offer the dryer backplate up to the
wall, and insert the four fixing screws
through the backplate into the wall
Remove the cover by unscrewing the
1)
two retainingplugs.
screws holding it in
•
•
•
•
•
Replace the cover, ensuring the two
not
Offer the hand dryer backplate up to
retaining screws are
the mounting surface and mark the
overtightened.
four fixing points
through the holes in
the backplate.
Recommended Mounting Heights
Drill the four marked fixing holes and
Measurements
are from the base of the
insert the
supplied wall plugs.
unit to the floor
3)
•
•
•
•
•
•
•
•
•
•
3)
3)
4)
4)
Mens: 45" (114 cm)
Mens: 45" (114 cm)
Ladies: 43" (109 cm)
Ladies: 43" (109 cm)
Teenagers: 41" (104 cm)
Teenagers: 41" (104 cm)
Small Children: 35" (89 cm)
Small Children: 35" (89 cm)
Disabled: 39” (99 cm)
Disabled: 39” (99 cm)
4)
Offer the dryer backplate up to the
wall, and insert the four fixing screws
• Mens: 45" (114 cm)
through the backplate into the wall
plugs. • Ladies: 43" (109 cm)
•
Teenagers: 41" (104 cm)
cm)
Replace the cover, ensuring the two
• Small Children: 35" (89
retaining screws are not
• Disabled: 39” (99 cm)
overtightened.
Recommended Mounting Heights
Measurements are from the base of the
unit to the floor
•
•
•
•
•
Replace the cover, ensuring the two
Replace the cover, ensuring the two
retaining screws are not
retaining screws are not
overtightened.
2)
overtightened.
Recommended Mounting Heights
Recommended Mounting Heights
Measurements are from the base of the
Measurements are from the base of the
unit to the floor
unit to the floor
position, using the supplied key.
•
•
3)
4)
Visit www.tekflo.com or email enquiries@tekflo.com for more in
Visit www.tekflo.com or email enquiries@tekflo.com for more i
Mens: 45" (114 cm)
Ladies: 43" (109 cm)
Teenagers: 41" (104 cm)
Small Children: 35" (89 cm)
Disabled: 39” (99 cm)
Visit www.tekflo.com or email enquiries@tekflo.com for more information
6
Visit www.tekflo.com or email enquiries@tekflo.com for more information
7
Operation Guidelines
Cleaning & Maintenance Guidelines
•
Before inserting hands under the dryer, shake off any excess water.
Cleaning and maintenance should be carried out by service personnel only. It is
recommended that cleaning be carried out regularly every month.
•
This hand dryer incorporates no touch sensor activation for hygienic use.
Simply place your hands 10cm from the air outlet and the hand dryer will be
automatically activated.
•
Remove your hands away from the air outlet and the hand dryer will be
deactivated after 2 seconds.
•
The hand dryer will automatically cut off after running for 60 seconds if the
sensor is activated for this period. If need be, remove hands from the sensor and
return your hands and the dryer will re-activate.
8
1.
2.
3.
4.
Ensure that the unit is disconnected from the mains supply.
Remove the front cover by releasing the two fixing screws.
Carefully remove any build up of dust from within the dryer mechanism.
Then replace the cover and wipe down the exterior of the dryer with a damp
cloth, removing any build of up dirt.
5. Ensure the unit is completely dry before reconnecting the power supply.
9
Warranty Details
•
All Tekflo Hand Dryers are guaranteed to be free from defects in parts and
manufacture for 2 years from the date of purchase, provided that the product is
used under the normal operating conditions stated within the manual.
•
The warranty is only available to the original purchaser and is not transferable.
Your consumer rights are not affected.
•
If there are any defects with your hand dryer please contact the provider stating
your invoice number, date of purchase, full name and address.
•
Do not attempt to repair or take apart the hand dryer your self. If the hand dryer
has been tampered with before it arrives with us, the warranty will be void.
•
We advise that all customers retain original packaging should the unit need to be
returned.
•
If your hand dryer occurs a problem outside of the warranty period, we offer a
repair service where we can collect and professionally repair your hand dryer.
10
Notes
11
Visit www.tekflo.com or email [email protected]
for more information
12