1
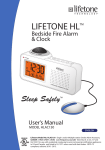
LIFETONE HL
TM
Bedside Fire Alarm
& Clock
User’s Manual
MODEL HLAC100
ENGLISH
SPANISH
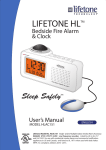
LIFETONE HL
TM
Bedside Fire Alarm
& Clock
User’s Manual
WARNING! DO NOT COVER
AC POWER
MODEL HLAC100
PLEASE READ THIS USER’S MANUAL COMPLETELY
AND THOROUGHLY BEFORE BEGINNING!
TABLE OF CONTENTS
I. INTRODUCTION
II. THE LIFETONE HL™ BEDSIDE FIRE ALARM AND CLOCK
A. CONTROLS AND DISPLAY
B. FEATURES
III. WARNINGS
IV. INSTRUCTIONS
V. BEFORE INSTALLING
VI. INSTALLATION AND ACTIVATION
A. LOCATION OF THE LIFETONE HL™
B. POWERING THE PRODUCT
C. SELF-TEST
D. SMOKE ALARM COMPATIBILITY TEST
E. SETTING THE CLOCK
F. SETTING THE ALARM
G. TROUBLESHOOTING ERROR MESSAGES
H. TESTING THE LIFETONE HL™
I. UNSUCCESSFUL SMOKE ALARM COMPATIBILITY TEST
VII. USING THE LIFETONE HL™
A. RECOGNIZING THE EMERGENCY ALARM SIGNALS
B. CLOCK LIGHT PANEL
C. BED SHAKER AND CARE
VIII. REGULAR MAINTENANCE
A. BATTERIES
B. POWER ADAPTER
IX. FREQUENTLY ASKED QUESTIONS
X. LIMITED WARRANTY
XI. RECOMMENDED LOCATIONS FOR SMOKE ALARMS
-1-
2
3
3
3-4
4-5
5-6
7
7
7
7
7-8
8-9
9
10
10
11
11
12
12
12
12
13
13
13
13
14
15
I. INTRODUCTION
Thank you for purchasing the Lifetone HL™ Bedside Fire Alarm and Clock. It is an
important part of your family’s safety plan. The Lifetone HL™ is not a smoke detector
and does not detect smoke. Instead, it detects the alarm sounds given by smoke alarms
and smoke alarm systems that are UL- listed, or Intertek listed to the UL-217 standard,
that emit a standardized T3 alarm signal. YOU MUST HAVE PROPERLY
INSTALLED UL- LISTED T3 SMOKE ALARMS IN YOUR HOME
BEFORE THE LIFETONE HL™ BEDSIDE FIRE ALARM AND CLOCK
WILL OPERATE CORRECTLY. THE LIFETONE HL™ BEDSIDE FIRE
ALARM AND CLOCK IS NOT COMPATIBLE AND WILL NOT WORK
IF YOU HAVE INSTALLED FIRST ALERT® ONELINK® TALKING
WIRELESS ALARMS. THE LIFETONE HL™ IS COMPATIBLE WITH
ALL OTHER UL-LISTED T3 SMOKE ALARMS.
The T3 pattern is an alarm signal that is on and off for 0.5 seconds three times in
succession followed by a 1.5 second pause. The alarm would sound like this:
“beep-beep-beep-pause” then “beep-beep-beep-pause” then “beep-beep–beep”. The
Lifetone HL™ Bedside Fire Alarm and Clock will detect this T3 pattern and activate a
loud, low and multiple frequency (520 Hz) alarm. Research has proven the 520 Hz alarm
to be more effective at awakening and alerting individuals with hearing loss. In addition
to the alarm sound, the Lifetone HL™ will activate the Lifetone Bed Shaker. Together,
the Lifetone HL™ alarm and the Lifetone Bed Shaker provide effective awakening and
alerting for individuals with hearing loss or the deaf.
The Lifetone HL™ Bedside Fire Alarm and Clock (“Lifetone HL™ Fire Alarm”) is an
assistive alerting device intended for use in a residence by individuals with hearing loss
or the deaf during a quiet environment and which is placed next to a bed or usual
nighttime sleeping area. The Lifetone HL™ Fire Alarm will detect the T3 emergency
signal given by existing, properly placed UL 217-listed smoke alarms and, when detected,
will give its own emergency signal at a lower frequency (520 Hz), which may be heard
by individuals with hearing loss in their beds. The product also gives its emergency
signals visually through a display screen and through a tactile Bed Shaker, either of which
may be detected by Deaf individuals in their beds. The Lifetone HL™ Fire Alarm is not
intended for use in marine watercraft, recreational vehicles (“RV”), mobile homes, or
hospitals.
-2-
II. Lifetone HL™ BEDSIDE FIRE ALARM and CLOCK
A. CONTROLS AND DISPLAY
1. Microphone grille and dust protector
2. Speaker – Must face pillow
3. Clock and Status Display
4. Wake Up Alarm and Clock Controls
5. Snooze/Light button
6. Test/Silence button
7. Battery Compartment
8. Optional Bed Shaker plug
9. Power Cord
1
WARNING! DO NOT COVER
AC POWER
3
2
Front View
6
1
7
4
Top View
5
TEST/SILENCE
8
Back View
BED SHAKER
9
Power Cord is located
under Bed Shaker Plug.
B. FEATURES
1. A patented Hearing Sensor that constantly listens for and detects only UL-listed and
NFPA recommended smoke alarms that emit a standardized T3 signal.
2. A low pitched alarm sound at 520 Hz that has been shown to be more effective for
waking and alerting individuals with hearing loss.
3. A tactile alarm is provided in the form of the UL-listed Lifetone Bed Shaker that
vibrates intermittently if there is an emergency alarm, and in a continuous manner for
the wake-up alarm.
4. A Silence button that can silence the emergency alarm temporarily. If the smoke
alarm is detected again the emergency alarm will sound again within 10-15 seconds.
5. In the event of a power failure, the Lifetone HL™ can operate in battery backup
mode for at minimum 7 days and still provide emergency alarm signals.
6. As a safety feature, when AC or battery power is first applied, the Lifetone HL™ will
require a test of your installed smoke alarms.
-3-
B. FEATURES (continued)
7. Other safety features and user status notifications include:
• If the Lifetone bed shaker is used, and becomes unplugged, the word “beds” and a
flashing bed shaker icon will appear on the screen and a low frequency chirp will sound.
• If AC power is lost, the red power LED, located on the front left corner, will go out. In
the left corner of the Display, an “ERROR” message and an AC plug icon will flash.
• If the batteries are too low or missing to support seven days of battery operation, the
word “BATT” will appear on the screen in large text, a low pitched “chirp” will sound
and the bed shaker will “twitch” at one minute intervals. If the batteries are low or
missing, replace them immediately to ensure your safety.
ICON
DESCRIPTION
Generic error message
AC Power is unplugged
Batteries are low or missing
Bed shaker is unplugged or defective
Wake up alarm is activated
III. WARNINGS
READ AND UNDERSTAND THESE WARNINGS BEFORE INSTALLING AND
OPERATING YOUR LIFETONE HL™ BEDSIDE FIRE ALARM AND CLOCK.
See Instructions in Section IV of the User’s Manual.
WARNING! ALWAYS install UL-listed T3 smoke alarms in proper locations in
your home before operating the Lifetone HL™ Fire Alarm. Failure to verify that
all existing smoke alarms are compatible with this product may obstruct proper
operation, which may result in personal injury or death.
WARNING! FREQUENTLY TEST the Lifetone HL™ Fire Alarm to assure its
proper operation with that of your existing smoke alarms. Failure to test this
product frequently may obstruct its proper operation, which may result in
personal injury or death.
WARNING! ALWAYS keep noise levels in your home to a minimum of 70 dB or
lower. Excessive noise levels may obstruct the emergency signals given by your
existing smoke alarm to the Lifetone HL™ Fire Alarm, which may result in
personal injury or death.
WARNING! DO NOT use the Lifetone HL™ Fire Alarm with acoustic
sound-dampening wall or ceiling materials. These materials may reduce sound
levels and obstruct the emergency signal given by the product, which may result
in personal injury or death.
-4-
III. WARNINGS (continued)
READ AND UNDERSTAND THESE WARNINGS BEFORE INSTALLING AND
OPERATING YOUR LIFETONE HL™ BEDSIDE FIRE ALARM AND CLOCK.
See Instructions in Section IV of the User’s Manual.
WARNING! DO NOT place any object covering the raised Microphone Grille
and Dust Protector. Covering or blocking this component may obstruct
proper operation, which may result in personal injury or death.
WARNING! ALWAYS face the Speaker towards the pillow. Improper
orientation of the Lifetone HL™ Fire Alarm to the user may obstruct proper
operation, which may result in personal injury or death.
WARNING! ALWAYS use the exact batteries specified by this User’s
Manual. DO NOT use rechargeable batteries. Use of different batteries may
damage the product or cause it to fail to detect a signal from an activated
smoke alarm, which may result in personal injury or death.
WARNING! DO NOT ignore any emergency alarm. Never silence the
emergency signal from the Lifetone HL™ Fire Alarm or disengage the Bed
Shaker before investigating for smoke or fire in your home. Failure to
investigate for smoke or fire after having received an emergency signal may
result in personal injury or death.
WARNING! DO NOT use the Lifetone HL™ Fire Alarm where the humidity
exceeds 95% or where the surrounding temperature is lower than 32°F (0°C)
or higher than 120°F (49°C). Constant exposures to high or low
temperatures or excessive humidity may obstruct the product’s intended
signaling performance, which may result in personal injury or death.
WARNING! This product contains a chemical known to the State of
California to cause cancer, birth defects, or other reproductive harm.
IV. INSTRUCTIONS
READ AND FOLLOW THESE INSTRUCTIONS BEFORE OPERATING
YOUR LIFETONE HL™ BEDSIDE FIRE ALARM AND CLOCK
See Warnings in Section III of the User’s Manual.
1. Make sure your existing smoke alarms are UL-listed T3 smoke alarms. You must have
properly installed UL-listed T3 smoke alarms in your home before the Lifetone HL™
Bedside Fire Alarm and Clock will operate correctly. Read and follow the instructions
and warnings that accompany your existing smoke alarms.
If you are unsure whether your existing smoke alarms are UL-lsited T3 smoke alarms,
ask the manufacturer of those products or your local fire official about your smoke
alarms. Investigate further until you are satisfied that your existing smoke alarms are
UL-listed T3 smoke alarms.
-5-
IV. INSTRUCTIONS (continued)
READ AND FOLLOW THESE INSTRUCTIONS BEFORE OPERATING
YOUR LIFETONE HL™ BEDSIDE FIRE ALARM AND CLOCK
See Warnings in Section III of the User’s Manual.
2. Frequently test your Lifetone HL™ Fire Alarm. Test your Lifetone HL™ Fire Alarm
weekly by pressing the red TEST/SILENCE button on the back of the product. Failure
to perform this test may not detect smoke alarms in your home that are not
functioning.
Also, manually test that the Lifetone HL™ Fire Alarm can detect your existing smoke
alarms by testing your smoke alarm emergency signal and obtaining a corresponding
emergency signal from the Lifetone HL™ Fire Alarm. Perform this test as often as you
replace batteries in your existing smoke alarms.
3. Keep noise levels in your home to a minimum during use. Your Lifetone HL™ Fire
Alarm is used properly in a quiet environment next to your bed or nighttime sleeping
area. Avoid excessive noise in your home during use. Excessive noise may mask the
emergency signal given by your smoke alarms and will obstruct the proper detection of
that signal by your Lifetone HL™ Fire Alarm.
4. Keep the Microphone Grille and Dust Protector free and clear. DO NOT cover the
top of the unit with anything. The domed microphone area must be free and clear to
assure proper operation of the product.
5. Keep the Lifetone HL™ Fire Alarm connected to electrical outlet. Always operate
your product from existing AC power via the electrical cord. DO NOT rely upon the
batteries for operation of the product. Instead, preserve the batteries for emergency
backup use. Also, DO NOT plug the product into a “switched” electrical outlet (i.e., an
outlet that is controlled by a wall switch).
6. Replace the batteries in your Lifetone HL™ Fire Alarm. Replace the batteries at least
once a year in your product or more often if the product has operated on batteries for
any reason. Also, the Display screen will give a visual notification signal and the product
will give an audio “chirp” to signal low batteries.
7. Use correct batteries in your Lifetone HL™ Fire Alarm. Use four (4) D cell alkaline
batteries in your product. DO NOT use rechargeable batteries as these may damage
your Lifetone HL™ Fire Alarm.
8. Face the Display screen toward you. The Display screen and speaker must face you
to assure proper operation of the product.
9. Read and follow all directions provided by the Display screen. Emergency signals
about smoke or fire are given, in part, by the Display screen. Also, notifications about
the proper operation of your Lifetone HL™ Fire Alarm are given by the Display screen.
DO NOT ignore these signals.
-6-
V. BEFORE INSTALLING
The Lifetone HL™ cannot awaken or alert you to smoke or fire if your existing smoke
alarms do not operate or if they do not have the UL-listed T3 emergency signal. The
Lifetone HL™ WILL NOT OPERATE with smoke alarms that do not use the T3 pattern
alarm signal.
When you power up the Lifetone HL™, you will be required to perform a Self –Test
followed by a Smoke Alarm Compatibility Test. The Smoke Alarm Compatibility Test will
tell you whether your existing smoke alarms are compatible with the Lifetone HL™ and
whether the batteries in your existing smoke alarms should be replaced. If your home
does not have T3 smoke alarms, the Smoke Alarm Compatibility Test will not be
successful. You must replace the older alarms with current UL-listed T3 smoke alarms
before your Lifetone HL™ will operate correctly. Refer to your smoke alarms User’s
Manual to determine when to replace your smoke alarms and their batteries.
VI. INSTALLATION AND ACTIVATION
A. LOCATION OF THE LIFETONE HL™
1. Place the Lifetone HL™ next to your bed
2. Speaker facing the pillow and 3 feet from the user’s head
B. POWERING THE PRODUCT
1. To use the bed shaker, plug it in on the back of the clock now
2. Remove the battery door located on back of clock
3. Insert 4 D cell alkaline batteries matching the polarity (+ and -) signs in the open
compartment
4. Replace battery door securely
5. Plug the Lifetone HL™ into electrical outlet closest to your bedside location
C. SELF-TEST
Your Participation in the Self-Test and Smoke Alarm Compatibility Test.
What YOU MUST do:
Read and follow the instructions, and take action each time the “YOU MUST”
language appears in BOLD text.
-7-
C. SELF-TEST (continued)
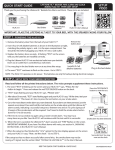
1. YOU MUST press the red “TEST/SILENCE”
button on the back of the clock to begin the
“Self-Test”.
TEST/SILENCE
BED SHAKER
2. The word “TEST” will appear on the display.
3. If a bed shaker is attached and the word “beds”
and a flashing bed shaker icon appear and a low
chirp is coming from the clock the bed shaker may
be improperly connected. Unplug the bed shaker
and the clock will proceed with the test.
Bed shaker ERROR display
4. The clock is emitting faint imitation
smoke alarm sounds.
5. Clock will then proceed to the Smoke Alarm
Compatibility Test and “TEST” will begin
flashing on the screen.
D. SMOKE ALARM COMPATIBILITY TEST
This important test will determine if your existing smoke alarms are compatible with
the Lifetone HL™. ALWAYS ASK FOR ASSISTANCE WHENEVER YOU ARE
UNABLE TO PROPERLY AND SAFELY ACTIVATE YOUR EXISTING SMOKE
ALARMS DURING THE SMOKE ALARM COMPATIBILITY TEST. IF YOU HAVE A
MONITORED SMOKE OR FIRE ALARM SYSTEM, CONTACT YOUR SERVICE AND
TELL THEM YOU ARE TESTING YOUR SYSTEM. WHEN YOU ARE DONE, CALL
THEM AGAIN TO TELL THEM YOUR TESTS ARE COMPLETED.
IF YOU ONLY HAVE SMOKE/CO COMBO DETECTORS IN YOUR HOME:
THE SMOKE DETECTOR WILL WORK IN AN EMERGENCY BUT TO ACTIVATE THE
LIFETONE HL™ YOU WILL NEED ONE WORKING T3 SMOKE ALARM OR A CAN
OF SMOKE CHECK™. PLEASE CONTACT US AT 1 800 648-7923 AND WE WILL
PROVIDE YOU WITH THE NECESSARY ITEM TO ACTIVATE THE LIFETONE HL™.
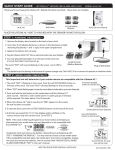
1. YOU MUST locate your nearest smoke alarm. It is recommended
you locate an alarm that is easy to activate avoiding smoke alarms
on high ceilings.
2. YOU MUST press and hold the test button on the
smoke alarm until the Lifetone HL™ alarm sounds.
Please note that anywhere between 4 and 8 smoke
alarm T3 cycles (groups of 3 beeps) may be required.
3. When the Lifetone HL™ alarm sounds and “FIRE”
appears on the Display the test has been successful.
-8-
D. SMOKE ALARM COMPATIBILITY TEST (continued)
4. To stop the alarm and bed shaker (if plugged in) YOU
MUST press the RED TEST/SILENCE button on the
back of the clock located above the Bed Shaker plug.
TEST/SILENCE
BED SHAKER
5. If all tests are passed, the “12 hr” will flash
on the Display Screen and you may begin to
set the clock.
NOTE: If the Display panel is flashing and the alarm is
emitting loud beeps your existing smoke alarms were not
detected or are not compatible with the Lifetone HL™.
This indicates an unsuccessful Smoke Alarm
Compatibility Test. YOU MUST unplug the clock from
the wall socket and remove the batteries. Please refer
to section I titled “Unsuccessful Smoke
Alarm Compatibility Test”
E. SETTING THE CLOCK
NOTE: At any time during this process if you need to reset the clock press and hold
“SET CLOCK” until the flashing “12hr” appears and repeat the steps below.
1. “12 hr” time display is flashing. To select a 24 hour display format press “+” or “-”.
2. Press the “SET CLOCK” button to set the hour.
3. Use “+” and “-” to increase or decrease setting value.
4. Press the “SET CLOCK” button again, and repeat the above steps to set Minutes.
5. Press the “SET CLOCK” button to set the Year.
6. To set Month and Date note “M” and “D” in lower right corner of display will be flashing.
a) To select a Month/Date format press “SET CLOCK” and proceed to set the
month and date.
b) To select a Date/Month format press “+” or “-” and proceed to set the date
and month.
7. “E” (for English) will be flashing, press “SET CLOCK”. If you prefer Spanish or French
use “+” and “-” to select and press “SET CLOCK”.
8. The clock has been successfully set.
9. The clock will show the day of the week next to the Month/Date, if you prefer to
display the Year press “SET CLOCK”.
10. Proceed to Setting the Alarm.
Your Lifetone HL™ Bedside Fire Alarm and Clock is now constantly monitoring your
home for the sound of smoke alarms.
-9-
F. SETTING THE ALARM
NOTE: At any time during this process if you need to reset the alarm press and hold
“SET ALARM” until the “hour” is flashing and repeat the steps below.
1. Press “+” and “-” to select the hour then press “SET ALARM”.
2. Press “+” and “-” to select the minutes then press “SET ALARM”.
3. Press “ON/OFF” to activate the alarm and the bell
icon will appear.
a. The low-pitched wake-up alarm will sound
as an intermittent beep. If a bed shaker is
attached, it will vibrate continuously.
4. Pressing the “SNOOZE/LIGHT” button on top of the clock will temporarily stop the
alarm for 10 minutes otherwise the wake-up alarm will stop after 10 minutes.
G. TROUBLESHOOTING ERROR MESSAGES
Bed Shaker: If the Display shows “beds”, a
flashing bed shaker icon and a low pitched tone is
coming from the clock make sure the bed shaker
is completely plugged in. If this continues the bed
shaker may not be working. Please contact us at
1 800 648-7923 for assistance.
Batteries: If the Display shows “BATT” after the
Smoke Alarm Compatibility is completed, the
batteries were improperly inserted. Remove the
batteries and insert them again making sure to
match the polarity (+and -) signs in the open battery
compartment. If “BATT” and the battery icon are
flashing on the display and the clock is sounding a
low pitched chirp the batteries must be replaced.
Non-Compatible Smoke Alarms: If the
Display panel is flashing and the alarm is emitting
loud beeps your existing smoke alarms were not
detected and/or are not compatible with the
Lifetone HL™. Please refer to “Section I”
titled Unsuccessful Smoke Alarm
Compatibility Test.
-10-
Bed shaker ERROR display
Battery ERROR display
Non-Compatible Smoke
Alarms ERROR Display
H. TESTING THE LIFETONE HL™
1. Weekly:
• Press and hold the red TEST/SILENCE button for
two seconds. A Self-Test will begin similar to when
batteries or power was initially applied, but without
the smoke alarm compatibility test. A successful
Self-Test will show “FIRE” on the Display and the
clock will sound two T3 alarm cycles.
TEST/SILENCE
BED SHAKER
• If a Self-Test is unsuccessful, the display will flash all
segments and a loud beep will sound. Remove the
batteries, unplug the clock and power up again. Please
refer to Installation and Activation - Powering the
Product Section (Page 7).
2. Annually:
Unplug the clock, remove the batteries then reconnect all power to conduct a Smoke
Alarm Compatibility Test. The entire self-test sequence may be performed at any time;
however, you will have to reset the year, month, date and time.
I. UNSUCCESSFUL SMOKE ALARM COMPATIBILITY TEST
If the Smoke Alarm Compatibility Test is unsuccessful, the
display will flash all segments a loud beep will sound, and if
a bed shaker is attached, it will vibrate at intervals.To stop
the loud beep and the vibrating bed shaker, if attached,
unplug the clock and remove the batteries.
Before a second test is conducted YOU MUST check to determine the following:
1. Is the power source for your smoke alarm working? (Batteries or AC)
2. Does your existing smoke alarm have a T3 alarm signal?
3. Has unusually loud background noise been eliminated?
4. Is the smoke alarm signal distant or hampered by sound barriers, such as sound proof
ceilings or closed doors?
5. After YOU HAVE checked the above and a second Smoke Alarm Compatibility Test
is unsuccessful, please contact us at 1 800 648-7923.
-11-
VII. USING THE LIFETONE HL™
A. RECOGNIZING THE EMERGENCY ALARM SIGNALS
1. The word “FIRE” will appear and flash on the
screen, the alarm will sound for 10 minutes or
until it is silenced.
2. If a bed shaker is attached, it will pulse
repeatedly with a 11/2 second on, 21/2 second off
pattern.
3. If the alarm has been silenced and the
patented Hearing Sensor continues to hear a
smoke alarm, the alarm will sound again within
15 seconds.
DO NOT IGNORE ANY ALARM,
ESPECIALLY A REPEATED ALARM.
B. CLOCK LIGHT PANEL
1. Press the “SNOOZE/LIGHT” button to change brightness level.
2. The display backlight has three levels of brightness (high and medium) or off.
3. If AC power is lost, the backlight will be off. Press “SNOOZE/LIGHT” and the display
will light for 5 seconds.
C. BED SHAKER USE AND CARE
1. The Lifetone bed shaker may be placed under the mattress pad or the pillow.
2. It is water resistant, but not waterproof. It may be cleaned periodically with soap and
a damp cloth. Do not submerge in water.
3. It has a thermal switch to turn it off if it gets too warm. It will reactivate after it cools
down and continue to vibrate if the alarm is still active. Do not try to open it.
4. The bed shaker is electronically supervised. Do not use any other bed shaker with the
Lifetone HL™ as doing so invalidates any Lifetone Technology™ warranties or claims.
5. If you disconnect the bed shaker to stop the clock from chirping press the red
“TEST/SILENCE” button. The Lifetone HL™ will conduct a brief self-test, but without
the Smoke Alarm Compatibility Test, and then it will reset itself without the bed shaker.
-12-
VIII. REGULAR MAINTENANCE
A. BATTERIES
1. Replace 4 D cell batteries once a year or more often if power outages occur,
or low battery warning occurs.
2. Use 4 new D cell alkaline batteries and replace ALL batteries at the same time.
B. POWER ADAPTER
1. The Lifetone HL™ includes an AC power adapter. No other power adapters should
be used. Failure to use the Lifetone AC adapter could result in damage or incorrect
operation of the Lifetone HL™.
IX. FREQUENTLY ASKED QUESTIONS
HOW DO I SILENCE THE EMERGENCY
ALARM SIGNAL?
TEST/SILENCE
1. Press the “TEST/SILENCE” button for 2
seconds.
BED SHAKER
2. If the Lifetone HL™ detects a smoke alarm
again the alarm will sound within 15 seconds.
WHAT HAPPENS IF I LOSE AC
POWER?
1. In the left corner of the Display, an “ERROR”
message and an AC power plug icon will flash. The
red LED AC Power indicator, located on the front
left corner, will not be visible.
2. The clock will operate for a minimum of 7 days
on battery backup and the emergency alarm will
still be able to sound for at least 4 minutes.
3.The wakeup alarm will go off at the proper time
during the first 24 hours without AC power. If the
power outage lasts more than 24 hours and you
wish to use the wake-up alarm, remove the
batteries, reinsert the batteries and proceed to
conduct a Smoke Alarm Compatibility Test. See
section VI, Smoke Alarm Compatibility Test (Page 8).
4. Normal operation will resume when AC power
is restored.
-13-
WARNING! DO NOT COVER
AC POWER
X. LIMITED WARRANTY
Lifetone Technology, Inc., (“Lifetone”) the maker of Lifetone brand products warrants that for a period of
two years (2 years) from the date of purchase, this product will be free from defects in material and
workmanship. Lifetone, at its option, will repair or replace this product or any component of the product
found to be defective during the warranty period. Replacement will be made with a new or repaired
product or component.
If the product is no longer available, replacement may be made with a similar product of equal or greater
value. This is your exclusive warranty.
A buyer of this product may have the right to have it serviced or repaired during the warranty period. The
warranty period will be extended for the number of whole days that the product has been out of the
buyer's hands for warranty repairs. If a defect exists within the warranty period, the warranty will not
expire until the defect has been fixed. The warranty period will also be extended if the warranty repairs
have not been performed due to delays caused by circumstances beyond the control of the buyer, or if the
warranty repairs did not remedy the defect and the buyer notifies the manufacturer or seller of the failure
of the repairs within 60 days after they were completed. If, after a reasonable number of attempts, the
defect has not been fixed, the buyer may return this product for a replacement or a refund subject, in either
case, to deduction of a reasonable charge for usage. This time extension does not affect the protections or
remedies the buyer has under other laws.
This warranty is valid for the original retail purchaser from the date of initial retail purchase and is not
transferable. Keep the original sales receipt. Proof of purchase is required to obtain warranty performance.
Lifetone dealers, service centers, retail stores, Internet purchase agents selling Lifetone products do not
have the right to alert, modify or any way change the terms and conditions of this warranty. This warranty
does not cover normal wear of parts or damage resulting from any of the following: negligent use or misuse
of this product, use on improper voltage or current, use of rechargeable batteries, use contrary to the
operating instructions, and disassembly, repair, or alteration by anyone other than Lifetone or an authorized
service center.
Further, this warranty does not cover Acts of God, such as fire, flood, hurricanes and tornadoes or any
batteries other than specified in this User’s Manual.
This product is warranted to be specifically fit for the particular needs of you, the buyer. If the product is
not specifically fit for your particular needs, it may be returned to the seller within 30 days of the date of
actual receipt by you or completion of fitting by the seller, whichever occurs later. If you return the
product, the seller will either adjust or replace the device or promptly refund the total amount paid. This
warranty does not affect the protections and remedies you have under other laws.
Lifetone shall not be liable for any incidental or consequential damages caused by the breach of any express
or implied warranty. Except to the extent prohibited by applicable law, any implied warranty of
merchantability or fitness for a particular purpose is limited in duration to the duration of the above
warranty. Some states, provinces or jurisdictions do not allow the exclusive or limitation of incidental or
consequential damages or limitation on how long an implied warranty lasts, so the above limitation or
exclusion may not apply to you. This warranty gives you specific legal rights, and you may also have other
rights that vary from state to state or province to province.
How to Obtain Warranty Service
Service: If service is required, do not return the product to the original place of purchase. In order to
obtain warranty service, please contact us at 1-800-648-7923 or email [email protected].
To assist us in serving you, please have the model number and date of purchase available when calling.
Manufacturer information:
Lifetone Technology, Inc.
800 Research Parkway, Suite 339
Oklahoma City, OK 73104
www.lifetonesafety.com
-14-
XI. RECOMMENDED LOCATIONS FOR SMOKE ALARMS
Make sure your existing smoke alarms are properly placed in your home. Your existing smoke alarms will
reference and rely upon the National Fire Protection Association’s (NFPA) Standard 72 regarding the
number and placement of smoke alarms in your dwelling. This information is critical to determine whether
you have the correct UL-certified T3 smoke alarms and that they are properly placed in your home.
The NFPA Standard 72 (August 17, 2006) and the California Fire Marshall’s Code provides, in part, the
following guidance about placement and detection of your existing smoke alarms:
“11.5.1.1 Required Detection. Where required by applicable laws, codes, or standards for a specific type of
occupancy, approved single- and multiple-station smoke alarms shall be installed as follows:
(1) In all sleeping rooms and guest rooms
(2) Outside of each separate dwelling unit sleeping area, within 6.4 m (21 ft) of
any door to a sleeping room, the distance measured along a path of travel
(3) On every level of a dwelling unit, including basements
(4) On every level of a residential board and care occupancy (small facility),
including basements and excluding crawl spaces and unfinished attics
(5) In the living area(s) of a guest suite
(6) In the living area(s) of a residential board and care occupancy (small facility)”
NFPA 72 at § 11.5.1.1 (2007 Ed.). - “A.11.4 Family Escape Plan. There often is very little time between the
detection of a fire and the time it becomes deadly. This interval can be as little as 1 or 2 minutes. Thus, this
Code requires detection means to give a family some advance warning of the development of conditions
that become dangerous to life within a short period of time. Such warning, however, could be wasted
unless the family has planned in advance for rapid exit from their residence. Therefore, in addition to the
fire-warning equipment, this Code requires exit plan information to be furnished. Planning and practicing
for fire conditions with a focus on rapid exit from the residence are important. Drills should be held so
that all family members know the action to be taken. Each person should plan for the possibility that exit
out of a bedroom window could be necessary. An exit out of the residence without the need to open a
bedroom door is essential.”
NFPA 72 at §A.11.4 (2007 Ed.). - “A.11.8.3 Are More Smoke Alarms Desirable? The required number of
smoke alarms might not provide reliable early warning protection for those areas separated by a door from
the areas protected by the required smoke alarms. For this reason, the use of additional smoke alarms for
those areas for increased protection is recommended. The additional areas include the basement,
bedrooms, dining room, furnace room, utility room, and hallways not protected by the required smoke
alarms. The installation of smoke alarms in kitchens, attics (finished or unfinished), or garages is not
normally recommended, because these locations occasionally experience conditions that can result in
improper operation.”
NFPA at § A.11.8.3 (2007 Ed.).- Also, the California State Fire Marshall’s code recommends that: Early
warning fire detection is best achieved by the installation of fire detection equipment in all rooms and areas
of the household as follows: A smoke alarm installed in each separate sleeping area (in the vicinity of, but
outside of, the bedrooms), and heat or smoke detectors in the living rooms, dining rooms, bedrooms,
kitchens, hallways, attics, furnace rooms, closets, utility and storage rooms, basements, and attached garages.
Consult your state and municipal codes for additional recommendations and requirements for smoke alarm
installation.
Copyright Lifetone Technology, Inc. All Rights Reserved, 2009
Model HLAC100
2/09
-15-