1
3
To remove terminals from 12-pin AUX
connector:
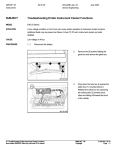
8. Unclip and remove black 12-pin housing (1)
from AUX cable connector.
9. Push in metal tabs securing pins into 12-pin
connector (2) and slide out all three terminals
(3).
To insert terminals from AUX cable to
existing radio connector:
10. Insert 3 AUX terminals (1) into pin locations
(provided in diagram) of 12-pin connector (2).
Depending on included options in vehicle,
other populated pin locations will vary.
White/Red - Slot 3
White/Blue - Slot 4
White/Brown - Slot 10
11. Slide black housing over 12-pin connector,
then insert 12-pin connector into main radio
connector.
12. Secure cable slack using provided cable ties.
13. Re-install radio and all components removed
during installation.
14. Turn radio ON. Press “MODE” button (1) on
radio until AUX mode is displayed. Test
operation of system.
Installation is complete.
Please place Auxiliary Input User’s Manual
(included in kit) in glove box for customer
reference.
The following parts will not be reused:
• Original ashtray
• Ashtray assembly securing screw
Vehicle Coding
No vehicle coding is required for this retrofit.
Installation Manual P/N 01 29 0 309 665