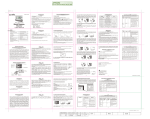
1
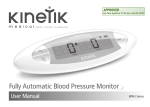
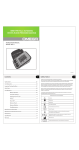
By paul.aylett at 5:39 pm, Jul 15, 2015 Advanced Blood od Pressure Monitor User Manual BPx1TL BPx1 x TL Content Introduction 2 Parts 3 Setting up your Blood Pressure Monitor Loading Battery Connecting the Cuff Putting on the Cuff 4-5 4 4 5 Backlight Indicator and Classification of Blood Pressure 6 Irregular Heart Beat 7 Using your Blood Pressure Monitor Your first test Setting the time and date Start Measuring Process 8-16 8 9 10 11 What the results mean Re-measuring Shut Down Memory Deleting Measurements from the Memory 12 13 13 14 14 Interpretation of Blood Pressure (BP) Results 15 Additional Information on Blood Pressure 16 Specification 17 Frequently Asked Questions 18-19 Abnormality & Troubleshooting 20 Maintenance 21 Blood Pressure Record Table 22 Explanation of symbols on unit 23 Introduction Thank you for buying your Kinetik Advanced Blood Pressure Monitor. Whether you have already been diagnosed with high blood pressure or want to track any changes to your blood pressure, you have taken the first step to quick, easy and accurate measurement that will keep you and, if necessary, your doctor informed. Easy to use – fully automatic, works at the push of a button. Easy to read – quick reference indicator. Comfortable - quick release one size cuff suitable for a wide range of arm sizes. High accuracy – averages last three readings plus irregular heartbeat detector Memory for two users Before you start, it is important that you read this manual carefully. Blood pressure testing is easy but to make sure you have the most accurate readings, it is important to follow the instructions. Please keep them in a safe place in case you need to refer back to them at a later date. 2 Parts Battery Indicator Systolic Blood Pressure Measurement Progress Indicator Diastolic Blood Pressure Average Value Symbol Unit Indicator Memory Date/Time Irregular Heartbeat Symbol Pulse Heartbeat Symbol Rubber tubule plug LCD Memory Mem Cuff Rubber tubule ule Set Start Start/Stop (Power On/Off) (Pow Setting up your Blood Pressure Monitor Loading the Batteries a. Open the battery cover at the back of the monitor. b. Insert three “AA” batteries, observing correct polarity. c. Close the battery cover. Do not mix old and new batteries or different types of batteries. Do not use rechargeable batteries. Only batteries of the same or equivalent type as recommended are to be used. Batteries must be handled with care under adult supervision. If batteries leak and come into contact with the skin or eyes, wash immediately with copious amount of water. Connecting the Cuff a. Insert the rubber tube plug of the cuff firmly into the cuff socket located on the side of the monitor to ensure there is no air leakage. b. The cuff should be ready to use. Ensure that the end is passed through the metal loop and the hook and loop fastening is facing outwards. Replacing Batteries When the LCD screen displays ‘ ’, new batteries must be inserted immediately to ensure accurate results. Rechargeable batteries with a voltage of 1.2V are not suitable for this product. Please dispose of batteries according to battery manufacture’s instructions. 4 Setting up your Blood Pressure Monitor Putting on the Cuff a. Place the cuff 1~2cm above the elbow joint. b. Place hand on a flat surface with the palm facing up and with the rubber tube running down the center of the arm. Measuring can be done on light clothing such as a shirt or blouse. However, if you have a weak pulse, it is recommended you test on a bare arm. d. Use your free hand to adjust the tightness of the cuff until it is firm. Remove any tight or restrictive clothing from your arm. For example, restriction caused by rolling up shirt sleeve. To get the correct tightness of the cuff, you should be able to fit two fingers under the cuff. c. Turn the cuff end outwards and tighten it by pulling it through the metal loop and pressing the hook surface of the cuff on to the loop surface of the cuff. Concerned about which arm to use? Please refer to ‘Your first test’ on page 6. The cuff can be cleaned by hand with warm, soapy water. Rinse thoroughly with cold water and towel dry. DO NOT IRON. 5 Backlight Indicator and Classification of Blood Pressure The backlight will change according to your measured result. The table below shows the different blood pressure classifications as defined by the British Hypertension Society and the corresponding backlight colour. Please note that factors such as smoking, obesity & diabetes will affect your blood pressure. Always consult your physician or healthcare professional before starting a diet or exercise regime. Classification of Blood Pressure Levels Systolic BP (mmHg) Diastolic BP (mmHg) Backlight Colour Low * Optimal Normal High-normal Grade 1 Hypertension Grade 2 Hypertension Grade 3 Hypertension 90 91–119 120–129 130–139 140–159 160–179 180 or 60 and 61 - 79 and 80 -84 or 85 - 89 or 90 - 99 or 100–109 or 110 Flashing green/amber Green Green Amber Flashing Amber Red Flashing red * Low blood pressure, or hypotension, occurs when blood pressure during and after each heartbeat is much lower than usual. This means the heart, brain, and other parts of the body do not get enough blood. Symptoms may include blurry vision, confusion, dizziness, fainting, light-headedness, sleepiness & weakness. However, blood pressure that is borderline low for one person may be normal for another. Consequently, hypotension in a healthy person that does not cause any problems usually doesn't require treatment. If in doubt, seek advice from your physician or healthcare professional. Note: The backlight indicator and the colours used are designed to indicate the various classifications of blood pressure only. The use of the colours Amber or Red should not be interpreted as a medical emergency. 6 Irregular Heart Beat This monitor can detect possible irregular heart beat (cardiac arrhythmia) disorders during measurement and if detected indicates the detection with the flashing icon “IHB”. Arrhythmia is a condition where the heart rhythm is abnormal as a result of defects in the bioelectrical system that controls the beating of the heart. The symptoms (premature or omitted heart beats, slow or excessively fast heart rate) may be caused by heart disease, age, physical predisposition, excessive use of stimulants, stress or lack of sleep. Arrhythmia can only be ascertained through examination by your doctor. Repeat the measurement if the flashing icon is displayed. Please note that you should rest for 5 minutes between measurements and not talk or move during the measurement. If the icon appears often, please contact your doctor. Any self-diagnosis and treatment based on the test results may be dangerous. It is vital to follow your doctor‘s instructions. Note: This monitor is designed to detect Sinus Arrhythmia or “Regular Irregular” Sinus Rhythm. It is not designed to detect Atrial Fibrillation or Atrial Premature Beats. 7 Using your Blood Pressure Monitor Your first test The British Hypertension Society (BHS) recommends that for your first test, you test both your arms. (Note: Ensure you do not suffer from any medical conditions which will prevent you from having your blood pressure measured in both arms). This will determine which arm should be used for future measurements. Take note of your systolic (high number) reading on both arms. The arm which gives the higher systolic reading should be used in the future for testing. Example Left arm: 132 86 (systolic) (diastolic) Right arm: 128 84 (systolic) (diastolic) Then use your left arm 8 Using your Blood Pressure Monitor Setting the time and date Once the batteries are inserted and the battery cover is put back into place, the display will flash the year 2015 in the bottom left hand corner. To adjust the Year press the MEM button repeatedly until correct (pressing and holding the MEM button will advance the year rapidly). When the correct year is shown, press the SET button and the display will now show the date in Day/Month form. Press the MEM button to adjust the Day then press the SET button to select the Month. Again adjust the Month using the MEM button. Once complete, press the SET button to adjust the hours and minutes. Finally, press the MEM button for the last time to select either 12 or 24 hour time format. Once the time and date have been set, press the START/STOP button. The unit will switch off with the time and date stored correctly. Note: The time and date will be stored even when the batteries have been removed to be changed. To re-adjust the time and date (when the clocks change for example), remove and reinstall the batteries to re-start the setting procedure. If however no change of time and date is necessary after changing the batteries, simply press the START/STOP button to cancel the setting procedure. 9 Using your Blood Pressure Monitor Start a. We recommend that you carry out you test whilst sitting at a table (ensuring the cuff is at the same height as your heart). This will place your arm and the monitor in an ideal position for the best results. b. Place the cuff on your selected arm (please refer to ‘Your first test’ on how to select an arm). Ensure the cuff is secure. Do not inflate the cuff when it is not wrapped around the arm. c. Once you are in a comfortable position, switch the unit on by pressing the START/STOP button. d. The last used memory bank (U1 or U2) will blink. Press MEM button to change over to other bank. Confirm your selection by pressing START / STOP button. The current bank can also be confirmed automatically after 5 seconds with no operation. 10 Using your Blood Pressure Monitor Measuring Process a. This monitor is uses Measure While Inflate technology. This means that the measurement is made as the cuff inflates, rather than fully inflating first then measuring during the deflation stage. As the cuff inflates the display will show the following: Measurement Progress Indicator Cuff Pressure in mmHg Pulse Detection* *Shown when a pulse is detected during the measurement process. b. The monitor will beep when the automatic measurement has finished. if you feel any discomfort or pain during this time, press the START/STOP button and remove the cuff immediately. Consult your local pharmacist or healthcare professional for advice. If there is an error or abnormal reading, please refer to the“Abnormality & Troubleshooting” section. 11 Using your Blood Pressure Monitor What the results mean a. The LCD screen will automatically display the systolic and diastolic pressure reading in mmHg and the pulse rate in pulse/min after each measurement. b. Record date, time, systolic reading, diastolic reading and pulse rate on your record card which you will find in the pack (including anything that may have influenced your blood pressure reading e.g. stress, anxiety). This will help you monitor trends. Please take this record card with you on your visits to your doctor, pharmacist or healthcare professional. Measurements should ideally be taken at the same time, under the same conditions and in the same position each time. Please be aware that blood pressure can fluctuate since it responds to minute changes in the body. It is unusual for it to continuously remain at the same value, hence it is recommended that the blood pressure be determined based on an average of multiple measurements. If you experience a higher than normal reading, do not panic as this can happen. Relax and take a break for at least 10 minutes before measuring your blood pressure again. Low blood pressure (Hypotension) and high blood pressure (Hypertension) can only be diagnosed by a qualified healthcare professional, such as a doctor, pharmacist. If you have any concerns or questions, please contact your pharmacist or healthcare professional. To get an accurate value: Measure one hour after eating and avoid measuring immediately after bathing. Measure one hour after smoking or drinking alcohol/coffee. Relax for 10-20 minutes before taking a measurement and remain relaxed whilst measuring. Do not move or talk during measurement, as this will affect the accuracy. Do not use this monitor if you suffer from atrial or ventricular premature beats or atrial fibrillation. 12 Using your Blood Pressure Monitor Re-measuring If you want to measure again, just press the START/STOP button twice. Leave at least three minutes between measurements to allow blood circulation to the arm to return to normal. Do not measure your blood pressure too many times in one session as it may cause discomfort in the arm. If you feel any discomfort or pain, turn the monitor off and remove the cuff immediately. Shut Down Please turn the unit off after measurement if not re-measuring. The unit has an automatic ‘switch off’ mechanism which means it will turn off after 2 minutes if not being used. 13 Using your Blood Pressure Monitor Memory The memory can store 90 sets of measurements and will additionally calculate the average (mean) of the last three readings. The results will be automatically stored. To check the memory, press the MEM button (either just after a measurement has been taken or while the unit is off). The unit will show the average of the last three readings. Press the MEM button to scroll up or the SET button to scroll down through the individual memories. Note that the most recent measurement is always stored in memory slot 1. Once all 90 memory slots are filled, the oldest memory will be erased during the next measurement to make room for the latest memory. Deleting the Memory With the unit off, press the MEM button to switch the unit on then press and hold the SET button for 4 seconds. Press the SET button again to alternate between ‘DEL NO’ and ‘DEL YES’. Confirm by pressing the START/STOP button. The above procedure will delete the entire memory bank, not just a single measurement. Once deleted, the memory cannot be recovered. 14 Interpretation of Blood Pressure (BP) Results Category of Blood Pressure Hypotension Ideal Normal Systolic BP (mmHg) <100 Diastolic BP (mmHg) <60 Advice on Results Practice a healthy lifestyle. Consult your doctor only if suffering symptoms of low BP (eg. fainting) <120 <80 Practice a healthy lifestyle. 120-129 80-84 Practice a healthy lifestyle. High Normal 130-139 85-89 Practice a healthy lifestyle. Hypertension (mild)* 140-159 90-99 Practice a healthy lifestyle. Re-measure BP monthly over next 3 months. If high levels ( 140/90) persist (eg. 2 high readings on 2 seperate occasions) consult doctor Hypertension (moderate)* 160-179 100-109 Practice a healthy lifestyle. Re-measure BP monthly over next 4 months. If high levels ( 140/90) persist (eg. 2 high readings on 2 seperate occasions) consult doctor Hypertension (severe)* 180-219 110-119 Re-measure BP in a few days. If BP 180/110, consult doctor Hypertension (very severe)* 220 120 We would recommend that you see your pharmacist or (very healthcare professional. * Your BP should be re-assessed professionally at least once a year - speak to your pharmacist or healthcare professional. If systolic BP and diastolic BP fall into different categories, the higher value should be taken for classification. 15 Additional Information on Blood Pressure Your heart is just like a pump which works all the time to make the blood flow through all blood vessels. Blood pressure measures the force on the wall of the blood vessels caused by the pressure of the blood. The output of blood from the heart when it pushes blood around the body is called systolic blood pressure. Diastolic blood pressure is the measurement of the blood returning to the heart. 120 (systolic) Blood pressure is normally written as, for example: 80 (diastolic) Fluctuation of Blood Pressure Blood pressure fluctuates constantly during the day. Its value in the daytime is higher than in the evening with the lowest level being at midnight. The pressure begins to rise again at 03:00am and reaches its highest level any time during the day – so it is impossible to get a consistent reading. For this reason, please take your measurements at the same time of day. Systolic 16 Diastolic SPECIFICATION (1) Model: BPx1TL (2) Digital display system (3) Measuring method: Oscillometric method (4) Measuring Accuracy: Within+3mmHg (5) Blood pressure Measuring range: 0mmHg~299mmHg (6) Pulse rate range: 40~180/min (7) Pulse rate accuracy: Within+5% (8) Power source: 3 x AA size batteries (9) Classification: Internal powered Equipment Type B (10) Pressurisation: automatic air inflation by an air pump (11) Deflation: Automatic exhaust (12) Automatic power off: To be automatically cut off after 2minutes of not being use to save energy. (13) Battery life: Approx.2 months with 3 times usage per day (14) Environmental temperature for using: 10~40oC (15) Environmental temperature for storage: -20~60oC (16) Environmental humidity for using: <90% (17) Environmental humidity for storage: <95% (18) Transport condition: Atmospheric pressure range: 80kPa~105kPa Humidity range: Less than 95% Ambient temperature range: -20~60oC This is a Class IIa medical device and fulfils the provisions of the medical devices directive 93/42/EEC Blood pressure measurements determined with this device are equivalent to those obtained by a trained observer using the cuff/stethoscope auscultation method, within the limits prescribed by the American National Standard, Electronic or automated sphygmomanometers. 17 Frequently Asked Questions What is the difference between systolic and diastolic pressure? Your heart is just like a pump which works all the time to make the blood flow through all blood vessels. Blood pressure measures the force on the wall of the blood vessels caused by the pressure of the blood. Systolic pressure is the pressure of the blood when your heart beats to pump blood out. Diastolic pressure is the pressure of the blood when your heart rests in between beats. This reflects how strongly your arteries are resisting blood flow. What if I want to retest? If you want to measure again, just press the START/STOP button twice. Leave at least three minutes between measurements to allow blood circulation to the arm to return to normal. Do not measure your blood pressure too many times in one session as it may cause discomfort in the arm. When is the best time to test my blood pressure? Blood pressure fluctuates constantly during the day. Its value in the daytime is higher than in the evening with the lowest level being at midnight. The pressure begins to rise again at 3:00am and reaches its highest level any time during the day – so it is impossible to get a consistent reading. For this reason, please take your measurements at the same time of day Relax for 10-20 minutes before taking a measurement and remain relaxed whilst measuring. Do not move or talk during measurement, as this will affect the accuracy. Measure one hour after eating and avoid measuring immediately after bathing. Measure one hour after smoking or drinking alcohol/coffee. 18 Frequently Asked Questions Do I need to test at the same time, every time? We recommend that measurements are taken at the same time, under the same conditions and in the same position each time because of the way your blood pressure constantly fluctuates depending on the time of day. This will help you to keep a more accurate record over time and reduce any possible variances to your readings. What if I get an error or abnormal reading? Please see the troubleshooting guide at the end of this section How do I know when I need to change the batteries? When the Low Battery Indicator is displayed, new batteries must be inserted immediately to ensure accurate results. Do not mix old and new batteries or different types of batteries. Can I use rechargeable batteries? No. You can only use standard alkaline batteries. Please dispose of batteries safely after use using your local battery re-cycling facility. 19 Abnormality & Troubleshooting Error Indicators The following symbol will appear on the display when measuring abnormally. Symbol Cause Correction Cuff not fitted correctly or air leakage detected. Wrap the cuff correctly and tightly ensuring the connection between the air plug and the unit is good. Movement detected during measurement. Do not move your arm or body, refrain from talking. Replace batteries with new ones. Low battery. Possible Problems & Solutions Problem Solution No power. Replace batteries with new ones. Display is blank. Check the batteries are inserted correctly observing the correct polarity. Measurement values appear too high or too low. Blood pressure varies constantly. Many factors including stress, time of day and how you wrap the cuff may affect your blood pressure. Review the section "Setting up your Blood Pressure Monitor". 20 Maintenance 1. Do not drop this blood pressure monitor or subject it to strong impact. 2. Avoid exposure to high temperatures, direct sunlight and contact with water. 3. If the monitor is stored at temperatures below freezing, do not use immediately. Leave at room temperature for at least one hour before use. 4. Do not attempt to disassemble the monitor. 5. Do not leave the batteries in the monitor if it is not in use for a long period of time. 6. This blood pressure monitor is calibrated at the time of manufacture. If the blood pressure monitor is used according to the instructions, periodic recalibration is not required. If at any time you question the accuracy of the measurement, please contact the retailer immediately. 7. Please use only Kinetik branded cuffs and accessories with this product. Harvard Medical Devices Ltd. Unit 1301, 13th Floor, Railway Plaza, 39 Chatham Road South, Tsimshatsui, Kowloon, Hong Kong. Kinetik Medical Devices Ltd. Mill Road, Rugby, Warwickshire, United Kingdom, CV21 1PR. BPx1TL 0197 Made in PRC 21 Blood Pressure Record Table Please log the date, time and your SYS (systolic) and DIA (Diastolic) blood pressure levels. We recommend you share this information with your Doctor 22 Explanation of symbols on unit Read the instructions. (The sign background color: blue. The sign graphical symbol: white.) This symbol indicates that this product is a Type BF device. Symbol for "Environment Protection" – Waste electrical products should not be disposed of with household waste. Please recycle where facilities exist. Check with your local Authority or retailer for recycling advice. Symbol for “Manufacturer”. 0197 This product complies with MDD93/42/EEC requirements. Symbol for “European Representative”. Keep Dry. Model Reference. KINETIK BPx1TL UK IB 20150713 23