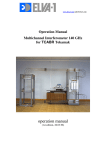
Download Operation manual in PDF format ~650Kb
Transcript
46 Robezu str. ! LV-1004 Riga ! Latvia Fax : +371-7-065102 Mm-wave Division. in St. Petersburg, Russia Fax: +7-812- 325-58-56 Tel: +7-812-325-58-58 (ext. 316) E-mail: [email protected] Real Time Frequency Analyzer 120-180 GHz Part No. RTA-D-180 Operation manual (2nd edition, 10.05.2000) Operation manual Containts Millimeter Wave Generator 1 Heterodyne Receiver 34 Real Time Analyzer 43 Millimeter Wave Generator G4-143ga. User Manual. Contents. 1. GENERAL REMARKS ...............................................................................................2 2. AMBIENTAL CONDITIONS.....................................................................................2 3. PARAMETERS ............................................................................................................2 4. RELIABILITY..............................................................................................................3 5. CONSTRUCTIVE PARAMETERS............................................................................3 6. PRINCIPLE OF OPERATION....................................................................................3 7. OPERATION MANUAL .............................................................................................6 8. HOW TO TURN ON THE GENERATOR .................................................................6 9. PURSUANCE OF MEASUREMENTS ......................................................................6 10. GPIB INTERFACE ..................................................................................................12 11. AN EXAMPLE OF OPERATION USING GPIB INTERFACE............................13 Supplements ......................................................................................................................19 1. Front panel of the Generator...........................................................................................19 2. Rear panel of the Generator...........................................................................................20 3. Disposition of the units in the Generator ..........................................................................21 4. Block diagram of the control unit ....................................................................................22 5.The structure of the calibration files..................................................................................23 6. The diagram of the Control Voltage and strobes..............................................................24 7. Output power versus frequency......................................................................................25 8. Frequency versus Control voltage, Frequency versus High voltage monitor......................26 9. Electrical Scheme of BWO Tube....................................................................................27 10. Example of programming..............................................................................................28 11. Step by step instruction: Setting Power Level and Fixed Frequency...............................30 1 1. GENERAL REMARKS 1.1. Microwave generator G4-143ga, hereinafter called Generator, is intended to be used as a signal source in the millimetre range of wavelengths for tuning and adjustment of the radio-electronic device. 1.2. The Generator may be used in laboratory conditions. 2. AMBIENTAL CONDITIONS Conditions: operations temperature: relative air humidity : primary power: atmospheric pressure: 5°-40° C° up to 95% at the temperature 30° C° AC(220±10)V/(50±0.5)Hz 84-112 kPa. Some abbreviation, used hereinafter: BWO - Back Wave Oscillator VSWR - Voltage Standing Wave Ratio CW - Continuous Wave OA - Operating Amplifier LCD - Liquid Crystal Display 3. PARAMETERS 3.1. Frequency range is 120-180 GHz. Device has a reserve more then 1% at the edges of the range. 3.2 Full band sweep time: less then 200 microseconds with external frequency control, 10 milliseconds with internal frequency control. 3.3. Admissible variation of the frequency of unmodulated oscillation, if primary power voltage changes up to ±10% for AC 50Hz, is no more than ±0.05%. 3.4. Relative variation of frequency of the output signal is no more than 10-4, if the load VSWR changes from 1.1 to 1.3 at the output power 1mW. Output power should be installed using an external attenuator. 3.5. Limit of instability of the frequency of unmodulated oscillations at the unchanged primary power voltage during any 15 min of work is 0.01% (the warmup time after adjustment from one frequency to another must be no less than 5 min). 3.6. 50 Hz deviation of the frequency of the CW output signal is no more than 0.002% in the mode with the frequency control by means of an external voltage. 3.7. Guaranteed power level of unmodulated oscillations is no less than 40 mW at the load VSWR no larger than 1.3 within frequency region 120-180 GHz. 3.8. The limit of instability of the output power level of unmodulated oscillation at the unchanged environment and primary power voltage during any 15 min of work is ± 0.3dB (the warm-up time after adjustment from one frequency to another must be no less than 5 min). 3.9. Admissible variation of output power level of unmodulated oscillation at slow 10% variation of primary power voltage for AC 50Hz, is no more than ±0.5dB. 3.10. 50 Hz AM level of output CW signal is no larger than 1%. 3.11. VSWR of output of the Generator is no more than 1.5:1 at the 1 mW output power. 3.12. Output waveguide WR-06. 3.13. Waveguide flange UG-387/U-M. 2 3.14. Internal square-wave modulation frequency, kHz 1. 3.15. External square-wave modulation frequency, kHz 1-100. 3.16. External Power Control Voltage, V 0…+10. 3.17. External Frequency Control Voltage, V +2…+8. 3.18. Operating modes CW: Remote frequency and power regulation by an analogue voltage, frequency and power regulation from front panel and GPIB interface. 3.19. Electrical resistance between primary power line and the cabinet is no less than 100 MOhm; at high humidity – no less than 3 MOhm; at high temperature – no less than 5 MOhm. 3.20. All parameters mentioned above are valid after 30-min warming-up period. 3.21. Power consumption is no more than 400 VA. 4. RELIABILITY 4.1. Main time to failure, no less than 2000 h. 4.2. 90% life time, no less than 2 years. 5. CONSTRUCTIVE PARAMETERS 5.1. Dimensions 495x180x480 mm. 5.2. Weight, no more than 23 kg. 6. PRINCIPLE OF OPERATION Generator is made up of the oscillator unit, control unit, modulator unit and power supply unit (Supplement. 3). Oscillator unit is made up of BWO and high voltage isolator. BWO intended to generate UHF oscillations. High voltage isolator intended to isolate the BWO’s cabinet being kept under high voltage, from grounded output waveguide. Control unit is based on PC microcomputer. It is used together with digital to analogue converter as triangle wave voltage oscillator, for digital remote control of generator from front panel or by means GPIB bus. Power supply unit includes the following parts. Controlled high voltage source for accelerating electrode of BWO. Controlled 5…230 V DC voltage intended to feed the modulator and BWO control electrode. DC 1.2 V voltage source intended to feed the BWO heater. DC +16 and –16 V voltage sources intended to feed OA’s. DC +5 V voltage source intended to feed computer and relays. BWO current overload protection circuit intended to switch off the high voltage transformer, if load current of decelerator power supply is larger than 50 mA. Control voltage overload protection circuit is intended to switch off the BWO control electrode voltage, if deceleration voltage is lower than 300 V. This circuit allows also the BWO control electrode voltage to be supplied, if only the deceleration voltage higher than 300 V is presented on BWO’s deceleration electrode, when the Generator is being turning on. BWO heater current overload protection circuit intended to limit the BWO heater current at the current spikes in the moment of Generator turning on. High voltage indication “READY” (3) circuit intended for signalling if decelerating voltage source is switched on. Modulator unit intended to modulate amplitude of output signal depending on operating mode. 3 On the front panel of generator are installed the following controls (see Supplement 1): Button “Power” (1) to turn on the generator and indicator “Power” to indicate condition of generator. Liquid Crystal Display for indication of various regimes of Generator (5). Tuning knob for frequency and power setting (6). Two buttons for fine setting of frequency or power (7). Digital Keyboard (8), Functions Keyboard (11-14). Button “Power Control”(14) switches External or Internal Power Control modes. If LED on the button is glow it means that External Power Control mode is switched on. In External Power Control mode 0…+10VDC control voltage should be applied to the corresponding socket “Input” (15) for a remote electrical manipulation of output BWO’s power. In Internal Power Control mode the power is controlled by microcomputer using DAC. Button “Frequency Control” (11) switches External or Internal Frequency Control modes. If LED on the button is glow it means that External Frequency Control mode is switched on. In External Frequency Control mode +2…+8VDC control voltage should be applied to the corresponding socket “Input” (10) for a remote electrical manipulation of output BWO’s frequency. In Internal Frequency Control mode the frequency is controlled by microcomputer using DAC. Buttons “Amplitude Modulation” (13) switch on different modes of amplitude modulation: CW (“OFF” button), Internal 1 kHz Amplitude Modulation (“Internal” button), Amplitude Modulation with External Triggering (“External” button). TTL signal from an external pulse generator should be applied to corresponding plug (__) (16) for the triggering of External Amplitude Modulation mode. Button “Reset” restarts built-in microcomputer (4). Button “Menu” calls operation menu to LCD (12). On the rear panel of generator the following controls are installed (see Supplement 2): “GPIB” for connecting the Generator to GPIB bus (22); «Operating Time» counter (21). Fuses (24 and 25). Ground socked (23). «Power Plug» AC 220V (26). «High Voltage Monitor» output plug (27) intended for an external checking up the frequency of the oscillation. Dependence of High Voltage Monitor output voltage versus frequency of oscillations is supplied in Supplement 8. «Strobe FM signal», output plug (TTL) (29). «Strobe AM signal», output plug (TTL) (28). BWO is a heart of the Generator. Electrical Scheme of BWO is presented in Supplement 9. The Generator is functioning properly, if the following conditions are met: • When turning on the power, the current spikes must be restricted; • BWO control electrode voltage should appear if only deceleration voltage is present, and must be switched off in the opposite case; • BWO control electrode voltage must not be higher than 237V. 4 BWO is a source of UHF oscillations, which a voltage of the decelerating system (Anode Voltage) controls frequency, and output power is controlled by a voltage applied to the control electrode. BWO is connected in a grounded-cathode circuit. In this case the output waveguide of the BWO, as well as its cabinet, has a high electric potential relative the Generator cabinet, so the special high voltage isolator is used to isolate the BWO’s output waveguide from the Generator’s cabinet. Setting the proper voltage on the BWO decelerating system provides the setting of the Generator’s frequency. For this purpose the circuit is used which consists of the next parts: • commutator; • control unit; • controlled high voltage source; • BWO decelerating system. Commutator provides a connection between control input of the High voltage power supply and external broadband frequency tune input (10), if “External Frequency Control” (11) is switched on. Commutator provides a connection between control input of the High voltage power supply and control unit output, if “External Frequency Control” (11) is switched off. Control unit provides: - Linear control voltage with different full band Sweep Times (0.01, 0.02, 0.04, 0.08, 0.1, 0.2, 0.4, 0.8, 1, 2, 4, 8, 10, 20, 80, 100 Sec) in sweep frequency mode (see Supplement 6); - Fixed DC voltage in fixed frequency mode. There are two possibilities of the Control unit programming: Manual control, using front panel controls; Remote control, using GPIB bus. Built-in microcomputer serves an indication of Initial and Final frequencies on the LCD display (5). The computer calculates corresponding frequency from the code of DAC that serves frequency control, using a calibration file “frequen.dat”. Please refer to supplement 5. This file contains 4096 lines. Each line presents frequency at maximum output power corresponding digital to analogue converter code from 0 till 4095. At smaller output power the operation frequency is shifted a bit from the position corresponded to the maximum output power. Frequency shift between values at maximal and minimal power is about 1 GHz. Frequency shift is calculated by formula and used by microcomputer for indication of actual frequency. For example, initial and final frequencies of the sweep indicated on LCD are calculated this way. Operating regime of the Generator is defined by BWO control electrode voltage (grid). In the CW regime this voltage is constant. In the Internal or External Amplitude Modulation regimes, this voltage is also symmetric rectangular pulse sequence with amplitude equal to the constant voltage in CW regime. In the External Power Control regime the voltage is user defined. In all regimes voltage applied to BWO control electrode must not exceed 237V. The operating regime of the Generator is defined by a joint functioning of the next parts of the device: • Operating regime switch; • Modulator; • 5-237 V controlled voltage source; • BWO control electrode. 5 The BWO current overload protection circuit receives the signal proportional to the decelerating system current. When this current is larger than 50 mA, the circuit comes into action and disconnect the high-voltage transformer. In order to switch the high voltage source again, it is necessary to turn off and then turn on the power switch. The high incidence of activation of this circuit testifies that Generator is out of order. The BWO control voltage overload protection circuit receives the signal proportional to the BWO decelerating system voltage. This circuit is a part of the modulator circuit. When BWO decelerating voltage falls down bellow 300 V, the BWO control electrode voltage is switched off. In particular, this circuit comes into action when high voltage transformer is switched off. The BWO heater overload protection circuit is a part of heat stabiliser circuit. It provides the limitation of BWO heater current during the transition process at the turning on the Generator. 7. OPERATION MANUAL ATTENTION! Before turning on the Generator, ensure that device is properly grounded using the corresponding contact “⊥”. When using the Generator connected with other electrical devices, the potentials of Generator and other devices must be equalised before the power is turned on. Mentioned actions are not needed if you sure, that the device is grounded in primary power plug. It is prohibited to turn on the Generator unless a waveguide with a load is attached to the output waveguide of the Generator! 8. HOW TO TURN ON THE GENERATOR · · · · Ground the Generator. Ensure that fuses are present. Attach a load to the output of Generator. Turn on the power. The “Power ON” indicator (2) must glow and in approximately 40s “READY “ indicator (3) must glow as well. On LCD (5) a current time will be indicated and after about 4s the main menu will be activated. · All settings are stored automatically in flash memory of microcomputer. Generator loads automatically last settings after switch on or restart. Every time the “10%” power level will be installed after the tuning on the Generator to avoid possible problems with high power output. User should to install the higher power level, if it is needed in the experiment. Warm-up time is approximately 30 min. 9. PURSUANCE OF MEASUREMENTS A. Frequency sweep mode. In this mode Generator provides frequency sweep from the initial frequency to final one. User would program both frequencies, power and time of sweep. The sweep is provided by saw-tooth voltage. During Sweep Time Control Unit provides linear 6 increasing of control voltage and then fast voltage decreasing during approximately 1 ms time. Pay attention that the sweep is provided by linear increasing control voltage, but frequency increases according the dependence of frequency versus control voltage that presented in Certification Card (see Supplement 8). There are two modes of frequency sweep: Internal and External Frequency Control modes. · Turn on the Generator as directed in part 8. · Set Internal Frequency control mode. One should check LED “External” on the button “Frequency Control” (11). If LED not glows, it means that the device is installed in Internal Frequency Control mode. If LED glows, one should run command “Control” of menu pressing key “4” on keyboard. Press button “Frequency Control” to switch off LED on the button (11). To abort “Control” presses key “Menu”. · Set External Frequency control mode. One should check LED “External” on the button “Frequency Control” (11). If LED glows, it means that the device is installed in External Frequency mode. If LED glows, one should go to position “Control” of menu pressing key “4” on keyboard. Press button “Frequency Control” to switch on LED on the button (11). To abort “Control” presses key “Menu”. There are two modes of power control: Internal and External Power Control modes. · Set Internal Power control mode. One should check LED “External” on the button “Power Control” (14). If LED not glows, it means that the device is installed in Internal Power Control mode. If LED glows, one should go to position “Control” of menu pressing key “4” on keyboard. Press button “Frequency Control” to switch off LED on the button (14). To abort “Control” presses key “Menu”. · Set External Power control mode. One should check LED “External” on the button “Power Control” (14). If LED glows, it means that the device is installed in External Power Control mode. If LED not glows, one should go to position “Control” of menu pressing key “4” on keyboard. Press button “Frequency Control” to switch on LED on the button (14). To abort “Control” presses key “Menu”. · Set the desired sweep time, power level, initial and final frequency. Press key “1” on Digital Keyboard (8) to activate “Set Up” local menu. There are four commands in the local menu “Set Up”: 1. “Fr_intl” – set initial frequency; 2. “Fr_fnl” – set final frequency; 3. “Time_swp” – set sweep time; 4. “Power_lv” – set power level. Press one of four keys from “1” to “4” to enter in local menu commands for example “1” – “Fr_intl” Wait few seconds, if Generator asks that. To enter the desired value one has three possibilities: - Rotate Tuning Knob (6) and then press key “Menu” (12); 7 Press buttons “Step” “<-“ or “->” (7) and then press key “Menu” (12). This way is useful if it is necessary to provide precision tuning. One button realising leads to the change of the value on the smallest available step; - Enter frequency from Digital Keyboard (8). One can use buttons “Step” “<-“ or “->” (7) to change marker position. That allows edit the value on the display. Press key “Enter” to finish editing. Press key “Menu” (12). One can combine these three cases. If one enter the value using Digital Keyboard, Generator sets the nearest value from value grid that reflects the fact that output voltage of controlling 12-bits DAC’s can’t be installed with accuracy better then 1/4096. In the case of Power Level, the grid is defined in percents of voltage applied to Control Electrode of BWO tube. In Supplement 7 dependencies of output power versus frequency for different voltage applied to control electrode (in percents) are presented. Control Unit indicates Output Power also in percents of control voltage applied, not in percents of real output power. In the case of Sweep Time, only one of the following values could be installed: 0.01, 0.02, 0.04, 0.08, 0.1, 0.2, 0.4, 0.8, 1, 2, 4, 8, 10, 20, 80, 100 Sec. If one try to enter a value that isn’t fitted to the grid exactly, the fitting will be produced automatically. - Press “Menu” button (12) to abort local menu. · To start sweep press key “2” on Digital Keyboard (8). Generator indicates initial and final frequencies of sweep and starts sweep. At the beginning of each sweep Generator produces TTL strobe pulses. Use Strobe Signal output plug (29) for the triggering of external devices at the moment of the sweep beginning (see Supplement.6). To stop sweep press key “Menu”. B. Fixed frequency mode. At this mode the operation frequency is fixed. Turn on the Generator as directed in part 8. Set Internal Frequency and Power control as described in par. A. Set the desired power level as described in par. A. Press key “3” on keyboard to activate the local menu “Manual”. Wait few seconds, if Generator asks that. To enter the desired frequency one has three possibilities: - Rotate Tuning Knob (6) and then press key “Menu” (12). Output operation frequency changes synchronously with value indicated on the display; - Press buttons “Step” “<-“ or “->” (7) and then press key “Menu” (12). This way is useful if it is necessary to provide precision tuning. One button realising leads to the change of the frequency on the smallest available step. Output operation frequency changes synchronously with value indicated on the display; - Enter frequency from Digital Keyboard (8). A marker will appear on the display just after the realising of one of the keys (8). One can use buttons “Step” “<-“ or “->” (7) to change the marker 8 position. That allows edit the frequency on the display. Press key “Enter” to finish editing and change the output operation frequency. Press key “Menu” (12). If one will try to enter a wrong frequency, out of operating frequency range, max or min one available will be installed correspondingly. One can combine these three cases. If one enter the frequency using Digital Keyboard, Generator sets the nearest frequency from frequency grid that reflects the fact that output voltage of controlling 12-bits DAC’s can’t be installed with accuracy better then 1/4096. If one try to enter a frequency that isn’t fitted to the grid exactly, the fitting will be produced automatically. Press “Menu” button (12) to abort local menu. C. Zoom frequency window mode. In this mode Generator provides frequency sweep in the vicinity of fixed frequency (See par. B). User would program zoom window width (0.25, 0.5, 1.0 or 2.0 GHz), power and time of sweep. The sweep is provided by saw-tooth voltage. Control Unit provides linear increasing of control voltage during Sweep Time and then fast voltage decreasing during approximately 1 ms time. Pay attention that the sweep is provided by linear increasing control voltage, sweep frequency range is small and linear approximation of the frequency dependence versus control voltage is taken into account within zoom window. Turn on the Generator as directed in part 8. Set Internal Frequency and Power control as described in par. A. Set the desired power level as described in par. A. Set the desired fixed frequency as described in par. B. Press key “5” on Digital Keyboard (8) to activate local menu “Zoom”. Set the desired zoom window width using the following command from the local menu: 1. 0.25 – set zoom width 0.25 GHz 2. 0.50 – set zoom width 0.5 GHz 3. 1.00 – set zoom width 1.0 GHz 4. 2.00– set zoom width 2.0 GHz Press one of four keys from “1” to “4”. Generator sets zoom window width and returns automatically to main menu. To start the sweep one should press key “6” on Digital Keyboard (8). Generator will indicate initial and final frequencies of sweep calculated using linear approximation and start the sweep. At the beginning of each sweep Generator produces TTL strobe pulses. Use Strobe Signal output plug (29) for the triggering of external devices at the moment of the sweep beginning (see Supplement.6). To stop sweep press key “Menu”. D. Internal Amplitude Modulation mode. Square wave 100% amplitude modulation with frequency 1 kHz is provided in this mode. Use Strobe Signal output plug (28) for the triggering of external devices. · Turn on the Generator as directed in par. A. · Set operating frequency and power level as described in par. A-B. · Press key “4” on Digital Keyboard (8) to activate local menu “Control”. 9 Press button “Internal” in “Amplitude Modulation” group of buttons on Functional Keyboard (13) to switch on 1 kHz Internal Amplitude Modulation mode. Press button “Menu” to abort local menu “Control” and return to main menu. After that Generator will provide 1 kHz amplitude modulation. E. External Amplitude Modulation mode. Square wave 100% amplitude modulation with frequency of an external triggering source is provided in this mode. · Turn on the Generator as directed in part 8. · Set the desired frequency and power level as described in par. A – B. · Press key “4” on Digital Keyboard (8) to activate local menu “Control”. · Press button “External” in “Amplitude Modulation” group of buttons on Functional Keyboard (13) to switch on External Amplitude Modulation mode. · Feed the 5 V (TTL) positive pulses with a frequency in the range 1-100 kHz and duty ratio 2 (square wave) into the External Triggering Plug __ (16). Press button “Menu” (12) to abort local menu “Control” and return to main menu. After that Generator will provide amplitude modulation with frequency of the triggering signal. F. External Power Control mode. In this mode an external positive voltage 0…+10 VDC controls output power of Generator. · Turn on the Generator as directed in part 8. · Set output frequency as described in par. A or B. · Set External Power control mode of Generator. One should check LED “External” on the button “Power Control” (14). If LED glows, it means that the device is installed in External Power Control mode. If LED not glows, one should go to position “Control” of menu pressing key “4” on keyboard. Press button “Frequency Control” to switch on LED on the button (14). To abort “Control” presses key “Menu”. · Feed the positive 0…+10 VDC voltage into the plug “Input” (15) “External Power Control”. The higher voltage corresponds to the higher output power. G. External Frequency Control mode. In this mode an external positive voltage +2…+8 VDC controls output frequency of Generator. · Turn on the Generator as directed in part 8. · Set output power as described in par. A. · Set External Frequency control mode of Generator. One should check LED “External” on the button “Frequency Control” (14). If LED glows, it means that the device is installed in External Frequency Control mode. If LED not glows, one should go to position “Control” of 10 menu pressing key “4” on keyboard. Press button “Frequency Control” to switch on LED on the button (14). To abort “Control” presses key “Menu”. · Feed the positive +2…+8 VDC voltage into the plug “Input” (10) “External Frequency Control”. The higher voltage corresponds to the higher output frequency. H. Save and load operation set-up. Generator automatically saves all settings from par. A-G just after one changes these. Current set-up is stored in memory and loaded after restart. There are 10 user defined operation set-ups stored in flash memory. Each set-up consists of the following settings: Initial frequency; Final frequency; Fixed frequency; Output power level; Sweep time; Zoom width; External of Internal Frequency control mode; External of Internal Power control mode; External, Internal or OFF amplitude modulation mode GPIB address. · Save current settings in flash memory. Only last settings are stored and then loaded in the device automatically. If one would like to store some special set-up, he should to install desire settings as described in par. A-G. Then one should enter to main menu. Press the button “Menu” (12), if it is needed. Press key “7” on Digital Keyboard (8) to activate command “Save Pr” from main menu. Choose number of program from “0” to “9” pressing the corresponding key on Digital Keyboard (8). The current set-up will be stored. · Load set-up from flash memory. If one would like to load set-up saved in flash memory, he should enter to main menu. Press the button “Menu” (12), if it is needed. Press key “8” on Digital Keyboard (8) to activate command “Load Pr” from main menu. Choose number of set-up from “0” to “9” pressing the corresponding key on Digital Keyboard. J. Set device address on GPIB bus. GPIB interface card integrated into Controller is initialised automatically in device (slave) mode. One can set Generator’s address on GPIB bus from 01 till 20. Generator saves GPIB address in flash memory and installs it automatically after restart. • Set new GPIB address for example 14, assuming that present address is 19; Press key “9” to activate menu of GPIB address setting. On LCD screen appears text “ GPIB address 19 Set new ”; Press keys "1","4" to enter new address 14; 11 Address 14 will be installed after the pressing of second digit. Controller will return main menu automatically after two seconds. If one would like to install address 1 he should enter “0” “1” in series. K. Test parameters of BWO tube. This mode allows measure actual operating voltages and currents for BWO tube: i) “Ih” – Heating Current; ii) “Uh” – Heating Voltage; iii) “Ia” – Anode Current; iv) “Ug” – Grid Voltage. • Press key “.” on Digital Keyboard (8) to active “Additional Menu”. • Please don’t use Key “2”.This is “Service” mode for the using of technical service staff only. • Press key “1” to active “Test”. • On LCD screen appears information about operating current and voltage for BWO tube. For example: “Ih=2.3A Ia= 40mA”, “Uh=1.14A Ug=230V”. “Ia” is variable 3…40mA, “Ug” is variable 3…230V. 10. GPIB INTERFACE All commands and settings would be controlled through GPIB interface. Connect the generator to GPIB bus (plug 22 on the rear panel) using special cable. • Turn on the generator as directed in chap. 9 par. A. • To control of Generator one should send ASCII symbols corresponded to keys on keyboard or buttons on front panel according to the following table: Keys or Buttons of Generator From 0 to 9 . Enter External Power Control Ext. Amplitude Modulation Ext. Amplitude Modulation Int. Amplitude Modulation Off Menu External Frequency Control Step <Step -> Application “10” Application “100” Application “1000” Harmonic Generator Symbol in GPIB port From 0 to 9 . e A B C D q F l r W E R T 12 The current the Generator settings may be read via GPIB bus in form of "Status String"=“Name_Condition_Finit_Ffin_Time_ScreenCopy”. It consists of 6 information words separated with blanks. The "Status String" dimension is variable and depends on the current status of the Generator. • The "Name" string occupies first six bytes, from 1st to 6th. For the Generator this string is fixed: "Name"="G4-143". • The "Condition" hexadecimal word occupies bytes from 8th to 11th. Correspondence between values of each "Condition" bit and the Generator settings are shown in the next table: Regime Bit Value Amplitude modulation “External” 0 0 Amplitude modulation “Internal” 1 0 Amplitude modulation “OFF” 2 0 Power “External Control” 3 0 Frequency “External Control” 4 0 Application “10” 5 0 Application “100” 6 0 Application “1000” 7 0 Harmonic Generator ON/OFF 8 0/1 • «Finit» describes the Initial Frequency in GHz. • «Ffin» describes the Final Frequency in GHz. • «Time» describes the sweep period in seconds. • “CopyScreen” contains 41 symbols displayed on LCD at the moment of the request. 20 first of them correspond to the first string of LCD, then <CR> symbol follows, the next 20symbols correspond to the second string of LCD. <CR> bytes are standard. The main principle of Generator control using GPIB interface is to repeat the same sequence of commands as used in manual control mode. 11. AN EXAMPLE OF OPERATION USING GPIB INTERFACE This part repeats par.’s A. –H. of par. 9, but only without comments. 13 A. Frequency sweep mode through GPIB bus. For example one could set the follows. Internal Frequency and Power Control mode, Initial Frequency 125.456 GHz, Final Frequency 136.987 GHz, Power Level 50%, Sweep Time 0.04 S. • Set Internal Frequency control mode. Read “Status String”. If bit 7 of 7th byte is clear, it means that the device is installed in Internal Frequency Control mode. “4” – activate local menu “Control”, if bit 7 is set. “F” – set Internal Frequency Control. “q” – abort local menu “Control” and return to main menu. Read “Status String”. Once more one should check bit 7 of 7th byte “Frequency Control” in “Status String”. • Set Internal Power Control mode. Read “Status String”. If bit 6 of 7th byte is clear, it means that the device is installed in Internal Power Control mode. “4” – activate local menu “Control”, If bit 6 is set. “A” – set Internal Power Control. “q” – abort local menu “Control”. Read “Status String”. Once more one should check bit 7 of 7th byte “Frequency Control” in “Status String”. • Set initial frequency. “1” – activate “Set Up” local menu; “1” – enter in local menu” Fr_intl”; “1” “2” ”5” ”.” ”4” ”5” ”6” – print frequency value on LCD; “e” – enter; “q” – return to local menu. • Set final frequency. “2” – to enter in local menu” Fr_fnl”; “1” “3” ”6” ”.” ”9” ”8” ”7” – print frequency value on LCD; “e” – enter; “q” – return to local menu. • Set Sweep Time. “3” – enter to local menu ”Time_Swp”; “0” ”0” ”.” ”0” ”4” – print frequency value on LCD; “e” – enter; “q” – return to local menu. • Set Power Level. “4” – enter to local menu ”Power_lvl”; “5” ”0” ”.” ”0” ”0” – print power level on LCD; “e” – enter; “q” – return to local menu; “q” – return to main menu. 14 • Start sweep “2” – to start sweep. “q” – to stop sweep and return to main menu. B. Set Fixed Frequency through GPIB bus. For example, to set the initial frequency 165.121 GHz and fine adjust it one should to send symbols sequence: • Set Internal Frequency control mode. See par. 11-A above. • Set Internal Power control mode. See par. 11-A above. • Set Fixed Frequency. “3” – activate “Manual” local menu; “1” “6” ”5” ”.” ”1” ”2” ”1” – print frequency value on LCD; “e” – enter. • Fine adjustment of Fixed Frequency. “l” – to decrease fixed frequency on one smallest available step (left). “r” – to increase fixed frequency on one smallest available step (right). • Abort setting of Fixed Frequency. “q” – return to main menu. C. Set Zoom Frequency Window mode through GPIB bus. For example, to set the zoom window width 1.0 GHz and start sweep one should send symbols sequence: • • • • Set Internal Frequency and Power control as described in par. 11-A; Set Power Level as described in par. 11-A; Set Fixed Frequency as described in par. 11-B; Set Zoom Frequency Window width; “5”- activate local menu “Zoom” “3”– set zoom width 1.0 GHz • Start the sweep; “6”- start sweep • Stop the sweep; “q”- stop sweep. D. Set Internal Amplitude Modulation mode through GPIB bus. Square wave 100% amplitude modulation with frequency 1 kHz is provided in this mode. • Set fixed frequency and power level as described in par. 11-A, 11-B; • Set Internal Amplitude Modulation mode; 15 Read “Status String” to check the current operation mode. If 4th bit of 7th byte is set, it means that the device is installed in Internal Amplitude Modulation mode; “4” – activate local menu “Control”, if 4 th bit of 7 th byte is clear; “C” – switch on Internal Amplitude Modulation mode; Read “Status String”. Once more one should check 4th bit of 7th byte: “Internal Amplitude Modulation” in “Status String”; “q” – return in main menu. E. Set external positive pulse modulation mode through GPIB bus. Square wave 100% amplitude modulation with frequency of an external triggering source is provided in this mode. • Set the frequency and power level as described in par. 11-A, 11-B. • Set External Amplitude Modulation mode; Read “Status String” to check operation mode. If bit 6 of 7th byte is set, it means that the device is installed in External Amplitude Modulation mode; "4" - activate local menu “Control”, if bit 6 of 7 th byte is clear; “B” – switch on External Amplitude Modulation mode; Read “Status String”. Once more one should check 6th bit of 7th byte: "External Amplitude Modulation” in “Status String”; “q” – return to main menu; • Feed the 5 V (TTL) positive pulses with a frequency in the range 1-100 kHz and duty ratio 2 (square wave) into the External Triggering Plug “__ “(16). F. Set External Power Control mode through GPIB bus. In this mode an external positive voltage 0…+10 VDC controls the output power of Generator. • Set External Power Control mode. Read “Status String ”, if bit 5 of 7th byte is set. It means that the device is installed in External Power Control mode; "4" – activate local menu "Control", if 5 th bit is clear; “A” – set External Power Control mode; “q” – abort local menu "Control"; Read“ Status String ”. Once more one should check 3rd bit of 7th byte: "Frequency Control” in “Status String ”; • Set the fixed frequency as described in par. 11-B; • Feed the positive 0...+10 VDC voltage into the plug “Input” (15) “External Power Control”. The higher voltage corresponds to the higher output power. G. Set External Frequency Control mode through GPIB bus. 16 In this mode an external positive voltage +2…+8 VDC controls output frequency of Generator. • .Set External Frequency Control mode; Read “Status String”. If 7th bit of 7th byte is set, it means that the device is installed in External Frequency Control mode; "4" – activate local menu "Control", if 7 th bit is clear; “F” – set External Frequency Control mode; “q” – abort local menu "Control"; Read “Status String”. Once more one should check 7th bit of 7th byte "Frequency Control” in “Status String ”; • Set output power as described in par. 11-A; • Feed the positive +2...+8 VDC voltage into the plug “Input” (10) “External Frequency Control”. The higher voltage corresponds to the higher output frequency. H. Save and/or load were saving currently settings through GPIB bus. Save current settings in program No. 5 and load settings from program No. 8. • • Save current settings in flash memory; “q” – activate main menu, if it is needed; "7" - activate command "Save Pr" from main menu; "5" – save settings to program No. 5; Load settings from flash memory; “q” – activate main menu, if it is needed; "8" - activate command "Load Pr" from main menu; "8" – load settings from program No. 8. J. Set device address on GPIB bus. GPIB interface card integrated into Controller is initialised automatically in device (slave) mode. One can set Generator’s address on GPIB bus from 01 till 20. Generator saves GPIB address in flash memory and installs it automatically after restart. • Set new GPIB address for example 5, assuming that present address is 14; “9” - activate menu of GPIB address setting; "0","5" set new address 5; Address 5 will be installed after the sending of “5” within few seconds. After that one have to communicate with device using the new address. K. Set regimes of the Receiver through GPIB bus. For example, for setting Application “100” one should to send symbol “E”. For switching ON/OFF the Harmonic Generator one should to send symbol “T”. 17 SUPPLEMENT 1 Front panel of the Generator 1 2 3 4 5 6 16 15 14 8 Menu Amplitude Modulation 17 7 13 12 11 10 Disposition of the plugs and knobs on the front panel of the Generator. 1. 2. 3. 4. 5. 6. 7. 8. 9. 10. 11. 12. 13. 14. 15. 16. 17. “Power” switch. “Power” indicator. “Ready” indicator. “Reset” button. Liquid Crystal Display. Tuning knob. “Step” knobs. Digital keyboard. Microwave output. External broadband frequency input +2…+9 V External frequency control switch. “Menu” button. Amplitude modulation mode switch. External power control switch. External power control 0…+5V input. External Triggering TTL input. External VGA monitor and keyboard (under left panel). 9 SUPPLEMENT 2 Rear panel of the Generator 22 21 30 24 29 28 27 23 26 25 Disposition of the plugs and knobs on the rear panel of the Generator. 21. «Operating Time» counter. 22. «GPIB» interface plug. 23. Ground 24. Fuses. 25. Fuse 5A (protection +5V). 26. «Power Plug» AC 220V. 27. «High Voltage Monitor» output plug. 28. «Strobe AM signal», output plug (TTL). 29. «Strobe FM signal», output plug (TTL). 30. «Receiver», plug for connecting with receiver. 21 SUPPLEMENT 3 Disposition of the units in the Generator HighVoltage Isolator Oscillator Unit BWO Modulator Unit Control Unit BWO current protection circuit 1.2 V, ±16 V, 5 V Voltage Sources with BWO heater current protection circuits Controlled High Voltage Source 50–240 V Source SUPPLEMENT 4 Block diagram of the control unit. GPIB External SVGA display Mouse port Mother Board with SVGA External keyboard ISA Bus Receiver ACL-8112 HG DAC 1 LPT LC Display Device Keyboard Voltage converter DAC 2 ACL-8112 HG DAC 3 Frequency control voltage converter Grid voltage source Anode voltage source DAC 4 A simplified block diagram of the Computer Unit is shown on the plot. It includes: • Mothers board Juky-730 Industrial Standard PC compatible microcomputer. • There are four digital to analog converters in two data acquisition cards ACL-8112. DAC1 sets the amplitude of power control voltage; DAC2 sets the amplitude of frequency control voltage. It is used for full band sweep; DAC3 sets the amplitude of frequency control voltage in Zoom Sweep Window mode; DAC4 sets the reference voltage for DAC3. It allows change width of “frequency window” in zoom sweep mode. The device operates as follows. Built-in microcomputer and data acquisition cards provide voltage for power and frequency control. DAC1 is used for the regulation of voltage applied to control electrode (grid) of BWO and so for the control of the output microwave power. DAC2 is used for the regulation of voltage applied to anode of BWO and so for the control of the output frequency. Control voltage is constant in Fixed Frequency mode or triangle linear rise voltage in Sweep Frequency mode. DAC3 is used in Zoom Sweep Window mode. A constant voltage from DAC2 is added to triangle linear rise voltage produced by DAC3. Output voltage of DAC3 is divided on coefficient 1:20. DAC4 controls amplitude of Zoom Sweep. Circuit switches between various modes are provided by relays. Parallel port (LPT1) is used for control of liquid crystal display (LCD). RS-232 serial port (COM3) is “mouse” port. It serves the operation of tuning knob. 23 SUPPLEMENT 5 The structure of the calibration files. The structure of the file. We calibrate the output frequency of Generator through DAC2 (See. Supplement 4). We change DAC2 code from $0000 till $0FFF and measure output frequency at 100% Power Level. Maximum Power Level 100% corresponds to code $0FFF in DAC1. Measured results are presented in file frequen.dat. This file is stored in flash memory of Control Unit. Example. There are 4096 strings in the file. Each string presents the frequency in GHz. Data presented at the first string corresponds to DAC2 code $0000. The code is increasing on 1 with increasing of string number. For example, DAC2 code $0006 corresponds to output frequency 117.08 GHz. 116.96 116.99 117.00 117.03 117.06 117.08 … 24 SUPPLEMENT 6 The diagram of the Control Voltage and strobes. Uout 1. F out t 2. t Ustrob 3. T S t 1. The diagram of the internal triangle wave control voltage on plug (27). 2. The diagram of the output frequency. 3. The diagram of TTL output strobe signal on plug (29). T – sweep time, set by Digital Keyboard (8) or by GPIB bus command. S – strobe time, duration about 0.001 sec. 25 SUPPLEMENT 7 Plot 1. Dependence of Output Power versus frequency by various Power Levels. Output Power vs Frequency 130 Power Level 120 Output Power, mW 110 100 90 100% 80 70 75% 60 50 40 50% 30 20 10 25% 182 180 178 176 174 172 170 168 166 164 162 160 158 156 154 152 150 148 146 144 142 140 138 136 134 132 130 128 126 124 122 120 118 116 0 Frequency, GHz The structure of the calibration data. The data in the calibration files are placed in ten columns divided by the tabs: Uinp HVm P25 F25 P50 F50 P75 F75 P100 F100 2.900 2.905 3.281 3.281 10.30 10.00 117.74 117.79 33.40 33.40 117.26 117.31 49.60 49.60 116.99 117.06 57.90 58.10 116.96 117.00 • The first column (Uinp) is a control voltage in V, applying to the external broadband frequency input (10), see supplement 1; • The second column (HVm) is a voltage in V, measured on the HV Monitor output plug (27), see supplement 2, corresponding to the data placed in the first column. • The third column (P25) is measured output power of Generator in mW at 25 % power level, corresponding to the data placed in the first column; • The forth column (F25) is a Generator frequency in GHz at 25 % power level, corresponding to the data placed in the first columns; • The fifth column (P50) is measured output power of Generator in mW at 50 % power level, corresponding to the data placed in the first column; • The sixth column (F50) is a Generator frequency in GHz at 50 % power level, corresponding to the data placed in the first columns; • The seventh and eighth columns (P75 and F75) correspond output power and frequency at 75% power level, corresponding to the data placed in the first columns; • The ninth and tenth columns (P100 and F100) correspond output power and frequency at 100% power level, corresponding to the data placed in the first columns; 26 SUPPLMENT 8 Plot 1. Dependence of voltage on the HV monitor output versus frequency at maximum level of output power. Frequency vs output voltage of High Voltage Monitor at 100 % Power Level 182 Frequency, GHz 172 162 152 142 132 122 112 2 3 4 5 6 7 8 9 High Voltage Monitor, V Plot 2. Dependence of frequency versus control voltage applied to the external broadband frequency tune input (10) at maximum level of output power. Frequency vs Input Control Voltage 182 Frequency, GHz 172 162 152 142 132 122 112 2 3 4 5 6 7 8 9 Input Control Voltage, V 27 SUPPLEMENT 9 Electrical Scheme of BWO Tube Anode Millimeter Wave Output Uanode Cathod Uheating Uanode = +500VDC…+2500VDC, Ucontrol=+50…+237VDC, Uheating=+1.0…+1.2VDC. SUPPLEMENT 10 Example of programming {This program is placed on flexible diskette and contains a example of programming on Pascal language} program sample_pas; uses dos,crt; {$L ITF488TP.OBJ} {$I ITF488TP.INC} var dev, i buff,str ch { include standart units } { load interface function } { include function declaration } : integer; : string[100]; : char; const port = $2E1; { GPIB card address } myadr = 1; bufflen = char(100); { } procedure SendCharToGPIB(Ch:char); begin buff:=ch; writeln(ibwrt(dev,buff)); Delay(10); end; { } procedure SendStringToGPIB(InputString:string); var l:word; begin for l:=1 to byte(InputString[0]) do SendCharToGPIB(InputString[l]); end; { } begin writeln('GPIB device address:'); readln(dev); { read device address} buff[0]:=bufflen; { clear buff} i:=ibinit(port,myadr,0); { initialisation } i:=ibtout(1000); { set timeout } i:=ibifc; { clear inteface} repeat writeln('Enter next regim: 1 - Initial Frequency.'); writeln(' 2 - Final Frequency.'); writeln(' 3 - Sweep Time.'); writeln(' 4 - Power Level.'); writeln(' 5 - Switch Ext/Int Frequency Control'); writeln(' 6 - Switch Ext/Int Power Control'); writeln(' 7 - Start Sweep'); writeln(' 8 - Stop Sweep'); writeln(' 9 - Read " Status String'); writeln(' 0 - Exit.'); Ch:= Readkey; case Ch of '1': begin { case of 1 } SendCharToGPIB('1'); { to local menu } SendCharToGPIB('1'); { to initial frequency set-up } delay(3000); { Please wait } SendStringToGPIB('55.00');{ initial frequency 55.00 GHz } SendCharToGPIB('e'); { Enter } 29 SUPPLEMENT 10 SendCharToGPIB('q'); SendCharToGPIB('q'); end; { to local menu } { to main menu } { case 1 } '2': begin SendCharToGPIB('1'); SendCharToGPIB('2'); delay(3000); SendStringToGPIB('56.00'); SendCharToGPIB('e'); SendCharToGPIB('q'); SendCharToGPIB('q'); end; { { { { { { { { { '3': begin { SendCharToGPIB('1'); { SendCharToGPIB('3'); { delay(3000); { SendStringToGPIB('000.01');{ SendCharToGPIB('e'); { SendCharToGPIB('q'); { SendCharToGPIB('q'); { end; { case of 3 } to local menu } to sweep time set-up } Please wait } sweep time 0.01 s } Enter } to local menu } to main menu } case 3 } '4': begin { SendCharToGPIB('1'); { SendCharToGPIB('4'); { delay(3000); { SendStringToGPIB('071.00');{ SendCharToGPIB('e'); { SendCharToGPIB('q'); { SendCharToGPIB('q'); { end; { case of 4 } to local menu } to power level set-up } Please wait } power level 71% } Enter } to local menu } to main menu } case 4 } '5': begin SendCharToGPIB('4'); SendCharToGPIB('F'); SendCharToGPIB('q'); end; { { { { { case of 5 } to control menu } switch ext/int frequency control } to main menu } case 5 } '6': begin SendCharToGPIB('4'); SendCharToGPIB('A'); SendCharToGPIB('q'); end; { { { { { case of 6 } to control menu } switch ext/int power control } to main menu } case 6 } '7': SendCharToGPIB('2'); '8': SendCharToGPIB('q'); '9': begin { case of receiver data} buff[0]:=bufflen; i:=ibrd(dev,buff); writeln('Exit code = ',i); for i:=1 to 100 do if buff[i] = #13 then buff[i]:=#32; writeln('Receive string:'); writeln(buff); end; case of 2 } to local menu } to final frequency set-up } Please wait } final frequency 56.00 GHz } Enter } to local menu } to main menu } case 2 } end; {} until Ch = '0'; end. 30 SUPPLEMENT 11 Step by step instruction: Setting Power Level and Fixed Frequency Mode without Amplitude Modulation This supplement describes how to set Power Level and Fixed Frequency mode without Amplitude Modulation using device keyboard steps 1…5 and trough GPIB interface steps 6…10 . • Step 1: Set Internal Frequency control mode. One should check LED “External” on the button “Frequency Control” (11). If LED not glows, it means that the device is installed in Internal Frequency Control mode and you should go to step 2. If LED glows, one should run command “Control” of menu pressing key “4” on keyboard. Press button “Frequency Control” to switch off LED on the button (11). To abort “Control” menu presses key “Menu”. • Step 2: Set Internal Power control mode. One should check LED “External” on the button “Power Control” (14). If LED not glows, it means that the device is installed in Internal Power Control mode and you should go to step 3. If LED glows, one should go to position “Control” of menu pressing key “4” on keyboard. Press button “Frequency Control” to switch off LED on the button (14). To abort “Control” presses key “Menu”. • Step 3: Set Amplitude Modulation OFF. One should check LED “OFF” on the field “Amplitude Modulation” (13). If LED glows, it means that the Amplitude Modulation switch off and you should go to step 4. If LED not glows, press key “4” on Digital Keyboard (8) to activate local menu “Control”. Press button “Off ” in “Amplitude Modulation” group of buttons on Functional Keyboard (13) to switch off Internal Amplitude Modulation. LED “OFF” should glow. Press button “Menu” to abort local menu “Control” and return to main menu. • Step 4: Set a Fixed Frequency. Press key “3” on keyboard to activate the local menu “Manual”. Wait few seconds, if Generator asks that. To enter the desired frequency one has three possibilities: i. Rotate Tuning Knob (6) and then press key “Menu” (12). Output operation frequency changes synchronously with value indicated on the display; ii. Press buttons “Step” “<-“ or “->” (7) and then press key “Menu” (12). This way is useful if it is necessary to provide precision tuning. One button realizing leads to the change of the frequency on the smallest available step. Output operation frequency changes synchronously with value indicated on the display; iii. Enter frequency from Digital Keyboard (8). A marker will appear on the display just after the realizing of one of the key (8). One can use buttons “Step” “<-“ or “>” (7) to change the marker position. That allows edit the frequency on the display. Press key “Enter” to finish editing and change the output operation frequency. Press key “Menu” (12). If one will try to enter a wrong frequency, out of operating frequency range, max or min one available will be installed correspondingly. 31 SUPPLEMENT 11 • Step 5: Set a desired Power Level. Press key “1” on Digital Keyboard (8) to activate “Set Up” local menu. There are four commands in the local menu “Set Up”: 1. “Fr_intl” – set initial frequency; 2. “Fr_fnl” – set final frequency; 3. “Time_swp” – set sweep time; 4. “Power_lv” – set power level. Press key “4” to enter in local menu commands “Power_lv”. Wait few seconds, if Generator asks that. To enter the desired value (for example 100%) one has two possibilities: i. Rotate Tuning Knob (6) in clock direction and then press key “Menu” (12); Output power changes synchronously with value indicated on the display ii. Enter Power Level from Digital Keyboard (8). Press keys “1”,”0”,”0”,”.”,”0”. One can use buttons “Step” “<-“ or “->” (7) to change marker position. That allows edit the value on the display. Press key “Enter” to finish editing. Output power changes after pressing key “Enter”. Press key “Menu” (12) to go to main Menu. Setting Power Level and Fixed Frequency Mode without Amplitude Modulation through GPIB • Step 6: Set Internal Frequency Control mode. Read “Status String”. If bit 7 of 7 th byte is clear, it means that the device is installed in Internal Frequency Control mode and you should go to step 7. “4” – activate local menu “Control”, if bit 7 is set. “F” – set Internal Frequency Control. Please pay attention that each of sending symbol “F” leads to switching between External/Internal Frequency control mode. “q” – abort local menu “Control” and return to main menu. Read “Status String”. Once more one should check bit 7 of 7th byte “Frequency Control” in “Status String”. • Step 7: Set Internal Power Control mode. Read “Status String”. If bit 6 of 7 th byte is clear, it means that the device is installed in Internal Power Control mode and you should go to step 8. “4” – activate local menu “Control”, If bit 6 is set. “A” – set Internal Power Control. Please pay attention that each of sending symbol “A” leads to switching between External/Internal Power control mode. “q” – abort local menu “Control” and return to main menu. Read “Status String”. Once more one should check bit 6 of 7th byte “Frequency Control” in “Status String”. • Step 8: Set Internal Amplitude Modulation OFF. Read “Status String” to check the current operation mode. If 3 rd bit of 7th byte is set, it means that the device is installed in Internal Amplitude Modulation mode and you should go to step 9. 32 SUPPLEMENT 11 “4” – activate local menu “Control”, if 3 rd bit of 7 th byte is clear; “D” – switch on Internal Amplitude Modulation OFF mode. Symbols “D” and “B”,”C” define Amplitude Modulation Mode one-valued. Read “Status String”. Once more one should check 3rd bit of 7th byte: “Internal Amplitude Modulation” in “Status String”; “q” – abort local menu “Control” and return in main menu. • Step 9: Set Fixed Output Frequency For example, to set the fixed frequency 135.121 GHz “3” – activate “Manual” local menu; Wait few seconds; “1” “3” ”5” ”.” ”1” ”2” ”1” – print frequency value on LCD; “e” – enter. Fixed frequency should changed. Abort setting of Fixed Frequency. “q” – return to main menu. • Step 10: Set Power Level. For example, to set the Power Level 100.00%. “1” – enter to local menu ”Set Up”; “4” – enter to local menu ”Power_lvl”; Wait few seconds; “1” “0” ”0” ”.” ”0” ”0” – print power level on LCD; “e” – enter; Output power should changed. “q” – return to local menu; “q” – return to main menu. 33 Heterodyne receiver Technical description and user manual Contents 1. TECHNICAL PARAMETERS 35 2. DESIGN AND PRINCIPLES OF OPERATION 35 3. PRINCIPLES OF UNITS OPERATION 36 4. CONTROL 37 SUPPLEMENTS 12. FRONT PANEL OF THE RECEIVER. 38 13. REAR PANEL OF THE RECEIVER. 39 14. BLOCK DIAGRAM OF THE RECEIVER 40 15. ELECTRICAL SCHEME OF KEYBOARD AND POWER SUPPLY 41 16 ELECTRICAL SCHEME OF AMPLIFIERS AND VIDEO DETECTOR 42 34 Heterodyne receiver Technical description and user manual 1. Technical parameters Frequency Range, GHz 120-180 Input waveguide WR6 Waveguide Flange UG-387/U-M Range of Input Signal Power, mW 0.001-1000 (set by RF Variable Attenuator) IF Bandwidth, MHz 4-16.5 Output Video Signal, V 0-5 Input Voltage, V 100/220 VAC 50 Hz Calibrator Frequencies, GHz N=20…30, N*6 Calibrator Stability 1 ppm Output power long term stability, % 5 Dimensions, mm 490x360x140 2. Design and principles of operation The functional scheme of the receiver is presented below. Harmonic Generator Power Suppliers Amplifier and Video detector Signal RF Preamplifier DC1 DC2 BD BI Variable Attenuator Variable Attenuator GENERATOR LO Output Figure 1. The receiver consists of: Directional Couplers 10 dB (DC1, DC2) Variable Attenuators 0…30dB Broadband Isolator (BI) Broadband Detector (BD) Harmonic Generator IF Preamplifier, Amplifier and Video detector Power Suppliers 35 The first directional coupler is used to apply local oscillator frequency (LO) and input radio frequency (RF) signal to the detector that is used in mixer mode. The second directional coupler is used to apply signal from harmonic generator to the detector. After the mixing Intermediate Frequency (IF) signal is obtained on the detector. Amplified signal is detected by the video detector and then conditioned by means of video amplifier. 3. Principles of units operation Schematic diagram of Receiver is shown on Supplement 14. Electrical scheme of IF Amplifier and Video amplifier is presented on Supplement 16. The Preamplifier is based on operating amplifier AD811 [U1]. Resistor [R1] sets biasing current of the diode, approximately 80 µA. IF signal passes through capacitor [C1] to preamplifier. [U1] amplifies signal with bandwidth from 4 to 16.5 MHz. Filter [R2, C1] define the low cut-off frequency 4MHz. The high cut-off frequency 16.5 MHz is defined by frequency characteristics of [U1]. Different power suppliers are used for amplifier module together with detector biasing circuit [R1] and other blocks of the scheme. There is a possibility to change the gain of the amplifier x10, x100 and x1000. For this aim there is a voltage divider [R6-R8, C4-C6] with relay commutation circuit [K1, K2]. One can change the gain manually using buttons “Amplification” (33), see Supplement 12, or remotely using 4 wires parallel interface. TTL pulses 0/1, with a duration less then 20msec, should be applied to “Generator” plug (38) according to the table presented below. Pin number 3 6 7 8 Signal Value 1 1 1 1 Descriptions Comments Switch ON gain “10” Switch ON gain “100” Switch ON gain “1000” Switch ON/OFF Condition of Harmonic Harmonic Generator Generator is indicated in pin 5 – 1/OFF, 0/ON Video detector [U2, U3, D1, D2] detects IF signal, then it is amplified by Video Amplifier. The Video Amplifier is based on [U4]. There are added negative synchronisation pulses to the output video signal. It is received from the Generator through plug “Generator” (38) pin 9. The circuit [D3, D4, R21] adds these pulses to output video signal. Power supply consists of transformer and integrated circuits. The scheme of power supply is built on typical elements, see Supplement 15. Keyboard plate provides control signals for setting gain mode and switching ON/OFF the Harmonic Generator, see Supplement 15. There is a possibility to control a condition of the Receiver. The Keyboard plate provides static TTL signals, which are applied to “Generator” plug (38). 36 Correspondence between values of signals and condition of the Receiver are shown in the next table: Pin number 1 2 4 5 Signal Value 0/1 0/1 0/1 0/1 Descriptions Gain “10” switch ON /OFF Gain “1000” switch ON/OFF Gain “100” switch ON/OFF Harmonic Generator switch ON/OFF Relays plate applies +12V and +24V to the Harmonic Generator for turning on it. They are controlled TTL signal from Keyboard plate, see Supplement 14. 4. Control List of controls situated on Receiver front and rear panels are presented in the following table: Name Power on Position on Front or Rear panels Front (31) Harmonic Generator Front (32) Amplification Front (33) “Generator”, waveguide input “Signal”, waveguide input Output Front (35) 100VAC 220VAC, switch Rear (39) “Generator”, connector Rear (38) Descriptions Comments Switch on/off power supply Switch on/off Harmonic Generator Gain Control When the receiver is turned on LED lights When the generator is turn on LED integrated in the button lights Corresponding LED integrated in the button lights Waveguide flange on the right panel of Receiver Waveguide flange on the right panel of Receiver - LO Signal Input Left (36) RF Signal Input Front (34) Output Video Signal Switching of AC Input Voltage 100/220 V Input/Output signals of remote control Control 37 SUPPLEMENT 12 Front panel of the Receiver. ON 31 0 - 5V 34 10 33 100 1000 32 ON 35 36 Plugs and buttons disposition on the front panel of the Receiver. 31. Power indicator and on/off switch. 32. Harmonic generator switch on/off. 33. Gain control. 34. Outputs plug (0..+5 V). 35. RF input. 36. LO input. 38 SUPPLEMENT 13 Rear panel of the Receiver. GENERATOR 38 39 100VAC 220VAC 37 FUSE 1A POWER PLUG 40 Plugs disposition on the rear panel of the receiver. 37 38 39 40 Fuse 1A. “Generator” control plug, 10 pins. Switch 100/220V AC. Power plug 39 SUPPLEMENT 14 Block diagram of the Receiver. Connector Generator “10” to G3 DI1 “1000” to G3 DI9 1 - 10 “10” from G3 DO12 “100” to G3 DI8 “HG” to G3 DI10 “100” from G3 DO13 “1000”fromG3 DO114 “HG” from G3 DO15 Strobe from G3 TRANSFORMER Ground Harmonic Generator X28 – X31 Power Supply +12V Grnd –12V +5V 24V Ground Ground +24V Ground +12V Relays +12V and +24V relay “10” Strobe relay “100” Ground -12V Output Video Amplifier Input Input Output Detector Preamplifier -12V +12V +12V +5V Ground Relay “100” Relay “10” Output Keyboard “HG” off/on TTL from/to G3 40 SUPPLEMENT 15 Electrical schemes of Keyboard and Power Supply. POWER SUPPLY +24V 1 4 IN + C20 C19 1 X28 3 GND D14-D17 U8 + 3 OUT X36 LM7824 C22 C21 + 1 1 SW5 220 2 2000 - X29 2 8 1 3 -12V D18-D21 3 5 7 C23 1 U9 C24 3 X35 LM7912 C25 1 2000 C26 1 220 4 + X31 2 OUT 1 + 100/220VAC IN GND - 2 X30 + 4 +12V D22-D25 1 C27 + 2 1 3 1 C28 3 2000 3 OUT X34 LM7812 C30 C29 + 1 1 220 2 4 5 - 3 U10 GND 8 J1 IN + 4 SW6 7 1 2 Power +5V 1 IN GND U11 3 OUT X33 LM7805 C32 C31 + 1 2 220 X32 X27 RELAY"10" U6A KEYBOARD 1 2 & R29 2.7k 3 T3 R31 390 7400 "10"fromG4-143 X16 U5A 1 2 C13 R28 5k & 2 3 X26 "10"to G4-143 - D8 D7 3 SW1 "10" C14 7400 0.068 R30 5.1k 1 1 1 + RELAY"100" X25 U6B 4 5 & 6 R33 2.7k T4 R35 390 2 7400 "100"fromG4-143 X17 U5B 4 5 C15 R32 5k & 3 - D10 D9 6 7400 SW2 "100" R34 5.1k 0.068 1 1 + X23 "1000"toG4-143 U6C 9 10 & 8 R38 390 2 7400 "1000"fromG4-143 X18 U5C 9 10 C16 R36 5k & X24 "100"to G4-143 3 - D12 D11 8 SW3 R37 5.1k 7400 0.068 "1000" 1 1 + RELAY+12Vand+24V X22 "HGoff/on"fromG4-143 X19 U5D 12 13 R39 5k C17 & D13 11 7400 0.068 R40 1k C18 4 3 2 1 10 11 12 13 S U7A C1 1D R 5 6 S C1 U7B 1D R 7474 9 8 R41 2.7k T5 R42 390 2 3 X21 "HGoff/on"toG4-143 - SW4 1 HG 1 1 + X20 +5V 41 SUPPLEMENT 16 Electrical schemes of Amplifiers and Video detector. X3 +12V PREAMPLIFIER 0.1 C2 7 R1 150k C 1 1n5 3 INPUT X1 + U1 2 AD811 - DETECTOR R2 200 4 X2 6 X4 OUTPUT R5 200 C3 0.1 R 4 50k R3 50 X5 GROUND X6 -12V R13 1.3k C9 1 2 3 390 2 U2 3 AD811 K1 C5 R8 5.1 3 7 C7 390 5 39 4 1 2 C6 3.9 6 R18 1k 3 + U4 2 AD811 - 6 + R7 51 U3 3 AD811 R15 390 R14 1.3k C11 1 R17 390 C12 R22 100 OUTPUT X15 R20 1k 510 R19 100 K2 6 7 R9 100 1 2 R12 1.3k 4 4 - C4 + R6 510 7 5 X6 R21 1k 4 D1 4 D2 R11 1k - INPUT R10 1k INPUT STROBE X16 D4 D3 R16 1.3k R23 100 C10 3n3 X14 X7 GROUND A2 4 D6 4 2 3 T2 T1 2 2 2 R25 1k R26 1k R27 1k 1 R24 1k 3 1 A1 3 1 3 1 D5 AMPLIFIER AND VIDEO DETECTOR X8 OpGROUND X9 OpInptu"100" X10 X11 Input"100" OpInput"10" X12 X13 Input"10" +5V 42 Real Time Frequency Analyzer 120-180GHz. Part No. RTA-D-180 User Manual. Contains. 1. GENERAL REMARKS ............................................................................................... 44 2. EXPLOITATION ......................................................................................................... 44 3. PARAMETERS ............................................................................................................ 44 4. RELIABILITY ............................................................................................................. 45 5. PRINCIPLE OF OPERATION .................................................................................... 45 6. HOW TURN ON THE ANALYZER ........................................................................... 46 7. PRIMARY TEST.......................................................................................................... 46 8. SOFTWARE………………………….....…………………………….….…...………47 9. MEASUREMENT………………………………………………………....……….…49 Supplements......................................................................................................................... 17. Calibration of Analyzer.............................................................................................. 50 18. Functional Scheme of Frequency Analyzer............................................................... 51 19. Windows…………………………………………………………………………….52 43 1. GENERAL REMARKS 1.1. When millimeter-wave applications came into many domains of human activity, a need for precise measurements of signal frequency spectrum has become critical. This need is quite understandable when, for example, it concerns to exploring extraterrestrial radio-sources or micro/mm-wave background emission in radio-astronomy, or measuring chemical composition of the atmosphere through the molecular emission of different its components, plasma diagnostics or many military applications. Moreover, in some cases the spectrum measurements have to be implemented in the real time scale. For example, the high temperature plasma physics research is just the case because of short plasma life time in experimental devices and poor plasma parameter reproducibility from discharge to discharge; also it is important for plasma feedback control purposes. As well, the real time spectrum measurements are very needed in electronic warfare applications, such as object recognising or electronic countermeasures to millimeter-wave weapons. However, real time broad band analyzers with direct frequency spectrum measuring continue to be a rare bird in catalogues of leading world manufacturers of mm-wave products. ELVA-1( DOK Ltd.) fill this need for the frequency range of 120 to 180GHz with their device. 1.2. The Anlalizer may be used in laboratory condition. 1. EXPLOITATION Conditions: operations temperature: relative air humidity : primary power: atmospheric pressure: 5°-40° C ° up to 95% at the temperature 30 ° C° AC(100/220±10)V/(50±0.5)Hz 84-112 kPa. 2. PARAMETRES 3.1. Frequency range of the input signal spectrum, GHz 3.2. IF Bandwidth, MHz 3.3. Basic frequency resolution, MHz 3.4. Maximum frequency resolution, kHz 3.5. Minimum time of the spectrum analysis, ms 3.6. Minimum time of single frequency measurement, ms 3.7. Power of the input signal, mW 3.8. Calibrator Frequencies, GHz 3.9. Calibrator Stability 3.10. Output power long-term stability, % 3.11. Voltage of the output video signal, V 3.12. Input waveguide 3.13. Input waveguide flange 120 to 180 4-16.5 12.5 61 10 0.0024 1 to 1000 N=20…30, N*6 1 ppm 5 0 to 5 WR6 UG-387/U-M Operational modes: • spectrum measurement during a single sweep; • measurement of the spectrum averaged over several sweeps visualization of the spectra on the IBM PC monitor with • real time spectrum measurements with continuously repeated sweeping and accumulating the output data on the IBM PC hard disc • basic frequency resolution of 15MHz and “zoom” mode with the resolution of 61 kHz 44 4. RELIABILITY 4.1. Main time to failure, no less than 2000 h. 4.2. 90% life time, no less than 2 years. 5. PRINCIPLE OF OPERATION The Real Time Frequency Analyzer is typical swept-frequency spectrum analyzer and uses the classic heterodyne-based architecture (Fig.1). Besides the double-sideband (DSB) heterodyne receiver the system incorporates the sweep generator with 120 to 180 GHz frequency band as local oscillator (LO) of the receiver. The main part of the generator is back wave oscillator (BWO). Sweeping its output frequency is realized by means of saw-tooth modulation of BWO accelerating potential. Being supplied to the receiver, the swept wave thus allows scanning input mm-wave signal over the frequency during each sweep period, so spectra repetition rate is equal to the sweep frequency. At each time point of the each period output video signal of the receiver is proportional to a power of the input signal at given frequency within its spectrum. This implies that both frequency and sensitivity calibration of the analyzer has to be carried out. The frequency calibration of the receiver may be performed at any time when it is needed with aid of internal harmonic generator built in the receiver and providing 11 equidistant frequencies covering the band from 120 to 180 GHz. As to the power calibration is concerned, it is fulfilled by the manufacturer using external calibrated mmwave source, which imitates the input signal. Result of the calibration is provided in form of the calibrating curves in the package with the device (Supplement 17). Maximum spectral sensitivity of the device is defined by the minimum input signal power, approximately 0.001 mW, and intermediate frequency (IF) bandwidth of the receiver. With the latter being equal to 12 MHz (from 4 to 16 MHz), it gives the maximum sensitivity to be equal to about 10-7 W/MHz. The sweep time for the whole frequency band can be varied within a wide range: 10ms, 20ms, 40ms, .., 4 s, 8 s, 10 s - 13 steps totally, that defines the frequency sweeping rate to be equal, respectively, to 5 GHz/ms, 2.5 GHz/ms etc.. The analyzer operates in two basic regimes. At the first of them, digital to analogue converter (DAC) of the generator produces 4096 conversions for the whole frequency band, from 120 to 180 GHz. It implies that frequency resolution at this regime is about 15 MHz which is the minimum one and corresponds to the IF bandwidth of the receiver. Of course, it is not obligatory to scan over the whole band, user may narrow the band decreasing, respectively, the sweep time and increasing sweep repetition rate, but the number of the conversions will be decreased proportionally keeping the same resolution. At the second, "zoom" or "lens" regime, the user chooses a narrowed band, 8 GHz, 1 GHz, 0.5 GHz or 0.25 GHz, centred about a frequency in any place of the whole band. Then the 4096 conversions is made for this, narrowed, band. Thus, the maximum frequency resolution of the analyzer may be carried to the value as high as 60 kHz. The entire device consists of Generator, Heterodyne Receiver, and microcomputer with Data Acquisition Card and software. Functional scheme of entire device is presented on Supplement 18. Generator provides frequency sweeping LO for Heterodyne Receiver. Output video signal of Heterodyne Receiver is proportional to the input RF power. During the sweep the video signal is digitised by means of Data Acquisition Card installed into main microcomputer. This scheme allows to obtain power spectrum of the input RF signal during each sweep of Generator. 45 Main microcomputer controls the operation of Generator by means of GPIB bus. Generator installs output power and frequency sweep accordingly instructions received from main microcomputer. At the beginning of each sweep it sends synchronisation signals SYNC (TTL) to Heterodyne Receiver, that is inverted in Receiver and mixed with output video signal. Data Acquisition Card uses this negative pulse for the synchronisation with the beginning of the frequency sweep. The signal “Calibrator ON/OFF” switches on Harmonic Generator that built into Heterodyne Receiver. The signal would be activated from microcomputer (see User Manual for Generator). It is needed for automatic calibration procedure. 6. HOW TO TURN ON THE ANALYZER To switch on the entire device one should to do the following: 6.1. Connect devices according the scheme presented on Supplement 18. Numbers of plugs are mentioned on the scheme according User Manual for Generator and Receiver. For connection between the Generator and the Receiver use applied special cable and waveguides. 6.2. Switch on all devices according User Manuals. 7. PRIMARY TEST 7.1. Turn on the Analyzer as directed in part 6. 7.2. Apply video signal from plug 34 on the Receiver to oscilloscope. 7.2. Set on the Generator the following parameters: -Fini = 118.00 GHz, -Ffin = 181.00 GHz, -Sweep Time - 0.01s, -Output Power - 10%. 7.3. Switch On the Harmonic Generator, for that press button 35 on front panel of the Receiver. If LED on button is glows, it means that the Harmonic Generator is working. 7.3. Run Sweep on the Generator. 7.4. Open the LO Variable Attenuator. 7.5. You must to see a picture on the oscilloscope is presented below: +5V 0 1 11 12 Time, ms 46 8. Software As it has been mentioned above, the Analyzer may be controlled manually with aid of the Front Panel controls or externally via PC Remote Control function using data acquisition cards PCI-1800 and PCI-488 as the hardware. Following minimum system requirements have to be met: Pentium processor 300 MHz, RAM 64 MB, a vacant RS232 serial port, two available PCI slots. PC is operated under Windows 95. The specific PC software is delivered written on CD. It consists of program exe-modules and an installation file. The program modules have been composed in the LabView standard and using its libraries. To enable the Remote Control function one should run the program SPECTRUM on PC. It will perform choosing operational regimes, frequency calibration of the Analyzer and analogue-to-digit conversion, storage and visualisation of the data obtained. Another software component, program 3DGRAPH, is used for representing the spectra measured in three-dimensional axonometric projection. Once the SPECTRUM is run, an image (Fig.1 Sup19) is displayed on the PC monitor consisting of upper toolbar with “File”, “Sweep”, “Remote”, “Calibration” and “Exit” options, left and right panels. The left panel has the ELVA-1 logo above, list of “Options” in the middle, and the “Message log” below. The “Remote” screen is displayed first on the right panel just after running the SPECTRUM. In the “Options”, the line “GPIB address” denotes logical number of the Analyzer in the GPIB interface. “Summary number” is number of sweeps used for obtaining averaged spectrum. “Archive number” defines number of spectra to be stored on the PC disc after completing the “File” option. In the “Noise level” line a voltage is determined (in Volts) that will be considered as the lower limit when searching for calibration signals (see subsection Calibration below). “Message log” describes last ten operations implemented by the SPECTRUM. “Remote” option. If the “Remote” option is enabled the “Remote” screen is displayed on the right panel of the PC monitor image (Fig. 2 Sup.19). It simulates Front Panels of the Heterodyne Receiver and the BWO Generator. The Analyzer may be controlled and the operational regimes are chosen with “pressing the buttons” on the screen in the same way as it has been described in the previous part of the Manual, simulated on the screen “LCD” exhibiting the same communications as the display on the Generator Front Panel. “Sweep” option. If the “Sweep” option is enabled the “Sweep” screen is displayed on the right panel of the PC monitor image (Fig. 1 Sup.19). It consists of two amplitude (V) vs frequency (GHz) graphs. The upper one, “Last sweep”, represents spectrum of the measured signal obtained during last individual heterodyne sweep. The lower one, “Summary sweep”, is the spectrum averaged over the number of sweeps set on the left panel in the “Summary number” window. “Autolock” option (here and in “Calibration”, see below), if enabled, shows white vertical mark which stands at the centered signal frequency. Its digitalized value in GHz is seen in the “Autolock” window. “Calibration” option. This option is operated when the Calibration Harmonic Generator is switched on with pressing the “Harmonic” button on the Receiver Front Panel, and the frequency window is chosen with setting the lower and upper sweep frequencies of the Generator. If the “Calibration” option is enabled the “Calibration” screen is displayed on the right panel of the PC monitor image (Fig. 3 Sup.19). It contains a three-row table, “Search” 47 and “Calibration” buttons and some additional “controls”, and the “Summary sweep” plot above described in the “Sweep option”. In the upper row, “Marker”, of the table 11 serial numbers of the calibration frequencies are inscribed. Their genuine values (in GHz), as generated, are shown in the row “Fix”. Pressing the “Search” button will display their values, as measured with the Analyzer using its preliminary calibration file, in the row “Found”. The calibration frequencies lying within the Analyzer frequency window are displayed with the green color and those lying beyond it are in the red. These data may be seen on the “Summary sweep” plot in a graphic form. If the Calibration Generator is not switched on or if less than two of the calibration frequencies are within the window, only the “Search” button continues to be visible and enabled. Decreasing the “Noise level” may result in detecting more calibration frequencies. Another way to find out more calibration marks is to press repeatedly the “Search” button. In some cases the averaged signal value may turn out to be higher than the individual one. If two or more of the calibration frequencies got into the window the calibration can be realized by pressing the “Calibration” button after that the frequencies of both the rows of the table must coincide. The calibration procedure should be performed after every operational regime reset. One of the most typical causes for the frequency deviation from its calibrated value is temperature variation in the Analyzer. Usually 10 to 15 min. after the reset are taken before the steady state is attained. Repeated checking the frequency is recommended; if no frequency drift is the case, values in both the rows “Fix” and “Found” will be equal. Some additional instruments to change the plot resolution are collected at the right side of the panel. They allow fitting scales of the coordinate axes to the maximum signal amplitude and/or to the full frequency band. Another group of options will enlarge an area of X- or Y-axis or both into the full-scale plot. A third tool will zoom continually an area pointed with the mouse driven cursor. “File” option. The “File” option, when enabled, proposes a menu to choose one of two possible formats for saved data file, text format or archive. The text file is to be analyzed with Microsoft Excel, and the archive file should be imported into the 3DVIEW program module (Fig.4 Sup.19). 9. Measurements. 1. Close both LO- and RF-attenuators in the Heterodyne Receiver. Connect the input signal waveguide to the RF input of the Receiver. 2. Switch the Analyzer on according to Section 6 of the Manual. Let it warming up for 30 min. 3. Set desired sweep parameters and the output power of the Generator (the power “10%” is recommended, it is the default level at switching the Generator on). 4. Run sweeping. 5. Run the SPECTRUM program. The upper toolbar, left and right panels should be displayed on the PC monitor. Ensure that everything is nominal. 6. Switch the Harmonic Oscillator on; gently open LO-attenuator so that the calibration mark was not less than 0.2 V. 7. Perform the calibration. 8. Switch the Harmonic Oscillator off. 48 9. Let the external signal be applied to the Analyzer. 10. Gently open RF-attenuator to obtain an acceptable amplitude of the measured signal (0.1 to 5 V). Use the “Autolock” option if wish. 11. Set number of spectra to be stored on the PC disc in the “Archive number” line on the left panel of the SPECTRUM screen. Enable the “File” option and complete data saving. During for saving Data please don’t use anything additional software, for excepting to appear breakpoints in save Data. 12. Both the frequency resolution and the frequency measurement accuracy may be improved if the operational regime of “Lens 8 GHz” is used (see Section C of the G4-143 Manual): 1. Close the RF-attenuator. 2. Determine the central “Lens” frequency (denoted as “fixed frequency” in (Section B of the G4-143 Manual) so that the analyzed signal together with two adjacent calibration marks were within the “Lens” frequency band (fixed frequency ± 4 GHz). 3. Set “Lens 8 GHz” regime with the chosen central frequency on the Generator and let it warming up for 15 min. 4. Switch the Harmonic Generator on. 5. Perform the calibration over the two marks. 6. Switch the Harmonic Generator off and open the RF-attenuator according to point 10 in the present Section. Other “Lens” regimes (see Section C of the G4-143 Manual) provide better frequency resolution but the calibration based on the frequency marks can not be carried out that results in worse accuracy of the frequency measurement because the preliminary calibration file will be used instead. 13. View save Data in arc format by 3DVIEW program. A) Run 3DVIEW.exe; B) Press LOAD (Fig.4 Sup. 19); C) Choose file for viewing; D) Press ‘Next’ or ‘Prev’ for moving thought viewing file. E) “Zoom” allows to change quantity viewing spectra. F) Use cursor with keys ‘Shift’, ‘Ctrl’ and ‘Alt’ you can change position and scale of plot. 49 SUPPLEMENT 17 Calibration of Frequency Analyzer Frequency dependencies of output signal at fixed power of input signal measured during the calibration procedure are presented on the plot below. Upper curve corresponds to input power of radio signal 2 mW. Each curve corresponds to a power decreasing on 3 dB by means of an external mechanical attenuator. Sensitivity at various input powers with step 3 dB 5000 4500 Output Signal, mV 4000 3500 3000 2500 2000 1500 1000 500 Frequeqncy, GHz Specially designed RF source with fixed output power was used. An electric attenuator supported constant output power 2 mW in frequency region from 120 till 180 GHz. Power Level of Generator (LO) was 10%. LO and RF Variable Attenuators were opened. Generator sweeps with time 40 mS. Amplitudes of output signal are presented on the diagram. It is important to note that the presented sensitivity of the Receiver is valid only if LO and RF Variable Attenuators are opened. If one will apply another LO power, the sensitivity will be changed accordingly. Calibration data are supplied on flexible disk in Excel format, file CalReceiver.xls. 50 180 178 176 174 172 170 168 166 164 162 160 158 156 154 152 150 148 146 144 142 140 138 136 134 132 130 128 126 124 122 120 0 SUPPLEMENT 18 1. Functional Scheme of Frequency Analyzer SYNC + CONTROL 38 30 22 Generator Heterodyne Receiver RF Input 36 9 LO 35 34 GPIB Main microcomputer PCI-488 Data Acquisition Card PCI-1800/L Data Acquisition Card CON3/pin1 SYNC + Output Video Signal 2. Waveguide’s connection between the Generator and the Receiver. 36 35 9 51 Supplement 19 Fig.1 Supplement 19 Fig.2 Supplement 19 Fig.3 Supplement 19 Fig.4 Welcome to http://www.elva-1.spb.ru/


