1
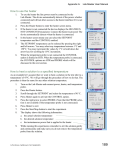
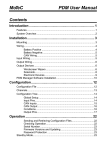
MoTeC MDD User Manual Contents Introduction ........................................................................ 1 Display ................................................................................................................1 Mounting .............................................................................................................1 Firmware Version ................................................................................................2 ADL Operation.................................................................... 3 1. Full ADL Display..............................................................................................4 2. Gain Loss Layout for ADL ...............................................................................6 3. Large Numeric Layout for ADL........................................................................8 4. Lap Display Layout for ADL.............................................................................9 5. Vertical Bar Graph Layout for ADL................................................................11 6. Horizontal Bar Graph Layout for ADL............................................................13 M800 Operation ................................................................ 15 M4/M48 Operation ............................................................ 23 M8 Operation .................................................................... 29 BR2 Operation (with ECU) .............................................. 31 BR2 Operation (Standalone)........................................... 33 Appendices....................................................................... 34 Appendix A: Specifications................................................................................34 Appendix B: MDD Diagnostics ..........................................................................35 Appendix C: Special Enunciator Strings............................................................36 Appendix D: General CAN Bus Wiring ..............................................................37 Appendix E: Wiring to M4 / M48 ECU ...............................................................38 Appendix F: Wiring to M8 ECU .........................................................................39 Appendix G: Wiring to M800 ECU.....................................................................40 Appendix H: Wiring to ADL ...............................................................................41 Appendix I: MDD Connector & Wire Colours ....................................................42 Appendix J: Case Dimensions ..........................................................................43 Copyright 2002-2003 – MoTeC Pty Ltd The information in this document is subject to change without notice. While every effort is taken to ensure correctness, no responsibility will be taken for the consequences of any inaccuracies or omissions in this manual. 28 August, 2004 MoTeC Introduction 1 Introduction The MoTeC MDD is a small satellite display for use with the MoTeC Advanced Dash Logger (ADL) or a MoTeC ECU. The MDD is small enough to mount on the vehicle steering wheel or it may be mounted in a more conventional position. When used with an ADL it is normally used with a “Blind” ADL (an ADL with no display). The MDD receives data from the ADL or M800 via CAN (Controller Area Network). It can also receive data from an M4, M48 or M8 ECU via a serial link. Display The display is a dot matrix backlit graphics LCD which allows the MDD to support a number of different display layouts to suit varied applications and make best use of the limited display area. Backlight Brightness The LCD backlight brightness may be remotely adjusted when the MDD is used with an ADL. See the ADL Operation section for further details. The brightness is not adjustable when used with an ECU. Contrast The display contrast is adjusted at manufacture and does not normally need to be changed. Mounting The MDD should be mounted using double sided adhesive tape or a rear panel fitted with mounting holes may be used. 2 Introduction Firmware Version The program inside the MDD is called “firmware”. The firmware determines the capabilities of the MDD. This document is current for firmware version V1.18 Updating the Firmware Version Over time newer firmware versions will be released that may have additional capabilities or display layouts. Updating the firmware requires special equipment. This can be performed by the MoTeC dealers listed below: • MoTeC Pty Ltd Australia • MoTeC Systems USA • MoTeC Europe Ltd • MoTeC Japan • MoTeC Queensland MoTeC ADL Operation 3 ADL Operation This section describes using the MDD with a MoTeC ADL. ADL Version For compatibility with MDD V1.18, (or later) the ADL must be running version 3.00M or later firmware. Wiring The MDD communicates with the ADL via a CAN connection. See Appendix H: Wiring to ADL for wiring details. A correctly configured ADL will be automatically detected by the MDD when powered up. Display Layouts A number of different display layouts are available. The display layout is selected by loading the appropriate MDD CAN template in the Inputs | Communications section of Dash Manager. The various display layouts are described in the following section. Backlight Brightness The LCD backlight brightness may be remotely adjusted with data received from the ADL. This information can be provided by an ADL which is using the appropriate Comms template to transmit a channel with the brightness value. Each of the layouts comes with a second template that includes Backlight Brightness. This allows the brightness of the MDD display to be controlled by generating the “MDD Backlight Brightness” channel in the ADL. The channel is a percentage value – note that if this channel has a value of 0, the MDD will default to full brightness. The channel can come from any source; a fixed value, a potentiometer connected to an input pin, from channel maths, etc as long as the required channel is generated. If the backlight brightness is not controlled by the ADL the MDD uses a default backlight brightness (less than maximum) which should suit most applications. At the default brightness the display illumination will be consistent for battery 4 ADL Operation voltages between 8V and 15V. When full brightness is selected then the intensity will reduce when battery voltage is below 12V 1. Full ADL Display This layout allows the MDD to mimic all standard features present on the ADL display with the exception of the enunciator for the top numeric display. The ADL Race/Practice/Warm-up display modes can be used to configure 3 different layouts. The implementation of time formats on the MDD display is more flexible than the ADL display – time channels with resolution of 1, 0.1 and 0.01 seconds can be correctly displayed on the left and right numeric. Example Displayed Channels The channels displayed should be configured in the ADL Display setup. Enunciators The enunciators displayed for the left and right numerics are taken from the enunciators configured on the ADL. The MDD includes some enunciator combinations that are not available on the ADL. These are listed in Appendix C: Special Enunciator Strings. ADL Comms Configuration In the ADL Inputs | Communications setup select the “MDD Transmit (ADL Display)” CAN template. Note that any vacant CAN Tab may be used. MoTeC ADL Operation 5 6 ADL Operation 2. Gain Loss Layout for ADL This display layout shows a ‘Lap Gain Loss’ bar graph at the top of the display and also includes the ADL left, right centre, and bottom displays. The Gain Loss bar graph is based on the ADL top numeric. The normal ADL bar graph is not shown The ADL Race/Practice/Warm-up display modes can be used to show different channels. Example Displayed Channels The channels displayed should be configured in the ADL Display setup. Enunciators The MDD includes some enunciator combinations that are not available on the ADL. These are listed in Appendix C: Special Enunciator Strings. ADL Comms Configuration In the ADL Inputs | Communications setup select the “MDD Transmit (Gain Loss Display)” CAN template. Note that any vacant CAN Tab may be used. MoTeC ADL Operation 7 Gain/Loss functionality The gain/loss bar-graph uses the data from the ADL Top Numeric. The bar-graph has 100 segments with 50 segment to the left of center and 50 segments to the right. Each segment represents one least significant digit of the value displayed in the ADL top numeric. For example if the Lap Gain Loss channel is displayed with two decimal places on the ADL top numeric then each segment will represent 0.01 seconds giving a maximum range of ±0.50 seconds. To optimise the display the Lap Gain Loss channel may need to be rescaled. For example if a range of ± 0.25 seconds is required than the Lap Gain Loss channel will need to be multiplied by two. This can be done in the ADL by feeding the Lap Gain Loss channel into Channel Maths which can then generate a new channel that is multiplied by two. Note that the ADL Top Numeric itself will not display a negative value, but negative values will be displayed on the MDD bar graph. 8 ADL Operation 3. Large Numeric Layout for ADL This layout displays two values in a large font for maximum readability. It also displays the ADL bottom line. It does not show the ADL bar graph, centre numeric or top numeric. The ADL Race/Practice/Warm-up display modes can be used to show different channels. Example ADL Display Mode } ADL left numeric and enunciator } ADL right numeric and enunciator ADL Bottom Line Displayed Channels The channels displayed should be configured in the ADL Display setup. Enunciators The MDD includes some enunciator combinations that are not available on the ADL. These are listed in Appendix C: Special Enunciator Strings. ADL Comms Configuration In the ADL Inputs | Communications setup select the “MDD Transmit (Large Numeric)” CAN template. Note that any vacant CAN Tab may be used. MoTeC ADL Operation 9 4. Lap Display Layout for ADL The Lap Display layout shows Lap Time and Number and optionally, Predicted Lap Time or Lap Time Gain Loss. It also mimics the Bottom line of the standard ADL display. Note that this display layout is an older style layout that was designed for a special racing category. It is normally easier to use one of the other layouts. The normal ADL Race/Practice/Warm-up display modes can be used to show different channels. Example: The example below shows Lap Time and Number and the Bottom Line. Other display configurations are also possible. } } ADL Top Numeric and label ADL Left Numeric and l b l ADL Bottom Line Displayed Channels The channels displayed should be configured in the ADL Display setup. In the example above the ADL Display setup is configured as follows: ADL Top Numeric: “Lap Number” with format = Decimal ADL Left Numeric: “Lap Time” with format = SS.HH Bottom Line: Will mimic the ADL bottom line ADL Comms Configuration In the ADL Inputs | Communications setup select the “MDD Transmit (Lap Display)” CAN template. Note that any vacant CAN Tab may be used. 10 ADL Operation Detailed Setup The following describes how the “Lap Display” layout treats the ADL display setup. Note that slightly different Layout and Labelling will be used depending on the setup as described below. MDD Gain / Loss Bar Graph If the ADL Right Numeric is visible and is in decimal format then the gain/loss bar graph will be displayed. The range is ± 0.40 sec if displaying a channel with resolution of 0.01 sec such as the “Lap Time Gain/ Loss” channel. Note that this bar graph may be turned off by leaving the Right Numeric setup blank. MDD Upper Location If the ADL Top Numeric value is visible then the value will be displayed in the upper location. If the value format is decimal then the “Lap Number” label will be displayed, otherwise “Fastest Lap” will be displayed. MDD Lower Location If the ADL Left Numeric is visible then the value will be displayed in the lower location. If the format is a time format (SS.HH or M:SS.HH) then the “Lap Time” label will be displayed otherwise a label will not be displayed. If the ADL Right Numeric is visible and is NOT in decimal format and the ADL Left Numeric is NOT visible the value will be displayed in the lower location and “Predicted Lap” will be displayed. Note that this is normally used with the ADL Left Numeric configured as an override so that when the override value is removed the Predicted Lap Time is displayed. MDD Bottom Location The MDD bottom location mimics the ADL Bottom line. MoTeC ADL Operation 11 5. Vertical Bar Graph Layout for ADL This layout displays 8 channels of data into vertical bar graphs, scaled within a range set by the user. It is also possible to display two marker lines and values. This layout would typically be used to display 8 Exhaust Gas Temperatures, but can be configured to display other channel values. The layout is not based on the ADL display setup, and so will not change when the ADL display mode changes. Example Maximum Marker 1 Marker 2 Minimum The eight bar graph values and the two marker positions are scaled according to the Maximum and Minimum values received from the ADL, within a range of -999 to 9999. Markers Marker numerics move with the marker dots, and are shown if they are within range and do not obscure the Maximum and Minimum numerics. A marker can be removed from the screen by sending a marker value outside of the displayed range. ADL Comms Configuration Unlike most other display layouts, the bar graph displays require two CAN templates to be selected. The first is ‘MDD Transmit (Vertical Bar Graph)’ which sets the display layout. 12 ADL Operation The second template contains the channels to be sent. While these can be configured by the user, included with Dash Manager is a template that contains 8 Exhaust Gas Temperature channels. For this option, choose a second (blank) CAN tab and select the comms template ‘MDD Transmit (8 x EGT)’ If different channels are to be displayed, first select the EGT template then change the EGT channels to the required channels. Do not change any of the other channels and do not modify any other values. Channels Required The Minimum, Maximum, Marker values and the “Display Markers Text” flag must be generated in the ADL configuration so that they can be transmitted to the MDD. The “Display Markers text” flag should be set to 1 if the marker values are to be shown, otherwise it should be set to zero. If these values are to be fixed, or rarely changed, then a value may be assigned in the Inputs | Remote Control screen. The desired value should be set in the Initial Value. The Default Value is not used and should generally be set to zero. The appropriate channels can be found in the MDD Channels | MDD Control category. MoTeC ADL Operation 13 6. Horizontal Bar Graph Layout for ADL This layout displays 8 channels of data into horizontal bar graphs, scaled within a range set by the user. It is also possible to display two markers lines and values. This layout would typically be used to display 8 Exhaust Gas Temperatures, but can be configured to display other channel values. The layout is not based on the ADL display setup, and so will not change when the ADL display mode changes. Example Bar values Minimum Maximum Marker 1 Marker 2 value value The eight bar graph values and the two marker positions are scaled according to the Maximum and Minimum values received from the ADL, within a range of -999 to 9999. Markers Marker numerics do not move with the marker dots, and may be hidden or displayed according to a flag in the user CAN messages. The marker dots can be removed from the screen by sending a marker value outside of the displayed range. ADL Comms Configuration Unlike most other display layouts, the bar graph displays require two CAN templates to be selected. The first is ‘MDD Transmit (Horizontal Bar Graph)’ which sets the display layout. 14 ADL Operation The second template contains the channels to be sent. While these can be configured by the user, included with Dash Manager is a template that contains 8 Exhaust Gas Temperature channels. For this option, choose a second (blank) CAN tab and select the comms template ‘MDD Transmit (8 x EGT)’ If different channels are to be displayed, first select the EGT template then change the EGT channels to the required channels. Do not change any of the other channels and do not modify any other values. Channels Required The Minimum, Maximum, Marker values and the “Display Markers Text” flag must be generated in the ADL configuration so that they can be transmitted to the MDD. The “Display Markers text” flag should be set to 1 if the marker values are to be shown, otherwise it should be set to zero. If these values are to be fixed, or rarely changed, then a value may be assigned in the Inputs | Remote Control screen. The desired value should be set in the Initial Value. The Default Value is not used and should generally be set to zero. The appropriate channels can be found in the MDD Channels | MDD Control category. MoTeC M800 Operation 15 M800 Operation This section describes how to use the MDD with a MoTeC M800 ECU. The MDD is capable of receiving and displaying data transmitted from a MoTeC M800 ECU via a CAN bus. A correctly configured M800 will be automatically detected when the MDD is powered up. There are two modes of operation “User” and “Tuning”, each mode has a number of display layouts as described later in this section. A momentary action switch wired to the MDD is used to move between the display modes and layouts. M800 Version For compatibility with the MDD V1.18, the M800 must be running version 2.11D or later firmware. ECU Configuration The M800 must be configured with the “CAN Data Set” set to 3 and the “CAN Address” set to 232. Note: If an ADL is present on the same CAN bus, it must not be configured to transmit to the MDD. Connections The MDD is connected to the M800 via the CAN bus. For wiring details see Appendix G: Wiring to M800 Operation The MDD has two modes of operation “User” and “Tuning”. There are seven user mode display layouts and ten tuning mode layouts. The mode (User or Tuning) and display layout are changed using the display mode button. • A short button press scrolls to the next screen in the current display mode. • A long button press (1.5 seconds or greater) toggles the display mode and displays a splash screen for the new display mode, as shown below: 16 M800 Operation When a particular layout has been displayed for at least 60 seconds (without a button press) the current layout selection is stored in the MDD. When the MDD is next powered up it will then display this layout. User Mode Layouts for M800 The M800 user mode layout displays four fixed parameters (Gear, RPM, Engine Temperature and Ground Speed) in the top section of the screen. The bottom line of the screen can display one of seven different layouts (selected with the button), or a lap time override if a BR2 is present and lap beacon has been passed (see the BR2 Operation section). The seven user mode layouts are shown below in the order they occur: Lap Time This layout is only shown if a BR2 is present Fastest Lap Time This layout is only shown if a BR2 is present MoTeC M800 Operation Oil Pressure (kPa) Fuel Pressure (kPa) Air Temperature (°C) Manifold Pressure (kPa) Throttle Position (%) Efficiency Point Oil Temperature (°C) Fuel Temperature (°C) 17 18 M800 Operation Fuel Used Lambda Note: If Lambda2 is non-zero and Lambda1 is zero, Lambda2 will be shown. In all other cases Lambda1 will be shown. MoTeC M800 Operation 19 Tuning Mode Layouts for M800 The M800 tuning mode has nine different screen layouts, shown below in the order they occur: RPM Throttle Position (%) Efficiency Point Lambda Note: If Lambda2 is non-zero and Lambda1 is zero, Lambda2 will be shown. In all other cases Lambda1 will be shown. Engine Temperature (°C) Air Temperature (°C) Oil Pressure (kPa) Fuel Pressure (kPa) User Channel 1 User Channel 2 User Channel 3 User Channel 4 Note: Raw values only (no decimal points) are shown for User Channels Air Temperature (°C) RPM Manifold Pressure (kPa) Throttle Position (%) 20 M800 Operation RPM Lambda1 Throttle Position (%) Lambda2 Manifold Pressure (kPa) Lambda1 Short Term Trim Mass Air Flow Lambda2 Short Term Trim Engine Temp (°C) Battery Voltage Oil Pressure (kPa) Left Ground Spd / Digital Input 1 speed Oil Temperature (°C) Right Ground Spd / Air Temperature (°C) Digital Input 2 speed Exhaust Temperature Left Drive Spd / (°C) Digital Input 3 speed Right Drive Spd / Digital Input 4 speed Fuel Injector Duty Cycle (%) Aux Output 1 Duty Cycle (%) Fuel Cut level (%) Aux Output 2 Duty Cycle (%) Ignition Cut level (%) Fuel Actual Pulse Width (mS) Fuel Used Aux Output 3 Duty Cycle (%) Aux Output 4 Duty Cycle (%) MoTeC M800 Operation 21 Active M800 diagnostics are displayed using the same abbreviations as ECU manager diagnostics screen. A maximum of 14 diagnostics can be displayed at any time. Active M800 Status flags are displayed using the same abbreviations as ECU manager status screen. A maximum of 14 status flags can be displayed at any time. BR2 comms status (active or inactive) Firmware version and date MoTeC M4/48 Operation 23 M4/M48 Operation This section describes how to use the MDD with a MoTeC M4 or M48 ECU. The MDD is capable of receiving and displaying data transmitted from a MoTeC M4 or M48 ECU via a serial link. A correctly configured M4/48 will be automatically detected when the MDD is powered up. There are two modes of operation “User” and “Tuning”, each mode has a number of fixed display layouts as described later in this section. A momentary action switch wired to the MDD is used to move between the display modes and layouts. M4/M48 Version For compatibility with MDD V1.18, the M4 or M48 must be running version 6.21b or later firmware. ECU Configuration The M4/M48 ECU musty be configured with the “Telemetry Data Set” set to 5 and the “Telemetry Baud Rate” set to 9601. Note: If an ADL present on the same CAN bus as the MDD it must not be configured to transmit to the MDD. Connections The MDD is connected to the M4 ECU or M48 ECU via a serial link. For wiring details see Appendix E: Wiring to M4 / M48. Operation The MDD has two modes of operation “User” and “Tuning”. There are seven user mode display layouts and seven tuning mode layouts available. The mode (User or Tuning) and display layout are changed using the display mode button. • A short button press scrolls to the next screen in the current display mode. • A long button press (1.5 seconds or greater) toggles the display mode and displays a splash screen for the new display mode, as shown below: 24 M4/48 Operation When a particular layout has been displayed for at least 60 seconds (without a button press) the current layout is stored in the MDD. When the MDD is next powered up it will display this layout. Temperature Units Selection The M4/M48 always transmits engine temperature (ET) and air temperature (AT) in units of degrees Celsius. The MDD may be configured to convert and display ET and AT in degrees Fahrenheit. To swap between temperature units, the display button must be held down for five seconds, until the following warning is displayed: The current temperature mode is stored in the MDD, and may be viewed in the MDD INFORMATION screen in tuning mode. When powered up the MDD will use the mode last set. MoTeC M4/48 Operation 25 User Mode Layouts for M4/M48 The M4/M48 user mode layout displays four fixed parameters (Gear, RPM, Engine Temperature and Ground Speed) in the top section of the screen. The bottom line of the screen can display one of seven different layouts (selected with the button), or a lap time override if a BR2 is present and lap beacon has been passed (see BR2 Operation section). The seven user mode layouts are shown below in the order they occur: Lap Time This layout is only shown if a BR2 is present Fastest Lap Time This layout is only shown if a BR2 is present Auxiliary Voltage 26 M4/48 Operation Auxiliary Temperature Air Temperature (°C) Manifold Pressure (kPa) Throttle Position (%) Efficiency Point Fuel Used Lambda MoTeC M4/48 Operation 27 Tuning Mode Layouts for M4/M48 The M4/M48 tuning mode has seven different screen layouts, shown below in the order they occur: RPM Throttle Position Efficiency Point Lambda Engine Temperature (°C) Air Temperature (°C) Auxiliary Voltage Auxiliary Temperature RPM Throttle Position (%) Manifold Pressure (kPa) Air Temperature (°C) Lambda Lambda Short Term Trim Engine Temperature (°C) Digital Input 1 speed Battery Voltage 28 M4/48 Operation Fuel Injector Duty Cycle (%) Aux Output 1 Duty Cycle (%) Fuel Cut level (%) Aux Output 2 Duty Cycle (%) Ignition Cut level (%) Fuel Actual Pulse Width (mS) Fuel Used Aux Output 3 Duty Cycle (%) Aux Output 4 Duty Cycle (%) A maximum of 14 active M4/M48 diagnostics can be displayed at any time. A maximum of 14 active M4/M48 status flags can be displayed at any time. BR2 comms status (active or inactive) Units conversion status, On (°F) or Off (°C) Firmware version and date MoTeC M8 Operation 29 M8 Operation This section describes how to use the MDD with a MoTeC M8 ECU. The MDD is capable of receiving and displaying data transmitted from a MoTeC M8 ECU via a serial link. There are two modes of operation “User” and “Tuning”, each mode has a number of fixed display layouts as described latter in this section. A momentary action switch wired to the MDD is used to move between the display modes and layouts. M8 Version For compatibility with MDD V1.18, the M8 must be running version 6.05f or later firmware. ECU Configuration The M8 ECU must be configured with the “Telemetry Data Set” set to 1 and the “Telemetry Baud Rate” set to 9601. Note: If an ADL is present on the same CAN bus as the MDD it must not be configured to transmit to the MDD. Connections The MDD is connected to the M8 ECU via a serial link. For wiring details, see Appendix F: Wiring to M8 Operation The MDD has two modes of operation “User” and “Tuning”. There are seven user mode display layouts and nine tuning mode layouts. The mode (User or Tuning) and display layout are changed using the display mode button. • A short button press scrolls to the next screen in the current display mode. • A long button press (1.5 seconds or greater) toggles the display mode and displays a splash screen for the new display mode, as shown below: 30 M8 Operation When a particular layout has been displayed for at least 60 seconds (without a button press) the current layout selection is stored in the MDD. When the MDD is next powered up it will then display this layout. User Mode Layouts The M8 user mode layout displays four fixed parameters (Gear, RPM, Engine Temperature and Ground Speed) in the top section of the screen. The bottom line of the screen can display one of seven different layouts (selected with the button), or a lap time override if a BR2 is present and lap beacon has been passed (see BR2 Operation below, for details). The User Mode layouts for the M8 are identical to those for the M800. See the section on M800 User Mode Layouts (above) for details. Tuning Mode Layouts All but one (shown below) of the tuning mode layouts for the M8 are identical to those for the M800. See the section on M800 Tuning Mode Layouts for details. Fuel Injector Duty Cycle (%) Aux Output 1 Duty Cycle (%) Fuel Cut level (%) Aux Output 2 Duty Cycle (%) Ignition Cut level (%) Fuel Actual Pulse Width (mS) Fuel Used Aux Output 3 Duty Cycle (%) Aux Output 4 Duty Cycle (%) MoTeC BR2 Operation (with ECU) 31 BR2 Operation (with ECU) The MDD is capable of displaying lap time information when connected to a BR2 via CAN. The MDD will display lap time as an override on the bottom line of the display for 25 seconds when a valid beacon signal is received by the BR2 Configuration The BR2 functionality is present when the MDD is connected to an ECU (M800, M4/M48 or M8). The BR2 must be configured (using the BR2 Configuration program) for a CAN Connection, and must have ‘Advanced Configuration’ enabled. The MDD will display lap times and the fastest lap for the first beacon in the Advanced Configuration Settings list. See the BR2 manual for details on configuring the BR2. BR2 Connections The BR2 is connected to the MDD via the CAN bus. See the Appendix E: Wiring to M4 / M48 or Appendix F: Wiring to M8 or Appendix G: Wiring to M800 for further details. Lap Time Display When a correctly configured BR2 passes the appropriate beacon and the MDD is in User Mode, the lap time is displayed in the bottom line of the screen for 25 seconds, or until the button is pressed. The most recent lap time and fastest lap time can be displayed at any time by scrolling to the appropriate User Mode layouts with the button. Lap time and fastest lap time are reset on MDD power up, and if communication to the BR2 32 BR2 Operation (with ECU) is lost. A BR2 power cycle switch would provide a simple method to reset fastest lap before a session. BR2 Beacon Diagnostics If an invalid beacon (i.e. Not the beacon configured in the BR2 to generate lap times) is passed twice without passing a valid beacon, then the BR2 fault message is displayed, as shown below: Note that this condition only applies for the first invalid beacon found after a valid beacon or after power up. The fault message indicates that either the BR2 is not configured correctly for the MDD and for the beacon transmitter being used, or that the beacon transmitter is incorrectly configured, faulty or missing. MoTeC BR2 Operation Standalone) 33 BR2 Operation (Standalone) This BR2 functionality is normally used when the MDD is only connected to a BR2. To use this functionality when an M800 or ADL is present on the same CAN bus as the MDD and BR2, the M800 and/or ADL must be configured so that they do not communicate with the MDD. Configuration The BR2 must be configured (using the BR2 Configuration program) for a CAN Connection, and must have ‘Advanced Configuration’ enabled. The MDD will display lap times and fastest lap time for the first beacon in the Advanced Configuration Settings list. Operation The following screen is displayed, and updated whenever the appropriate beacon is passed: All lap times are cleared when the button is pressed, on MDD power up, and if communication to the BR2 is lost. If communications to the BR2 is lost (or the BR2 is incorrectly configured), the following screen is displayed: 34 Appendices Appendices Appendix A: Specifications Electrical Operating Voltage Range: 6.5V to 15V Reverse polarity protected Operating Current: at normal brightness: 85mA Typical (8V to 14V) at full brightness: 150mA Typical at 14V Environmental Operating Temperature Range: -10°C to 70°C Internal (65°C Ambient Typical) Weight: 120grams (0.26 lb) Approx. Dimensions (W x H x D): 85.8 x 59.5 x 21.9 mm (3.38 x 2.34 x 0.86 in) Communications CAN Interface 1 Mbit/sec Serial 9600 baud, Logic Level. MoTeC Appendices 35 Appendix B: MDD Diagnostics Warning Message CAN Wiring No CAN data CAN WARNING Bad CAN data NO RS232 DATA WAITING FOR DEVICE DATA BUTTON STUCK CHECK WIRING TEMPERATURE UNITS CHANGED Description A CAN error is detected Check that CAN Hi and Lo wires are not swapped, and that the CAN bus is correctly terminated No CAN messages have been received for two seconds from an ADL or M800. Check wiring CAN error counts are close to error thresholds The M800 telemetry stream is not the correct length Check that CAN Data Set 3 has been selected in the M800 configuration No M4/M48/8 data has been received for three seconds. Check wiring No device (ADL, ECU or BR2) has been found at power up. Check wiring The button on an MDD connected to an M800 has been closed for more than 5 seconds. Switch may be jammed The button on an M4/M48 has been held down for 5 seconds and the units conversion mode has been toggled. Example Note: BR2 Diagnostic messages are described in the section on BR2 Operation. 36 Appendices Appendix C: Special Enunciator Strings The ADL layouts on the MDD can display the following special enunciator strings, as configured from Dash Manager. ADL Enunciator Setup MDD Enunciator Displayed OT + OP RPM ET + FP FUEL SPEED + TIME SPLIT TIME OT + TIME FASTEST TIME OT + ET BRAKE BIAS % OT + FP LAMBDA OP + FP AIR FUEL RATIO OT + LAP PREDICTED LAP SPEED + LAP FASTEST LAP All other enunciator combinations will be displayed as “INVALID ENUNC” on the MDD MoTeC Appendices 37 Appendix D: General CAN Bus Wiring The CAN bus should consist of a twisted pair trunk with 100R (0.25Watt) terminating resistors at each end of the trunk. The preferred cable for the trunk is 100R Data Cable but twisted 22# Tefzel is usually OK. The maximum length of the bus is 16m (50ft) including the MoTeC CAN Cable (PC to CAN Bus Communications Cable) CAN Devices (such a MoTeC ADL, BR2 etc) may be connected to the trunk with up to 500mm (20in) of twisted wire. The connector for the CAN Communications Cable may also be connected to the trunk with up to 500mm (20in) of twisted wire and should be within 500mm of one end of the trunk. If desired two CAN Cable connectors may be used so that the MoTeC CAN Cable may be connected to either side of the vehicle. Both connectors must be within 500mm of each end of the trunk. Minimum one twist per 50mm (2in) CAN-HI CAN-LO 0V 8V CAN Device eg BR2 CAN Device eg MDD CAN-HI CAN-LO 500mm Max CAN-HI CAN-LO CAN-HI CAN-LO 100R 100R << CAN Bus >> 500mm Max CAN Cable Connector 1 These wires must be Twisted CAN-HI 5 CAN-LO 4 3 100R Terminating Resistors at each end of the CAN Bus 500mm Max CAN Device eg ADL Short CAN Bus If the CAN Bus is less than 2m (7ft) long or there is only one CAN device then a single termination resistor may be used at the opposite end of the cable as the CAN Cable connector. 38 Appendices Appendix E: Wiring to M4 / M48 ECU The diagram below shows how to connect the MDD to an M4 or M48. Note: Splice MDD Power and Ground close to ECU M4 / M48 25 BAT11 Tx 1 BAT+ BATNote 1 BAT+ Display Mode Button MDD BATRX BAT+ CAN-LO CAN-HI 1 2 3 4 5 6 Note1: M4 (Pre M4e) and all M48 will require splicing with the 9pin PC communications connection M4/48 and BR2 The diagram below includes a BR2 Lap Beacon receiver For detail on CAN Bus wiring refer to Appendix D: General CAN Bus Wiring. Note: Splice MDD Power and Ground close to ECU 25 BAT11 Tx 1 BAT+ BATBAT+ Display Mode Button MDD 1 2 3 4 5 6 CAN-HI CAN-LO 8V 26 BR2 1 2 3 8V Power 4 CAN-LO 5 CAN-HI BAT- See the General CAN Bus Wiring for details CAN-HI CAN-LO 100R 100R BATRX BAT+ CAN-LO CAN-HI M4 / M48 MoTeC Appendices 39 Appendix F: Wiring to M8 ECU The diagrams below show how to connect the MDD to the M8. Note: Splice MDD Power and Ground close to ECU BATNote 1 BAT+ 1A, 13A BATD9 pin 5 Tx 2A, 14A BAT+ Display Mode Button MDD BATRX BAT+ CAN-LO CAN-HI M8 1 2 3 4 5 6 Note1: May be spliced with the PC communications connection by making a short 9pin to 9pin adapter lead (no longer than 300mm) M8 and BR2 The diagram below includes a BR2 Lap Beacon receiver For detail on CAN Bus wiring refer to Appendix D: General CAN Bus Wiring. Note: Splice MDD Power and Ground close to ECU 1A, 13A BATD9 pin 5 Tx 2A, 14A BAT+ BATBAT+ Display Mode Button MDD 1 2 3 4 5 6 CAN-HI CAN-LO 8V 11A BR2 1 2 3 8V Power 4 CAN-LO 5 CAN-HI BAT- See the General CAN Bus Wiring for details CAN-HI CAN-LO 100R 100R BATRX BAT+ CAN-LO CAN-HI M8 40 Appendices Appendix G: Wiring to M800 ECU The wiring below shows how to connect the MDD to the M800. For detail on CAN Bus wiring refer to Appendix D: General CAN Bus Wiring. BATBAT+ MDD BATRX BAT+ CAN-LO CAN-HI M800 / M880 1 2 3 4 5 6 BATBAT+ Note: CAN Cable connector not shown Display Mode Button B24 / 47 CAN-LO B23 / 48 CAN-HI See the General CAN Bus Wiring for detail 100R CAN-HI CAN-LO 100R CAN-HI CAN-LO M800 and BR2 The diagram below includes a BR2 Lap Beacon receiver BATBAT+ MDD 1 2 3 4 5 6 BATBAT+ Display Mode Button 8V B24 / 47 CAN-LO B23 / 48 CAN-HI A13 / 2 CAN-HI CAN-LO BR2 1 BAT2 3 8V Power 4 CAN-LO 5 CAN-HI CAN-HI CAN-LO See the General CAN Bus Wiring for details Note: CAN Cable connector not shown 100R 100R BATRX BAT+ CAN-LO CAN-HI M800 / M880 MoTeC Appendices 41 Appendix H: Wiring to ADL The wiring below shows how to connect the MDD to the ADL. For more detail on the CAN Bus wiring refer to Appendix D: General CAN Bus Wiring. BATBAT+ MDD 1 2 3 4 5 6 BATBAT+ 73 or 75 CAN-LO 74 or 76 CAN-HI CAN-HI CAN-LO 100R 100R BATRX BAT+ CAN-LO CAN-HI ADL See the General CAN Bus Wiring for details Note: CAN Cable connector not shown 42 Appendices Appendix I: MDD Connector & Wire Colours Mating Connector Deutsch: RM68056C Wire Wire to suit connector: 22# Tefzel, Mil Spec: M22759/16-22 Wire Colours There are two versions of wire colours released: Pin Version 1 Version 2 Function 1 Black Black Bat - 2 Brown Blue Data/mode button 3 Red Red Bat + 4 Orange Green CAN Lo 5 Yellow White CAN Hi MoTeC Appendices Appendix J: Case Dimensions 43 MoTeC Notes 45 46 Notes