1
Setting the System Date and Time
To set the system time, enter [✱] [6] followed by the Master Code. Press [1]. The keypad will now
accept 10 consecutive digits:
• Enter the Time in Hours and Minutes using the 24 Hour format (00:00 to 23:59).
• Enter the Date in Months, Days and Years (MM DD YY).
NOTE: If you have an LCD keypad, your installer may have programmed your system to display the
time and date while the keypad is idle. If this is the case, you may have to press the [#] key to clear
the date and time before entering an access code to arm the system, or before performing any
other keypad function.
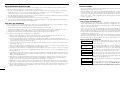
Testing Your System
Alarm Test
The Alarm Test provides two second test of the keypad sounder and bell or siren. Begin with the panel
in the Ready state.
From an LED keypad, Enter [✱][6][Master Code][4] then press [#] to return to the Ready state.
From an LCD keypad, press [✱] to enter the functions list. Use the arrow (< >) keys to scroll to find
“ User Functions” and press [✱] to select. Enter your Master Code and scroll to find the following
message...
Select Option <> Press [✱] to perform an Alarm Test. The keypad will display the following message...
System Test
System Test
In Progress
Press [#] to return to the Ready state.
Full System Test
Disarming the System
Disarming from an LED Keypad:
Enter the premises through a designated Exit/Entry door; entering by any other door will sound an
immediate alarm. As soon as the Exit/Entry door is opened, the keypad will beep to indicate that the
system should be disarmed. Go to the keypad and enter your access code. If an error is made
entering the code, re-enter your code correctly. As soon as the correct code is entered, the Armed
light will go out and the keypad will stop beeping.
The correct access code must be entered before the entry delay period expires. If a valid access
code is not entered during this time, the system will go into alarm. The entry time delay may be
changed by your installer.
If an alarm occurred while the system was armed, the Memory light (or System light on a PC1555RKZ
keypad) and the zone light corresponding to the zone which caused the alarm will flash for 30
seconds. After the 30 second period, the Memory (or System) light and zone light will stop flashing
and the panel will return to the Ready state. Pressing the [#] key during the 30 second period will
cancel the alarm memory display. To view other alarms, press [✱][3].
If a trouble was detected when the panel is disarmed, the Trouble light (or System light on a
PC1555RKZ keypad) will turn ON (See “ Viewing Trouble Conditions” on page 11 to determine the
source of the trouble.) Please note that troubles will not display while the system is in the Alarm
Memory Display mode.
Disarming from an LCD Keypad:
Upon entering through a designated Exit/Entry door, the keypad will beep and the entry delay will
commence, reminding you to disarm the system. The keypad will display the following message...
Enter your access code. If an error is made in entering the code, re-enter the
Entry Active
Enter Your Code code correctly. When a valid access code is entered, the keypad will stop
beeping. If no alarms occurred while the panel was armed, and there are no
troubles, the display will read...
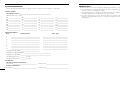
We recommend that you test your system weekly. Should the system fail to function properly, call your
installation company immediately for service.
NOTE: Perform system tests during off-peak hours, such as early morning or late evening.
1. Inform the monitoring station that you are testing your system.
2. Begin with the system in the Ready state.
3. Perform a Bell/Battery test by pressing [✱][6][Master Code][4]. The bell and keypad buzzer will
sound for two seconds and all keypad lights will turn ON. Press [#] to exit.
4. Activate each sensor in turn (e.g. open a door/window or walk in motion detector areas).
From an LED keypad, observe the zone light turn ON when the zone is activated. The zone light will
turn OFF when the system restores to normal (i.e. door or window closed).
From an LCD keypad, the following message will be displayed when each zone is activated...
Use the arrow (< >) keys to view which zone is open. This message will
Secure System
Before Arming <> disappear when the zone is restored.
System Disarmed
No Alarm Memory
After about five seconds, the system will return to the Ready state and the display
will read...
Enter Code to
Arm System
View Memory <> If an alarm occurred while the system was armed, this message will be displayed.
“Zone of Alarm” Use the arrow (< >) keys to view which zones caused the alarm. If a zone is still in
alarm, the display will show the following message to indicate that a zone is open...
Secure System
Before Arming <>
Upon disarming and if a trouble is present, this message will be displayed. Use the
Enter Code to
Arm System
<> arrow (< >) keys to view which troubles are affecting the system (see “ Viewing
Trouble Conditions” on page 11).
5. If the panel has any fire zones, activation will cause the alarm signal to sound in a pulsed mode.
CAUTION: Do not use an open flame or burning materials to test a smoke or heat detector.
Contact your installer for information on safe methods of testing detectors.
6. When testing is complete, call and advise the monitoring station. Should the system fail to function
properly, contact your installer.
12
NOTE: Some features described above will not be functional unless enabled by your installer.
Please ensure that your installer has advised you which features are functional on your system.
NOTE: If you return and find that an alarm has occurred while you were away, it is possible that
an intruder may still be on the premises. Go to a neighbour's house, and call the local police to
investigate.
The alarm memory is cleared each time the panel is armed so that any alarms showing are
alarms that occurred only during the last armed period.
5