1
Artisan Technology Group is your source for quality
new and certified-used/pre-owned equipment
• FAST SHIPPING AND
DELIVERY
• TENS OF THOUSANDS OF
IN-STOCK ITEMS
• EQUIPMENT DEMOS
• HUNDREDS OF
MANUFACTURERS
SUPPORTED
• LEASING/MONTHLY
RENTALS
• ITAR CERTIFIED
SECURE ASSET SOLUTIONS
SERVICE CENTER REPAIRS
Experienced engineers and technicians on staff
at our full-service, in-house repair center
WE BUY USED EQUIPMENT
Sell your excess, underutilized, and idle used equipment
We also offer credit for buy-backs and trade-ins
www.artisantg.com/WeBuyEquipment
InstraView REMOTE INSPECTION
LOOKING FOR MORE INFORMATION?
Visit us on the web at www.artisantg.com for more
information on price quotations, drivers, technical
specifications, manuals, and documentation
SM
Remotely inspect equipment before purchasing with
our interactive website at www.instraview.com
Contact us: (888) 88-SOURCE | [email protected] | www.artisantg.com
Micro Analytical Gradient Integrated Chromatograph 2002
MAGIC 2002 TM
Operator’s Manual
Version 2.0
Part No. 602-00000-00
01/99
Artisan Technology Group - Quality Instrumentation ... Guaranteed | (888) 88-SOURCE | www.artisantg.com
TABLE OF CONTENTS
Page
Warranty & Service Agreement Information
5
Safety Information
6
System Requirements
9
List of Spare Parts
10
Chapter 1
I.
II.
III.
Instrument Description
Overview
Basic Components
Hardware Description
11
11
12
15
Chapter 2
I.
II.
III.
IV.
V.
Basic Operation
System Startup
Operating the MAGIC 2002TM
System Shutdown
System Maintenance
Re-Installing a MAGIC 2002TM
23
23
27
36
36
39
Chapter 3
I.
II.
III.
IV.
V.
Options
Selecting Flow Range Kits for Optimum HPLC Conditions
Capillary Flows
Auto sampler
Trapping Options
Fraction Collector
41
41
42
45
47
47
Appendix
I.
II.
III.
Troubleshooting Guide
Configuring the MAGIC 2002TM for use with Data Acquisition
Configuring the MAGIC 2002TM for Control only
51
51
55
63
2
Artisan Technology Group - Quality Instrumentation ... Guaranteed | (888) 88-SOURCE | www.artisantg.com
Figures
1.
2.
3.
4.
5.
6.
7.
8.
9.
10.
11.
12.
13.
14.
15.
16.
17.
18.
19.
20.
21.
22.
23.
24.
25.
26.
27.
28.
29.
30.
31.
32.
33.
34.
35.
36.
37.
38.
39.
40.
41.
42.
43.
44.
Page
MAGIC 2002TM with PC
MAGIC 2002TM with doors open
Rear Panel
Right Side Panel
Helium Panel
Solvent Select Panel & UV/Vis Lamps Panel
Pump skid Face Plate
Injection Valve Panel
Column Compartment (Opened)
Flow Cell Assembly with Photodiode
UV/Vis Lamps Compartment (Opened)
EZChrom Elite Client/Server Screen
Instrument Status/Preview Screen
Instrument Setup of Temperature Controller Screen
Instrument Setup of Pumps Screen
Instrument Setup of External Events Screen
Instrument Setup of Data Acquisition Channels Screen
Instrument Setup of Detector Screen
Instrument Setup of Trigger Screen
Single Run Acquisition Screen
Michrom BioResources, Inc. Peptide Standard Chromatogram
Run Sequence Screen
Instrument Status of Temperature Controller Screen
Instrument Status of Pumps Screen
Instrument Status of External Events Screen
Instrument Status of Detector Screen
Check Valve Replacement
Pump head Replacement
Capillary Setup
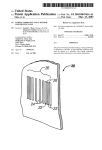
MAGICTM Variable Splitter
Auto sampler Wiring Diagram
Auto sampler Plumbing Diagram
Fraction Collector Wiring Step 1
Fraction Collector Wiring Step 2
Fraction Collector Wiring Step 3
EZChrom Elite Client/Server Screen
Interface Configuration Screen
SS420 Configuration Screen
EZChrom Elite Client/Server Screen
EZChrom Elite Client/Server Screen
Interface Configuration Screen
MAGIC Configuration Screen
Event Configuration Screen
MAGIC Pump Configuration Screen
11
12
13
14
16
17
18
20
21
21
22
25
26
28
28
29
29
30
30
31
32
33
34
34
35
35
38
39
42
43
46
46
48
49
50
55
55
56
56
57
57
58
58
59
3
Artisan Technology Group - Quality Instrumentation ... Guaranteed | (888) 88-SOURCE | www.artisantg.com
Figures Continued
Page
45.
46.
47.
48.
49.
50.
51.
52.
53.
54.
55.
56.
57.
58.
59.
60.
61.
60
60
60
61
61
62
63
63
64
64
65
65
66
66
67
68
68
MAGIC Detector Configuration Screen
MAGIC Temperature Controller Configuration Screen
Detector Configuration Screen (UV 1)
Detector Configuration Screen (UV 2)
Detector Configuration Screen (Fraction Collector)
Detector Configuration Screen (Pressure)
EZChrom Elite Client/Server Screen
Interface Configuration Screen
CIO/DIO Configuration Screen
EZChrom Elite Client/Server Screen
EZChrom Elite Client/Server Screen
Instrument Configuration Screen
MAGIC Configuration Screen
Event Configuration Screen
MAGIC Pump Configuration Screen
MAGIC Detector Configuration Screen
MAGIC Temperature Controller Configuration Screen
Tables
Page
1.
2.
3.
4.
19
41
59
67
Mixer Cartridges
Flow Rate Optimization by Column Dimension
Data Acquisition Event Configuration
MAGIC Control Only Event Configuration
4
Artisan Technology Group - Quality Instrumentation ... Guaranteed | (888) 88-SOURCE | www.artisantg.com
WARRANTY & SERVICE AGREEMENT
MAGIC TM Warranty Policy
Michrom BioResources, Inc. (the “Company”) warrants the Micro Analytical Gradient
Integrated Chromatograph 2002 TM (MAGIC 2002TM ) for a period of one year from the
date of delivery by the Company to the original buyer against defects in materials and
workmanship under normal use and maintenance, as described in the operating
instructions within this manual. This warranty covers all of the MAGIC 2002TM
components, excluding expendable items such as columns, check valves, pistons, piston
seals, lamps, trap cartridges, rotors, purge valves, bottles and tubing. The exclusive
remedy for defects in material and workmanship, at the option of Michrom
BioResources, Inc., shall be replacing or repairing the parts determined to be defective.
This warranty is void in the event the MAGIC 2002 TM is altered or modified other than
by or at the direction of Michrom BioResources, Inc.
The foregoing warranty is exclusive and all other warranties, whether expressed or
implied, including any warranties of merchantability and warranties of fitness for
purpose, but without limitation thereto, are expressly excluded. Under no circumstances
shall the company be liable for any consequential damages or any indirect or incidental
damages.
Service Agreements
After the expiration of the warranty period, extended service agreements are available for
purchase through Michrom BioResources, Inc. Please contact Michrom BioResources,
Inc. for detailed information on current service agreement options.
5
Artisan Technology Group - Quality Instrumentation ... Guaranteed | (888) 88-SOURCE | www.artisantg.com
SAFETY INFORMATION
This manual contains warnings and precautionary statements that can prevent personal
injury, instrument damage, and loss of data if properly followed.
Specific Hazards
Every instrument has specific hazards associated with it. Reading and complying with
the following precaution instructions will help ensure the instrument’s safe long-term use
and the operator’s personal safety.
1.
Before supplying power to the MAGIC 2002TM HPLC (High Performance Liquid
Chromatograph), check to ensure that the voltage and fuses are set appropriately
for your local power supply. Never run the instrument at more than 8% below the
nominal line voltage!
2.
The power cord must be inserted into a power outlet with a protective earth
contact (ground). When using an extension cord, make sure that it is also
grounded.
3.
Do not change the external or internal grounding connections. Tampering with or
disconnecting these connections could endanger you and/or damage the
instrument.
4.
Never operate the instrument with the top cover removed except during
troubleshooting procedures under the direction of a Michrom BioResources, Inc.
service representative.
5.
Do not turn the instrument on if you suspect that it has incurred electrical damage.
Disconnect the power cord and contact Michrom BioResources, Inc. or its
authorized representative in your area.
6.
Damage can result if the instrument is stored for prolonged periods of time under
unfavorable conditions (e.g., temperature extremes, humidity, etc.). Prior to
prolonged storage or shipment, the instrument should be thoroughly flushed with
wash solvent (40/40/20 Acetonitrile/n-propanol/H2O) to remove salts, buffers,
acids, bases or other chemicals that could cause corrosion or precipitation in the
system.
7.
Always disconnect the power cord before attempting any type of electronic
maintenance.
6
Artisan Technology Group - Quality Instrumentation ... Guaranteed | (888) 88-SOURCE | www.artisantg.com
8.
Capacitors inside the instrument may still be charged even if the instrument is
turned off. Proper precautions should be taken when working with electronic
components in the instrument.
9.
Never try to repair or replace an instrument component not described in this
manual without first consulting Michrom BioResources, Inc., or its authorized
representative in your area.
Good Laboratory Practices
•
Maintaining Records Michrom BioResources, Inc. recommends that records of
system operating conditions be maintained. At a minimum, keep a chromatogram of
a standard test mixture along with the associated system conditions. Careful
comparison of retention times, peak shapes, column pressure, peak sensitivity, and
baseline noise can provide valuable clues to identifying and solving problems.
•
Chemical Toxicity The large volume of toxic and flammable solvents used and
stored in laboratories can be potentially dangerous. In addition, the potential
hazards posed by samples should be recognized. Special care should be taken to
follow all precautions necessary to ensure proper ventilation, storage, handling, and
disposal of both solvents and samples. Become familiar with the toxicity data and
potential hazards associated with all chemicals by referring to the manufacturers’
Material Safety Data Sheets (MSDS).
•
Sample Preparation Filter samples that might contain particulate matter using a
0.45µm filter. Always consider the solubility of your sample in the mobile phase.
Sample precipitation can plug the system by obstructing the flow through the injector
and/or column. This obstruction may result in damage to parts of the system. If
possible, samples should be dissolved in the starting mobile phase (Solvent A) or a
solvent of lower chromatographic mobility than the mobile phase.
•
Solvent Requirements Many chemical manufacturers provide high-purity or
spectro-quality reagents that are free of chemical impurities. Typically, HPLC-grade
solvents do not require filtration. Choose a mobile phase that is compatible with the
sample and a column that is specific for your separation requirements. The structural
materials that comprise the solvent fluid pathway in the MAGIC 2002TM include
stainless steel, ceramic, sapphire, quartz and PEEK. Caution should be taken when
using strong acids, strong bases, non-volatile buffers, THF (Tetrahydrofuran) and
Chlorinated solvents.
•
Degassing the Solvents Degas the solvents as instructed under the Basic Operation
section in this manual (Chapter 2; Section I.).
•
Solvent Disposal All solvent waste lines on the MAGIC 2002 TM terminate in the
solvent waste container in the waste compartment on the right side of the instrument.
7
Artisan Technology Group - Quality Instrumentation ... Guaranteed | (888) 88-SOURCE | www.artisantg.com
Empty the waste container on a regular basis. Many solvents have special disposal
requirements. Follow all governmental regulations when disposing of any chemical.
•
High-pressure Systems and Leaks Little danger arises from the pressure in an
HPLC system. However, if a leak does occur, it should be corrected as soon as
possible in order to maintain system integrity and operator safety. It is recommended
that eye and skin protection be utilized as standard laboratory attire when working on
an HPLC system and that the system be shut down and returned to atmospheric
pressure before attempting maintenance.
8
Artisan Technology Group - Quality Instrumentation ... Guaranteed | (888) 88-SOURCE | www.artisantg.com
SYSTEM REQUIREMENTS
Power:
100-240 VAC/47-63 hz/600Va
Gas:
Helium, 20-200 PSI, high pressure input
System control:
Windows 95 (or NT 4.0) Full Digital Control
Location:
Ventilation slots (air inlet and air outlet) for the column forced-air
compartment require at least 2 inches of clearance
The air inlet to the instrument is located in the front of the
waste/wash bottle compartment (See Figure 4, page 14)
The air outlet (cabinet fan) from the instrument is located on the
top rear panel (See Figure 3, page 13)
Environmental:
Temperature 20-25 degrees Celsius
Humidity 20-90%
Physical:
Size: 19”w x 26”h x 23”d
Weight: 140 lbs.
PC Requirements:
CPU: Pentium 166 MHz minimum
Memory: (Minimum Requirements)
NT
Win95
Clients
32MB
24MB
EZServers
64MB
N/A
Network: Microsoft networking (TCP/IP req. for client server)
O/S: Win95 service pack 1 (DCOM95 1.1 req. for client server)
WinNT 4.0 service pack 3
Disk: At least 80 MB free disk space
Note: Service packs and DCOM95 are available on the Elite 2.1
CD-ROM
Note: Do not use Open GL Screen Savers with EZChrom Elite.
Controller Kit:
MAGIC 2002TM HPLC Control System
OR
MAGIC 2002TM HPLC Control/Data System
Flow Range Kit:
Analytical Flow Range Kit
OR
Microbore Flow Range Kit
OR
Capillary Flow Range Kit
9
Artisan Technology Group - Quality Instrumentation ... Guaranteed | (888) 88-SOURCE | www.artisantg.com
LIST OF SPARE PARTS AND CONSUMMABLES
SPARE PARTS
Part Number
004-32012-01
004-61027-00
004-32033-00
003-51003/00
003-51004/00
003-51005/00
003-51006/00
Description
O-ring, Viton
Bottle, 1000mL, Plastic coated
Bottle, Nalgene 2L
Fuse, GMA, 5x20, 5A, 250VAC
Fuse, GMA, 5x20, 3.5A, 250VAC
Fuse, GMA, 5x20, 2.5A, 250VAC
Fuse, GMA, 5x20, 2A, 250VAC
CONSUMMABLES
Part Number
602-25011-99
602-25027-88
602-25028-88
200-39000-00
004-25106-00
004-25131-88
004-25003-00
004-25004-00
004-25005-00
004-25006-00
004-25027-00
004-65023-00
004-25094-00
004-25008-00
004-25009-00
004-32001-00
004-32002-00
004-32004-00
Description
Pump head Rebuild
Replacement Check Valve, Inlet
Replacement Check Valve, Outlet
Replacement Deuterium Lamp
2u Titanium Filer Assy
Repair Kit, Helium Check valve Assembly
Upchurch 1/16 SS Male Nut
Upchurch 1/16 SS Ferrule
Valco 1/16 SS Male Nut
Valco 1/16 SS Ferrule
Union, ZDV, Peek, 10-32
Upchurch 10-32 Delrin Plug
Optimize 10-32 Delrin Plug
Upchurch Lite-Touch 10-32 Nut
Upchurch Lite-Touch Ferrule, Front and Rear
Tubing, Peek, .007”
Tubing, Peek, .010”
Tubing, Peek, .030“
10
Artisan Technology Group - Quality Instrumentation ... Guaranteed | (888) 88-SOURCE | www.artisantg.com
CHAPTER 1
INSTRUMENT DESCRIPTION
I. Overview
The MAGIC 2002TM is the first of a new generation of HPLC systems designed to let the
user translate methods from analytical to microbore levels with no impact on the
separation. The MAGIC 2002TM’s dual pump high pressure binary gradient solvent
delivery system will deliver accurate gradient flows from 0.5µl/min to 5.0 ml/min. The
system will accept a wide range of column sizes from 50µm to 10mm ID and from 50mm
to 250mm in length. Conventional analytical columns or Michrom BioResources, Inc.’s
custom microbore columns or capillary columns can be utilized. The built-in dual
wavelength UV/Vis detector has flow cells to cover the entire gradient flow range.
Auxiliary detectors, including fluorescence, electrochemical, radioactivity or mass
spectrometer can be added with no impact on extra column band broadening. The
MAGIC 2002TM design allows for the connection of peripheral devices and accessory
items that automate sampling, fraction collection and online sample preparation.
Figure 1 MAGIC 2002TM with PC
11
Artisan Technology Group - Quality Instrumentation ... Guaranteed | (888) 88-SOURCE | www.artisantg.com
II. Basic Components
The MAGIC 2002TM is a fully integrated HPLC system optimized for speed, sensitivity,
recovery, and capacity without compromising reproducibility or resolution.
Figure 2 MAGIC 2002TM with doors open
2 Channel UV/Vis Detector
Dual Piston Pumps
Column Oven
Solvent Degas System
Autoinjector
Mixer Body
FEATURES
Dual Range Piston Pumps Micro flow or analytical pump heads deliver degassed
solvents at precise flows down to 1% of total flow.
Unique Flow Dynamics Thorough mixing, rapid flush out, optimized post-column
collection with minimum volumes.
Custom Columns Michrom BioResources, Inc. custom columns thread directly into
micro or capillary flow cells, eliminating extra column volume; conventional columns
can also be used with a standard column adaptor (Microbore P/N 602-25026-01;
Analytical P/N 602-25026-02).
12
Artisan Technology Group - Quality Instrumentation ... Guaranteed | (888) 88-SOURCE | www.artisantg.com
DESCRIPTION OF INSTRUMENT REAR PANEL
Figure 3 Rear Panel
Input Configuration
Pressure Outputs
External Inputs
Data System
PC I/O
UV Outputs
PC RS-232
Remote I/O
Cabinet Fan
Helium Input
Input Configuration A series of switches for On/Off control of the Data System inputs.
External Inputs The location for the input of external signals to the data acquisition
system (i.e. auxiliary detectors). The input configuration switch for the external input
must be placed in the “on” position for the data system to accept an external input signal.
Data System The connection between the Data system PC board and the MAGIC
2002TM 25-pin A/D connector.
PC I/O The connection between the Data System PC board (or the I/O PC board) and
the MAGIC 2002TM 15-pin I/O connector.
Remote I/O Remote I/Os that are programmable in a Procedure (A, B, C) (i.e., Fraction
Collector start), and external input and output for auto sampler interfacing.
PC RS-232 Connection between the PC RS-232 board and the MAGIC 2002TM 78-pin.
UV Outputs The connections between MAGIC 2002TM and external devices to collect
UV data.
Pressure Outputs The connections between the MAGIC 2002TM and external devices
to collect pressure information.
Helium Connections The location for connection of Helium to the MAGIC 2002TM.
The recommended input is 20-200 PSI.
13
Artisan Technology Group - Quality Instrumentation ... Guaranteed | (888) 88-SOURCE | www.artisantg.com
DESCRIPTION OF RIGHT SIDE PANEL
Figure 4 Right Side Panel
Flow Cell Outlet Access Port
P h l
Air Inlet for Forced
Air Oven
Waste Compartment
Wash Bottle
Waste Container
Injection Valve Access Port
Main Power Switch
Waste/Wash Compartment Compartment designed to house the waste container and
wash solvent bottle.
Waste Container 2-liter Nalgene bottle (Note: All Solvent waste lines should go into
the waste bottle and the bottle should be emptied when the waste solvent reaches the
waste lines. If not, waste solvent may back flow out to the manual injection port.)
Wash Solvent Bottle 1-liter solvent bottle for wash solvent (40/40/20 ACN/ProH/H20).
Main Power Switch Contains power entrance block, main fuses, power switch and
voltage select switch.
Flow Cell Outlet Access Port Provides accessibility to flow cell outlet for flow
measurements or connection to peripheral devices (mass spectrometer, fraction collector,
etc.)
Injection Valve Access Port Provides accessibility to injection valve for auto sampler
or other in-line devices.
14
Artisan Technology Group - Quality Instrumentation ... Guaranteed | (888) 88-SOURCE | www.artisantg.com
III. Hardware Description
This section provides the user with a better understanding of the MAGIC 2002TM HPLC
system and its components.
Solvent Degas/Pressurization System
The Helium input line is located on the rear instrument panel (Refer to Figure 3,
page 13). There is an additional Helium output for attachment of accessory
devices such as the Michrom BioResources, Inc. Pulseless Flow Module. The
solvent degas system internally regulates pressure to 6 PSI. The system gas is
split to independently degas and pressurize the A/B solvent bottles, and to
pressurize the wash solvent bottle.
Solvent Bottle Degas/Pressurization System
There are two switching valves above the solvent bottles on the inside front door
of the pump compartment (Refer to Figure 5, page 16). The first valve is a
Helium shutoff valve and is used to introduce or interrupt Helium flow to the A/B
solvent bottles. Please note that this shutoff valve does not stop Helium flow to
the wash solvent bottle. The second valve is the Pressurize/Sparge valve. In the
sparge position, this valve allows Helium to freely enter the solvents and remove
Oxygen (degas solvents). Excess air and Helium are vented from the solvents and
bottles. When the Pressurize/Sparge valve is in the pressurize position, the bottles
are sealed and placed under 6 PSI of head pressure on the solvents. Prior to
opening a bottle to replace solvent, the Helium shutoff valve must be closed and
the Pressurize/Sparge valve turned to the Sparge position. This action allows
the bottles to vent and releases system pressure.
The Helium to the solvent bottles has two functions. First, it serves to degas
solvents by removing air that can cause problems with pumping, separation and
detection in the HPLC. Second, it equalizes the pressure on the two solvents.
This pressure equalization provides the stability required for the reproducible
solvent delivery system necessary to form gradients between solvents of varying
viscosities.
15
Artisan Technology Group - Quality Instrumentation ... Guaranteed | (888) 88-SOURCE | www.artisantg.com
Figure 5 Helium Panel
Sparge/Vent
Valve
Helium On/Off
Valve
Wash Bottle Pressurization System
The delivery of Helium to the wash bottle is constant at 6 PSI. There is no shutoff
valve for this gas line. When replacing the wash solvent, depressurize the wash
bottle prior to opening the bottle. To depressurize the wash bottle, place the
Helium valve on the Helium panel in the “Off” position (Refer to Figure 5), turn
off the Helium source to the instrument, and then vent the bottle by loosening the
Delrin plug on the cap insert.
The solvent in the wash bottle serves several functions. The wash solvent washes
behind the pump piston seals at a flow rate of 5-10 µl/min to clear away any
particulate matter or salts that may damage the seals or pistons. The wash behind
the pump pistons continually flows to waste, and any leaks that occur because of
worn primary piston seals are also vented to waste. Note: The piston wash
continually flows at 5-10 µl/min as long as the wash bottle is pressurized with a
Helium source. The Wash Solvent level should be checked regularly to ensure
that the wash bottle solvent is never depleted, as this can cause rapid loss of
Helium from the source and may damage the pistons and piston seals. Another
function of the wash solvent is to flush the system of potential harmful mobile
phases or to clean the system prior to shutdown. To flush the system with wash
solvent, point the solvent selection valves (Refer to Figure 6, page 17) inward
toward the wash position.
16
Artisan Technology Group - Quality Instrumentation ... Guaranteed | (888) 88-SOURCE | www.artisantg.com
High Pressure Pumps
The system contains two pumps (Refer to Figure 2, page 12), an upper pump
(Pump A) and a lower pump (Pump B). Solvents are delivered to the pump heads
from either the solvent bottles on the door or the wash solvent on the right side
instrument panel. The solvent from the “A” bottle travels through the left side
solvent select valve (Refer to Figure 6) into the upper pump head. Solvent from
the “B” bottle travels through the right side solvent select valve into the lower
pump head. If the solvent select valves are positioned inward toward “Wash”,
then the wash solvent travels through the pump heads. If the solvent select valves
are in the upward or “Off” position, no solvent is going to the pump head. The
solvent select valves interrupt solvent flow to the pump heads that occurs due to
Helium head pressure on the solvents. Positioning the valves in the “Off”
(upward position) allows the operator to change the column, injector loops, mixer
or pump heads without depressurizing the A/B Solvent bottles. Never turn the
solvent select valves to the upward position if the pumps are running. Operating
the pumps without solvent supplied to the pump heads may cause permanent
damage to the pump head seals and pistons.
Figure 6 Solvent Select Panel & UV/Vis Panel
Solvent
Selection Panel
UV/Vis Lamp
Compartment
A Pump
(Upper Pump)
Solvent
Selection Valve
B Pump
(Lower Pump)
Solvent
Selection Valve
The pump status indicators are on the left portion of each pump faceplate (Refer
to Figure 7, page 18). The power indicator LED (light emitting diode) should be
on whenever the power to the instrument is on. The pump status flow indicator
LED should be lit when the pumps are operating. The Pmin (pressure minimum)
indicator light will flash when a pump error has occurred due to low system
pressure. The default Pmin value is Zero, therefore, the pumps will continue to
run even if the purge valves are open or the system has developed a leak. The
Pmax (pressure maximum) indicator light will flash when a pump error has
occurred due to high pressure. The default Pmax is 5000 PSI, which should stop
17
Artisan Technology Group - Quality Instrumentation ... Guaranteed | (888) 88-SOURCE | www.artisantg.com
the pumps without causing system leaks. Please contact Michrom BioResources,
Inc. before attempting to change the default Pmin and Pmax settings.
Figure 7 Pump Skid Faceplate
Purge Valve and
Pressure Transducer
Outlet Check
Valve
Pump Status
Indicators
Pump Head
Inlet Check
Valve
The pump heads are located to the right of the purge valve (Refer to Figure 7).
The pump heads are mounted onto the pump drive by four Allen head screws.
The MAGIC 2002TM offers either analytical heads for gradient flows between 0.1
and 5 ml/min or microbore heads for gradient flows between 20 and 1000 µl/min.
Capillary flows are also achieved using the microbore pump heads in conjunction
with a pre-column flow splitter for gradient flows between 0.1 and 10 µl/min.
The two solvent lines located on the back of each pump head (top and bottom) are
the wash solvent lines for solvent flow behind the pump head piston seals. The
inlet solvent line from the solvent select valve is located on the lower left side of
the pump head. An inlet check valve is the interface between the inlet line and
the pump head. The outlet check valve is located on the upper left side of the
pump head and is the solvent path to the lower right side of the pump head.
Solvent exits the pump head from the upper right side and is directed into the
bottom of the purge valve via a stainless steel tube.
The purge valve (Refer to Figure 7) houses the pressure transducer. There are
three solvent lines attached to the purge valve. The stainless steel inlet line from
the pump head is located on the bottom of the purge valve. The PEEK line to the
mixer is located on the top of the purge valve. The Teflon line on the right side of
the purge valve is routed to the waste container. The purge valve in the closed
position (completely clockwise until finger tight) allows solvent to flow through
the PEEK line exiting the top of the purge valve to the mixer. The volume from
the purge valve to the mixer is approximately 65µl. The purge valve turned
counter clockwise to the open position allows for the venting of solvent and air to
waste via the Teflon line exiting the purge valve to the left. Further discussion on
displacing air bubbles from the pumps using the purge valves is found in Chapter
18
Artisan Technology Group - Quality Instrumentation ... Guaranteed | (888) 88-SOURCE | www.artisantg.com
2 (Section I) under System Startup. It is not necessary to fully open the valve
(multiple full revolutions of the valve) during purging.
Variable Volume Mixer
Solvent passes from the pumps to the dual stage, variable volume mixer (Refer to
Figure 8, page 20) located below the column oven compartment adjacent to the
10-port injector valve. The first stage is a static vortex mixing tee that is followed
by a high pressure static mixer cartridge. The cartridges are designed to provide
effective gradient delay volumes with effective mixing to cover the gradient range
of the MAGIC 2002TM (Refer to Table 1). The housing for the mixer cartridge is
mounted onto the valve/actuator panel of the instrument for easy accessibility.
Table 1 MAGICTM Mixer Cartridges
Cartridge Size Physical
Volume
Total Sweep Out Volume
Effective
Range
50 µl
100 µl
200 ul
500 µl
1000 µl
~50µl
~100µl
~200µl
~500µl
~1000µl
20-100µl/min
40-200µl/min
100-500µl/min
500-2500µl/min
500-5000µl/min
18 µl
36 µl
72 µl
180 µl
360 µl
Flow
Rate
To reduce baseline noise and maximize reproducibility for slow (<1%/min) high
sensitivity gradient runs, use a larger mixer volume. For fast (>1%/min) gradients
and faster system re-equilibration, use a smaller mixer volume.
Injector Valve
The flow input from the mixer routes to the 10-port injector valve (Refer to
Figure 8, page 20). This valve is for sample loading and provides additional ports
for flexibility in sample handling. The standard loop volume for microbore flows
is 20 µl, although loops ranging from 0.5-1000µl are available. Michrom
BioResources, Inc. trap cartridges for concentrating and desalting samples (see
Trapping Options in Chapter 3) can also be used as sample loops. There is an
electronic switch on the left side of the valve for manual load/inject positioning of
the valve. The injector sensing/positioning is also controlled from the software
via both Control/Instrument Status and Method/Instrument Setup menus. The
injector position and port connections can also be observed on the
Control/Instrument Status screen. Samples can be manually loaded with a syringe
through the manual injection port located on valve port number one. Valve port
one is located on the top of the valve and is accessible with the door closed. The
volume from the mixer to the end of the column inlet line with a 20 µl loop is
approximately 40 µl.
19
Artisan Technology Group - Quality Instrumentation ... Guaranteed | (888) 88-SOURCE | www.artisantg.com
Figure 8 Injection Valve Panel
Manual Injection
Switch
Manual
Injection
Port
Mixer
10 Port Injection
Valve
Column Compartment and Flow Cell
The column compartment is a temperature controlled forced-air heated oven. The
column oven compartment door is located in the top portion on the front right
hand side of the MAGIC 2002TM . The compartment door is hinged on the bottom
(Refer to Figure 9, page 21) so that the top of the door moves out and down to
allow access to the column, UV detector photodiode and flow cell assembly. The
opening of this door causes the temperature controller to shut off. The
compartment is designed to handle various internal diameter columns and column
lengths up to 250 mm. Conventional columns are connected to the flow cell
assembly using a Michrom BioResources, Inc. Standard Column Adapter.
Michrom BioResources, Inc. columns are connected directly into the bottom of
the flow cell assembly.
The flow cell assembly (Refer to Figure 10, page 21) consists of an outer diode
(secured to the mounting plate with two thumb screws), mounting plate, flow cell
holder, flow cell and flow cell outlet line. The flow cell is held in the holder by
the outlet line and a locking nut. An analytical system consists of a 5 mm path
length flow cell (2.4 µl volume) with a 0.007 inch ID outlet line (5 µl volume).
The microbore assembly consists of a 2 mm path length flow cell (0.3 µl volume)
with a 0.003 inch ID output line (1 µl volume). A capillary assembly consists of a
2 mm path length flow cell (0.02 µl volume) with a 0.002 inch ID outlet line
(0.6µl volume). The flow cell output line is attached to the waste line via the
stainless steel bulkhead union located on the ceiling outside the column
compartment. Alternatively, the flow cell outlet line can be routed to an auxiliary
detector and/or fraction collector by attachment through the access port in the
upper right side using a zero-dead-volume union or tee (See Spare Parts List,
page 10).
20
Artisan Technology Group - Quality Instrumentation ... Guaranteed | (888) 88-SOURCE | www.artisantg.com
Figure 9 Column Compartment (Opened)
Flow cell
Assembly with
Photodiode
Flow cell Outlet
Tube
Column
Column Inlet Tube
Figure 10 Flow Cell Assembly with Photodiode
Outlet Tube
Photodiode
Flow Cell
Flow Cell Holder
21
Artisan Technology Group - Quality Instrumentation ... Guaranteed | (888) 88-SOURCE | www.artisantg.com
UV/Vis Detector
The UV/Vis detector is located above the upper pump (A solvent pump) in the
pump compartment. Removing the UV/VIS compartment front cover allows
access to the UV lamp compartment (Refer to Figure 11). The UV/Vis lamp
compartment houses the pre-aligned Deuterium (D2) lamp (UV) and Tungsten
lamp (Vis). The MAGIC 2002TM operates in either single or dual wavelength
modes. The lamp compartment cover must be installed for the lamp to operate. If
the cover is removed, the lamp will turn off. The lamp will restart (re-fire) and
the wavelength will reset when the door is reinstalled.
Figure 11 UV/Vis Lamps Compartment (Opened)
D2 Lamp (UV)
Tungston
Lamp (Vis)
D2 Lamp Hour
Meter
22
Artisan Technology Group - Quality Instrumentation ... Guaranteed | (888) 88-SOURCE | www.artisantg.com
CHAPTER 2
BASIC OPERATION
Initial installation of the MAGIC 2002TM is normally performed by Michrom
BioResources, Inc. personnel or their authorized agents. Instrument installation includes
power, cabling, Helium, pump heads, flow cell, column, solvent bottles, and accessories.
The gas and solvent connections, system controller (data system), and accessory
connections are made on site and system integrity is verified. If the MAGIC 2002TM
system is removed or shipped to a new location, note the cabling configuration for proper
reinstallation. If problems arise after moving the MAGIC 2002TM, contact Michrom
BioResources, Inc. or the authorized representative in your area for technical support.
Note: The MAGIC 2002TM is shipped with two lock-down screws for each pump
fastened to the back of the instrument. These screws are normally removed during
installation to allow access to the pump compartments from the front of the instrument.
Note: Although the system can be moved without these lock-down screws in place, it
should not be shipped without replacing these lock-down screws.
I. System Startup
Column Installation
Michrom BioResources, Inc.’s microbore columns (0.5, 1.0 and 2.0 mm ID) are
designed to thread directly into the Flow Cell Holder (refer to Figure 9, page 21).
Michrom BioResources, Inc.’s capillary columns (0.1, 0.2 and 0.3 mm ID) are
designed to thread into a specially designed Flow Cell Inlet tube. A standard
column adapter (P/N 602-25026-01) should be used with all non-Michrom
BioResources, Inc. columns that use conventional 10/32 end fittings. The column
inlet line should be connected to the column inlet (or guard column inlet) or be
directed to a waste reservoir prior to pressurizing the MAGIC 2002TM solvents
with Helium. Helium head pressure (6 PSI) will cause solvent flow with no
system back pressure if the solvent select valves are in the A/B or wash postions.
Note: It is recommended that all pump flows be turned off whenever installing
or changing a column.
Solvent Sparging and Detection of Helium Leaks
Confirm that all solvent containers have the appropriate solvents and are properly
sealed. The solvent bottle cap inserts form a seal between the Viton o-ring and
the bottle tops when pressurized with Helium. Inspect the tops of the bottles for
chips and/or cracks and ensure that each o-ring is properly seated in the groove on
23
Artisan Technology Group - Quality Instrumentation ... Guaranteed | (888) 88-SOURCE | www.artisantg.com
the underside of the cap insert prior to tightening the caps on the bottles. The
system is shipped with plastic coated bottles with plastic pouring rings removed
from the top. If other bottles are to be used with the MAGIC 2002TM, verify they
are clean and crack/chip free before use. Although the Viton o-rings are very
inert, some organic solvents can cause the o-rings to swell in size. If the o-ring
does not fit into the grove in the cap insert, it should be removed and replaced
with a new o-ring. If the swollen (oversized) o-ring is not torn or cut, it can be
stored in a drawer and will return to its original size in a few days. The MAGIC
2002TM is shipped with 3 spare o-rings.
Turn on the Helium source to the instrument. Helium should be regulated to the
instrument between 20 and 200 PSI. This pressure is then regulated within the
instrument to 6 PSI. Please note that once the Helium source is on, Helium will
be delivered to the wash Bottle. To allow Helium to be delivered to the Solvent A
and Solvent B bottles, open the Helium valve located above the solvent bottles
(Refer to Figure 5, page 16). To open the valve, place the valve in the On
position. A moderate bubbling of gas should be observed in the A and B bottles
with the opening of the Helium valve. Prior to pressurizing the solvent bottles,
sparging should be performed. To sparge the bottles (degas solvents), simply
select Sparge/Vent on the Sparge/Vent valve next to the Helium On/Off valve.
After one to three minutes of sparging, the Sparge/Vent valve should then be
turned to Pressurize. While the solvent bottles are pressurizing, the instrument
should be checked for Helium leaks. Check for gas leaks around the solvent bottle
caps and all associated fittings. Also, check for Helium leaks around the inlet
fitting to the instrument, the Helium On/Off valve and the Sparge/Vent valve.
The system is completely pressurized when no more bubbling is observed in the
bottles. This may take as little as 10 minutes or as much as several hours
depending on the type of solvents used, and the solvent level in each bottle.
Solvent Flow to the Pump heads
Prior to turning the pumps on, confirm that there is solvent flow to the pump
heads. To check for flow at the pump heads, adhere to the following procedure.
Turn the Solvent Select valves (Refer to Figure 6, page 17) to the desired solvent,
open the purge valves (Refer to Figure 7, page 18) and observe the Teflon waste
line exiting the purge valve to the right for flow of solvent and/or air bubbles.
Allow the Helium head pressure to force the solvents through the pumps for 3-5
minutes before closing the purge valves. This procedure should be followed for
the A/B solvents and/or the wash solvent any time the solvent inlet lines have
gone dry. The above process is not necessary during routine solvent changes or
when refilling the solvent bottles.
24
Artisan Technology Group - Quality Instrumentation ... Guaranteed | (888) 88-SOURCE | www.artisantg.com
Powering up the PC & the MAGIC 2002TM
After solvent flow has been established to the pump heads, power can be supplied
to the computer and instrument. The main power switch to the instrument can be
found on the right side panel toward the rear of the instrument (Refer to Figure 4,
page 14). Allow 2-3 minutes for the detector to initiate diagnostic routines before
starting the MAGIC 2002TM control software on the computer. To open the
control software, double click on the MAGIC 2002TM icon. At the EZChrom
Elite Client/Server screen (Refer to Figure 12) double click on MAGIC 2002TM to
access the instrument control and data acquisition windows.
Figure 12 EZChrom Elite Client/Server Screen
Initial System Operation
The initial control of the MAGIC 2002TM is through the Instrument Status
window. To access the Instrument Status window, click on Control and select
Instrument Status (Refer to Figure 13, page 26). The solvent select valves are
normally in the Off position prior to initial system startup and need to be
manually changed to select wash solvent or solvents A and B prior to enabling the
pumps using the Control/Instrument Status Magic Pump window (Refer to Figure
24, page 34). Note: It is necessary to click on status enable to verify pump head
type prior to running or purging the pumps.
25
Artisan Technology Group - Quality Instrumentation ... Guaranteed | (888) 88-SOURCE | www.artisantg.com
Figure 13 Instrument Status/Preview Screen
Purging Pumps to Remove Air
The pump purge flow rate for each pump is 1 ml/min for microbore pump heads
and 5 ml/min for analytical pump heads. The pumps are purged to remove air in
the solvent lines and to replace wash solvent with gradient solvents to the column
inlet. The minimum purge time required to displace system solvents and/or air
bubbles is approximately 30 seconds. With solvent flow verified to the pump
heads (Refer to page 24 “Solvent Flow to the Pump heads”), close the purge
valves, ensure solvent select valves are set to the wash solvent position and direct
the column inlet line to a waste container. The system purge control is found on
the Magic Pump tab in the Control/Instrument Status window (Refer to Figure 24,
page 34). Disable the Status Enabled (if checked) and click on the Pumps On,
Purge On for both pumps A and B then, click on Manual Set. A warning box will
be displayed for each pump to open purge valves as a precautionary reminder in
case the column is in the solvent pathway. Opening the purge valves is not
required if the column inlet line is removed from the column prior to purging.
With both pumps purging at 1.0 ml/min, pressure should build to between 300600 PSI and a continuous stream of solvent should be exiting the column inlet line
(Note: Pressure can be viewed from the Magic Pump Status screen, or if running
with the 4-channel data system option, a graphical display of pressure can be
obtained on Channel D by using the Preview button on the tool bar).
26
Artisan Technology Group - Quality Instrumentation ... Guaranteed | (888) 88-SOURCE | www.artisantg.com
If the flow and/or pressure are inconsistent, the A and B purge valves should be
opened and closed until no air bubbles are observed in the purge valve exit line
and the flow and pressure stabilize (Change in pressure should be no greater than
±50 PSI). Once good flow is established for both pumps with wash solvent, the
purge/prime procedure should be repeated for solvents A/B. After purging is
complete, close the purge valves, and return the pumps to the control of the
method by removing the check marks from the Purge On for both pumps, setting
the flow rate and %B, clicking on Manual Set and then clicking on Status
Enabled. At this time, the tubing can be reconnected to the column inlet and the
column allowed to equilibrate prior to running samples.
System Pressure Stabilization
Allow the system to equilibrate at the optimum column flow rate at 50% B until
pressure and baseline are stable (5 to 15 minutes). Set the %B to 95% for 5 to 10
minutes to flush the column, then set the %B to the initial conditions for the
method to be executed (i.e., 5%B) and wait until the pressure and UV baselines
are stable.
II. Operating the MAGIC 2002TM
The MAGIC 2002TM control and data acquisition system is based on the EZChrom Elite
Client/Server platform. The purpose of this section is to provide step-by-step instructions
for creating or editing a MAGIC 2002TM method. This section also describes how to use
the Instrument Status window for direct access and control of each of the MAGIC
2002TM’s components. If the MAGIC 2002TM was purchased with only the control
software, the information in this section will provide the necessary information for
running the instrument. If the system was purchased with the control and data system
option, detailed explanations of all the data system functions can be found in the
EZChrom Elite on-line manual on the CD-ROM.
Creating or Editing a Method
The method is edited in the Instrument Setup window. To access the Instrument
Setup window, click on Method and select Instrument Setup or click on the
button on the toolbar. Each component of the MAGIC system has a separate tab
for entering data (Refer to Figures 14-19, pages 28-30). To create or edit a
method, click on the appropriate tab, position the cursor in the appropriate field
and enter the appropriate data. An example of a method typically used for a
1.0mm ID column is provided on the following pages. The values that can be
edited are in white and items that cannot be edited are gray. After creating a new
method or editing an existing method, save the method prior to running it in the
single run or sequence run mode. Methods will be saved automatically with a
.met extension unless otherwise specified.
27
Artisan Technology Group - Quality Instrumentation ... Guaranteed | (888) 88-SOURCE | www.artisantg.com
Figure 14 Instrument Setup of Temperature Controller Screen
Enter the desired temperature for the method.
Acceptable range is from 20 to 60 oC.
Figure 15 Instrument Setup of Pumps Screen
Select the type of
pump head
installed on the
MAGIC.
Enter the gradient information for the method run.
Select which pump
or pumps that you
want flowing in the
method.
Enter total run time
for the method.
Select the injector valve position. This is the position the injector will be
in while the method waits for a trigger.
Selects between table and graphic display of
the gradient information. Must select table
to edit the gradient.
28
Artisan Technology Group - Quality Instrumentation ... Guaranteed | (888) 88-SOURCE | www.artisantg.com
Figure 16 Instrument Setup of External Events Screen
Select the output
that you want to
occur during the
method run.
Enter the time that you
want the output to
occur.
Enter the amount of
time that you want
the output to be
active.
Select the active state of
the output. Choices are:
Open or Closed.
Figure 17 Instrument Setup of Data Acquisition Channels Screen (Same for all
channels)
Select to turn on the data acquisition channel for
the method run.
Enter the
amount of
time you
want to
delay the
start of the
data
acquisition
after a
trigger has
been
received.
Select the
sample rate for
data
acquisition.
Faster sample
rates = larger
data files, more
resolution.
Enter the
amount of time
to acquire data.
Note: The screens for data acquisition will only be displayed in the method if the
data system option was purchased as part of the MAGICTM control software
29
Artisan Technology Group - Quality Instrumentation ... Guaranteed | (888) 88-SOURCE | www.artisantg.com
Figure 18 Instrument Setup of Detector Screen
Select which
lamp is on for
the method
run. Note: If
you select
Dual Vis for
number of
wavelengths,
you must have
both lamps on.
Select this if
you want the
detector to
auto zero on a
wavelength
change during
the method
run.
Enter the
time and
wavelength
for the
method run.
Normally
this will be
set at time
zero with no
changes
during the
method run.
Enter the total run time for the method.
Select the number of wavelengths for the method
run. Choices are: Single, Dual UV or Dual Vis.
Figure 19 Instrument Setup of Trigger Screen
Select the type of trigger that you want to start the method. Choices
are: None, Manual and External. Use External when you want
another device (like an autosampler) to start the method.
30
Artisan Technology Group - Quality Instrumentation ... Guaranteed | (888) 88-SOURCE | www.artisantg.com
Single Run
A single run can be performed by clicking on the dark blue single arrow on the
tool bar (Refer to Figure 13, page 26). This will bring up the Single Run
Acquisition Screen (Refer to Figure 20).
Figure 20 Single Run Acquisition Screen
To verify that the system is operating properly, analyze a standard using the
appropriate flows for the column of choice (Refer to Chapter 3, Section I, page
41). If a 1.0mm ID column is in-line, simply use the method as created in figures
14-19. Prior to starting a run, flush the sample loop with A Solvent to ensure that
the loop is free of organic solvent greater than 5%. Load a syringe with the
appropriate amount of test mixture, and then load the syringe contents into the
sample loop (Refer to Chapter 3 Section I for column capacity). For example: If a
1.0mm ID peptide column is in-line, load the syringe with 5µl of A Solvent and
10µl of the 10ng/µl Synthetic Peptide Test Mix (Part Number 910-00002-02), and
then load the loop with the syringe contents. Once the sample loop has the
appropriate contents, start the run. An example of a typical test chromatogram on
31
Artisan Technology Group - Quality Instrumentation ... Guaranteed | (888) 88-SOURCE | www.artisantg.com
a 1.0mm ID peptide column (Part Number 900-61211-00) is provided below
(Refer to Figure 21).
Figure 21 Michrom BioResources, Inc. Peptide Standard Chromatogram
150
150
UV 1
UV 1
UV 1
UV 1
UV 1
100
50
50
0
mAU
mAU
100
0
-50
0.0
2.5
5.0
7.5
10.0
12.5
15.0
17.5
20.0
22.5
25.0
27.5
-50
30.0
M inutes
Column Type
Size
Part #
Dimensions
Gradient
Solvent A
Solvent B
Flow Rate
Test Mix
MAGIC MS C18
5µ
µ 200A
900-61211-00
1.0 X 150mm
5%B-65%B in 20 min
2/98/0.1% ACN/H2O/TFA
90/10/0.09% ACN/H2O/TFA
µl/min
50µ
Part # 910-00002-02, Synthetic Peptide Test Mix
Sequences
Sequences link individual methods together for multiple, automated runs.
Sequences can be created method by method or by multiple runs of the same
method. To create a sequence, click on File (Refer to Figure 13, page 26), choose
Sequence, then choose New Sequence and follow the Sequence Wizard. Save the
sequence once the wizard is finished. To run a sequence, click on the green
double arrows button on the tool bar (Refer to Figure 13, page 26). This will pull
up the Run Sequence Screen (Refer to Figure 22, page 33). Please refer to the
EZChrom on-line manual on the CD-ROM for details.
32
Artisan Technology Group - Quality Instrumentation ... Guaranteed | (888) 88-SOURCE | www.artisantg.com
Figure 22 Run Sequence Screen
Instrument Status
The Instrument Status window is where direct control of each of the MAGIC
2002TM components can be performed. Manually setting individual parameters
can also be performed, as well as monitoring the status of the current operating
conditions during a single method or sequence run. To open the Instrument Status
window, click on Control (Refer to Figure 13, page 26) and select Instrument
Status. Each component of the MAGIC 2002TM system has a separate tab (Refer
to Figures 23-26, page 34-35) in which to enter data and/or monitor status. If no
check mark is present in the Status Enabled box, data can be entered into any
white field. When the Manual Set button is clicked, all of the values in the fields
are sent to the instrument and take effect immediately. When there is a check
mark in the Status Enabled box, the fields reflect the current instrument
conditions. The Status Enabled box should always be checked during a single
method or sequence run. Although the Manual Set function can be used to
change conditions manually during a run, these changes will not be saved with the
method or data file, making it difficult to interpret results at a later time. If a
method run is not going as expected (no peaks or sample elutes at time zero), the
method should be stopped and Manual control used to change, flush out and reequilibrate the system prior to restarting a run.
33
Artisan Technology Group - Quality Instrumentation ... Guaranteed | (888) 88-SOURCE | www.artisantg.com
Figure 23 Instrument Status of Temperature Controller Screen
Displays the MAGIC column
heater temperature when Status
Enabled is checked. Allows for
entry of temperature when
Status Enabled is not checked.
Updates all fields with current
instrument operating conditions.
When the Status Enabled is not
checked, clicking on this button
sends the value in the Temperature
o
C field to the MAGIC, effective
immediately.
Figure 24 Instrument Status of Pumps Screen
Updates all fields with current
instrument operating conditions.
Updates the instrument with
the values in all of the fields.
Displays or sets the
total system flow rate.
Displays the
installed pump
heads when Status
Enabled is checked.
Note: The first
time the software is
launched, you must
set Status Enabled
before you can
send data to the
pumps.
Displays the status
of the pump flow
when Status
Enabled is checked.
Allows starting and
stopping flow when
used with the
Manual Set button.
Displays or sets
the %B.
Displays
or sets the
Injector
valve
position.
Also
shows
which
ports are
connected
in each
position.
When used with the Manual Set button,
allows purging of the pumps to remove
air bubbles. Note: You must Manual
Set to start and stop purging.
Displays the method run
time when Status Enabled
is checked.
Displays total
system pressure
when Status
Enabled is checked.
34
Artisan Technology Group - Quality Instrumentation ... Guaranteed | (888) 88-SOURCE | www.artisantg.com
Figure 25 Instrument Status of External Events Screen
Updates all fields with current
instrument operating conditions.
Updates the instrument with
the values in all of the fields.
Displays the status of the events in real time when the Status
Enabled is checked. Displays if the pumps are in High Flow or
Low Flow modes. Can be used with the Change box to set events.
Putting a check mark in the On and
Change boxes and clicking on Manual
Set will cause that event to happen.
Figure 26 Instrument Status of Detector Screen
Updates all fields with current
instrument operating conditions
when checked.
Updates the instrument with
the values in all of the fields.
Allows manual auto zero of
the detector when used with
the Manual Set button.
Displays the
current number
of wavelengths
when Status
Enabled is
checked. Allows
setting of number
of wavelengths
when used with
the Manual Set
button.
This box
shows when
the detector
is running a
method.
Must have
Status
Enabled
checked.
Displays or sets
the primary
wavelength
information.
Displays or sets
the secondary
wavelength
information.
Displays
lamp
status or
allows
Manual
Set to turn
lamps on
or off.
Displays primary and
secondary absorbance in
real time when Status
Enabled is checked.
Displays primary and
secondary sample
energy when Status
Enabled is checked.
Displays primary and
secondary reference
energy when Status
Enabled is checked.
35
Artisan Technology Group - Quality Instrumentation ... Guaranteed | (888) 88-SOURCE | www.artisantg.com
III. System Shutdown
When the system is not in use, an orderly shutdown procedure should be followed to help
maintain the instrument.
Daily Shutdown
At the end of the day, run the shutdown procedure. If a group of samples is being
analyzed, simply attach the shutdown procedure to the end of the sequence. The
Shutdown procedure allows the pumps to flow at a rate of 10 µl/min at 50% B
with the detector lamps off.
Short Term Shutdown
If the instrument will be shutdown for a few days or if running solvents that are
too corrosive to leave in the pumps or column, run the shutdown procedure using
wash solvent rather than solvents A & B.
Long Term Shutdown
If the instrument is to be shutdown for more than a few days, a more extensive
shutdown procedure may be necessary. First, flush the system with wash solvent
for approximately 30 minutes at the appropriate flow rate for the column in use.
Second, turn the pumps off and close the controller software. Turn the solvent
select valves to the upward (Off) position so that no solvents are selected. Power
off the instrument and PC. If Helium is still being supplied to the instrument,
wash solvent will continue to be flushed through the pump head pistons.
If the instrument is to be shut down for an indefinite period of time or to be
moved, then the system should also be depressurized and the Helium source shut
off. To depressurize the system, first turn the Helium Valve to Off and choose
Sparge/Vent on the Helium panel. Unscrew the Delrin plug on the cap insert of
the wash bottle to allow the gas to escape. Retighten the Delrin plug once the gas
has escaped.
IV. System Maintenance
Proper maintenance of the instrument will help prolong the life of the MAGIC 2002TM
and its components. Change solvents on a regular basis to help to keep contamination
problems and/or particulate formation from occurring. Routinely check all solvent levels
and fill the reservoirs as needed so as not to run the system dry. Follow the proper
shutdown procedure to help prolong the life of the pump heads and detector lamps.
36
Artisan Technology Group - Quality Instrumentation ... Guaranteed | (888) 88-SOURCE | www.artisantg.com
Solvent Replacement
Whenever replacing solvents the system will need to be depressurized prior to
opening the bottles. First turn all pump flows off and place the solvent select
valves in the upward (Off) position. Turn the Helium to the Off position on the
Helium panel and the Sparge/Vent valve to Sparge/Vent. Turn the main Helium
supply off, and then vent the wash bottle by loosening the Delrin plug and
allowing the gas to escape. The solvents can be replaced once the system has
been completely depressurized. Once the solvents are replaced, then the system
should be re-pressurized and checked for Helium leaks as discussed on page 22
under “Solvent Sparging and Detection of Helium leaks”.
Measuring Flow Rates
Flow measurement readings should be taken with the column in-line for
consistent back pressure. Flow measurements are taken from the flow cell outlet
tube for accurate readings. To take a flow measurement, the following items are
needed: a union (Part Number 004-25027-00), the manual injection port (from
port 1 of the injection valve), and a syringe with appropriate volume to see 2-5
minutes of flow.
Prior to taking flow measurements, allow the system pressure to stabilize at the
desired flow rate and initial gradient conditions. Once the system pressure is
stable, disconnect the flow cell outlet tube from the stainless steel bulkhead union
in the ceiling of the column compartment. Take the line, along with the long
PEEK nut, and place it through the access port near the bulkhead union on the
right panel of the instrument. Screw the union onto the PEEK nut that is now in
the access port in the right panel. Remove the Manual Injection Port (Refer to
Figure 8, page 20) from port 1 of the injection valve, and connect it to the union.
A syringe can now be placed in the manual injection port to take flow
measurements. For troubleshooting low or high flows, please refer to the
Troubleshooting Guide at the end of this manual. Once the desired flow rate is
achieved and/or confirmed, a standard can be analyzed to verify that the system is
running properly.
Replacing Check Valves
To replace an inlet and/or outlet check valve on a pump head, all pump flow and
solvent flow must first be stopped. Remove the old check valve from the check
valve housing by loosening the associated tubing from the housing with a ¼”
open ended wrench and then loosen the housing itself with a ½” open ended
wrench (Refer to Figure 27, page 38). Note the orientation of the old check valve
before it is removed. Dry the inside of the housing and then place the new check
valve inside the housing with the proper orientation (The Outlet check valve
arrow should be pointing away from the pump head. The Inlet check valve arrow
should be pointing toward the pump head.) Reinstall the housing to the pump
37
Artisan Technology Group - Quality Instrumentation ... Guaranteed | (888) 88-SOURCE | www.artisantg.com
head and the tubing to the housing. Do not over tighten. Once the new check
valve is in place, follow the procedure outlined on page 24 under “Solvent Flow
to the Pump Heads” and then purge the pumps to remove air as described on page
26 under “Purging Pumps to Remove Air”.
Figure 27 Pump head
Replacing Pump heads
Prior to replacing a pump head, stop all pump flows and solvent flows, close
EZChrom Elite software, and turn the power to the instrument off. Remove the
tubing (Refer to Figure 28, page 39) by using a ¼” open ended wrench and then
remove the pump head by unscrewing the four Allen screws. To install the new
pump head, simply reattach the tubing and Allen screws. Once the new pump
head is installed, turn the power to the instrument back on and allow the detector
to re-initialize prior to re-opening the EZChrom Elite software. Verify solvent
flow to the pump heads by following the procedure outlined on page 24 under
“Solvent Flow to the Pump heads” and then purge the pumps to remove air as
outlined on page 26 under “Purging Pumps to Remove Air”.
38
Artisan Technology Group - Quality Instrumentation ... Guaranteed | (888) 88-SOURCE | www.artisantg.com
Figure 28 Pump head
Replacing Detector Lamps
Prior to changing either detector lamp (D2 or Tungsten), close the controller
software and power the instrument off. Remove the cover from the UV lamp
compartment as shown on page 21 (Refer to Figure 11, page 22). Disconnect the
appropriate plug from the connector and remove the lamp by unscrewing the
associated thumb screw(s). Replace the lamp, reconnect the plug to the connector
and place the cover back on the UV lamp compartment. The instrument can now
be powered on.
V. Re-Installing The MAGIC 2002TM
If an instrument has been moved and/or needs to be installed by someone other than a
Michrom BioResources Inc. specialist, follow the procedure below for Helium
connection and power connection. Refer to the section in this manual entitled “System
Startup” (Chapter 2; Section 1, page 23) for guidelines to getting the system operational.
39
Artisan Technology Group - Quality Instrumentation ... Guaranteed | (888) 88-SOURCE | www.artisantg.com
Helium
Helium must be connected to the MAGIC 2002 for proper solvent delivery to the
pumps. Helium is connected to the rear panel of the MAGIC using a 1/8 inch
brass Swagelok nut and ferrule and 1/8 inch PEEK tubing (Refer to Figure 3,
page 13). The other end of the tubing is connected to a Helium source regulator
set between 10 and 200 PSI. DO NOT TURN HELIUM ON TO THE
INSTRUMENT AT THIS TIME.
Install solvent bottles A and B (filled with the appropriate solvents) in the front
left door of the instrument (Refer to Figure 2, page 12). Install the wash solvent
bottle (filled with the appropriate solvent) in the waste compartment located in the
rear of the right side panel of the instrument (Refer to Figure 4, page 14). Turn
the Helium On/Off valve located on the inside of the left front door to the Off
position (Refer to Figure 5, page 16). Turn the “Pressurize Sparge/Vent” valve to
the Pressurize position. Set Helium flow to the MAGIC 2002TM by opening the
valve on the Helium source. Turn the Helium On/Off valve to the On position
(Refer to Figure 5, page 16). The filters in the bottom of the solvent bottles will
begin to bubble (sparge) Helium into the solvents. This sparging will continue
until the bottles are fully pressurized.
Power
The MAGIC 2002TM can accept voltages of 100-120V AC and 220-240V AC.
The power entrance to the MAGIC 2002 is located at the rear of the right side
panel (Refer to Figure 4, page 14). This is where the power cord to the
instrument is inserted and where the voltage selection switch is located. The
MAGIC 2002TM is shipped with 115V AC as the default voltage selection, unless
otherwise specified. If the instrument needs to be changed to 230V AC, remove
the power cord to the instrument. Remove the voltage selection switch block
using a small screwdriver. Change the fuses so that a 2.0A fuse is on the side
labeled 110V-120V and a 2.5A fuse is on the side labeled 220V-240V. Insert the
voltage selection block so that the white down arrow under the 220V-240V lines
up with the white up arrow on the voltage selection socket on the MAGIC
2002TM. Switch the voltage select switch to the 230V AC setting. The MAGIC
2002TM can run at 100V AC by keeping the original fuses in place at the 115V
AC setting and simply changing the setting on the back of the UV/Vis Detector
from 120V AC to 100V AC.
40
Artisan Technology Group - Quality Instrumentation ... Guaranteed | (888) 88-SOURCE | www.artisantg.com
CHAPTER 3
OPTIONS
I. Selecting Flow Range Kits for Optimum HPLC Conditions
Gradient delay volume, equilibration volume, sample injection volume and extra column
volume can be optimized using the MAGIC 2002TM to achieve the true theoretical gains
in sensitivity with microbore and capillary columns. The MAGIC 2002TM has been
especially designed to be flexible for changing between analytical (100-5000µl/min),
microbore (20-1000µl/min) and capillary flows (0.1-20µl/min) with the use of Flow
Range Kits (Analytical, Microbore or Capillary). Each Flow Range Kit optimizes the
system for that particular flow range to allow for the best sensitivity.
As shown in Table 2, the HPLC column diameter should be matched to the capacity of
analytes (retained components of the injected sample) to insure optimum
chromatography. Too large a sample load may cause excessive band spreading,
saturation of detection and/or contamination of the column. However, too small a sample
load may cause excessive analyte dilution, limited detection signal to noise and/or
nonlinear recovery due to excess adsorptive surfaces. Sample injection volume can also
be a rate-limiting step, since sample volumes greater than 10% of the column volume
may contribute to band broadening (unless specialized loading techniques are employed).
Table 2 HPLC Column Capacity & Flow Conditions
Column
ID
µ)
(µ
5cm
Bed Vol
µl)
(µ
50
0.1
100
0.4
200
Analyte
Capacity
(grams)
Optimum
Flow Rate
µl/min)
(µ
<10-12
Flow Rate
Range
µl/min)
(µ
Optimum
MAGIC
Flow Range Kit
0.10
0.05-0.50
Capillary
10-10 - 10-14
0.50
0.25-2.50
Capillary
1.6
10-9 - 10-13
2.00
1.00-10.0
Capillary
300
3.6
10-8 - 10-12
5.00
2.00-20.0
Capillary
500
10
10-7 - 10-11
12.0
5.00-50.0
Microbore
1000
40
10-6 - 10-10
50.0
20.0-200
Microbore
2000
160
10-5 - 10-9
200
100-1000
Microbore
3000
360
10-4 - 10-8
500
200-2000
Analytical
4600
800
10-3 -10-7
1000
500-5000
Analytical
41
Artisan Technology Group - Quality Instrumentation ... Guaranteed | (888) 88-SOURCE | www.artisantg.com
With the analytical or microbore Flow Range Kits installed on the MAGIC 2002TM, no
special procedures are required to achieve optimum performance.
II. Capillary Flows
The Capillary Gradient Flow Range Kit includes microbore pump heads, a 100 µl mixer
cartridge, a pre-column splitter, a capillary flow cell assembly, and a post column splitter.
The capillary system is designed to run the microbore pump heads at optimal flows while
delivering the desired capillary flows by utilizing a specially designed pre-column
splitter.
Figure 29 MAGIC 2002TM as Capillary Unit
42
Artisan Technology Group - Quality Instrumentation ... Guaranteed | (888) 88-SOURCE | www.artisantg.com
The MAGIC Variable SplitterTM
The MAGIC Variable SplitterTM (MVSTM) is designed for use with the MAGIC
2002TM (Refer to Figure 30). The MAGIC Variable SplitterTM utilizes a unique
approach for capillary HPLC. The MVSTM consists of an off-line variable splitter
box, a splitter tee, and capillary FSLP (Fused Silica Lined PEEK) tubing. The
variable splitter box contains five different packed bed restrictors which vary in
pressure drop in the same way a packed bed HPLC column does. This provides a
reproducible split ratio allowing a consistent flow rate across the capillary
column. Unlike inline splitters, the MVSTM was designed to add no extra system
volume, thus allowing fast gradient separations at capillary flow rates.
Figure 30 MAGIC Variable SplitterTM
Optimum Input Flow Range: 50-100 µl/min
Effective Input Flow Range: 20-200 µl/min
Capillary Column Output Flow Range: 0.2-25µl /min
Optimum Split Flow Range: 1:1 to 1:100
Effective Back pressure Range: 50-4500 PSI
Flow Rate Reproducibility: +/- 0.1 %
43
Artisan Technology Group - Quality Instrumentation ... Guaranteed | (888) 88-SOURCE | www.artisantg.com
Capillary Flow Range Kit Setup
If the MAGIC 2002TM was purchased as a capillary unit, the system will come
with the Capillary Flow Range Kit installed. However, if the MAGIC 2002TM is
set up as a Microbore unit, the following procedure should be followed:
1. Turn flows to the pumps off and close the solvent select valves.
2. Remove both loops from the injector valve, the mixer to valve tube,
and the column inlet tube.
3. Connect the splitter tee to the injection valve port 4 using the LiteTouch fitting on the 10 cm Fused Silica Lined PEEK tubing (FSLP).
4. Connect the splitter tee to the mixer output using the Lite-Touch fitting
at the end of the 5 cm stainless steel tubing.
5. Thread the third line from the splitter tee (with micro filter in place)
out through the lower access port in the right side panel, and connect
to port R3 on the MAGIC Variable SplitterTM .
6. Connect the Teflon waste line to port W3 on the MAGIC Variable
SplitterTM and place the outlet of the waste line into the MAGIC
2002TM waste container.
7. Connect the sample PEEK loop or capillary trap/loop of choice
between ports 3 and 10 on the injection valve.
8. Connect the bypass PEEK loop between ports 5 and 8 on the injection
valve.
9. Connect the column inlet tube to port 9 on the injection valve.
10. Close the controller software and power the unit off.
11. Install the Capillary Flow Cell Assembly in place of the Microbore
Flow Cell Assembly.
12. Turn the power to the instrument back on (wait 2-3 minutes for
detector to reinitialize) and then restart the controller software.
Checking for Leaks
After installing a column, check the new setup for leaks. To do this, turn the
solvent select valves on and start the pumps flowing at 100 uL/min at 50 % B.
Check all fittings around the injection valve, the mixer, and the MAGIC Variable
SplitterTM for leaks and confirm flow through the column inlet tube.
Column Installation
With the capillary system, it is especially important to minimize the introduction
of air to the flow cell. Once flow through the column inlet tube is confirmed,
allow the system to run for approximately 3-5 minutes. Turn the pump flow off
and dry the end of the tube. Connect the column to the column inlet tube. Refer
to the Column Test Certificate for an approximation of flow parameters to achieve
the desired flow rate. Choose the MAGIC Variable SplitterTM level and set the
flow rate in the control software according to the test certificate. Change the
44
Artisan Technology Group - Quality Instrumentation ... Guaranteed | (888) 88-SOURCE | www.artisantg.com
waste line on the MAGIC Variable SplitterTM to the W position directly opposite
the R setting. If no test certificate is available, a good starting point is R3 with a
flow rate of 100 µl/min. Confirm flow through the column prior to connecting it
to the flow cell inlet tube. Once the system pressure has stabilized, check the flow
cell outlet tube to ensure some liquid is flowing through the column and flow cell.
If no measurable flow is obtained in 15-20 minutes, there may be a leak or
blockage in the system. Check the fittings around the injector, from the column to
the flow cell, and the flow cell outlet fittings.
Measuring and Adjusting Flows
Measure the flow rate as described on page 37 under “Measuring Flow Rates”,
and adjust the pump flow rate and/or the restriction as needed to achieve the
desired capillary flow rate. When it is necessary to switch from one splitter level
to another, turn pump flow off and allow the column to depressurize to less than
100 PSI.
If the measured flow rate is more than the desired capillary flow rate, simply
decrease the pump flow rate. If it is necessary to decrease the pump flow
significantly below 50 µl/min, then it is best to move the tubing going into the
Variable Splitter Box to an R value setting that provides less restriction. This will
allow the pumps to run under optimal conditions of 50-100 µl/min, yet deliver the
appropriate flow through the column.
If the measured flow rate is less than the desired capillary flow rate, move the
tubing going into the MAGIC Variable SplitterTM to another R value setting of
higher value. Change the pump flow rate by factors of 2 to achieve the desired
capillary flow through the column (another change in restriction may also be
necessary). Keep in mind that the optimal pump flow conditions are 50-100
µl/min.
Running Samples in the Split-Flow Mode
Once the desired flow rate has been achieved, set the solvent composition to the
initial conditions of the desired method. Ensure the method contains the proper
pump flow rate prior to running a sample. Follow the operation procedures as
outlined in Chapter 2 under Operating the MAGIC 2002TM.
III. Auto sampler
Although a wide variety of auto samplers can be utilized along with the MAGIC 2002TM,
Michrom BioResources, Inc. offers an auto sampler optimized for use with the MAGIC
2002TM. Please refer to the manual that comes with each auto sampler for detailed
information on operation, features, and options.
45
Artisan Technology Group - Quality Instrumentation ... Guaranteed | (888) 88-SOURCE | www.artisantg.com
Connecting a Michrom BioResources, Inc. Auto sampler to the MAGIC 2002TM
The auto sampler will need to be wired to the MAGIC 2002TM. Please refer to the
wiring diagram (Figure 31) for connection to External Start Out and External
Trigger Input on the rear panel of the instrument.
The auto sampler can be plumbed to the injection valve of the MAGIC 2002TM
several different ways. Refer to the plumbing diagram (Figure 32) for the
standard setup.
Figure 31 Auto Sampler Wiring
Figure 32 Auto Sampler Plumbing
46
Artisan Technology Group - Quality Instrumentation ... Guaranteed | (888) 88-SOURCE | www.artisantg.com
Operating with a Michrom BioResources, Inc. Auto sampler
Whenever an auto sampler will be used to trigger the MAGIC 2002TM, it is
necessary to set the trigger in the control software to “External”. Program the
auto sampler to run according to the desired parameters with the correct number
of injections.
IV. Trapping Options
Michrom BioResources, Inc. has designed trap cartridges that allow automated sample
preparation (concentration, desalting, buffer exchange and detergent removal) prior to
analysis by the MAGIC 2002TM.
Configuration on the MAGICTM
The traps are designed along with a trap holder to take the place of the sample
loop (port 10 and port 3) on the injection valve.
Using a Trap Cartridge
To achieve the best results using a trap, some sample handling requirements are
necessary. The sample should be loaded in the solution which ensures solubility
of all the components of interest (Solvent A), yet has very low chromatographic
mobility. The trap should be washed with a solution similar to the sample loading
solution in sufficient volume to remove all of the salts and other potential
interfering components without eluting the analytes of interest. The trap should
be back flushed with a gradient to strip the components of interest from the trap in
very concentrated bands.
For detailed information on various traps and their uses, please refer to the
specific trap literature available from Michrom BioResources, Inc.
V. Fraction Collector
Although a wide variety of fraction collectors can be used with the MAGIC 2002TM
HPLC System, Michrom BioResources, Inc. offers a “Micro Fraction Collection System”
optimized for use with the MAGIC 2002TM. Please refer to the manual that comes with
the fraction collector for information on operation features and options. (Refer to Figure
33-35, page 48-50).
47
Artisan Technology Group - Quality Instrumentation ... Guaranteed | (888) 88-SOURCE | www.artisantg.com
Figure 33 Fraction Collector Wiring Step 1
Fraction Collector
DET
(+) red
(-) black
MAGIC
UV Outputs
Channel 1
(+) red
(-) black
48
Artisan Technology Group - Quality Instrumentation ... Guaranteed | (888) 88-SOURCE | www.artisantg.com
Figure 34 Fraction Collector Wiring Step 2
Fraction Collector
Input 1
(+) red
(-) black
MAGIC Remote I/O
Output C
(+) red
(-) black
49
Artisan Technology Group - Quality Instrumentation ... Guaranteed | (888) 88-SOURCE | www.artisantg.com
Figure 35 Fraction Collector Wiring Step 3
Output 1
(+) red
(-) black
MAGIC External Inputs
Output 2
(+) red
(-) black
Fraction Collector Outputs
C (+)
Output 1 (+) red
Output 2 (-) black
C (-)
Output 1 (-) black
Output 2 (+) red
This wiring configuration will show downward tick marks at the beginning of each collected peak
and upward tick marks at the end of each collected peak in the EZChrom Elite data acquisition
screen.
50
Artisan Technology Group - Quality Instrumentation ... Guaranteed | (888) 88-SOURCE | www.artisantg.com
Appendix
I. Troubleshooting Guide
SYMPTOM
No power to instrument.
Power to instrument but no
lights on pump panels.
Computer does not
communicate with the
instrument.
EZ Chrom Data System only
operates in the Demo Mode.
The Magic Control software
does not communicate with the
instrument.
One or both solvent bottles
continually sparge or bubble.
POSSIBLE CAUSE
SOLUTION
Power cord is not properly
plugged into instrument.
Power entrance fuses are
blown.
Pump fuses blown at pump
power entrance.
Communication cables are not
connected from the computer
to the instrument.
Plug power cord into
instrument.
Replace fuses with known
good 5 A and 3.5 A fuses.
Replace fuses with known
good 500 mA fuses.
Plug all cables into the proper
ports on the back of the
computer and on the back of
the instrument.
Plug the EZ Chrom license key
into the printer port in the back
of the computer.
The EZ Chrom license key is
not plugged into the printer
port on the back of the
computer.
The instrument needs to be
started and internal diagnostics
completed before
communication is attempted
through the control software.
There is a leak in the Helium
system internal to the
instrument.
There is a leak in the Helium
system external to the
instrument.
No solvent to pump head inlet.
No solvent in solvent bottles.
No Helium pressure to solvent
bottles.
He On/Off valve on inside left
door of instrument is in the
“Off” position.
Close the instrument control
software and power off the
instrument. Power the
instrument up and let it warm
up for several minutes before
attempting to communicate
with it through the control
software.
Check for Helium leaks around
the bottle caps and bottle cap
insert fittings. Delrin plug in
Wash bottle cap insert is loose
or missing.
Check for Helium leaks around
the tank and all external fittings
to the instrument. Tighten
fittings as necessary.
Fill solvent bottles with
appropriate solvent.
Make sure Helium tank valve
is open and appropriate Helium
pressure is set at the tank
regulator.
Turn the He On/Off valve to
the “On” position.
51
Artisan Technology Group - Quality Instrumentation ... Guaranteed | (888) 88-SOURCE | www.artisantg.com
SYMPTOM
POSSIBLE CAUSE
No solvent to pump head inlet
(Continued).
Plugged tubing in the Helium
system.
No pressure with flow set in
the Magic control software.
One or both purge valves are
open to the waste
compartment.
No analytical column is
installed with column inlet
tubing attached.
There is a leak at a fitting on a
pump head, purge valve or the
10-port valve.
Pump head check valve(s)
failed.
Pump head seals are worn or
scored.
Pump head piston(s) are worn
or scored.
SOLUTION
Isolate the plugged tubing and
clear the blockage or replace
the tube.
Close the purge valve by
turning clockwise until tight.
Install analytical column and
attach column inlet tubing to
head of column.
Shut flow off to pumps via the
control software. Turn solvent
selection valves to the vertical
or “Off” position. Remove the
fitting and thoroughly dry
ferrule and ferrule seat using a
Kimwipe. Retighten fitting.
Replace check valve(s) with
new or rebuilt check valve(s).
Run pumps isocratically in
wash solvent at 50 µl/min, 5%
pump B, for 30 minutes. Save
pressure data. Now run pumps
isocratically in Wash solvent at
50 µl/min, 95% pump B, for 30
minutes. Save pressure data.
Fax data to Michrom
BioResources, Inc. for
diagnosis by technical support
personnel.
Operate pumps isocratically in
wash solvent at 50 µl/min, 5%
pump B, for 30 minutes. Save
pressure data. Now run pumps
isocratically in wash solvent at
50 µl/min, 95% pump B, for 30
minutes. Save pressure data.
Fax data to Michrom
BioResources, Inc. for
diagnosis by technical support
personnel.
52
Artisan Technology Group - Quality Instrumentation ... Guaranteed | (888) 88-SOURCE | www.artisantg.com
SYMPTOM
No pressure with flow set in
the Magic control software
(Continued).
Wavy or choppy UV baseline
trace.
No peaks are observed when a
sample is run.
POSSIBLE CAUSE
SOLUTION
Air bubble trapped in pump
head.
Disconnect column inlet
tubing. Set the pumps on
purge via the software and
open and close both purge
valves on pumps to release
trapped air bubbles.
Flow cell leak.
Remove column, photodiode
and flow cell assembly.
Thoroughly dry quartz flow
cell and reinstall into flow cell
holder and bracket. Ensure
proper alignment of flow cell
in bracket before reinstalling
assembly in column
compartment.
Air bubble trapped in flow cell
Run wash solvent at twice
normal flow rate for about 30
minutes. Re-equilibrate at
initial run conditions.
Lack of efficient mixing.
Check to ensure that a mixer
cartridge of sufficient volume is
installed. in the mixer cartridge
holder.
The 10-port valve is in the
Make sure that the 10-port
valve is in the load position
inject position when the
sample is loaded from the
when the sample is loaded
syringe.
from the syringe.
The sample was prepared in an Prior to loading the sample into
inappropriate solvent for the
the sample loop of the
application.
instrument, be sure the sample
is in solvent which is less than
5% organic in composition.
The D2 lamp has expired.
Replace the D2 lamp with a
new one.
The active procedure does not
Verify that the detector is
specify the lamp being ignited
turned on and a wavelength
and a wavelength selected.
selected in the active
procedure.
The programmed gradient does Program the gradient to deliver
not call for sufficient B
at least 65% B solvent (∼ 90%
(organic) solvent to be
organic) to sufficiently enhance
delivered to enhance peak
peak elution.
elution.
53
Artisan Technology Group - Quality Instrumentation ... Guaranteed | (888) 88-SOURCE | www.artisantg.com
SYMPTOM
POSSIBLE CAUSE
No peaks are observed when a
sample is run (Continued).
The sample loop contains a
high percentage of organic
solvent. This has caused the
peaks to elute in the solvent
front.
There is a leak at a fitting on a
pump head, purge valve or the
10-port valve.
Irreproducible retention times.
Pump head check valve(s)
failed.
Pump head seals are worn or
scored.
Air bubble trapped in pump
head.
SOLUTION
Flush the sample loop with a
low percentage of organic
solvent (∼ 2%) with the valve
in the load position.
Shut flow off to pumps via the
control software. Turn solvent
selection valves to the vertical
or “Off” position. Remove the
fitting and thoroughly dry
ferrule and ferrule seat using a
Kimwipe.
Replace check valve(s) with
new or rebuilt check valve(s).
Run pumps isocratically in
Wash solvent at 50 µl/min, 5%
pump B, for 30 minutes. Save
pressure data. Now run pumps
isocratically in Wash solvent at
50 µl/min, 95% pump B, for 30
minutes. Save pressure data.
Fax data to Michrom
BioResources, Inc. for
diagnosis.
Run pumps isocratically in
Wash solvent at 50 µl/min, 5%
pump B, for 30 minutes. Save
pressure data. Now run pumps
isocratically in Wash solvent at
50 µl/min, 95% pump B, for 30
minutes. Save pressure data.
Fax data to Michrom
BioResources, Inc. for
diagnosis by technical support
personnel.
Disconnect column inlet
tubing. Set the pumps on
purge via the software and
open and close both purge
valves on pumps to release
trapped air bubbles.
54
Artisan Technology Group - Quality Instrumentation ... Guaranteed | (888) 88-SOURCE | www.artisantg.com
II. Configuring the MAGIC 2002TM Instrument for use with
Data Acquisition
After installation of the EZChrom Elite and MAGIC 2002TM software, it is necessary to
configure the computer hardware. To configure the MAGIC 2002TM hardware, first open
EZChrom Elite by clicking on Start, going to Programs, going to Chromatography and
selecting EZChrom Elite. Figures 36 through 50 present step by step instructions for
configuring the computer hardware for instrument control and data acquisition.
Figure 36 EZChrom Elite Client/Server Screen
To configure the hardware, click on Tools, select Interface Configuration.
Figure 37 Interface Configuration Screen
Highlight the SS420 A/D icon and click on Properties.
55
Artisan Technology Group - Quality Instrumentation ... Guaranteed | (888) 88-SOURCE | www.artisantg.com
Figure 38 SS420 Configuration Screen
Select Board 1
After entering all
of the data, click
on OK to exit.
Enter the Base
address.
Normally set to
360.
Select the Base
frequency.
Normally set to
10.
Select the
Interrupt level.
This must match
the switch
settings on the
SS420 board.
Select the full
scale range for
each channel.
Normally set to
0-1 v.
After setting the Interface configuration the computer must be restarted for the new
hardware settings to take effect. When the computer restarts, click on Start, go to
Programs, go to Chromatography and select EZChrom Elite.
Figure 39 EZChrom Elite Client/Server Screen
Select New Instrument
56
Artisan Technology Group - Quality Instrumentation ... Guaranteed | (888) 88-SOURCE | www.artisantg.com
Figure 40 EZChrom Elite Client/Server Screen
Right mouse click on the new instrument icon and select Configure.
Figure 41 Instrument Configuration Screen
Type in the name of the instrument (MAGIC 2002).
Click on
Configure.
Select MAGIC
for the type of
instrument.
57
Artisan Technology Group - Quality Instrumentation ... Guaranteed | (888) 88-SOURCE | www.artisantg.com
Figure 42 MAGIC Configuration Screen
Double
clicking on
each icon on
the Available
Modules side
will move
them over to
the Configured
Modules side.
Double clicking on each icon on the Configured
Modules side will open the configuration screen for
each module.
Move all of the Modules from the Available module side to the Configured module side.
Move three additional detector modules as shown above (one for each of the four
channels of A/D input available with the MAGIC Elite data system.) Configure the
Event Configuration first (Refer to Figure 43 and Table 3, pages 58-59 ), and then
continue on until all the modules have been properly configured as shown on the
following pages (Refer to Figures 44-50, pages 59-62) .
Figure 43 Event Configuration Screen
The Event Configuration should look like this when all the events are configured.
58
Artisan Technology Group - Quality Instrumentation ... Guaranteed | (888) 88-SOURCE | www.artisantg.com
The following table lists the Events by Name, the Source and the Setup for each event
Table 3 Event Configuration
.
Name
Trigger
Ready
MAGIC High Flow A
MAGIC High Flow B
Load (must be typed in)
Inject (must be typed in)
Output A (must be typed in)
Output B (must be typed in)
Output C (must be typed in)
Source
SS420
SS420
SS420
SS420
SS420
SS420
SS420
SS420
SS420
Board
Setup
Input
1
1
1
1
1
1
1
1
1
In 1
Out 5
Out 1
Out 2
Out 3
Out 4
Out 6
Out 7
Out 8
Triggered
State
Closed
Closed
Closed
Closed
Figure 44 MAGIC Pump Configuration Screen
Select COM 3 for
Pump A Com Port
After entering all of the
data, click on OK.
Select COM 4 for
Pump B Com Port
Select the Pressure
Units. Choices are:
PSI, Mpa or Kg/M2.
Enter the minimum
operating pressure.
The pumps will
shut off if the
pressure drops
below this value.
Entering a value of
0 disables this
function.
Select the LOAD
Event. This should
always be set to
Load.
Enter the maximum
operating pressure.
The pumps will shut
off if the pressure
goes above this value.
Select the INJECT
Event. This should
always be set to
Inject.
59
Artisan Technology Group - Quality Instrumentation ... Guaranteed | (888) 88-SOURCE | www.artisantg.com
Figure 45 MAGIC Detector Configuration Screen
Select COM 5 for
the Detector Com
Port.
Click on OK after selecting
the Detector Com Port.
Figure 46 MAGIC Temperature Controller Configuration Screen
Select COM 6 for the
Temperature Controller
Com Port.
Click on OK after select the
Temperature Controller Com
Port.
Figure 47 Detector Configuration Screen (UV 1)
Enter UV 1 for the
Detector Name.
Select Analog for the
Detector Model.
Select SS420 for the
Acquisition Source.
Click on this symbol
and select
Board Number: 1
Analog Input: Chan A
Enter mAU for the YAxis Units.
Enter 1e-003 for the
Y-Axis Multiplier.
Click on OK after
entering all of the data.
60
Artisan Technology Group - Quality Instrumentation ... Guaranteed | (888) 88-SOURCE | www.artisantg.com
Figure 48 Detector Configuration Screen (UV 2)
Enter UV 2 for the
Detector Name.
Select Analog for the
Detector Model.
Click on this symbol
and select
Board Number: 1
Analog Input: Chan B
Select SS420 for the
Acquisition Source.
Enter mAU for the YAxis Units.
Enter 1e-003 for the
Y-Axis Multiplier.
Click on OK after
entering all of the data.
Figure 49 Detector Configuration Screen (Fraction Collector)
Enter Fraction
Collector for the
Detector Name.
Select Analog for the
Detector Model.
Click on this symbol
and select
Board Number: 1
Analog Input: Chan C
Select SS420 for the
Acquisition Source.
Enter mAU for the YAxis Units.
Click on OK after
entering all of the data.
Enter 1e-003 for the
Y-axis Multiplier
61
Artisan Technology Group - Quality Instrumentation ... Guaranteed | (888) 88-SOURCE | www.artisantg.com
Figure 50 Detector Configuration Screen (Pressure)
Enter Pressure for the
Detector Name.
Select Analog for the
Detector Model.
Click on this symbol
and select
Board Number: 1
Analog Input: Chan D
Select SS420 for the
Acquisition Source.
Enter PSI for the YAxis Units.
Enter .147 for the YAxis Multiplier.
Click on OK after
entering all of the data.
After all eight modules have been configured, click OK on the MAGIC Configuration
screen to save these configurations and return to the MAGIC EZChrom Elite
Client/Server screen. Double-click on the MAGIC 2002TM icon to open the MAGIC
software.
62
Artisan Technology Group - Quality Instrumentation ... Guaranteed | (888) 88-SOURCE | www.artisantg.com
III. Configuring the MAGIC 2002TM Instrument for Control
Only
After installation of the EZChrom Elite and MAGIC 2002TM software, it is necessary to
configure the computer hardware. To configure the MAGIC 2002TM hardware, first open
EZChrom Elite by clicking on Start, going to Programs, going to Chromatography and
selecting EZChrom Elite. Figures 51 through 61 present step by step instructions for
configuring the computer for instrument control.
Figure 51 EZChrom Elite Client/Server Screen
To configure the hardware, click on Tools, select Interface Configuration.
Figure 52 Interface Configuration Screen
Highlight the CIO/DIO icon and click on Properties.
63
Artisan Technology Group - Quality Instrumentation ... Guaranteed | (888) 88-SOURCE | www.artisantg.com
Figure 53 CIO/DIO Configuration Screen
Place a check mark here to install the board.
Select CIODIO24 for the board
Model.
Set the Base Address to 320 by
clicking on the switches to arrange
them as shown.
Set the Connector to 0.
Click on Port B to change it from
an Output to an Input.
Click on OK after entering all of
the data.
After setting the Interface configuration, the computer must be restarted for the new
hardware settings to take effect. When the computer restarts, click on Start, go to
Programs, go to Chromatography and select EZChrom Elite.
Figure 54 EZChrom Elite Client/Server Screen
Select New Instrument
64
Artisan Technology Group - Quality Instrumentation ... Guaranteed | (888) 88-SOURCE | www.artisantg.com
Figure 55 EZChrom Elite Client/Server Screen
Right mouse click on the new instrument icon and select Configure.
Figure 56 Instrument Configuration Screen
Type in the name of your instrument (MAGIC 2002).
Click on
Configure.
Select MAGIC
for the type of
instrument.
65
Artisan Technology Group - Quality Instrumentation ... Guaranteed | (888) 88-SOURCE | www.artisantg.com
Figure 57 MAGIC Configuration Screen
Double clicking on each icon on the
Available Modules side will move
them over to the Configured Modules
side.
Double clicking on each icon on the Configured
Modules side will open the configuration screen
for each module.
Move the four Modules from the Available modules side to the Configured modules side
as shown in Figure 57. Configure the Event Configuration first (Refer to Figure 58 and
Table 4, pages 66-67), and then continue on until all the modules have been properly
configured as shown on the following pages (Refer to Figures 59-61, pages 67-68) .
Figure 58 Event Configuration Screen
The Event Configuration should look like this when all events are
configured.
66
Artisan Technology Group - Quality Instrumentation ... Guaranteed | (888) 88-SOURCE | www.artisantg.com
The following table lists the Events by Name, the Source and the Setup for each event.
Table 4 Control Only Event Configuration
Name
Trigger
Ready
MAGIC High Flow A
MAGIC High Flow B
Load (must be typed in)
Inject (must be typed in)
MAGIC Get Load
MAGIC Get Inject
Output A (must be typed in)
Output B (must be typed in)
Output C (must be typed in)
Source
CIO/DIO
CIO/DIO
CIO/DIO
CIO/DIO
CIO/DIO
CIO/DIO
CIO/DIO
CIO/DIO
CIO/DIO
CIO/DIO
CIO/DIO
Board
Setup
Input
0
0
0
0
0
0
0
0
0
0
0
B0
A4
A0
A1
A2
A3
B1
B2
A5
A6
A7
Triggered
State
Closed
Closed
Closed
Closed
Closed
Closed
Figure 59 MAGIC Pump Configuration Screen
Select COM 3 for
Pump A Com Port
After entering all of the
data, click on OK.
Select COM 4 for
Pump B Com Port
Select the Pressure
Units. Choices are:
PSI, Mpa or Kg/M2.
Enter the minimum
operating pressure.
The pumps will
shut off if the
pressure drops
below this value.
Entering a value of
0 disables this
function.
Select the LOAD
Event. This should
always be set to
Load.
Enter the maximum
operating pressure.
The pumps will shut
off if the pressure
goes above this value.
Select the INJECT
Event. This should
always be set to
Inject.
67
Artisan Technology Group - Quality Instrumentation ... Guaranteed | (888) 88-SOURCE | www.artisantg.com
Figure 60 MAGIC Detector Configuration Screen
Select COM 5 for
the Detector Com
Port.
Click on OK after selecting
the Detector Com Port.
Figure 61 MAGIC Temperature Controller Configuration Screen
Select COM 6 for the
Temperature Controller
Com Port.
Click on OK after select the
Temperature Controller Com
Port.
After all four modules have been configured, Click OK on the MAGIC Configuration
screen to save these configurations and return to the MAGIC EZChrom Elite
Client/Server screen. Double-click on the MAGIC 2002TM Icon to open the MAGIC
software.
68
Artisan Technology Group - Quality Instrumentation ... Guaranteed | (888) 88-SOURCE | www.artisantg.com
The contents of this operator’s manual were compiled with the intent to provide the
instrument user with all of the information necessary to operate the MAGIC 2002TM
HPLC and the associated peripheral devices and accessories available from Michrom
BioResources, Inc. Further clarification and/or additional information can be obtained
from the Michrom BioResources, Inc. technical support staff at the following numbers.
Telephone:
Fax:
e-mail:
(530) 888-6498
(530) 888-8295
[email protected]
The Michrom BioResources, Inc. staff thanks you for your interest in our product line
and look forward to serving you in the future.
69
Artisan Technology Group - Quality Instrumentation ... Guaranteed | (888) 88-SOURCE | www.artisantg.com
Artisan Technology Group is your source for quality
new and certified-used/pre-owned equipment
• FAST SHIPPING AND
DELIVERY
• TENS OF THOUSANDS OF
IN-STOCK ITEMS
• EQUIPMENT DEMOS
• HUNDREDS OF
MANUFACTURERS
SUPPORTED
• LEASING/MONTHLY
RENTALS
• ITAR CERTIFIED
SECURE ASSET SOLUTIONS
SERVICE CENTER REPAIRS
Experienced engineers and technicians on staff
at our full-service, in-house repair center
WE BUY USED EQUIPMENT
Sell your excess, underutilized, and idle used equipment
We also offer credit for buy-backs and trade-ins
www.artisantg.com/WeBuyEquipment
InstraView REMOTE INSPECTION
LOOKING FOR MORE INFORMATION?
Visit us on the web at www.artisantg.com for more
information on price quotations, drivers, technical
specifications, manuals, and documentation
SM
Remotely inspect equipment before purchasing with
our interactive website at www.instraview.com
Contact us: (888) 88-SOURCE | [email protected] | www.artisantg.com