1
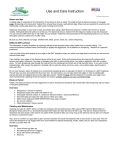
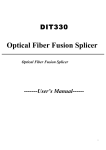
Electric Knife Sharpener Commercial and Outdoor Model Patented Worldwide USER MANUAL (SAVE THIS MANUAL FOR FUTURE USE) ¬ [email protected] www.mastergradeknifesharpener.com Copyright © 2004 ~ 8 by Jack Chen TABLE OF CONTENTS A. Important safeguards ………………………………….…..… 1 B. Why is MASTER GRADE different from other knife sharpeners? ……………………………………… 2 C. MASTER GRADE vs. a Professional sharpening service ... 2 D. How to get the best results from your machine …………... 2 E. MASTER GRADE vs. the other knife sharpeners ……...... 3 F. Cautions………..……………………………………………… 4 G. What comes with this machine? …………………..……….. 4 H. What types of knives can be sharpened? …………………. 5 I. Warning ……………………………………………………….. 5 J. How does MASTER GRADE work? ……………………….. 5 K. How to re-profile a knife’s bevel ………………...…..……… 6 L. How to sharpen a cleaver or knife blades that is thicker than ³/16” or 4 mm …………………..………. 8 M. How to sharpen cleaver & knife blades thinner than ³/16” or 4 mm ……………….…..…….. 10 N. How to sharpen serrated knives …….……………….……. 12 O. How to remove chips from damaged knives ………..…… 12 P. Special instructions for extremely tempered knives ….…. 14 Q. Maintenance 1) Daily maintenance ……………………………………... 14 2) Cleaning sharpening wheel ……..……………………. 14 R. Questions & Answers …………..…………….…………..… 16 S. Technical data 1) Commercial Knife Sharpener …………………….…… 19 2) Outdoor Knife Sharpener ………..……………….…… 20 3) Soft Touch Flexible Sharpening Wheels ..…………… 20 T. Warranty ……………………………….…………………...… 21 U. Parts list ………………………………………………….…… 22 V. Recipe (Yan Can Cook) …………..………………………… 23 A) IMPORTANT SAFEGUARDS When using electrical appliances, basic safety precautions should always be observed including the following: a) Read all instructions. b) To protect against risk of electrical shock do not immerse cord, plugs, or portable appliances in water or other liquids. c) Close supervision is necessary when any appliance is used near children. Even with adult supervision, children should never sharpen or handle knives. d) Unplug from power outlet when not in use, before putting on or taking off parts, and before cleaning. e) Always switch the appliance to the “off” position before plugging into the power outlet. To disconnect, set the switch to the “off” position before removing the plug from the power outlet. f) Avoid contacting moving parts. g) Do not operate any appliance with a damaged cord or plug or after the appliance malfunctions, or is dropped or damaged in any manner. Return appliance to the nearest authorized service facility for examination, repair or electrical or mechanical adjustment. h) The use of attachments not recommended or sold by the manufacturer may cause fire, electric shock, or injury. i) Do not use outdoors. j) Do not let cord hang over edge of table or counter. k) Do not let cord contact hot surfaces and do not place the appliance on or near a hot stove burner or in a heated oven. l) Do not use this appliance for other than its intended use. m) This appliance has a polarized plug (one prone is wider than the other). To reduce the risk of electric shock, this plug will fit in a polarized outlet in only one way. If the plug does not fit fully in the outlet, reverse the plug. If it still does not fit, contact a qualified electrician. Do not modify the plug in any way. n) SAVE THESE INSTRUCTIONS B) Why Master Grade is different from other knife sharpeners? “REVOLUTIONIZING the way to sharpen your knives.” Applying the latest technology, we have developed a soft sharpening wheel that is unlike conventional stone wheeled units that overheat and grind away the blade. This innovative sharpener will enable you to produce a RAZOR SHARP EDGE IN JUST A FEW PASSES. Ours is unique in that it makes possible re-profiling the knife bevel up to 3/5" high and a 1/2" thick blade. In addition it still maintains the desired 15° angle without leaving a burred. Professional chefs and meat cutters unanimously agree that the Master Grade Commercial Electric Knife Sharpener is both technologically and economically superior to others. C) Master Grade vs. a sharpening service: Master Grade Pro Service Cost /mo $3 ~ 5 $39 ~ 69 cost / yr cost / 5 yr $37 ~ 60 $434 ~ 549 $468 ~ 828 $2,340 ~ 4,140 The above calculations are based on 6 chefs' knives, 3 boning knives and 4 knives slicer sharpened once a week. Professional sharpening service charge is based on year 2003 survey. This one time investment can save you at least $431~ $768 within the first year and $1,906 ~ $3,591 within the first 5 years. This patented knife sharpener is the #1 seller in England, Germany, China, Taiwan and Japan. D) How to get the best results from your machine CONGRATULATIONS on your purchase of the award winning Master Grade knife sharpener. Please Take A Few Moments to Read The Instructions And View The Included Video CD to Gain The Maximum Benefit From Your Investment. E) Master Grade vs. other knife sharpeners Master Grade Safe to use Pre sharpening Over heating Scratching knife blade Burr 15° every pass True angle (Blade) hollow-ground (Blade) Pre sharpening height Debris storage Motor efficiencyn Torque Wheel type NSF Certified Retail pricer Master Grade Commercial Premium YES YES YES YES NO NO No Slight No Slight YES YES YES YES NO NO 15 mm 2 mm YES YES Top Top High Medium Soft Stonep Yes No $299.95 $99.95 Chef Edlund Choice 2000 401 YES YES NO YES YES YES Excessive Excessive Excessive Excessive YES NO YES YES NO NO 1 mm 2 mm YES NO Very Low Very Low Low Low Stoneq Stone No Yes $499.00 $399.00 F. Dick RS-150 Duo NOo NO YES Excessive Excessive NO NO YES 1 mm NO Medium High Steelq No $968.00 Tru Hone HCF NOo YES YES Excessive Excessive NO NO YES 1 mm NO Medium High Stone No $950.00 n Our Efficient motors use the same electricity and output maximum power -- the best in the world. o F. Dick and Tru Hone both have a sharpening wheel without cover, which may cause serious injuries. p Our stones are oven baked over 45 days, for super balance, compared to most factories only bake 1 ~ 3 days. q Diamond hone is steel plate coating with diamond dust always scratches the blade due to uneven hardness and disk surface. r The retail prices based on the year of 2003 survey. F) CAUTION: ¾ ALWAYS WEAR SAFETY GOGGLES AND CUT RESISTANT GLOVES WHEN YOU OPERATE THIS MACHINE. ¾ WHEN OPERATING THE MACHINE, HOLD IT WITH YOUR LEFT HAND AND HOLD THE KNIFE WITH YOUR RIGHT HAND G) What comes with this machine? For Outdoor Model For Commercial Model H) What types of knives can be sharpened? Most chef’s knives, carving knives, filleting knives, Japanese knives (except sashimi knives), serrated knives and even Chinese cleavers can be given razor sharp edges with the MASTER GRADE knife sharpener. I) WARNING: Never Expose Machine To Water Or Moisture At Any Time. Never Leave Your Razor Sharp Knives In A Washing Bowl. Wipe The Knife Clean After Sharpening And Before Use. To extend the life of the motor, do not press a knife on the wheel so hard that the motor is not able to run or runs at a very slow speed. Slowing or stopping the motor will overload it and shorten the life of the machine. If your knife is bent, straighten it before sharpening. Have to clean all knives, including the handle, before sharpening; make sure the blade is very dry and free of oil, grease, and food particles. Otherwise, damage may occur to the sharpening wheels reducing performance and the life of the sharpener. J) How does the Master Grade work? The machine has two sharpening openings. The left opening is for the left side of the blade, and the right opening is for right side of the blade. Pull the knife blade through the left opening, and then repeat in the right opening. Continue this alternating process, decreasing pressure with each pass, until the blade is sharp. The first time you sharpen your knife on the Knife Sharpener, you will need to spend more time to establish the desired 15˚ angle. This is accomplished with the coarse wheels. Subsequent sharpening should be done with the fine wheels and will require only a few passes. K) How to re-profile a knife’s bevel (Use CW-5000 wide opening cover) 1) Remove the top cover by unscrewing the inset hand screw. 2) Remove the fine wheels (FS-304F) by unscrewing caps. 3) Insert the coarse sharpening wheels (FS-300C). 4) After screwing the wheel caps back on snugly, re-install the top. (The wide opening top CW-5000.) 5) Make sure the whole knife is dry and clean. If knife tip is bent, straighten it before sharpening. 6) Hold your knife firm and insert the blade into the left opening leaning your knife to the left. Tilt the knife against sharpening wheel and draw the knife smoothly back towards you with moderate down pressure, if you hear the motor is slowing down, you are using too much down pressure. (Fig 3) 7) Insert the knife into the right opening, leaning your knife to the right. Tilt the knife against the sharpening wheel and draw the knife smoothly back towards you with equal and constant down pressure as in step 6. (fig 4) 8) Continue alternating process until you see the slicer knife bevel 5˚ ~ 15˚, cleaver bevel 15˚ ~ 25˚. The process of reprofiling the bevel may take 10 or more passes depending on the blade condition and blade temper. The next stage uses the FS-302M medium sharpening wheels to smooth the edge. Finally, to make a razor sharp edge – follow instructions on pages 8 and page 10. L) How to sharpen a cleaver or knife blade that is thicker than ³/16” or 4 mm (If attempting to sharpen a blade that is thinner than ³/16” or 4 mm please see page 11) 1) Remove the top cover by unscrewing the inset hand screw. (See fig 1 on page 6) 2) Insert the proper sharpening wheels (for regular knives use FS-304F fine sharpening wheels, for cleavers use FS-302 medium wheels, see fig 2 on page 6) 3) After screwing the wheel caps back on snugly, re-install the wide opening cover (the CW-5000 cover). 4) Make sure the whole knife is clean and dry. If the knife tip is bent, straighten it before sharpening. 5) Hold the knife firmly and start with the knife in the forward position with the blade in the left opening and parallel to the flat surface (see fig 5). Draw the knife smoothly back towards you with moderate down pressure (if you hear the motor is slowing down, you are using too much down pressure). Some knives have a curved end, so as the knife curves, rotate your arm upwards so that the contact surface is always parallel to the flat surface. 6) Repeat the process in the right opening to sharpen the other side of the knife, see fig 6 (if the knife has only one sharpened edge, use only the one relevant opening). Continue alternating the process decreasing pressure with each pass until the knife feels sharp to the touch or slicing paper feels smooth. (USE CAUTION - AVOID CUTTING YOURSELF). When re-profiling the edge of a dull knife the process may take 10 or more passes depending on the condition and the blade temper. 7) Make sure blade has no burrs (see fig 7 a & b on page 9 & 11), otherwise repeat step 5 & 6 with minimum pressure (FEATHER TOUCH) until the burrs disappear. M) How to sharpen cleaver & knife blades thinner than ³/16” or 4 mm. Note: The outdoor model doesn’t have a narrow opening cover, therefore, use the same procedures in L on page 8 1) Remove the top cover by unscrewing the inset hand screw. (see fig 1 on page 6) 2) Install the sharpening wheels (regular knives use FS-304F fine sharpening wheels, for cleavers use FS-302 medium wheels). see fig 2 on page 6). 3) After screwing the wheel caps back on snugly, re-install the top (the narrow opening top CN-5000). 4) Make sure the whole knife is clean and dry. If the knife tip is bent, straighten it before sharpening. 5) Hold the knife firmly with the blade in the forward position, as shown in fig 8. Start with the knife in the forward position with the blade in the left opening to line 1 on cover and parallel to the flat surface. Draw the knife smoothly back towards you with moderate down pressure (if you hear the motor is slowing down, you are using too much pressure). Some knives have a curved end, so as the knife curves, rotate your arm upwards so that the contact surface is always parallel to the flat surface. 6) Repeat the process in right opening (see fig 9 to line 1). (If the knife has only one bevel edge, then use only the relevant opening). Continue alternating the process, decreasing pressure and position blade to line 2 (fig 10 & 11). Repeat process and position blade to line 3 (fig 12 & 13) until the knife feels sharp to the touch or slicing paper feels smooth (USE CAUTION - AVOID CUTTING YOURSELF). 7) Make sure the blade has no burrs (see fig 7 a & b), otherwise repeat step 5 & 6 with minimum pressure (FEATHER TOUCH) until the burrs disappear. The process of re-profiling the edge may take 10 or more passes depending on the condition and hardness of the knife blade. N) How to sharpen serrated knives 1) Use wide opening cover (CW-5000) 2) Make sure the whole knife is clean and dry. If the knife tip is bent, straighten it before sharpening. 3) Start with the knife in the forward position in the left opening. Rather than dropping the blade deep into the slot of the cover as in step 5 above, keep the blade elevated so that it makes contact with only the upper part of the wheel; simultaneously tilt the blade to the left applying minimal pressure (feather touch), excessive pressure may rip the wheel and damage the blade. (fig 14) 4) Repeat in right opening until both sides of the blade are smooth. Do not attempt to sharpen the bottom part of the serrated teeth. O) How to remove chips from damaged knives (use FS-300C coarse wheel) 1) If your knives are ³/16” or 4 mm thick or more use the wide opening cover (CW-5000) otherwise use the narrow opening cover (CN-5000). 2) The MASTER GRADE can repair chips up to ⅛”. If chips are bigger than ⅛” do not attempt to repair. It may cause damage to the sharpening wheel and machine. 3) Use only the FS-300C coarse wheel. 4) Make sure the whole knife is clean and dry. If knife tip is bent, straighten it before sharpening. 5) Insert the knife first than turn on the machine. Start with the knife in the forward position with the blade in the left side opening in front of chip. Slowly pull the knife through the slot parallel to the flat surface past the chip. Next, draw the knife smoothly backward and forward. Continue the process in the right opening alternating the process until chips disappear. (see fig 15) 6) If chips are deeper than '/16”. After all chips are removed, draw the knife smoothly back towards you with maximum downward pressure (if you hear the motor is slowing down, you are using too much down pressure). Continue alternating the process in each opening until the edge is straight. (See fig 16). P) Special instructions for extreme tempered knives Most extreme tempered knives use special materials like 440 steels, high speed steels … etc. You may find those materials use in German knives, Master Grade knives and Japanese Global Knives. Those knives the sharpened edges are not as easy to sharpen evenly as most other knives. So, special care and procedures are necessary when sharpening these expensive knives. We recommend that before you sharpen above knives, you “break in” the NEW FS-300C coarse sharpening wheel by sharpening conventional knives a few times to re-profile the correct bevel. After you get the correct bevel for the blade, use the FS-302M medium sharpening wheel to smooth the edge. Finally use FS-304F fine sharpening wheel to re-move the burrs and restore a razor sharp edge to these knives. In our experience, the most effective way to sharpen such a knife is to use the left opening more than the right. Using very light pressure, try the following sequence: LEFT, LEFT, RIGHT, LEFT Q) MAINTENANCE 1) DAILY MAINTENANCE: To clean debris loosen hand screw on bottom of unit, remove cover and remove the sharpening wheel. Shake unit upside down and brush to clean. Repeat cleaning at least once a day or after every five uses. (See fig 17) 2) CLEANING SHARPENING WHEEL: To clear debris from sharpening wheel, use a brush (hard bristles) with detergent scrub off debris and rinse with clean water. Allow at least 24 hours to completely dry before using it again (see fig 18). R) Questions & Answers 1) Q: Can Master Grade knife sharpener sharpen any knife? A: Yes, it can sharpen most knives. For serrated knives, see fig 14 on page 13. 2) Q: Can Master Grade sharpen scissors? A: Yes, but we do not recommend it for safety reasons. 3) Q: Can Master Grade sharpen the lawn mower blade? A: Yes, just use a new set of coarse sharpening wheels and wide opening cover. 4) Q: Where is this machine manufactures? A: Final assembling is in Taiwan, However, parts come from USA, Holland, Sweden, Japan and Taiwan. 5) Q: I am already using a Professional Sharpening Service. Why do I need an electric knife sharpener? A: Please see detail in page 2 paragraph C. 6) Q: How can I get the best results from the sharpener? A: Please see detail in page 2 paragraph D. 7) Q: How long does it take to replace the sharpening wheels? A: It only takes about 10 ~ 15 seconds. 8) Q: Why is Master Grade better than other commercial knife sharpeners on the market? A: Please see detail in page 3. 9) Q: How long will the sharpening wheels last and when do I have to change them to different grades of wheels? A: Please see page 20 section 3 for detail. 10) Q: If a wheel rips and is replaced and the wheel rips again what should I do? A: Insert the knife in sharpening slot before turning it on. Repeat it in the opposite slot. 11) Q: Does it get the knife sharp enough to remove hair from your arm, like a razor? A: If you use a sharpening stone, you have to have a very good sharpening skill. From our experience about only 1 out of ten thousand people can do it. If you use our commercial model or outdoor model 95% people can do it. We would like to recommend you to use old knives or the knives you want to throw them away to practice until you become familiar and adept at the proper pressure and achieving desired bevels. Then practicing with different type of knives, once you’ve learned the skill, your knife will definitely remove hair from your arm. 12) Q: Why are there two different covers for commercial model knife sharpener? A: To provide more versatility in sharpening different sizes and types of knives. 1. CW-5000 is for wide knives & cleavers wider than ³/16” or 4 mm and to create bevels between 6˚ ~ 30˚. 2. CN-5000 narrow cover is designed to fit knives less than 4 mm or ³/16” thick. This cover makes it easy to guide your knife straight through the slots at the proper angle and reduces vibration, especially with smaller knives. We recommend use of this cover initially until you become familiar and adept at using the proper pressure and achieving desired bevels. 13) Q: When I turn on the machine, it does not run. A: 1. Make sure you have plugged in machine to power outlet. 2. Machine has been immersed in the liquid & has short circuited the motor wire. 14) Q: What is the best way to maintain and prolong the sharpened edge? (Why does the knife get dull so quickly?) A: This is because your knife blade still has burrs. When you sharpen your knife, especially the last few passes, do it lightly - minimum pressure (FEATHER TOUCH) until all burrs have disappeared (see page 8 Step 7 and fig 7A & B) or you can use a sharpening stick to remove the burrs. 15) Q: When I turn on the machine the motor is running but both side wheels are not turning at the same speed. A: In our experience, there are two possible causes: 1. A knife blade was inserted forcefully (sudden entry) into the slot and pushed down too hard and cause the wheel to stop rotating while the motor continues to turn. This will dislocated and destroy the gears, and the wheels will appear to rotate at different speeds. After a short time, the wheels will stop rotating all together. The unit will need to be serviced. 2. The machine was dropped from over 5 feet high, which could have dislocated the gear. The next time that you turn on the machine and the gear is not in the proper position, it will destroy the whole gear and cause it to malfunction. The unit will need to be serviced. 16) Q: Why the sharpening wheels DO NOT last as specified in question # 5? A:1. If fine sharpening wheels are used for re-profiling, it will cause excess wear. Use only coarse wheels for profiling. 2. If your knives have chip(s), the sharpening wheels will wear out quickly or they may rip the sharpening wheel. 3. Use of excessive pressure when sharpening your knife will shorten the life of the wheels. 4. Dirty knives that have food particles or liquid on them will damage the wheel surface. 5. After approximately half of sharpening wheel life, you will notice that only half of your sharpening wheel has been used. Remove the wheel from the unit and turn it over. This will expose the unused portion of the wheel to the blade to be sharpened. 17) Q: What causes the sharpening wheels to rip? A: 1. Dirty knives that have food particles or liquid. Make sure they are clean and dry. 2. If your knife has a chip(s) (up to ⅛”) you need to use the coarse sharpening wheels to remove chips, and sharpen with light pressure then increase the pressure slightly. Even the tiny chips (sometimes invisible from your eyes) or knife tip bent may rip the wheel. If the knife tip is bent, straighten it before sharpening. 3. If you allow the knife to vibrate it can damage the wheel. Hold your knife firm and glide it smoothly through each slot following the curvature of the blade. 4. Not using the correct grade of sharpening wheel. 5. Gouging the wheel with the knife heel by rushing the blade through the guide. 6. Not following the blade curvature when drawing the blade back through the guide. 7. If the sharpening wheel is bent, this problem may occur in connection with storage. Do not place heavy items on top of the sharpening wheel boxes. 18) Q: I am a left handed can I still use this machine? A: It is designed for right handed but not limited to left handed user. Just turn around the machine. Use your right hand hold the handle and left hand hold your knife. S) Technical Data 1) Commercial Model Voltage / Power Safety Standard / Certification Sharpening Angle (Tan θ) Blade Angle / Blade Thickness Wheel Speed / Torque Max blade contacts Unit net weight / Unit per case Dimension in inch W X H X D 100V ~ 120V AC / 180 Watt cUL, UL, NSF, CE, GS 15° 30° ~ 6° / Up to ½" tang 2,500 RPM / 3,000 GCM Pre sharpening up to 3/5" high 5.4 Lbs / 6 units 13" X 4.9" X 4.5" 2) Outdoor Model AC 100V ~ 120V / 180 Watt AC 220V ~ 240V / 180 Watt Safety Standard / Certification Sharpening Angle (Tan θ) Blade Angle / Blade Thickness Wheel Speed / Torque Max blade contacts Unit net weight / Unit per case Dimension in inch W X H X D Dimension in cm W X H X D USA model Europe model cUL, UL, NSF, CE, GS 15° 20° ~ 6° / Up to ½" tang 2,500 RPM / 1,200 GCM Up to 3/5" or 1.5 cm high 1.75 Kg / 5 units 12.2" X 4.3" X 4.3" 31 cm X 11 cm X 11 cm 3) Soft Touch Flexible Sharpening Wheel* Stock# FS-300C coarse wheel FS-302M Medium wheel FS-304F Fine wheel Usage 2,000 ~ 2,500 passes 1,500 ~ 1,800 passes 1,000 ~ 1,200 passes Function For re-profiling or to repair knives with chip(s) up to ⅛". For heavy commercial use or speed sharpening. To get razor sharp. Not for Pre-sharpening (re-profiling). * The key to our quality edge is a Soft touch flexible sharpening surface. This is made possible by ensuring contact 99.9% contact between the blade and the sharpen surface. This is the only sharpener in the world that can perform at this incredibly high contact rate and is the only sharpener that can maintain the desired 15° angle bevel every time you sharpen. The Coarse sharpening wheels can be used approximately 500 ~ 800 passes. After this, it will become medium sharpening wheel. The medium sharpening wheel can be used around 500 ~ 800 passes. Eventually they will become fine sharpening wheels. If you want to re-profile the knife bevel ALWAYS USE NEW COARSE WHEELS. T) Warranty 1) This limited warranty is against manufacturer’s defects. Damage due to abuse, misuse, neglect, un-usual wear and tear is not covered. 2) To activate this warranty. You must complete and return registration form within one month of purchase and include a copy of receipt showing your original date and place of purchase. 3) Under this limited warranty, MASTER GRADE reserves the right to either repair or replace the unit without charge. The customer is responsible for all freight and shipping insurance charges. 4) Warranty period for following products a) Knife sharpener: one year parts and labor b) KS-5000 Stainless mounting bracket & knives storage and P-802 900 Gauss Permanent Magnetism Bar: two years c) Sharpening wheel: one year. d) Knives i. High speed stainless steel five years ii. 3-layer stainless steel three years iii. 440 stainless steel three years iv. 420 stainless steel two years e) All other products one year or specified by separate warranty. To send merchandise for return or repair, in the USA and Canada, please contact the warranty center via email at [email protected], to get a return authorization number (RAN). Please send this RAN along with the unit to be serviced and proof of purchase to the address provided in the E-mail. Customer is responsible for all freight and shipping insurance charges. U) REPLACEMENT PARTS LIST 2. Base 4. Wide cover (CW-5000) 6. Rotation Shaft (KP-5000R)* 19. Electric cord (KP-5000E) 25. Screw 26. Hand screw (KP-5000H) (KP-1000H) 51. Narrow cover (CN-5000) 52. Switch (KP-5000S) (KP-1000S) 53. Wheel cover (KP-5000C)* 54. Sharpening wheel (FS-300 Coarse)* (FS-302 Medium)* (FS-304 Fine)* 55. Housing 56. Motor set (KP-5000M) (KP-1000M) 57. Gear set (KP-5000B) (KP-1000B) 58. Cushion leg (KP-5000L) (KP-1000L) 5000 for Commercial model 1000 for Outdoor model * For both models Recipes by Master Chef Martin Yan TV host on PBS “Yan Can Cook” Show Assorted Fresh Fruit with Chicken Makes 4 - 6 servings Ingredients 250 g boneless chicken 2 slices ginger, crushed 2 green onion, cut into 3 cm sections 1 red chili, seeded and sliced 1 apple, peeled, cored, and cubed 1 mango, peeled, seeded, and cubed 1/2 Asian pear, peeled, cored, and cubed 1/2 cup diced pineapple Marinade 2 teaspoons soy sauce 1 teaspoon rice wine 1/2 teaspoon cornstarch Seasonings 1/4 cup sweet and sour sauce 2 tablespoons white rice vinegar 1 tablespoon tomato paste 2 teaspoons soy sauce 1 teaspoon salt 1/2 teaspoon sugar Cooking Method 1. Cut chicken into small pieces. Combine chicken and marinade ingredients in a bowl; stir to coat. Let stand 10 minutes. Combine seasoning ingredients in a bowl; set aside. 2. Heat 2 tablespoons cooking oil in a hot wok over high heat. Add chicken; stir-fry 2 to 3 minutes. Remove and set aside. 3. Heat another 1 tablespoon cooking oil over high heat. Add ginger, green onion, and red chili; stir-fry until fragrant. Add all fruits and seasonings; stir-fry 1 minute. Add chicken, cook until heated through. Transfer to a serving plate. Assorted Vegetables in Pumpkin Bowl Makes 4 - 6 servings Ingredients 1 small pumpkin, about 750 g 1 slice ginger, minced 2 cloves garlic, minced 70 g sliced celery 50 g pumpkin flesh 1/3 cup straw mushrooms 30 g fresh or canned lotus seeds, drained 20 g fresh or 10 g dried lily buds, soaked and drained 6 water chestnuts, sliced 1/4 carrot, sliced Seasonings 1/4 cup soup stock or water 2 tablespoons vegetarian oyster sauce 1 teaspoon rice wine 1 teaspoon sesame oil 1/2 teaspoon cornstarch, dissolved in 1 teaspoons water Cooking Method 1. Prepare pumpkin basket: Remove a thin slice from bottom of pumpkin so it stands upright. Cut off top 1/4 of pumpkin. With a small knife, remove flesh without tearing shell; slice 50 g flesh and set aside. Prepare a wok for steaming. Add pumpkin basket; steam 5 minutes. Set aside. Combine seasoning ingredients in a bowl; set aside. 2. Heat 2 tablespoons cooking oil in a hot wok over high heat. Add ginger and garlic; stir-fry until fragrant. Add remaining ingredients and seasonings; reduce heat to low; cook, covered, 4 to 5 minutes. Add cornstarch solution; cook, stirring, until sauce thickens. Transfer to pumpkin bowl. Fish in Eight Treasure Sauce (Makes 4 - 6 servings) Ingredients 1 whole fish, about 500 g Marinade 2 slices ginger, minced 1/2 teaspoon salt 1/4 teaspoon white pepper Eight Treasures 3 cloves garlic, minced 1 green onion, chopped 2 red chilies, seeded and chopped 3 tablespoons dried shrimp, soaked and chopped 4 dried black mushrooms, soaked and chopped 40 g Sichuan preserved vegetables, chopped 6 water chestnuts, chopped 1 piece five-spice pressed bean curd, chopped Seasonings 1 cup soup stock 1 tablespoon oyster-flavored sauce 2 teaspoons chili sauce 2 teaspoons rice wine 2 teaspoons sesame oil 2 teaspoons sugar 1/4 teaspoon toasted ground Sichuan peppercorns 1 teaspoon cornstarch, dissolved in 2 teaspoons water Cooking Method 1. Clean fish and pat dry. Combine fish and marinade ingredients; stir to coat. Let stand 10 minutes. Combine seasoning ingredients in a bowl; set aside. 2. Heat 2 tablespoons cooking oil in a hot wok over high heat. Add fish; pan-fry 3 to 4 minutes on each side or until golden brown. Set aside and keep warm. 3. Heat another 1 tablespoon cooking oil in wok over high heat. Add garlic, green onion, chilies, and dried shrimp; stir-fry until fragrant. Add remaining eight treasures ingredients; cook 1 to 2 minutes. Add seasonings; cook 1 to 2 minutes. Add fish; braise 5 minutes over low heat. Add cornstarch solution; cook, stirring, until sauce thickens. We create soft touch technology RAZOR SHARP IN JUST A FEW PASSES ¬ [email protected] www.mastergradeknifesharpener.com Copyright © 2004 ~ 8 by Jack Chen