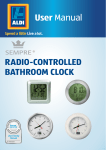
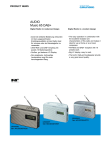
1
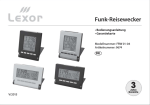
Mit Ausnahme von Aldi Süd
verwenden alle anderen Länder das
Sempre Logo mit „R“.
User Manual
Spend a little Live a lot.
OPED I
N
VEL
DE
nse
om
my
ha
NY
RMA
GE
MANUA
L
RC DIGITAL WALL CLOCK
c o n t ro
l.c
User-friendly
Manual
ID: #05007
Contents
Overview.............................................................................. 4
Use......................................................................................... 5
Product contents/device parts........................................... 6
General information.............................................................7
Reading and storing the instruction manual..................... 7
Explanation of symbols.......................................................... 7
Safety.................................................................................... 9
Proper use.................................................................................9
Safety notes............................................................................ 10
Checking the digital wall clock and product contents.....13
Setting up the digital wall clock........................................13
Tabletop clock: ........................................................................13
Wall clock:.................................................................................14
Receiving and syncing the radio signal............................14
Start-up...............................................................................15
Inserting/changing batteries..............................................15
Configuring the basic settings.............................................17
Alarms................................................................................. 20
Selecting the alarm mode.....................................................21
Setting the daily alarm..........................................................21
Activating/deactivating the
daily alarm.............................................................................. 22
Activating/deactivating the appointment alarm............ 24
Additional functions and symbols.................................... 24
Setting the snooze function................................................ 24
Setting the timer.................................................................... 25
Setting the temperature format......................................... 26
Activating and deactivating the time zone function...... 27
Calendar week tracking....................................................... 27
Current date............................................................................ 27
Lunar phase symbol..............................................................28
Selecting a language............................................................28
Contents
Dok./Rev.-Nr. 92991_20150427_2
Cleaning.............................................................................. 29
Storage............................................................................... 30
Technical data.....................................................................31
Declaration of conformity..................................................31
Disposal...............................................................................31
Disposing of the packaging..................................................31
Disposing of old devices....................................................... 32
Disposing of batteries and rechargeable batteries........ 32
Warranty card..................................................................... 33
Warranty conditions.......................................................... 34
4
GB
IRE
A
11
1
2
10
3
9
4
8
B
18
17
7
6
5
12
13
14
15
16
GB
C
5
IRE
19
MODE ALARM
SNOOZE
20
21
D
MODE ALARM
SNOOZE
26
22
25
E
EINST. ALARM
NACHWECKEN
23
24
F
MODE ALARM
21
20
SNOOZE
6
GB
IRE
Product contents/device parts
1
Minutes
17
Battery
2
Seconds
18
Time format
3
Lunar phase
19
Wall mounting hole
4
Temperature
20
Support
5
Calendar week (W)
21
Battery compartment cover
6
Week day/language/timer
22
Snooze button
7
Month
23
Back arrow button
8
Day
24
Forward arrow button
9
Daylight saving time
25
Alarm button
10
Radio
26
Mode button (settings)
11
Hours
12
Snooze function
13
Time zone function
14
Appointment time (AP)
15
Daily alarm 1 (A1)
16
Daily alarm 2 (A1)
The product contents include two
type LR6/R 6 batteries with 1.5 V (type AA).
General information
IRE
GB
General information
Reading and storing the instruction
manual
This instruction manual accompanies this RC
digital wall clock. It contains important information on start-up and operation.
For improved readability, the RC digital wall clock will be
referred to only as the “digital wall clock” below.
Before using the digital wall clock, read the instruction
manual carefully. This particularly applies for the safety
notes. Failure to comply with the instruction manual
may result in damage to the digital wall clock.
The instruction manual is based on the standards and
rules in force in the European Union. When abroad, you
must also observe country-specific guidelines and laws.
Store the instruction manual for future use. If you pass
the digital wall clock on to third parties, please be absolutely sure to include this instruction manual.
Explanation of symbols
The following symbols and signal words are used in this
instruction manual, on the digital wall clock or on the
packaging.
after sales support
GB IRE 00800-98887000
[email protected]
7
GB
IRE
General information
WARNING!
WARNING! This signal word designates a hazard with
moderate degree of risk which may lead to death or severe injury if not avoided.
CAUTION!
CAUTION! This signal word designates hazard with low risk,
which may result in minor or moderate injury if not avoided.
NOTICE!
NOTICE! This signal word warns against potential damages to property.
This symbol provides you with useful
supplementary information on operation.
Declaration of conformity (see chapter “Declaration of conformity”): Products marked
with this symbol meet all applicable Community regulations for the European Economic Area.
This symbol indicates that the radio operation is activated.
This symbol indicates that Daylight Saving
Time (DST) is currently activated.
This symbol indicates that the batteries are low.
8
[email protected]
GB
after sales support
IRE 00800-98887000
Safety
IRE
GB
TM
If the TM abbreviation blinks on the LCD display, the timer is on.
AM/PM
This symbol indicates that the 12-hour time
format has been activated.
This symbol indicates that the snooze function has been activated.
ZONE
This symbol indicates that the time zone
function has been activated.
This symbol shows the current lunar phase.
This symbol indicates that the daily alarm 1
has been activated.
This symbol indicates that the daily alarm 2
has been activated.
This symbol indicates that the appointment
alarm (AP) has been activated.
This symbol indicates that the adjacent value represents the current temperature.
Safety
Proper use
The digital wall clock is only designed for displaying
the time and temperature. The digital wall clock is only
intended for private use in dry indoor rooms and is not
suitable for commercial purposes. The digital wall clock
is not a children's toy.
after sales support
GB IRE 00800-98887000
[email protected]
9
GB
IRE
Safety
Only use the digital wall clock as described in this instruction manual. Any other use is deemed improper
and may result in damage to the digital wall clock.
The manufacturer or vendor accepts no liability for damage caused by improper or incorrect use.
Safety notes
WARNING!
Danger of explosion!
Batteries and rechargeable batteries may
explode if they are excessively heated up.
−− Do not subject the digital wall clock to
direct sunlight to prevent the batteries
from becoming too hot.
−− Don’t heat up or open the batteries and
don’t throw them in an open fire.
−− Do not place any open sources of fire like
candles on the radio clock.
WARNING!
Danger of suffocation!
Children can become trapped in the packing
film when playing and suffocate.
−− Do not allow children to play with the
packaging wrapper.
10
[email protected]
GB
after sales support
IRE 00800-98887000
Safety
IRE
GB
WARNING!
Risk of poisoning!
If children swallow batteries, the batteries
could leak and result in poisoning or even
death.
−− Store the batteries in an area that is not
accessible for children.
−− If it is no longer possible to close the battery compartment, dispose of the digital
wall clock (see chapter “Disposal”).
−− If you suspect that a battery has been
swallowed or otherwise incorporated by
a child or an animal, promptly consult a
physician.
NOTICE!
Risk of damage!
Improper handling of the digital wall clock
may damage the digital wall clock.
−− Make sure that the digital wall clock is
out of the reach of small children or pets.
They may accidentally knock over the
digital wall clock.
−− Only replace empty batteries with full
batteries of the same type.
after sales support
GB IRE 00800-98887000
[email protected]
11
GB
IRE
Safety
−− Do not place any objects on the digital
wall clock.
−− Do not apply pressure to the display as it
could break as a result.
−− Do not touch the display with angular or
scratchy objects to prevent abrasion.
−− Do not expose the digital wall clock to
excessive humidity in the bathroom.
−− Do not expose the digital wall clock continuously to temperatures below 0 °C
and above 40 °C.
−− Keep the digital wall clock away from
dust, heat, direct sunlight, strong percussions as well as magnetic fields.
−− Do not open the housing, instead contact the manufacturer for repairs at the
service address provided on the warranty card.
−− When you are not using the digital wall
clock, cleaning it or if a fault occurs,
switch the digital wall clock off by removing the battery.
12
[email protected]
GB
after sales support
IRE 00800-98887000
Checking the digital wall clock and product contents
IRE
GB
Checking the digital wall clock and
product contents
NOTICE!
Risk of damage!
If you are not cautious when opening the
packaging with a sharp knife or other pointy
objects, you may quickly damage the digital
wall clock.
−− Therefore, be very careful when opening.
1.Take the digital wall clock out of the packaging.
2.Check to make sure that the delivery is complete
(see fig. A).
3.Check whether the digital wall clock or the individual
parts exhibit damage. If this is the case, do not use
the digital wall clock. Contact the manufacturer at
the service address specified on the warranty card.
Setting up the digital wall clock
You can use the digital wall clock as a wall or tabletop clock.
Tabletop clock:
−− Fold out the bottom support 20 on the back of the
digital wall clock (see fig. F).
Position the digital wall clock.
after sales support
GB IRE 00800-98887000
[email protected]
13
GB
IRE
Receiving and synchronising the radio signal
Wall clock:
CAUTION!
Risk of injury!
If the radio clock is not hung on the wall properly, it could fall down and on someone’s
feet for example.
−− Hang the radio clock on the wall with care
so that there is no risk of it falling down.
−− Hang the digital wall clock on a nail or a screw on a
suitable wall.
Use the wall mounting hole 19 for this purpose.
Observe the following when hanging the
digital wall clock on a wall:
• The alarm may be muffled somewhat
because the speakers are on the back of
the housing.
• The buttons are no longer easily accessible because they are located on the
back of the housing.
Receiving and synchronising the
radio signal
If radio mode is activated, the clock will synchronise
every day at 1:00 p.m., 2:00 p.m. and 3:00 p.m. so that
the digital wall clock displays the current time accurate
14
[email protected]
GB
after sales support
IRE 00800-98887000
Start-up
IRE
GB
to the second.
The synchronisation process will take seven minutes.
The radio symbol 10 will blink during synchronisation.
In case of poor reception, only the radio tower will blink,
but no radio waves will be shown.
If the clock fails to successfully synchronise at 3:00 p.m.,
it will synchronise at 4:00 p.m. when the next radio signal is available.
If it successfully synchronises, no further synchronisation will take place on that day. If the clock failed to synchronise, it will synchronise again at 5:00 p.m. when the
next radio signal is available. No further synchronisation
will take place on the same day; regardless whether the
clock successfully synchronised at 5:00 p.m. or not.
Start-up
Inserting/changing batteries
WARNING!
Risk of chemical burns from battery acid!
The older the batteries, the greater the risk
of battery acid being leaked. Leaking battery
acid may lead to chemical burns.
−− Do not allow battery acid to come into
contact with skin, eyes or mucus membranes.
after sales support
GB IRE 00800-98887000
[email protected]
15
GB
IRE
Start-up
−− Immediately consult a physician if
children or animals have swallowed a
battery.
−− In the event of contact with battery acid,
immediately flush the applicable areas
with plenty of clean water and consult a
physician.
−− Do not open the batteries. Otherwise,
battery acid may leak.
NOTICE!
Risk of damage!
Improper handling of the digital wall clock
may damage the digital wall clock.
−− Take the old batteries out of the battery
compartment if they are empty or if you
do not use the device for a prolonged
period of time.
−− Always change both batteries at the
same time.
−− Do not attempt to recharge empty
non-rechargeable batteries.
If the voltage of the batteries falls below 2.5 V, the battery symbol 17 will light up. Replace the batteries to
prevent them from running out at an inconvenient time
and e.g. causing the morning alarm to not sound.
16
[email protected]
GB
after sales support
IRE 00800-98887000
Start-up
IRE
GB
To insert new batteries:
1.Open the battery compartment on the back of the digital wall clock by carefully unhooking the cover 21 .
2.If necessary, take out any empty/old batteries.
3.Insert two new AA batteries (see fig. E).
Make sure the polarity of the batteries is correct in
the process.
4.Close the battery compartment
by carefully pushing the cover back into place.
Configuring the basic settings
Once you have inserted batteries in the digital wall
clock, you can configure the basic settings directly. This
includes, among other things, the time, date, language
and day of the week.
After 10 seconds of button inactivity, the
digital wall clock will automatically switch
back to the standard display mode from
configuration mode.
Perform the following basic settings:
1.Push the mode button 26 (settings).
The language symbol 6 will start to flash.
2.Use the arrow keys 23 / 24 to set the desired
language.
You can choose from German (GE), Italian (IT), French
(FR), Dutch (DU), Spanish (SP), Danish (DA) and English (EN).
after sales support
GB IRE 00800-98887000
[email protected]
17
GB
IRE
Start-up
3.Confirm your selection by pushing the mode button
(settings).
The year will start to flash.
4.Use the arrow keys to set the current year.
5.Confirm your selection by pushing the mode button
(settings).
The date format will start to flash.
6.Use the arrow keys to select the desired date format.
Reading
Meaning
M D
Month Day
D M
Day Month
7.Confirm your selection by pushing the mode button
(settings).
The month 7 will start to flash.
8.Use the arrow keys to set the current month.
9.Confirm your selection by pushing the mode button
(settings).
The day 8 will start to flash.
10. Use the arrow keys to set the current day.
The days are abbreviated for the individual languages as follows:
18
GE
IT
FR
DU
SP
DA
EN
MO
LU
LU
MA
LU
MA
MO
DI
MA
MA
DI
MA
TI
TU
[email protected]
GB
after sales support
IRE 00800-98887000
Start-up
IRE
GE
IT
FR
DU
SP
DA
EN
MI
ME
ME
WO
MI
ON
WE
DO
GI
JE
DO
JU
TO
TH
FR
VE
VE
VR
VI
FR
FR
SA
SA
SA
ZA
SA
LO
SA
SO
DO
DI
ZO
DO
SO
SU
GB
11. Confirm your selection by pushing the mode button
(settings).
The hour 11 will start to flash.
12. Use the arrow keys to set the current hour.
13. Confirm your selection by pushing the mode button
(settings).
The minutes 1 will start to flash.
14. Use the arrow keys to set the current minutes.
15. Confirm your selection by pushing the mode button
(settings).
The time format will start to flash.
16.Use the arrow keys to set the desired time format.
Reading
Time format
24 h
24 hour time
12 h
12 hour time (AM/PM)
17.Confirm your selection by pushing the mode button
(settings).
The time zone will start to flash.
after sales support
GB IRE 00800-98887000
[email protected]
19
GB
IRE
Alarms
18.Use the arrow buttons to set the desired time zone
(e.g. 0 for United Kingdom and the Republic of
Ireland).
You can select a time zone from -12 to +12.
19.Confirm your selection by pushing the mode button
(settings).
The radio symbol 10 will start to blink.
20.Use the arrow buttons to select whether the time will
be determined based on the radio signal or not.
Reading Time format
ON
Radio mode is activated and the time
will be updated three times a day so
that it is accurate to the second.
OFF
Radio mode is deactivated (see chapter
“Receiving and syncing the radio
signal”).
21.Confirm your selection by pushing the mode button
(settings).
You have successfully configured the basic settings.
Alarms
The digital wall clock has two daily alarms (A1 and A2)
as well as an appointment alarm (AP). The appointment
alarm can be set for a certain date.
20
[email protected]
GB
after sales support
IRE 00800-98887000
Alarms
IRE
GB
Selecting the alarm mode
1.To select the alarm mode, push the Alarm button 25 .
2.Push the Alarm button again until the desired alarm
mode appears on the display
(see position 14 , 15 and 16 in fig. B).
3.Push and hold the Alarm button to select the desired
alarm mode.
Setting the daily alarm
1.Select alarm mode A1 or A2 by pushing the Alarm
button 25 .
2.Push and hold the Alarm button to select the desired
alarm mode.
The hours for the alarm will start to flash.
3.Use the arrow keys 23 / 24 to set the desired hour.
4.Confirm the selected hour by pushing the Alarm
button.
The minutes for the alarm will start to flash.
5.Use the arrow keys to set the minutes.
Holding the arrow buttons down will cycle faster
through the minutes.
6.Confirm the selected minutes by pushing the Alarm
button.
You have successfully configured the alarm.
7.Push the Alarm button to quit alarm mode.
You have successfully configured a daily alarm. The corresponding symbol will now light up on the display and
signal that the alarm is activated.
after sales support
GB IRE 00800-98887000
[email protected]
21
GB
IRE
Alarms
Activating/deactivating the
daily alarm
To activate or deactivate a daily alarm:
1.Select alarm mode A1 or A2 by pushing the Alarm
button 25 .
2.Push the mode button 26 in the respective alarm
mode until the desired setting lights up on the
display:
Reading
Setting
M-F
M-F
S-S
S-S
M-F/S-S
M-F/S-S
Monday to Friday
Saturday and Sunday
Monday to Sunday
Alarm off
The alarm is activated for the first three symbols. If no
symbol is shown, the alarm is deactivated.
3.Push the Alarm button until the current time appears
on the display again.
If the alarm is activated and the alarm time has been
reached, a signal will sound for two minutes. This signal
will sound at increasingly shorter intervals.
−− Push any button to interrupt the alarm tone.
−− Activate the “snooze function” by pushing the
snooze button 22 (see chapter “Setting the snooze
function”).
22
[email protected]
GB
after sales support
IRE 00800-98887000
Alarms
IRE
GB
The “snooze function” can only be set in combination with the daily alarms and not with
the appointment alarm.
Setting the appointment alarm
1.Select the appointment alarm AP by pushing the
Alarm button 25 three times.
2.Push and hold the Alarm button to select the desired
alarm mode.
The year will start to flash.
3.Use the arrow keys 23 / 24 to set the desired year.
4.Confirm the desired year by pushing the Alarm button.
The month will start to flash.
5.Use the arrow keys to set the desired month.
6.Confirm the desired month by pushing the Alarm
button.
The day will start to flash.
7.Use the arrow keys to set the desired day.
8.Confirm the desired day by pushing the Alarm button.
The hours for the alarm will start to flash.
9.Use the arrow keys to set the desired hour.
10.Confirm the desired time by pushing the Alarm button.
The minutes for the alarm will start to flash.
11.Use the arrow keys to set the minutes.
12.Confirm the desired time by pushing the Alarm button.
You have successfully set the appointment alarm.
after sales support
GB IRE 00800-98887000
[email protected]
23
GB
IRE
Additional functions and symbols
Activating/deactivating the
appointment alarm
To activate or deactivate the appointment alarm:
1.Select the AP alarm mode by pushing the Alarm
button 25 .
2.Push the mode button 26 (settings) until the desired setting appears on the display:
Reading
Setting
The appointment alarm has been
activated.
The appointment alarm has been
deactivated.
After a few seconds, only the current time will appear
automatically and, if applicable, the AP clock symbol
will appear on the right.
Additional functions and symbols
Setting the snooze function
If a daily alarm sounds, you can interrupt it for five minutes instead of deactivating it.
−− Activate the snooze function by pushing the snooze
button 22 (snooze).
The alarm sound will stop, the snooze symbol 12
will start to flash and the alarm sound will resume in
five minutes.
24
[email protected]
GB
after sales support
IRE 00800-98887000
Additional functions and symbols
IRE
GB
You can repeat the snooze function as often
as you like.
The snooze function can only be set in combination with the daily alarms and not with the
appointment alarm.
Setting the timer
With the timer function, you can set the amount of time
that will count down once set. The alarm sound will
sound once the set time has elapsed.
1.Push the snooze button 22 until 0:00 and TM appear on the LCD display.
2.Press the forward arrow key 24 to set the hours.
Be sure you know the value you intend to set before
you start as you can only cycle forward through the
numbers and not backward. You can set the timer
between 0:00 and 23:59.
3.Press the back arrow button 23 to set the minutes.
Be sure you know the value you intend to set before
you start as you can only cycle forward through the
numbers and not backward.
4.Start the timer by pushing the snooze button
(snooze).
TM is now flashing on the LCD display and the time
will count down.
You have successfully set the timer.
after sales support
GB IRE 00800-98887000
[email protected]
25
GB
IRE
Additional functions and symbols
−− To switch from the timer screen to the normal
screen, push the mode button 26 (settings).
The normal screen will appear and, every five seconds, TM will flash instead of the weekday 6 .
−− Push the mode button (settings) again to switch from
the normal screen to the timer screen.
−− Push the snooze button to pause the timer.
While the timer pauses, you can use the arrow keys
23 / 24 to extend the time as long as you want and
restart the timer.
Once the timer has counted down, an alarm will
sound for two minutes and TM will flash.
−− Push any button to switch the alarm off.
Setting the temperature format
You have the possibility of displaying the current room
temperature in °Fahrenheit (°F) or °Celsius (°C).
−− Push the forward arrow button 24
to switch the temperature format.
For temperatures over 50 °C, HH.H will appear on the display. For temperatures under
0 °C, LL.L will appear on the LCD display.
26
[email protected]
GB
after sales support
IRE 00800-98887000
Additional functions and symbols
IRE
GB
Activating and deactivating the time
zone function
You have the possibility of activating or deactivating the
“time zone” function.
−− Push the back arrow button 23 to activate or deactivate the time zone function.
If the time zone function is activated, the zone symbol will light up 13 .
Calendar week tracking
The digital wall clock is programmed so that Monday is
always the first day of the week.
If January 1st is a Monday, Tuesday, Wednesday or Thursday, this week will be set as the first calendar week of
the new year.
If January 1st is a Friday, Saturday or Sunday, this week
will be set as the last calendar week of the old year.
Current date
The digital wall clock shows the day 8 , month 7 ,
week day 6 and calendar week 5 .
Though the year is selected with the basic
settings, it is not shown continually.
after sales support
GB IRE 00800-98887000
[email protected]
27
GB
IRE
Additional functions and symbols
Lunar phase symbol
If you have correctly set the date and time of your digital
wall clock or if your digital wall clock is synchronising
with the radio signal, your digital wall clock will also display the current lunar phase.
Reading
New moon
Waxing moon
Full moon
Waning moon
Selecting a language
You can choose from the following languages for the
digital wall clock:
• German (GE),
• Italian (IT),
• French (FR),
• Dutch (DU),
• Spanish (SP),
• Danish (DA) and
• English (EN).
28
[email protected]
GB
after sales support
IRE 00800-98887000
Cleaning
IRE
GB
Cleaning
NOTICE!
Risk of short circuit!
Water that has infiltrated the housing may
cause a short-circuit and irreparably damage the digital wall clock.
−− Never submerge the digital wall clock in
water or other liquids.
−− Make sure that water and other liquids
do not end up in the housing.
NOTICE!
Risk of damage!
Improper handling of the digital wall clock
may result in damage.
−− Do not use any aggressive, acid- or vinegar-based cleaners, brushes with metal or
nylon bristles, sharp or metallic cleaning
utensils such as knives, hard scrapers and
the like. They could damage the surfaces.
−− Clean the digital wall clock so that it can
not fall into a sink or a tub.
after sales support
GB IRE 00800-98887000
[email protected]
29
GB
IRE
Storage
1. Take the batteries out of the battery compartment
(see chapter “Inserting/changing batteries”).
2. Clean the digital wall clock with a damp cloth and, if
necessary, a small amount of mild soap.
3. Wipe the digital wall clock off with a dry, lint-free
cloth.
4. Put the batteries back in
(see chapter “Inserting/changing batteries").
Storage
NOTICE!
Risk of damage!
The older the batteries, the greater the risk
of battery acid being leaked. Battery acid
that has been leaked could damage the digital wall clock.
−− Take the batteries out of the digital wall
clock before it.
−− Store the digital wall clock in a dry, temperatureresistant location.
30
[email protected]
GB
after sales support
IRE 00800-98887000
Technical data
IRE
GB
Technical data
Model:
Battery type:
DWU01b, DWU01w
Two 1.5 V type LR6/R 6 batteries
(AA batteries)
Operating and stor- 0 °C to 40 °C
age temperature:
( -10 °C to -1 °C and 41 °C to 45 °C
only for short periods of time at
most)
Dimensions
(W x D x H):
22.8 x 2 x 16 cm
Article number:
92393
Display:
LCD display
Declaration of conformity
The EU declaration of conformity can be requested from the address specified on the
warranty card (at the end of this instruction manual).
Disposal
Disposing of the packaging
Dispose of the packaging separated into
single type materials. Dispose of cardboard and carton as waste paper and
foils via the recyclable material collection
service.
after sales support
GB IRE 00800-98887000
[email protected]
31
GB
IRE
Disposal
Disposing of old devices
(Applicable in the European Union and other European
states with systems for the separate collection of reusable waste materials)
Old devices must not be disposed of with
household waste!
If at some point it is no longer possible to use
the digital wall clock, each consumer is required by law to dispose of old devices separately from their household waste, e.g. at a collection
point in their community/borough. This ensures that old
devices are recycled in a professional manner and also
rules out negative consequences for the environment.
For this reason, electrical equipment is marked with the
symbol shown here.
Disposing of batteries and rechargeable
batteries
Batteries and rechargeable batteries may not be disposed of with household waste!
As the end user you are required by law to
bring all batteries and rechargeable batteries,
regardless whether they contain harmful substances* or not, to a collection point run by the
communal authority or borough or to a retailer,
so that they can be disposed of in an environmentally
friendly manner.
* labelled with: Cd = cadmium, Hg = mercury, Pb = lead
32
[email protected]
GB
after sales support
IRE 00800-98887000
IRE
GB
Warranty Card
RC DIGITAL WALL CLOCK
Your details:
Name
Address
E-mail
Date of purchase *
* We recommend you keep the receipt with this warranty card.
Location of purchase
Description of malfunction:
If after contacting the
manufacturer you are
requested to return the
faulty product please
return the completed
warranty card together
with it.
Sertronics UK
45 Regal Drive
Walsall Enterprise Park,
Wallsall, WS2 9HQ
UNITED KINGDOM
AFTER SALES SUPPORT
GB
IRE
00800-98887000
[email protected]
Model:
Product Code:
DWU02b, DWU02w 92393
07/2015
Free hotline
years
warranty
GB
IRE
Warranty conditions
Dear Customer,
The ALDI warranty offers you extensive benefits in addition to your statutory rights:
Warranty period: 3 years from date of purchase.
Costs:
Free repair/exchange.
No transport costs.
Hotline:
Free hotline.
ADVICE:
Please contact our service hotline by
phone, e-mail or fax before sending
in the device. This allows us to provide
support in the event of possible operator errors.
In order to make a claim under the warranty, please
send us:
• the faulty item together with the original purchase receipt and the completed warranty card.
• the faulty product with all components included
in the packaging.
The warranty does not cover damage caused by:
IRE
GB
• Accident or unanticipated events (e.g. lightning, water, fire).
• Improper use or transport.
• Disregard of the safety and maintenance instructions.
• Other improper treatment or modification.
After the expiry of the warranty period, you still have the
possibility to have your product repaired at your own expense. If the repair or the estimate of costs is not free of
charge you will be informed accordingly in advance.
This warranty does not affect your statutory rights. In the
event that a product is received for repair, neither the
service company nor the seller will assume any liability
for data or settings possibly stored on the product by the
customer.
Spend a little Live a lot.
Great care has gone into the manufacture of this product and it should therefore provide you with years of good service when used properly. In the event
of product failure within its intended use over the course of the first 3 years after date of purchase, we will remedy the problem as quickly as possible once it
has been brought to our attention. In the unlikely event of such an occurrence,
or if you require any information about the product, please contact us via our
helpline support services, details of which are to be found both in this manual
and on the product itself.
GB
IRE
Produced in china for:
Aldi Stores ltd. po box 26, Atherstone
Warwickshire, cv9 2SH
3
Aldi stores (ireland) LTD.
Po box 726, naas, co. Kildare.
visit us at www.aldi.com
years
Warranty
AFTER SALES SUPPORT
GB
IRE
00800-98887000
Model: DWU02b, DWU02w
[email protected]
Product code: 92393
07/2015