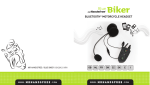
1
Svenska OH-Gruppen Ltd filial
D6 & D6 Adventure
Snabbstart & Info
Quickstart & Info
User Instruction Manual
Bluetooth®
www.trolleborg.se
[1]
Svenska OH-Gruppen Ltd filial
Tack för att du köpt D6 / D6 Adventure!
Jag hoppas du får mycket glädje av systemet och att det ger ytterligare en dimension
till mc-åkningen som vi tycker är så kul. Här får du en kortfattad svensk uppstarts info
(egentligen är det bara att plugga i och starta, allt är konfigurerat och klart)
Snabbstart & Info
Kanal 1-8 är standard PMR (446 MHz)
Kanal 9-16 är också standard kanal 1-8 MEN med en pilotton på
67 Hz inlagd (CTCSS 67,0). Detta utestänger de flesta störningar, praktiskt! Men
kräver att den som sänder också måste ha ställt in CTCSS 67,0 på sin radio för att höras
av dig. Systemet är standard och finns på de flesta professionella komradio apparater.
Lagom volym brukar vara med volymreglaget satt ”kl. 9-10” SÄTT INTE DENNA
FÖR HÖGT!
Alla delarna är grundladdade. Efter 6-7 uppladdningar når batterierna sin
normala arbetstid.
Uppstart:
1. Sätt blåtandsdongeln i radion. Dongeln till har en on/off knapp på sidan som hålls
inne ca 7 sek för on/off – blå lampa blinkar till. Starta radion.
2. Starta D6 (on/off knapp ca 3 sek) och vänta på röst som efter ca 30 sek säger
”…connected to device bt-dongle #...”
3. Starta PTT-knappen genom att hålla knappen på densamma intryckt i ca 5 sek – blå
lampa blinkar till.
Justera volymen direkt på radion - Klart!
Avstängning:
Gör du i vilken ordning som helt men på detta vis hör du vad som sker.
PTT-knappen behöver inte stängas av.
BT-dongel – håll in on/off knappen ca 10 sek. – Röst bekräftar i hjälmen.
D6 - håll in on/off knappen ca 5-6 sek. Röst bekräftar ”Powering down” i hjälmen. –
Ladda allt utom PTT-knappen (räcker att den laddas efter ca 3-4 dagar)
Koppla in din GPS
Med D6 AVSTÄNGD. Håll in on/off knappen på D6 i ca 8 sek så går den in i
ihopkopplingsläge. Gör nu resten av hopkopplingen från din GPS, lägg D6 som en
”hörlur”. Din telefon paras ihop med GPS:en inte D6 enheten.
TIPS!
Den lilla PTT-knappen monteras med fördel på lite tygtejp lindat kring styret och
streckkoden uppåt. Då halkar den inte runt så lätt samt risken för vatten i kontakterna
minskar.
www.trolleborg.se
[2]
Svenska OH-Gruppen Ltd filial
Thanks for buying the D6 / D6 Adventure!
I wish that You will have a lot of fun with the system and that it will give You a new
dimension of the tours with Your bike and friends. This page is a shortcut to get
started in a minute or two! Actually everything is preconfigured just for You to startup
but here are some good things to know before.
Quickstart & Info
The radio is configured with standard PMR channels # 1-8, no pilot tones. Channel
9-16 are the same channels but with pilot tone 67,0 (CTCSS 67,0) So if you use
channel 9-16 all in the group who want to be heard of you MUST use pilot tone 67,0.
The good (very good) thing with pilot tones are that most interferences are blocked
out and that only those with the same pilot tone communicates. The CTCSS system is
standard on most professional radios.
All batteries are preloaded but reaches their top effect first after 6-7 charges.
Connect the headset cables for the D6 to the D6.
Startup
1. Connect the Bluetooth dongle to the radio. Press the on/off switch on the dongle
for about 7 sec and it will start. Start the radio and set the volume on “9-10”
counter clockwise.
2. Press the on/off switch on the D6 for about 3 sec and it will soon tell you the
battery status. Within another 30 sec D6 will say “connected to device bt dongle
#....” This is great!
3. Switch on the small PTT-button while pressing it´s button for about 5 sec. A blue
led will flash! Now it´s on.
The system is now ready to go! Put some cloth tape on the handlebar before mounting
the PTT-button. Barcode on top!
Shutdown
You can switch of the equipment in any way you like but if you first switch of the
bt-dongle by holding the on/off switch for about 10 sec a voice in the D6 will confirm
the switch off. Then turn of the D6 by holding the on/off switch for 5-6 sec and the
voice will confirm “Powering down” The small PTT-button will power down after a
while.
D6, radio and Bluetooth dongle needs charging after about 8 hrs of use. PTT-button
will be able to standby for about 120 hrs or 80 hrs of use.
Connect GPS
With D6 powered OFF. Hold on/off switch on D6 for about 8-10 sec and it will go into pairing
mode. Now from you GPS start pairing to the D6 as a “headset” if you can choose. A phone has to
be connected to your GPS then it will be connected to the D6 at once.
www.trolleborg.se
[3]
Svenska OH-Gruppen Ltd filial
Applicable: All Cell phones with BT function and All Helmets
Thank you for purchasing the Bluetooth Helmet Headset of D6, which enable you use the mobile
phone calls or enjoy music from it while you riding motorcycles or bicycles in the most safe and
comfortable manner. Without mobile phone you can also have crystal clear full-duplex driver to
passenger (driver to driver) voice inter-communication.
Please read this guide carefully to assure safe and satisfactory operation.
Technical Specification
Name of Product
Model
Microphone Type
Bluetooth Version
Chip
Module
Bluetooth Profile
RF Frequency
Intercom Range
Helmet Bluetooth Headset
D6
DSP Noise Suppression MIC
V3.0 Class 1
CSR BlueCore5MM
DK_218M
HSP, HFP, A2DP, AVRCP
2.4GHZ
Up to 500 meters
Charge Time
Up to 3 hours
Music Play Time
Up to 8 hours
FM Radio Work Time
Up to 8 hours
Cell Phone Talk Time
Up to 8 hours
Intercom Talk Time
Up to 8 hours
Standby time
Weight
Up to 100 hours
130g
Working Temperature
-15℃~50℃
Storage Temperature
-25℃~60℃
Battery Type
Li-Polymer 500mAh/3.7V
www.trolleborg.se
[4]
Svenska OH-Gruppen Ltd filial
Product Overview
Control Button: Power
Pairing / Intercom
/
Multi function Button
Volume + : Volume up / Track
forward / Voice dial
Volume - : Volume down/ Track
backward / last number redial
LED indicator
Earphone connection
www.trolleborg.se
[5]
Svenska OH-Gruppen Ltd filial
How To Fit
There are two choice fou you to install the D6 Helmet Bluetooth Headset to your helmet.
Using the mounting plate with the 2 screws,
attach it to the outside of helmet shell by
loosening screws and sliding under shell on side of helmet. Tighten 2 screws securely, do not
over tighten, and slide comm unit into slots in mounting plate.
OR
Use the adhesive back mounting plate
by simply peeling off the protective sticker on
back of adhesive pad and press mounting plate firmly onto outside of helmet shell. Slide
comm unit into slots in mounting plate.
Mounting plate
or
for mounting
the D6 Helmet Bluetooth Headset
NOTE: 1.We advise if you don’t use the
clip, it’s better to remove it from the helmet
2. If there has call coming and intercom, be
careful to drive.we advise you stop riding
to talk when the weather is bad or there
have a traffic jam.
&
Inserting speakers:
Remove adhesive protective sticker from back of Velcro
pieces and firmly apply speaker to area inside ear pocket
opening inside helmet on left and right sides.
Microphone:
Adjust the microphone before removing the velcro sticker.
Apply to the middle of the mouth of helmet. (put the short
headset cable on the left, and the long headset cable on the
right).
www.trolleborg.se
[6]
Svenska OH-Gruppen Ltd filial
Main Features
Bluetooth Hands-free. Automatically switch seamlessly among
Bluetooth mobile phone, Intercom and stereo sources.
Support voice dial.
Support the last number redial.
Call Answer, reject and hang up functions supported.
Hands-free Volume Control.
Mobile phone highest priority.
Support 500m max range full duplex intercom.
With DSP wind noise suppression to ensure the crystal clear voice
quality when speeding along the highway.
Intercom states prompts.
Independent intercom volume control.
Voice volume adjusting automatically according to the motorcycle
speed and ambient noise.
Support the A2DP.
Sharing the music from the mobile phone or other music sources with
A2DP.
Support music play, pause, playback and forward control with AVRCP.
Independent volume control.
Volume memorizing.
Support connecting with the GPS Navigation.
Sharing the audio from the GPS Navigation.
Independent Volume control.
Frequency covers 76~108MHz.
FM audio station auto searching function.
FM audio station memorize function.
Independent FM volume control.
FM audio can save Max 8 stations.
www.trolleborg.se
[7]
Svenska OH-Gruppen Ltd filial
New Function
Text To Speech function
12 Languages text to speech supported
User operation feedback
Reports caller number and caller name
Reports the battery status
Connect with walkie talkie BT adapter
Connect with walkie talkie Bluetooth adapter
PTT function
Intercom states prompts
Independent intercom volume control
Intercom high priority
Dual Link Function
Can connect with two mobile phones, or one mobile phone and one
walkie talkie Bluetooth adapter, or one GPS and one phone etc at
the same time.
Can set one device (phone, Bluetooth adapter or GPS) as priority
device
Volume level can be turned and remembered separately
How To use
Power on/off
In power off state, press Control Button and hold it for about 2 seconds, until hear a “di” tone,
release the button, blue indicator will flash to indicate power on successfully.
In power on state, press Control Button and hold it for about 8 seconds, until hear a long “di”
tone, all LED indicators will be shut off to indicate the headset is been powered off.
Pairing Two Bluetooth Helmet Intercom headsets.
To conduct duplex talkback between two helmet Bluetooth headset, they need to pair with each
other for using at the first time, and the pair info will be saved for using next time (it pairs each
other automatically). Follow the instruction below:
Place two Bluetooth headsets in a visible area together (distance less than1 meter range), and
make sure there is no other Bluetooth headsets in pairing state within 10M around, and both of the
Bluetooth Helmet Intercom headsets are in power off state.
Press and hold Control Button of both Bluetooth Helmet Intercom headsets for about 8
seconds, until hear a “dudu” tone, the Blue LED and the Red LED flashing alternately, release
www.trolleborg.se
[8]
Svenska OH-Gruppen Ltd filial
both buttons, and both Bluetooth Helmet Intercom headsets are in pairing state then.
While the Blue LED and the Red LED flashing alternately (Pairing state), short press either of
control buttons .
The pressed Bluetooth Helmet Intercom headset will search another in pairing state one and try
to pair with it.
Once paired success, both Bluetooth Helmet Intercom headsets indicators will exit the Blue/Red
flashing state simultaneously, and shift to only Blue LED flashing state same time.
PS: Bluetooth headset turn to intercom state automatically after the first pairing
succeed.
Pairing between D6 Bluetooth headset and Mobile.
Place the D6 Bluetooth Helmet Intercom headset and the mobile phone in a visible area within
1 meter range.
Make sure the Bluetooth Helmet Intercom headset is in power off state.
Press and hold Control Button for about 8 seconds, release until hear a “dudu” tone, and the
Blue LED and the Red LED flashing alternately, then the Bluetooth Helmet Intercom headset is in
pairing state now.
Follow the user manual of your mobile phone, turn on the Bluetooth function, and searching the
Bluetooth headset devices.
From the found devices in your mobile phone, select the device named “D6”, and then connect
to pair with it, when it prompts to enter password, enter password <0000>. Once paired successful,
LED Indicator will change from Blue/Red alternately to Blue flashing, and with a “di” tone to note
that the Bluetooth Helmet Intercom headset has connected with your mobile phone. Now you can
use the headset to answer you phone call, or enjoy the music from your mobile phone.
PS: Pairing password may not necessary for some mobile.
Function Operations
Phone call
Answer incoming call
When there is an incoming phone call, short press MFB to manual answer the call.
Automatically answer incoming call
After prompt ring played (about 8 seconds), and still no operations from the headset, the headset
will connect the call automatically.
Reject incoming phone call
Quick double press MFB to reject a incoming phone call.
④Hang up call
In call active state, short press MFB can hang up the call.
⑤Audio transfer
In call active state, press and hold the MFB button for 3 seconds, after an “du”tone, the call audio
will transfer from headset to mobile phone.
www.trolleborg.se
[9]
Svenska OH-Gruppen Ltd filial
⑥ Last number redial
Quick double press Vol- Button then the Mobile phone will dial out the last call out number.
⑦ Voice Dial
Quick double press Vol+ Button, then the mobile will prompt you to speak out your desired
information. (only when headset is in standby state, or music play paused state.)
(Note: The above function requires the mobile phone supports Bluetooth A2DP and AVRCP,
and please make sure your Mobile Phone supports Voice Dial before activate Voice Dial
function.)
Two part Bluetooth Intercom talking
①Turn on Bluetooth Intercom talking function
D2 Bluetooth Intercom headset has memory function.when they paired successfully once, they will
remember each other. Just short press either of MFB Button while in power on state, the Intercom
Function will be activated.
②Turn off Bluetooth Intercom talking function
Either of Bluetooth Helmet headset users want to turn off the Intercom talking function, just short
press MFB Button, then the Intercom call will be ended.
Stereo music play control and Volume control
①Play forward
Short press Vol+Button to select next music.
②Play backward
Short press Vol- Button to select previous music or song playback.
(Note: The above function requires the mobile phone supports Bluetooth A2DP and AVRCP)
③Volume control
To adjusting voice volume during the phone call state, Music playing state and FM radio playing
state, Press and hold Vol+ Button to turn up the volume; Press and hold Vol-Button to turn down
the volume. Release the Button till you feel good.When reaching the maximum or minimum
volume, a “DiDong” tone will be played.
GPS navigator
Make sure the GPS have the Bluetooth function.After pairing and connecting, the voice can be
shared from the GPS navigator.
www.trolleborg.se
[10]
Svenska OH-Gruppen Ltd filial
FM radio
Turn On/Off FM
Quick double press the MFB can turn On/Off the FM Radio receiver.
Search frequency station
Short press “Volume +”makes the FM radio to start searching station forward to higher frequency,
Short press “Volume -” makes the FM radio to start searching station forward to lower frequency,
and a "dudu" tone means that the bottom frequency station is reached.
Station save and replace
Save the station you are Listen-in by double pressing “V+/V-”accessing to Station Save mode,
keeping single press “V+/V-” to search station, when you search a station you want to save, then
short press MFB and a short "di" prompt tone means station saved successfully .Max 8 stations
can be saved. After that, the saved station you was listening at the last time will be replaced
by a new station saving.
Aux-in
①Plug in/pull out Aux
During in none phone call and duplex talkback state, just connect the headset Aux-in interface
with stereo music source by cable, it will turn automatically to play A2DP music.
②Manual switchover the AUX-IN function
Double click MFB to switch over among FM radio,
AUX-IN, and mobile music play.
Text To Speech Function
12 Language Available
The 12 language available list as below:
British English, United States English, French, Italian, German, Europe Spanish, Mexican Spanish, Brazilian
Portuguese, Mandarin Chinese, Russian, Polish, Japanese .
Select Language
In pairing state, press and hold the Vol+ and Vol- for more than 1 second, you will hear a TTS
in current language promoting ”PLEASE SELECT LANGUAGE”, then the language
selection mode is enabled for 20 seconds,during this time you can press Vol+ or Vol- to select
your desired language. When one language is selected the TTS will voice prompt the language name,
shot press MFB or waiting further more 20 seconds to confirm, then confirmed language will be
memorized.
www.trolleborg.se
[11]
Svenska OH-Gruppen Ltd filial
PTT Function
)
1 This function need to use with Bluetooth adapter made by us, users can make intercom talk by
wireless PTT.
)
2 Pairing headset with Bluetooth adapter( users can refer to the method of adapter using manual to
pair);
)
3 When pairing successful, press MFB of headset, this button will works as a remote PTT button
to control the two-way radio that connects with the adapter;
)
4 Once adapter is connected with the headset, the MFB button is mainly works as a PTT button
function, user can not use this button to control A2DP music, FM or Aux any more. Power off the
radio adapter to disconnect it with with the headset, the MFB function to control A2DP music, FM
or Aux can be restored.
)
5 The adapter will occupy one HSP/HFP link, if one adapter is connected with the Bluetooth
headset, then for headset only one mobile phone can be connected to the headset, other model may
need to disconnect with the mobile phone.
)
6 For headset even an adapter connected with the headset, if only the adapter is not been paired
as super priority, if there is still another mobile phone also connected with the headset, the phone
call from the mobile phone can be answered and hangup by the MFB button.
Intercom high priority, must power off adapter before using other function.
Once connected to the adapter, the handle phone call, music, FM, and Aux audio are disabled
for headset.
:
Note D0/D1/D2 has no Dual Link Function.
Dual link function
Dual-link two mobile phones or one Mobile Phone GPS or Bluetooth Device
1. Place the Bluetooth headset and the mobile phone(GPS or Bluetooth Device) in a visible area
within 1 meter range.
2. Make sure the phone(GPS or Bluetooth Device) and Bluetooth headset are in power off state.
3. Press and hold CTRL Button of Bluetooth headset for about 8 seconds, until hear a “dudu”
note, the Blue LED and the Red LED flashing alternately, release the buttons, then the Bluetooth
headset is in pairing state now.
4. If you want to assign the HFP/HSP of one of two mobile phones(GPS or Bluetooth Device) as
super priority device, just short press the MFB button once at this time, then the LED indicator
flash pattern will be changed to red two times and blue two times quick flashing. Super priority
HFP/HSP link pairing is ready.
www.trolleborg.se
[12]
Svenska OH-Gruppen Ltd filial
5. Follow the user manual of your mobile phone(GPS or Bluetooth Device) , turn on the Bluetooth
function, and searching the Bluetooth headset devices.
6. From the found devices in your mobile phone(GPS or Bluetooth Device), select the device
named “D-series”, and then try to pair with it. Once paired successful, LED Indicator will change
from Blue/Red alternately to Blue intermittent flashing, and with a “du” tone to note that the
Bluetooth headset has connected with your mobile phone(GPS or Bluetooth Device).
7. To pair a second cell phone device just repeat the steps from 1~6. Special note should be taken
is that only the HFP/HSP link can be assigned as super priority link, and only one device can be
assigned as super priority, the latest pair assigned super priority device will replace the old one.
Note D0/D1/D2 has no Dual Link Function.
:
All Functions Priority Sequence
Phone call highest>Duplex talkback > A2DP music> FM radio>Aux-in
LED Indicator
LED flash indicator
Indicated State
All LED Indicators off
Power off
Red/Blue lights flashing alternately
Pairing state
Blue light flash every 1 secs.
Standby/working state
Red light flash every 3 secs.
Battery is low
Red light flashing every 1 seconds
Headset is being charged
Red light is on for a long time
Headset is fully charged
List of standard accessories
Remote transmitter
X1
USB Chargers
X1
USB Charging cable
X1
Mounting plate
X2
screwdriver
X1
AUX-In cable
X1
Headset
X1
Velcro
X2
www.trolleborg.se
[13]
Svenska OH-Gruppen Ltd filial
Trouble shooting
Phenomenon
Cause
Operation
Not working
It could be a flat battery
Please charge it for 3 hours
No sound
1.The speakers and microphone Please adjust the volume button and
has not been connected right
check the speakers and microphone
2.The volume too low
whether connect right
the speakers has the
Whistling
The microphone is too closed a Please take the microphone away
speaker
from the speaker
Lose connection with
mobile phone
The battery is too low
Please charge the headset
Can not connect with your Your cellphone don't take the
Mobile phone
standard of BT profile
Please check your cellphone
whether support the BT profile
Can not reconnect with your Your cellphone paired with
Mobile phone
many device before
Please clear all the pairing
information,then pair again
Headset halted
High RF strength or near high
power TV transmitters, GSM
station or airport radars occur
Please charge the unit, and then it
will be reset and normally work
again.
Attentions
1.Do not immerse in water to avoid damaging the product as well as shortening its lifetime.
2.Do not drop or apply shock to the product. Such act may cause irreparable damage to the
product.
3.Do not expose the product to open flame or under the direct sunlight for a prolonged period of
the time. Such environment may cause malfunction or fire.
4.Do not lick,bite or put the product into the mouth. Such act may result in serious accidents,take
utmost caution around children.
5.Do not change the mic when it gets wet. With water exposure, it may cause fire, electrification
or failure.
6.Do not throw the product into the fire. Built-in battery may explode.
7.Do not disassemble or modify the product. Such act may cause malfunction, electric shock or
fire.
8.Please use only qualified accessories which have been authenticated by us, in order to guarantee
the product correct functioning.
9.Please do not change the setting or talk on the cell phone while driving. It may cause an
accident.
10.Please note in no event our product shall be liable for any special, indirect, punitive, incidental,
exemplary or consequential damages, or any damages whatsoever resulting from the usage of this
product.
11.Conversation on the cell phone when driving is extremely dangerous. Please go out of the road
for doing the telephone call.
12.Charge battery at least once every six months even if the product is not use for an extended
period of time. Over discharge may require battery replacement.
www.trolleborg.se
[14]