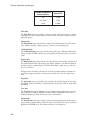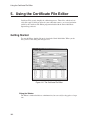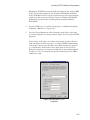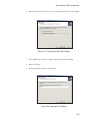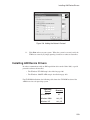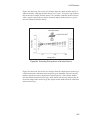
1
Genie™ 2000
Spectroscopy Software
Operations
9233652E
V3.0
Body: 9230846J
Copyright 2004, Canberra Industries, Inc. All rights reserved.
The material in this document, including all information, pictures,
graphics and text, is the property of Canberra Industries, Inc. and
is protected by U.S. copyright laws and international copyright
conventions.
Canberra expressly grants the purchaser of this product the right
to copy any material in this document for the purchaser’s own use,
including as part of a submission to regulatory or legal authorities
pursuant to the purchaser’s legitimate business needs.
No material in this document may be copied by any third party, or
used for any commercial purpose, or for any use other than that
granted to the purchaser, without the written permission of
Canberra Industries, Inc.
Canberra Industries, 800 Research Parkway, Meriden, CT 06450
Tel: 203-238-2351 FAX: 203-235-1347 http://www.canberra.com
The information in this document describes the product as
accurately as possible, but is subject to change without notice.
Printed in the United States of America.
Genie is a trademark of Canberra Industries, Inc.
Canberra’s True Coincidence Summing Correction for Radiation
Detectors is covered by US Patent 6,225,634.
Java and Javascript are registered trademarks of Sun Microsystems, Inc. in the United States and other countries.
Microsoft, Windows, NT, and Visual Basic are trademarks or registered trademarks of Microsoft Corporation in the
United States and/or other countries.
Pentium is a registered trademark of Intel Corporation in the United States and/or other countries.
Adobe, Acrobat and Reader are trademarks or registered trademarks of Adobe Systems in the United States
and/or other countries.
Table of Contents
1. Introduction . . . . . . . . . . . . . . . . . . . . . . . . . . . . . 1
Overview of Genie 2000 . . . . . . . . . . . . . . . . . . . . . . . . . . . . . . . . . . . . . . 1
Genie 2000 Support Services . . . . . . . . . . . . . . . . . . . . . . . . . . . . . . . . . . . . 3
Training . . . . . . . . . . . . . . . . . . . . . . . . . . . . . . . . . . . . . . . . . . . . . 3
Maintenance Contracts . . . . . . . . . . . . . . . . . . . . . . . . . . . . . . . . . . . . . 4
About this Manual. . . . . . . . . . . . . . . . . . . . . . . . . . . . . . . . . . . . . . . . . . 4
Operations. . . . . . . . . . . . . . . . . . . . . . . . . . . . . . . . . . . . . . . . . . . . 4
Customization Tools . . . . . . . . . . . . . . . . . . . . . . . . . . . . . . . . . . . . . . 5
Genie 2000 Software . . . . . . . . . . . . . . . . . . . . . . . . . . . . . . . . . . . . . . . . 5
Typographic Conventions . . . . . . . . . . . . . . . . . . . . . . . . . . . . . . . . . . . . . 11
Keyboard Access. . . . . . . . . . . . . . . . . . . . . . . . . . . . . . . . . . . . . . . . . . 11
Accelerator Keys . . . . . . . . . . . . . . . . . . . . . . . . . . . . . . . . . . . . . . . 11
Help Keys . . . . . . . . . . . . . . . . . . . . . . . . . . . . . . . . . . . . . . . . . . . 14
System Keys . . . . . . . . . . . . . . . . . . . . . . . . . . . . . . . . . . . . . . . . . . 14
Window Keys . . . . . . . . . . . . . . . . . . . . . . . . . . . . . . . . . . . . . . . . . 14
Pop-Up Window Keys. . . . . . . . . . . . . . . . . . . . . . . . . . . . . . . . . . . . . 15
Editing Keys . . . . . . . . . . . . . . . . . . . . . . . . . . . . . . . . . . . . . . . . . . 15
2. MCA Input Definition . . . . . . . . . . . . . . . . . . . . . . . . 17
The InSpector 2000 Simulator . . . . . . . . . . . . . . . . . . . . . . . . . . . . . . . . . . . 17
The MID Wizard . . . . . . . . . . . . . . . . . . . . . . . . . . . . . . . . . . . . . . . . . . 17
Using the Wizard . . . . . . . . . . . . . . . . . . . . . . . . . . . . . . . . . . . . . . . 18
The MCA Input Definition Editor . . . . . . . . . . . . . . . . . . . . . . . . . . . . . . . . . 21
Basic Concepts. . . . . . . . . . . . . . . . . . . . . . . . . . . . . . . . . . . . . . . . . . . 22
Starting the MCA Input Definition (MID) Editor . . . . . . . . . . . . . . . . . . . . . . . . . 22
Building an MCA Definition . . . . . . . . . . . . . . . . . . . . . . . . . . . . . . . . . . . 23
Adding an MCA . . . . . . . . . . . . . . . . . . . . . . . . . . . . . . . . . . . . . . . . 23
Interpreting the Definition Entry . . . . . . . . . . . . . . . . . . . . . . . . . . . . . . . 25
Deleting an MCA . . . . . . . . . . . . . . . . . . . . . . . . . . . . . . . . . . . . . . . 25
Defining an MCA . . . . . . . . . . . . . . . . . . . . . . . . . . . . . . . . . . . . . . . . . 26
Devices . . . . . . . . . . . . . . . . . . . . . . . . . . . . . . . . . . . . . . . . . . . . 26
MCA . . . . . . . . . . . . . . . . . . . . . . . . . . . . . . . . . . . . . . . . . . . 27
Sample Changer . . . . . . . . . . . . . . . . . . . . . . . . . . . . . . . . . . . . . . 28
Stabilizer, High Voltage, DSP Gain and DSP Filter . . . . . . . . . . . . . . . . . . . 28
The Settings . . . . . . . . . . . . . . . . . . . . . . . . . . . . . . . . . . . . . . . . . . 29
MCA Settings . . . . . . . . . . . . . . . . . . . . . . . . . . . . . . . . . . . . . . . 29
Stabilizer Settings . . . . . . . . . . . . . . . . . . . . . . . . . . . . . . . . . . . . . 29
High Voltage Settings . . . . . . . . . . . . . . . . . . . . . . . . . . . . . . . . . . . 31
DSP Gain Settings. . . . . . . . . . . . . . . . . . . . . . . . . . . . . . . . . . . . . 31
DSP Filter Settings . . . . . . . . . . . . . . . . . . . . . . . . . . . . . . . . . . . . 32
MCS Settings . . . . . . . . . . . . . . . . . . . . . . . . . . . . . . . . . . . . . . . 33
Input Settings . . . . . . . . . . . . . . . . . . . . . . . . . . . . . . . . . . . . . . . 34
Saving the Input Definition . . . . . . . . . . . . . . . . . . . . . . . . . . . . . . . . . . . . 34
Changing the Summary View . . . . . . . . . . . . . . . . . . . . . . . . . . . . . . . . . . . 35
Editing an MCA Definition . . . . . . . . . . . . . . . . . . . . . . . . . . . . . . . . . . . . 36
Viewing the File Details . . . . . . . . . . . . . . . . . . . . . . . . . . . . . . . . . . . . 36
Editing the Definition . . . . . . . . . . . . . . . . . . . . . . . . . . . . . . . . . . . . . 37
The New Command . . . . . . . . . . . . . . . . . . . . . . . . . . . . . . . . . . . . . . 37
The Input Definition Report . . . . . . . . . . . . . . . . . . . . . . . . . . . . . . . . . . 37
Using MCA Definition Tables . . . . . . . . . . . . . . . . . . . . . . . . . . . . . . . . . . . 37
Viewing the Current Database. . . . . . . . . . . . . . . . . . . . . . . . . . . . . . . . . 37
Loading and Unloading Definitions . . . . . . . . . . . . . . . . . . . . . . . . . . . . . . 38
Loading the Definition . . . . . . . . . . . . . . . . . . . . . . . . . . . . . . . . . . . . 39
Unloading the Definition . . . . . . . . . . . . . . . . . . . . . . . . . . . . . . . . . . . 39
3. Gamma Acquisition and Analysis. . . . . . . . . . . . . . . . . 41
File Menu . . . . . . . . . . . . . . . . . . . . . . . . . . . . . . . . . . . . . . . . . . . . . 41
Open Datasource. . . . . . . . . . . . . . . . . . . . . . . . . . . . . . . . . . . . . . . . 41
Close . . . . . . . . . . . . . . . . . . . . . . . . . . . . . . . . . . . . . . . . . . . . . . 43
Save . . . . . . . . . . . . . . . . . . . . . . . . . . . . . . . . . . . . . . . . . . . . . . 43
Save as . . . . . . . . . . . . . . . . . . . . . . . . . . . . . . . . . . . . . . . . . . . . . 43
Data Plot . . . . . . . . . . . . . . . . . . . . . . . . . . . . . . . . . . . . . . . . . . . . 44
Plot to Clipboard. . . . . . . . . . . . . . . . . . . . . . . . . . . . . . . . . . . . . . . . 45
Print Report Window . . . . . . . . . . . . . . . . . . . . . . . . . . . . . . . . . . . . . 45
ii
Export Report to PDF . . . . . . . . . . . . . . . . . . . . . . . . . . . . . . . . . . . . . 45
Open Workspace . . . . . . . . . . . . . . . . . . . . . . . . . . . . . . . . . . . . . . . 45
Save Workspace . . . . . . . . . . . . . . . . . . . . . . . . . . . . . . . . . . . . . . . . 46
Delete Workspace . . . . . . . . . . . . . . . . . . . . . . . . . . . . . . . . . . . . . . . 46
Exit . . . . . . . . . . . . . . . . . . . . . . . . . . . . . . . . . . . . . . . . . . . . . . 46
MCA Menu . . . . . . . . . . . . . . . . . . . . . . . . . . . . . . . . . . . . . . . . . . . . 47
Acquire Start. . . . . . . . . . . . . . . . . . . . . . . . . . . . . . . . . . . . . . . . . . 47
Acquire Stop . . . . . . . . . . . . . . . . . . . . . . . . . . . . . . . . . . . . . . . . . . 47
Acquire Setup . . . . . . . . . . . . . . . . . . . . . . . . . . . . . . . . . . . . . . . . . 47
Mode . . . . . . . . . . . . . . . . . . . . . . . . . . . . . . . . . . . . . . . . . . . 47
Time Preset . . . . . . . . . . . . . . . . . . . . . . . . . . . . . . . . . . . . . . . . 48
External Start/Stop . . . . . . . . . . . . . . . . . . . . . . . . . . . . . . . . . . . . 48
Input Size . . . . . . . . . . . . . . . . . . . . . . . . . . . . . . . . . . . . . . . . . 48
Computational Presets. . . . . . . . . . . . . . . . . . . . . . . . . . . . . . . . . . . 48
MCS Preset . . . . . . . . . . . . . . . . . . . . . . . . . . . . . . . . . . . . . . . . . . 49
Clear . . . . . . . . . . . . . . . . . . . . . . . . . . . . . . . . . . . . . . . . . . . . . . 49
Adjust . . . . . . . . . . . . . . . . . . . . . . . . . . . . . . . . . . . . . . . . . . . . . 49
ADC . . . . . . . . . . . . . . . . . . . . . . . . . . . . . . . . . . . . . . . . . . . . 49
Stabilizer . . . . . . . . . . . . . . . . . . . . . . . . . . . . . . . . . . . . . . . . . 51
Amplifier . . . . . . . . . . . . . . . . . . . . . . . . . . . . . . . . . . . . . . . . . 53
High Voltage . . . . . . . . . . . . . . . . . . . . . . . . . . . . . . . . . . . . . . . 54
Power Manager . . . . . . . . . . . . . . . . . . . . . . . . . . . . . . . . . . . . . . 55
MCS . . . . . . . . . . . . . . . . . . . . . . . . . . . . . . . . . . . . . . . . . . . . 56
Status . . . . . . . . . . . . . . . . . . . . . . . . . . . . . . . . . . . . . . . . . . . . . 58
Advance . . . . . . . . . . . . . . . . . . . . . . . . . . . . . . . . . . . . . . . . . . . . 59
Load . . . . . . . . . . . . . . . . . . . . . . . . . . . . . . . . . . . . . . . . . . . . . . 59
Calibrate Menu. . . . . . . . . . . . . . . . . . . . . . . . . . . . . . . . . . . . . . . . . . . 59
Setup . . . . . . . . . . . . . . . . . . . . . . . . . . . . . . . . . . . . . . . . . . . . . . 60
Energy Only Calibration. . . . . . . . . . . . . . . . . . . . . . . . . . . . . . . . . . . . 61
Energy Coefficients . . . . . . . . . . . . . . . . . . . . . . . . . . . . . . . . . . . . . . 63
Energy Full . . . . . . . . . . . . . . . . . . . . . . . . . . . . . . . . . . . . . . . . . . 63
By Certificate File . . . . . . . . . . . . . . . . . . . . . . . . . . . . . . . . . . . . . 64
By Nuclide List . . . . . . . . . . . . . . . . . . . . . . . . . . . . . . . . . . . . . . 65
By Calibration File . . . . . . . . . . . . . . . . . . . . . . . . . . . . . . . . . . . . 67
iii
By Entry . . . . . . . . . . . . . . . . . . . . . . . . . . . . . . . . . . . . . . . . . . 68
Energy Calibration – Full . . . . . . . . . . . . . . . . . . . . . . . . . . . . . . . . . . . 69
Energy Recalibration . . . . . . . . . . . . . . . . . . . . . . . . . . . . . . . . . . . . . 71
Energy Show . . . . . . . . . . . . . . . . . . . . . . . . . . . . . . . . . . . . . . . . . 72
Peak-to-Total Calibration . . . . . . . . . . . . . . . . . . . . . . . . . . . . . . . . . . . 73
Guidelines for Improving Accuracy. . . . . . . . . . . . . . . . . . . . . . . . . . . . 73
Setting up a Peak-to-Total Calibration . . . . . . . . . . . . . . . . . . . . . . . . . . 74
Performing the Peak-to-Total Calibration. . . . . . . . . . . . . . . . . . . . . . . . . 76
Editing the Peak-to-Total Calibration Results . . . . . . . . . . . . . . . . . . . . . . 77
Establishing a Crossover Energy . . . . . . . . . . . . . . . . . . . . . . . . . . . . . 77
Peak-to-Total Show . . . . . . . . . . . . . . . . . . . . . . . . . . . . . . . . . . . . 78
Efficiency . . . . . . . . . . . . . . . . . . . . . . . . . . . . . . . . . . . . . . . . . . . 79
By Certificate File . . . . . . . . . . . . . . . . . . . . . . . . . . . . . . . . . . . . . 79
By Nuclide List . . . . . . . . . . . . . . . . . . . . . . . . . . . . . . . . . . . . . . 80
By Calibration File . . . . . . . . . . . . . . . . . . . . . . . . . . . . . . . . . . . . 83
By Entry . . . . . . . . . . . . . . . . . . . . . . . . . . . . . . . . . . . . . . . . . . 84
By ISOCS/LabSOCS . . . . . . . . . . . . . . . . . . . . . . . . . . . . . . . . . . . 85
Performing the Efficiency Calibration . . . . . . . . . . . . . . . . . . . . . . . . . . . . 89
Peak Edits . . . . . . . . . . . . . . . . . . . . . . . . . . . . . . . . . . . . . . . . . 90
Cascade Correction . . . . . . . . . . . . . . . . . . . . . . . . . . . . . . . . . . . . 90
Perform Cascade Correction . . . . . . . . . . . . . . . . . . . . . . . . . . . . . . . 91
Auto . . . . . . . . . . . . . . . . . . . . . . . . . . . . . . . . . . . . . . . . . . . . 91
Use-results. . . . . . . . . . . . . . . . . . . . . . . . . . . . . . . . . . . . . . . . . 92
Show . . . . . . . . . . . . . . . . . . . . . . . . . . . . . . . . . . . . . . . . . . . 92
Supported Curves . . . . . . . . . . . . . . . . . . . . . . . . . . . . . . . . . . . . . 92
Efficiency Show . . . . . . . . . . . . . . . . . . . . . . . . . . . . . . . . . . . . . . . . 93
Gain Evaluator. . . . . . . . . . . . . . . . . . . . . . . . . . . . . . . . . . . . . . . . . 94
Source of True Energies. . . . . . . . . . . . . . . . . . . . . . . . . . . . . . . . . . 95
The Data Plot . . . . . . . . . . . . . . . . . . . . . . . . . . . . . . . . . . . . . . . 97
Data Text Box . . . . . . . . . . . . . . . . . . . . . . . . . . . . . . . . . . . . . . . 97
Fix File Gain . . . . . . . . . . . . . . . . . . . . . . . . . . . . . . . . . . . . . . . 97
Save New CAL File . . . . . . . . . . . . . . . . . . . . . . . . . . . . . . . . . . . . 98
ReEvaluate . . . . . . . . . . . . . . . . . . . . . . . . . . . . . . . . . . . . . . . . 98
Auto Gain Adjust . . . . . . . . . . . . . . . . . . . . . . . . . . . . . . . . . . . . . . . 98
iv
Certificate File . . . . . . . . . . . . . . . . . . . . . . . . . . . . . . . . . . . . . . 100
Peak Search ASF. . . . . . . . . . . . . . . . . . . . . . . . . . . . . . . . . . . . . 100
Single/Double Convergence . . . . . . . . . . . . . . . . . . . . . . . . . . . . . . . 100
Iteration Limit . . . . . . . . . . . . . . . . . . . . . . . . . . . . . . . . . . . . . . 101
Preset Live Time . . . . . . . . . . . . . . . . . . . . . . . . . . . . . . . . . . . . . 101
Percent Gain Shift Tolerance . . . . . . . . . . . . . . . . . . . . . . . . . . . . . . 101
Adjust Zero . . . . . . . . . . . . . . . . . . . . . . . . . . . . . . . . . . . . . . . 101
QA Transfer Before/After . . . . . . . . . . . . . . . . . . . . . . . . . . . . . . . . 102
Execute. . . . . . . . . . . . . . . . . . . . . . . . . . . . . . . . . . . . . . . . . . 102
Save . . . . . . . . . . . . . . . . . . . . . . . . . . . . . . . . . . . . . . . . . . . 102
Cancel . . . . . . . . . . . . . . . . . . . . . . . . . . . . . . . . . . . . . . . . . . 102
Auto Gain Adjust Status . . . . . . . . . . . . . . . . . . . . . . . . . . . . . . . . . . . 102
Cancel/Abort . . . . . . . . . . . . . . . . . . . . . . . . . . . . . . . . . . . . . . . 103
Print Report Now . . . . . . . . . . . . . . . . . . . . . . . . . . . . . . . . . . . . 103
Return to Setup/Save. . . . . . . . . . . . . . . . . . . . . . . . . . . . . . . . . . . 103
General Information . . . . . . . . . . . . . . . . . . . . . . . . . . . . . . . . . . . 104
Data Text Box . . . . . . . . . . . . . . . . . . . . . . . . . . . . . . . . . . . . . . 104
File Gain Adjust . . . . . . . . . . . . . . . . . . . . . . . . . . . . . . . . . . . . . . . 106
Current Energy Calibration . . . . . . . . . . . . . . . . . . . . . . . . . . . . . . . 106
Goal Calibration File. . . . . . . . . . . . . . . . . . . . . . . . . . . . . . . . . . . 106
Goal Energy Calibration . . . . . . . . . . . . . . . . . . . . . . . . . . . . . . . . . 106
Reanalyze After Adjustment . . . . . . . . . . . . . . . . . . . . . . . . . . . . . . . 107
Load . . . . . . . . . . . . . . . . . . . . . . . . . . . . . . . . . . . . . . . . . . . . . 107
Store . . . . . . . . . . . . . . . . . . . . . . . . . . . . . . . . . . . . . . . . . . . . . 108
Display Menu. . . . . . . . . . . . . . . . . . . . . . . . . . . . . . . . . . . . . . . . . . . 108
Expand . . . . . . . . . . . . . . . . . . . . . . . . . . . . . . . . . . . . . . . . . . . . 108
Scale . . . . . . . . . . . . . . . . . . . . . . . . . . . . . . . . . . . . . . . . . . . . . 110
Compare . . . . . . . . . . . . . . . . . . . . . . . . . . . . . . . . . . . . . . . . . . . 110
On . . . . . . . . . . . . . . . . . . . . . . . . . . . . . . . . . . . . . . . . . . . . 110
Off . . . . . . . . . . . . . . . . . . . . . . . . . . . . . . . . . . . . . . . . . . . . 111
VFS . . . . . . . . . . . . . . . . . . . . . . . . . . . . . . . . . . . . . . . . . . . 112
ROIs . . . . . . . . . . . . . . . . . . . . . . . . . . . . . . . . . . . . . . . . . . . . . 112
Display Preferences . . . . . . . . . . . . . . . . . . . . . . . . . . . . . . . . . . . . . 113
Edit Colors . . . . . . . . . . . . . . . . . . . . . . . . . . . . . . . . . . . . . . . . 113
v
Peak Labeling . . . . . . . . . . . . . . . . . . . . . . . . . . . . . . . . . . . . . . 114
Energy Units . . . . . . . . . . . . . . . . . . . . . . . . . . . . . . . . . . . . . . . 116
Plot Mode . . . . . . . . . . . . . . . . . . . . . . . . . . . . . . . . . . . . . . . . 116
Update Information . . . . . . . . . . . . . . . . . . . . . . . . . . . . . . . . . . . 116
Spectrum Labels . . . . . . . . . . . . . . . . . . . . . . . . . . . . . . . . . . . . . 116
MCA View. . . . . . . . . . . . . . . . . . . . . . . . . . . . . . . . . . . . . . . . 117
Operations . . . . . . . . . . . . . . . . . . . . . . . . . . . . . . . . . . . . . . . . 121
Interactive NID . . . . . . . . . . . . . . . . . . . . . . . . . . . . . . . . . . . . . 121
Analyze Menu . . . . . . . . . . . . . . . . . . . . . . . . . . . . . . . . . . . . . . . . . . 122
Execute Sequence . . . . . . . . . . . . . . . . . . . . . . . . . . . . . . . . . . . . . . 122
Abort Sequence . . . . . . . . . . . . . . . . . . . . . . . . . . . . . . . . . . . . . . . 123
Analysis Phase Selection . . . . . . . . . . . . . . . . . . . . . . . . . . . . . . . . . . . 123
Acquisition . . . . . . . . . . . . . . . . . . . . . . . . . . . . . . . . . . . . . . . . . . 123
Peak Locate . . . . . . . . . . . . . . . . . . . . . . . . . . . . . . . . . . . . . . . . . 124
Unidentified Second Difference . . . . . . . . . . . . . . . . . . . . . . . . . . . . . 124
User Specified . . . . . . . . . . . . . . . . . . . . . . . . . . . . . . . . . . . . . . 126
Library Locate (Gamma-M) . . . . . . . . . . . . . . . . . . . . . . . . . . . . . . . 127
Library Locate (Simple) . . . . . . . . . . . . . . . . . . . . . . . . . . . . . . . . . 129
VMS Standard Peak Search . . . . . . . . . . . . . . . . . . . . . . . . . . . . . . . 131
Peak Area. . . . . . . . . . . . . . . . . . . . . . . . . . . . . . . . . . . . . . . . . . . 133
Sum/Non-Linear Least Squares Fit Peak Area . . . . . . . . . . . . . . . . . . . . . 133
Library (Gamma-M) . . . . . . . . . . . . . . . . . . . . . . . . . . . . . . . . . . . 136
Area Correction . . . . . . . . . . . . . . . . . . . . . . . . . . . . . . . . . . . . . . . 138
Standard Background Subtract. . . . . . . . . . . . . . . . . . . . . . . . . . . . . . 139
Reference Peak Correction. . . . . . . . . . . . . . . . . . . . . . . . . . . . . . . . 140
Efficiency Correction . . . . . . . . . . . . . . . . . . . . . . . . . . . . . . . . . . . . 141
Nuclide Identification . . . . . . . . . . . . . . . . . . . . . . . . . . . . . . . . . . . . 142
Tentative NID . . . . . . . . . . . . . . . . . . . . . . . . . . . . . . . . . . . . . . 142
NID . . . . . . . . . . . . . . . . . . . . . . . . . . . . . . . . . . . . . . . . . . . 143
NID with Interference Correction . . . . . . . . . . . . . . . . . . . . . . . . . . . . 145
Parent-Daughter Correction . . . . . . . . . . . . . . . . . . . . . . . . . . . . . . . . . 147
Detection Limits . . . . . . . . . . . . . . . . . . . . . . . . . . . . . . . . . . . . . . . 147
Post NID Processing . . . . . . . . . . . . . . . . . . . . . . . . . . . . . . . . . . . . . 149
LACE (Line Activity Consistency Evaluator) . . . . . . . . . . . . . . . . . . . . . . 149
vi
Action Level Calculations . . . . . . . . . . . . . . . . . . . . . . . . . . . . . . . . 152
Script Engine. . . . . . . . . . . . . . . . . . . . . . . . . . . . . . . . . . . . . . . 154
Gain Evaluator . . . . . . . . . . . . . . . . . . . . . . . . . . . . . . . . . . . . . . 155
Reporting . . . . . . . . . . . . . . . . . . . . . . . . . . . . . . . . . . . . . . . . . . . 156
Standard . . . . . . . . . . . . . . . . . . . . . . . . . . . . . . . . . . . . . . . . . 156
Print Spectrum . . . . . . . . . . . . . . . . . . . . . . . . . . . . . . . . . . . . . . 157
Save Datasource . . . . . . . . . . . . . . . . . . . . . . . . . . . . . . . . . . . . . . . 159
Edit Menu. . . . . . . . . . . . . . . . . . . . . . . . . . . . . . . . . . . . . . . . . . . . . 160
Sample Info . . . . . . . . . . . . . . . . . . . . . . . . . . . . . . . . . . . . . . . . . 160
Analysis Sequence . . . . . . . . . . . . . . . . . . . . . . . . . . . . . . . . . . . . . . 161
Insert Step . . . . . . . . . . . . . . . . . . . . . . . . . . . . . . . . . . . . . . . . 163
Delete Step . . . . . . . . . . . . . . . . . . . . . . . . . . . . . . . . . . . . . . . . 163
Select Algorithm . . . . . . . . . . . . . . . . . . . . . . . . . . . . . . . . . . . . . 163
Setup Algorithm . . . . . . . . . . . . . . . . . . . . . . . . . . . . . . . . . . . . . 163
Sequence Preferences . . . . . . . . . . . . . . . . . . . . . . . . . . . . . . . . . . 164
Load . . . . . . . . . . . . . . . . . . . . . . . . . . . . . . . . . . . . . . . . . . . 166
Store . . . . . . . . . . . . . . . . . . . . . . . . . . . . . . . . . . . . . . . . . . . 167
Execute. . . . . . . . . . . . . . . . . . . . . . . . . . . . . . . . . . . . . . . . . . 167
Options Menu. . . . . . . . . . . . . . . . . . . . . . . . . . . . . . . . . . . . . . . . . . . 167
Change Operator Name . . . . . . . . . . . . . . . . . . . . . . . . . . . . . . . . . . . 167
Interactive NID . . . . . . . . . . . . . . . . . . . . . . . . . . . . . . . . . . . . . . . . 167
Geometry Composer . . . . . . . . . . . . . . . . . . . . . . . . . . . . . . . . . . . . . 168
Strip . . . . . . . . . . . . . . . . . . . . . . . . . . . . . . . . . . . . . . . . . . . . . 169
Smooth . . . . . . . . . . . . . . . . . . . . . . . . . . . . . . . . . . . . . . . . . . . . 169
Datasource Overview . . . . . . . . . . . . . . . . . . . . . . . . . . . . . . . . . . . . 170
Acquisition Data . . . . . . . . . . . . . . . . . . . . . . . . . . . . . . . . . . . . . 170
Analysis Data . . . . . . . . . . . . . . . . . . . . . . . . . . . . . . . . . . . . . . 171
Calibration Data . . . . . . . . . . . . . . . . . . . . . . . . . . . . . . . . . . . . . 172
Report Window . . . . . . . . . . . . . . . . . . . . . . . . . . . . . . . . . . . . . . . 173
Datasource Menu . . . . . . . . . . . . . . . . . . . . . . . . . . . . . . . . . . . . . . . . . 174
Show All Datasources . . . . . . . . . . . . . . . . . . . . . . . . . . . . . . . . . . . . 175
4. Using the Nuclide Library Editor. . . . . . . . . . . . . . . . . 176
Getting Started . . . . . . . . . . . . . . . . . . . . . . . . . . . . . . . . . . . . . . . . . . 176
vii
Editing a Nuclide Library . . . . . . . . . . . . . . . . . . . . . . . . . . . . . . . . . . . . 177
Opening a Nuclide Library . . . . . . . . . . . . . . . . . . . . . . . . . . . . . . . . . . 177
The Nuclide Data. . . . . . . . . . . . . . . . . . . . . . . . . . . . . . . . . . . . . . . 178
The Energy Line Data . . . . . . . . . . . . . . . . . . . . . . . . . . . . . . . . . . . . 180
The Options Menu . . . . . . . . . . . . . . . . . . . . . . . . . . . . . . . . . . . . . . . . 182
Extract . . . . . . . . . . . . . . . . . . . . . . . . . . . . . . . . . . . . . . . . . . . . 182
Energy Units . . . . . . . . . . . . . . . . . . . . . . . . . . . . . . . . . . . . . . . . . 183
MPC Units . . . . . . . . . . . . . . . . . . . . . . . . . . . . . . . . . . . . . . . . . . 183
MPC Values . . . . . . . . . . . . . . . . . . . . . . . . . . . . . . . . . . . . . . . . . 184
Effl./DAC Units . . . . . . . . . . . . . . . . . . . . . . . . . . . . . . . . . . . . . . . 185
Effl./DAC Values . . . . . . . . . . . . . . . . . . . . . . . . . . . . . . . . . . . . . . 185
Action Level/Derived Units . . . . . . . . . . . . . . . . . . . . . . . . . . . . . . . . . 186
Action Level/Derived Values . . . . . . . . . . . . . . . . . . . . . . . . . . . . . . . . 187
The Search Menu . . . . . . . . . . . . . . . . . . . . . . . . . . . . . . . . . . . . . . . . . 188
Find Name . . . . . . . . . . . . . . . . . . . . . . . . . . . . . . . . . . . . . . . . . . 188
Find Energy . . . . . . . . . . . . . . . . . . . . . . . . . . . . . . . . . . . . . . . . . 189
Find Mass Number . . . . . . . . . . . . . . . . . . . . . . . . . . . . . . . . . . . . . . 189
The File Menu . . . . . . . . . . . . . . . . . . . . . . . . . . . . . . . . . . . . . . . . . . 190
Creating a New Library . . . . . . . . . . . . . . . . . . . . . . . . . . . . . . . . . . . 190
Saving the Library . . . . . . . . . . . . . . . . . . . . . . . . . . . . . . . . . . . . . . 190
Printing the Library . . . . . . . . . . . . . . . . . . . . . . . . . . . . . . . . . . . . . 191
Exiting the Editor . . . . . . . . . . . . . . . . . . . . . . . . . . . . . . . . . . . . . . 191
The Master Libraries . . . . . . . . . . . . . . . . . . . . . . . . . . . . . . . . . . . . . . . 191
5. Using the Certificate File Editor . . . . . . . . . . . . . . . . . 192
Getting Started . . . . . . . . . . . . . . . . . . . . . . . . . . . . . . . . . . . . . . . . . . 192
The Options Menu . . . . . . . . . . . . . . . . . . . . . . . . . . . . . . . . . . . . . . . . 193
Library Extract . . . . . . . . . . . . . . . . . . . . . . . . . . . . . . . . . . . . . . . . 193
Certificate Extract . . . . . . . . . . . . . . . . . . . . . . . . . . . . . . . . . . . . . . 194
Energy Units . . . . . . . . . . . . . . . . . . . . . . . . . . . . . . . . . . . . . . . . . 194
Editing a Certificate File . . . . . . . . . . . . . . . . . . . . . . . . . . . . . . . . . . . . . 195
Opening a Certificate File . . . . . . . . . . . . . . . . . . . . . . . . . . . . . . . . . . 195
The Header Data . . . . . . . . . . . . . . . . . . . . . . . . . . . . . . . . . . . . . . . 196
The Line Data . . . . . . . . . . . . . . . . . . . . . . . . . . . . . . . . . . . . . . . . 196
viii
The File Menu . . . . . . . . . . . . . . . . . . . . . . . . . . . . . . . . . . . . . . . . . . 198
Saving the Certificate File . . . . . . . . . . . . . . . . . . . . . . . . . . . . . . . . . . 198
Printing the Certificate File . . . . . . . . . . . . . . . . . . . . . . . . . . . . . . . . . 198
Creating a New Certificate File . . . . . . . . . . . . . . . . . . . . . . . . . . . . . . . 198
Viewing the Original Certificate . . . . . . . . . . . . . . . . . . . . . . . . . . . . . . . 198
Exiting the Editor . . . . . . . . . . . . . . . . . . . . . . . . . . . . . . . . . . . . . . 198
6. Using the Analysis Sequence Editor . . . . . . . . . . . . . . 199
Launching the Editor . . . . . . . . . . . . . . . . . . . . . . . . . . . . . . . . . . . . . . . 199
Editing a Sequence File. . . . . . . . . . . . . . . . . . . . . . . . . . . . . . . . . . . . . . 200
Insert Step . . . . . . . . . . . . . . . . . . . . . . . . . . . . . . . . . . . . . . . . . . 201
Delete Step . . . . . . . . . . . . . . . . . . . . . . . . . . . . . . . . . . . . . . . . . . 201
Select Algorithm . . . . . . . . . . . . . . . . . . . . . . . . . . . . . . . . . . . . . . . 201
Setup Algorithm . . . . . . . . . . . . . . . . . . . . . . . . . . . . . . . . . . . . . . . 202
Sequence Preferences . . . . . . . . . . . . . . . . . . . . . . . . . . . . . . . . . . . . 202
Edit Sample Information . . . . . . . . . . . . . . . . . . . . . . . . . . . . . . . . . 202
Prompt to Select Datasource . . . . . . . . . . . . . . . . . . . . . . . . . . . . . . . 202
Options Menu. . . . . . . . . . . . . . . . . . . . . . . . . . . . . . . . . . . . . . . . . . . 205
Saving a New Sequence File . . . . . . . . . . . . . . . . . . . . . . . . . . . . . . . . . . . 205
7. Using Cascade Correction . . . . . . . . . . . . . . . . . . . . 206
Prerequisites . . . . . . . . . . . . . . . . . . . . . . . . . . . . . . . . . . . . . . . . . . . 206
Performing the Analysis . . . . . . . . . . . . . . . . . . . . . . . . . . . . . . . . . . . . . 207
8. Using the Geometry Composer . . . . . . . . . . . . . . . . . 208
Starting the Composer . . . . . . . . . . . . . . . . . . . . . . . . . . . . . . . . . . . . . . 208
Creating a Geometry Definition . . . . . . . . . . . . . . . . . . . . . . . . . . . . . . . . . 209
Selecting the Geometry Template . . . . . . . . . . . . . . . . . . . . . . . . . . . . . . . . 209
Editing the Detector and Sample Dimensions . . . . . . . . . . . . . . . . . . . . . . . . . . 210
Save Data As User Version . . . . . . . . . . . . . . . . . . . . . . . . . . . . . . . . . 215
Verifying the Geometry Definition . . . . . . . . . . . . . . . . . . . . . . . . . . . . . . . . 217
Editing a Geometry Definition . . . . . . . . . . . . . . . . . . . . . . . . . . . . . . . . . . 218
Editing the Sample Environment . . . . . . . . . . . . . . . . . . . . . . . . . . . . . . . . . 218
ix
Editing the Efficiency Parameters . . . . . . . . . . . . . . . . . . . . . . . . . . . . . . . . 219
Editing the Energy List. . . . . . . . . . . . . . . . . . . . . . . . . . . . . . . . . . . . 219
Changing the Integration Settings . . . . . . . . . . . . . . . . . . . . . . . . . . . . . . 220
Checking the Geometry’s Validity . . . . . . . . . . . . . . . . . . . . . . . . . . . . . . . . 221
Saving the Definition . . . . . . . . . . . . . . . . . . . . . . . . . . . . . . . . . . . . . . . 221
Generating an Efficiency Curve . . . . . . . . . . . . . . . . . . . . . . . . . . . . . . . . . 222
The Materials Library Editor . . . . . . . . . . . . . . . . . . . . . . . . . . . . . . . . . . . 222
The Nature of a Library Entry . . . . . . . . . . . . . . . . . . . . . . . . . . . . . . . . 223
Defining New Materials . . . . . . . . . . . . . . . . . . . . . . . . . . . . . . . . . . . 224
Correcting Data Entry Errors. . . . . . . . . . . . . . . . . . . . . . . . . . . . . . . . . 226
Basing a New Material on an Existing Definition . . . . . . . . . . . . . . . . . . . . . . 227
Combining Existing Materials to Make a New One . . . . . . . . . . . . . . . . . . . . . 228
Deleting a Material Library Entry . . . . . . . . . . . . . . . . . . . . . . . . . . . . . . . . 228
View Menu . . . . . . . . . . . . . . . . . . . . . . . . . . . . . . . . . . . . . . . . . . . . 229
Toolbar . . . . . . . . . . . . . . . . . . . . . . . . . . . . . . . . . . . . . . . . . . . . 229
Status Bar. . . . . . . . . . . . . . . . . . . . . . . . . . . . . . . . . . . . . . . . . . . 229
Split . . . . . . . . . . . . . . . . . . . . . . . . . . . . . . . . . . . . . . . . . . . . . 229
Option Menu . . . . . . . . . . . . . . . . . . . . . . . . . . . . . . . . . . . . . . . . . . . 230
Configuration. . . . . . . . . . . . . . . . . . . . . . . . . . . . . . . . . . . . . . . . . 230
Default Parameters for New Geometries . . . . . . . . . . . . . . . . . . . . . . . . . . . 231
Deleting a Geometry Definition . . . . . . . . . . . . . . . . . . . . . . . . . . . . . . . . . 234
9. DataSource Preview . . . . . . . . . . . . . . . . . . . . . . . 235
Enabling Datasource Preview . . . . . . . . . . . . . . . . . . . . . . . . . . . . . . . . . . 235
The Active Desktop . . . . . . . . . . . . . . . . . . . . . . . . . . . . . . . . . . . . . 235
Customizing the Datasource Folder . . . . . . . . . . . . . . . . . . . . . . . . . . . . . 236
Working With the Preview . . . . . . . . . . . . . . . . . . . . . . . . . . . . . . . . . . . . 237
A. Software Installation . . . . . . . . . . . . . . . . . . . . . . . 239
Installing Windows . . . . . . . . . . . . . . . . . . . . . . . . . . . . . . . . . . . . . . . . 240
Installing Genie Software. . . . . . . . . . . . . . . . . . . . . . . . . . . . . . . . . . . . . 241
Installing Genie 2000 . . . . . . . . . . . . . . . . . . . . . . . . . . . . . . . . . . . . 242
Standard Installation . . . . . . . . . . . . . . . . . . . . . . . . . . . . . . . . . . . 243
Custom Installation . . . . . . . . . . . . . . . . . . . . . . . . . . . . . . . . . . . 243
x
Installing Optional Software . . . . . . . . . . . . . . . . . . . . . . . . . . . . . . . . . 243
Completing the Installation . . . . . . . . . . . . . . . . . . . . . . . . . . . . . . . . . 244
Installing TCP/IP Network Components . . . . . . . . . . . . . . . . . . . . . . . . . . . . . 244
Windows NT/2000/XP TCP/IP Setup . . . . . . . . . . . . . . . . . . . . . . . . . . . . 244
Additional TCP/IP Installation Tips . . . . . . . . . . . . . . . . . . . . . . . . . . . . . 251
Non-Network VDM Configuration. . . . . . . . . . . . . . . . . . . . . . . . . . . . . . . . 253
Windows 2000 Setup. . . . . . . . . . . . . . . . . . . . . . . . . . . . . . . . . . . . . 253
Windows XP Setup . . . . . . . . . . . . . . . . . . . . . . . . . . . . . . . . . . . . . 256
Installing AIM Device Drivers . . . . . . . . . . . . . . . . . . . . . . . . . . . . . . . . . . 259
Windows NT Setup . . . . . . . . . . . . . . . . . . . . . . . . . . . . . . . . . . . . . 260
Windows 2000/XP Setup . . . . . . . . . . . . . . . . . . . . . . . . . . . . . . . . . . 260
Installing the USB Driver . . . . . . . . . . . . . . . . . . . . . . . . . . . . . . . . . . 261
Installation of the PCI MCA Driver . . . . . . . . . . . . . . . . . . . . . . . . . . . . . 261
Installing the Security Key . . . . . . . . . . . . . . . . . . . . . . . . . . . . . . . . . . . . 262
Creating a Shortcut on Your Desktop . . . . . . . . . . . . . . . . . . . . . . . . . . . . . . 262
Starting the Virtual Data Manager . . . . . . . . . . . . . . . . . . . . . . . . . . . . . . . . 263
Uninstalling the Genie Software . . . . . . . . . . . . . . . . . . . . . . . . . . . . . . . . . 263
B. Genie 2000 Configuration . . . . . . . . . . . . . . . . . . . . 264
Genie 2000 Environment Settings . . . . . . . . . . . . . . . . . . . . . . . . . . . . . . . . 264
File Formats . . . . . . . . . . . . . . . . . . . . . . . . . . . . . . . . . . . . . . . . . . . 268
Report Template Files . . . . . . . . . . . . . . . . . . . . . . . . . . . . . . . . . . . . 268
Analysis Engine Files . . . . . . . . . . . . . . . . . . . . . . . . . . . . . . . . . . . . 268
Genie 2000 Network Configuration File . . . . . . . . . . . . . . . . . . . . . . . . . . . 270
Workspace Files . . . . . . . . . . . . . . . . . . . . . . . . . . . . . . . . . . . . . . . 271
Genie 2000 Font Customization . . . . . . . . . . . . . . . . . . . . . . . . . . . . . . . . . 273
Sample Files . . . . . . . . . . . . . . . . . . . . . . . . . . . . . . . . . . . . . . . . . . . 275
C. Technical Information . . . . . . . . . . . . . . . . . . . . . . 277
Adjusting the PUR/LTC . . . . . . . . . . . . . . . . . . . . . . . . . . . . . . . . . . . . . 277
Manual Pole/Zero. . . . . . . . . . . . . . . . . . . . . . . . . . . . . . . . . . . . . . . . . 278
Adjusting the TRP Reset Pulse . . . . . . . . . . . . . . . . . . . . . . . . . . . . . . . . . . 281
Status Screen Entries . . . . . . . . . . . . . . . . . . . . . . . . . . . . . . . . . . . . . . . 282
Stabilizer . . . . . . . . . . . . . . . . . . . . . . . . . . . . . . . . . . . . . . . . . . . 282
xi
Power Manager. . . . . . . . . . . . . . . . . . . . . . . . . . . . . . . . . . . . . . . . 282
D. Correcting for Cascade Summing . . . . . . . . . . . . . . . . 284
Why Efficiency Calibration Correction is Needed . . . . . . . . . . . . . . . . . . . . . . . . 284
Correcting the Calibration . . . . . . . . . . . . . . . . . . . . . . . . . . . . . . . . . . . . 284
E. The InSpector 2000 Simulator . . . . . . . . . . . . . . . . . . 287
MID Definition . . . . . . . . . . . . . . . . . . . . . . . . . . . . . . . . . . . . . . . . . . 287
Acquisition and Analysis . . . . . . . . . . . . . . . . . . . . . . . . . . . . . . . . . . . . . 287
Spectrum Simulation . . . . . . . . . . . . . . . . . . . . . . . . . . . . . . . . . . . . . 288
PHA Mode . . . . . . . . . . . . . . . . . . . . . . . . . . . . . . . . . . . . . . . . . . 289
MCS Mode . . . . . . . . . . . . . . . . . . . . . . . . . . . . . . . . . . . . . . . . . . 289
Percent Dead Time . . . . . . . . . . . . . . . . . . . . . . . . . . . . . . . . . . . . . . 289
Amp Gain . . . . . . . . . . . . . . . . . . . . . . . . . . . . . . . . . . . . . . . . . . 289
LLD . . . . . . . . . . . . . . . . . . . . . . . . . . . . . . . . . . . . . . . . . . . . . 290
Voltage . . . . . . . . . . . . . . . . . . . . . . . . . . . . . . . . . . . . . . . . . . . . 290
Digital Stabilizer . . . . . . . . . . . . . . . . . . . . . . . . . . . . . . . . . . . . . . . 290
Filter, Digital Oscilloscope and Pole/Zero . . . . . . . . . . . . . . . . . . . . . . . . . . 291
Other MID and Adjust Controls . . . . . . . . . . . . . . . . . . . . . . . . . . . . . . . 291
F. Line Activity Consistency Evaluator . . . . . . . . . . . . . . 293
LACE Analysis . . . . . . . . . . . . . . . . . . . . . . . . . . . . . . . . . . . . . . . . . . 294
Launching the Viewer . . . . . . . . . . . . . . . . . . . . . . . . . . . . . . . . . . . . . . 305
LACE Report . . . . . . . . . . . . . . . . . . . . . . . . . . . . . . . . . . . . . . . . . . . 309
Index . . . . . . . . . . . . . . . . . . . . . . . . . . . . . . . . . 315
xii
1. Introduction
Welcome to Genie™ 2000 Spectroscopy Software
Canberra is pleased that you have chosen to join the ranks of Genie 2000 users. We
feel that Genie 2000 represents the true state of the art in spectroscopy software platforms. It offers the exceptional ease of use that gets you up and running quickly –
combined with the extensive flexibility that lets you operate your system your way.
No matter what your application, you will find Genie 2000 to offer the power and
flexibility you need. Whether you are using the software for simple spectral data collection and viewing – or for complete assay of complex samples, Genie 2000 gives
you the tools to get the job done.
This manual is a comprehensive reference on the capabilities and operation of
Genie 2000. While others may consider the user manual to be an afterthought,
Canberra considers it to be an integral part of the product – an essential tool for you to
take full advantage of the capabilities of the system. As such we are proud of the effort and consideration that went into the development of this user documentation.
The other chapters of this manual are dedicated to the details. This chapter is intended
to give you an overview of the system and its architecture.
Note: This and other Genie 2000 manuals may also be available in computer readable format (PDF) in the <G2K Install Path>\PDF\DOCS folder on your
hard disk. <G2K Install Path> is the top level directory you have chosen
for the installation of the Genie 2000 software (C:\GENIE2K by default).
During the installation of Genie 2000 you may select whether the electronic
manuals are copied and whether you want to install the application required
to view these manuals (Adobe Acrobat® Reader®).
Overview of Genie 2000
Genie 2000 is a comprehensive set of capabilities for acquiring and analyzing spectra
from Multichannel Analyzers (MCAs). Its functions include MCA control, spectral
display and manipulation, basic spectrum analysis and reporting. Optional capabilities
include comprehensive spectrum analysis for alpha and gamma spectroscopy, quality
assurance, system automation and turnkey packages for specific, dedicated applications.
A block diagram of the Genie 2000 architecture is shown in Figure 1.
The core of the Genie 2000 software is a module known as the Virtual Data Manager
or VDM. The VDM manages all information flow within the system. It is responsible
for communications with both data files and MCA devices – and for presenting information from them to the subsequent layers of software in a consistent manner. Thus,
the VDM makes it possible for the user to operate on all spectra – whether from a data
Introduction
Figure 1 The Genie-2000's Architecture
file or from one of the 10 or so different MCA hardware products supported – with
consistent display, user interface and analysis. VDM and its attached hardware drivers
maintain all the low level communications to MCAs as well as data transfer from
MCAs to data files.
The VDM is designed to communicate to subsequent layers of software via a layer
called inter process communication or IPC. IPC is designed to function both within a
single computer and over a network. Thus an MCA hardware device connected to one
computer’s VDM can be accessed for control, display and analysis over a network
from another computer.
The next layers are the compute modules. These are small modular programs that perform basic functions – start/stop of acquisition, transfer of spectrum from MCA to
disk, peak search, etc. This modular nature makes possible the extensive flexibility in
Genie 2000 – individual modules can be operated together in a sequence to meet specific application requirements.
Tying the compute modules together are two completely separate user interface environments – the interactive environment and the batch procedure environment. These
distinct environments were developed for very different needs – in recognition of the
fact that there can be very different uses of a single system.
The interactive environment – embodied in the Gamma Acquisition and Analysis
Window and (optionally) in the Alpha Acquisition and Analysis Window – is intended
for direct hands on operation of all aspects of the system. From an integrated window
featuring pull down menus, a tool bar, status pages, a report window and spectral display, the user can do essentially anything with the system. Acquisition control, analysis, spectrum manipulation are all very interactive and are all available to the user all
the time. This makes the environment very powerful for the knowledgeable user – the
experienced spectroscopist reviewing difficult spectra, testing system performance on
unique samples, optimizing analysis routines, etc.
2
Genie 2000 Support Services
However, many lab operations consist mostly of routine repetitive operations using
less skilled operators – users who are not trained as scientists or radiochemists, but
technicians who are trained to count samples by specific procedures. These users do
not need immediate access to everything – in fact their access to sensitive setup functions needs to be controlled. For this group of users, the batch procedure environment
provides a step by step guide through the process of counting samples – as well as
other operations. Additionally, the batch procedure environment features a security
system that prevents access to various functions by operators not qualified to operate
them.
Both the interactive and batch user interface environments operate on a common set of
compute modules – so consistency of operation and results is assured irrespective of
the environment used. They can (and most typically do) exist side by side in a given
system – with the batch environment used for routine operations and the interactive
used for the non–routine.
The power of the batch environment is exploited by a range of special dedicated applications software products for specific applications. If you are involved in applications
such as routine alpha and gamma sample counting, whole body counting, safeguards
confirmatory measurements, waste assay or a host of others – applications packages
built on the batch environment address the unique requirements of those applications
very specifically. Consult your local Canberra office for information and availability.
We expect that you will find Genie 2000 to provide you a comprehensive set of capabilities for nuclear measurements. We also value your feedback – as this is the input
that leads us to continuous improvement of our capabilities. Feel free to contact us
with your comments at any time. Call and ask for the Genie 2000 Product Manager or
visit our home page at http://www.canberra.com. We look forward to hearing from
you.
Genie 2000 Support Services
We view support services as a key ingredient to your overall success with a spectroscopy system. Support services are widely varied and can be tailored to meet your specific requirements. A brief overview of available Genie 2000 support services appears
below. For more details, see or Customer Services Catalog.
Training
Our training department offers a wide array of training courses for the Genie 2000
user. These range from basic and advanced operations courses, to customization/applications development courses and operations courses on dedicated application software.
There are also related courses in basic nuclear measurements and techniques – gamma
and alpha spectroscopy, health physics, etc. Training can be conducted either at our
training center in Meriden, Connecticut, USA or at your site anywhere in the world.
3
Introduction
Maintenance Contracts
Software maintenance contracts are available for Genie 2000 for an annual fee. The
contract customer enjoys unlimited telephone and Internet support, newsletters containing useful information on using the software, Software Services Bulletins notifying
them of any software problems and – most importantly – free copies of all software
updates released during the contract period. Typically, releases occur twice per year.
Thus the user who keeps up a service contract is always assured of running the very
latest developments in spectroscopy software.
Updates
Updates are also available for users who do not choose to take a maintenance contract.
Although most find the contract to be more cost effective, the availability of updates
still assures that the Genie 2000 customer can use the latest technology.
About this Manual
If you bought a complete system from Canberra, you’ll find the early chapters are designed to get you up and running quickly. If you’re installing the software and hardware yourself, you’ll first want to refer to Appendices A and B for installation
information.
Operations
Volume 1, Operations, contains information for day to day operation of the Genie
2000 system.
Chapter 1, Introduction, this chapter, lists the software available for the Genie 2000,
the typographic conventions used in the manual, and the keyboard conventions for using the program without a mouse.
Chapter 2, The Acquisition and Analysis Window, describes the appearance and function of the Genie 2000’s main window.
Chapter 3, MCA Input Definition, takes you through system configuration, the definition of physical MCA inputs. The first part of the chapter discusses the MID Wizard,
which will quickly and easily set up your system’s MCA for most common situations.
The remainder of the chapter is devoted to the MCA Input Definition Editor, which is
available for those setups which will use other parameter settings.
Chapter 4, Gamma Acquisition and Analysis, provides a structured reference where
you can easily locate specific information.
The next four chapters discuss the Certificate File Editor, the Nuclide Library Editor,
the Analysis Sequence File editor, and the Geometry Composer. These utilities create
and edit calibration standard certificate files, nuclide library files, analysis sequence
files. Comprehensive standard libraries are included with the package and can serve as
the basis for easily defined custom libraries. These are followed by two chapters specific to Using Cascade Correction and Using the Geometry Composer.
4
Genie 2000 Software
The Appendices
Software installation, a nearly automatic process, is covered in detail Appendix A, Installing the Software. Appendix B, Genie 2000 Configuration, discusses many modifiable Windows® parameters; though most users won’t need to customize their
Windows setup, the information in this section is useful for configuring Windows for
specific situations. Appendix C, Technical Information, covers hardware adjustments,
and the Genie 2000 Status Screen. Appendix D, Correcting Cascade Summing, talks
about why efficiency calibration correction is needed and how to do it. Appendix E,
The InSpector 2000 Simulator, discusses the InSpector 2000 Simulator software and
its functions. Appendix F, Line Activity Consistency Evaluator, gives detail description of how the Line Activity Consistency Evaluator works.
Customization Tools
Volume 2, Customization Tools, contains a great deal of specialized material for advanced users, such as how to program a Report Template to your needs, the meaning
of all CAM parameters, Genie 2000 algorithm descriptions, and so on.
Batch Tool Support
All of the material on batch tool commands, including its error messages, has been
moved from the Customization Tools manual to the new Model S561 Batch Tool Support Reference Manual.
Genie 2000 Software
Genie 2000 software is available in several variations and with several layered optional packages, most of which are covered in this manual.
In the interest of clarity, this manual does not associate individual features of the Genie 2000 system with the model numbers purchased to implement those features. This
section summarizes the differences between the various models.
Software Covered by This Manual
S500 Genie 2000 Basic Spectroscopy Software
Includes:
• Acquisition control for all Canberra acquisition devices.
• Gamma acquisition and analysis window.
• Batch procedure environment.
• Flexible reporting system.
• Second difference peak search.
• Library directed peak search.
5
Introduction
• Tentative Nuclide Identification.
• User ROI peak definition.
• Summation and non-linear least squares fit.
• Complete calibration functions.
• Certificate file editor.
• Nuclide library editor and comprehensive gamma libraries.
• Ability to import efficiency calibration data generated by LabSOCS or
ISOCS.
S501 Genie 2000 Gamma Analysis Software option
Includes:
• Peak area background subtract.
• Efficiency correction.
• Nuclide identification.
• Automatic interference correction.
• Weighted mean activity calculation.
• Minimum detectable activity.
• Post-NID processing (action levels).
• Canberra’s patented cascade summing correction.
• Parent/Daughter decay correction.
• Workspace save/restore Acquisition and Analysis Settings
• Requires S500 or S502.
S502 Genie 2000 Basic Spectroscopy Software (Standalone)
Same as S500, except:
• Supports one MCA Input only.
• Does not support Multiplexers.
S511 Genie 2000 Right to Copy (Standalone)
• Right to copy and execute S501, S502, S503, S505, S506 and S509 on
one additional computer in the same location.
• Requires purchase of S502 and optionally S501, S503, S505, S506 or
S509 for one computer at the location.
6
Genie 2000 Software
S520 Genie 2000 Right to Copy (Basic)
Including:
• Right to copy and execute S500, S501, S503, S505 and S510 on one
additional networked computer.
• Requires purchase of S500, and optionally S501, S503, S505, S506 or
S510 for one computer at the location.
Application Options
There are a large number of optional application software packages available for the
Genie 2000 spectroscopy platform. Several of these optional applications are described below.
For easy reference, the printed version of this manual includes the Models S505 QA,
S506 IPF, and S509 Alpha Spectroscopy User’s Manuals. The PDF versions of these
manuals are in separate files.
S503 PROcount-PC Control Procedures
• Complete procedures for routine sample counts.
• Calibrate procedures.
• Quality control procedures (requires S505).
• Background counting procedures.
• System maintenance.
• Procedure for complete gamma analysis (requires S501).
• Requires S500 or S502.
S505 Genie 2000 Quality Assurance Software
• Tracks and reports on the performance of your Genie 2000 spectroscopy
system.
• Interactively establishes a database of key system performance parameters
• Warns you if the parameters drift outside the allowable warning and error
limits which you have set.
• Includes a comprehensive statistical analysis, reporting, and plotting
facility for tracking system performance.
S506 Genie 2000 Interactive Peak Fit
• Displays peak fit information allowing review of peak search results.
• Allows user to adjust peak search results by adding/deleting peaks,
adjusting fit regions, etc.
7
Introduction
• Requires S500 or S502.
S509 Genie 2000 Alpha Analysis Software
Includes:
• Alpha acquisition and analysis window.
• Peak area and ROI background subtract.
• Reagent correction.
• Efficiency correction.
• Nuclide identification.
• Automatic interference correction.
• Weighted mean activity calculation.
• Minimum detectable activity.
• Post-NID processing (action levels).
• Workspace save/restore Acquisition and Analysis Settings
• Requires S500 or S502.
S544 Genie 2000 NuCHART Chart of Nuclides
• Color-coded Chart of Nuclides
• Comprehensive compilation of nuclear data from the Brookhaven NuDat
database.
• Presents data on alpha, beta, gamma, x-ray and neutron decay.
• Quick search by nuclide name.
• Comprehensive search by energy window, intensity, half-life, radiation
type, etc.
• Shows parent/progeny relationship.
• Creates CAM file nuclide libraries for Genie.
S560 Genie 2000 Programming Library
• Allows a programmer to interact directly with Genie 2000 capabilities
from a C++ language environment.
• Allows the addition of user-coded analysis engines to the Genie 2000 environment.
• The Programming Library also provides a set of ActiveX components
which can easily be used with any ActiveX compliant programming environment like Microsoft® Visual Basic™ and others.
8
Genie 2000 Software
• Using the Programming Library assumes a basic knowledge of C++ or
Microsoft Visual Basic programming and an understanding of the basic
operation of 32-bit Windows environments and Genie 2000’s data structures and architecture.
S561 Genie 2000 Batch Programming Support
• Provides REXX script language environment for advanced automated
procedure development.
• Requires S500 or S502.
S573 Genie 2000 ISOCS In Situ Calibration Software
• Mathematical efficiency calibration software. No radioactive sources
needed!
• Eliminates the cost of purchasing radioactive standards, creating custom
distributions, and radioactive waste disposal.
• Results are available within a few seconds.
• Calibrations valid from zero distance out to 500 meters.
• Calibrations valid from 45 to 7000 keV.
• Calibrations accurate to within a few percent.
• Calibrations accurate at any angle from detector, not just on detector axis
line.
• Operates with any size or type of Germanium detector which has been
characterized by Canberra.
• Ideal for In-Situ or Waste Assay applications, where large and various
sample types are often encountered.
• Includes predefined geometry templates for twenty common container
shapes and sample distributions.
• Only a few physical sample parameters (e.g. size, distance from detector,
etc.) are needed to tailor a template to a sample.
• User-defined templates containing all static information about a sample
may be saved and easily be recalled.
• Ability to vary assumed sample characteristics (e.g. density, container
wall thickness, etc.) makes it ideal for “What if…?” analyses.
• Resulting calibrations may be stored, recalled, and used just like those
generated by traditional calibration techniques.
• Multi-Efficiency program allows creation of compound efficiencies for
multiple detectors, multiple locations or multiple sources.
9
Introduction
• Includes library of common materials and tools to create new materials.
• Works with cylindrical collimators with conical holes, and rectangular
collimators with trapezoidal holes.
• Includes predefined collimator entries for ISOCS Shield.
S574 Genie 2000 LabSOCS Laboratory Calibration Software
• No radioactive sources needed for accurate efficiency calibrations.
• Works over a wide range of geometries.
• Calibrations valid from zero distance out to 500 meters.
• Calibrations valid from 50 keV to 7000 keV.
• Calibrations accurate to within a few percent.
• Calibrations accurate at any angle from detector, not just on centerline.
• Eliminates the cost of purchasing radioactive standards, creating custom
distributions, and radioactive waste disposal.
• Results are available within a few seconds.
• Operates with any size or type of germanium detector which has been
characterized by Canberra.
• Optimized for laboratory applications where complex shaped containers
are used repetitively.
• Includes predefined geometry templates for common laboratory container
shapes.
• Includes library of common commercially available containers, and tools
for the user to create new containers.
• Includes library of common matrix/absorber materials and tools to create
new materials.
• Custom templates can be provided to meet special application needs.
• Sample size can be point-like, or up to 500 meters in size.
• Easy to use fill-in-the blank operator interface.
• Ability to vary assumed sample characteristics (e.g. density, container
wall thickness, etc.) makes it ideal for “What if...?” analyses.
• Resulting calibrations may be stored, recalled, and used just like those
generated by traditional calibration.
10
Typographic Conventions
Typographic Conventions
The following typographic conventions are used throughout this manual:
Key Names
This manual shows the names of the keyboard keys as they usually appear on a keyboard and are seen in small capital letters (for example, ESC, ENTER, CTRL).
Key Sequences
If a comma ( , ) separates the names of the keys, this means they must be pressed in sequence. For example, “Press ALT, SPACEBAR” means that you should press ALT
and release it, then press and release the SPACEBAR.
Key Combinations
A plus sign (+) between two key names means that these keys must be pressed at the
same time. For example, “Press ALT+ESC” means that you should press the ALT key
and hold it down while you press the ESC key.
Windows Commands
Windows commands are shown in bold type (Edit).
User Entries
Text you are expected to type in is shown in Courier (typewriter style) type.
Titles
Titles of books and of manual chapters are shown in italics; titles of manual sections
are enclosed in “quotes”.
Keyboard Access
The Genie 2000 programs, like any 32-bit Windows programs, can be used with or
without a mouse. If you aren’t using a mouse with your system, the keyboard conventions listed in this section will allow you to operate Genie 2000 programs from your
computer’s keyboard.
Accelerator Keys
Right Arrow
Move the channel cursor to the right
11
Introduction
Left Arrow
Move the channel cursor to the left
Up Arrow
Increment the display VFS
Down Arrow
Decrement the display VFS
Ctrl + Ins
Create a ROI at the cursor
Ins
Create a ROI between the markers
Del
Delete the ROI between the markers
+
Index markers right to the next ROI
–
Index marker left to the previous ROI
PgUp
Display the previous Info page.
PgDn
Display the next Info page.
F4
Toggle Acquire on and off
F5
Toggle Autoscale on and off
F6
Select the next Datasource
Shift+F6
Select the previous Datasource
12
Keyboard Access
F7
Select the next Memory Group
Shift+F7
Select the previous Memory Group
F8
Toggle Expand on and off
Ctrl+C
Copy the spectrum window to the clipboard
Ctrl+L
Move the Left Marker to the cursor channel
Ctrl+R
Move the Right Marker to the cursor channel
Ctrl+M
Move both markers into the expand region
Ctrl+Right Arrow
Move expand window to the right
Ctrl+Left Arrow
Move expand window to the left
Ctrl+Up Arrow
Move expand window up
Ctrl+Down Arrow
Move expand window down
Alt+Right Arrow
Increase the width of the expand window
Alt+Left Arrow
Decrease the width of the expand window
Alt+Up Arrow
Increase the height of the expand window
13
Introduction
Alt+Down Arrow
Decrease the height of the expand window
Shift+Up Arrow
Move the compare spectrum up
Shift+Down Arrow
Move the compare spectrum down
Help Keys
F1
Get help
Alt+F4
Close the help window
System Keys
Alt+Tab
Switch to the next windowed program
Ctrl+Alt+Del
Switch to the Task List
Window Keys
F10
Go to/from the action bar
Arrow keys
Move among choices
Esc
Cancel a pull-down or the system menu
PgUp
Scroll the contents of the window up one page
14
Keyboard Access
PgDn
Scroll the contents of the window down one page
Underlined letter
Move among the choices on the action bar and pull-downs
Alt
Go to/from the action bar
Alt+F4
Close the window
Ctrl+PgDn
Scroll the contents of the window right one page
Ctrl+PgUp
Scroll the contents of the window left one page
Alt+Spacebar
Go to the system menu
Pop-Up Window Keys
Enter
Complete the pop-up window
Esc
Cancel the pop-up window
Spacebar
Set a check box on/off or perform the task described on the select pushbutton
Tab
Move to the next entry field or check box
Editing Keys
Backspace (left arrow delete)
Delete the character to the left of the cursor
15
Introduction
Del
Delete the character to the right of the cursor
End or Ctrl+Right Arrow key
Move to the end of a field
Home or Ctrl+Left Arrow key
Move to the beginning of a field
16
The InSpector 2000 Simulator
2. MCA Input Definition
The first step in using your Genie 2000 system is to create at least one MCA Input
Definition (MID) so the system knows what kind of MCA is installed in or connected
to your system.
This chapter demonstrates how to create the definition with both the MID Wizard and
the MID Editor, using the DSA-2000 MCA as an example. Instructions for setting up
your MCA will be found in its user’s manual.
For most systems, you’ll use the MID Wizard to help you set up your Input Definition
quickly and easily. But if your Input Definition is more complex than the MID Wizard
was designed to handle, you’ll have to create your definition in the MID Editor, which
is covered in detail starting on page 21.
For System 100 and AccuSpec MCAs, refer to the Historical Canberra MCAs.pdf file
on your Genie 2000 CD-ROM. For AIM MCAs, refer to the Model 556A User’s Manual.
Note: When you open the MID editor on a remote VDM server while it’s in use,
Genie 2000 will prevent certain operations with the VDM.
The InSpector 2000 Simulator
Genie 2000 V2.1 and later includes InSpector 2000 Simulator, software designed as a
tutorial for, or a demonstration of, Genie 2000, without the need for an actual MCA, a
detector, and associated front-end electronics. The Simulator mimics a fully functioning InSpector 2000 and works within Genie 2000 as though it were an actual MCA,
with working Adjust Controls and simulated data acquisition.
For more information on the Simulator, please refer to Appendix E, The InSpector
2000 Simulator.
The MID Wizard
To use the MID Wizard, open the Genie 2000 folder and select the MID Wizard icon
to start the definition process.
Restrictions
The Wizard does not support:
• Definition of multiplexer (MXR) inputs. This includes devices such as the Alpha Analyst.
17
MCA Input Definition
• Configuration of remote VDMs.
For these situations, you must use the MID Editor (page 21).
Using the Wizard
To use the MID Wizard, open the Genie 2000 folder and select the MID Wizard icon
to see the Step 1 screen.
Note: The screens shown here are examples; the screens you see may vary, depending on the MCA type you specify.
Step 1
The first screen (Figure 2) lets you select the MCA you’re creating the definition for.
Click on the ‘+’ next to the “Network MCAs” board type, choose DSA-2000, then
click the Next button.
Figure 2 Step 1
18
The MID Wizard
Step 2
The Step 2 screen (Figure 3) will ask you to define the MCA’s Full Memory size, Station address, and the acquisition mode, PHA or MCS.
Figure 3 Step 2
Step 3
The Step 3 screen (Figure 4) asks for an Input Name, the Detector Type, Memory
Groups and the Number of Channels.
Figure 4 Step 3
19
MCA Input Definition
You can change the default Input Name if you like, but if the field is empty, you won’t
be able to go to the next screen
With the Memory Groups box selected, the full memory can be divided into two or
more memory groups. The number of groups depends on the Number of Channels setting.
Steps 4 and 5
Steps 4 and 5 are not used in setting up the DSA-2000.
Step 6
The Step 6 screen in Figure 5 asks you to define the high voltage power supply’s
Range, Voltage Limit and working Voltage.
Figure 5 Step 6
Step 7
The Step 7 screen in Figure 6 displays a summary of the current MCA’s configuration
for review and lets you enter the name of the MID file that the configuration is to be
saved to.
20
The MCA Input Definition Editor
Figure 6 Step 7
Ending the Definition
To complete your Input Definition, select Finish. The input that you just defined will
be stored as an MID file, using the name you specified in Step 7. The new MID file
will automatically be loaded into the MCA Runtime Configuration Database (described on page 37).
When you select Finish, you will be asked if you would like to define another input.
Answering No will close the Wizard.
The Step 7 Input Name defaults to UNTITLED, which you’ll probably want to change
to something more meaningful. If the name you enter is the same as that of an existing
MID file, the system will ask if you want to overwrite the existing file.
The MCA Input Definition Editor
In addition to using the MID Editor to create a new input definition (MID File), it’s
used to edit an existing MID File. For instance, you might want to:
• Change the default settings for any of your MCA’s programmable components
• Replace a manual HVPS with a programmable HVPS and select its default
settings.
21
MCA Input Definition
Basic Concepts
We’ll begin with some basic concepts that are important to understand before actually
getting into the details of how you define your system’s MCAs.
Multiple MCA Configurations
Since MCA definitions are saved in disk files, you can have as many definitions as
you like. For example, you might have one MCA defined as an 1K Sodium Iodide
Spectroscopy MCA in one file and another as a 2K Sodium Iodide Spectroscopy MCA
in another file. Before you start an experiment you simply pick the configuration you
want to use.
Because an MCA definition file can include any or all of the MCAs that are available
to your system, you can use more than one MCA at a time. However, each MCA can
be included only once in a given definition file and each MCA in that file must have a
unique name.
Using the MCA Definition Files
To use an MCA Definition, you must first have saved the definition to disk as a file.
Once you’ve done that, all you have to do is load that file into the VDM’s internal MCA
Runtime Configuration Database. From that point on, all MCA operations will use the
configuration information that was stored in the Definition File. To change to a new configuration, all you have to do is replace the database’s contents with a new file.
Starting the MCA Input Definition (MID) Editor
Start the MID Editor by double clicking on its icon in the Genie 2000 Program Group.
The result will be the application window shown in Figure 7.
Figure 7 The MID Editor Window
22
Building an MCA Definition
Note that the phrase “local:Untitled” in the title bar, means that the MID Editor is connected to the local VDM and that no file is currently open; this is the default condition
in a non-networked environment.
Building an MCA Definition
In creating an MCA Input Definition, you’ll use the MID Editor’s:
• Devices Menu to select the MCA and its front-end components: amplifier,
ADC, HVPS, and so forth.
• Settings Menu to define the operating characteristics and modes for each
MCA and its front-end components.
In this section we’ll explain how to add (and delete) the MID editor’s MCA entries
and will explain what the definition entry consists of. The next section. Defining an
MCA on page 26, explains how to create an Input Definition for a DSA-2000 MCA.
The remainder of this chapter discusses how the definition is saved to a disk file, how
a definition can be edited, and how to use a definition by loading the file into the
MCA Runtime Configuration Database.
Adding an MCA
The Edit menu, shown in Figure 8, is used to add an MCA to or delete an MCA from
an MCA Input Definition.
Figure 8 The Edit Menu
23
MCA Input Definition
To add an MCA, select the Add MCA command in the Edit menu. You’ll see the
“Add MCAs to Definition Table” Dialog Box (Figure 9).
Figure 9 The Add MCA Dialog
This typical Add MCA tree view shows the MCAs grouped by MCA type. Clicking on
the ‘+’ next to a MCA type lets you choose a specific MCA.
You can add as many MCAs to the definition as are necessary for your system by
highlighting one or more MCAs and clicking the Add button to add them to the MCA
Definition Table. When you’ve finished adding MCAs, click on the Done button.
Please remember that this display, as well as many others in this chapter, are examples
of what you might see; your display will probably differ.
24
Building an MCA Definition
Interpreting the Definition Entry
As you can see in Figure 10, adding MCAs puts more than just the name of the MCA
in the definition table. Note the letter following the unit number in some of the Definition Table items: M for a manually controlled unit, and P for a programmable unit.
Figure 10 An MCA Has Been Added to the Table
MCA
This is the type of MCA device being used for this particular entry in the table.
Input
This is the name that will be used to refer to this specific hardware entry in the table.
The MID Editor automatically assigns these names sequentially as DETnn, starting
with nn=01. You can easily edit this assignment to an input name of your choice.
Size
This shows the number of data channels assigned to this input.
Gain
This column describes the DSP Gain device associated with the DSA-2000.
Other Entries
All of the other entries, ADC, MXR, Stab, Amp and HV, tell you whether that kind of
component is assigned to the MCA and if it’s Manual or Programmable.
Deleting an MCA
If you want to remove an MCA that you have added to the definition, you can do it
easily by:
25
MCA Input Definition
1. Selecting the table entry you want to delete.
2. Clicking on the Delete MCA command in the Edit menu to see the Dialog
Box in Figure 11. Click on OK to remove the entry.
Figure 11 The Delete MCA Dialog
Defining an MCA
This section discusses setting up a DSA-2000 MCA, which has a fully programmable
front end. That is, its DSP Gain, DSP Filter, Digital Stabilizer, MCS and High Voltage
Power Supply are all controlled from the host computer rather than manually with
front panel knobs and switches. To begin, click on the MCA entry in the Definition
Table that you want to set up.
Devices
The Devices menu, shown in Figure 12, sets the parameters for the MCA and associated devices. Some Devices are disabled (grayed out) because they aren’t used with
your MCA.
26
Defining an MCA
Figure 12 The Devices
Menu
MCA
Selecting the MCA command in the Devices menu pops up the Dialog Box shown in
Figure 13, which lets you set the Ethernet address for the DSA-2000 and select the
type of input.
Figure 13 The MCA Device Setup Dialog
27
MCA Input Definition
• MCA Full Memory selects the DSA-2000’s full memory size.
• Station Address specifies the network address for communicating with the
module.
• DSA-2000 selects the DSA-2000’s input type.
Sample Changer
The Sample Changer screen in Figure 14 lets you disable the sample changer interface,
(None) or enable the Internal Changer interface.
Figure 14 The Sample Changer Controls
Stabilizer, High Voltage, DSP Gain and DSP Filter
If any of these are available for your MCA, you’ll select either manual device or programmable device here. For the DSA-2000, these components are already selected, so
these screens are used for general information.
28
Defining an MCA
The Settings
The following section describes those parameters for the DSA-2000 that can be accessed from the MID Editor via the Settings menu (Figure 15).
Figure 15 The Settings
Menu
MCA Settings
For the DSA-2000, “This device has no adjustable controls”, so there’s nothing to do
here.
Stabilizer Settings
The Stabilizer maintains the stability of high resolution spectroscopy in applications
involving long count times or high count rates.
Selecting the Stabilizer command displays the Dialog Box shown in Figure 16.
Note
This window’s initial focus is on the Cancel button; pressing the keyboard’s
ENTER key after making changes in this dialog box will cancel the changes.
Be sure to click on the OK button to accept the changes.
29
MCA Input Definition
Figure 16 The Stabilizer Setting
Select the:
• Gain Centroid (in channels) of the reference peak at the high end of the spectrum for gain stabilization,
• Gain Window width (in channels) of the upper and lower sampling windows
on either side of the gain reference peak,
• Gain Spacing (in channels) between the upper and lower sampling windows,
• Gain Ratio value (the ratio to maintain between the two gain windows),
• Zero Centroid (in channels) of the reference peak at the low end of the spectrum,
• Zero Window (in channels) of the upper and lower sampling windows on either side of the zero reference peak.
• Zero Spacing (in channels) between the upper and lower sampling windows,
• Zero Ratio, the ratio to maintain between the two zero windows,
• Gain Rate Divisor, the count rate dividers at the input to the Gain correction
register,
• Zero Rate Divisor, the count rate dividers at the input to the Zero intercept
correction register,
• Correction Range, the Gain Correction range to correct for drift.
30
Defining an MCA
High Voltage Settings
The High Voltage command, shown in Figure 17, adjusts the High Voltage Power
Supply (HVPS).
Figure 17 The High Voltage Settings
Note: This window’s initial focus is on the Cancel button; pressing the keyboard’s
ENTER key after making changes in this dialog box will cancel the changes.
Be sure to click on the OK button to accept the changes.
Select the:
• Range must be set before the Voltage Limit or Voltage Control is adjusted. It
sets the HV Power Supply’s absolute voltage limit.
• Voltage limit establishes the HVPS’s maximum output voltage within the selected range.
• Voltage sets the output of the HVPS between the Voltage Limit’s minimum
and maximum settings.
• Inh. Signal sets the pull-up voltage of the HV INH connector.
DSP Gain Settings
The DSP Gain settings screen (Figure 18) has three Gain controls. The combination of
Coarse and Fine Gain sets the overall system gain to match the requirements of the detector and energy application; overall gain is continuously variable from x2.0 to
x1536. The Fine Gain factor is dependent on the Super-Fine Gain (SFG) value. With
the SFG set to 0.0000e-2, the Fine Gain covers a range of x0.4 to x1.6. The SFG value
adds to the Fine Gain factor and covers a range of 0.0000e -2 to 3.0000e-2.
31
MCA Input Definition
Figure 18 The DSP Gain Settings
Select the:
• Coinc Mode sets the devices gating mode (COINCidence or ANTIcoincidence).
• Offset sets the devices digital offset in channels.
• LLD sets the devices Lower Level Discriminator (LLD) as a percentage of the
ADC’s full scale.
• Zero sets the device’s zero intercept as a percentage of the device’s full scale.
• Conv. Gain sets the device’s conversion gain.
• FDisc Mode sets the device’s Fast Discriminator threshold mode. AUTO allows the threshold to be optimized automatically above the system noise level;
MANUAL allows the threshold to be manually adjusted.
• FDisc Setting sets the device’s Fast Discriminator threshold level.
• Inp. Polarity sets the device’s Input signal polarity.
• Inh. Polarity sets the device’s Inhibit signal polarity to either Positive or Negative.
DSP Filter Settings
The DSP Filter settings screen (Figure 19) for the DSA-2000 contains the following
controls.
32
Defining an MCA
Figure 19 The DSP Filter Settings
Select the:
• Rise Time sets the rise time and fall time of the digital filter time response.
• BLR Mode sets the baseline restorer mode.
• Preamp Type selects the Preamplifier type as either TRP or RC.
• Flat Top sets the flat top portion of the digital filter time response.
MCS Settings
If you chose either MCS or Both in the Devices | MCA menu (page 27), you’ll select
the MCS Disc Mode in Figure 20.
Note: This window’s initial focus is on the Cancel button; pressing the keyboard’s
ENTER key after making changes in this dialog box will cancel the changes.
Be sure to click on OK to accept the changes.
• Disc Mode establishes the MCS mode to be used.
Figure 20 Choosing the MCS Disc Mode
33
MCA Input Definition
Input Settings
The Input command is used to change the name of the Input and set up the structure
of its memory via the Dialog Box shown in Figure 21. These commands are not available in the Acquisition and Analysis application.
Figure 21 The Define Input Dialog
Note: This window’s initial focus is on the Cancel button; pressing the keyboard’s
ENTER key after making changes in this dialog box will cancel the changes.
Be sure to click on the OK button to accept the changes.
• Input Name lets you change the default detector name.
• Detector Type selects the type of detector to be used with this MCA.
• Input Size changes the number of channels assigned in the Devices | MCA
menu.
• Out of Service lets you make this Input temporarily unavailable.
• Memory Groups allows you to define a multi-memory group input.
Saving the Input Definition
After completing the definition, use the Editor’s File | Save command to save the
definition so that it can be loaded into the MCA Runtime Configuration Database for
use. See “Loading and Unloading Definitions” on page 38.
To remind you to save a changed definition, you’ll see an asterisk (*) next to the name
of the current definition in the Title Bar.
34
Changing the Summary View
CAUTION
If you change an existing Input Definition, saving it will clear
the Acquisition Start time. You will be asked to retain the existing energy calibration information.
The File Descriptor
When a Definition is saved for the first time, the Save As file dialog box is automatically opened. In this dialog box (Figure 22), you’ll see a File Descriptor field, which
lets you store a 32-character description with your file to make it easier to locate when
you want to use it again.
Figure 22 The Save As Dialog
Changing the Summary View
Before going on to see how to edit an existing Input Definition Table, one that you’ve
built previously and saved to disk, there’s one more menu to look at. This is the Summary menu, which is shown in Figure 23.
The Summary menu has two commands: By MCA and By Input, which change the
order in which the information in the Input Definition Table is displayed. By MCA
means that the first column of the table will display the MCA type that is being used
for each entry. If you choose By Input, the MCA and Input columns will be reversed
in the display and the Inputs will be sorted alphabetically.
You can choose either method, but in the case of systems with a large number of inputs, “By Input” is an easier display to understand than “By MCA”.
35
MCA Input Definition
Figure 23 The Summary
Menu
Editing an MCA Definition
To edit an MCA Definition, use the MID Editor’s File | Open command to select the
file and open it in the editor.
Editing a File in the MCA Runtime Configuration Database
If the Definition you want to edit has been loaded into the MCA Runtime Configuration Database, it must first be unloaded before it can be opened in the editor. See “Unloading the Definition” on page 39 for instructions.
Viewing the File Details
If you’re not sure which file you want to edit, select a file, then click on the Info button to see further information about the file, as shown in Figure 24.
Figure 24 The File Info Display
The key piece of information here is the File Descriptor, which you added when the
file was first saved. This should help you decide if the file you selected is the one you
want to edit.
36
Using MCA Definition Tables
Editing the Definition
All of the menus and commands available for defining an MCA are also used for editing a definition. Just select the entry you want to change and apply the commands as
before, then Save the Definition file.
The New Command
If you want to create a totally new MCA Definition, the File menu’s New command
clears the definition table so you can begin a new definition.
Because New is a destructive operation, selecting it will cause the program to ask for a
confirmation in one of two ways:
• If the Definition currently being displayed has not been changed since it was
last saved (no asterisk in the Title Bar), you will be asked if you want to erase
the current Definition. Click on OK to erase it, or Cancel to return to the Input Definition Editor.
• If the Definition currently being displayed has been changed but not saved,
you will be given a chance to save it.
The Input Definition Report
The File menu’s Report command always saves to a disk file, but if you click on Yes
in the dialog box that pops up, you can send the report to a disk file and print the report as well. Click on No to save it to a disk file without printing the report.
Using MCA Definition Tables
The whole purpose behind building MCA Input Definitions is to let Genie 2000 know
the number and types of MCAs you’ll be using with your system. You do this by loading one or more MCA Definition Files into the MCA Runtime Configuration Database.
This database is shared by all of the programs which make up the Genie 2000 software
package, and is used by those programs to gain access to the actual MCA hardware in
your system. In this section we’ll take a look at the procedures used for setting up that
database.
Viewing the Current Database
To view the current contents of the database, click on the Database menu’s View
command, which will pop up the display shown in Figure 25. If you click on a line in
37
MCA Input Definition
the list, you can use the Device and Settings menus to look at details of that definition.
Click on OK to close the View window.
Figure 25 Viewing the Database
Loading and Unloading Definitions
The Load/Unload functions will be disabled while any Acquisition and Analysis applications are running and have open datasources. This prevents one user from altering
the runtime database while another user is accessing it.
Before you can use a Definition, whether created with the MID Wizard or with the
MID Editor, it must be loaded into the MCA Runtime Configuration Database (described on page 37)
Wizard Definitions
An MCA Definition created with the MID Wizard will automatically be loaded into
the MCA Runtime Configuration Database when you finish the definition. You don’t
need to do anything more.
Editor Definitions
If you created or edited the MCA Definition with the MID Editor, you’ll have to
manually load the saved file into the database yourself. The next section tells you how.
38
Using MCA Definition Tables
Loading the Definition
Use the Load to command (Figure 26) to choose the Definition to be added to the database.
Figure 26 The Load To Dialog
Loading Multiple Definitions
Though you will usually use only one definition at a time, there may be times when
you want to load more than one definition. To do this, be sure that the Input name in
each of the Definition Files is unique.
If you try to load an Input Definition which contains a duplicate Input name, you’ll see
an error message telling you that the requested Definition can’t be loaded.
Unloading the Definition
Though some of the programmable front end controls, such as ADC Gain or Amplifier
Gain, are initially set with the MCA Input Definition Editor, many may also be adjusted in the Acquisition and Analysis application while you’re collecting data. These
adjustments can be stored in the database (with File | Save), and when you Unload the
database, are saved in an Input Definition File for future sessions.
The Unload Process
To unload a Database, click on the Database menu’s Unload from command, which
will bring up the Dialog Box shown in Figure 27. If several choices are listed, there
are multiple definitions in the database.
39
MCA Input Definition
Figure 27 The Unload Dialog
Click on the one you want to unload, then click on the Unload from button. Note that
this menu item is disabled if the MCA Runtime Configuration Database is currently
being used by another application.
40
File Menu
3. Gamma Acquisition and Analysis
This operations reference for both the basic Model S500/502/504 Basic Spectroscopy
Software and the Model S501 Gamma Analysis Option, lists all of their commands
and functions by menu and submenu.
For a description of the application’s user interface, please refer to The Genie 2000
Tutorials Manual.
File Menu
The File menu lets you open, close or save a datasource, save it under another name
(save as), print or copy a plot of the current spectrum, print the contents of the Report
Window, open, save or delete workspace files, and exit the program.
Open Datasource
The Open Datasource command displays a dialog (Figure 28) which allows you to
open a datasource.
Figure 28 The Open Datasource Dialog
41
Gamma Acquisition and Analysis
Datasource
When the Detector button is selected, the “Node is” dropdown will list all the available local and remote VDMs. The list box will show all of the currently selected
nodes’ defined input names. If the datasource is a multiple memory group detector,
you can display any of the groups by typing its name into the edit box. For example:
MULTIPLE(3:4).
When the File button is selected, the “Look in” dropdown will list all the available
drives. The list box will show all of the files and directories in the current directory.
The file name can be typed into the Name edit box or it can be selected from the list
box.
Type
When the File button is selected, the “Type” dropdown will list the file format types
you can open.
• When opened, a file with a format other than other than a CAM will automatically be converted to a CAM file of the same name, with a .CNF file extension.
Note: For the file conversion routine to work properly, the correct file type must
be selected before opening the file.
• If any critical parameters are not available in the selected file, appropriate default values will be provided during conversion.
• The converted file will be stored in the same directory as the original file.
• Old files of the same name as the intended output file name will have their extension changed to *.b?? where the question marks will be replaced with an
integer.
• The original file will be retained in its native format.
• The converted file will be opened by the application.
The supported file types are:
42
CAM
Oxford
AccuSpec
InterWinner
(v 4.1 Unpacked)
S100 File
Ortec-GammaVision
Silena
Aptec PCMCA
(v 6.31-7.02)
EasySpec
Intertechnique
Nucleus
Ortec-ADCAM
Sampo 90
PC-Toolkit
Gamma-AT
IEC 1455
Spectran-AT
File Menu
The Info Button
Press the Info button (Figure 28) to display information about the currently selected
CAM File datasource.
Close
Selecting Close lets you close the current datasource. If the open datasource has been
changed but not saved, you will be asked if you want to save it.
Save
Save allows you to save the datasource, with all related information, to its original location.
Save as
Save as displays a dialog box (Figure 29) which prompts you for a file name to save
the current datasource to.
Figure 29 The Save As Dialog
The file types supported by this operation are:
CAM files (.CNF)
Toolkit files (.TKA)
IEC1455 files (.IEC)
43
Gamma Acquisition and Analysis
The Description text field lets you add a file description of up to 32 characters to be
saved with the file. This information, which you’ll see in the File Descriptor field in
the Open Datasource dialog box (Figure 28), makes it easier to identify this specific
data file.
Data Plot
The Data Plot command sends a plot of the data in the spectral display to the printer
device. The scale type (linear or log) and VFS are determined by the current settings
of the spectral display.
Customizing Your Plot
You can choose one of four plot styles, any of three customization check boxes and either a range of channels or the full spectrum (Figure 30). Selecting any checkbox will
preview that selection on the four sample plots.
Figure 30 The Data Plot Dialog
Plot Styles
Although any style will work well with any printer, Styles 2 and 3 are intended for
color printers and Styles 1 and 4 are intended for black and white printers.
1. Solid black spectrum line; ROIs filled with hatching.
2. Solid black spectrum line; ROIs outlined in color.
3. Solid black spectrum line; ROIs filled with colors.
4. Solid black spectrum line.
44
File Menu
Grid
Check the Grid box to add X and Y grid lines to the plot. The grid is printed as
shown, with dotted lines.
Y Log Scale
Check the Y Log Scale box to change the Y-axis scale from linear to log. The maximum number of counts is determined automatically.
X Energy Scale
Check the X Energy Scale box to change the X-axis scale from channels to energy.
Range
The entire spectrum will be plotted if the Full Spectrum box is checked. If the box is
not checked, a range of channels can be plotted. If an illegal value is entered into either of the channel boxes, the word “Error” will replace the illegal value in the box.
Print
When all parameters have been chosen, click Print to bring up the printer selection dialog.
Plot to Clipboard
The Plot to Clipboard command copies the current spectral display (including expand
window, cursors, markers) to the Windows clipboard as a bitmap. This image may
then be pasted into other applications such as word processors or paint programs. This
command can also be executed with CTRL+C.
Print Report Window
Selecting Print Report Window will print the contents of the Report Window (page
173) to the Windows default printer.
Export Report to PDF
The Export Report to PDF command creates a PDF file of the contents of the Report
Window (page 173). The standard Save As dialog lets you choose the folder to store
the file in.
Open Workspace
The Workspace function lets you save and restore the current Gamma Acquisition and
Analysis(GAA) settings to a “Workspace” file. A workspace file contains the specific
datasources (detectors and/or spectrum files) that will be loaded, which datasource will
be the currently displayed datasource, and other display settings.
45
Gamma Acquisition and Analysis
Select Open Workspace (Figure 31) to open a workspace file, which will set up the
Gamma Acquisition and Analysis (GAA) window. See “Workspace Files” on page
271 for a detailed description of a workspace file.
Or, in in Windows Explorer, you can navigate to C:\Genie2k\CAMfiles and click on
a Gamma Workspace (GWS) file to automatically start the GAA application and load
the selected workspace file.
Figure 31 The Open Workspace Dialog
Save Workspace
Select Save Workspace to save the current workspace file. If the workspace file already exists, you will be asked to confirm that you want to overwrite it.
Delete Workspace
Select Delete Workspace to delete the selected workspace file. You will be asked for
confirmation before the file is deleted.
Exit
Select Exit to close Genie 2000. If you have an open but unsaved datasource, you will
be asked if you want to save it.
46
MCA Menu
MCA Menu
The MCA menu, which is available only when the currently selected datasource is a
Detector Input, contains the set of operations to be performed on the MCA and electronic front-end hardware.
Acquire Start
Select Acquire start or press the F4 key to initiate data acquisition on the current
datasource. This command is disabled for datasources that are already acquiring data.
Acquire Stop
Select Acquire stop or press the F4 key to issue an unconditional Stop command to a
currently collecting datasource.
Acquire Setup
Selecting Acquire setup displays a dialog box (Figure 32) which allows you to define
default acquisition parameters to be used when starting data collection on hardware
datasources.
Figure 32 Typical PHA Acquire Setup
Mode
The available acquisition modes depend on the MCA being used and the time and
computational preset options depend on the current acquisition mode. For instance,
time and computational presets are available only in PHA or LFC mode, MCS presets
are available only in MCS mode.
47
Gamma Acquisition and Analysis
Time Preset
The time presets are available only when the MCA is set to PHA mode or LFC mode.
Live time preset for the current hardware datasource in seconds, minutes or hours.
Live time is mutually exclusive with real time, but can be combined with any one
computational preset.
Real time preset for the current hardware datasource in seconds, minutes, and hours.
Real time is mutually exclusive with live time, but can be combined with any one
computational preset.
External Start/Stop
These controls are enabled when a hardware datasource is opened that supports triggering of collect via an external source. When selected, the chosen operation will be
acted upon when the external source is triggered. For example, if external start is enabled and OK is selected, collect will not start until the external collect trigger is received.
Input Size
The Input Size control lets you alter the displayed size of the input of the current detector input, and what is saved to a disk file. It does not change the input size in the detector input definition.
Computational Presets
The Computational Presets are available only when the MCA is set to PHA mode or
LFC mode. None turns off computational presets. Only the time preset will be used.
Integral is a computational preset for the integral of any one ROI. The integral value
and the ROI’s Start and Stop channels must be specified. The ROI channels will default to the current computational preset if there is one, otherwise the default ROI
channels will be 1 to the highest channel number. You may replace the default by entering Start and Stop channel values or by using the ROI Index buttons to scroll
through currently defined ROIs. The integral preset is mutually exclusive with all
other computational presets, but can be combined with either a live time or real time
preset.
Area is a computational preset for the area of any one ROI. The area value and the
ROI’s Start and Stop channels must be specified. The ROI channels will default to the
current computational preset if there is one, otherwise the default ROI channels will be
1 to the highest channel number. You may replace the default by entering Start and
Stop channel values manually or by using the ROI Index buttons to scroll through currently defined ROIs. The area preset is mutually exclusive with all other computational presets, but can be combined with either a live time or real time preset.
Counts is a computational preset for total counts in a single channel within the channel range specified by the Start and Stop channels. The Value, which must be specified, indicates the number of counts which will stop acquisition. The counts preset is
48
MCA Menu
mutually exclusive with all other computational presets, but can be combined with either a live time or real time preset.
MCS Preset
The MCS Preset is available only when the MCA is set to MCS mode. Sweep counts
selects the number of sweeps to be performed during MCS data acquisition. Dwell
time is set on the hardware MCS unit for the S100; it is set in MCS Adjust (refer to
“MCS” on page 56) for other MCAs.
Clear
There are two options for clearing the spectral display:
• Select Data to remove all spectral data, including the time information in
channels one and two, from the display.
• Select Data & ROIs to remove both the data and all ROIs from the display.
Adjust
Adjust allows you to adjust the controls of the current hardware datasource’s programmable front-end electronics. This section shows typical adjust screens, but only
those which are applicable to the current datasource will be available to you and the
controls they show will not necessarily be those shown in the illustrations.
As adjustments are made in the dialog box, the new values are sent to the hardware.
To save the adjustments to the datasource’s CAM file, use the File | Save command so
that the next time this datasource is selected, the proper setting will be loaded into the
MCA.
The Next and Prev(ious) buttons at the left side of the dialog box are used to move to
the next (or previous) “page” of the controls when there are more control elements
than will fit in the basic box.
ADC
Click on the ADC button to see the dialog box in Figure 33, which shows a typical
ADC adjust screen. The controls you see on your adjust screen may vary, depending
on which ADC you assigned to this datasource.
49
Gamma Acquisition and Analysis
Figure 33 Typical ADC Adjust Dialog
Conv. Gain
Clicking either on the arrows at the ends of the Scroll Bar or in the area to either side
of the Scroll Bar’s “Slider” will change the gain by a factor of two over the control’s
range of 256 channels to the maximum number of channels supported by the MCA.
LLD Threshold
The window between the ULD setting and the sum of the LLD and LLD Threshold
settings limits the energy range considered by the ADC.
LLD
The ADC’s Lower Level Discriminator (LLD) can be set as a percentage of the ADC’s
full scale input.
ULD
The ADC’s Upper Level Discriminator (ULD) can be set as a percentage of the ADC’s
full scale input.
Zero
The ADC’s Zero is factory set for each conversion gain, so that a Zero setting of 0%
corresponds to zero intercept (zero energy input stores in channel 3, the first channel
used for spectral data storage) for that conversion gain. The Zero control can be used
to change the zero intercept to another channel.
Offset
The ADC’s Digital Offset shifts the memory assignment of the ADC’s conversions.
With no (zero) offset, the ADC’s channel numbers are the same as the memory assignment’s channel numbers. For example, if the Gain is programmed to 8192 and the
memory assignment is only 4096, an Offset of zero will allow only the lower half of
the full-scale conversions to be stored. But if the Offset were set to 4096, channel
4096 of the ADC would be shifted down to correspond to channel zero of the memory.
This offset would allow the upper half of the full-scale conversions to be stored in the
assigned MCA memory.
50
MCA Menu
Stabilizer
Click on the Stab. button to see the Stabilizer Gain dialog box in Figure 34, which
shows a typical stabilizer adjust screen. The controls you see on your adjust screen
may vary, depending on which stabilizer you assigned to this datasource.
Figure 34 Typical Stabilizer Adjust Dialog
Figure 35 shows the relationship between several of the Stabilizer’s functions.
After setting the Stabilizer’s controls, perform a File | Save so that the next time this
datasource is selected, the proper setting will be loaded into the MCA.
Figure 35 Relationship Between Stabilizer Functions
51
Gamma Acquisition and Analysis
Gain Centroid
This control sets the reference channel at the high end of the spectrum for gain stabilization, since gain drift is more pronounced in the upper channels. The centroid’s channel number can also be typed in from the keyboard, then accepted with the Ok button
within the control. To allow the stabilizer to correct for gain drift, the count rate in the
gain reference peak must be significantly higher than the count rate in the background.
Zero Centroid
This control sets the reference channel at the low end of the spectrum for zero intercept stabilization, which prevents interference from the effects of gain drift. The centroid’s channel number can also be typed in from the keyboard, then accepted with the
Ok button within the control. To allow the stabilizer to correct for zero drift, the count
rate in the zero reference peak must be significantly higher than the count rate in the
background.
Gain and Zero Window Controls
These controls set the width (in channels) of the upper and lower sampling windows
for each Mode. The operation of the stabilizer depends on measuring the count rate in
these two windows, detecting a difference, then providing a correction to equalize
count rates.
Gain and Zero Spacing Controls
These two controls set the spacing (in channels) between the upper and lower sampling windows for each Mode. The windows should be placed so that a shift in the reference peak reflects a significant change in count rate through the windows. For broad
peaks, the spacing should be set so that the windows edges are not on the flat part of
the peak.
Gain and Zero Mode Controls
The Stabilizer’s Gain and Zero, or both, can be set to Off, On or Hold.
If the drift in either mode (zero or gain) exceeds the Correction Range, the overrange
flag will be set and that mode will be changed to hold. Set that mode to off to clear the
overrange flag, then correct the cause of the excessive drift before returning the mode
to on.
On enables stabilization for the specified mode, allowing the Stabilizer to compare
the incoming data to the Mode’s Centroid and Window settings, then compensate
for data below (or above) the Centroid.
Off disables stabilization for the specified mode and sets the correction adjustment
to zero and clears the overrange flag if it was set.
Hold disables stabilization for the specified mode, but maintains the current
correction adjustment at the Stabilizer’s output.
52
MCA Menu
Amplifier
Click on the Amp button to see the dialog box in Figure 36, which shows a typical adjust screen for a programmable amplifier. The controls you see on your adjust screen
may vary, depending on which amplifier you assigned to this datasource. Click on the
Next button to see the PUR and Pole/Zero controls.
Figure 36 Typical Amplifier Adjust Dialog
Coarse Gain
The Amplifier’s Coarse gain setting is selected from the drop down list. For most configurations, it’s best to choose the highest Coarse Gain which, combined with the Fine
and S-Fine Gains, will produce the total desired gain.
Fine Gain and S-fine Gain
The Fine Gain and Super Fine Gain controls are set with their Scroll Bars.
Shaping Mode
This control sets the amplifier’s shaping time constant for use with different detectors.
PUR
This control, turns the amplifier’s Pileup Rejector (PUR) On or Off. When PUR is on,
a Live Time correction is performed for pulses that are piled up. A procedure for adjusting the Pileup Rejector for optimum performance is described in “Adjusting the
PUR/LTC” on page 277.
BLR Mode
The BLR (baseline restorer) control’s Asymmetrical mode normally offers superior
high count rate performance for high resolution Ge spectroscopy. The Symmetrical
mode is used on Ge systems with high noise levels, scintillation and proportional detectors, and Si systems.
The Symmetrical mode should always be used for detector systems which exhibit
baseline discontinuities resulting from excessive noise and/or high voltage effects,
preamp reset pulses and preamp secondary time constants. Secondary preamp fall time
constants result in unipolar output undershoots making it difficult to optimize the amplifier preamp matching.
53
Gamma Acquisition and Analysis
Pole/Zero
The amplifier’s pole/zero, which must be changed whenever the Amplifier’s Shaping
is changed or a different detector is used, can be adjusted automatically or manually.
Auto P/Z: Click on Start to start the amplifier’s automatic pole/zero optimization process, which is required before acquiring spectra with RC-type preamps.
For auto pole/zero to function properly, the incoming counts should be between 25%
and 100% of full scale. For a 0-2 MeV setup, this generally means that at 500 keV or
higher, the incoming count rate in this window should be greater than 100 cps. The
maximum count rate over the full ADC range should be < 2 kcps. If the pole/zero fails
to converge, check for the proper count rate.
The pole/zero adjustment will be more accurate if the spectrum contains a significant
count rate above 70% of full scale.
After adjusting the pole/zero, you can see the current pole/zero setting by selecting a
different Adjust screen, such as ADC, then reselecting Amp. This will update the number above the slider control. If, after performing an Auto P/Z and refreshing the
screen, the setting has changed significantly, try to do another Auto P/Z cycle; the P/Z
circuits may need more time to find the optimum setting.
Manual P/Z: In some situations the auto pole/zero may fail to converge to an optimal
value, so a slider control is provided which allows you to manually adjust the
pole/zero setting. The adjustment procedure is described in detail in the “Manual
Pole/Zero” on page 278.
TRP Preamps
When a Transistor Reset Preamp (TRP) is used, the pole/zero is fixed (at 0), but you
may have to make an adjustment on the TRP preamp so that the amplifier and ADC
are gated off during the preamp’s reset time. This procedure is described in the “Adjusting the TRP Reset Pulse” on page 281.
High Voltage
Click on the HVPS button to see the dialog box in Figure 37, which shows a typical
HVPS adjust screen. The controls you see on your adjust screen may vary, depending
on which HVPS you assigned to this datasource.
Figure 37 Typical High Voltage Adjust Dialog
54
MCA Menu
Voltage
The Voltage scroll bar sets the output of the HVPS between the minimum and maximum settings of the Voltage Limit control set in the MID Editor. The voltage can also
be typed in from the keyboard, then accepted with the Ok button within the control.
Status
If the Power Manager, described in the next section, is in the Battery Full mode or the
AC Full mode, you can turn the HVPS On or Off. In the Battery Save mode, you can
set the HVPS to Armed or Off. If Armed is selected, the HVPS will be automatically
turned on when acquisition starts.
HVPS Reset
The HVPS is turned Off when a fault caused by an overload or an Inhibit occurs with
an InSpector HVPS. After the fault condition has been cleared, click on HVPS Reset
to reset the HVPS, then turn it On again with the Status control.
Clear Ov/In Latches
When a fault caused by an overload or an inhibit occurs with an ICB HVPS, its Overload and Inhibit latches are set. After the fault condition has been cleared, click on
Clear Ov/In Latches to reset the latches.
Power Manager
Click on the PwrMgr button to see the dialog box in Figure 38, which shows a typical
power manager adjust screen. The controls you see on your adjust screen may vary,
depending on which power manager you assigned to this datasource.
Figure 38 Typical Power Manager Adjust Dialog
Power Mode
Click on a Power mode button to select one of the device’s power modes.
The Battery Full mode keeps the system electronics on at all times using power
from the device’s batteries.
55
Gamma Acquisition and Analysis
The Battery Save mode minimizes battery drain by turning off some of the
device’s circuits whenever possible. When data acquisition is initiated, the system
changes to the Battery Full mode and data acquisition begins after the Acquisition
Delay time has elapsed, which allows time for the high voltage to reach its preset
value and for the internal electronics to become thermally stable. When acquisition
is finished, the system returns to the Battery Save mode.
In the AC Full mode, the device operates from battery port A. If the AC Power
Adapter is connected to this port, it will supply power to the device. The AC
Adapter’s User’s Manual tells you how to connect it to the battery port with the
supplied connecting cable. If ac power is lost, the Power Manager will
automatically switch to port B, allowing its battery to continue supplying power.
When ac power is restored, the Power Manager will switch back to port A.
Acq. Delay
The Acq. Delay control (enabled only in the Battery Save mode) sets a delay time
which holds off actual data acquisition until the high voltage has reached its preset
value and the internal electronics are thermally stable. A minimum delay of one minute is provided to allow the high voltage to increase to its preset value and the internal
electronics to warm up. The internal electronics will stabilize to within 0.1% of their
final settings in less than five minutes.
Standby Delay
The Standby delay control sets the amount of time that the system can remain idle
(neither acquiring data nor communicating with the host computer) before it automatically changes to Standby. In Standby, all electronics except the Power Manager are
shut down until the next command is received from the host. A setting of 0 minutes
will prevent the device from switching to Standby.
MCS
The MCS Adjust (Figure 39) allows you to set parameters such as Dwell time, Mode
and ROI limits for the MCS device. The controls you see on your adjust screen may
vary, depending on which MCS you assign to this datasource.
Figure 39 MCS Adjust Dialog
56
MCA Menu
Dwell Range
Choose seconds, milliseconds, or microseconds as the Range for the dwell time.
Dwell Value
Sets the dwell-time, within the selected Range.
Disc. Mode
This can be TTL, FDisc or ROI. TTL picks up the signals to be counted from the external connector; FDisc sees any counts converted by the DSP; ROI counts only those
events in a limited Region of Interest.
For the AccuSpec FMS board there is a special mode of operation that emulates PHA
acquisition. For this detector, PHA replaces FDisc as a possible mode, and the following controls (to support “pseudo-PHA”) appear:
Scan Window
The percent of the start/end window used to set the discriminator ROI.
Scan Start
Percent of full scale where the scan for PHA data will start.
Scan End
Percent of full scale where the scan for PHA data will end.
Set ROI
The FMS board uses SCA LLD and ULD (as percent of full scale) instead of ROI
Start and End. This button picks up the current Left and Right Marker positions and
sets those values from them. Those settings will then be used for any subsequent
ROI-mode acquisition.
Pseudo-PHA
Pseudo-PHA is intended to be used to collect a pseudo spectrum to be used for defined
discrimination window to be used during ROI mode of MCS. When you select PHA
mode and then Start Acquire, the values for scan window, scan start, and scan end will
be used as follows:
• With a fixed dwell time (2 ms).
• The discrimination ROI is set to the scan window, limited by (and scaled to)
the scan start and scan end.
• That “scan window” moves across the spectrum, synchronized with the dwell
time.
When collect ends, either by preset (sweeps) reached or manual Stop, you can place
the Left and Right markers on either side of the peak of interest, and then use the Set
57
Gamma Acquisition and Analysis
ROI button to pick up those positions and (using the values of scan start and end)
convert those positions into a discrimination ROIs (SCA LLD and SCA ULD) that
will be used for subsequent MCS acquisition. Or you can try again, moving your scan
start and/or scan end in so that the board will see a smaller part of the full scale
allowing you to get better resolution.
Status
Selecting Status shows a Hardware Status Report for all devices (MCA and programmable front-end electronics) associated with the current hardware datasource. Figure
40 shows a typical Status Report, which includes device type, serial number, and any
programmable settings that are obtainable from each device. An asterisk next to the
parameter means that an unexpected setting was read from the device.
Though the majority of the entries in the Status Report are direct reflections of the
MCA Input Definition Editor settings or the spectral display Adjust settings, a few of
them are explained in greater detail in the “Status Screen Entries” on page 282.
The Update button sends all programmable parameters to the devices and verifies
them, updates the Status Screen. If the display’s Status field had been changed to red
because an error was detected on the datasource, the field will be changed to white if
the reported error has been corrected (remember that a datasource includes an MCA
and various front-end devices). You’ll find more information on possible errors in
“Genie 2000 Input Datasource Errors” in the Error Codes chapter of the Genie 2000
Customization Tools Manual.
Figure 40 Typical Status Report
58
Calibrate Menu
Advance
Selecting Advance issues an advance command to a sample changer assigned to the
current hardware datasource. If this datasource does not have a sample changer assigned to it in the MID configuration file, the command will not be issued.
Load
If you are displaying a Detector (hardware) datasource and you have at least one CAM
File datasource open, you can copy spectral data and energy calibration information
from the selected CAM File datasource to the Detector datasource.
Selecting Load displays the dialog box in Figure 41. Use the “Load from:” list box to
choose one of the open CAM File datasources. If you want to copy the energy calibration information as well, select the “Include Energy Calibration” check box.
Figure 41 Load From a Datasource
Calibrate Menu
The Calibrate menu provides several options for calibrating the energy and efficiency
of the datasource, graphically displaying the calibration, setting preferences for the
calibration, and loading and storing calibration files.
59
Gamma Acquisition and Analysis
Setup
Setup displays a dialog screen (Figure 42) which allows you to select preferences and
calibration settings to be used throughout the calibration and analysis processes.
Figure 42 Calibration Setup
Preferences
Energy Units: Though energies are stored in keV, you can change how energy units
are shown in the display’s dialog boxes and in reports: eV, keV, MeV or Other.
The proper Conversion Factor for “other” units is defined as the number of keV units
equal to 1 “other unit”. For example, the conversion factor for MeV would be 1000 because there are 1000 keV units in 1 MeV.
Tolerance Units: For the units to be used for entering tolerances, chose either Energy
(a constant energy value across the spectrum) or FWHM (the energy varies according
to the FWHM calibration).
Calibration Settings
Tolerance: Energy Calibration and Peak Match values can be set in terms of energy
(in the selected energy units) or FWHM.
Energy Calibration Tolerance is used during energy calibration in matching
spectrum peaks to the current populated list, plus or minus the tolerance value.
60
Calibrate Menu
Efficiency Match Tolerance is used during efficiency calibration to match
calculated peaks with the peaks in the specified certificate file, plus or minus the
tolerance value. It is also used to match energies and peaks during later analysis.
Tail curves: None or Low. A germanium detector (for instance) tends to exhibit tailing on the low energy side of its peaks, so you’d normally choose Low to take this into
account during calibration. None is usually appropriate for NaI spectra.
Continuum: Linear, Step, None. You can establish the continuum by selecting either
a Linear function or a Step function. The Linear function is adequate when the continuum is relatively flat. It is a simple, straightforward equation that estimates the continuum under the peaks as a trapezoid. The Step function should be chosen if there are
any regions in the spectrum where the continuum is significantly higher on the left
side of a peak region than on the right side. This function automatically reduces to a
flat line when the continuum is flat. None is typically used only with Alpha spectra.
The value in the Channels text box establishes the continuum under the peak ROIs.
If you have two peaks that are close together, reducing the number of continuum
channels may give better results. If you have poor peak statistics and there are no
other peaks nearby, increasing the number of continuum channels establishes the
continuum more accurately but makes it more likely that close lying peaks will be
considered as a multiplet instead of as a singlet.
FWHM or Channels. Choose FWHM to let the continuum vary according to the
shape calibration. Choose Channels to keep the continuum fixed across the
spectrum. The specified number of FWHMs or the specified number of continuum
channels will be used on both sides of the peak to establish the continuum under the
peak ROIs.
If you plan to use either the Cursor or the Marker method and the calibration peaks
are very close to other peaks, you should set the continuum mode to Channels and
set the value in the Channels text box to a small number. The Cursor and Marker
methods do not use the expected FWHM information, even when it is available. If
you plan to use the Auto button, you may set the continuum mode to FWHM. If
you plan to use a mixture of both modes, both parameters should be set
appropriately.
Analysis Sequence Description
The Analysis Sequence Description dropdown is a list of the currently defined analysis
sequence on your system. Selecting one of the sequences will direct efficiency calibration to execute the peak locate and peak area engines of the selected sequence when
the Auto button is pressed. The default selection is NONE.
Energy Only Calibration
The standard energy calibration includes low-tail and FWHM values. For a simpler
energy calibration, this function (Figure 43) allows you to enter the calibration using
only energy/channel pairs, either by the Cursor Method or the Manual Method. If only
61
Gamma Acquisition and Analysis
one energy/channel pair is entered, a second pair will automatically be generated as
<energy/channel, 1> when you exit the dialog with an OK.
Figure 43 Energy Only Calibration
Manual Method
To add an entry to the list box, type an energy value into the Energy text box and the
corresponding channel number in the Channel text box, then select Accept. You can
add these energy/channel pairs in any order; they will always be displayed in ascending energy order.
Cursor Method
To use this method, there must be a spectrum in the Spectral Display area and its cursor must be on the peak that is being used for calibration.
Select the Cursor button to add the window’s cursor channel position to the Channel
text box. Now enter an energy value in the Energy text box and press Accept to add
the data to the list box.
Show
This function is available only when at least two energy/channel pairs have been entered, either by you or by the system. When you select the Show button, the energy
calibration curve will be displayed as a graph. Please refer to “Energy Show” on page
72 for a complete discussion and an illustration of this function.
Delete
To remove a line and its values from the list box, highlight the line, then select the Delete button.
62
Calibrate Menu
Energy Coefficients
Selecting Energy Coefficients displays a dialog box (Figure 44) which allows you to
edit or manually enter known energy calibration coefficients for the energy vs. channel, FWHM vs. energy, and tail vs. energy curves.
Figure 44 The Energy Coefficients Dialog
If you edit an existing calibration curve, any points previously used to generate that
curve will be deleted and will not be available for further Populate operations on the
current datasource.
Show Button
Select the Show button to display the energy calibration curve as a graph. Please refer
to “Energy Show” on page 72 for a complete discussion and an illustration of this
function.
Energy Full
When you select Energy Full, its menu lets you choose how energies are to be entered
for spectrum calibration:
• By Certificate File, which allows you to select a certificate file containing the
energies.
• By Nuclide List, which allows you to select a list of nuclides and their
energies from a specified library.
• By Calibration File, which allows you to select a calibration file defining the
list of energies.
• By Entry, which lets you manually enter each energy, its channel number, and
its FWHM and Low Tail values.
63
Gamma Acquisition and Analysis
By Certificate File
Calibrating By Certificate File lets you choose either of two types of a certificate file
(Figure 45) as a source of calibration energies: full or partial. The partial certificate file
(.CTP) is similar to the full certificate file (.CTF), lacking only the assay date and
time and the activity units for each nuclide. See “Save as Certificate” on page 65 for
more information.
When you have highlighted the certificate file name you want to use, you can either
select Info to see more information on the file, or select OK to load the file’s energy
data into the energy line editor.
Append to Existing Calibration
When adding energy points to the current datasource from a file, such as in constructing a composite energy file, there may be common energy points in the two files. If the
Append to Existing Calibration checkbox is selected, the system will ask if you want
to append to the existing calibration. If you answer “yes”, it will tell you each time it
finds a duplicate entry.
Editing the List
When you select OK, you’ll see the “Energy Calibration – Full” screen, which allows
you to examine and, if necessary, edit the data in any of the lines. Please refer to “Energy Calibration – Full” on page 69 for an illustration and explanation of this screen.
Figure 45 Calibrate by Certificate File
64
Calibrate Menu
By Nuclide List
Calibrating By Nuclide List lets you choose a nuclide list (Figure 46) as a source of
nuclide lines. You can accept all nuclides in the list by choosing OK to move to the
“Energy Calibration – Full” screen, which allows you to examine and, if necessary,
edit the data in any of the lines. Please refer to “Energy Calibration – Full” on page 69
for an illustration and explanation of this screen.
Figure 46 Calibrate by Nuclide List
Save as Certificate
If you highlight one or more nuclides, then choose Save as Certificate you’ll create a
“partial” certificate file (.CTP) which can be used for energy calibration.
This certificate file is similar to the “full” certificate file (.CTF) created in the Certificate File Editor (page 192), lacking only the assay date and time and the activity units
for each nuclide.
Append to Existing Calibration
When adding energy points to the current datasource from a file, such as in constructing a composite energy file, there may be common energy points in the two files. If the
Append to Existing Calibration checkbox is selected, the system will ask if you want
to append to the existing calibration. If you answer “yes”, it will tell you each time it
finds a duplicate entry.
You can select OK to save this limited data as a “partial” certificate file. If you want
to add the missing information, making this a “full” certificate file, highlight one or
more nuclides, then choose Additional Info to enter the additional data.
65
Gamma Acquisition and Analysis
Additional Nuclide Information
In addition to entering the nuclide’s assay date and time and its activity units, this
screen (Figure 47) lets you enter the percent uncertainty and change the activity units.
Figure 47 Additional Nuclide Information
General Information: These text boxes let you enter or change assay date and time
and the activity units.
The Assay Date is the date and time when the source was measured (you must enter
both).
Though Activity Units defaults to µCi, you can choose another unit for reporting
nuclide activities. The Conversion Factor defaults to the proper value for converting
Bq to µCi. If you choose the last item in the Activity Unit list, < >, you can type in the
name of any other unit, then enter the Conversion Factor that will convert your units
to µCi.
Nuclides: Highlight a nuclide in the list box to enter or edit its Activity and Percent
Uncertainty data. When you’ve finished editing that nuclide, select Change. This will
copy the data to the list file and move the highlight to the next nuclide.
When you’ve finished, select OK to save this as a “full” (.CTF) certificate file and return to the Calibrate by Nuclide List screen. You’ll see that all nuclides which have
Additional Nuclide Information added are marked by a double asterisk (**).
If you are satisfied that all data in the Calibrate by Nuclide List screen is correct, you
can select this screen’s OK to load the file into the energy line editor.
66
Calibrate Menu
Editing the List
When you select OK, you’ll see the “Energy Calibration – Full” screen, which allows
you to examine and, if necessary, edit the data in any of the lines. Please refer to “Energy Calibration – Full” on page 69 for an illustration and explanation of this screen.
Figure 48 Calibrate by Calibration File
By Calibration File
Choosing to calibrate By Calibration File displays a dialog box (Figure 48) which
lets you select a Calibration File defining the list of energy/channel pairs to be used for
calibration. The Info button displays descriptive information for the selected file.
Append to Existing Calibration
When adding energy points to the current datasource from a file, such as in constructing a composite energy file, there may be common energy points in the two files. If the
Append to Existing Calibration checkbox is selected, the system will ask if you want
to append to the existing calibration. If you answer “yes”, it will tell you each time it
finds a duplicate entry.
Editing the List
When you select OK, you’ll see the “Energy Calibration – Full” screen, which allows
you to examine and, if necessary, edit the data in any of the lines. Please refer to “Energy Calibration – Full” on page 69 for an illustration and explanation of this screen.
67
Gamma Acquisition and Analysis
By Entry
Choosing to calibrate By Entry displays a dialog box (Figure 49) which lets you manually enter energy/channel pairs to be used in generating the energy calibration coefficients for the energy vs. channel equation.
Figure 49 Calibrate by Entry
You must also manually enter FWHM values to be used in generating the shape calibration coefficients for the FWHM vs. energy equations.
If Low Tail Curve was selected in Calibration Setup (page 60), you are also allowed to
manually enter Low Tail values to be used in generating the shape calibration coefficients for the Low Tail vs. Energy equations.
Add Button
To create an entry in the list box, type an energy value into the Energy text box, then
the corresponding channel number, FWHM value (in channels), and Tail value (in
channels) in their text boxes. When the values have been entered, select Add. You can
add these energy/channel pairs in any order; they will always be displayed in ascending energy order.
Delete Button
To remove a line and all its values from the list box, highlight the line, then select the
Delete button.
Change Button
To change any of the values for a line, highlight the line, edit any of the values, then
select the Change button to move the changes to the list box.
68
Calibrate Menu
Clear Button
Instead of editing the values one by one, you can remove all values from the text
boxes for the highlighted line by selecting the Clear button. This will clear all entries
at the once.
Append to Existing Calibration
When adding energy points to the current datasource from a file, such as in constructing a composite energy file, there may be common energy points in the two files. If the
Append to Existing Calibration checkbox is selected, the system will ask if you want
to append to the existing calibration. If you answer “yes”, it will tell you each time it
finds a duplicate entry.
Editing the List
When you select OK, you’ll see the “Energy Calibration – Full” screen, which allows
you to examine and, if necessary, edit the data in any of the lines. Please refer to “Energy Calibration – Full” on page 69 for an illustration and explanation of this screen.
Energy Calibration – Full
The Energy Calibration – Full dialog (Figure 50) allows you to mark calibration
peaks in a reference spectrum, then calculate the energy vs. channel, FWHM vs. energy, and tail vs. energy curves. You can enter Calibration peaks into the list box by
the Cursor Method or the Marker Method, described in the following subsections.
Figure 50 The Energy Calibration – Full Dialog
Peak Edits
In the Peak Edits box, you’ll see the Cursor button, used with the Cursor Method, the
Markers button, used with the Marker Method, and the Accept button, used with both
methods, to add the entry in the Energy text box to the list box. The Delete button deletes the highlighted entry from the list box. You’ll also see the Ref Pk button, which
selects/deselects the currently highlighted entry in the list box as the reference peak.
69
Gamma Acquisition and Analysis
Only one peak, from a pulser for instance, may be assigned as a reference peak. The
reference peak will not be used during the calculation of the calibration coefficients.
Cursor Method
To use the Cursor Method, there must be a spectrum in the Spectral Display area and
its cursor must be on the peak that is being used for calibration.
Select the Cursor button to use the spectrum’s cursor channel position to determine an
approximate FWHM in order to establish a computed (as opposed to displayed) ROI
and attempt to fit the peak. The computed peak centroid, computed FWHM, and tail
values will be calculated and displayed in the list box.
Now enter an energy value in the Energy text box and choose Accept to add the data
to the highlighted list box entry.
Note that because the Cursor Method uses a relatively unsophisticated routine to determine ROI limits, it is not the best choice in certain calibrations, such as for NaI spectra. The Marker Method is recommended for NaI spectra.
Marker Method
To use the Marker Method, there must be a spectrum in the Spectral Display area and
its markers must be around the peak that is being used for calibration.
Select the Markers button to use the spectrum’s markers to establish an ROI and attempt to fit the peak. The computed peak centroid, computed FWHM, and tail values
will be calculated and displayed in the list box.
Now enter an energy value in the Energy text box and choose Accept to add the data
to the highlighted list box entry.
The Marker Method is recommended for spectra where there are other peaks close to
the calibration peak or when calibrating NaI spectra.
Auto Button
The Auto button performs an automatic Peak Locate on the reference spectrum. The
list box is then populated with the energies found in both the populate file and the reference spectrum, with their associated channel values.
Use-Results Button
The Use-results button will retrieve energy/channel/FWHM/tail results directly from
the current datasource and populate the list box. This button will be disabled if peak
area analysis results are not present.
Show Button
Select the Show button to display the energy calibration curve as a graph. Please refer to
“Energy Show” on page 72 for a complete discussion and an illustration of this function.
70
Calibrate Menu
Energy Recalibration
Selecting Energy recalibration displays a dialog box (Figure 51) which lets you
recompute the energy vs. channel calibration curve. Shape calibrations (FWHM and
Low Tail) are not affected by this command; note that the FWHM/energy and Low
Tail/energy pairs used by the shape calibration curves are zeroed out.
Figure 51 The Energy Recal Dialog
Populate
The Populate button invokes a dialog screen, similar to the one in Figure 52, which
allows you to populate the list box with the energies from the current datasource, a
certificate file, or a previously stored calibration file.
Figure 52 The Populate Screen
71
Gamma Acquisition and Analysis
If the certificate or calibration population option is invoked when the list box already
contains energies, there may be a duplication of energy entries. If a duplicate is found,
you will be asked if you want to replace the existing energy entry.
Auto
The Auto button performs an automatic peak locate on the reference spectrum. The
list box is then populated with those energies found in both the populate file and the
reference spectrum with their associated channel values.
Show Button
Select the Show button to display the energy calibration curve as a graph. Please refer
to “Energy Show” on page 72 for a complete discussion and an illustration of this
function.
Energy Show
Selecting the Energy Show menu item (or the Show button on some screens) will display the calculated energy calibration curve as a graph, as seen in Figure 53. You can
select the Energy button to show the energy curve or you can select the Shape button
to show the FWHM and Low Tail curves.
Figure 53 A Typical Energy Show Display
The Show Energy Calibration Curves display contains a Peak text box so that you can
eliminate outlying peaks one at a time. Enter the number of the peak to be dropped,
then select Drop Pk. The peak will be deleted from the list and both the curve and the
equation will be regenerated. You may repeat Drop Peak until satisfactory results are
obtained but you can’t reduce the number of data points to less than two.
72
Calibrate Menu
Note that the “Order of the polynomial” is limited by the number of data points present. For instance, at least two points are required for a first order curve and at least
four points are required for a third order curve.
The “Order of the polynomial” field is enabled for the energy curve only. Click on the
‘+’ (’–’) button to increase (decrease) the order value.
Select the Print button to send an output of the currently displayed curve(s) to the default print queue.
Peak-to-Total Calibration
A Peak-to-Total efficiency calibration is required before you can use Canberra’s
patented Cascade Summing Correction feature (refer to “Using Cascade Correction”
on page 206).
Guidelines for Improving Accuracy
The following are provided as guidelines for performing an accurate Peak-to-Total
(P/T) calibration.
Calibration Sources
In order to carry out a P/T calibration we recommend a set of low cost point sources
with the following nuclides: 109Cd, 57Co, 113Sn, 137Cs, 54Mn and 65Zn. The Model
S-PTC P/T Calibration Source Set, available from Canberra, is a convenient set of radioactive sources suitable for the P/T calibration of any detector.
Note that the peak-to-total ratios at 109Cd (88 keV) and 113Sn (392 keV) gamma ray energies could be inaccurate because of X-ray contributions to the total counts in these
spectra. To filter out the X rays, either a thin absorber foil may be placed between the
source and the detector, or the Extrapolation Channel parameter (page 76) may be
used to cut off the X ray and noise contributions to the total.
Background Compensation
When the ambient background in the counting area is not negligible, it is recommended that a background spectrum be acquired, and used while performing the P/T
calibration.
Calibration Curve Fitting
The cascade summing correction factors obtained using Genie 2000 software could be
in serious error if you’re not careful in fitting the P/T calibration curve. The error due
to extrapolating the curve beyond the last empirical P/T data point could be significant. To avoid this, it is highly recommended that a dual-curve fit with a crossover energy of 122 keV (57Co) be used. It is further recommended that the default order of 2
be used for the high energy polynomial. This would provide a linear and a predictable
extrapolation in the log-log scale.
73
Gamma Acquisition and Analysis
Keeping the above in mind, you can correctly use the Peak-to-Total Calibration procedure described in the following sections.
Setting up a Peak-to-Total Calibration
Selecting the Peak-to-Total command opens the dialog box shown in Figure 54.
Figure 54 The Peak-to-Total Dialog
Selecting the Calibration Spectra
The first step is to select the spectra that will be used for the Peak-to-Total (P/T) calibration. These spectra must each have been generated by a single line nuclide (or a nuclide which does not give rise to coincidence summing effects), and have these
characteristics:
• The files must all be stored in the same subdirectory on your hard drive or
network.
• The files must all be of the same size (e.g. 4K channels, 8K channels, etc.).
• The files must all be Energy Calibrated, though they’re not required to have
the same energy calibration.
• All spectra used for the P/T calibration, including the optional background
file, must be acquired under similar conditions (geometry, background, etc.).
74
Calibrate Menu
To select the spectra, click the File Folder button (uppermost button on the right) to
navigate to the directory where the P/T calibration files are stored. Hold down the
CTRL key and select as many files as you want to work on, then select Open.
The list of selected files will be displayed in the P/T Files box (Figure 55). If you
don’t want to use one of the files, it can be removed by selecting it, then clicking on
the Garbage Can button (just below the File Folder button).
Figure 55 The Selected Spectra
Selecting the Background Spectrum
It is recommended that a background spectrum be selected for subtraction during the
P/T calibration process. Click the File Folder button to the right of Background File
field to select this file.
Note: The background file must be the same size (number of channels) as the calibration files and must be energy calibrated.
PTEG Parameters
The defaults for the three PTEG parameters are best for most situations, but may be
changed if necessary.
75
Gamma Acquisition and Analysis
Extrapol. Chan.
This parameter defines a lower limit (LLD) channel for the P/T calibration spectra.
Spectral data below the extrapolation channel are replaced by a computed (predicted)
value. Use this lower limit adjustment to discard unwanted low energy content (i.e.
noise, etc.).
Avg. Window
The average window width to be used during peak analysis. This parameter sets the
number of channels to the left and right of the extrapolation channel, and is used to determine the average count to be placed in all channels from zero to the Extrapolation
Channel.
Iterations
This parameter displays the maximum number of iterations being used to correct for
side-peaks on the P/T ratio during calibration. Ten iterations are more than sufficient
to insure convergence to within 0.1%.
Peak-to-Total Data in the Opened Datasource
The Number of triplets (energy/efficiency/error) used will be displayed if the
datasource is already P/T calibrated and Add new data to existing ones will be enabled. Select the checkbox to add the new data to be incorporated into the existing P/T
calibration. Deselect it to replace the existing P/T calibration.
Performing the Peak-to-Total Calibration
After you’ve entered all of the parameters, click on OK to perform the calibration.
While the calibration is being performed, an “in progress” message is displayed. Figure 56 shows the calibration results.
Figure 56 The P/T Calibration Results
76
Calibrate Menu
Editing the Peak-to-Total Calibration Results
Figure 56 shows how the results of the P/T calibration can be reviewed and edited as
needed. At this stage of the process, the effect of the side-peaks on the P/T ratios for
57Co, 113Sn, and 65Zn has not yet been corrected. The displayed P/T ratios shown are
therefore still uncorrected values.
Click on either the Show or OK button to correct for the effect of the side peaks, using
the selected number of Iterations.
Editing an Entry
To edit an entry, highlight it to transfer its data into the Peak Edits text entry fields.
Make any needed edits, then click on the Accept button to store the revisions.
Deleting an Entry
Select an entry, then click on the Delete button.
Note: There is no confirmation dialog; the peak and its data will be removed from
the list and cannot be recovered.
Adding a New Entry
To add a new entry to the list:
1. Click on New Record to clear the Peak Edit fields.
2. Enter the new entry’s values into the appropriate fields.
3. Click on Accept to insert the new entry into the list.
Establishing a Crossover Energy
For fitting the peak-to-total calibration curve, it is recommended that a dual polynomial curve fit be used. To do this, a crossover energy must be specified. The recommended crossover energy is 122 keV.
Click the Cross-over button to select the currently highlighted entry in the list box as
the crossover energy point. Only one crossover point may be assigned. The selection
of a crossover energy point indicates that two curves will be generated for the dual
polynomial curve. If no crossover energy point is selected, a single curve will be generated.
The result of doing this can be seen in Figure 57. Note that at least two data points
must exist on each side of the crossover energy point for dual curves to be generated.
Clicking either Show or OK starts the correction, with the software performing the iterations to correct the peak-to-total ratios for the effect of the side-peaks. If you click the
List Pks button in the Show display (Figure 58), you’ll see the iterated or final values of
the peak-to-total ratios.
77
Gamma Acquisition and Analysis
Figure 57 A Crossover Peak has Been Selected
Peak-to-Total Show
Select the Show button to display the Peak-to-Total calibration curve as a graph (Figure 58). Please refer to “Efficiency Show” on page 93 for a complete discussion of this
function.
Note that the default order for the polynomial is 2 for both the low energy and high energy curves. The order of the polynomial settings can be changed up (+) or down (–)
as required.
Figure 58 Show the Peak-to-Total Calibration
List Peaks
Select the List Pks button to display a list of the peaks used in the calibration, as
shown in Figure 59. The calculated vs. measured P/T ratios are listed to show how ac-
78
Calibrate Menu
curately the curve follows the measured points. Note that the input P/T ratios used
have been corrected for the effect of side peaks.
Figure 59 The Peak-to-Total List Peaks Dialog
You can leave the list on screen while working in the Peak-to-Total Show dialog box
so that you can see the results of changing the graph’s Scale.
Efficiency
When you select Efficiency, you be asked to choose a method for entering the energies for spectrum calibration:
• By Certificate File, which allows you to select a certificate file containing the
energies (page 79).
• By Nuclide List, which allows you to select a list of nuclides and their energies from a specified library (page 80).
• By Calibration File, which allows you to select a calibration file defining the
list of energies (page 83).
• By Entry, which lets you manually enter each energy and its Efficiency and
%Error values (page 84).
• By ISOCS/LabSOCS, which lets you use an efficiency file generated by the
optional ISOCS or the LabSOCs software (page 85).
By Certificate File
Calibrating By Certificate File lets you choose a certificate file (Figure 60) as a
source of calibration energies and their efficiencies. When you have highlighted the
79
Gamma Acquisition and Analysis
certificate file name you want to use, you can select either Info to see more information on the file, or OK to load the file into the energy line editor.
Figure 60 Calibrate by Certificate File
Append to Existing Calibration
When adding energy points to the current datasource from a file, such as in constructing a composite efficiency file, there may be common energy points in the two files. If
the Append to Existing Calibration checkbox is selected, the system will ask if you
want to overwrite the existing energy each time it finds a duplicate entry.
Editing the List
When you select Open, you’ll see the “Efficiency Calibration” screen, which allows
you to examine and, if necessary, edit the data in any of the lines. Please refer to “Performing the Efficiency Calibration” on page 89 for an illustration and explanation of
this screen.
By Nuclide List
Calibrating By Nuclide List lets you choose a nuclide list (Figure 61) as a source of
nuclide lines. You can accept all nuclides in the list by choosing OK to move to the
“Efficiency Calibration” screen, which allows you to examine and, if necessary, edit
80
Calibrate Menu
the data in any of the lines. Please refer to “Efficiency Calibration” on page 89 for an
illustration and explanation of this screen.
Figure 61 Calibrate by Nuclide List
Save as Certificate
If you highlight one or more nuclides, then choose Save as Certificate, you’ll create a
“partial” certificate file (.CTP), which is similar to the “full” certificate file (.CTF)
created in the Certificate File Editor, lacking only the assay date and time and the activity units for each nuclide.
To save this as a “full” certificate file (to use for efficiency calibration), you’ll have to
add the missing information. Highlight one or more nuclides, then choose Additional
Info to enter the additional information.
Append to Existing Calibration
When adding energy points to the current datasource from a file, such as in constructing a composite efficiency file, there may be common energy points in the two files. If
the Append to Existing Calibration checkbox is selected, the system will ask if you
want to append to the existing calibration. If you answer “yes”, it will tell you each
time it finds a duplicate entry.
81
Gamma Acquisition and Analysis
Additional Nuclide Information
In addition to entering the nuclide’s assay date and time and its activity units, the
screen in Figure 62 lets you enter the percent uncertainty and change the activity units.
Figure 62 Editing Additional Nuclide Information
General Information: These text boxes let you enter or change assay date and time
and the activity units.
The Assay Date is the date and time at which the source was measured (you
must enter both).
Though Activity Units defaults to µCi, you can choose another unit for reporting
nuclide activities. Since the activities are stored in microcuries, the Conversion
Factor defaults to the proper value for converting microcuries to other units. If
you choose < >, you can type in the name of an Activity Unit not shown in the
list, then enter the Conversion Factor that will convert your units to µCi.
Nuclides: Highlight a nuclide in the list box to enter or edit its Activity and Percent
Uncertainty data. When you’ve finished editing that nuclide, select Change. This will
copy the data to the list file and move the highlight to the next nuclide.
When you’ve finished, select OK to save this as a “full” (.CTF) certificate file and return to the Calibrate by Nuclide List screen. You’ll see that all nuclides which have
Additional Nuclide Information added are marked by a double asterisk (**).
If you are satisfied that all data in the Calibrate by Nuclide List screen is correct, you
can select this screen’s OK to load the file into the energy line editor.
82
Calibrate Menu
Editing the List
When you select OK, you’ll see the “Efficiency Calibration” screen, which allows you
to examine and, if necessary, edit the data in any of the lines. Please refer to “Performing the Efficiency Calibration” on page 89 for an illustration and explanation of
this screen.
By Calibration File
Choosing to calibrate By Calibration File displays a dialog box (Figure 63) which
lets you select a Calibration File defining the list of energy/efficiency/error triplets to
be used for calibration. The Info button displays descriptive information for the selected file.
Figure 63 Calibrate by Calibration File
Append to Existing Calibration
When adding energy points to the current datasource from a file, such as in constructing a composite efficiency file, there may be common energy points in the two files. If
the Append to Existing Calibration checkbox is selected, the system will ask if you
want to append to the existing calibration. If you answer “yes”, it will tell you each
time it finds a duplicate entry.
Editing the List
When the values for all nuclides have been entered, select OK to move to the Efficiency Calibration screen. This screen allows you to examine and, if necessary, edit
any of the lines. Please refer to “Performing the Efficiency Calibration” on page 89 for
an illustration and explanation of this screen.
83
Gamma Acquisition and Analysis
By Entry
Choosing to calibrate By Entry displays a dialog box (Figure 64) which lets you manually enter energy, efficiency and percent error values to be used in generating the efficiency calibration. Note that you can use up to 20 calibration data sets for
calibration; any more than that will be ignored.
Figure 64 Calibrate by Entry
Add Button
To create an entry in the list box, type an energy value in the Energy text box, then the
corresponding Efficiency and Percent Error values in their text boxes. When the values have been entered, select Add. You can add these values in any order; they will always be displayed in ascending energy order.
Delete Button
To remove a line and all its values from the list box, highlight the line, then select the
Delete button.
Change Button
To change any of the values for a line, highlight the line, edit any of the values, then
select the Change button to move the changes to the list box.
Clear Button
Instead of editing the values one by one, you can remove all values from the text
boxes for the highlighted line by selecting the Clear button. This will clear all entries
at the once.
Append to Existing Calibration
When adding energy points to the current datasource from a file, such as in constructing a composite efficiency file, there may be common energy points in the two files. If
the Append to Existing Calibration checkbox is selected, the system will ask if you
84
Calibrate Menu
want to append to the existing calibration. If you answer “yes”, it will tell you each
time it finds a duplicate entry.
Editing the List
When the values for all nuclides have been entered, select OK to move to the Efficiency Calibration screen. This screen allows you to examine and, if necessary, edit
any of the lines. Please refer to “Performing the Efficiency Calibration” on page 89 for
an illustration and explanation of this screen.
By ISOCS/LabSOCS
This calibration method is available only on systems with Model S573 ISOCS or
Model S574 LabSOCS installed. If neither ISOCS nor LabSOCS is installed on your
system, this command will be grayed out.
Choose Calibrate | Efficiency | By ISOCS/LabSOCS to see the dialog box shown in
Figure 65. The Run Geometry Composer button launches the Geometry Composer
application described in Chapter 8.
Figure 65 The ISOCS Efficiency
Calibration Dialog
Selecting the Input File
Assuming that you are going to use an existing set of LabSOCS/ISOCS data points,
the next step is to specify which set of efficiency data points (the .ECC file) you want
to use.
85
Gamma Acquisition and Analysis
• If the file has recently been used by the Geometry Composer or the calibration
process, it can be selected from the list in the File Name field.
• If it is not there, click on the Select button to browse to the desired directory
and file. LabSOCS output files are usually stored in the following path:
Genie2K\isocs\data\Geometry\Laboratory\Template_Name
Where Template_Name is the subdirectory for the files associated with a
given template.
When the file has been selected, click on Next.
Run Geometry Composer
If you need to create a new geometry definition (.ECC) file (“Creating a Geometry
Definition” on page 209) or edit an existing one (“Editing a Geometry Definition” on
page 218), click on the Run Geometry Composer button to open the Composer.
Selecting an Efficiency Factor
The dialog in Figure 66 lets you select the desired efficiency calibration type. For ‘traditional’ calibrations, select Efficiency and the results will be calculated in Activity.
To convert to concentration, the activity can be divided by the mass in the Genie Report template. Alternatively, if you want to compute the Activity per mass (gram) directly, select Efficiency*Mass. Other options are Efficiency*Length and
Efficiency*Area. Other options are Efficiency*Length and Efficiency*Area.
Figure 66 Select Efficiency Factor
86
Calibrate Menu
When you’ve selected an efficiency type, click on Next. The calibration information
will presented as in Figure 67.
Figure 67 Results of an Efficiency
Calibration
If you have selected an Efficiency*Mass, Efficiency*Length or Efficiency*Area calibration type, the screen shown in Figure 68 will be displayed. Check the default value
for the mass (or length, area) and correct it to the appropriate value, if needed. Press
the Recalculate button to see the new values.
Figure 68 Results of an
Efficiency*Mass Calibration
87
Gamma Acquisition and Analysis
For a discussion on how the mass, area and length of the various geometry definitions
impact the analysis results, refer to the LabSOCS/ISOCS Technical Notes chapter in
the Genie 2000 Customization Tools Manual.
Efficiency Results
The list box shows the efficiency calculated for each of the energy points.
Show
Select the Show button to view the calibration graphically, as shown in Figure 69.
Please refer to “Efficiency Show” on page 93 for a complete discussion of this function.
Figure 69 Show ISOCS Efficiency Calibration
Report
Select the Report button in Figure 67 (page 87) to display the complete calibration report shown in Figure 70.
Store
To save the calibration results for later use, select the Store button in Figure 67 (page
87).
Cross-over
Select the Cross-over button in the Show screen to select the currently highlighted entry in the list box as the crossover energy, the point where the low energy curve and
the high energy curve intersect. Only one point may be assigned.
88
Calibrate Menu
Figure 70 The Efficiency Calibration Report
The selection of a crossover energy point indicates that two curves will be generated
for the dual polynomial curve. If no crossover energy point is selected, a single curve
will be generated. Note that at least two data points must exist on each side of the
crossover energy point for dual curves to be generated.
Print
Select the Print button in Figure 70 to send a copy of the report to the default print
queue. Select OK to return to the Efficiency Results screen (Figure 67 on page 87).
Using the Calibration
Select the Finish button, which will then load this newly created efficiency calibration
into the currently open datasource. If the calibration was Stored then you can also use
the Calibrate | Load or the Calibrate | Efficiency | By Calibration File command to
load the file you just created.
Performing the Efficiency Calibration
The Efficiency Calibration screen (Figure 71) will be seen only after you’ve completed all steps for the method you chose on page 79: Certificate File, Nuclide List,
Calibration File or Entry.
89
Gamma Acquisition and Analysis
Figure 71 Efficiency Calibration
Peak Edits
Peak Edits lets you enter Energy, Efficiency, and Error (%) data by hand. You can
use up to 45 calibration data sets for calibration; any more than that will be ignored.
Since Efficiency Calibration always executes the Peak Locate and Peak Area algorithms, you should first choose the algorithms you want to use from the Analyze Menu
(“Peak Locate” on page 124 and “Peak Area” on page 133).
If you don’t specify the algorithms, Efficiency Calibration will use the first Peak Locate and Peak Area algorithms it finds in the spectroscopy application’s .AEF file
(which may not always be the ones you want to use). Note that these choices apply to
all open datasources.
Accept
The Accept button verifies the entered values and displays them in the list box.
Delete
The Delete button is used to delete the highlighted entry from the list box.
Cross-over
The Cross-over button selects/deselects the currently highlighted entry in the list box
as the crossover energy point. Only one crossover point may be assigned. The selection of a crossover energy point indicates that two curves will be generated for the
dual polynomial curve. If no crossover energy point is selected, a single curve will be
generated. Note that at least two data points must exist on each side of the crossover
energy point for dual curves to be generated.
Cascade Correction
These controls enable Genie 2000’s Cascade Correction routines.
90
Calibrate Menu
Geometry Composer File
Select the Geometry Composer (.GIS) file associated with the geometry used to acquire this data.
Generate Reports
Select the Generate Reports checkbox to output the reports generated by the analysis
algorithms.
Detector Characterized for LabSOCS
Select this checkbox if the detector being calibrated was characterized by Canberra.
Geometry Composer
If there is no geometry (.GIS) file for the geometry used to acquire this data, select the
Geometry Composer to launch the Geometry Composer application described in Chapter 8.
Perform Cascade Correction
Selecting this checkbox enables the “Cascade Correction” group box and performs additional processing when the Auto button is selected. This produces an efficiency calibration that is free from cascade summing effects. This is necessary to get valid results
from the Cascade Correction feature of the NID with Interference Correction algorithm. For information on performing the correction, refer to Appendix D, Correcting
for Cascade Summing.
Auto
If population was done from a certificate file, the Auto button will perform a peak locate with area analysis for each peak in the current datasource. The list box is then
populated with the peak areas in the datasource that match those in the certificate file.
If the “Perform Cascade Correction” checkbox has been selected, additional processing will take place and the list box will be populated with the corrected results. For information, refer to Appendix D, Correcting for Cascade Summing.
Note that the peak locate and peak area analysis algorithms are determined by the
Analysis Sequence Description selected in the Calibration Setup Dialog (page 61). If
“NONE” was selected, the algorithms will default to the ones last chosen from the Analyze Menu.
CAUTION
Analysis sequence (.ASF) files contain their own algorithm
definitions. It is your responsibility to ensure that the algorithms called in these sequences are the same as the algorithms used for efficiency calibration. Failure to do so may
greatly affect the accuracy of the results.
91
Gamma Acquisition and Analysis
Use-results
The Use-results button will retrieve peak analysis results directly from the current
datasource and populate the list box. This button will not be enabled if peak area analysis results are not present in the datasource.
Show
Select the Show button to display the efficiency calibration curve as a graph. Please
refer to “Efficiency Show” on page 93 for a complete discussion and an illustration of
this function.
Supported Curves
All supported efficiency curves will be generated so that any one can be used for later
analysis. The supported curves are:
• Dual Polynomial, using ln() of energies for low and high curve on each side of
a crossover point. A minimum of 2nd order (ln-ln) polynomial is allowed, and
u
For Dual in the single-curve mode and for the high energy curve in the
two-curve mode, a maximum of 9th order (ln-ln) polynomial is allowed.
u
For the low energy curve in the two-curve mode, a maximum of 5 th order
(ln-ln) polynomial is allowed.
• Linear Polynomial, using linear 1/E coefficients. A minimum of 2 nd order and
a maximum of 9th order polynomial are allowed.
• Empirical Polynomial, using ln() of scaling-factor/E coefficients. A minimum
of 2nd order and a maximum of 5th order polynomial are allowed.
• Interpolated, using a straight-line interpolation in the ln-ln domain.
The default order of the polynomial (n) for both the high-energy and low-energy
curves will be determined as follows:
n = 5 for ten or more calibration points.
n = 4 for eight or nine calibration points.
n = 3 for six or seven calibration points.
n = 2 for three to five calibration points.
Once an order has been determined by the program or has been adjusted in the Show
screen, that order will be used as the default for future calibrations.
92
Calibrate Menu
Efficiency Show
Selecting the Efficiency Show menu item (or the Show button on some screens) will
display the efficiency calibration as a graph (Figure 72).
Figure 72 Show Efficiency Calibration
You can choose which curve to display (Dual, Empirical, Linear or Interpolated) in the
Curve box and the scale of the graph (Linear or Log/Log) in the Scale box.
The order of the polynomial settings can be changed up (+) or down (–) as required.
The “Order of the low polynomial” will be enabled for use only if Dual curve has been
chosen and a low-energy curve is present.
Note that when a crossover point is specified, the low energy curve can only be adjusted up to a 5th order polynomial. The high energy curve can be adjusted up to a 9th
order polynomial.
Peak Text Box
The Peak text box lets you eliminate outlying peaks one at a time. Enter the number of
the peak to be dropped, then select Drop Pk. The peak will be deleted from the list
and both the curve and the equation will be regenerated. You may repeat Drop Peak
until satisfactory results are obtained but you can’t reduce the number of data points to
less than three (or five if a crossover peak for Dual Polynomial was specified).
93
Gamma Acquisition and Analysis
List Peaks Button
Select the List Pks button to display a list of the peaks used in the calibration, as
shown in Figure 73. The measured vs. calculated efficiencies are listed to show how
accurately the curve follows the measured points.
Figure 73 The List Peaks Dialog
You can leave the list on screen while working in the Show Efficiency Calibration
Curve dialog box so that you can easily change the graph’s scalne, change curve type,
change the order of the polynomial or drop peaks. If you highlight a peak in the List
Peaks box, its number will automatically be placed in the Peak text box so that you
can easily drop it.
Print
Select the Print button to send an output of the currently displayed curve(s) to the default print queue.
Gain Evaluator
The Gain Evaluator (Figure 74), which can be used with both file datasources and detector datasources, does not perform any hardware adjustments. Instead, it allows you
to analyze the quality of the current datasource energy calibration and gain settings, to
assess the impact on NID analysis, and to make corrective data adjustments, including
file gain adjustments and saving the calculated energy calibration.
The specified datasource must already contain a spectrum acquired from a source with
known true energies. When the Evaluator window opens, the evaluation results are
populated using the datasource NID analysis results for true energies and the current
peak search results for found energies.
The Gain Evaluator and Auto Gain Adjust functions primarily correct and assess gain
shift (errors in the slope term of the initial energy calibration). Though some error in
the initial equation's other calibration terms (zero/intercept and quadratic/higher order)
94
Calibrate Menu
can be accommodated, you should ensure that these other terms are reasonably accurate to obtain the most stable, reliable results.
Figure 74 Gain Evaluator Dialog
Interactive vs. ASF Evaluation
The Gain Evaluator can be run interactively or as a part of an analysis sequence. In the
interactive mode, you can select any or all of the energies in the True Energies list
box. When used as a step in an Analysis Sequence File, energies can’t be selected; the
routine will use all of the energies in the specified Source of True Energies.
Source of True Energies
Select the source of energies to be used in performing the Gain Evaluation.
• The Current NID Analysis Results
• A Certificate File
• A Nuclide Library File
Ideally, the source of true energies should list energies that correspond to all of the
found peaks and no more. However, to get reliable results and avoid excessive
95
Gamma Acquisition and Analysis
computational time, the number of input true energies should be no greater than twice
the number of found energies (and contain energies that actually correspond to most of
the found peaks).
The routine can’t resolve more than one nuclide at the same energy in the source of
true energies, so matches will not be made at any true energy that is repeated. Best results will be obtained if all of the input true energies have a relative separation of at
least several FWHM. It is also desirable to have peaks that span the full range of the
spectrum.
Current NID Analysis Results
Select the Current NID Analysis Results button to specify the Nuclide ID analysis of
the current spectrum as the source of true energies.
Using the current NID analysis results as the source of true energies will be successful
only if any gain shift was small enough to be accommodated by the NID energy tolerance during analysis.
Unexpected or low quality NID analysis results may indicate an excessive gain shift
that would be better evaluated using a different source of true energies. In this case,
selecting only expected nuclide energies from a nuclide library or certificate file is recommended (perhaps requiring some trial and error experimentation).
Certificate File
Select the Certificate File button to specify a certificate (CTF) file as the source of
true energies.
A certificate file is typically used when the NID analysis results are unavailable or are
suspect, and there is some a priori knowledge about the measured source that is already documented in the certificate file.
Nuclide Library
Select the Nuclide Library button to specify a nuclide (NLB) library as the source of
true energies.
A nuclide library is typically used when the NID analysis results are unavailable or are
suspect, and there may or may not be some a priori knowledge about the measured
source.
Iteratively selecting likely nuclides and assessing the results until good matches are
achieved can sometimes be a successful strategy for empirically determining what nuclide(s) are evident in the spectrum even when excessive gain shift precludes successful NID analysis.
True Energies (Nuclide)
The True Energies list box lists the energies and their associated nuclides in the Source
of True Energies you selected. By default, all of the energies from the NID Analysis
96
Calibrate Menu
Results or from a Certificate File are initially selected; none of the energies from a Nuclide Library are initially selected.
• The Select All button selects all of the listed energies.
• The Clear button deselects all of the listed energies.
• Click on a single energy to select or deselect it.
The Data Plot
Data points for all matched peaks are displayed and plotted as True Energy (X-axis)
vs. Energy Shift (Y-axis). The energy shift plotted at each matched true energy is the
difference between the true energy and the corresponding matched found energy.
Error Bars
Error bars plotted at each point show the uncertainty in energy shift at each matched
true energy.
Fit to Data Points
The solid line represents the fit to the data points. If the solid line is sloped, gain has
shifted. If the solid line doesn’t pass through the origin, zero has shifted. A perfect energy calibration would have a flat, horizontal line passing through the origin.
Data Text Box
The Data Text Box shows the data similar to the Auto Gain Adjust dialog’s Data Text
Box (page 104). These evaluation results are concatenated with any previous results
during the current session.
Key data to focus on includes the reported reliability of the results, evaluated percent
gain shift and corresponding shift/FWHM fraction. Review the table of energy
matches to assess whether the match results and evaluated gain shift seem logical. The
shift/FWHM fraction(s) provide an indication of whether NID analysis should be successful, given the NID energy tolerance used for the analysis (when specified as
FWHM).
Fix File Gain
Click the Fix File Gain button, which is enabled only for file datasources, to execute a
a File Gain Adjustment (page 106) with the calculated energy calibration as the goal
energy calibration.
This causes a rebinning of the spectrum to make the current energy calibration valid
and should be performed only when the evaluated gain shift is deemed excessive. Alternatively, the datasource can be recalibrated outside of the Gain Evaluator (perhaps
aided by Save New CAL File, below). In either case, the altered datasource would require a new analysis that reflects the changes. Detector datasources can be corrected
via recalibration (see Save New CAL File) or gain adjustment via Auto Gain Adjust
(page 98).
97
Gamma Acquisition and Analysis
Save New CAL File
Click the Save New CAL File button to save the calculated energy calibration in a
new calibration (CAL) file.
This saved CAL file can then be loaded, outside of the Gain Evaluator, to establish a
new, corrected energy calibration for the datasource (and perhaps other datasources
known to have the same energy calibration/gain shift). Alternatively, the datasource
can be rebinned to make the current energy calibration valid using Fix File Gain,
above. In either case, the altered datasource would require a new analysis that reflects
the changes.
ReEvaluate
Click the ReEvaluate button to perform another evaluation on the current datasource using the selected energies. The results will be displayed in the plot and the Data Text Box.
Since the interactive version of the Gain Evaluator initializes with the current NID
analysis results, when available, using a different or altered source of true energies requires a re-evaluation.
Auto Gain Adjust
When the gain of a measurement system changes between the energy calibration
acquisition and other acquisitions, the energy calibration becomes inaccurate for the
other acquisitions. This suite of gain adjustment utilities provides the ability to assess the
magnitude and importance of gain shifts for all datasources (Gain Evaluator) and to fix
the gain shift for active detectors (Auto Gain Adjust) and saved files (File Gain Adjust).
The routine collects a spectrum, analyzes it for peaks, compares the energy at which
each peak is observed against the “true” energy in a certificate file, then derives the actual energy calibration equation. Differences between actual and desired energy calibrations drive the hardware adjustments.
The Auto Gain Adjust and Gain Evaluator functions primarily correct and assess gain
shift (errors in the slope term of the initial energy calibration). Though some error in
the initial equation's other calibration terms (zero/intercept and quadratic/higher order)
can be accommodated, you should ensure that these other terms are reasonably accurate to obtain the most stable, reliable results.
The AGA Routine
1. Acquires a spectrum for the specified preset live time.
2. Performs a peak search using the specified ASF algorithm.
3. Matches the found peak energies to the energies in the specified certificate.
A weighted average gain correction factor (and possibly a zero correction) is
calculated.
98
Calibrate Menu
• If the average gain correction factor satisfies the specified Percent Gain
Shift Tolerance, adjustment is complete (specifying double convergence
requires this to occur twice successively).
• If the average gain correction factor does not satisfy the specified Percent
Gain Shift Tolerance, the gain (and possibly the zero) is adjusted appropriately.
4. Clears the spectrum.
5. These steps are repeated until one of the following occurs:
• The routine completes successfully.
• The specified maximum number of iterations is reached.
• An acquisition is manually aborted.
Setting Up AGA
The Auto Gain Adjust Setup screen is used to select the parameters to be used by the
routine (Figure 75).
Figure 75 Auto Gain Adjust Dialog
99
Gamma Acquisition and Analysis
Certificate File
Selects the Certificate File (CTF) to be used for the gain adjustment calculations. The
certificate file contains the energies and emission rates of the calibration source. If the
detector datasource is efficiency corrected by the specified Peak Search ASF, the
emission rate data will be used as an aid in properly matching true energies with found
peaks.
Successful gain adjustment requires that the true energies listed in the specified certificate file correlate to at least half of the peaks found by the specified peak search ASF.
Successful ADC zero adjustment requires that at least one low energy (less than 1/3
that of the highest certificate energy) in the certificate file be matched with a found
peak. In addition, the ADC must allow computer-controlled adjustments and its zero
adjustment must have been specified during setup. Otherwise, only the gain will be
adjusted.
Ideally, the certificate file should list only those energies that correspond to all of the
found peaks. However, the number of input true energies must be no more than twice
the number of found energies and contain energies that actually correspond to most of
the found peaks.
If the number of input true energies is more than twice the number of found peak energies, peak matching and gain adjustment will fail.
The routine can't resolve more than one nuclide at the same energy in the source of
true energies, so matches will not be made at any true energy that is repeated. Best results will be obtained if all of the input true energies have a relative separation of at
least several FWHM. It is also desirable to have peaks that span the full range of the
spectrum.
Peak Search ASF
Selects the Analysis Sequence (ASF) file to be used for the gain adjustment calculations. For successful execution of AGA, the selected sequence must include at least a
peak locate step and a peak area step, such as Peak_sho.asf, installed with Genie
2000.
Ensure that the peak search parameters are optimized to locate those peaks that correspond to the true energies in the specified certificate file while locating as few extraneous peaks as possible.
If the specified ASF includes an efficiency correction (which requires the detector to
be efficiency calibrated to the source specified in the certificate file), the emission rate
information is used with measured count rate data to help match found peaks to certificate lines. Otherwise, only the energy information is used for matching.
Single/Double Convergence
Select either Single or Double convergence to determine whether the routine completes successfully after getting the average gain correction factor to satisfy the specified Percent Gain Shift Tolerance either once or twice, successively. Double
100
Calibrate Menu
convergence may minimize any possible overshoot or undershoot bias, but requires
more iterations.
Iteration Limit
Specify the maximum number of iterations that can be performed. If convergence is
not obtained before the specified limit is reached, the algorithm will stop with an error.
The typical number of iterations required to reach convergence depends on the Preset
Live Time as compared to the source intensity and the Percent Gain Shift Tolerance.
Reasonable settings usually result in convergence within 3 iterations, so 5 might be a
typical Iteration Limit setting.
Preset Live Time
Select the live time in seconds that each iteration’s data acquisition is to be performed.
This acquisition time should be long enough to provide adequate statistics for a successful peak search analysis.
The acquisition time may typically range from 10 seconds to several minutes, depending on the source intensity and desired Percent Gain Shift Tolerance. A typical button
source in the 37 Bq (1 µCi) range placed at the detector will probably provide sufficient counts (depending on branching ratios) after about 30 seconds. Optimizing the
Preset Live Time may initially require some experimentation.
Percent Gain Shift Tolerance
The Percent Gain Shift Tolerance is the percent deviation that the average gain correction factor can deviate from unity after a successful gain adjustment.
Given sufficient acquisition time to adequately determine peak centroids, a Percent
Gain Shift Tolerance of 1% or less for high resolution (HPGe) detectors and perhaps
up to several percent for low resolution (NaI) detectors is usually a good starting point.
Optimizing the Percent Gain Shift Tolerance in conjunction with the Preset Live Time
may initially require some experimentation.
Adjust Zero
Check the Adjust Zero box to cause the ADC zero to be adjusted after each iteration.
The checkbox is enabled only when the ADC allows computer-controlled zero adjustments. A zero adjustment cannot be performed unless the lowest matched energy is
less than 1/3 of the highest matched energy.
Note: A shift in zero tends to be much less likely than a shift in gain. Unless a zero
shift is suspected, it is recommended that Adjust Zero not be specified.
101
Gamma Acquisition and Analysis
QA Transfer Before/After
Check the Before box to transfer data from the first iteration to the specified QA File.
Check the After box to transfer data from the successfully completed iteration to the
specified QA File. You may check either box or both boxes.
Specifying the Before box allows tracking the amount of pre-correction gain shift with
the first iteration. Specifying the After box allows tracking any residual, post-correction gain shift with the successfully completed iteration. Specifying both allows tracking of the amount of correction actually applied.
QA File
Enabled only if the Model S505 Quality Assurance Software is installed on your system. Use this field to Browse for the QA file to which the adjustment data is to be
transferred. This file determines which CAM parameters are extracted from the
datasource for archiving. For more information, please refer to the Model S505 Quality
Assurance Software User's Manual.
Execute
When you click the Execute button, you’ll be told that executing this routine will
overwrite your existing certificate file data with the data in the specified certificate
file. When you click OK, the routine will start and the Auto Gain Adjust Status window (page 102) will open.
Note: The routine can usually determine which ampifier you’re using. If it can’t,
you’ll be asked to specify the amplifier type.
Save
After executing the AGA routine, click the Save button to save the current parameters,
both current setup parameters and any adjusted hardware settings, to the current detector’s MID file.
Any adjustment already made will be retained only after saving. Canceling or closing
the dialog without saving will cause hardware settings to revert to their original values.
Cancel
If the current parameters have not yet been Saved, clicking the Cancel button will reset all parameters to their initial values, and close the dialog.
Auto Gain Adjust Status
The Auto Gain Adjust Status window (Figure 76) shows you a live-time update of the
gain adjustment while it’s in progress. Analysis results from each iteration/acquisition
are listed in order in the Data Text Box in the lower half of the window. If you would
102
Calibrate Menu
like a record of the contents of the Data Text Box (described on page 104), click the
Print Report Now button.
Figure 76 Auto Gain Adjust Status
Cancel/Abort
Clicking the Cancel/Abort button, enabled only if a gain adjustment is in progress,
stops the routine and returns to the setup dialog. Any adjustment already performed
will only be retained after saving. Canceling or closing the setup dialog without saving
will cause hardware settings to revert to their original values.
Print Report Now
Only the data from the last iteration is saved to the datasource after leaving the AGA
Status window; data from previous iterations is not retained.
To create a record of all iterations, click the Print Report Now button.
Return to Setup/Save
Click the Return to Setup/Save button, enabled only when a gain adjustment is not in
progress, to Return to the AGA setup screen, where you can Save the current settings
and parameters. Adjustments are retained only when the Save button in the setup
screen is clicked.
103
Gamma Acquisition and Analysis
General Information
The upper part of the AGA Status screen displays general information about the current AGA session.
Status – current status may be In Progress, Completed Successfully or Failed
(iteration limit reached or communication failure).
Initiated – the date and time when the adjustment was started.
Acquisition – the current live time and preset.
Iteration – the current iteration and iteration limit.
% Gain Shift – the current percent gain shift and percent gain shift tolerance.
Gain
Initial – the amplifier gain before any adjustments are made; not changed by
AGA.
Current – the gain which was used to acquire the data displayed in the
report; changes with each iteration.
Calculated – the gain to be used on the next iteration; changes with each
iteration.
Zero
Initial – the ADC zero before any adjustments are made; not changed by
AGA.
Current – the ADC zero value which was used to acquire the data displayed
in the report; changes with each iteration.
Calculated – the ADC zero value to be used on the next iteration; changes
with each iteration.
Data Text Box
The text box in the lower half of the AGA Status screen (Figure 76) displays the concatenated data from all iterations as tabular data and gain adjustment data.
Tabular Data
• True and Found energies in the first two columns, with unmatched energies
indicated by dashes.
• Matches are aligned, showing the resulting gain Correction Factor in the third
column.
• The fourth column lists the ratio of the energy shift, calculated from the evaluated energy calibration versus the current energy calibration, to the local
FWHM.
104
Calibrate Menu
Gain Adjustment Data
Input is considered sufficient if the number of supplied true lines is at least half
the number of found peaks. This makes it likely that the true pattern will be
dominant, reducing the chances of false matches.
Matching is considered sufficient when the number of peak-line matches is
considered statistically significant. Statistical significance is determined when
the number of successful matches compared to the number of possible matches
(true energies supplied) exceeds that expected for a normal distribution within
the determined number of standard deviations. The determined number of
standard deviations is provided by the listed Tolerance Factor. The required
threshold for statistical significance has a maximum of 0.75 to allow for up to
25% spurious input true energy lines.
Output is considered reliable when both the Input and Matching are sufficient.
Reliability must be established before Auto Gain Adjust performs any hardware
adjustments in a given iteration.
Tolerance Factor is the minimum number of standard deviations of the energy
uncertainties required to obtain the maximum number of unambiguous peak-line
matches. The higher the tolerance factor (the greater the number of standard
deviations) required for the matches, the less stringent the matching process and
the more likely that inappropriate matches might be made and therefore the more
restrictive the criteria to consider Matching sufficient.
Average Shift/FWHM Fraction gives the average from all of the listed energies
and indicates the required NID Tolerance (FWHM) to be able to perform a
successful NID analysis. While this gives the average value for all of the found
energies as a general characteristic, the individual values given for each line in
the tabular data indicate which lines in particular might have trouble being
properly identified via NID analysis.
Percent Gain Shift Tolerance is the measured Percent Gain Shift that must be
attained to have a status of Completed Successfully. The measured shift must be
less than the tolerance value.
Percent Gain Shift is calculated from the weighted average of all of the
correction factors of the listed matches and indicates how much gain has shifted.
Each correction factor is weighted according to respective uncertainties.
Datasource Energy Calibration indicates the current energy calibration
equation.
Calculated Energy Calibration is determined using the true energies and their
matched peak channels. The current energy calibration quadratic term, if any, is
kept constant during the fit.
105
Gamma Acquisition and Analysis
File Gain Adjust
File Gain Adjust (Figure 77) is available only for file datasources. Executing this routine shifts the current file’s spectral data so that it matches the specified “goal” energy
calibration instead of the current energy calibration. File Gain Adjustment makes it
easier to add, strip or compare spectra.
Figure 77 The File Gain Adjust Dialog
Current Energy Calibration
This box displays the energy calibration equation of the current datasource.
Goal Calibration File
Browse for the CNF file or CAL file containing the calibration equation which you
want to match the current data source’s equation to.
Goal Energy Calibration
When the Goal Calibration File has been specified, this box will display the file’s energy calibration equation.
106
Calibrate Menu
Reanalyze After Adjustment
Check this box to reanalyze the current datasource, using the specified ASF file, after
the adjustment has changed the spectrum. Reanalysis is recommended because the current analysis results may not be accurate for the altered spectrum.
ASF
Specify the ASF file you want to use for the Reanalyze After Adjustment selection.
Load
Selecting Load displays a dialog which lets you load a previously stored calibration
file (.CAL) into the current datasource (Figure 78). You can load any combination of
the Energy/Shape, Efficiency or Peak-to-Total calibration data by checking the corresponding checkboxes.
The Info button displays a dialog box which shows descriptive information for the
currently selected file, provided such information was entered when storing the calibration file.
Figure 78 Load Calibration File Dialog
107
Gamma Acquisition and Analysis
Store
Selecting Store displays a dialog screen which prompts you to save the current calibration into a .CAL file (Figure 79). This file can later be retrieved through Calibrate | Load. An Efficiency Geometry ID is required and must be entered. You can
enter an optional Calibration Description to be saved with the file.
Figure 79 Store Calibration Dialog
Display Menu
The Display menu contains several functions for the data display: Expand, Scale,
Compare, ROIs, and Preferences.
Expand
The expanded display, shown in Figure 80, is a split-screen display, with the whole
spectrum in the lower half of the display and the expanded portion in the upper half.
The upper and lower half of the window can be resized by moving the splitter bar between the upper and lower halves. Note that Expand and Compare (page 110) can be
enabled simultaneously.
108
Display Menu
Expand On
The Expand mode can easily be turned on by clicking on the Control Panel’s Expand
On button or by pressing the F8 key.
Expand Off
The Expand mode can easily be turned off by clicking on the Control Panel’s Expand
Off button or by pressing the F8 key.
The Expanded Spectrum
The expanded half of the display is the data inside the rectangle in the lower half of
the display.
The focus of the expanded display, the rectangle, can be moved through the spectrum
by putting the mouse pointer inside the rectangle, then clicking and dragging it to a
new location. The data shown in the expanded half of the display will track the moving rectangle.
Resizing the Rectangle
The rectangle can be resized by moving the mouse pointer to any side of the rectangle
so that the pointer changes to a two-headed arrow. Click the mouse button and drag
the rectangle’s side to a new height or width.
Figure 80 A Typical Expanded Display
109
Gamma Acquisition and Analysis
Rescaling With the Rectangle
Changing the height of the rectangle will automatically rescale the expanded display to
accommodate the data in the rectangle. The normal (unexpanded) display’s VFS will
not change.
Pressing CTRL+M on the keyboard will move the markers to the sides of the rectangle
in the lower half and to either end of the expanded region in the upper half.
Scale
The Scale menu lets you select the method of setting the display’s vertical full scale
(auto or manual) and the scale type (linear or log). The scale type you choose can be
saved as a permanent setting; see “Display Preferences | Save” on page 113.
Manual
Manual lets you adjust the display’s vertical full scale, either by using a mouse to
change the scroll bar at the right side of the spectrum display or by pressing the keyboard’s up arrow or down arrow key. Pressing the F5 key will toggle between Manual
and Auto.
Auto
Selecting Auto lets the program automatically set the display’s vertical full scale
(VFS). As the spectrum grows, the VFS is automatically reset to show all of the data.
Pressing the F5 key will toggle between Auto and Manual.
Note that if you use the scroll bar while Auto is enabled, the program will change the
scale mode to Manual.
Linear
Linear defines the vertical scale of the display as a linear scale.
Log
Log defines the vertical scale of the display as a logarithmic scale.
Compare
The Compare command lets you turn the compare function on or off and, when on,
lets you position the compare spectrum by specifying its vertical full scale (VFS).
On
Selecting On displays a dialog box (Figure 81) which allows you to visually compare
the current, reference, spectrum with spectral data from another open datasource. This
function is not available if only one datasource is open. Note that Compare and Expand (page 108) can be enabled simultaneously.
110
Display Menu
The spectrum selected for compare will automatically be energy normalized to the reference spectrum. That is, the compare spectrum’s energies will be aligned with the
same energies in the reference spectrum.
Once the compare datasource is selected, you’ll see the compare spectrum displayed in
the currently selected compare spectrum color (“Display Preferences” on page 113)
just above the reference spectrum.
If you change the reference datasource by selecting a different spectrum, the Marker
Info status page information changes accordingly. Only one energy calibration (that of
the reference spectrum) is meaningful for the set of compared spectra.
Figure 81 The Compare Dialog
Move the Compare Spectrum
When Compare has been turned on, you can move the compare spectrum by clicking
on the VFS box in the upper right-hand corner of the display window (the VFS box
will change to the color of the compare spectrum) or by selecting Display | Compare
VFS. The mouse cursor will change to a solid double-headed vertical arrow. Use the
mouse or the cursor keys to position the compare spectrum anywhere within the spectral display.
When the compare spectrum is enabled, the VFS scroll bar controls the compare spectrum’s scale. With the reference spectrum enabled (VFS box returned to its original
color), the VFS scroll bar controls the reference spectrum’s scale.
Off
Select Off to disable the compare mode and return to the current display mode, normal
or expanded, whichever was in effect before Compare was turned on.
111
Gamma Acquisition and Analysis
VFS
When Compare has been turned on, selecting VFS will let you position the compare
spectrum vertically within the spectral display as described in “Move the Compare
Spectrum” on page 111. It also allows independent VFS control of the compare spectrum.
ROIs
The choices offered by the ROI menu are: Add or Delete an ROI, Clear All ROIs, and
Load or Store an ROI file.
Add ROIs
Select Add ROIs or press the keyboard’s INS key to enter an ROI between the current
marker positions. The ROI will be of the current ROI type as defined in the Preferences dialog (page 113).
Auto ROI
Select Auto ROI or press the keyboard’s Ctrl+Ins to add an ROI at the current cursor
position. The ROI’s width will be determined by the current energy and shape calibration. The left channel will be 2 FWHM and 1 Low Tail to the left of the cursor. The
right channel will be 2 FWHM to the right of the cursor. The ROI will be of the current ROI type defined in the Preference’s dialog (page 113).
Delete ROIs
Select Delete ROIs or press the keyboard’s DEL key to delete the ROI between the
markers. The item is disabled if the markers are not positioned at the limits of a previously defined ROI.
Clear All
Selecting the Clear All command clears all ROIs in the current database.
Load
Selecting Load displays a dialog box which lets you select a datasource whose ROIs
are to be loaded into the current datasource. These ROIs will replace the currently defined ROIs, if there are any. Select the “By Energy” check box to load ROIs by energy. This will attempt to use the energies stored in the ROI file rather than the
channel values. If the check box is not selected or those values are not defined, then
the ROIs will be loaded by channel value. Note that only ROI files stored using Store
ROIs will contain energy values.
Store
Selecting Store displays a dialog which lets you select the name of a datasource which
will be used to store the currently defined ROIs. Note that ROI files created using
Store ROIs will now store ROIs by energy and channel. This allows you to load ROIs
using the energy values if so desired.
112
Display Menu
Display Preferences
Select Preferences to reconfigure the display with your own settings (Figure 82).
Figure 82 Display Preferences Dialog
Save
You can Save these preferences so that your display will always be set the way you
want it to be. In addition to the settings shown on this screen, selecting Save will save
the display’s Scale Type (page 110), the chosen Status Pages (page 119), and the Report Window’s size (page 173).
OK
Selecting OK will use the settings only during the current session; they will not be
saved for future use.
Default
The Default button resets all parameters to the factory default state.
Edit Colors
You can change the displayed colors for the:
• Spectrum background
• Reference Spectrum
113
Gamma Acquisition and Analysis
• Compare Spectra
• ROI type
• Peak Labels
ROI Type
Selecting an ROI type by number allows you to select both the color of each type and
the type itself. For instance, selecting type 3 means that all of the ROIs you enter from
now on will be known as type 3. You may use any combination of the four types and
colors for ROIs which you add to the spectrum.
Note that the Peak Area Analysis algorithm sets regions around the peaks when it is
run. If you selected “Show ROIs in MCA View” in the algorithm’s dialog box, these
ROIs will replace the currently displayed ROIs. The type and color of each of these
ROIs depends on the Peak Area Analysis algorithm used. “Peak Area” on page 133
discusses the Peak Area routines and denscribes how they use ROI colors.
Peak Labeling
You can add two kinds of peak information to the spectral display:
• The Nuclide lD labels for identified ROIs are derived from the chosen Nuclide
Identification Source (page 115).
• The Peak Information bubble, which can be seen only when the spectrum cursor is in an ROI.
Figure 83 shows Nuclide ID labels on the peaks and Peak Information data for the second 60Co peak in the NBS Standard spectrum.
Figure 83 Nuclide IDs and 60Co Peak Information
114
Display Menu
The color of the Nuclide ID’s text label can be changed under Edit Colors, but the
color of the Peak Information bubble’s text cannot.
Display Nuclide ID on Spectrum
Check the Display Nuclide ID on Spectrum checkbox to add a Nuclide ID label above
every identified peak. Multiple labels will be attached to a peak if more than one nuclide can be associated with that peak.
Note: When data acquisition is active, the label will appear only at the peak cursor.
Ascending
Choose Ascending to show Nuclide ID labels with their text oriented bottom-to-top.
Descending
Choose Decending to show Nuclide ID labels with their text oriented top-to-bottom.
Display Peak Information
When Display Peak Information is checked, moving the mouse cursor over an identified peak will display the peak’s Nuclide ID, Energy, Net Area with percent error and
Activity (optional) in a bubble (Figure 83).
• The Energy Units (page 116) displayed in the bubble are those specified for
the entire system.
• The activity units displayed in the bubble are chosen in Interactive NID (page
121) in the Display Preferences dialog. The activity value will be correctly
displayed for the selected unit but the unit itself is not displayed.
The two nuclide identification source radio buttons are enabled only if one of the Peak
Labeling checkboxes is checked.
Library Lines
Choose the Library Lines button to display peak bubble information from the
Nuclide Library chosen in Interactive NID setup (page 121). When you use Library
Lines, the bubble’s Activity values will be estimated.
Analysis Results
Choose the Analysis Results button to display the Activity from the current NID
results for this datasource.
Show Activity
Check Show Activity to add Activity data to the Peak Information bubble (Figure 83).
This checkbox is enabled only if Display Peak Information is checked.
115
Gamma Acquisition and Analysis
Energy Units
Select the Energy Units to be used for reporting energy in the display. Select Other to
use the calibration units and conversion factor stored in the current datasource.
Plot Mode
Normal shows a maximum of 1024 data points. For example, in a 4K spectrum, the
plot routine considers groups of four channels at a time and displays the channel in
each group which has the highest number of counts. Note that for spectra with more
than 1024 channels, selecting Full will slow down the display update rate.
• Full shows a data point for every channel in the spectrum being viewed.
• Envelope shows the normal plot with the data points connected.
• Fill shows the envelope plot with a color fill of the data.
Update Information
The Update Rate can be set for the number of seconds between screen updates of
spectral data during data acquisition. The range is 0 (as quickly as possible) to 60 seconds, with the actual rate affected by how busy the processor is at the end of any given
update interval. A value of 3 to 5 is usually best, allowing an operator’s key presses or
mouse movements to be serviced promptly.
Real-Time Expand Update
If the Real-Time Expand Update checkbox is selected, the expand window will refresh as the expand rectangle is moved in the main spectral display. If the box is not
checked the expand window does not update until the mouse movement is complete.
Spectrum Labels
These selections let you add x- and y-axis gridlines to the spectral display and
tickmarks to the x- and y-axes of the display.
X-Axis Ticks/Labels
Selecting X-Axis Ticks/Labels creates X-Axis labels on the spectrum display. These
may be displayed in terms of Channel or Energy. See X-Axis as Energy.
X-Axis Gridline
Selecting X-Axis Gridline creates X-Axis gridlines on the spectrum display.
Y-Axis Ticks/Labels
Selecting Y-Axis Ticks/Labels creates Y-Axis labels on the spectrum display.
116
Display Menu
Y-Axis Gridline
Selecting Y-Axis Gridline creates Y-Axis gridlines on the spectrum display.
X-Axis as Energy
Selecting X-Axis as Energy displays X-Axis labels in terms of energy. If this is not
selected, the X-Axis will be displayed in terms of channel.
MCA View
The MCA View selections let you modify the apperance of the application’s interface
and select the data it displays.
MCA-Only Menus
Select the MCA-only menus checkbox to remove the Analyze menu from the application’s menu bar and the Efficiency items from the Calibrate menu.
Control Panel Shown
Removing the check from the Control Panel checkbox will remove the Control Panel
from the display, leaving more room for the spectrum
Toolbar Setup
The Toolbar Setup dialog screen (Figure 84) allows you to tailor the display of the Acquisition and Analysis toolbars. The dialog is divided into three panes: Toolbars,
Commands, and Customize Buttons.
Figure 84 Toolbar Setup Dialog
117
Gamma Acquisition and Analysis
The Toolbars pane allows you to create, rename, and delete toolbars:
• To create a new toolbar, select the New button. This will prompt you to input
a name for the toolbar. The new toolbar will initially be empty.
• To rename a toolbar, highlight it in the list and edit the name in the edit box
below the list.
• To delete a toolbar, highlight it in the list and select the Delete button.
You may also enable/disable the Tooltips and Cool Look features of the toolbar.
The Commands pane allows you to customize the command buttons that will appear
on your toolbars. The list on the left contains a variety of categories of commands organized in a similar fashion as the main menu. Selecting a category will change the
command buttons that appear in the Button area of the pane. Selecting a command
button will show that button’s description in the Description field. To modify the
toolbars:
• To add a command button to a tool bar, select the button you want` to add
from the Buttons area of the pane. Then, hold the left mouse button down,
drag the command button to the exact place on your toolbar you wish to place
it. Then release the left mouse button.
• To remove a command button from a toolbar, select the button from the
toolbar and drag it off the toolbar. Then release the left mouse button.
• To add a separator between command buttons on your toolbar, select the command button you wish to have on the right of the separator and drag it slightly
to the right.
The Customize Button pane allows you to associate certain command buttons with
Analysis Sequences and Executable programs. There are 10 special “Analysis” buttons
and 10 special “Executable” buttons. These can be added to any toolbar from the
Commands pane. Then, using the Customize Buttons pane, select the appropriate item
from alist box and:
• To change an Analysis Sequence button select the sequence from the
drop-down Analysis Sequence combo box.
• To change an Executable button edit the command line in the Executable edit
field. To browse for a specific program use the Browse button.
Select OK from the dialog will confirm all changes. Cancel will discard all changes.
The settings only be permanently saved if the Save button is selected in Display
Preferences. Otherwise the toolbars will return to the last saved state upon the next
invocation of the Acquisition and Analysis window.
118
Display Menu
Status Page Shown
Unchecking the Status Page Shown checkbox removes the Status Page from the display, leaving more room for the spectrum
Checking the Status Page Shown checkbox lets you click the Status Pages button to
choose which pages will be displayed (Figure 85).
The Status Pages you choose can be saved as a permanent setting; see “Display Preferences | Save” on page 113.
Figure 85 Selecting the Status Pages
Note that some of the data shown on the Status Pages is the result of a rough calculation for the region between the markers. This means that this displayed data may not
agree with the data you see in a report generated by your analysis application.
Marker Info
The Marker Info status page includes data related to the current Region of Interest
(ROI): left and right marker channel and energy, centroid channel and energy, area
and percent error, FWHM and FWTM, Gaussian ratio, ROI type, and integral.
The calculated values centroid, area, percent error, FWHM, FWTM, and Gaussian ratio are computed only when the size of the current ROI meets the following criteria:
119
Gamma Acquisition and Analysis
Number of Spectral
Data Channels
Size of ROI
256
≤ 256
512–2048
≤ 512
> 2048
≤ 1024
Time Info
The Time Info status page includes: acquire start time, dead time percentage, computational preset region, elapsed and preset values for the live time, real time, and computational presets.
Sample Info
The Sample Info status page includes sample-related information: Title, ID, sample
type, quantity and units, sample geometry, geometry id, and buildup type.
Calibration Info
The Calibration Info status page includes energy and shape calibration information:
energy equation, FWHM equation, low tail equation and efficiency/error at cursor position.
Display Info
The Display Info status page includes data related to the current display window and
the current ROI defined by the markers: the display window’s start and end channels
and their energies, and the display VFS. The current ROI’s width, net cps, and total
cps are also shown.
If Expand is on, the display window data is for the expanded window. If Compare is
on and the compare spectrum is currently selected, the data is for the compare spectrum.
Input Info
The Input Info status page includes data related to the configuration of the currently
open input: number of channels, acquisition mode, and the type of MCA, Amp, ADC,
and HVPS.
User Info
The User Info status page includes six extra CAM parameters which can be used for
special purposes: CAM_T_DISSTR1 through CAM_T_DISSTR6. If none of these
CAM parameters have been defined, this screen will be blank.
Nuclide Info
The Nuclide Info status page includes estimated nuclide information for the current
cursor channel: Nuclide, Energy, Half-life and Percent Yield. If the cursor is within an
ROI then the FWHM, Area, and estimated Activity is also displayed.
120
Display Menu
Operations
If Ask to Save on Clear is enabled, you’ll be asked to save changes when clearing a detector’s spectrum. If this option is disabled then the clear will be done unconditionally.
Interactive NID
The Interactive NID Setup dialog (Figure 86) lets you choose the nuclide library to be
used for the Nuclide Identification Source (page 115), as well as setting the tolerance
for searching that library, and the activity units to be used in the Peak Information
window.
Figure 86 The Interactive NID Setup
Tolerance
This is used to specify the value to be used in deciding if an energy line in the given library matches the peak being searched for.
Energy/FWHM
The energy units for the Peak Match Tolerance value. Choose Energy for a fixed tolerance or FWHM for a variable tolerance.
Peak Match
Enter the Tolerance value for peak matching. If you choose Energy Units, enter the
value in keV. If you choose variable, the tolerance becomes the number entered multiplied by the FWHM calculated at the energy of the peak.
NID Library
Select the default Nuclide Library to be used when Library Lines is used for the Nuclide Identification Source (page 115).
121
Gamma Acquisition and Analysis
Activity Units
The selected Activity Unit determines the activity units used for reporting in the Peak
Information window. When you choose one of the standard activity units (µCi, pCi,
Bq, kBq, mBq), the correct Conversion Factor, referenced to 1 µCi, is automatically
supplied.
If none of the standard units is acceptable, select Other, then type a label in the text
box and enter the unit’s Conversion Factor.
Analyze Menu
The Analyze menu lets you select and execute or abort (stop) a single analysis phase,
such as “Acquisition”, or a predefined sequence of analysis phases. A phase includes
all of the parameters the needed for its successful execution. A sequence is a list of
phases, including the algorithms for a given phase, processing parameters required for
each algorithm, and so forth, needed to perform a given set of analyses and generate
reports.
Execute Sequence
Select Analyze | Execute Sequence to see a menu of all currently defined analysis sequences on your system. Figure 87 shows both the Model S500/502/504 Basic Spectroscopy Software sequences and those installed with the Model S501 Gamma
Analysis Option. If your system has other optional software installed, you may see its
sequences listed here as well.
Figure 87 The Analysis Sequences
122
Analyze Menu
Selecting one of the sequences will execute it. For information on creating or editing a
sequence, refer to “Analysis Sequence” on page 161.
Abort Sequence
Selecting Abort Sequence allows you to abort execution of the current sequence.
Note that the sequence may not stop immediately; it will continue until the analysis
step already in progress has finished.
Analysis Phase Selection
The Analyze menu lists the analysis phases for the S500 Basic Spectroscopy Software
and all those associated with installed options. Each item in the menu lets you select
an algorithm to associate with the selected phase, then assign and save the algorithm’s
parameters, execute the algorithm, or do both.
The following sections discuss each of the phases, their algorithms and the required
parameters. For more detailed information on the algorithms, refer to the Algorithms
chapter in the Genie 2000 Customization Tools Manual.
Acquisition
The Acquire Setup dialog box (Figure 88) allows you to define default acquisition parameters to be used when starting data collection on hardware datasources.
Time Preset
You can set the Live Time or Real Time preset for the current hardware datasource in
seconds, minutes or hours. Live Time and Real time are mutually exclusive, but either
time preset can be combined with any one computational preset (see next subsection).
Figure 88 The Acquire Setup
123
Gamma Acquisition and Analysis
Computational Presets
These presets stop acquisition when a computed value you specify is reached. When a
computational preset is defined, the chosen time preset is still active. The acquire stop
command is issued by the preset that is reached first. If you want to use a computational preset alone, set the time preset to a very large value, such as 9000 hours (more
than one year). This insures that the computational preset will be reached first.
Each of the three computational presets are mutually exclusive, but any one of them
can be combined with eithet time preset.
• None turns off computational presets and uses only a time preset.
• Integral is a preset for the integral of any one ROI. The integral’s Value and
the ROI’s Start and Stop Channels must be specified.
• Area is a preset for the area of any one ROI. The area’s Value and the ROI’s
Start and Stop Channels must be specified.
• Counts is a preset for the total counts (Value) in any one channel within the
range specified by the Start Channel and Stop Channel.
MCS Preset
Sweep Count selects the number of sweeps to be made during multichannel scaling
data acquisition. Both Time and MCS Presets can be set here, but which is used depends on the Mode Setup of the hardware input you acquire data from.
Clear Data/Time
Select “Clear Data/Time at Start of Acquisition” to automatically clear both data and
elapsed time at the start of acquisition.
Peak Locate
The Peak Locate phase contains the algorithms which locate the peaks of interest in
the spectrum. In addition to the usual library locate parameters, there are several occasionally useful “More Peak Locate Parameters” starting on page 128.
Unidentified Second Difference
The generalized second difference method (Figure 89) locates all peaks in the Search
Region that are significantly above the continuum, as described in the “Generalized
Second Difference Method” section of the Algorithms chapter in the Genie 2000 Customization Tools Manual.
124
Analyze Menu
Figure 89 Second Difference Peak Locate Setup
Significance Threshold
The second difference algorithm automatically calculates a significance value for each
peak it considers. The larger the peak with respect to the continuum that it rests on, the
larger the significance value.
Only peaks that exceed the Significance Threshold will be accepted as valid. For less
sensitivity, for example to pick out just the large peaks for calibration, the Significance
Threshold can be raised. For more sensitivity, the significance limit may be lowered.
However, experience has shown that threshold values below 3.00 produce increasing
numbers of false peaks.
Figure 90 The User Specified Peak Locate
Setup
125
Gamma Acquisition and Analysis
Add to Existing Results and Tolerance
If the Add to existing results box is checked, each found peak will be compared with
peaks listed in the peak results table. A found peak that is closer to an existing peak
than the specified Tolerance value (either fixed Energy or variable FWHM) is assumed to be the listed peak and will be discarded. A found peak that is farther away
from an existing peak than the specified tolerance is considered to be a separate peak
and will be merged with the existing peak results table. If the “Add to existing results”
box is not checked, the current peak results table will be replaced by this search.
Generate Report
If the Generate Report box is checked, a predefined report will be generated when
this phase is executed and will be displayed in the application’s report window. The
report is defined in the AEF file as the Report Template Name and Section Name associated with this phase.
User Specified
This method, using the parameters in Figure 90, calculates the centroid for each peak
displayed in the Search Region, as described in the “User Specified Peak Locate” section of the “Algorithms” chapter in the Genie 2000 Customization Tools Manual.
Use MCA View
Select this button to perform the Peak Locate using the ROIs displayed in the spectral
display.
Use ROI File
Select this button to use an ROI file for Peak Locate. Enter the name of the file in the
Use ROI File text box or click on Select and choose a file from the file open dialog
box.
Add to Existing Results and Tolerance
If the Add to existing results box is checked, each found peak will be compared with
peaks listed in the peak results table. A found peak that is closer to an existing peak
than the specified Tolerance value (either fixed Energy or variable FWHM) is assumed to be the listed peak and will be discarded. A found peak that is farther away
from an existing peak than the specified tolerance is considered to be a separate peak
and will be merged with the existing peak results table. If the “Add to existing results”
box is not checked, the current peak results table will be replaced by this search.
Generate Report
If the Generate Report box is checked, a predefined report will be generated when
this phase is executed and will be displayed in the application’s report window. The
report is defined in the AEF file as the Report Template Name and Section Name associated with this phase.
126
Analyze Menu
Library Locate (Gamma-M)
The Gamma-M Library Peak Locate setup screen is shown in Figure 91. The analysis
will include the library energies included within the Search Region or that are equal to
either region limit. The current energy calibration will be used to determine whether a
library peak falls within the Search Region.
Figure 91 The Gamma-M Library Locate Setup
Nuclide Library
The name of the library in the current datasource will be shown in the Nuclide Library
text box. To select another library, click on Select, then choose a library file from the
file open dialog box.
Include Unknown Search
Peaks found by the Unknown Search algorithm that are farther away from existing library locations than the Energy Tolerance are treated as separate peaks. Peaks that are
closer to the existing library locations than the Energy Tolerance are assumed to be the
library peaks already assigned. The Library Locate will be followed by the Unknown
Locate, which is governed by the Search Region.
The Energy Tolerance value, which is accessible only if the Include Unknown Search
box is checked, specifies the Energy Tolerance as a full width at half maximum
(FWHM) multiplier. This determines whether a peak found during the Unknown Locate is one of the peaks already assigned during the Library Locate.
Gain Shift Correction
Gain Shift Correction is a technique for moving the peaks so that their centroids are
correctly placed. It is normally enabled (checked) because NaI peaks, in particular,
tend to shift from their original calibrated positions as a function of temperature.
127
Gamma Acquisition and Analysis
More Peak Locate Parameters
Selecting the More button brings up the screen in Figure 92, which lets you set several
other parameters affecting Gamma-M Library Peak Locate. The description of each
parameter lists the default value for both Ge and NaI detectors.
Figure 92 The Peak Locate “More” Setup Showing Ge
Detector Defaults
Window Settings
Area specifies the FWHM multiplier which establishes the left and right ROI
limits around the peaks for a fit to determine whether the peak is present in the
spectrum. Default: 2.5 for Ge; 1 for NaI.
Interference specifies the FWHM multiplier which establishes the limit beyond
which two adjacent peaks are no longer considered to interfere with each other
when determining whether a peak is present. Default: 3 for Ge; 1.5 for NaI.
Overlap specifies the FWHM multiplier which establishes the limit below which
two adjacent peaks are considered as one; that is, one of the two peaks is deleted.
Default: 0.3 for both Ge and NaI.
Reject Factors
Variance specifies the peak height variance rejection factor. Only peaks whose
height is larger than this factor times the uncertainty of the height (at 1 sigma)
will be accepted as valid peaks. Default: 0 for Ge; 1 for NaI.
Background specifies the peak rejection factor based on the height of the
background. Only peaks whose square of the height is larger than this factor
times the height of the background will be accepted as valid peaks. Default: 0 for
Ge; 1 for NaI.
128
Analyze Menu
Number of Background Terms defines whether the fits are to be made with an
added constant or linear continuum. 0 means that no additional continuum term
will be used, 1 means that only a constant continuum will be used, and 2 means
that a linear continuum will be used. Default: 2 for both Ge and NaI.
Gain Correction
The Gain Shift Correction check box on the Gamma-M Library Peak Locate
Setup screen must be checked for these parameters to be used in the calculations.
Maximum Number of Gain Passes is used to specify the maximum number of
iterations allowed for peak fitting with automatic gain correction. Default: 10 for
both.
Reject Gain Factor specifies the convergence criterion. When consecutive
iterations produce a change in the chi-square less than this value, convergence
has been achieved. Default: 0.0001 for Ge; 0.005 for NaI.
Reject MDA
Sigma specifies the multiplier of the MDA equation used to accept or reject a
library peak in the spectrum. Default: 2.5 for both Ge and NaI.
Constant specifies the constant term of the MDA equation used to accept or
reject a library peak in the spectrum. Default: 3 for both Ge and NaI.
Generate Report
If the Generate Report box is checked, a predefined report will be generated when
this phase is executed and will be displayed in the application’s report window. The
report is defined in the AEF file as the Report Template Name and Section Name associated with this phase.
Library Locate (Simple)
The Simple Library Peak Locate setup screen is shown in Figure 93. The analysis will
include the library energies included within the Search Region or that are equal to either region limit. The current energy calibration will be used to determine whether a library peak falls within the Search Region.
129
Gamma Acquisition and Analysis
Figure 93 The Simple Library Locate Setup
Nuclide Library
The name of the library in the current datasource will be shown in the Nuclide Library
text box. To select another library, click on Select, then choose a library file from the
file open dialog box.
Add to Existing Results and Tolerance
If the “Add to existing results” box is checked, peaks outside the specified Tolerance
(either fixed Energy or variable FWHM) of a peak in the datasource’s peak results table will be added to the table. Peaks within the Tolerance of an existing peak will not
be added. If the “Add to existing results” box is not checked, the current peak results
table will be replaced by this search.
Generate Report
If the Generate Report box is checked, a predefined report will be generated when
this phase is executed and will be displayed in the application’s report window. The
report is defined in the AEF file as the Report Template Name and Section Name associated with this phase.
Auto Generate ROIs
If this option is selected, then the peak locate engine will automatically generate ROIs
based on the FWHM calibration. The user can also specify a multiplier to be applied to
the ROI width. In addition, an option for checking for adjacent peaks can be enabled –
this will flag any peak ROI that may be affected by an adjacent peak.
130
Analyze Menu
VMS Standard Peak Search
The VMS Standard Peak Search (Figure 94) is taken from the Genie-VMS application
as an optional Peak Locate/Analysis engine. It locates all peaks in the search region
whose significance is above the Peak Search Sensitivity threshold. A second difference method locates the peaks above the sensitivity threshold, which are then fitted using a pure Gaussian fit routine.
Figure 94 VMS Standard Peak Search Setup
Peak Search Start / End Channel
The peak search will be performed on the region between the Peak Search Start and
End Channels.
Peak Search Sensitivity
The Sensitivity Threshold (i.e., the number of standard deviations above background a
feature must be to be considered a peak) controls the sensitivity of the peak locating
algorithm. For example, if the sensitivity is set to 5, and the average background in a
region is 10 000 counts, any feature with a height smaller than about 500 counts above
background will be ignored. (One standard deviation of 10 000 is 100.) Typically, the
sensitivity should be between 3 and 10.
Gaussian Sensitivity
The Gaussian Sensitivity determines how near to a pure Gaussian shape peaks should
be. Low settings (5-10) cause the peak fitting algorithm to expect cleanly shaped
peaks. Higher settings (15-20) provide the algorithm more latitude in working with
poorly shaped peaks. If multiplets are not being found where they should be, the value
of the Gaussian Sensitivity should be decreased.
131
Gamma Acquisition and Analysis
Maximum Number of Iterations
This value is the maximum number of iterations the peak search will perform when fitting a Gaussian function to a multiplet. The minimum value is 0; a reasonable value is
10.
FWHM Based Rejection
If the FWHM Based Rejection checkbox is enabled, the standard peak search function
will reject singlet peaks whose (measured FWHM) / (expected FWHM) ratio is less
than the FWHM Rejection Ratio setting. This option is very useful if you typically
analyze spectra at low sensitivities (e.g. less than 3).
FWHM Rejection Ratio
This value specifies the minimum valid (measured FWHM) / (expected FWHM) ratio
that will be accepted for a singlet peak. If the ratio for a peak is less than this value the
peak will be rejected. This parameter is used only if the FWHM Based Rejection
function is enabled. Minimum value is 0; maximum value is 1.0.
Fit Singlets
Fit Singlets controls singlet peak analysis. If the checkbox is enabled, singlet peaks are
fitted to a single peak Gaussian function, otherwise singlet values are calculated by the
total peak area method.
Show Regions of Interest
If the Show Regions of Interest checkbox is checked, the ROIs calculated during the
area analysis are copied to the “display ROIs” section of the datasource, thus causing
the ROIs to appear in the MCA View/Control window.
The ROI color conventions are:
Color 1: Singlet peaks
Color 2: Multiplet peaks
Color 3: Not used
Color 4: Not used
Any previously displayed ROIs are cleared before generating the new ROI list.
Critical Level Test
If this checkbox is enabled, any corrected peak that has a net area less than k times the
uncertainty of the background will be discarded, where k is the Confidence Factor set
in either the Nuclide Identification setup (page 145) or the Detection Limits setup
(page 147).
Use Fixed FWHM
If the Use Fixed FWHM checkbox is enabled, the FWHM of peaks in a region will be
held fixed to their calibration value. Otherwise they will be allowed to freely vary dur-
132
Analyze Menu
ing the fitting process. Note that this parameter only applies to singlets if the Fit
Singlets checkbox is enabled, or when analyzing multiplets.
Generate Report
When this checkbox is enabled, a predefined report is generated in the Report Window
upon successful completion of the analysis phase execution. The report is defined in
the analysis engine (AEF) file as the Report Template Name and Section name associated with this phase. By default, the report template used is ANALYSIS.TPL distributed in the standard Genie 2000 packages. The section of the template used is
NDPeaks. The report format is that generated by the Peak Search function on the VMS
platform.
Peak Area
The peak area phase contains the algorithms to calculate the net peak areas of all peaks
found by the peak locate phase (independent of the peak locate method).
Sum/Non-Linear Least Squares Fit Peak Area
Selecting Sum/Non-Linear LSQ Fit brings up the setup screen shown in Figure 95.
The Peak Area Non-Linear Least Squares Fit algorithm calculates peak areas of
multiplets using the fitting method described in the “Peak Area for Multiplets” section
of the Algorithms chapter in the Genie 2000 Customization Tools Manual.
It normally calculates the peak areas of single peaks using a summation method (described in the “Peak Area for Single Peaks” section of the “Algorithms” chapter), but
you can choose the peak fitting method instead.
This method also automatically determines the region-of-interest (ROI) around each
peak found by the peak locate method in use. Peaks that are close to each other are automatically grouped into multiplet ROIs and analyzed as multiplets. The method of determining the ROIs is described in more detail in the “Determination of Peak Region
Limits” section of the Algorithms chapter in the Genie 2000 Customization Tools
Manual.
If the peak locate results already contain ROI definitions, such as after a User Specified Peak Locate, these ROIs will be used without changes. No multiplet analysis will
be performed. If the peak locate results do not contain ROI definitions (that is, they include peak centroids only) the ROI limits will be calculated automatically.
133
Gamma Acquisition and Analysis
Figure 95 The Sum/Non-Linear LSQ Fit Setup
Peak Area Region
You can limit the region to be searched by specifying the Start and Stop channels.
Continuum
Selecting the Channels button fixes the number of continuum channels added to each
ROI throughout the spectrum at the value entered in the text box. For most spectra, especially those acquired with a sodium iodide detector, it’s usually better to select the
FWHM button so that the continuum channels are added as a function of each peak’s
FWHM. The channels/FWHM parameter and its value can also be specified in “Continuum” in Calibrate | Setup on page 60). If you have two peaks that are close together, reducing the number of continuum channels may give better results. If you
have poor peak statistics and there are no other peaks nearby, increasing the number of
continuum channels establishes the continuum more accurately but makes it more
likely that close lying peaks will be considered as a multiplet instead of as a singlet.
Continuum Function
You can establish the continuum of a spectrum by selecting either a Linear function or
a Step function. The Linear function is adequate when the spectrum’s continuum is
relatively flat. It is a simple, straightforward equation that estimates the continuum under the peaks as a trapezoid. The Step function should be chosen if there are any regions in the spectrum where the continuum is significantly higher on the left side of a
peak region than on the right side; this function automatically reduces to a flat line if
the continuum is flat. None is normally not used with Gamma spectra; it is typically
used only with Alpha spectra. This parameter can also be specified in “Continuum” in
Calibrate | Setup on page 60.
134
Analyze Menu
95% Critical Level Test
If the 95% Critical Level test is enabled, the net peak area of a singlet is examined to
see if it exceeds the 95% Critical Level value as described in the “Critical Level
Testing” section of the Algorithms chapter in the Genie 2000 Customization Tools
Manual.
Peaks that do not pass this test will be deleted from the peak results table. If the Critical Level test is not enabled, all peak areas are accepted regardless of their size, even
negative areas.
Fixed Parameters
Selecting the Fixed FWHM Parameter or Fixed Tail Parameter check box causes the
chosen parameter(s) to be used for all multiplet peaks instead of allowing the value to
vary for best fit. If either or both of these check boxes is not checked, the specified parameter will be allowed to vary.
Fit Singlets
Normally, the Peak Area routine fits only multiplet peaks, but if you check the Fit
Singlets check box, singlets will also be fitted, rather than calculated using the summation method.
Display ROIs
If the “Display ROIs” check box is checked, the ROIs resulting from the analysis will
be copied to the Display ROIs block in the datasource.
The ROI color conventions are:
Color 1: Singlet peaks
Color 2: Multiplet peaks
Color 3: Not used
Color 4: Not used
Reject Zero Area Peaks
If the “Reject zero area peaks” check box is checked, any peaks with negative or zero
peak areas will be deleted from the peak results table.
Residual Search
When the Perform Search checkbox is selected, the algorithm will examine the current
datasource’s ROIs for “hidden” components in a peak region, those that would otherwise not be found by the Peak Locate algorithm. A new peak will be added at the
highest residual which is separated from the nearest established peak by at least the
specified Minimum Separation (in FWHM) and the limits for that ROI will be
re-established. This process will be repeated until there are no more peaks to be added.
In most situations, the residual search works best when the Fixed FWHM, Fixed Tail
and Fit Singlets check boxes are selected.
135
Gamma Acquisition and Analysis
ROI Limits Determination
The Sum/Non-Linear LSQ peak area calculations rely on these three parameters in determining whether multiplets are to be included in an ROI. Peaks that are no farther
apart than the Maximum Number of FWHMs Between Peaks are seen as part of a
multiplet and will be included in the ROI.
The calculation of the left and right ROI boundaries is influenced by the Maximum
Number of FHWMs for Left (Right) Limit values. The ROI will not be extended beyond these limits even if the data has not leveled out.
Generate Report
If the Generate Report box is checked, a predefined report will be generated when
this phase is executed and will be displayed in the application’s report window. The
report is defined in the AEF file as the Report Template Name and Section Name associated with this phase.
Library (Gamma-M)
The Gamma-M Library Peak Area algorithms include steps for defining the background continuum using the erosion technique, as well as calculating the peak areas
and their uncertainties. The Gamma-M Library Peak Area setup screen is shown in
Figure 96.
Figure 96 The Gamma-M Library Peak Area Setup
Peak Area Region
The analysis will include the energies included within the Peak Area Region or that
are equal to either limit. The current peak locate table will be used to determine
whether a peak falls within the specified Region.
136
Analyze Menu
Gain Shift Correction
Gain Shift Correction is a technique for moving the peaks so that their centroids are
correctly placed. It is normally enabled (checked) because NaI peaks, in particular,
tend to shift from their original calibrated positions as a function of temperature.
Display ROIs
If the “Display ROIs” check box is checked, the ROIs resulting from the analysis will
be copied to the Display ROIs block in the datasource.
The ROI color conventions are:
Color 1: Non-interfered library peaks.
Color 2: Non-interfered unknown peaks.
Color 3: Interfered library peaks.
Color 4: Interfered unknown peaks.
More Peak Area Parameters
Selecting the More button brings up the screen in Figure 97, which lets you set several
other parameters affecting Library Peak Area. The description of each parameter lists
the default value for both Ge and NaI detectors.
Figure 97 The Peak Area “More” Setup Showing Ge Detector
Defaults
Window Settings
Area specifies the FWHM multiplier to establish the left and right ROI limit
around the peaks for a fit to calculate the peak area. Default: 3 for Ge; 1.5 for
NaI.
Interference specifies the FWHM multiplier to establish the limit beyond which
two adjacent peaks are no longer considered to interfere with each other for the
purpose of determining their areas. Default: 4 for Ge; 2.5 for NaI.
137
Gamma Acquisition and Analysis
Overlap specifies the FWHM multiplier to establish the limit below which two
adjacent peaks are considered as one; that is, one of the two peaks is deleted.
Default: 0.3 for both Ge and NaI.
Reject Factors
Variance specifies the area variance rejection factor. Only peaks whose area is
larger than this factor times the uncertainty of the area (at 1 sigma) will be
accepted as valid peaks. Default: 0 for Ge; 1 for NaI.
Background specifies the peak rejection factor based on the area of the
background. Only peaks whose square of the area is larger than this factor times
the area of the background will be accepted as valid peaks. Default: 0 for Ge; 1
for NaI.
Number of Background Terms defines whether the fits are to be made with an
added constant or linear continuum. 0 means that no additional continuum term
will be used. 1 means that only a constant continuum will be used, and 2 means
that a linear continuum will be used. Default: 2 for both Ge and NaI.
Gain Correction
The Gain Shift Correction check box on the Gamma-M Library Peak Area Setup
screen must be checked for these parameters to be used in the calculations.
Maximum Number of Gain Passes specifies the maximum number of iterations
allowed for the fits with the automatic gain correction. Default: 10 for both Ge
and NaI.
Reject Gain Factor specifies the convergence criterion. When consecutive
iterations produce a change in the chi-square less than this value, a convergence
has been achieved. Default: 0.0001 for Ge; 0.005 for NaI.
Reject MDA
Sigma specifies the multiplier of the MDA equation used to accept or reject a
peak area in the spectrum. Default: 2.5 for both Ge and NaI.
Constant specifies the constant term of the MDA equation used to accept or
reject a peak area in the spectrum. Default: 3 for both Ge and NaI.
Area Correction
(S501 Gamma Option) The area correction phase contains algorithms to correct the net
peak areas before further calculations are made. You can choose either Standard Background Subtract or Reference Peak Correction with or without Background Subtract.
138
Analyze Menu
Standard Background Subtract
(S501 Gamma Option) The Standard Background Subtract algorithm (Figure 98) allows you to subtract background peak areas from matching peak areas in the current
datasource as described in the “Subtraction of Peak Environmental Background” section of the Algorithms chapter in the Genie 2000 Customization Tools Manual.
Figure 98 The Standard Background Subtract Setup
Background File
Type in the fully specified name of a background (.CNF) file to be used in the subtraction or click on Select, then choose a file from the file open dialog box.
Note: Do not enter a file name when using one of Canberra’s automatic applications, such as PROcount. They use a specific background file. See the application’s user’s manual for more specific information.
95% Critical Level Test
The 95% Critical Level test may be enabled or disabled for this phase of the calculations. If the test is enabled, the net peak area of a singlet after the background subtract
must exceed the 95% Critical Level value as described in the “Critical Level Testing”
section of the Algorithms chapter in the Genie 2000 Customization Tools Manual.
If the Critical Level test is not enabled, all peaks are retained even if their areas are
zero or negative after the background subtract.
Tolerance
Enter a tolerance value (either fixed Energy or variable FWHM) to define how large a
difference can be allowed between a peak in the current datasource and a peak in the
background datasource and still be considered the same peak.
139
Gamma Acquisition and Analysis
The tolerance value can also be specified from within Calibration Setup (page 60) as
Peak Match Tolerance.
Generate Report
If the Generate Report box is checked, a predefined report will be generated when
this phase is executed and will be displayed in the application’s report window. The
report is defined in the AEF file as the Report Template Name and Section Name associated with this phase.
Reference Peak Correction
(S501 Gamma Option) The Reference Peak Correction algorithm (Figure 99) uses a
reference peak of a known count rate to normalize the areas of all other peaks in the
spectrum. The reference source can be either an electronic pulser or an external stationary source.
Figure 99 The Reference Peak Correction Setup
If both a reference peak correction and an environmental background subtract are to be
applied, the reference peak correction must always be applied first. Therefore, this algorithm provides both of these corrections in the proper order as described in the “Reference Peak Correction” section of the Algorithms chapter in the Genie 2000
Customization Tools Manual.
Reference Peak
The Reference Rate in counts per second is the emission rate of the reference source at
the reference energy. The Reference Energy is the energy of the reference peak. Enter
the Uncertainty of the reference peak in counts per second.
140
Analyze Menu
Peak Match Tolerance
Enter the Peak Match Tolerance value either in energy or in FWHM units to define
how large a difference to allow between a peak in the current spectrum and a peak in
the background spectrum and still be considered the same peak.
Reference Source
You can choose either a Stationary reference source or a Pulser. For a stationary
source, the Reference Date is the date and time at which the source was measured.
Enter the Half Life of the nuclide which caused the reference peak. and choose the
half-life’s time units: Years, Days, Hours, Minutes or Seconds.
Background Subtract
Select the Yes checkbox to perform background subtraction. For the location of the
background datasource, enter a fully specified pathname in the Bkg. File text box. If
you like, press the Select button to look for a .CNF background file to load.
Efficiency Correction
(S501 Gamma Option) The efficiency correction phase contains the algorithms to calculate the efficiency values for each of the peaks with calculated net areas. You can
select one of four modes from the drop down list: Dual, Linear, Empirical or Interpolated (Figure 100).
Figure 100 The Efficiency Correction Setup
Dual
Dual efficiency correction calculates the efficiency at each peak energy using the Dual
efficiency curve as described in the “Efficiency Correction Using the Dual Curve” section of the Algorithms chapter in the Genie 2000 Customization Tools Manual.
141
Gamma Acquisition and Analysis
Linear
Linear efficiency correction calculates the efficiency at each peak energy using the Linear efficiency curve as described in the “Efficiency Correction Using the Linear Curve”
section of the Algorithms chapter in the Genie 2000 Customization Tools Manual.
Empirical
Empirical efficiency correction calculates the efficiency at each peak energy using the
Empirical efficiency curve as described in the “Efficiency Correction Using the Empirical Curve” section of the Algorithms chapter in the Genie 2000 Customization
Tools Manual.
Interpolated
Interpolated efficiency correction calculates the efficiency using a straight-line interpolation (in the ln-ln domain) between the two points on either side of the requested
energy. If the energy is outside the range of calibration points, the nearest point is
used.
Generate Report
If the Generate Report box is checked, a predefined report will be generated when
this phase is executed and will be displayed in the application’s report window. The
report is defined in the AEF file as the Report Template Name and Section Name associated with this phase.
Nuclide Identification
The nuclide identification step contains the algorithms to perform the nuclide identification and activity calculations.
Note that the MDA Confidence Factor is used both here and in the Detection Limits
algorithm (page 147). If the Confidence Factor is changed here, the Detection Limit
calculations are affected too, unless the factor is changed again in the MDA Setup
screens before performing its calculation. In either case, VMS Standard Peak Search
(page 131) will be affected by any change in the Confidence Factor if its Critical Level
test is enabled.
Tentative NID
The Tentative Nuclide Identification (NID) algorithm (Figure 101) will generate a tentative nuclide identification. The algorithm looks at each of the peaks established by
the Peak Area step of the analysis, and attempts to find a match in the specified nuclide library. It uses the specified tolerance to perform the search; all nuclides that sat-
142
Analyze Menu
isfy that tolerance are recorded for reporting. The nearest match will be reported first,
followed by any ‘more distant’ matches in order.
Figure 101 The Tentative NID Analysis Setup
NID Library
This selection specifies the file whose nuclide library information is to be searched for
each of the peaks. You can use the Select button to browse for nuclide libraries.
Tolerance
This is used to specify what value is to be used to decide if an energy line in the given
library matches the peak being searched for. The tolerance can be a fixed energy (in
keV), or variable. If you choose variable (FWHM) the tolerance becomes the number
entered multiplied by FWHM calculated at the energy of the peak.
Generate Report
If checked, a report will automatically be generated and displayed in the report window after the analysis has executed. The name of the report template file, and the
name of section to be used, are defined in the Analysis Engine File.
NID
(S501 Gamma Option) If the current spectrum already includes peak area and efficiency correction results, the Nuclide Identification (NID) algorithm (Figure 102)
143
Gamma Acquisition and Analysis
identifies the spectrum’s nuclides, as described in the “Basic Calculations” section of
the Algorithms chapter in the Genie 2000 Customization Tools Manual.
Figure 102 The NID Setup
NID Range
The identification is limited to the specified NID Range; only peaks within those limits will be considered for identification. Note that though the stop channel initially defaults to a large value, the algorithm will only search to the spectrum’s highest
channel.
NID Library
Type in the fully specified name of a library (.NLB) file to be used in the identification
or click on Select, then choose a file from the file open dialog box.
Perform MDA Test
The Perform MDA Test is most useful in cases where a nuclide has many peaks with
small branching ratios that would result in peaks that are below the MDA level, such
as in most low activity samples. Enabling this function will ignore small peaks when
calculating the identification confidence so that expected peaks below the MDA will
not penalize the confidence test results.
Inhibit Acquisition-Time Decay Correction
If this option is enabled, decay correction will not be performed during the count time.
Decay correction will still be performed for wait time (the time between sample time
and the start of the count) and for build up time (the time the sample is building up on
a filter), if any.
144
Analyze Menu
Tolerance Value
You must set the tolerance value in either energy or FWHM units (this value can also
be specified as Eff & Match Tolerance in Calibration | Setup on page 60).
NID Confidence Threshold
The NID Confidence Threshold is used to accept or reject peaks for identification; this
parameter’s range is 0 (low) to 1 (high).
MDA Confidence Factor
In the standard NID, the MDA Confidence Factor is used as the designated MDA confidence during the MDA test only if Perform MDA Test is enabled.
Note that the MDA Confidence Factor is used both here and in the Detection Limits
algorithm (page 147). If the Confidence Factor is changed here, the Detection Limits
calculations are affected too, unless the factor is changed again in the Detection Limits
Setup screen before performing its calculation. In addition, the VMS Standard Peak
Search (page 131) will be affected by any change in the Confidence Factor if its Critical Level test is enabled.
Generate Report
If the Generate Report box is checked, a predefined report will be generated when
this phase is executed and will be displayed in the application’s report window. The
report is defined in the AEF file as the Report Template Name and Section Name associated with this phase.
NID with Interference Correction
(S501 Gamma Option) If the current spectrum already includes peak area and efficiency correction results, the Nuclide Identification with Interference Correction algorithm (Figure 103) identifies the spectrum’s nuclides and automatically performs an
interference correction and weighted mean calculation on them, as described in the
“Basic Calculations” and “Activity Corrections” sections of the Algorithms chapter of
the Genie 2000 Customization Tools Manual.
MDA Confidence Factor
The MDA Confidence factor for NID with Interference Correction is the same that
used for standard NID, except that there is an added function. This factor governs the
allowed uncertainty of the activity results, which must exceed its own uncertainty
times a factor related to the MDA Confidence Factor. The smaller the MDA Confidence Factor, the larger the multiplier. Note that this factor is applied only if the 95%
Critical Level test, which is set in either the Sum Non/Linear LSQ Fit Peak Area
screen (page 133), the VMS Standard Peak Search screen (page 131) or the Standard
Background Subtract screen (page 139), is enabled.
145
Gamma Acquisition and Analysis
Figure 103 The NID with Interference Correction
Setup
Cascade Correction
Canberra’s patented Cascade Correction feature lets you correct nuclide activities for
losses or gains due to the cascade summing effect of gamma rays. The Cascade Correction can be enabled/disabled in the NID with Interference Correction dialog.
For information on setting up and using Cascade Correction, please refer Chapter 7,
Using Cascade Correction on page 206.
For cascade correction to work, the gamma ray spectrum must include a valid
peak-to-total calibration and a valid efficiency calibration that is free from cascade
summing effects. Refer to Appendix D, Correcting an Efficiency Calibration for Cascade Summing, on page 284 for details on correcting an empirical efficiency calibration.
Other components that are necessary for running the cascade correction are the Coincidence library and a Geometry file that contains the source-detector geometry information for the given measurement.
Generate Report
If the Generate Report box is checked, a predefined report will be generated when
this phase is executed and will be displayed in the application’s report window. The
report is defined in the AEF file as the Report Template Name and Section Name associated with this phase.
146
Analyze Menu
Parent-Daughter Correction
(S501 Gamma Option) The Parent-Daughter Correction algorithm loops through the
identified nuclides in the datasource, searching for nuclides in parent-daughter pairs. It
performs corrections to the activities of the daughter nuclides (where appropriate) to
account for possible feeding from a parent nuclide. The algorithm only treats parent-daughter pairs. It does not handle multiple generation (e.g. parent-daughter-granddaughter) nuclide chains.
Note that it is necessary to execute the “NID plus Interference Correction” analysis
step on the datasource prior to running this algorithm. The NID plus Interference Correction step calculates the activity of each identified nuclide at the Sample Time by
treating it as a standalone decay. That is, it does not account for parental feeding.
The definition of the parent or daughter for a given nuclide is established in the nuclide library (NLB) file used in the NID plus Interference Correction step. These definitions are editable in the Nuclide Library Editor (see “The Optional Nuclide Data” on
page 178). Note that while defining a parent-daughter relationship you must specify
the Decay Ratio (the fractional probability for the parent to decay into the daughter)
and the Error in the Decay Ratio while editing the daughter nuclide.
The Parent-Daughter Correction algorithm first examines each nuclide as a potential
daughter. If the nuclide has a parent defined in the nuclide library and the parent was
found in the datasource, the nuclide’s activity at the Sample Time is corrected for
feeding from the parent.
The algorithm then makes a second pass through the list of identified nuclides, this
time examining each as a potential parent. If the nuclide has a daughter defined in the
nuclide library but the daughter was not found in the datasource, an activity record is
created for the daughter and its activity is calculated (assuming 0 for the uncorrected
activity) and stored.
The mathematical expressions used for the corrected activities and their uncertainties
are given in the “Parent-Daughter Correction” section of the Algorithms chapter in the
Genie 2000 Customization Tools Manual.
Generate Report
If the Generate Report checkbox is checked, a report will automatically be generated
and displayed in the report window after the analysis has executed. In this report, if a
nuclide’s activity has been corrected by the Parent-Daughter Correction algorithm, it is
flagged with a special symbol in the left-hand margin. The name of the report template
file, and the name of section to be used, are defined in the Analysis Engine File entry
for this algorithm.
Detection Limits
(S501 Gamma Option) The Detection Limits step contains the algorithms to perform
MDA or KTA MDA (used for German regulatory compliance) and LLD calculations.
If applied to a spectrum collected with a blank sample or in an empty shield, the Detection Limits calculation is equivalent to an LLD calculation.
147
Gamma Acquisition and Analysis
The MDA algorithm (Figure 104) calculates the MDA values for all the nuclides as
described in the “MDA Calculations” section of the Algorithms chapter in the Genie
2000 Customization Tools Manual.
Figure 104 Detection Limit Setup
Note: When a Cascade Correction is applied to the data before the MDA step, the
MDA algorithm will take the cascade corrected results into account.
Confidence Factor
The MDA Setup screen lets you select the MDA Confidence Factor, which can be set
to any value between 0.1% (high) and 40% (low) for calculating detection limit values. For instance, to use the NRC 95% confidence factor, you would enter 5.00% here.
Note that the MDA Confidence Factor is used both here and in the Nuclide Identification algorithm (page 145). If the Confidence Factor is changed here, the Nuclide Identification calculations are affected too, unless the factor is changed again in the
Nuclide Identification Setup before performing its calculation. In either case, VMS
Standard Peak Search (page 131) will also be affected by any change in the Confidence Factor if its Critical Level test is enabled.
Perform Variable ROI Width
Selecting this checkbox extends the MDA ROI to the left and right of the expected location of the energy line by the number of expected FWHMs entered in the ROI Width
text box. If not selected, 4.0 FWHM will be used for Currie MDA calculations or 1.25
FWHM for KTA MDA calculations.
148
Analyze Menu
ROI Width
This parameter establishes the width of the ROI as plus and minus the specified number of FWHMs from the expected location of an unidentified peak. The minimum setting is 0.8 FWHM.
Use Variable MDA Constants
Selecting this allows the user to specify the values for the Add Constant and the Multiplier used in the MDA calculations, as described in the “Currie MDA” section or the
“KTA MDA” section of the Algorithms chapter in the Genie 2000 Customization
Tools Manual.
If the checkbox is not selected, the “normal” equation of L D = k2 + 2LC is used. At the
typical 95% confidence level the “normal” equation is equivalent to specifying 2.71
for the Add Constant and 3.29 for the Multiplier.
Add Constant
This parameter specifies the Add Constant used in the MDA calculation if the “Use
Variable MDA Constants” option has been checked.
Multiplier
This parameter specifies the Multiplier used in the MDA calculation if the “Use Variable MDA Constants” option has been checked.
Generate Report
If the Generate Report box is checked, a predefined report will be generated when
this phase is executed and will be displayed in the application’s report window. The
report is defined in the AEF file as the Report Template Name and Section Name associated with this phase.
Post NID Processing
The Post NID Processing menu item allows you to run the Line Activity Consistency
Evaluator, perform Action Level Calculations, or run the Genie Script Engine.
LACE (Line Activity Consistency Evaluator)
LACE is used only after NID analysis, as it requires the quantitative output from such
analysis. Data can be post-NID processed by LACE as a component of an analysis sequence, as shown in Figure 105, or manually via the Post NID Processing sub-menu of
the Analyze menu.
149
Gamma Acquisition and Analysis
Figure 105 Adding LACE to an Analysis Sequence
For addtional information on how Lace operates, refer to Appendix F, Line Activity
Consistency Evaluator.
Figure 106 shows the output options available after analysis is performed by the
LACE algorithm during manual initiation. The results can be displayed as a plot on a
screen window and/or printed via a report template.
Figure 106 LACE Analysis Setup Screen
If no output option is selected, the processed data is available for future output from
the datasource CAM parameters designated for storing LACE results, specified in the
CAM Files chapter of the Genie 2000 Customization Tools Manual. LACE can also be
launched as an executable separate from the Genie MCA for the purpose of opening
150
Analyze Menu
and viewing results from datasources that have already been processed by the LACE
analysis algorithm. Refer to “Launching the Viewer” on page 305 for more details.
When setting up an analysis sequence containing the LACE analysis, the algorithm
setup has the option of displaying the results as a plot on a screen window. If a report
printout is desired, a separate report step can be inserted with the option of a LACE
template.
When a datasource is processed by the LACE algorithm with the display results option
selected, the window shown in Figure 107 appears. The graph shows the data points
and curve for a single calculated equation. The nuclide list (to the right of the graph)
lists all nuclides in the datasource. Clicking on a nuclide name will select the nuclide
for display. Clicking on Next or Previous buttons will select the next or previous nuclide name in the list. The Weighted Mean or Key Line curve, whichever button is
selected, will be displayed along with the data points defined by the Energy/Ratio
pairs, where the Ratio is the Weighted Mean or Key Line ratio. The error bars are the
calculated ratio uncertainties.
Figure 107 LACE Screen Plot for the Display
Results Output
The equation defining the displayed curve is shown just below the graph. This equation corresponds to the selected Ratio type. The screen controls are defined below:
151
Gamma Acquisition and Analysis
Ratio
The weighted mean ratios are ratios of each line activity to the weighted mean of the
nuclide activity as calculated during NID with interference correction analysis.
Weighted mean ratios are only available if NID with interference correction was performed on the datasource. The key line ratios are ratios of each line activity to the activity of the key line for the nuclide. For key line ratios, available nuclides are only
those that had the activity determined for the key line specified in the library file used
for the NID analysis. Key line designation can be added or changed by editing the library file and reperforming the NID and LACE analyses.
Y Scale
Includes edit boxes for specifying the Y-axis limits for viewing. Clicking Auto allows
LACE to calculate limits based on the data points for the displayed nuclide.
X Scale
Includes edit boxes for specifying the X-axis limits for viewing. Clicking Auto allows
LACE to calculate limits based on the data points for the displayed nuclide.
View
When checked LACE displays X and/or Y grid lines on the graph.
Save Preferences
Saves the default ratio and coordinate scaling parameters to those currently selected.
Print Graph
Prints a hard-copy of the graph.
Interpretation of the displayed data includes finding outliers and whether the trend of
the lines is reflected in the slope of the fit or exhibits any concavity, as well as the
magnitude and direction of the slope.
Action Level Calculations
(S501 Gamma Option) The Post Processing algorithm will perform Action Level calculations on identified and unidentified nuclides, as described in the “Post-NID Processing Algorithms” section of the Algorithms chapter in the Genie 2000
Customization Tools Manual.
152
Analyze Menu
In addition, it will total the number of identified nuclides and unidentified peaks. The
Post NID Processing setup parameters are shown in Figure 108.
Figure 108 The Action Level Calculation Setup
Sum Action Level 1
Specifies Alarm Limits 1 and 2 for the sum of Action Level 1 values for all nuclides.
Sum Action Level 2
Specifies Alarm Limits 1 and 2 for the sum of Action Level 2 values for all nuclides.
Use MDA Values
When this checkbox is selected, the action level calculation will include MDA values
for those nuclides that were not identified, and therefore had no activity values calculated. If not selected, the action level calculations will not include those nuclides for
which no activity was found.
Use Upper Level Values
When this checkbox is selected, the activity plus its error or the MDA value plus its
error will be used as the upper bound value for the action level calculation. If not selected, action level calculations will simply use activity or MDA values.
Generate Report
If the Generate Report box is checked, a predefined report will be generated when
this phase is executed and will be displayed in the application’s report window. The
report is defined in the AEF file as the Report Template Name and Section Name associated with this phase.
153
Gamma Acquisition and Analysis
Script Engine
The Script Engine Setup (Figure 109) lets you specify a Visual Basic® or Java® script
to execute on the currently opened datasource. This lets you perform custom operations within the Genie 2000 Acquisition and Analysis environment.
All scripts must be located in the \Genie2k\Scripts folder. By default, CAMDatasource
methods and properties should be used within the script.
Figure 109 Script Engine Setup
Name of Script Component
Enter the name and extension, up to 64 characters, of the script to be executed. Do not
include the path.
Setup / Execute
The Setup and Execute buttons must be included as functions in the script being executed, otherwise they do nothing.
Running the Example Script
The example script, \Genie2k\Scripts\GenieScriptEngine.wsc, is a text file included
with the Genie 2000 distribution and installed in the \Genie2k\Scripts folder. To run
the script:
• Open a spectrum file in the Gamma application.
• Select Analyze | Post NID Processing | Script Engine.
• Enter the script’s name in the Name of Script Component text box (Figure
109).
• Press the Setup button, enter sample quantity conversion factor, for instance
24.
• Press the Execute button to pass the conversion factor to the CAM parameter
specified in the script.
154
Analyze Menu
To see the result, open the Edit | Sample Info screen. Its Quantity field should contain
24. If you save the file, the new value will be saved with the spectrum.
Gain Evaluator
The Gain Evaluator can be used with both file datasources and detector datasources. It
does not perform any hardware adjustments. Instead, it allows you to analyze the quality of the current datasource energy calibration and gain settings, assesses the impact
on NID analysis and make corrective data adjustments, including file gain adjustments
and saving the calculated energy calibration.
Gain Evaluator Setup (Figure 110) asks you to specify the actual (true) energies expected to occur in the spectrum by selecting lines from the current NID results, a certificate file or a nuclide library file. These true energies are matched to peaks found in
the resident peak search analysis results.
Figure 110 Gain Evaluator Setup
Output includes the reliability of the peak matching, the percent gain shift, and the resulting energy shift in each found peak as a fraction of the local peak width.
The specified datasource must already contain a spectrum acquired from a source with
known true energies.
Note: Use generic nuclide libraries with caution since extraneous true energies can
result in unreliable results and excessive calculation time. Use of a
source-specific certificate file or nuclide library is recommended.
Source of True Energies
Select the source of energies to be used in performing the Gain Evaluation. All of the
energies listed in the specified source will be used.
• The Current NID Analysis Results
• A Certificate File
155
Gamma Acquisition and Analysis
• A Nuclide Library File
Generate Report
Selecting the Generate Report button generates a report containing a table of data for
all true and all found energies, all matched energies and all found energies, and a summary of the analysis results.
Current NID Analysis Results
Select the Current NID Analysis Results button to specify the Nuclide ID analysis
results of the current spectrum as the source of true energies.
Certificate File
Select the Certificate File button to specify a certificate (CTF) file as the source of
true energies.
Nuclide Library
Select the Nuclide Library button to specify a nuclide (NLB) library as the source of
true energies.
Reporting
The reporting phase contains standard routines to output analysis results and other information contained in the datasource as well as a routine for printing spectra.
Standard
The functions of the Standard reporting dialog are explained in the following paragraphs. The Genie 2000 Report System, including how to create your own templates,
is covered in detail in the Report Module and Template Files chapter of the Genie
2000 Customization Tools Manual.
Template Name and Section Name
To output the analysis results, choose both a Template Name and a Section Name
within that file, as shown in Figure 111 (note that a section named <all> is available if
you want to use the entire template file).
Error Multiplier
Though uncertainty values are always calculated and stored at 1 sigma, errors can be
reported at a different sigma level by entering a specific Error Multiplier here. For instance, if you’d like errors to be reported at 3 sigma, type in 3 as the Error Multiplier.
Start On
You should check one of the boxes in the “Start on” section:
156
Analyze Menu
• Page One means that the first page of the next report section will be
numbered as one.
Figure 111 The Standard Report Setup
• New page means that the new results will be appended to existing results and
start on a new page.
• New file means that any previous report file (spectrum file name with an
extension of .RPT) will be overwritten; if this box is not checked, the data
will be appended to the existing file.
Output To
To create both a text file and a printout of the report, click on File | Report, then click
on Yes. If you click on No, only the text file will be created and saved. The default
save path is C:\GENIE2K\REPFILES\name.RPT, where name is the name of the
datasource being reported on.
Activity Units and Multiplier
Activity Units is normally µCi; if you want to use another unit for reporting nuclide
activities, enter that unit here. Since the activities are stored in microcuries, you’ll
have to enter a factor to convert microcuries to your units (if you want to use Bq, for
instance, enter 37000 here).
Print Spectrum
The Print Spectrum dialog (Figure 112) lets you set the parameters that control the
way a hard copy printout of the spectrum will appear.
157
Gamma Acquisition and Analysis
VFS
Choose either Linear or Log for the vertical full scale of the graph.
Max Counts
The maximum number of counts can either be determined automatically or chosen by
the user from the drop-down list. This maximum must be determined automatically if
a second spectrum is to be overlaid (for comparison purposes).
Figure 112 The Print Spectrum Dialog
ROI
To print only a part of the spectrum, check “ROI”, then enter the region’s starting and
ending channel numbers. The starting channel must be at least 1. The maximum number of ROI channels that can be printed is 1024.
Compare to Other Datasource
To overlay your current spectrum with that of a second datasource, check “Compare to
other datasource” and specify the datasource:
• Choose the datasource with the Select button.
• Type in the fully specified datasource path for any .CNF CAM file.
For example – C:\genie2k\camfiles\Nbsstd.cnf
• Type in any detector name, prefixing it with “DET:”.
For example – DET:DET1 or \\HOTLAB1\DET:Ge2
158
Analyze Menu
Note that since the vertical scale should be automatically determined for printed
comparisons, “Auto” must be selected in the VFS “Max Counts” box.
Full Channel Display
The normal method of spectrum plotting compresses adjacent channels to simplify the
graph. Check the “Full channel display” box to display a data point for every channel
in the range of channels being plotted. This option is only effective for a range of more
than 1024 channels.
Save Datasource
This phase specifies the save location for an open datasource. If the phase is invoked
from the Analyze menu, the save will occur immediately after you click the Execute
button.
Note: Although analysis sequences can be executed in a command line environment using REXX or ANALYZE.EXE directly, the Save Datasource step
will only work in that environment if automatic file naming has been enabled in the Sequence Preferences dialog on page 165.
In an Analysis Sequence File, the phase can appear more than once as a step. The Save
Datasource window in Figure 113 will appear, once for each step, when the sequence
begins execution.
Figure 113 Save Datasource Dialog
159
Gamma Acquisition and Analysis
This lets you specify the save parameters separately for each instance of the step. The
save parameters you specify for each instance will be used when that instance is executed in the sequence.
Save as Type
The “Save as type” box lets you select the file format you’ll save as: CAM (.CNF),
Toolkit (.TKA), or IEC455 (.IEC). If you type in the file name without an extension,
the selected “Save as type” extension will automatically be appended.
To save a file with an extension other than those associated with the file filters, type
the file name and extension, surrounded by double quotes (“filename.abc”), into the
“Save as type” box.
Description
For CAM files, you can enter an optional description of up to 32 characters.
Edit Menu
The Edit Menu allows you to enter and edit Sample Information, define and edit Analysis Sequences.
Sample Info
Sample info presents you with a dialog screen (Figure 114) for entering sample information for the current datasource.
Figure 114 Editing Sample Information
160
Edit Menu
The Text Fields
The text fields allow you to enter descriptive data for your sample. You can enter up to
64 characters in the Sample Title field and all four of the Sample Description fields.
You can enter up to 16 characters in the Sample ID, Type, and Sample Geometry
fields and up to 24 characters in the Collector Name field.
The Information Fields
The information fields let you enter the Sample ID, Type, sample Quantity, its Uncertainty and Units, the Sample Geometry and the user-defined percent Random Error
and percent Systematic Error, all of which are used in calculating the uncertainty for
the nuclide line activity, as described in the “Basic Calculations” section of the Algorithms chapter in the Genie 2000 Customization Tools Manual.
Buildup Type
Selecting None will allow entry of the Sample Date and time; that is, the time you collected the sample. The Begin Date is not available for this Type.
Selecting Deposition or Irradiation lets you enter the Begin Date and time and End
Date and time for your sample’s deposition or irradiation time.
Load Cal
The Load Cal button lets you load a calibration file (.CAL) into the datasource. You
have the option of loading the source’s Energy/Shape calibration, Efficiency calibration, or both. The Info button displays a dialog box which shows descriptive information for the currently selected file, if any is available.
More
The More button will not be seen on the Edit Sample Information screen unless the
GAAINFO.FDS file is present in the directory defined by the environment variable
EXEFILES (refer to “Genie 2000 Environment Settings” on page 264 for more information on environment variables).
When the More button is present, it lets you define or customize a dialog which allows editing of additional sample information parameters. Only CAM sample class parameters are supported by this mechanism.
Note: If an .FDS file is defined that contains sample parameters already present on
the main edit sample information dialog, any value entries for those duplicate parameters will be overridden by values entered in the main dialog
screen.
Analysis Sequence
The Analysis Sequence command allows you to create or edit analysis sequences that
you can use to automatically analyze your spectra (Figure 115).
161
Gamma Acquisition and Analysis
Figure 115 The Edit Analysis Sequence Dialog
Sizing the Window
The Editor’s window defaults to a minimum size, but can easily be dragged to a larger
size.
In the Algorithms and Current Steps lists, you’ll see some steps with an asterisk before
their names, such as “*Reporting – Standard”. These steps have parameters that control how the sequence’s output will be presented.
Note: An Analysis Sequence file can also be created or edited with the standalone
Analysis Sequence Editor, which is described in detail in Chapter 6, “Using
the Analysis Sequence Editor”.
Unique Parameters
Note that the steps listed in the following table have parameters that can be defined
uniquely each time they occur in a sequence.
Step
Parameters
Peak Locate and Peak Area Start channel and Stop channel
162
Save Datasource
File name, Save as type and
Description
Report
All parameters other than Activity Units
and Multiplier
Edit Menu
Common Parameters
All other sequence step parameters are “common”; they cannot be specified independently. If there are multiple instances of one of these steps in a sequence, all instances
of that step will have the same parameters.
Insert Step
To add a step to the sequence, highlight a step in the Step Selection list box, then click
on the Insert Step button. The step will be added to the Current Steps list.
Delete Step
To remove a step from the sequence, highlight the step in the Current Steps list that
you want to remove, then click on the Delete Step button.
Select Algorithm
To choose an algorithm for the current step, press the Select Algorithm button. For instance, if you had inserted and highlighted the Peak Locate phase step, pressing the
Select Algorithm button would bring up a window similar to Figure 116, which shows
the Peak Locate phase’s algorithms. To associate one of the algorithms with the phase,
highlight the algorithm then press OK to save the association.
Figure 116 Selecting an Algorithm
Setup Algorithm
After you have associated an algorithm with the phase, press the Setup Algorithm
button and verify or change the algorithm’s parameters. The setup screens and parame-
163
Gamma Acquisition and Analysis
ter choices for each of the analysis phases are described in detail in “Analyze Menu”,
starting on page 122.
Figure 117 Analysis Sequence Preferences
Sequence Preferences
After you have begun editing an analysis sequence, press the Sequence Preferences
button to set a group of preferences for that sequence (Figure 117).
Edit Sample Information
If the “Edit sample information” box is checked, you will be prompted to edit Sample
Information (page 160) when the sequence begins execution. If the box is not checked,
there will be no prompt.
Note: No prompt will be issued if the analysis sequence is executed in a command
line environment using ANALYZE.EXE directly or via REXX, regardless
of this preference setting.
Prompt to Select Datasource
If you check the “Prompt to select datasource” box, you’ll be prompted to choose a
datasource when the sequence begins execution. If the box is not checked, the analysis
sequence will use the detector or file datasource that is open and active when the analysis
sequence is run.
Note: No prompt will be issued if the analysis sequence is executed in a command
line environment using ANALYZE.EXE directly or via REXX, regardless
of this preference setting.
164
Edit Menu
Automatic File Naming
Check the “Automatic file naming” box to cause the system to automatically create a
new file name each time the Save Datasource step is executed. The files are saved in
the standard CAMFILES subdirectory and are named sequentially. If the box is not
checked, you will have to specify a file name when the sequence is run.
The first time this function is executed, the file will be named “00000001.CNF” and the
counter will be incremented by one. When the counter reaches 108, it will reset to 1.
Note: This preference must be enabled for any sequence that includes a Save
Datasource step and that will be executed in a command line environment
using ANALYZE.EXE or REXX directly.
Efficiency Calibration
Check the “Import calibration at execution” box to indicate that an efficiency calibration should be imported at execution. If the box is not checked, the calibration in the
datasource being analyzed will be used.
Notes: No calibration selection prompt will be issued if the analysis sequence is executed in a command line environment using ANALYZE.EXE directly or
via REXX.
When an efficiency calibration that includes the specification of a .GIS file
is imported during an analysis sequence, this specification will be overridden if a .GIS file is also specified in either the Sequence Preferences settings
or the NID with Interference Correction algorithm settings.
Prompt
If “Prompt” is selected, you will be asked to specify the calibration when the analysis
sequence starts to run.
Specify Now
If “Specify now” is selected, you’ll choose the calibration file now instead of at execution time. The drop-down list shows the efficiency geometry identifier of each .CAL
calibration file found in the CALFILES directory.
If a calibration file does not specify an efficiency geometry identifier, the list will display the file name (truncated if necessary) enclosed in parentheses. Note that the efficiency geometry identifier can be set via Calibrate | Store menu selection.
Cascade Correction
To enable cascade correction, mark the checkbox. The currently specified .GIS Geometry Composer file is displayed.
165
Gamma Acquisition and Analysis
Note: When an efficiency calibration that includes the specification of a .GIS file
is imported during an analysis sequence, this specification will be overridden if a .GIS file is also specified in either the Sequence Preferences settings
or the NID with Interference Correction algorithm settings.
Prompt for Geometry Composer File
If “Prompt for Geometry Composer File” is selected, you will be asked to specify the
calibration when the analysis sequence starts to run.
Note: No file selection prompt will be issued if the analysis sequence is executed
in a command line environment using ANALYZE.EXE directly or via
REXX.
Use
If “Use” is selected, you’ll choose the indicated file now instead of at execution time.
Note: This setting will overwrite any existing .GIS file specification in interference-corrected nuclide identification steps. Similarly, specifying a .GIS file in
such a step after choosing one in the Analysis Sequence Preferences window
will overwrite the preference setting. (Both methods control the same property.)
Load
Load (Figure 118) lets you load a defined sequence, populating the Current Steps list
box with the sequence’s steps and loading their associated setup parameters.
Figure 118 Loading a Sequence
166
Options Menu
OK
Selecting OK loads the sequence highlighted in the Seq. Descriptions list.
Current
Selecting Current loads the steps from the last sequence file executed in this session,
or if no sequence has been executed, the sequence stored in the current datasource.
Store
Store allows you to save the currently defined analysis sequence as a file. These files
will appear in both the Analyze menu and the Load screen’s sequence descriptions.
Execute
The Execute button executes the currently defined analysis sequence, which is the sequence of steps listed in the Current Steps list box.
Options Menu
The Options Menu lets you Change the Operator’s Name, perform Strip and Smooth,
and work with the Report Window.
Change Operator Name
Selecting Change Operator Name lets you enter or edit an operator name. This name
will be stored in all currently opened datasources whenever various phases of analysis
and calibration are performed.
Interactive NID
The Interactive Nuclide Identification (NID) option (Figure 119) brings up a modeless
dialog, allowing you to see a graphical connection between the location of the spectrum cursor and the nuclides in a library.
167
Gamma Acquisition and Analysis
Figure 119 The Interactive NID Dialog
As you may move the cursor in the spectrum window Interactive NID will attempt to
find the closest matching line (within tolerance) in the nuclide library and select that
line in the list box. Alternatively, you may select a line in the list box and this will automatically move the spectrum cursor (if possible) to that energy.
The nuclide information for the currently selected line will also be displayed in the
Nuclide Info status page. If the cursor is within an ROI, an activity will be calculated
using the current efficiency calibration and displayed in that page.
Sort By Nuclide or Energy
The list can be sorted either by nuclide name, or by line energy. Use these radio buttons to toggle between the two modes.
Show Confirming Lines
If the Confirming Lines box is checked, the energies of any other lines for the selected
nuclide will be marked in the spectrum window.
Setup
The Setup button lets you change the Interactive NID preferences. This includes nuclide library, tolerance, and activity units.
Geometry Composer
This menu entry will be available if the S501 Gamma Analysis, S573 ISOCS or S574
LabSOCS application option is installed. Refer to Chapter 8, Using the Geometry
Composer, for details.
168
Options Menu
Strip
The Strip command (Figure 120), lets you choose the Background Datasource, multiplied by the selected factor, to be subtracted from the Current Datasource, channel by
channel.
Figure 120 The Strip Dialog
Source = Source Background
Enter the factor to multiply the Background Datasource by.
Background Datasource
Click on one of the Source buttons, then select a CAM File or a Detector from the list
box to start the strip function.
Smooth
Choosing Smooth (Figure 121) lets you smooth the current datasource to decrease or
eliminate random data fluctuations. You can choose one of six weighted-average
smoothing algorithms, from 3 point to 13 point.
169
Gamma Acquisition and Analysis
Figure 121 The Smooth Dialog
How Smoothing Works
As an example of how smoothing works, let’s consider 3 Point smoothing, which
weight-averages three channels at a time: the current channel and one channel to either
side. The weighted-average value is placed in the current channel, then the algorithm
moves on to the next channel, repeating the process until the entire spectrum has been
smoothed.
Datasource Overview
The three Datasource Overviews display a brief summary of the Acquisition, Analysis
and Calibration parameters stored in the current datasource.
Acquisition Data
The Acquisition Data view (Figure 122), summarizing data about the datasource acquisition, shows the datasource’s name and detailed input information.
Datasource Name
File datasources will be listed as Path\FileName.
MCA datasources will be listed as Detector: <MID input name>.
Input Information
This information describes the physical device used to acquire the datasource. The information is also available on the “Input Info” Status Page (page 120). If the data is
not present, the field will be blank.
170
Options Menu
Figure 122 Acquisition Overview
Analysis Data
The Analysis Data view (Figure 123) summarizes data about the analysis that has been
applied to the datasource. The algorithms used for that step will also be identified. If
an Analysis Sequence has been stored in the datasource, the steps will be displayed. A
list of files that will be or have been used for an analysis step will also be displayed.
Figure 123 Analysis Overview
171
Gamma Acquisition and Analysis
Analysis Sequence Description
Analysis Sequence Description data names the analysis sequence file (ASF) used to
analyze the spectrum. If no sequence file was executed, the Description will be blank.
Analysis Files
Any additional files used to perform analysis steps, such as NLB and CNF files, will
be listed here.
Note: An entry in the Analysis Files section does not necessarily mean that the
step has been performed on the datasource.
Analysis Steps
The Analysis Steps section lists the analysis steps performed on the datasource. The
list of steps is derived from an Analysis Sequence File (ASF), selections from the Analyze menu, or both. A grayed-out algorithm name indicates that analysis step has not
been executed.
Calibration Data
The Calibration Data view (Figure 124) displays the current energy and efficiency
calibration data for the foregound datasource.
Figure 124 Calibration Overview
172
Options Menu
Energy
The Energy data includes the energy, FWHM and Low Tail equations.
Efficiency
The Efficiency data includes the efficiency equation, model (type), and the order of
both the low energy peak and the polynomial.
Peak to Total
The Peak-to-Total data includes the peak to total calibration equations, the order of the
low energy peak and order of the polynomial.
Report Window
The Report Window menu item lets you work with the window’s contents and control the window’s size. The window size you choose can be saved as a permanent setting with the Display Preferences | Save command (page 113).
You can create a PDF file of the Report Window’s contents with the File | Export Report to PDF command (page 45).
Copy Highlighted to Clipboard
This command copies the highlighted contents of the Report Window to the system
clipboard so you can paste the data in another application, such as a word processor or
a presentation program.
Copy Contents to Clipboard
This command copies the entire contents of the Report Window to the system clipboard.
Clear Contents
Selecting this command will remove all data from the Report Window.
Load Existing Report
This command loads a selected RPT file into the Report Window. If there is already a
report in the window, the loaded file will overwrite it. Execution of this command requires that the Report Window not be minimized.
Default Size
If you have changed the size of the Report Window, either by dragging a window border or by using one of the sizing commands in this menu, this command will return the
window to its default size.
173
Gamma Acquisition and Analysis
Maximize
The Maximize command will enlarge the Report Window to full screen, allowing you
to read the data more easily.
Minimize
This command removes the Report Window from the display and maximizes the spectral display.
Datasource Menu
The Datasource menu doesn’t appear in the Menu Bar until at least one datasource has
been opened. It can show up to eight datasource file names. If more than eight
datasources are currently open, the “More” item will be added to the menu. Selecting
More brings up a list of all open datasources, letting you choose the one of interest (Figure 125). The maximum number of datasources which can be open at one time is 48.
When one of the datasource file names is selected, the spectral display area changes to
show the selected datasource.
Figure 125 The Datasource Menu
Next Group
Select Next Group to index to and display the next memory group. This menu item is
available only if the datasource is a multi-memory group input.
174
Datasource Menu
For example, if you open a Detector Input called MULTI(1:4), the spectral displays
will display the first memory group. Selecting Next Group will display memory
group 2 and the Title Bar will show MULTI(2:4), and so on.
Previous Group
The Prev Group menu item, which is available only if the datasource is a
multi-memory group input, indexes to and displays the previous memory group.
For example, if you open a Detector Input called MULTI(1:4), the spectral displays
will display the first memory group. Selecting Prev Group will display memory
group 4 and the Title Bar will show MULTI(4:4), and so on.
Show All Datasources
Show All Datasources is available only if more than one datasource is open. Selecting
it will simultaneously display up to eight open datasources. The name of each
datasource will be shown in the top right corner of the datasource’s display. The acquisition status of each hardware datasource will be shown in the top left corner.
You can list the next set of eight eight either by using F6 (next datasource) or by selecting the Datasource | More menu item and choosing any of the open datasources.
When displaying multiple datasources, the current datasource has a heavy border
around its display and its name is displayed in the Title Bar.
Single click on any one of the display areas to make it the current datasource. Double
click on any one of the display areas to make that datasource a full screen display.
175
Using the Nuclide Library Editor
4. Using the Nuclide Library Editor
Included with the Genie 2000 Basic Spectroscopy software is an editor for creating
and maintaining the nuclide libraries that are used for both qualitative and quantitative
radionuclide analysis. In this chapter we’ll take a look at how to use that editor to
modify existing and create new nuclide libraries.
Getting Started
To start the Editor, double click on its icon in the Genie 2000 folder. This will start the
program and will bring up the Dialog Box shown in Figure 126.
Figure 126 The Nuclide Library Editor
Sizing the Window
The Editor’s window defaults to a minimum size, but can easily be dragged to a larger
size.
176
Editing a Nuclide Library
Editing a Nuclide Library
Genie 2000 includes a Standard Nuclide Library, a NaI Detector (example) Library, a
Demo Nuclide Library and four Master Libraries. The Demo Nuclide Library,
DEMOLIB.NLB, contains 17 nuclides and 60 lines. The “No MDA” flag (page 180) is
not set for any of the nuclides in the Demo Nuclide Library. Table 1 lists the library.
The Standard Nuclide Library STDLIB.NLB contains 109 nuclides and 511 lines; the
“No MDA” flag is set for all nuclides except those listed in the Demo Nuclide Library.
Table 1 The Demo Nuclide Library
K-40
Co-57
Co-60
Se-75
Sr-85
Y-88
Cd-109
Sn-113
Cs-134
Cs-137
Cs-138
Ce-139
Hg-203
Kr-85
Sc-46
Sc-46
Pb-214
The four Master Libraries are included to help you build tailored libraries for specific
situations. For more information on these libraries, their origin and their use, refer to
“The Master Libraries” on page 191.
We’ll edit the Demo Nuclide Library to see how to use the Nuclide Library Editor.
Opening a Nuclide Library
The Open command in the File menu is used to select a file for editing. From the standard File Open dialog box, open the file DEMOLIB.NLB. This will result in a screen
like the one in Figure 127; the first nuclide – Be-7 – is selected for editing. Note that a
scroll bar is provided for scrolling through the library list.
177
Using the Nuclide Library Editor
Figure 127 A Library Opened for Editing
The Nuclide Data
For each radionuclide in the library, there is both a basic set of data that must be present plus optional sets of permissible limit data. In addition, there are editing buttons
that are used to deal with nuclide entries as a whole (as opposed to operating upon just
one energy line of a nuclide).
The Basic Nuclide Data
The first entry for each nuclide in the library is general information about the nuclide
itself. These fields include:
1. Name. This is an eight-character field that is used for the name of the
nuclide.
2. Type. This is a 16-character field that can be used to enter a type or
classification for the nuclide if you like.
3. Half-Life. Enter the nuclide’s half-life in this field, then choose the time
units: Years, Days, Hours, Minutes, or Seconds.
4. Uncertainty. This is the uncertainty in the half-life, expressed in the same
time units as the half-life.
The Optional Nuclide Data
Clicking on the More button pops up the Dialog Box shown in Figure 128, which is
178
Editing a Nuclide Library
used to add nuclide information related to decay chain information, Parent/Daughter
information, Health Physics analyses and more.
Figure 128 The Optional Data Dialog
1. Decay Chain. These fields specify the parent and daughter nuclides, if any,
of the current nuclide. They are used by Genie 2000’s Parent-Daughter
function.
2. Abundance Limit. This field is reserved for future use.
3. Average Gamma. This is the average gamma energy that is emitted by this
nuclide.
4. Average Beta. This is the average beta energy that is emitted for this
nuclide.
5. MDA to be met. The value entered here is used by the MDAPRESET Job
Function, which is described in section with that title in the Batch Procedure
Reference chapter of the Model S561 Batch Tools Support Reference
Manual.
6. Equiv. Factor. This field is used for 131I or 137Cs equivalency calculations.
7. No EBAR. If this check box is selected, this nuclide will not be included in
any EBAR calculations that are made.
179
Using the Nuclide Library Editor
8. No MDA. If this check box is selected, the “No MDA” flag will be set and
this nuclide will not be included in any Minimum Detectable Activity
calculations that are performed.
9. The Parent-Daughter Decay Ratio and the Error on Parent-Daughter
Decay Ratio specify the parent nuclide’s fractional decay probability and its
error (uncertainty), specified in the Decay Chain – Parent field of this dialog,
to decay into the current nuclide. Note that this is an absolute fraction, not a
percentage.
For all of these fields that require a text entry, click in the field, then enter the values
you want to use.
Clear
The Clear button clears the edit boxes so that new values can be entered without having to delete the box’s contents first.
Adding a Nuclide
To add a new nuclide to the library, edit the nuclide data as above, then click on the
Add Nuclide button. This will position the nuclide in the library so that the library remains sorted by mass number and nuclide name.
Changing the Nuclide Entry
Once you’ve made all your edits to an existing nuclide entry, clicking on the Change
button will update the entry in the list with the values from the edit fields.
Deleting a Nuclide
To delete a nuclide from the library, select it by clicking on it, then click on the Delete
button. This pops up a query box to confirm the deletion.
The Energy Line Data
In addition to the general nuclide data, each library entry also contains one or more
Energy Line entries. There will be one such entry for each Energy Line that you want
to have associated with that nuclide.
Editing an Energy Line Entry
To edit an existing Energy Line entry, click on it in the library list to select it. When
180
Editing a Nuclide Library
you do that its parameters will be copied into the Energy Line edit area, as shown in
Figure 129. The parameters for each line are:
Figure 129 Editing Energy Line Data
1. Energy. This is the energy of the line. In this case the energy is displayed in
keV.
2. Uncertainty. This is the uncertainty in the energy, expressed in the same
units as the energy.
3. Abundance. This is the percentage of the total events emitted by the nuclide
at this particular energy. Abundance is also called branching ratio or yield in
the literature.
4. Uncertainty. This is the uncertainty in the abundance, expressed in Absolute
terms. For example, in Figure 129 the abundance is 10.67 ± 0.11%.
5. Key Line. This check box is used to select or deselect this line as the “Key
Line” for the nuclide. It is used for reporting purposes, and is normally
selected for the highest abundance line for a nuclide with multiple lines.
6. No Wt Mean. Check the No Weighted Mean checkbox if you want to omit
this line from the weighted mean activity calculations, as described in the
“Activity Corrections” section of the Algorithms chapter in the Genie 2000
Customization Tools Manual.
Once you’ve made all your edits to an Energy Line, clicking on the Change button
will update the entry in the list with the values from the edit fields.
181
Using the Nuclide Library Editor
Adding an Energy Line
To add a new line to the nuclide, edit the line data as above, then click on the Add
Line button. This will add the line in its proper energy position in the list of lines for
the nuclide.
Deleting a Line
To delete a line from a nuclide, select it by clicking on it, then click on the Delete button. There is no confirmation query, so make sure you have selected the correct line
before clicking on Delete.
The Options Menu
The Options Menu contains several commands that can be used to further tailor the
Nuclide Library.
Extract
This command lets you extract nuclides and their associated energy lines and information from an existing nuclide library file.
Select Extract, then click on Open and double click on a nuclide library name in the
Files list box. The Extract Library Nuclides list box will be populated with the
nuclides from the selected library, as seen in Figure 130.
Figure 130 The Extract List Has Been
Populated
Single nuclides can be extracted simply by clicking on the nuclide name in the list
box, or click on Select all to extract all lines.
182
The Options Menu
Energy Units
Though energies are stored in keV, the Energy Units command can change how energy units are shown in the editor’s dialog boxes and in reports. The dialog box in Figure 131 allows you to select which energy units you want to display: eV, keV, MeV, or
Other.
Figure 131 Energy Units Dialog
The proper Conversion Factor for “other” units is defined as the number of keV units
equal to 1 “other unit”. For example, the conversion factor for MeV would be 1000
because there are 1000 keV units in 1 MeV.
MPC Units
To set the MPC units, click on MPC Units in the Option Menu. You’ll see the dialog
box shown in Figure 132, where you can select the MPC Activity Units (µCi or Bq)
for the library and the Volume Units (cm3, m3, ml or l) for each of the MPC limit variables in the library.
183
Using the Nuclide Library Editor
Figure 132 The MPC Units Dialog
Drop down lists are used for the selection. For each item you want to change, click on
the Down Arrow, then click on your choice from the list.
MPC Values
This command is used to set the MPC values for the currently selected radionuclide.
Click on MPC Values in the Option Menu to see the dialog box shown in Figure 133.
Now you can set values for each of the eight Maximum Permissible Concentration
limits. The units for these MPC values are the ones set under MPC Units in the Options menu (page 183).
Figure 133 The MPC Values Dialog
184
The Options Menu
Effl./DAC Units
This command is used to set the Effluent and DAC limit units. Click on Effl./DAC
Units in the Option Menu to see the dialog box shown in Figure 134. Now you can set
the Effluent and DAC limit Activity Units (µCi or Bq) for the library and the volume
units (cm3, m3, ml, l) for each of the Effluent and DAC limit variables in the library.
Drop down lists are used for the selection. For each item you want to change, click on
the Down Arrow, then click on your choice from the list.
Figure 134 Effluent and DAC Limit Units Dialog
Effl./DAC Values
This command sets the Effluent and DAC limit values for the currently selected
radionuclide. Click on Effl./DAC Values in the Option Menu to see the dialog box
shown in Figure 135.
Figure 135 The Effluent/DAC Values Dialog
185
Using the Nuclide Library Editor
Now you can set values for each of the four Effluent and DAC limits for regulation
10CFR20. The units for these Effluent and DAC values are the ones set under
Effl./DAC Units in the Options menu (page 185).
Action Level/Derived Units
To set the Action Level values, open a library file, then choose this command to specify the unit for either or both of the Action Levels (Figure 136). Because activities are
stored in microcuries, you’ll have to enter a Conversion Factor to convert microcuries
to your unit. The conversion factor must include any necessary mass (or volume) conversion, as might happen if Concentration is selected and its unit is different from that
of the current sample.
Figure 136 The Action Levels Unit Dialog
Activity vs. Concentration
Select Activity if the action level is to be based on total activity (such as µCi) or Concentration if the action level is to be based on activity per unit quantity (such as
Bq/kg).
Examples
Example 1: If the Action Level 1 Unit is microcuries and it is activity based, Conversion Factor 1 must be set to 1.
Example 2: If the Action Level 2 Unit is Bq/kg, it is concentration based, and sample
quantity values have been entered in grams (g), the Conversion Factor 2 is
0.000027/0.001 or 0.027.
186
The Options Menu
Action Level/Derived Values
With a nuclide library open and appropriate Action Level Units defined, the dialog
box shown in Figure 137 will let you set the Derived Nuclide parameters and Action
Levels for a nuclide. Note that the Action Level units displayed are those which were
defined in “Action Level Units” on page 186).
Figure 137 The Action Level Values Dialog
Derived Nuclide
An observed nuclide, which represents the nuclide from which activity data will be derived, must be specified. The “Observed Nuclide” drop down list lets you choose a nuclide from the current library.
For the Derived Nuclide calculation, four factors are required. The first three factors,
Adj. Factor – Offset, Adj. Factor – Gain, and Adj. Factor – Quadratic, are coefficients
from an efficiency curve fitted through a set of data representing “observed vs. derived” activity pairs.
To find the values for the three Adjust Factors, use your spectroscopy application’s Efficiency Calibration window to enter each derived nuclide’s Energy and Efficiency
values from your own data table (you don’t need to enter the percent error value and
you must not select a Crossover Energy).
When you have finished entering your data, press the Show button to see the curve
generated from your data (the Dual button at the top of the Show screen should be selected). At the bottom of the Show screen you’ll see the calibration equation. The
equation’s first three terms, left to right, are the Offset, Gain and Quadratic Adjust
Factors.
The Error Adjust Factor is taken from the Show screen’s List Peaks dialog box. It is
the larger of: the largest Measured Error or the Deviation (the maximum difference between the known and fitted values).
187
Using the Nuclide Library Editor
Action Level
The two values required for the Action Level calculation are the levels that nuclide activity (or concentration) can be tested against. These values are typically application-specific, such as MPBB or ALI values for Whole Body Counting or release levels
for Q2 users.
The Search Menu
To aid you in locating specific entries in a large library, the Search menu contains the
commands Find Name, Find Energy and Find Mass Number.
Find Name
Click on Find Name to see the dialog box in Figure 138, which is used to search the
library for a specific nuclide name. Type the name (full or partial) into the Name text
input, then click on the First button.
Figure 138 The Find Name Dialog
The library will be searched until either the name is matched or the end is reached. If
the end is reached, a message will tell that there was no match. When a matching entry
is found the search will stop and the nuclide will be selected for editing.
To search for the next entry that matches the search criterion, click on the Next button.
The searching is done by comparing the name you entered to each name in the library
in turn, starting with the first character of the nuclide name and stopping when the last
character in the “search for” name has been used. If all of the characters up to that
188
The Search Menu
point match, a match is declared to have been found. Because of this, partial searches
are very easy to make.
For example, a search for “CO” will match any Cobalt entry, or searching for “S” will
find any nuclide name beginning with the that letter.
If you want to leave the last entry you found selected for editing, click on OK. Click
on Cancel to restore the name selected before you brought up Find.
Find Energy
The Find Energy command uses the dialog box in Figure 139.
Once you’ve entered the energy (and changed the tolerance, if you like), click on the
First button. The library will be searched until either the energy is matched, plus or
minus the specified tolerance, or the end is reached. If the end is reached, a message
will tell you that there was no match. When a matching entry is found the search will
stop and the energy line will be selected for editing.
To search for the next entry that matches the search criterion, click on the Next button.
If you want to leave the last entry you found selected for editing, click on OK. Click
on Cancel to restore the name selected before you brought up Find.
Figure 139 The Find Energy Dialog
Find Mass Number
The Find Mass Number command uses the dialog box in Figure 140 to locate a specific
mass number in the library. It searches for the value you enter in the Mass Number text
box.
189
Using the Nuclide Library Editor
Once you’ve entered the mass number, click on the First button. The library will be
searched until either the mass number is matched or the end is reached. If the end is
reached, a message will tell that there was no match. When a matching entry is found
the search will stop and the nuclide will be selected for editing.
To search for the next entry that matches the search criterion, click on the Next button.
If you want to leave the last entry you found selected for editing, click on OK. Click
on Cancel to restore the name selected before you brought up Find.
Figure 140 The Find Mass Number Dialog
The File Menu
The file menu lets you: Start a New library; Open, Save or Save as, a file; print the file
as a Report; or Exit the editor.
Creating a New Library
The File menu’s New command erases the current Library from the editing window,
allowing you to enter a new Library.
Saving the Library
The File Menu offers the Save command for saving the file under the same name and
the Save as command for saving the file under a different name.
190
The Master Libraries
Printing the Library
To create both a text file and a printout of the current Library’s contents, click on File |
Report, then click on Yes. If you click on No, only the text file will be created and
saved. The default save path is C:\GENIE2K\REPFILES\name.RPT, where name
is the name of the library being printed.
Exiting the Editor
When you are finished with the editor, click on the Exit command in the File menu to
close it.
The Master Libraries
To help you build tailored libraries, Genie 2000 is shipped with a set of four master libraries, containing about 800 nuclides and 31 000 energy lines, obtained from the
NUDAT database maintained by the National Nuclear Data Center of the Brookhaven
National Laboratory. These master libraries, named A_G.NLB, H_O.NLB, P_R.NLB,
S_S.NLB, T_T.NLB and U_Z.NLB, contain nuclides with names starting with letters
in each file’s name.
The Master Libraries include these 10CFR20 Appendix B parameters: DAC, Effluent
Concentrations and Release to Sewers values; class has been set to most restrictive
non-zero D, W, Y category.
For practical reasons, the NUDAT data has been somewhat reduced by including only:
• Gamma data
• Gamma energies greater than 50 keV
• Nuclides with half-lives greater than three minutes
• Energy lines with branching ratios greater than 0.1%
To copy nuclide data from one of these libraries into the current library, choose
Options | Extract, open one of these master libraries, then select the nuclides of
interest to copy from the master library to the current library. Further editing may then
be done within the current library as desired.
More nuclides may be added to the current library with additional extracts from the
same master library or from another master library. Be sure to Save the current library
after completing the edits.
191
Using the Certificate File Editor
5. Using the Certificate File Editor
Certificate Files greatly simplify the calibration process. Those files, which are basically disk copies of the data sheets for your calibration sources, are created and maintained by the Certificate File Editor program included with the Genie 2000 Basic
Spectroscopy software.
Getting Started
To start the Editor, double click on its icon in the Genie 2000 folder. When you do
that, you’ll see the dialog box in Figure 141.
Figure 141 The Certificate File Editor
Sizing the Window
The Editor’s window defaults to a minimum size, but can easily be dragged to a larger
size.
192
The Options Menu
The Options Menu
The Options menu has three commands that can be used to further tailor the Certificate
File: Library Extract, Certificate Extract, and Energy.
Library Extract
This command lets you extract energy lines and their associated information from one
or more existing nuclide library files (.NLB). You can extract energy lines from multiple nuclide libraries at any point while editing the current certificate file.
Select Library Extract, then double click on the name of a nuclide library in the Files
list box. All of the selected library’s nuclides will be listed in the Extract Library Nuclides list box, as seen in Figure 142. Specify your library’s activity units from the list
in the Activity Units drop down list box.
Figure 142 Extracting Nuclides From a
Library
If your library uses activity units other than curies or becquerels, you’ll have to convert its units to becquerels. Choose “< >” from the Activity Units list box, then type
the appropriate conversion factor into the Conversion Factor text box. The conversion
factor is the number of becquerels in each < >unit.
Select the nuclides you want to include by clicking on them one at a time in the list
box. The activity of each nuclide (in the selected units) must be entered in the edit box
provided; any uncertainty should also be entered. When data has been entered in all of
the edit boxes, click on the Change button to update the list box.
When all the nuclides to be extracted have had activities entered, click on OK. This
will make entries in the certificate file for all of the energy lines of the selected
193
Using the Certificate File Editor
nuclides. The emission rate for a line will be calculated from the activity and the abundance of that line from the library file.
Certificate Extract
This command lets you extract energy lines and their associated information from one
or more existing certificate files (.CTF). You can extract energy lines from multiple
certificate files at any point while editing the current certificate file.
Select Certificate Extract, then click on Open and double click on a certificate file
name in the Files list box. The Extract Certificate Nuclides list box will be populated
with the energy lines from the selected certificate file, as seen in Figure 143.
Figure 143 Extracting Nuclides From a
Certificate
Selected energy lines can be extracted simply by clicking on those lines in the list box,
or click on Select all to extract all lines.
Energy Units
Though energies are stored in keV, the Energy Units command can change how energy units are shown in the editor’s dialog boxes and in reports. The Dialog Box in
Figure 144, allows you to select which energy units you want to display: eV, keV,
MeV, or Other.
The proper Conversion Factor for “other” units is defined as the number of keV units
equal to 1 “other unit”. For example, the conversion factor for MeV would be 1000 because there are 1000 keV units in 1 MeV.
194
Editing a Certificate File
Figure 144 Selecting the Energy Units
Editing a Certificate File
The easiest way to see how the Certificate File Editor works is to edit an existing file,
so that’s where we’ll begin.
Opening a Certificate File
Select the File | Open command to load a Certificate File, then select the
NBSSTD.CTF file. The result will be the screen in Figure 145.
Figure 145 Editing a Certificate File
195
Using the Certificate File Editor
The Header Data
At the top of the screen are the Title, Quantity, Assay Date and Original Certificate,
which are used as follows:
Title
The title you enter here will be used when a report is printed.
Quantity
This is the size (volume or mass) of the standard used in efficiency calculations. If the
activity of a standard source is known to be the total activity content of the standard,
enter 1 in the Quantity field. For example, if a 5 mL standard sample is known to contain 1 µCi of 60Co, the Quantity should be entered as 1, and the activity as 1 µCi (or
the equivalent emission rate in gammas or alphas per second).
If the activity of a standard source is known to be an activity concentration, enter the
real standard quantity in the Quantity field. For example, if a 5 mL standard sample is
known to contain 0.2 µCi/mL of 60Co, the Quantity should be entered as 5, and the activity as 0.2 µCi/mL (or the equivalent emission rate in gammas or alphas per second
per unit volume).
Either mode of describing the activity content of the standard source is correct. Note,
however, that if the Sample Quantity1 is entered as the real quantity (5 mL), an analysis of both of these examples will report the 60Co activity to be 0.2 µCi/mL. If an analysis of the calibration spectrum is to yield an activity report of 1µ Ci/each, the sample
quantity must be entered as 1 each.
Assay Date
The assay date and time, which are used for an Efficiency Calibration decay correction, can be found on the data sheet that came with the source.
Original Certificate
This field lets you link a scanned copy (BMP or JPG) of the original calibration certificate to the current CTF file.
To view this bitmap copy of the original certificate, select the File | View Original
Certificate menu option.
The Line Data
At the bottom of the screen is a List Box that is used to scroll through the contents of
the Certificate File. Above the List Box are the edit fields for the currently selected file
entry (the one shown in reverse type).
1. The Sample Quantity is entered by way of the Edit | Sample info dialog in the Acquisition and Analysis application.
196
Editing a Certificate File
Selecting an Entry to Edit
Each entry describes a single line in the calibration source spectrum. When you click on
the line you want to edit, the edit fields will be loaded with the data from the selected entry.
Editing the Line Data
The fields in the entry are used as follows:
1. Nuclide. This is the name of the radionuclide which caused this particular
line, and can be any text string of your choice up to a total of eight
characters.
2. Energy. The photopeak energy of the line, in keV, is shown here.
3. Emission Rate. This is the number of gammas per second (gps) or alphas
per second (aps) that this line was emitting at the time the source was
originally assayed.
4. Rate Uncertainty. The uncertainty in the assayed emission rate, expressed
as a percent, is displayed here.
5. Half-Life. This is the half-life of the nuclide, which can be expressed in
Years, Days, Hours, Minutes, or Seconds. The unit should be chosen before
entering the half-life value.
6. Uncertainty. This is the uncertainty of that half-life, expressed in the same
units as the half-life. For example, in Figure 145 the data shown would be
read as “The half-life is 463.9 Days plus or minus 0.1 Days.
7. Use for Calib/INIT? This option is used only when performing an Energy
Calibration with Genie 2000’s batch commands. Selecting this option for a
peak tells the Batch Calibration that the peak is to be used for performing an
Initial Energy Calibration before doing a complete calibration. Normally
only the first (lowest energy) and last (highest energy) peaks would have this
option enabled. For further details, refer to the “ECAL” section of the Batch
Procedure Reference chapter in the Model S561 Batch Tools Support
Reference Manual.
Clear
The Clear button clears the list box so that new values can be entered without having
to delete the box’s contents first.
Updating the Line
Once you’ve made any needed changes, click on the Change button to transfer the
new parameters into the List Entry for the line.
197
Using the Certificate File Editor
Adding a New Line
To add a new line to the list, first use the above editing procedure to alter an existing
entry to look like the new one you want to add. When you’re finished with the edits,
click on the Add button instead of the Change button. Since the list is sorted by ascending energy, the new entry will automatically appear in its correct location in the
list.
Deleting an Entry
To remove an entry from the list, click on it to select it, then click on the Delete button.
The File Menu
The file menu lets you: Open, Save or Save as a file, print the file as a Report, start a
New file, or Exit the editor.
Saving the Certificate File
Once you’ve edited the file you have to save it with either the Save or Save as command before it can be used.
Printing the Certificate File
Use the File | Report command to print a disk file and a hard copy report of the current
Certificate File. Click on Yes to send the report to a disk file and print the report, or
No to send the report to the disk file only.
Creating a New Certificate File
The File menu’s New command erases the current Certificate File from the editing
window, allowing you to enter a completely new Certificate File.
Viewing the Original Certificate
If you have attached a bitmap copy of the original certificate file to a CTF file (page
196), you can view it with the View Original Certificate command.
Exiting the Editor
When you are finished with the editor, click on the Exit command in the File menu to
close it.
198
Launching the Editor
6. Using the Analysis Sequence Editor
Genie 2000 includes an Analysis Sequence Editor which allows you to create or edit
analysis sequences that you can use to automatically analyze your spectra.
Launching the Editor
To launch the editor, type ASE at the command line.1 When you press ENTER, you’ll
see a window similar to the one in Figure 146.
Figure 146 The Analysis Sequence Editor Window
You can also start the editor with an ASF file loaded by typing, for instance:
ASE <filepath>\MDA_sho.asf
Or you can launch the editor, then use the File | Open command to open an existing
ASF file for editing.
Figure 147 shows the editor with MDA_sho.asf loaded. In the Algorithms and Current
Steps lists, you’ll see some steps with an asterisk before their names, such as “*Re-
1. See the “Batch Procedure Reference” chapter of the Model S561 Batch Tools Support Reference Manual for details of the
ASE command.
199
Using the Analysis Sequence Editor
porting – Standard”. These steps have parameters that control how the sequence’s output will be presented.
Figure 147 An ASF File Opened for Editing
Editing a Sequence File
The editor allows you to create a new sequence, change an existing sequence’s list of
steps or edit any of the steps, by:
• Inserting or deleting steps
• Selecting the proper algorithm for each step
• Setting the parameters for each algorithm
• Editing the parameters for a step
In addition, you can set a number of parameters separately for each analysis sequence.
Unique Parameters
Note that the steps listed in the following table have parameters that can be defined
uniquely each time they occur in a sequence.
200
Editing a Sequence File
Step
Parameters
Peak Locate and Peak Area Start channel and Stop channel
Save Datasource
File name, Save as type and
Description
Report
All parameters other than Activity Units
and Multiplier
Common Parameters
All other sequence step parameters are “common”; they cannot be specified independently. If there are multiple instances of one of these steps in a sequence, all instances
of that step will have the same parameters.
Insert Step
To add a step to the sequence, highlight a step in the Step Selection list box, then press
the Insert Step button. The step will be added to the Current Steps list.
Delete Step
To remove a step from the sequence, highlight the step in the Current Steps list that
you want to remove, then press the Delete Step button.
Select Algorithm
To choose an algorithm for the Current Step, press the Select Algorithm button. For
instance, if you had inserted and highlighted the Peak Locate phase step, pressing the
Select Algorithm button would bring up the window in Figure 148, which shows the
algorithms available for the Peak Locate phase. To associate one of the algorithms
with the phase, highlight the algorithm then press OK to save the association.
The available analysis phases and algorithms are slightly different for the Alpha Spectroscopy Analysis option and the Gamma Spectroscopy Analysis option. The setup
screens and parameter choices for each of the analysis phases are described in detail in
“Analyze Menu” of this manual, starting on page 122, or in the “Analyze Menu” section of the Model S509 Alpha Spectroscopy User’s Manual.
201
Using the Analysis Sequence Editor
Figure 148 Selecting a Peak Locate Analysis
Phase
Setup Algorithm
After you have associated an algorithm with the phase, highlight the step and press the
Setup Algorithm button (or double click on the step). Now you can verify or change the
algorithm’s parameters.
Sequence Preferences
After you have begun editing an analysis sequence, press the Sequence Preferences
button to set a group of preferences for that sequence (Figure 149).
Edit Sample Information
If the “Edit sample information” box is checked, you will be prompted to edit sample
information when the sequence begins execution. If the box is not checked, there will
be no prompt.
Note: No prompt will be issued if the analysis sequence is executed in a command
line environment using ANALYZE.EXE directly or via REXX, regardless
of this preference setting.
Prompt to Select Datasource
If you check the “Prompt to select datasource” box, you’ll be prompted to choose a
datasource when the sequence begins execution. If the box is not checked, the analysis
sequence will use the detector or file datasource that is open and active when the analysis
sequence is run.
202
Editing a Sequence File
Note: No prompt will be issued if the analysis sequence is executed in a command
line environment using ANALYZE.EXE directly or via REXX, regardless
of this preference setting.
Figure 149 Analysis Sequence Preferences
Automatic File Naming
Check the “Automatic file naming” box to cause the system to automatically create a
new file name each time the Save Datasource step is executed. The files are saved in
the standard CAMFILES subdirectory and are named sequentially. If the box is not
checked, you will have to specify a file name when the sequence is run.
The first time this function is executed, the file will be named “00000001.CNF” and
the counter will be incremented by one. When the counter reaches 10 8, it will reset to
1.
Note: This preference must be enabled for any sequence that includes a Save
Datasource step and that will be executed in a command line environment
using ANALYZE.EXE or REXX directly.
Efficiency Calibration
Check the “Import calibration at execution” box to indicate that an efficiency calibration should be imported at execution. If the box is not checked, the calibration in the
datasource being analyzed will be used.
Notes: No calibration selection prompt will be issued if the analysis sequence is executed in a command line environment using ANALYZE.EXE directly or
via REXX.
203
Using the Analysis Sequence Editor
When an efficiency calibration that includes the specification of a .GIS file
is imported during an analysis sequence, this specification will be overridden if a .GIS file is also specified in either the Sequence Preferences settings
or the NID with Interference Correction algorithm settings.
Prompt
If “Prompt” is selected, you will be asked to specify the calibration when the analysis
sequence starts to run.
Specify Now
If “Specify now” is selected, you’ll choose the calibration file now instead of at execution time. The drop-down list shows the efficiency geometry identifier of each .CAL
calibration file found in the CALFILES directory. If any calibration file does not have
an efficiency geometry identifier specified, the list will display the file name (truncated if necessary) enclosed in parentheses. Note that the efficiency geometry identifier can be set via the Store... option in the Calibrate menu.
Cascade Correction
To enable cascade correction, mark the checkbox. The currently specified .GIS Geometry Composer file is displayed.
Note: When an efficiency calibration that includes the specification of a .GIS file
is imported during an analysis sequence, this specification will be overridden if a .GIS file is also specified in either the Sequence Preferences settings
or the NID with Interference Correction algorithm settings.
Prompt for Geometry Composer File
If “Prompt for Geometry Composer File” is selected, you will be asked to specify the
calibration when the analysis sequence starts to run.
Note: No file selection prompt will be issued if the analysis sequence is executed
in a command line environment using ANALYZE.EXE directly or via
REXX.
Use
If “Use” is selected, you’ll choose the indicated file now instead of at execution time.
Note: This setting will overwrite any existing .GIS file specification in interference-corrected nuclide identification steps. Similarly, specifying a .GIS file in
such a step after choosing one in the Analysis Sequence Preferences window
will overwrite the preference setting. (Both methods control the same property.)
204
Options Menu
Options Menu
Though energies are stored in keV, the Energy Units command can change how energy units are shown in the editor’s dialog boxes and in reports. The Dialog Box in
Figure , allows you to select which energy units you want to display: eV, keV, MeV, or
Other.
The proper Conversion Factor for “other” units is defined as the number of keV units
equal to 1 “other unit”. For example, the conversion factor for MeV would be 1000 because there are 1000 keV units in 1 MeV.
Saving a New Sequence File
The File | Save as command lets you save a new sequence file with a Description as
shown in Figure 150. The Description is displayed in the editor’s Sequence Title field
the next time you open the file.
Figure 150 Save As with a Description
205
Using Cascade Correction
7. Using Cascade Correction
Canberra’s patented Cascade Correction feature, included in Genie 2000 software, lets
you more accurately determine the activities of radionuclides that exhibit cascade summing effects, such as 88Y, 60Co and 152Eu.
Prerequisites
Before you execute a Cascade Correction analysis, you must have performed these
steps:
1. Install the Model S501 Genie 2000 Gamma Analysis Option software, if that
has not already been done.
2. Energy calibrate the detector to be used, as described in “Calibrate” on page
59.
3. Create a Geometry Description for the sample analysis configuration that
will be used, as described in Chapter 8, Using the Geometry Composer, on
page 208.
4. Perform a Peak-to-Total Calibration for that geometry, as described in
“Peak-to-Total” on page 73.
5. Perform an Efficiency Calibration for that geometry as described in
“Efficiency” on page 79.
CAUTION
If you performed a source-based (empirical) efficiency calibration, and your calibration source includes nuclides which
give rise to cascade summing (e.g. 88Y, 60Co, 152Eu), you
should refer to Appendix D, Correcting an Efficiency Calibration for Cascade Summing, on page 284.
Note: Calibrations performed by the optional Model S573 ISOCS or Model S574
LabSOCS applications do not suffer from cascade summing effects and
therefore do not need to be corrected as described in Appendix D.
206
Performing the Analysis
Performing the Analysis
Once the prerequisites have been met, you are ready to use Cascade Summing Correction in your analyses. The details on the procedure can be found in the “NID with Interference Correction” on page 145.
As you perform the procedure outlined there, you will find a reference to the Coincidence Library used for the Cascade Summing Correction calculations. The library includes:
• Nuclides and gamma lines that are affected by cascade summing, as well as
those that are free from the effect, and
• Decay parameters such as branching ratio, internal conversion correction
factors, and absolute yield percentages for nuclides and gamma lines that are
affected by cascade summing.
• The data in this library were obtained from the NuDat online database at the
National Nuclear Data Center (http://www.nndc.bnl.gov/nndc/nudat) in
December, 2000. Although this library is not user editable, it is quite
comprehensive and will be updated periodically by Canberra Industries.
Table 2 The Cascade Correction Data Library
24
38
42
K
47
59
60
65
Ni
72
Na
Fe
75
Se
97
Ru
111
Ag
Cl
Co
82
Br
88
Y
Ca
Ga
90
Y (m)
46
Sc
56
Ge
76
77
97
Zr
Mn
As
99Mo
103
Ru
105
109
Pd
111
110
111
Cd (m)
115
115
Cd (m)
114
116
Ru
Cd
Pd (m)
In (m)
Ag (m)
In (m)
117
In
117
125
122
Sb
124
125
127
Te
134
131
133
Ba
139
140
143
Ce
147
Nd
149
151
153
152
152
154
Eu
153
159
160
165
166
171
169
175
177
Yb
177
175
Hf
180
181
182
187
W
188
Os
193
Eu (m)
Ho
185
199
Au
Sn (m)
Cs
Er
Hf (m)
Os
233
Pa
Sn
Ba
Nd
Gd
Yb
Hf
192
Ir
Pm
Gd
Yb
Ta
194
Ir
Sb
Ba
Sm
Tb
197
Pt (m)
Sb
La
Eu
Dy
Lu
Re
198
Au
239
Np
207
Using the Geometry Composer
8. Using the Geometry Composer
The information developed by the Geometry Composer is used by Canberra’s patented
Cascade Summing Correction algorithms and the LabSOCS/ISOCS software.
The Composer helps you define sample geometries for HPGe gamma spectroscopy
analysis. You can use one of eight sample templates, or customize your own template,
to define sample geometries. For each geometry that is defined, you specify:
• The size and shape of the sample and its container.
• The materials from which they are made.
• The type of the detector that will be used for the analysis of this sample.
Starting the Composer
Before you can run the Geometry Composer, you’ll have to open a datasource. When
the datasource has been opened, select Options | Geometry Composer. This brings
up the Geometry Composer screen in Figure 151. Many of the Composer’s menu commands are available as buttons in the toolbar at the top of the screen.
Figure 151 The Geometry Composer
208
Creating a Geometry Definition
Creating a Geometry Definition
The next step is to create a new geometry definition. This is done by selecting the
File | New command or the icon, which pops up the dialog box in Figure 152.
Figure 152 Selecting the Geometry
Template
Selecting the Geometry Template
Select one of the Group of Geometry Templates buttons to enable the set of template
definitions you’ll use. Which buttons are enabled depends on the software options installed on your system (S501 Gamma Analysis, S574 LabSOCS or S573 ISOCS).
The Select Base Template list shows the definitions available in the chosen group.
Click on the description which most closely matches the geometry you want to define
(Simplified Marinelli Beaker for this example), then click on OK. The result will be
the display shown in Figure 153.
For a detailed description of the available templates, refer to the Standard LabSOCS
Template Drawings chapter in the Genie 2000 Customization Tools Manual.
209
Using the Geometry Composer
Figure 153 Editing the Sample and Detector Dimensions
Editing the Detector and Sample Dimensions
The next step is to modify the selected geometry template to match the specific detector, container, and sample that will make up this geometry.
Template Version
The template version you selected is shown here (‘default’ in this case).
Detector and End Cap
For the most accurate efficiency calibration and for cascade summing results, the
HPGe detector being used in this geometry definition should have been characterized
for LabSOCS/ISOCS at the factory. If that option has been purchased, and if the detector characterization file has been installed, the detector’s serial number will appear in
the drop down list. Selecting it will automatically insert its dimensions into the
“Diam.” and “Length” parameters.
CAUTION
If you have LabSOCS or ISOCS installed, do not use the generic characterizations for Coaxial or Planar detectors for efficiency calibrations; they are not suitable for that purpose.
Nor should you use the ‘Example’ detector; it’s used only for
testing and training.
For accurate efficiency calibration results, you must use the
specific characterization file supplied for your particular detector.
210
Editing the Detector and Sample Dimensions
The generic characterizations are used only by Cascade
Correction users who do not have LabSOCS or ISOCS software, and thus do not have their individual detectors characterized.
• Coaxial Detectors (GC, GX, GR, etc.):
Select the detector named “Dia=nn.._Coaxial”, where nn is the diameter (in
mm) which most closely matches the (germanium crystal) diameter of the actual detector. Consult your detector’s specification sheet to obtain this
information.
• Planar Detectors (BEGe, etc.):
Select the detector named “Dia=nn.._Planar”, where nn is the diameter (in
mm) which most closely matches the (germanium crystal) diameter of the actual detector. Consult your detector’s specification sheet to obtain this
information.
Using this method, a bias in the cascade summing correction factor of less than ±15%
can be expected. For greater detail on the correction factor, refer to the Selecting an
ISOCS Detector Characterization chapter in the Genie 2000 Customization Tools
Manual.
Figure 154 shows the result of selecting a characterized detector named “Example”.
Figure 154 The Detector Has Been Selected
211
Using the Geometry Composer
Geometry Information
The definition of the geometry starts with its Description and an optional descriptive
Comment. Since Genie uses the Description as the File ID, and the Comment as the
File Descriptor, these should be selected to uniquely identify the geometry so that
when the calibration file is retrieved, it can be shown to be the proper one.
Density and Material
Enter the density and material of the sample (source). They are used by the calibration
process to correct for factors such as attenuation due to sample and container wall
composition.
The list at the right of the dialog box is used to specify the material used for the container and source. Double-click on a material to display its name, default density,
chemical composition, and mass attenuation coefficients (Figure 155).
Figure 155 Displaying the Material Parameters
To modify these parameters, or to add further materials to the library, click on the Call
MuEditor button directly above the material list. This will launch the Materials Library Editor (described on page 222).
To specify the material for the container, click on its name in the list (e.g. glass), then
click on the upper arrow (⇐) to copy that choice and its density to the Container Wall
Density and Material fields. Next, click on the sample material (e.g. water), then click
on the lower arrow (⇐) to copy that data to the Source Density and Material fields. In
Figure 156 glass was selected for the beaker and water for the sample.
212
Editing the Detector and Sample Dimensions
Figure 156 Add Geometry Information
The density values from the Materials Library entries for the selected materials are automatically inserted into the Geometry Description. If necessary, the density can be
edited to better fit the sample.
CAUTION
Carefully review the default density to assure that it is appropriate for the actual material used.
Set Sample Via
By default, the Geometry Composer bases its calculations on the sample’s Dimensions. Click on Volume or Weight to select another basis for the calculations.
The selected basis is inserted into the Dimensions table and an entry box for its value
is enabled. Once the dimensions of the sample and its container have been entered (see
“Sample Dimensions”, below), the value for the volume or weight is set automatically
based on the container dimensions and the sample density previously entered in the
Density and Material section of the window.
Dimensions Scale
All dimensions default to the unit selected in “Default Parameters for New Geometries” on page 231. Use the buttons here in Dimensions Scale to select another unit.
Note that the units selected apply to the dimensions for both the detector and the sample.
CAUTION
Changing units during data entry will convert all existing entries to the new units.
213
Using the Geometry Composer
Sample Dimensions
The Dimensions table in the middle of the window is used to enter the dimensions of
the sample and its container. There is one row in the table for each element in the definition of the geometry and one or more columns of data.
Show Template
Click on the Show Template button to see a drawing like the one in Figure 157,
showing the elements and relationships of the geometry currently being defined.
Figure 157 Displaying a
Geometry Template
The numbers in the drawing correspond to the row and column position of the element
in the sample Dimensions table. For example, the value for the dimension labeled 2.1 the diameter of the detector well - is entered into Row 2 (Detector Well), Column d.1.
Auto and Fixed
The two Picture Scale buttons in Figure 157 are used to resize the window for easier
viewing. Use the Close button to exit the viewer.
214
Editing the Detector and Sample Dimensions
Notes: A Source-to-Detector distance of 0 mm is permitted; for example, when the
source is resting directly on the detector end-cap.
For geometries where it is physically appropriate, additional
Source-to-Detector data fields for parameters such as source orientation relative to the detector’s axis will be found. Refer to the descriptions of the
various template descriptions in the Standard LabSOCS Template Drawings
chapter in the Genie 2000 Customization Tools Manual for further details.
Save Data As User Version
You can save a partial description as a custom template for future use. For example, if
you will be using several different Marinelli Beakers for sample assay, you may wish
to save a partial definition now in order to reduce geometry definition time in the future.
Click on the Save Data As User Version button in the upper left corner of the screen
in Figure 154 (page 211) to save the partial template.
Note: A User-defined Template should only be saved with those parameter values
which will be constant from one geometry to the next, because those values
can’t be edited when that User-defined Template is used as the basis for a
new geometry definition.
You’ll now see Figure 158, where you should change “untitled” to an appropriate
215
Using the Geometry Composer
name for the new template, then click Add to add the new definition to the list of
available template definitions.
Figure 158 Saving a User
Template
Selecting a User Defined Template
To define a geometry based on any partial template you have saved:
1. Select File | New.
2. Select the same generic definition used previously (in this example,
Simplified Marinelli Beaker), then click on OK.
3. This will display the dialog shown in Figure 159, where you can select the
custom definition you just saved as your base template, then continue as
described in “Detector and End Cap” on page 210.
216
Verifying the Geometry Definition
Figure 159 Selecting a
User-defined Template.
Verifying the Geometry Definition
When you’ve completed the geometry definition, click on OK. The Composer will
verify the definition and, if a potential problem is found, display an error message. If
the definition is valid, you’ll see a report like the one in Figure 160.
Figure 160 The Geometry Composer Report
217
Using the Geometry Composer
Note:
If you open an existing definition in the Geometry Composer, you’ll immediately see the Geometry Composer Report for that definition.
Editing a Geometry Definition
If need to change any of the parameters shown in the report, select Edit | Dimensions
and Detector to open the editing window (Figure 153 on page 210).
Editing the Sample Environment
In the LabSOCS/ISOCS efficiency calibration process, air fills all undefined spaces
between the sample and the detector. In order to correctly calculate the attenuation of
the air, you’ll have to define three environmental (ambient) parameters.
To edit these parameters, temperature, pressure and relative humidity, select Edit |
Environment. You’ll see the dialog box in Figure 161.
Figure 161 The Edit Environment
Dialog
Note: These edits affect only the current geometry. You can change the defaults
for all future geometries under “Default Parameters for New Geometry” in
the Options menu (page 231).
218
Editing the Efficiency Parameters
Editing the Efficiency Parameters
If you need to modify the Convergence, Maximum Detector Reference Point Number
(MDRPN), Energies, and Error Values used in the LabSOCS/ISOCS efficiency calibration process, select the command Efficiency Parameters for this Geometry from
the Edit menu, which opens the dialog box shown in Figure 162.
Note: These edits affect only the current geometry. You can change the defaults
for all future geometries under “Setting the Default Parameters for New Geometry” in the Options menu (page 231).
Since editing and using these parameters is beyond the scope of this chapter, only an
overview of parameter use and editing functions will be presented here. For an
in-depth discussion of how the Convergence and MDRPN parameters affect the calibration process, refer to the LabSOCS/ISOCS Technical Notes chapter in the Genie
2000 Customization Tools Manual.
Editing the Energy List
Select the Energy List tab in Figure 162 to activate the Energy List Editor. This editor allows you to define the energies for which efficiencies will be calculated. This feature
may be used to establish properly spaced efficiency values for the desired energy range.
Figure 162 shows that the default energy list covers the 100 to 2000 keV range. The
error values listed are the estimated uncertainty error values for each energy based on
LabSOCS/ISOCS validation testing.
Deleting an Energy from the List
Select the energy line to be deleted, then click on Remove.
Adding an Energy to the List
Type the new energy value into the “Energy, keV” field and its associated uncertainty
into the “Error, %” field, then click on Add. The new line will be added to the list.
Restoring the Default Values
To restore the Energy List defaults in Figure 162, click on Use Default Energies.
Load Energy List
Use this button to load a previously saved list of energies, replacing the current one.
Save Energy List
This button is used to save a custom list of energies for later use
219
Using the Geometry Composer
.
Figure 162 The Energy List Dialog
Changing the Integration Settings
Selecting the Integration tab in Figure 162 brings up the dialog box in Figure 163,
which is used to change the integration settings for efficiency calculation. For a discussion on how these parameters affect the efficiency calculation, refer to the ISOCS
Technical Notes chapter in the Genie 2000 Customization Tools Manual.
Convergence %
This parameter defines the maximum acceptable deviation in the results of the efficiency calibration calculations. The default value of 1% typically yields the best tradeoff between accuracy and computation time.
MDRPN
The Use MDPRN option (Maximum Detector Reference Point Number) should always be checked (default) to enable a process that increases the accuracy of the
LabSOCS/ISOCS computations for close-detector geometries.
A Value of 4 has been found to be the optimum for most applications. Accordingly,
this value will be used in the calculations if the “Use MDRPN defined for detector”
check box is enabled.
Show Progress Bar
Select Yes to enable display of the Progress Bar during the Efficiency Calibration Calculation.
220
Checking the Geometry’s Validity
Figure 163 The Integration Settings Tab
Checking the Geometry’s Validity
Once you have completed making all necessary changes to your definition, you should
again have it tested to insure that is valid for later use by the calibration and analysis
procedures.
To do that, select Efficiency Curve | Check Geometry Validity to perform a more
extensive validation of the geometry definition than the automatic validity check made
when you exit the geometry definition window.
Saving the Definition
Once you are satisfied that all of the parameters are correct, you must do a File | Save
As to save the definition before going on to perform a LabSOCS/ISOCS efficiency
calibration.
Note: This will generate two files: a .GEO file and a .GIS file. Each contains the
same information, but in two different formats for different sections of the
software. To avoid confusion, they should always be treated - deleted, renamed, etc. - as a two-part set.
221
Using the Geometry Composer
Generating an Efficiency Curve
This function is available only if LabSOCS/ISOCS is installed.
First make sure that you have already saved your newly created or modified Geometry
Definition. Then select Efficiency Curve | Generate Efficiency Data Points to calculate the efficiency curve for the defined geometry. This process creates an .ECC file in
a subdirectory defined by the geometry template chosen.
Figure 164 The Data Points Have Been Generated
A progress report is displayed during this process, and the message in Figure 164 is
displayed when it is complete. Note that the full path to .ECC file that was generated
is shown.
To use the completed calibration, see “By LabSOCS/ISOCS” on page 85 and select
the *.ecc file you have just created. Refer to Calibration by LabSOCS/ISOCS (page
85) for the rest of the process. Closing the Geometry Composer returns you to the
screen shown in Figure 65 (page 85).
The Materials Library Editor
The Edit | Materials Library command is used to edit the library containing the material choices and characteristics used to specify the composition of the sample and its
container. Selecting it opens the library editing window shown in Figure 165.
222
The Materials Library Editor
Figure 165 The Materials Library Editor
The Nature of a Library Entry
The uses of the library’s editing tools can be better understood by examining the
makeup of a Materials Library entry. For example, to view data for “concrete”, double
click on its name in the Material Library list on the right side of the window. The result will look like Figure 166.
Figure 166 The Library Entry for Concrete
223
Using the Geometry Composer
You’ll see the name of the material and its density, any comments, the chemical composition of the material, and the coefficients used to correct for the material’s radiation
attenuation. These parameters cannot be modified from this display; it is for information purposes only.
The Chemical Composition of this compound, shown in Figure 166, is interpreted as:
15.42% C + 35.75% O + 18.77% Si + 26.82% Ca + 0.56% H + 2.68% Mg
The total may not always be 100% because of rounding errors.
Defining New Materials
There are three ways that new materials can be defined:
• By defining a completely new material.
• By basing the new material on an existing definition.
• By combining two or more existing materials into a new one.
The left side of the Material Editor window is used for the definition of a new
material. To illustrate how the process, the definition of a new material called
“bronze” will be entered. Bronze is composed of 90% Copper and 10% Tin, by
weight. The procedure is as follows:
1. Select copper (Cu) from the list of elements at the left.
2. Insure that the n= field shows a value of 1.
3. Click on the
button above the list to copy the Cu entry from the list to the
Formula box (the button is green, indicating that it’s enabled; red buttons are
disabled.)
4. Enter the value “90" in the left-hand Mass Percentage field.
5. Click on the “Add As Component” button ( ) directly above that field.
The result will be a display like the one in Figure 167. The New Substance Composition indicates that we just entered a component that will make up 90% of the mass of
our new material, and that component consists of pure (100%) copper. Note the line
directly above this field, which tells us we still have 10% of the material’s composition left to be defined.
224
The Materials Library Editor
Figure 167 The Copper Component Has Been Added
The same basic procedure is then used for entering the tin component, using Sn for the
Element and 10% for the Mass Percentage. After doing that, the window will look like
the one in Figure 168. With 100% of the material defined, the Arrow Buttons we have
been using have turned red.
Figure 168 The Tin Component Has Been Added
225
Using the Geometry Composer
Saving the Definition
There are two or three more data entries to make before the definition is complete (see
Figure 169):
• Density of the material in g/cm3.
• The Name of the New Substance (8 characters, maximum).
• An optional Comment (32 characters, maximum).
Once you’ve done this, the new material can be added to the Material Library by
simply clicking on the Load into Library button ( ). A message will be displayed to
let you know the entry was successful. Click on OK to acknowledge it, and “bronze”
will be found in its correct alphabetical position in the Material List.
CAUTION
Load the definition into the Library before exiting the editor
or the definition will be lost.
Figure 169 The Completed Definition
Correcting Data Entry Errors
In the Material Editor’s window you’ll notice two Clear buttons, one at the top of the
Chemical Formula Composer and one in the New Substance Composition. These allow you to delete the current contents of these fields and enter new values.
226
The Materials Library Editor
Basing a New Material on an Existing Definition
To illustrate how this is done we will take the definition of a material called “dirt1",
add some water to it, and save it as ”mud1". Assuming a three parts “dirt1" to one part
water, the process is as follows:
1. Click on “dirt1" in the Material Library.
2. Enter 75 into the right-hand Mass Percentage field.
3. Click on the green “Add as Component” button (
) directly above that field.
The result can be seen in the New Substance Composition window of Figure 170,
which indicates that 75% of our new material is composed of the elements which
make up “dirt1".
Figure 170 Dirt1 Has been Added
Next we have to add some water, using the Chemical Formula Composer on the left
side of the window:
1. Click on the element H.
2. Enter 2 in the n= field, indicating 2 atoms of hydrogen.
227
Using the Geometry Composer
3. Click on the green button above the list to copy the H element from the
list to the Formula box.
4. Click on the element O.
5. Insure that n= shows a value of 1, indicating 1 atom of Oxygen.
6. Click on the green
button to complete the formula for water (H2O will be
seen in the Formula text box).
7. Type 25 into the left Mass Percentage field, then click on the Add As
Component button ( ) directly above it, to add the water to the dirt.
To complete the definition of “mud”, enter the density, name, and comments as we did
for “bronze” (on page 226). Now click on the Load into Library button ( ) to add
“mud” to the Material Library.
Alternatively, you could have simply used the “Water” already defined in the materials library for the remaining 25%.
Combining Existing Materials to Make a New One
Since “water” and “dirt1" are already in the Material Library, we could have made our
”mud1" by simply combining them. This is done by:
1. Selecting “dirt1", entering 75 as its Mass Percentage and clicking on the
right-hand Add as Component button.
2. Repeat that process for “water”, using 25 as its Mass Percentage.
3. Enter the new name, density, and comments, click on Load into Library,
and the definition is complete.
Any of these three techniques make it very easy to define a custom Material Library
tailored to the specific needs of your laboratory.
Deleting a Material Library Entry
To delete an entry from the library, select it in the list, then click on the Delete Substance button. If the entry is part of another definition, the deletion will not be allowed. For example, “dirt1" cannot be deleted as long as the just created ”mud1" still
exists.
228
View Menu
View Menu
The View menu’s commands are used to customize the display. For instance, turning
off the Toolbar and the Status Bar will make the display area larger and the Split command lets you display up to four geometries at a time.
Toolbar
When checked, the toolbar is displayed just below the Geometry Composer’s menu
bar.
Status Bar
When checked, the status bar is displayed below the bottom scroll bar in the Geometry
Composer.
Split
When checked, the Split display function is enabled as shown in Figure 171. You can
change the split at any time by dragging the gray lines to create two or four “panes” of
any size.
Figure 171 The Initial Split Window
To return to a single-pane display from a four-pane display, drag the gray lines to a
corner of the display. From a two-pane display, drag the single gray line to the side of
the display.
229
Using the Geometry Composer
Option Menu
The Options menu contains commands that are used to establish the default operating
preferences and parameters used by the Geometry Composer.
Note: The Geometry Composer’s default configuration parameters are suitable for
most uses and do not normally need to be altered.
Configuration
Select Options | Configuration to display the dialog box in Figure 172. The current
Version Numbers and Dates of the program’s software modules are displayed. These
will be helpful to Canberra’s service personnel for troubleshooting purposes. Click on
the Update Configuration button to ensure that the most current information is being
displayed.
Figure 172 The Geometry Configuration Tab
The Current LabSOCS/ISOCS Path tab displays the complete path to all of the data
files used by the software (Figure 173).
If you use a different file structure, you can change the data by double-clicking on a
path description, then selecting a new path via the dialog box that is displayed.
230
Option Menu
Figure 173 The Current ISOCS Path Tab
CAUTION
An incorrectly set path can cause the system to stop
functioning.
Default Parameters for New Geometries
Select Options | Default Parameters to establish default values for some of the parameters used when creating a new geometry. This command is not available if a geometry definition is open in the Composer.
Preferences
The Preferences tab (Figure 174) is used to establish the defaults used for the sample,
container, and environmental measurement units. Note that the choices made here are
simply setting the defaults that will be displayed when a new geometry definition is
created. The defaults may be changed as needed when a geometry is defined.
231
Using the Geometry Composer
Figure 174 Setting the Default
Parameters
Efficiency Integration Process Tab
The Efficiency Integration Process tab (Figure 175) is used to set default parameters
for the efficiency calculation. The Use MDRPN box should be checked for accurate
computations when the sample or absorber is close to the detector.
Figure 175 The Integration Defaults
232
Option Menu
The CRPN parameter shown below this check box is relevant only for collimator calibrations within ISOCS; for LabSOCS the CRPN setup can be ignored.
For further information on these parameters refer to “Changing the Integration Settings” on page 220 and to the LabSOCS/ISOCS Technical Notes chapter in the Genie
2000 Customization Tools Manual. The default values may be re-established by clicking on the Restore Recommended Values button.
Energy List
The Energy List tab (Figure 176) is used to establish the default energies and uncertainties that will be used for calibrating a new geometry definition.
Figure 176 The Energy List Tab
Delete an Energy:
Select the energy line to be deleted, then click on the Remove button.
Add an Energy:
Type the new energy value into the Energy, keV field and
its associated uncertainty into the Error, % field, then
click on the Add button. The new line will be inserted into
the list.
Refer to the ISOCS Validation Documentation for guidance as to the estimated
accuracy of the ISOCS/LabSOCS calibration methodology, or use values determined
locally. Enter the estimated 1 sd value in %.
233
Using the Geometry Composer
Deleting a Geometry Definition
To delete a definition that is no longer needed:
1. Select Open from the File menu.
2. Locate the definition to be deleted.
3. Right click on the name of the definition, and select Delete from the list of
commands that is displayed.
4. Click on Yes in the confirmation dialog that is displayed.
5. Click on Cancel to close the Open command dialog box.
234
Enabling Datasource Preview
9. DataSource Preview
DataSource Preview lets you preview Genie 2000 spectrum (CNF) files using Windows Explorer without having to open the file in an MCA view. Preview uses a directory configurable Javascript® in conjunction with Genie 2000 components.
• You can configure any directory to use this function.
• When the function is enabled, you can only preview the datasource. The preview can be disabled, allowing you to move or copy files.
• When a datasource is opened for preview, you cannot open it in an MCA
view.
• This function is not supported under Windows NT.
Requirements
The Datasource Preview function requires that three conditions be met:
• Your operating system must be Windows 2000 SP2 or later, or Windows XP
SP1 or later.
• After installing Genie 2000, you must reboot for Datasource Preview to work.
• Screen Resolution must be 1024 by 768 pixels, minimum.
Enabling Datasource Preview
If the following settings are not enabled after you’ve installed Genie 2000 and
rebooted, they must be configured manually.
The Active Desktop
First, you’ll have to enable the Active Desktop feature of Windows Explorer.
Windows 2000
In Windows 2000, select Tools | Folder Options | Web View | Enable Web content in
folders.
Windows XP
In Windows XP, select Tools | Folder Options | Tasks | Show common tasks in folders.
235
DataSource Preview
Customizing the Datasource Folder
Next, you’ll have to customize the folder where the datasource files are stored. If you
performed a Standard Genie 2000 Installation, the files are in
C:\GENIE2K\CAMFILES.
Windows 2000
For Windows 2000:
• Find and select the directory containing the datasource files.
• Click View | Customize This Folder. This opens the Customize This Folder
Wizard.
• Click Next.
• In the next dialog box, select Customize | “Choose or Edit an HTML template
for this folder”, then click Next.
• In the next dialog box, select Current, then click Next.
• At this point, the Folder.htt file will be launched in Notepad.
CAUTION: DO NOT edit this file.
• Close Notepad, then click Finish in the Wizard.
Windows XP
For Windows XP:
• Find and select the directory containing the datasource files.
• Click View | Customize This Folder.
• In the dropdown box, choose Use existing customization template.
• If you want to apply this template to all the subfolders check the “Also apply
this template to all subfolders” checkbox.
• Click OK.
The first time the datasource folder is opened in Windows XP, you’ll see the message
that “The file or folder you are opening contains Web content that may be unsafe…”
Click the message’s Yes button to allow the datasource preview to run.
If datasource preview does not work under Windows XP after you’ve installed Genie
2000 and rebooted, check the following:
• Click View | Customize This Folder.
236
Working With the Preview
• In the dropdown box make sure “Use existing customization template” is selected. If it isn’t, select it, then click OK.
Using a Different Directory
Any directory can use this feature. To enable another directory, do the following.
• Using the Control Panel Folder options, enable the showing of hidden and system files.
• Navigate to the datasource directory (\GENIE2K\CAMFILES) and copy the
Desktop.ini file and the “Folder Settings” folder to the target directory, the one
you want to enable for datasource previewing.
• Open a Command Window and navigate to the target directory.
• The target directory’s system attribute must be set to ‘true’. At the command
prompt, type:
attrib +s directoryname.
Where ‘directoryname’ is the name of the target directory. Be sure to include
the ‘.’ following the directoryname.
• Perform the configuration steps listed above for your operating system.
Working With the Preview
When the datasource directory is opened, datasource preview is enabled by default.
Select a datasource, such as Nbsstd.cnf, to display it (Figure 177).
Note: The preview function needs enough space to display the datasource’s spectrum. If the the Explorer is not maximized, you may not see the spectrum;
stretch the Explorer horizontally until the spectrum is displayed.
237
DataSource Preview
Figure 177 Previewing Nbsstd.cnf
Copying a File In the Preview Mode
Unchecking the Enable DataSource Preview checkbox will allow you to safely copy
the currently selected file.
CAUTION
Attempting to copy a file with Enable DataSource Preview
checked can cause unexpected results.
Scale
Click the Linear Scale checkbox to toggle the preview’s vertical full scale between
linear and log.
Cursor / Counts
You can use the standard Genie 2000 controls to move the cursor and the region markers through the spectrum. The Cursor and Counts fields above the spectrum will be updated to reflect the cursor’s current position.
238
A. Software Installation
Because of the flexibility of the Genie 2000 system, there are many aspects to system
installation and setup. The applicability of these various aspects is a function of the individual installation, its desired capability, its hardware, and so forth.
This chapter serves as a guide to the installation process, directing you to the related
information in this manual as required.
Factory Assembled Systems
For complete systems provided by Canberra, the hardware and software have been installed and tested at the factory. After setting up the system, go to Chapter 2, MCA Input Definition. Preliminary configuration of inputs will have been done at the factory
for testing, but you will probably want to change some of the initial definition (for example, the detector names) for your own operation.
Doing it Yourself
If you are putting the system together yourself, Canberra recommends that you follow
the sequence presented here.
Basic System Requirements
Successful installation and operation of Genie 2000 software requires at a minimum:
Computer:
Industry standard computer with a Pentium ®-233 processor
and CD-ROM drive is required.
Operating Systems:
Windows NT® V4.0, Windows 2000 or Windows XP.
RAM:
A minimum of 64 MB (Windows NT/2000) or 128 MB
(Windows XP) is recommended, but in the Genie 2000 environment more memory will generally improve performance.
Hard Disk:
100 MB free disk space for Genie 2000 software and sample data file storage.1
Display:
VGA color, 800 x 600 resolution, minimum; 1024 x 768
recommended.
1. Due to extensible nature of the CAM file system, you can expect data files, including all parameters, analysis results,
library information and calibrations, to average 80-100 KB each.
239
Software Installation
Security Key:
The security key supplied with the Genie 2000 software
must be connected to a parallel port.2
1. Referring to Installing Windows” on page 240, install the appropriate
Windows operating system.
2. Install MCA hardware and any network hardware. Refer to the manual for
your for installation instructions. For the System 100 and AccuSpec MCAs,
refer to the Hardware Installation” chapter of the Historical Canberra
MCAs.pdf file on your Genie 2000 CD-ROM.
3. Referring to “Installing Genie 2000” on page 241, install the Basic
Spectroscopy Software.
4. Referring to Installing TCP/IP Components” on page 244, install the
required TCP/IP network software components.
5. To install any Genie 2000 software options, refer to “Installing Optional
Software” on page 243.
6. Additional information on customizing Windows for running Genie 2000,
which is not required by most users, can be found in Appendix B, Genie
2000 Configuration.
7. To set up your MCA Input Definitions, use the MID Wizard or MID Editor,
both described in Chapter 2, MCA Input Definition.
Installing Windows
Windows must be installed on the hard drive; refer to the appropriate Windows manuals for complete instructions. Please follow these guidelines when installing Windows
on your system.
1. You’ll need approximately 550 MB (Windows NT/2000) or 1.5 GB
(Windows XP) of free space on your hard disk for the complete Windows
installation.
2. Remove all Canberra PC-board acquisition devices prior to the installation of
Windows NT/2000/XP. Windows NT/2000/XP supports Plug-n-Play, which
will automatically detect hardware during installation and attempt to install
the proper support. Canberra’s PC-board acquisition devices do not support
2. This parallel port can still be used for most peripherals, but not for control of the Model 8224 Multiplexer.
240
Installing Genie Software
Plug-n-Play and may cause detection problems if plugged in during
Windows installation.
Installing Genie Software
This section describes installing the Genie 2000 Basic Spectroscopy and optional software from the distribution CD. Please note that this installation requires 50 to 90 MB
of free space on your hard disk, depending on options selected. Note also that Administrator privilege is required under Windows NT/2000/XP to perform the installation
since edits to the registry are made.
Notes: Canberra recommends that Genie-2000 software be operated using the local
system administrator account. If however, you opt to run Genie-2000 from a
non-privileged account, you must manually change the permission and security setting in the Genie2K directory tree and their files. Not doing so will
produce unreliable results.
It is also recommended that the Windows XP “Switch Users” function be
disabled to prevent simultaneous access to common Genie-2000 files. The
System Administrators Control Panel can be used to disable this feature. Refer to the Windows XP online help for additional information on how to disable this feature.
Update Procedure
Before performing a software installation or upgrade, it’s highly recommended that
you make a complete backup of all of your Genie 2000 directories. If this is not practical, you should at least copy any *.ASF, *.TPL or *.NLB files that you modified (but
that still use the default file names) to a disk or to a temporary directory to be sure that
the software installation procedure does not overwrite them with default files. After
the installation is complete, these files can be restored to their original directories.
Release Notes
During installation of each software option, a Release Notes file containing information on the current version of the software, is copied to the GENIE2K directory on
your hard disk. It is worthwhile to read this text (ASCII) file, which has a general file
name of G2K*.TXT, directly from the installation CD before installing the software, to
see if there is any variation in the installation procedure.
To install the Genie 2000 software:
1. If you are installing this software as an upgrade from a previous version,
make sure that no Genie 2000 software programs, such as the VDM, are
running.
2. Insert the CD into the CD-ROM drive.
241
Software Installation
3. Click Start | Run and type ?:\setup, where ? is your CD drive, then click
OK.
4. The setup screen (Figure 178) offers several Genie 2000 options. In addition
to installing the software, you can read the Release Notes, install Acrobat ®
Reader® and review the Genie 2000 Tutorials Manual, the Genie 2000
Operations Manual, and the Genie 2000 Customization Tools Manual.
Figure 178 The Genie 2000 Installation Screen
Installing Genie 2000
Note: Windows Scripting Host, one of the components being installed with Genie,
may ask you to reboot when its installation is complete. If this happens, select No. You should allow the Genie 2000 installation to finish before you
reboot.
1. To install the software, select the Install Genie-2000 button and follow the
instructions presented on the screen.
2. You will be asked if you want to install Genie 2000 documentation directly
on your hard drive. Installing the documents requires about 21 MB of disk
space.
242
Installing Genie Software
3. Next, setup will ask if you would like to Install Acrobat Reader. You can
also install the Reader by clicking its button on the setup screen.
4. Next, you will be asked to choose between Standard Installation and Custom
Installation, as described in the following two sections.
Standard Installation
This is the choice that most people will use. The Genie 2000 application is installed
with predefined defaults – no further user selections are required.
Select the Standard button, then click Next. The application will now be installed.
When the installation is complete, some final instructions will be displayed.
Custom Installation
The components that comprise the Genie 2000 application are installed in sub-directories in the installation directory specified earlier in the procedure. If these default
sub-directories are not acceptable for a particular installation you can change the location (directory) where these components are installed.
In addition, Setup allows you to modify the values of the following environment settings: SAD_TIMEOUT, DS_LOGON, PSET_DELAY, ADVISE_HOLD and
HDW_STATUS. See Appendix B, Genie 2000 Configuration, for a description of
these settings.
1. Select the Custom button, then click Next or press the ENTER key.
2. A dialog box will appear. Select the components whose directories you want
to change. When you have made all your selections click Next or press the
ENTER key.
3. For each component selected, a dialog box will prompt you to enter the drive
and directory in which to install the component. Change the drive/directory
as necessary and click Next or press ENTER. After all selected components
are complete the application will be installed.
4. After installing the application, Setup will display each of the above
mentioned environment settings. You may keep the default settings or
modify the settings. Setup will run through the final installation steps.
5. When the installation is complete, some final instructions will be displayed.
Installing Optional Software
To install another Genie 2000 program, put the first, or only, installation disk in its
drive, then:
243
Software Installation
1. Click Start | Run and type ?:\setup, where ? is your CD drive, then click
OK.
2. Follow the instructions presented on the screen.
3. If the instructions on the screen tell you to reboot your system and you are
installing several options, you can install all of them before rebooting.
Completing the Installation
After installing all the software:
• Install and configure the TCP/IP network components (page 244).
• Install the AIM system drivers, if required (page 259).
• For Models S500 and S502, you must install the security key (page 262).
• You might want to have a shortcut to the Genie 2000 folder on your desktop
(page 262).
Installing TCP/IP Network Components
The TCP/IP network protocol is a standard component of the Windows operating system environments. The Genie 2000 software is a client/server architecture; communications between the client and server components is through Windows sockets using
the TCP/IP protocol.
Note: Genie-2000 assumes that a network interface is installed in the local PC. If
you do not have a network interface in a Windows 2000 or Windows XP
PC, refer to the precedures in “Non-Network VDM Configuration” on page
253.
Windows NT/2000/XP TCP/IP Setup
The following steps should be performed to ensure proper setup of TCP/IP for use by
Genie 2000 under Windows NT/2000/XP. If remote VDM access is required, either by
this computer or by another remote computer to this computer’s VDM, some additional steps may be required; these are described in “Additional Setup Steps for Remote VDM Access” on page 248.
1. To determine if TCP/IP is already installed on your computer, right click on
the Network Neighborhood icon, select Properties, then select the
Configuration tab.
244
Installing TCP/IP Network Components
If you see TCP/IP in the Configuration list (Figure 179), it is installed and no
further action is required. Click on Cancel to exit the Network window
without making any changes.
Figure 179 Network Protocol Screen
2. Only two network components require installation for Genie 2000. First, a
network adapter must be added. If your computer does not contain a network
adapter card, then an MS Loopback Adapter must be added. Click on the
Adapters notebook tab (this brings up the Network Adapters selection page);
click on the Add button to bring up the dialog in Figure 180.
245
Software Installation
Figure 180 Select Network Adapter
Select the appropriate vendor and network adapter card to match the one in
your machine. If none is present, then select the MS Loopback Adapter entry
in the Network Adapters list. Choose OK to add the selected adapter. You
will be prompted for your Windows NT/2000/XP installation disks
(CD-ROM) in order to copy the required files for the selected network
adapter (note that on some pre-loaded systems, the Windows NT/2000/XP
distribution is installed on the hard disk partition containing Windows
NT/2000/XP).
3. It is now time to add the TCP/IP protocol. Select the Protocols notebook tab
on the Network Settings screen and press the Add button to bring up the
Select Network Component Protocol dialog (Figure 181).
Figure 181 Select Network Protocol
246
Installing TCP/IP Network Components
Highlight the TCP/IP Protocol from the Network Protocol list and press OK
to add. You will be prompted for your Windows NT/2000/XP installation
disks (CD-ROM) in order to copy the required files for the selected network
adapter (note that on some pre-loaded systems, the Windows NT/2000/XP
distribution is installed on the hard disk partition containing Windows
NT/2000/XP).
4.
If remote VDM access is required, then proceed to ”Additional Setup Steps
for Remote VDM Access” on page 248.
5.
Press the Close pushbutton to exit the Network setting dialog. At this time
you will be prompted (via a dialog shown in Figure 182) for setup of TCP/IP
properties.
On this dialog, an IP address and subnet mask must be specified. Since the
loopback adapter has been selected (i.e. restricting TCP/IP communications
to local only), then any legal IP address and subnet mask may be specified
(e.g. 200.200.200.1 for IP address and a subnet mask of 255.255.255.0).
Note that with this type of setup, Genie 2000 will use the standard loopback
IP address, 127.0.0.1, and not the one specified in this dialog. Press OK to
complete the setup.
Figure 182 Microsoft TCP/IP
Properties
247
Software Installation
6. When all required files have been copied and the installation is complete,
you will be reminded to reboot your system to complete the installation
process and will be given the option of restarting your computer
immediately.
Additional Steps for Remote VDM Access
If access to this computers VDM is required from another remote computer, then this
computer must identify itself via a unique computer name. If, after setting up your remote VDM access, you have persistent problems in establishing client connections to
the VDM, refer to “Additional TCP/IP Installation Tips” on page 251.
To set up remote VDM access, perform the following steps:
1. The name of this computer must be defined via the Network Settings applet.
To do this, click on the Identification notebook tab which brings up a dialog
box.
Click the Change button to enter a unique computer name (maximum of 8
characters allowed by Genie 2000; no spaces allowed). This dialog (Figure
183) requires entry of a workgroup; this is not used by the Genie 2000
software so the value of this field is at the discretion of the user (this field is
typically used in larger networks to help partition them and its users into
logical domains).
Figure 183 Computer Name
Identification
248
Installing TCP/IP Network Components
2. Click the Close button to exit the Network setting dialog. You’ll be
prompted (via the dialog in Figure 184) to set up the TCP/IP properties.
Figure 184 TCP/IP Properties Screen
An IP address must be defined for this computer so it can be associated with
the previously entered computer name (this is how computers and
applications communicate with each other using TCP/IP; the computer name
is translated into an IP address). Either select the “Specify an IP address”
radio button and enter in a valid IP address and subnet mask (e.g. IP address
of 200.200.200.1 and a subnet mask of 255.255.255.0) or select the “Obtain
an IP address automatically” radio button if this computer resides on a
network which uses TCP/IP and employs dynamic IP addressing.
It is recommended that you contact your network administrator for guidance
in setting up this portion of TCP/IP since IP addresses must be unique on a
network. Select OK when setup of TCP/IP properties is complete.
3. When all required files have been copied and the installation is complete,
you will be reminded to reboot your system to complete the installation
process and will be given the option of restarting your computer
immediately. Select No to the restart computer question since some
additional setup steps are still required.
249
Software Installation
4. The Genie 2000 Network Configuration File (as pointed to by the
environment variable CINETCFG; typically named G2K_VDM.NCF) must
be edited as follows:
Edit the first line of this file to remove the text LOCAL as shown below (this
indicates that the computer name/IP address information is defined via the
network settings information and not defaulted to Local / 127.0.0.1):
Original:
1 -\local
1B-\pipe\datasrce
1C-\pipe\configur
Edited:
1 -\
1B-\pipe\datasrce
1C-\pipe\configur
If access to another computers VDM is required from this computer, perform the
following steps:
1.
The Genie 2000 Network Configuration File (as pointed to by the
environment variable CINETCFG) must be edited as follows:
Edit additional lines (after the first three lines) into the file as follows (this
example assumes a remote computer name of NODE1):
Original:
1 -\local
1B-\pipe\datasrce
1C-\pipe\configur
Edited:
1 -\
1B-\pipe\datasrce
1C-\pipe\configur
1M-\\node1\pipe\datasrce
1C-\\node1\pipe\configur
Add additional lines as required to define subsequent remote computers.
250
Installing TCP/IP Network Components
2.
Assuming your network does not use DNS, WINS or dynamic IP addressing,
then one additional Windows NT/2000/XP TCP/IP file requires editing in
order for this computer to resolve the remote computer name to an IP
address. This file is named HOSTS. and must be located in the
WINNT\SYSTEM32\DRIVERS\ETC directory. A sample file named
HOSTS. is installed (located in the aforementioned directory) and can be
used as the template for creating this file. Computer name, IP address entries
must be made to this file so the remote computer running the VDM can be
accessed by this computer. An example file is shown below with edits for the
remote computer name NODE1.
#
#
#
#
#
#
#
#
#
#
#
#
#
#
#
#
#
#
#
#
#
#
#
#
#
Copyright (c) 1993-1995 Microsoft
Corp.
This is a sample HOSTS file used by
Microsoft TCP/IP for Windows/NT
This file contains the mappings of
IP addresses to host names. Each
entry should be kept on an individual
line. The IP address should
be placed in first column followed
by the corresponding host name.
The IP address and the host name
should be separated by at least one
space.
Additionally, comments (such as
these) may be inserted on individual
lines or following the machine name
denoted by a ‘#’ symbol.
For example:
102.54.94.97
38.25.63.10
127.0.0.1
200.200.200.5
rhino.acme.com
x.acme.com
localhost
node1
# source server
# x client host
# Node 1 IP address
Additional TCP/IP Installation Tips
Genie 2000 uses (by default) the port numbers 1200, 1300, and 2000 when creating
socket connections for client/server communications. These are in the range of “user
defined” services as specified by the TCP/IP standard. It is possible that these may be
defined by another application on your computer which will cause conflicts with
Genie 2000. If problems persist in establishing client connections to the VDM, this
may be a possible cause of the problems. To verify, examine the file
WINDOWS\SERVICES (Windows 98/Me) or
WINNT\SYSTEM32\DRIVERS\ETC\SERVICES (Windows NT/2000/XP). as shown
below.
251
Software Installation
#
#
#
#
#
#
#
#
#
#
Copyright (c) 1993-1995 Microsoft Corp.
This file contains port numbers for
well-known services as defined by
RFC 1060 (Assigned Numbers).
Format:
<service name> <port number>/
<protocol> [aliases...] [#comment>]
echo
7/tcp
echo
7/udp
discard
9/tcp
sink null
discard
9/udp
sink null
systat
11/tcp
systat
11/tcp
daytime
13/tcp
daytime
13/udp
netstat
15/tcp
users
.
.
.
kpop
1109/tcp
phone
1167/udp
ingreslock
1524/tcp
maze
1666/udp
nfs
2049/udp
.
.
.
# Pop with Kerberos
# sun nfs.
Check to see if any one of the default Genie 2000 port numbers are defined. If so, then
edits must be made to this file as follows:
Datasrce
Advise
Configur
tion
nnnn/tcp
nnnn/tcp
nnnn/tcp
# VDM datasource connection
# VDM advise connection
# VDM configuration connec-
where nnnn is an undefined port number.
If a Dialup Adapter is used for binding the TCP/IP protocol stack, it is possible that
your Windows system is set up to “Connect to the Internet as needed”. This feature
252
Non-Network VDM Configuration
will instruct the system to prompt you for an Internet connection whenever a Genie
2000 client application connects to the VDM.
To disable this behavior, bring up the Internet settings applet from within the Control
Panel. Use the Connections notebook tab (as shown in Figure 185) and uncheck the
checkbox labeled “Connect to the Internet as needed”; click on OK to save this settings change.
Figure 185 Connect to Internet
Non-Network VDM Configuration
This section provides procedures for VDM configurationof an non-network Windows
2000 or Windows XP system.
Windows 2000 Setup
This procedure supercedes the TCP/IP configuration procedure for Windows 2000 installations that do not contain a network adapter.
Communication to the Virtual Data Manager (VDM) is performed using the TCP/IP
network protocol stack. With Windows 2000 installations, the configuration of this
protocol differs somewhat from the Windows-NT installations when network adapter
253
Software Installation
is not resident in the computer. Follow the steps outlined below to configure the
TCP/IP protocol stack.
1. Connect the Genie hardware key to the local parallel port.
2.
Log in to a local Administrator account.
3. Click Start | Setting. Click on the Network and Dialup Connections.
4. Double click on “Make New Connection”. This will launch the Network
Connection Wizard. Click on Next to continue
5. Select Connect to a Private Network through the Internet as shown in Figure
186. Click on Next.
Figure 186 Selecting the Network Connection
Type
254
Non-Network VDM Configuration
6. Select Do Not Dial the Initial Connection as shown in Figure 187. Click Next.
Figure 187 Connecting to the Public Network
7. Enter a Host IP of 100.0.0.1 as shown in Figure 188. Click on Next.
8. Select “All Users”.
9. When prompted to Connect, select Cancel.
Figure 188 Entering the IP Address
255
Software Installation
Windows XP Setup
This procedure supercedes the TCP/IP configuration procedure for Windows XP installations that do not contain a network adapter.
Communication to the Virtual Data Manager (VDM) is performed using the TCP/IP
network protocol stack. With Windows-2000 installations, the configuration of this
protocol differs somewhat from the Windows-NT installations when network adapter
is not resident in the computer. Follow the steps outlined below to configure the
TCP/IP protocol stack.
1. Connect the Genie hardware key to the local parallel port.
2. Log in to a local Administrator account.
3. Click on Start | Settings then Network and right click on “Network”.
4. This will launch the New Network Connection Wizard. Click Next to
continue.
5. Select “Setup and Advanced Network Connection” as shown in Figure 189.
Click on Next.
Figure 189 Selecting the Network Connection
Type
256
Non-Network VDM Configuration
6. Do not configure any connection devices if this is a stand-alone system. See
Figure 190. Click on Next.
Figure 190 Selecting Devices for Incoming
Connection
7. Select “Allow Virtual Private Connections” as shown in Figure 191. Click on
Next.
Figure 191 Selecting the VPN Connection
257
Software Installation
8. Select all users you wish to have access rights to the network. At a minimum,
the Local Administrator must have network rights assigned. Click on Next.
9. Add the network protocols to the network. TCP/IP must be added at this time
if not already in the protocol list. See Figure 192. Click on Next.
Figure 192 Selecting the Network Software
10. Configure a range of IP addresses allowed to access the system. A minimum
range must be assigned as shown in Figure 193. Click OK.
258
Installing AIM Device Drivers
Figure 193 Adding the Network Protocol
11. Click Next and restart your system. When the system is restarted, verify the
VDM starts correctly by simply opening a hardware or software datasource.
Installing AIM Device Drivers
In order to communicate with an AIM acquisition device under Genie 2000, a special
protocol stack must be installed.
• The Windows NT AIM setup is described on page 260
• The Windows 2000/XP AIM setup is described on page 260.
For CD-ROM distributions, the following table shows the CD-ROM location of the
AIM drivers for each operating system.
Operating
System
Windows NT
Directory
NT
Windows 2000
2000_XP
Windows XP
2000_XP
259
Software Installation
Windows NT Setup
The following steps should be followed to ensure proper setup of the AIM protocol
stack under Windows NT:
1. Launch the Network applet (via the Control Panel).
2. Click on the Protocols notebook tab and then press the Add pushbutton.
3. Click on the Have Disk pushbutton.
4. Make sure the CD is still loaded in the CD-ROM drive. Select the directory
(?:\Bin\G2KVx.x\NT) having the required Windows NT AIM driver, where ?
is your CD-ROM drive and x.x is the version of Genie being installed.
4. Click OK.
5. A dialog box will appear having the following entry: Canberra 802.3 SNAP
Protocol driver V1.0; click OK to accept this protocol.
6. Make sure that the Canberra 802.3 SNAP Protocol is bound to the correct
Ethernet adapter (this is not an issue if you have only one Ethernet adapter in
your computer). If multiple adapters are present, the adapter binding can be
determined from the Bindings dialog. The name of the protocol can be
clicked on which brings up a list of adapters it is bound to. Highlight the
adapter(s) which do not require the Canberra 802.3 protocol driver and click
on Disable. Click on Close to save these new bindings.
7. Exit the Network settings dialog by clicking on OK (follow the prompts for
your Windows distribution and reboot your system.)
Windows 2000/XP Setup
The following steps should be followed to ensure proper setup of the AIM protocol
stack under Windows 2000/XP:
1. Launch the Network and Dial-up Connections applet for Windows 2000 or
the Network Connections applet for Windows XP (via the Control Panel).
2. Right click on the Local Area Connection icon and click Properties.
3. Click the Install pushbutton on the Local Area Connection Properties
window.
4. Highlight Protocol and then click the Add pushbutton.
260
Installing AIM Device Drivers
5. Click on the Have Disk pushbutton.
6. Make sure the CD is still loaded in the CD-ROM drive. Click the Browse
pushbutton to select the directory (?:\Bin\G2KVx.x\2000_XP) having the
required Windows 2000/XP AIM drivers, where ? is your CD-ROM drive
and x.x is the version of Genie being installed.
7. Click OK.
8. A dialog box will appear having the following entry: Canberra NDIS 5.0
SNAP Protocol driver; click OK to accept this protocol.
9.
Make sure that the Canberra NDIS 5.0 SNAP Protocol is bound to the
correct Ethernet adapter (this is not an issue if you have only one Ethernet
adapter in your computer). If multiple adapters are present, the adapter
binding can be determined from the Bindings dialog. The name of the
protocol can be clicked on which brings up a list of adapters it is bound to.
Highlight the adapter(s) which do not require the Canberra NDIS 5.0 SNAP
Protocol driver and click on Disable. Click on Close to save these new
bindings.
10. Exit the Local Area Connection Properties dialog by clicking Close (follow
the prompts for your Windows distribution and reboot your system).
Installing the USB Driver
In order to communicate with Canberra’s USB enabled devices (MCAs), a special
driver must be installed. Follow these steps to install the USB driver.
1. Plug the MCA into the USB.
2. Windows will prompt you for the USB driver diskette.
3. Insert the Genie 2000 CD into the CD ROM drive.
4. Specify the CIUsb directory on the CD ROM.
5. Click OK. It is not necessary to reboot when installation is complete.
Installation of the PCI MCA Driver
Windows 2000 and XP are “Plug and Play” operating systems. Therefore, after a PCI
MCA (i.e. ASA-100) is installed in the system and the system is restarted, the operat-
261
Software Installation
ing system will automatically detect the presence of the MCA and prompt the user to
navigate to a directory that contains the Canberra PCI driver.
The directory will be found on your distribution media in an operating system-specific
directory ?:\Bin\G2KVx.x\CIPCI\PIx\WNT_2000, where ? is your CD-ROM drive
and x.x is the version of Genie being installed.
Note however, that Windows XP uses the same driver as the Window NT and 2000
operating system. During the installation of the PCI driver on a Window-XP system,
the operating system will inform the user that the Canberra MCA is not a certified
Window device. Select Continue to complete the installation of the PCI driver.
Windows-NT does not require any additional operation. The PCI driver will be installed during installation of Genie-2000 regardless whether the PCI device is present
or not.
Installing the Security Key
Install the security key in a parallel port. The Models S500 and S502 Genie 2000 software will not operate without this key.
Creating a Shortcut on Your Desktop
After software installation, you can use this method to create a shortcut to any
Genie 2000 program on Windows 2000 or Windows XP. 3
1. Click on Start Menu.
2. Click on Programs.
3. Click on Genie-2000.
4. Using the secondary (usually the right) mouse button, click on the desired
program, such as “Gamma Acquistion & Analysis”.
5. Using the primary (left) mouse button, click on Send To.
6. Click on Desktop (create shortcut).
3. Windows NT uses a different method; refer to Windows NT Help for details.
262
Starting the Virtual Data Manager
The newly created shortcut will appear on your Windows desktop. You can move this
shortcut icon anywhere on the desktop and, if you like, you can rename it.
Starting the Virtual Data Manager
All Genie 2000 programs require the Virtual Data Manager (VDM) program to be running before they can be started. If the VDM is not already running when an application
is launched, it will be started automatically. This may cause a brief delay when launching an application.
Uninstalling the Genie Software
Note: The Genie 2000 software components must be uninstalled in the order in
which they were installed to ensure that all modified Genie 2000 and system
files are returned to their proper state.
To uninstall all or part of the Genie 2000 software:
1. Click on Start Menu.
2. Select Settings.
3. Select Control Panel.
4. Select the Add/Remove Programs icon.
5. In the scroll-down list of programs in the Install/Uninstall pane, highlight the
Genie 2000 component(s) you want to uninstall.
6. Select the Add/Remove button to remove the highlighted items.
263
Genie 2000 Configuration
B. Genie 2000 Configuration
Though most users won’t need to customize their Genie 2000 setup, the information in
this chapter is useful for configuring Genie 2000 for specific situations.
Genie 2000 Environment Settings
Starting with V1.2, Genie 2000 stores all its environment settings in the registry (as
opposed to defining environment variables via SET statements in AUTOEXEC.BAT).
The registry key location of these settings will be:
HKEY_LOCAL_MACHINE\SOFTWARE\Canberra Industries,Inc.\
Genie 2000 Environment
The software installation scripts for Genie 2000 now perform just two modifications to
the AUTOEXEC.BAT file:
1.
Modifications as required to the PATH environment variable.
2.
On upgrades from V1.0/V1.1 systems, all Genie 2000 environment
definitions are removed.
A special batch file, GENIE2K.BAT, containing all environment variables will be created in the GENIE2K\EXEFILES directory during Genie 2000 software installation.
This file can be executed to recreate the full set of Genie 2000 environment variable
definitions, if necessary.
Note that Genie 2000 environment settings can be altered in one of two ways after installation:
1.
Using the Windows registry editor, REGEDIT, you can select and modify
the appropriate Genie 2000 setting.
2.
A registry setting can be overridden by defining the corresponding
environment variable in AUTOEXEC.BAT. For instance, if you would like
to override the default report format setting of WYSIWYG, you can add the
following line to AUTOEXEC.BAT:
SET RPTFORMAT=DRAFT
CAUTION
264
Use extreme caution if you elect to modify settings using
REGEDIT; any erroneous edits/deletions can result in problems when running your Windows environment.
Genie 2000 Environment Settings
The following is a list of the various environment settings that are defined in the
registry. Each of the setting descriptions is followed by its default value during
installation.
CINETCFG
Fully specified pathname of Network Configuration File.
SET CINETCFG=C:\GENIE2K\CTLFILES\G2K_VDM.NCF
CAMFILES
Pathname used for storing CAM (.CNF), Certificate
(.CTF), Workspace (.WSP) and Nuclide Library (.NLB)
files.
SET CAMFILES=C:\GENIE2K\CAMFILES
VDM$TEMPS
Pathname which the VDM will use to manage temporary
files.
SET VDM$TEMPS=C:\GENIE2K\VDMTEMP
EXEFILES
Pathname where all Genie 2000 .EXE and .DLL files are
stored.
SET EXEFILES=C:\GENIE2K\EXEFILES
GENIE2K
Pathname defining the root directory in which Genie 2000
was installed.
SET GENIE2K=C:\GENIE2K
MCA$DRIVERS
Pathname which the VDM will search for Programmable
Device Driver (.DRD) files.
SET MCA$DRIVERS=C:\GENIE2K\DRIVERS
ASEQFILES
Pathname which the Acquisition and Analysis applications
will search for Analysis Sequence (.ASF) files so that the
Analyze menu can be populated with a list of predefined
sequences; the Edit Current Sequence menu will also use
this when opening and saving analysis sequence files.
SET ASEQFILES=C:\GENIE2K\CTLFILES
MCA$DEFINES
Pathname used by the VDM for managing MCA Input Definition (.MID) files and MCA Configuration Files.
SET MCA$DEFINES=C:\GENIE2K\MIDFILES
265
Genie 2000 Configuration
RTPLFILES
Pathname which the Acquisition and Analysis applications
will search for Report Template (.TPL) files when displaying the setup dialog for the standard report module.
SET RTPLFILES=C:\GENIE2K\CTLFILES
REPFILES
Pathname used by the standard report module when creating report (.RPT) disk files.
SET REPFILES=C:\GENIE2K\REPFILES
GAMMAAEF
Fully specified pathname of the Analysis Module File used
by the Gamma Acquisition and Analysis window.
SET GAMMAAEF=C:\GENIE2K\CTLFILES\GAMMA32.AEF
OS2FCTSFILE
Fully specified pathname of the Genie 2000 Job Functions
File used by REXXFCTS job command to register functions with the REXX language environment.
SET OS2FCTSFILE=C:\GENIE2K\CTLFILES\REXXFC32.DAT
CAMDB
Fully specified pathname of the CAM schema file.
SET CAMDB=C:\GENIE2K\CTLFILES\CAMDB.DAT
CALFILES
Pathname which the Acquisition and Analysis windows use
to manage calibration files (for LOAD and STORE).
SET CALFILES=C:\GENIE2K\CALFILES
CIJOBHELP
Pathname which the various Genie 2000 job commands
will search for HELP files.
SET CIJOBHELP=C:\GENIE2K\JOBHELP
SAD_TIMEOUT
Timeout value (in tenths of a second) used internally by applications during its handling of communications with the
VDM. This value may need to be increased based on the
actual communications throughput of your system.
SET SAD_TIMEOUT=300
DS_LOGON
Timeout value (in tenths of a second) used internally by the
VDM during its handling of the create/logon process.
SET DS_LOGON=50
266
Genie 2000 Environment Settings
PSET_DELAY
Timeout value (in milliseconds) used by the VDM to control the cycle time of the preset checking thread.
SET PSET_DELAY=31
ADVISE_HOLD
Timeout value (in milliseconds) used by the VDM to control the cycle time of the advice-handling checking thread.
SET ADVISE_HOLD=31
HDW_STATUS
Timeout value (in milliseconds) used by the VDM to control the cycle time of the hardware status checking thread.
SET HDW_STATUS=5000
MVCPREFS
Fully specified pathname of the preferences file used by the
Acquisition and Analysis applications.
SET MVCPREFS=C:\GENIE2K\CTLFILES\MVCPREFS.INI
GENIE2K_VERSION
Version number of the currently installed Basic Spectroscopy Software. This environment variable must not be edited in any way since it is checked by the optional Genie
2000 software packages during their installation.
RPTFORMAT
This setting, which is not written to the registry during software installation, specifies how reports are to be sent to the
printer device. If your system needs this setting, you must
add it to the registry (or add the environment definition to
AUTOEXEC.BAT).
WYSIWYG (default value if setting is not defined) specifies that the report system is to send all data to the printer
device through the printer drivers.
DRAFT specifies that the report system is to send all data
to the printer device in “draft mode” (if supported by the
printer). This means that all Windows printer driver settings are overridden and that the local printer settings are
used.
SET RPTFORMAT=WYSIWYG
AIMPROTO_RETRIES This setting, which is not written to the registry during software installation, specifies the number of retries attempted
by the AIM driver when it encounters an Ethernet communications error. The default value for this setting, if not defined, is 3. This setting may need to be increased on
Ethernet networks that contain heavy traffic.
267
Genie 2000 Configuration
SPACE
This is a fully specified pathname, pointing to the location
of the ISOCS/LabSOCS SPACE.INI file.
SET SPACE=C:\GENIE2K\ISOCS\DATA
ISOCS_HOME
This is a fully specified pathname, pointing to the root
ISOCS directory.
SET ISOCS_HOME=C:\GENIE2K\
ASEQNUM
This is the name of the last file stored by an Analysis Sequence file save. Used only if the Automatic File Naming
feature has been turned on.
SET ASEQNUM=<value>
where <value>=00000001–99999999
File Formats
The Genie 2000 Report Template files, Analysis Engine files, Network Configuration
file and Workspace files can be configured to your own requirements with the information in this part of the manual.
Report Template Files
Report Template Files are ASCII files that govern the content and format of report
data as generated by the Acquisition and Analysis windows as well as the Report job
command (the location of these files is defined by the environment variable
RTPLFILES, which is described on page 266). Please refer to the Report Module and
Template Files chapter in the Genie 2000 Customization Tools Manual for details of
file content and syntax.
Analysis Engine Files
The Analysis Engine File (AEF) is an ASCII file (using ‘$’ as the delimiter) which
contains a table that defines analysis phases, a list of descriptions for the engines supported by a phase, and their operating-system dependent command line and resource
file name. There is only one AEF per client node (the file name is defined by the Genie 2000 environment variable GAMMAAEF); this file will be updated automatically
during installation of Genie 2000 analysis package options. This file can also be edited
to add user-defined sections (phases and engines). The format of an AEF is as follows:
PHASE (Max. 24 chars.)
The name of the analysis phase. This list of phases is used to construct the Manual
menu in the Gamma Analysis application. Note that multiple engines can be defined
for a given phase; the phase name only appears once in the menu.
268
File Formats
PHASE TYPE (Max. 3 chars.)
The analysis phase type is used by applications that need to determine what particular
engine to execute for a given phase of analysis (that is, efficiency calibration in batch
will automatically execute a peak locate and peak analysis engine during its operation). Types 1-499 are reserved for internal Canberra use.
DESCRIPTION (Max. 24 chars.)
The descriptive name of an analysis engine. This name is used by the Gamma Analysis
application when listing the various engines available for a given phase (i.e. the contents of the Algorithms list box within the Algorithm Selection dialog box).
ENGINE (Max. 16 chars.)
This field represents the generic (language independent) name of the engine for a particular phase. It is this field that is stored in the Analysis Control block CAM record
structure to define the analysis sequence.
TYPE (Max. 1 char.)
The engine types are:
• Type 1: Analysis Engine (subroutine) – uses predefined common CAM
parameters
• Type 2: Analysis Engine (subroutine) – uses both predefined common CAM
parameters and optional parameters from the ‘analysis sequence’ record structure within the Analysis Control Parameters block.
• Type 3: Report Engine (subroutine) – uses both predefined common CAM
parameters and optional parameters from the analysis sequence record
structure within the Analysis Control Parameters block.
LOCATION (Max. 64 chars.)
This is the engine location. The portion of the line preceding the ‘!’ is the name of the
system dependent DLL (Windows) that contains the engine. The name of the entry
point for the engine follows the ‘!’.
As mentioned above, there are different types of engines. They can make use of a step
number passed to them as follows:
• Type 1 entries in the AEF are restricted to using common CAM parameters
only (this implies that when these entries are used as part of an analysis
sequence, one common set of parameters are used for multiple invocations).
• Type 2/3 entries in the AEF have additional flexibility in that they determine
the source of required input parameters based on how they are invoked.
Specifically, a Type 2/3 entry that is invoked from the Manual menu, will be
called with the step number parameter being zero (0). This instructs the entry
to read its required input parameters from the appropriate common CAM
parameters section. If a Type 2/3 entry is invoked as part of an analysis
sequence (through the Analyze menu), then its step number parameter will be
269
Genie 2000 Configuration
non-zero and indicate the record number from within the Analysis Control
Block from which it will read its required input parameters.
RESOURCE (Max. 64 chars.)
This is the engine setup screen location. The portion of the line preceding the ‘!’ is the
name of the DLL (Windows) which contains the setup screen dialog procedure and resource; it is system dependent. The name of the entry point for the setup screen function follows the ‘!’.
A typical record in the AEF would look like this:
Peak Analysis$2$Simple$PSSIMP$1$
C:\DLL\PSSIMP.DLL!PSSIMP$
C:\DLL\PSSRES.DLL!PSSPROC$
ANALYSIS.TPL!PeakAnalysis
TEMPLATE NAME (Max. 12 chars.)
This is the name of the default report template used by the engine when “generate report” is selected.
SECTION NAME (Max. 8 chars.)
This is the name of the default report section used by the engine when “generate report” is selected.
Genie 2000 Network Configuration File
A Network Configuration File is required on all computer nodes that are running the
Genie 2000 software environment (the name and location of the file is defined by the
environment variable CINETCFG as described in “Genie 2000 Environment Variables” on page 264. This file defines both the location and the functions of the Virtual
Data Managers (VDMs) that the client node has access to.
Example
This example of a typical Network Configuration File is followed by a detailed explanation of format and content.
1 -\Local
1F-\pipe\datasrce
1M-\\node1\pipe\datasrce
1C-\\node1\pipe\configur
1M-\\node2\pipe\datasrce
1C-\\node2\pipe\configur
The format of a Network Configuration record is:
• Node System Type (1 char.): Specify type 1 for Intel nodes.
• VDM Type Code (1 char.): Type code as follows:
270
File Formats
M:
VDM supports hardware control access
F:
VDM supports file access
B:
VDM supports both hardware control and file access
C:
VDM supports hardware configuration access
• VDM Connection Identifier: This identifier must be in the form of
[\\nodename]\pipe\pipeid where:
\\Nodename
Optional identifier which is the name of the remote node;
the \\ are required.
\pipe
Required text for connection identifier.
pipeid
Actual name of the connection; must be either DATASRCE
for M, F, or B type VDMs or CONFIGUR for C type
VDMs.
The first record of this file indicates whether “local only” TCP/IP or “network”
TCP/IP connections are allowed. If the first line contains Local as the entry, then a
loopback IP address is used for socket connections. If the first line contains anything
other than local, the computer name/IP address is defined via the system network
settings.
Given the above explanation of the file format, the example file defines the following
information:
• The local node is named LOCAL and is an Intel node.
• There is a local VDM which support access to files only.
• There are two remote VDM’s (on nodes NODE1 and NODE2) which support
both control access and configuration of hardware.
Please be aware that F and B type VDMs are only supported locally; they cannot be a
remote node.
Note also that a default Network Configuration File (named G2K_VDM.NCF) is automatically installed with the Genie 2000 software; this file is configured to allow access
to a local VDM for both file/MCA and MCA configuration operations.
Workspace Files
The workspace function allows you to save a specific configuration within the Gamma
Acquisition and Analysis (GAA) and Alpha Acquisition and Analysis (AAA) packages. For example, if you have a four detector system, a workspace file can be created
that allows you to open all datasources (detectors) at once by selecting the saved
workspace file from the menu selection.
271
Genie 2000 Configuration
Workspace files are created when a current Acquisition and Analysis configuration is
saved to a workspace file. A workspace file normally never needs to be edited, but the
following information is provided in case a workspace file needs to be created or edited outside Acquisition and Analysis.
Workspace files are ASCII files written in a .INI file format. These files control the
datasource(s) opened and the display options selected by the Acquisition and Analysis
windows when a workspace file is loaded. These files have a .GWS file extension for
mvcg.exe (Gamma) and a .AWS file extension for mvca.exe (Alpha).
INI files, or profile files as they are sometimes called, have a standard format: Each
file is divided into sections. Each section is marked by a name of the section in brackets, i.e. [section name]. Within each section, entries are formed of two parts separated
by an equal sign. The first part is the key name or entry name. The second part is the
string for the key value, i.e. key name = string key value. The workspace file follows
this format.
[Datasource]
This section contains key information about the datasource sections to follow, the
show all display option, and the datasource that was being displayed.
OpenNames=DSn, …
This key name/value pair contains information about the names of the datasource sections to follow. The value is a comma delimited list of strings used to uniquely identify the section names for datasource information. Each string is made up of a “DS”
string and a unique number i.e. OpenNames=DS1,DS2.
ShowAll=1(On) / 0(Off)
This key name/value pair represents a on/off switch for the Show All datasource display option. A 1 represents a On value and a 0 is Off, i.e. ShowAll=0. See “Show All
Datasources” on page 175 for more detail.
CurrentDS=datasource file name or Detector name
The datasource name (CurrentDS) should contain the name of the datasource to be
opened when the workspace file is loaded. The name can be either a detector name or
a fully qualified CAM file name, i.e.
CurrentDS=C:\GENIE2K\CAMFILES\Naidemo.cnf.
[DataSource.DSx]
This section is used to specify information for a given datasource, including the
datasource name, the type of datasource and whether the datasource is to be opened as
read-only. There should be a section like this for each name in the OpenNames section
list.
DSName=datasource file name or Detector name
The datasource name (DSName) should contain the name of the datasource to be
opened when the workspace file is loaded. The name can be either a detector name or
a fully qualified CAM file name, i.e.
DSName=C:\GENIE2K\CAMFILES\Naidemo.cnf.
272
Genie 2000 Font Customization
DSCType= 769(Detector) / 1(NativeSpect file)
Currently there are two types of datasources, a detector or a file. If the datasource is a detector, then type value should be 769. If the datasource is a file, then type value should be 1.
DSReadOnly=1(On) / 0(Off)
This value is the flag to open that datasource as read only or not. A 1 means On (open
as read only) and 0 means Off (open as read/write).
[Display]
This section contains the available Acquisition and Analysis datasource display options.
Each key name corresponds to a display option that affects how the datasource data is
viewed. All the key values, except for CompareDS, are On/Off values, 1 for On and 0 for
Off.
ScaleIsAuto=1(On) / 0(Off)
Set ScaleIsAuto=1 to change the display’s vertical full scale (VFS) automatically.
Set ScaleIsAuto=0 to require that the VFS be set manually (page 110).
ScaleisLinear=1(On) / 0(Off)
Set ScaleIsLinear=1 to define the display’s scale as Linear.
Set ScaleIsLinear=0 to define the display’s scale as Log (page 110).
Expand=1(On) / 0(Off)
Set Expand=1 to change the display mode to expanded.
Set Expand=0 to restore the display mode to normal (page 108).
Compare=1(On) / 0(Off)
Set Compare=1 to turn the compare function On.
Set Compare=0 to turn the compare function Off (page 110).
CompareDS=datasource file name or Detector name
The CompareDS key value should contain the name of the datasource to be used to
compare with the other loaded datasources. The name can be either a detector name or
a fully qualified CAM file name, i.e. CompareDS=C:\GENIE2K\CAMFILES\Naidemo.cnf.
Genie 2000 Font Customization
It’s possible to customize fonts used in selected portions of Genie 2000 by creating an
file named G2KFONTS.INI in the GENIE2K\CTLFILES directory.
• A section is required in the INI file for each font you want to customize.
• Sections that are not being customized are not required in the INI file.
• The valid section names and their uses are listed below.
[MVC Report]
Report window (within the Gamma/Alpha Acquisition and Analysis windows and the
QA Editor window).
273
Genie 2000 Configuration
[MVC Status Bar]
Status bars within the Gamma/Alpha Acquisition and Analysis windows.
[MVC Status Pages]
Status pages within the Gamma/Alpha Acquisition and Analysis windows.
[MVC Lists]
Owner drawn listboxes (such as those within the various calibration screens, QA editor screens, etc.).
[GBT View]
Graphical Batch Tools reporting window (GBT main screen and GBT_VIEW window).
[Cfed List]
Certificate Editor listboxes.
[Nuclib List]
Nuclide Library Editor listboxes.
[Reporter]
Reports directed to a printer.
[QA Edit]
Quality Assurance Editor data entry fields.
[QA Lists]
Quality Assurance list boxes.
[Peak Label]
Peak labels in the spectrum. Large font sizes are not recommended for this section.
[Peak Information]
Peak information in the spectrum. Large font sizes are not recommended for this section.
Example Section
This [MVC Report] example illustrates all the available customization options. Specifying these values in the INI file will customize the MVC Report Window text as 9
point Bold Courier New.
[MVC Report]
274
Sample Files
Point=9
Facename=Courier New
Italic=0
Bold=1
Underline=0
Strikeout=0
FixedWidth=1
Charset=0
Though this example shows all options, only the options you want to change need to
be specified in the INI file. Values that are not being changed can be omitted.
Option Values
The valid values for each of the customization options are listed below:
Point=6,7,8,9,…
Facename=Courier New, MS Sans Serif, …
Italic=0 or 1
Bold=0 or 1
Underline=0 or 1
Strikeout=0 or 1
FixedWidth=0 or 1
Charset=0 (ANSI), 1 (Default), 204 (Russian), 136
(CHINESEBIG5), 255 (OEM)
Facename can be any valid font facename currently installed in the system. Valid point
sizes are determined based upon the font selected. Most fonts support a range from 6
to 72.
Sample Files
A number of sample files are automatically installed with the Basic Spectroscopy software:
• Spectral data files, gamma and alpha (.CNF)
• Certificate file (.CTF)
• Nuclide library files (.NLB)
275
Genie 2000 Configuration
• Analysis sequence files (.ASF)
• Report template files (.TPL)
• Batch procedure files (.REX)
276
Adjusting the PUR/LTC
C. Technical Information
This appendix contains instructions on adjusting the PUR/LTC, performing a manual
pole/zero for an amplifier, adjusting a TRP preamp’s reset pulse width and additional
information on some of Status Screen’s entries.
Adjusting the PUR/LTC
To achieve the highest performance of your amplifier’s Live Time Corrector, it may
be necessary to adjust the ADC’s LLD control. This adjustment must be made after the
amplifier and ADC have been set to process the energy range of interest.
To make the adjustment, two radioactive sources with high activity are required:
Source A with an energy peak in the upper part of the desired spectrum and Source B,
a high activity source with an energy peak in the lower part of the spectrum. The following LTC optimizing process assumes that Source A is 60Co and Source B is 137Cs.
The 1173.2 keV peak of 60Co will be used as a reference. The upper peak, at 1332.5
keV, is not a good choice because a sum peak of 137Cs at 2 x 661.6 = 1323.2 keV
would interfere with the measurement.
1. Put Source A near the detector so that the total count rate from this source is
< 5 kcps.
2. Set the LLD for a low value so that only energy above the noise level is
acquired.
3. Enter an ROI about the reference peak and, with PUR enabled, acquire data
until there are ≈ 30 kcounts in the peak area.
4. Clear the data from the spectrum, then put Source B near the detector. Adjust
the total count rate to be the maximum expected in the course of normal
measurements. Repeat the acquisition, stopping when the area of the
reference peak reaches 30 kcounts.
5. Compare the count rates (Peak Area divided by the Elapsed Live Time) of
Steps 3 and 4. If they are within several percent of each other, the LLD is
properly adjusted.
6. If you feel improvement is desirable, adjust the LLD about 1% or 2% higher.
7. Repeat Steps 3 through 6 until an optimum setting has been achieved.
277
Technical Information
Manual Pole/Zero
At high count rates, the pole/zero adjustment is extremely critical for maintaining
good resolution and low peak shift. Figure 194 shows how misadjustment will affect
peak shape and resolution.
Figure 194 The Effect of Pole/Zero on a Spectral
Peak
For a precise and optimum setting of the pole/zero, a scope vertical sensitivity of 50
mV/div should be used. However, most scopes will overload for a 7 V input signal
when the vertical sensitivity is set for 50 mV/div. Overloading the scope input will
distort the signals’ recovery to the baseline.
Thus, the pole/zero will be incorrectly adjusted resulting in a loss of resolution at high
count rates.1
When performing the manual pole/zero, set the scope vertical sensitivity to 50 mV/div,
clamping the signal with the clamp box or the equivalent. The AMP signal will now be
clamped, eliminating potential scope overload allowing precise pole/zero adjustment.
Pole/Zero Using a Ge Detector and a 60Co Source
Adjust the position of the source so that the count rate is between 2 kcps and 25 kcps.
While observing the signal at the amplifier’s output connector, adjust the pole/zero
1. The Model LB1502 Schottky Clamp Box is available from Canberra to prevent this problem. The Schottky clamp is built into
the Model 1510 Intergrated Signal Processor and Models 2025 and 2026 Spectroscopy Amplifiers.
278
Manual Pole/Zero
control so that the trailing edge of the unipolar pulse returns to the baseline with no
overshoots or undershoots, as shown in Figures 195, 196 and 197.
Figure 195 Correctly Adjusted Pole/Zero
Some amplifier shapings may exhibit small undershoots. These arise primarily from
amplifier shaping component tolerances and secondary time constants associated with
the detector/preamp system. If an undershoot is present and is less than 20 mV, its impact on performance is insignificant. However, these small shaping undershoots
should not be confused with pole/zero misadjustment undershoots which exhibit a
much longer time constant and have a larger performance impact.
279
Technical Information
Figure 196 Undercompensated Pole/Zero
Figure 197 Overcompensated Pole/Zero
280
Adjusting the TRP Reset Pulse
Adjusting the TRP Reset Pulse
When a Transistor Reset Preamp (TRP) is used, its Reset output is connected to the
amplifier’s Inhibit input and the pole/zero is fixed at 0. For proper operation, you’ll
have to make an adjustment on the TRP preamp so that the amplifier and ADC are
gated off during the preamp’s reset time.
The adjustment is made with an oscilloscope connected to the amplifier’s output2
Trigger the scope on the leading edge of the Reset pulse and adjust its width so that it
returns to its baseline after the amplifier’s output returns to within 2 mV of the baseline, as shown in Figures 198 and 199.
Figure 198 Amp, TRP, and Reset Signals Compared
2. The Model LB1502 Schottky Clamp Box is available from Canberra. The Schottky clamp is built into the Model 1510
Intergrated Signal Processor and Models 2025 and 2026 Spectroscopy Amplifiers.
281
Technical Information
Figure 199 Setting the TRP Inhibit Pulse Width
Status Screen Entries
Though the majority of the entries in the Status Report are direct reflections of the
MCA Input Definition Editor settings or the Analysis and Acquisition application’s
Adjust settings, a few of them are explained in greater detail here.
Stabilizer
This section refers to adjustments for the InSpector MCA only. The Zero and Gain
correction values are the numbers representing the amount of correction made to the
ADC. The range of correction is 0 to 4095, with 2048 representing no correction. If
data drift causes either the Gain or the Zero correction to reach the limit of 0 or 4095,
that stabilizer function will be changed to Hold and an overrange error flag will be set.
To clear the flag, set that function to off to clear the overrange flag (and set the value
to 2048), then correct the cause of the excessive drift before returning the mode to on.
Power Manager
This section refers to adjustments for the InSpector MCA only.
Battery A and B Status
Bat A (or B) Status is reported as:
Good, when the battery voltage is > 5.8 V
Low, when the battery voltage is ≤ 5.8 V
Discharged, when the battery voltage is ≤ 5.5 V
282
Status Screen Entries
When the Power Manager detects a “Discharged” battery, it will no longer use that
battery port until the battery is removed (voltage detected as ≤ 0.5 V) and replaced
with a battery with a voltage > 5.5 V. The Power Manager specifically looks for the
battery to be removed because an unloaded battery will recover some of its voltage but
will not have enough capacity to support a load for more than a few seconds.
Batteries
The line labeled “Batteries” shows the status of the InSpector’s batteries.
If this line reads “Warning”, you have only a few minutes of power left before the InSpector shuts down.
“Good” means that at least one battery’s voltage is > 5.8 V.
“Warning” means that the voltage of both batteries, or just one if only one is connected, is ≤ 5.8 V.
RAM Batt Back
The “RAM Batt Back” line shows the condition of the internal lithium battery used for
maintaining data in the spectrum memory when the InSpector’s power switch is turned
off. This battery, with an operating life of at least five years, is in a socket on the InSpector’s MCA Board. When its status changes from “Good” to “Disc” (discharged),
replace it with a Panasonic CR2025 battery, or equivalent.
±12 V Fault
The ±12 V Fault status tells you that because there is an overload on the +12 V or –12
V power supply, the Power Manager has put the supply into a Power Save condition.
The most likely cause of this is that the preamplifier connected to the rear panel
Preamp connector requires more power than the InSpector can supply. The proper remedial action is to disconnect the preamplifier’s power cable and change the power
mode to Battery Full or AC Full. If successful, the fault will be cleared.
283
Correcting for Cascade Summing
D. Correcting for Cascade Summing
In gamma-ray counting laboratories, it is a common practice to use mixed gamma-ray
standard sources for performing an empirical efficiency calibration of the detector.
Nuclides such as 60Co and 88Y are almost invariably present in these mixed standards.
This is because, the gamma rays emitted by 60Co and 88Y can be used to extend the efficiency calibration up to an energy of 1836 keV. 152Eu may also be used due to its
multiple energies and long half-life.
Note: If a mathematical efficiency calibration method such as Model S573 ISOCS
or Model S574 LabSOCS is used instead of a source-based method, the
problem of having to correct the efficiency calibration for cascade summing
effects will not arise. LabSOCS and ISOCS users can therefore ignore this
chapter.
Why Efficiency Calibration Correction is Needed
Unfortunately, the gamma rays emitted by 60Co, 88Y, or even 152Eu, are affected by the
phenomenon of cascade summing. As a result, counts are lost from the full energy peaks of
these nuclides, and smaller detection efficiency will be measured at the gamma-ray energies.
An efficiency calibration performed using such data points affected by cascade summing will, therefore, be in error. The magnitude of the error depends on the
source-detector counting geometry. The closer the source is to the detector, the larger
the error due to cascade summing. Also, the larger the detector size, the larger will be
the error due to cascade summing.
Efficiency errors of 10-30% are not uncommon in such scenarios. It is therefore necessary to correct the empirical efficiency calibration for cascade summing losses (or
gains) to obtain the true efficiency. The next section, “Correcting the Calibration” describes the procedure for correcting the efficiency calibration.
Correcting the Calibration
This procedure assumes that a spectrum has been acquired using a mixed gamma ray
standard source, and that it has been energy and shape calibrated. The mixed gamma
ray standard is assumed to contain nuclides that are affected by cascade summing. It is
further assumed that a peak analysis has been performed on the spectrum, including an
optional background correction.
284
Correcting the Calibration
1. Perform a Peak-to-Total Calibration for the detector, as described in
“Peak-to-Total” on page 73. Alternatively, you can load a Peak-to-Total
calibration file previously created for that detector.
2. Select Calibrate | Efficiency | By Certificate File. Select the source
certificate file for the gamma ray standard.
3. Select the Perform Cascade Correction checkbox (Figure 200). If any of the
prerequisites have not been met, an appropriate error message will be
displayed. The checkbox will be disabled and you must exit the dialog to
correct the deficiency. Otherwise, the Cascade Correction group box will be
enabled.
Figure 200 Enabling Cascade Correction
4. Select the geometry description (.GIS) file to be used for this calibration. If a
file does not exist, select the Geometry Composer button. This will start the
Geometry Composer application, where you can create and save a geometry
description file. The newly created file must then be selected.
If your HPGe detector is not characterized for LabSOCS/ISOCS, you should
select the closest generic detector characterization while editing the
Geometry Composer parameters. For more information, refer to the Selecting
a Generic LabSOCS Detector Characterization, appendix in the Genie 2000
Customization Tools Manual.
5. The Generate Reports checkbox determines if the analysis algorithms will
output their standard reports.
6. Select the Detector Characterized for LabSOCS checkbox if Canberra has
characterized the detector being calibrated. This will add a 5% systematic
285
Correcting for Cascade Summing
error to the certificate file uncertainty (Error % triplet) of all affected
nuclides. If the detector has not been characterized, a 10% systematic error
will be added if the nuclide is 60Co or 88Y and a 15% systematic error will be
added to any other affected nuclide’s uncertainty.
7. The Auto button will now perform all the steps necessary to correct the
calibration for Cascade Summing. The status bar at the bottom of the Gamma
Acquisition and Analysis (GAA) window will show the stages being
executed.
a. First, a peak locate with area analysis will be done using the sequence
selected from the Calibration | Setup dialog. If “NONE” was selected,
the algorithms will default to the ones last chosen from the Analyze
Menu.
b. The Standard Efficiency Correction algorithm will be executed and a
report generated in the GAA’s report window. It is not necessary to
preset parameters for this step.
c. Nuclide Identification will take place using the NID with Interference
Correction algorithm. The NID parameters used should be set up from
the Analysis | Nuclide Identification | NID w/Interf. Corr. menu before
performing this process. A report will be generated in the GAA’s
report window.
d. The energy lines in the certificate file will be compared to the results
of the NID process. When a match is found, the efficiency will be
divided by the Coincidence Correction factor calculated during the
NID process. The certificate’s error will be adjusted as described in
step 5. An asterisk (*) will be displayed to the right of any line that
has been adjusted.
8. Click on the Show button to display the calculated calibration curve. Select
the appropriate polynomial fit to the efficiency data points. Click on the OK
button when you are done.
9. In the Efficiency Calibration window click on the OK button to accept the
calibration. The empirical efficiency calibration has been corrected for the
effect of cascade summing and should now closely represent the true
efficiency. Use the Calibrate | Store function to save your corrected
efficiency calibration as required.
286
MID Definition
E. The InSpector 2000 Simulator
Genie 2000 V2.1 and later includes the InSpector 2000 Simulator, software which approximates many of the functions of a real InSpector 2000. It is designed to be used as
a tutorial for and demonstration of Genie 2000, without the need for an actual MCA, a
detector, and associated front-end electronics. This appendix describes the InSpector
2000 functions which are available in the Simulator.
MID Definition
The Simulator is definable as a standard MCA, therefore an MID file definition must be
created for it. It is listed as one of the MCAs in the MID Editor’s MCA list. The MID
Editor’s screens are the same as those for an InSpector 2000 – USB device. There are a
few points to remember when creating the MID definition for the InSpector 2000 Simulator:
• The Simulator’s serial number can be any positive decimal number. The serial
number for a real InSpector 2000 is a hexadecimal number.
• The MID Editor’s input definition screen contains the selection for Detector
Type. This selection will determine the type of spectrum (Germanium, NaI or
Alpha) displayed during acquisition. This is explained in more detail in “Spectrum Simulation” on page 288.
• The Simulator’s High Voltage Range (High Voltage settings screen) must be
set. Unlike the real InSpector 2000, the Simulator does not support negative
voltages.
When the MID definition has been saved, the Simulator can be opened in the
Acquisition and Analysis application.
Note: A maximum of 48 Simulators may be defined, but only 32 can be opened
concurrently in the Acquisition and Analysis application. Each Simulator
must have a unique Serial Number defined.
Acquisition and Analysis
Within the Acquisition and Analysis application, the Simulator will closely
approximate an actual InSpector 2000 device. All of the adjust controls are included;
their values will be correctly reported in the Status window and will be saved to (and
reloaded from) the device definition file. Many of the adjust control settings will affect
the simulated spectrum. For example, modifying the Coarse or Fine Gain will cause a
shift in the spectrum, as would be true for a real device. The method for generating the
simulated spectrum is discussed in “Spectrum Simulation” on page 288.
287
The InSpector 2000 Simulator
Spectrum Simulation
The basis for all of the Simulator’s functionality is the “Template” file, a CAM file
containing an actual spectrum. Any CAM file can be used, and the behavior of the
Simulator, especially the simulated spectrum, will match that of the template file. As a
result, any real spectrum can be simulated. Each of the following sections further describes how the template file contributes to the simulation.
The Simulator will always reproduce the spectrum of its template file. Genie 2000 installation provides an NaI template file (SimNai.cnf), a Ge template file (SimGe.cnf)
and an Alpha template file (SimAlpha.cnf). In addition, any number of custom template files may be used, which must be actual CAM files containing real spectral data.
Before opening the default template, the Simulator will search for a file with the name
Sim#.cnf, where # is the Simulator’s serial number. In this way every Simulator can
have a unique template file. If this template file is not found the default template file is
used.
Note: All template files must reside in the Genie2k\Ctlfiles folder.
A Simulator device defined with two memory groups can have a separate template file
for each memory group, using the name Sim#m.cnf, where m is ‘A’ or ‘B’, corresponding to memory groups 1 and 2, respectively.
Therefore, the Simulator searches for template files in the following order:
1. Sim#m.cnf
Devices with two memory groups.
2. Sim#.cnf
Devices with no memory groups defined.
3. SimNai.cnf, SimGe.cnf
or SimAlpha.cnf
Default templates.
In addition to a real spectrum, each template file must also have these three CAM parameters defined: CAM_F_VOLTAGE, CAM_F_AMPGAIN and CAM_F_LLD 1.
The first two, CAM_F_VOLTAGE and CAM_F_AMPGAIN are especially critical.
Since the spectrum is affected by changes in the voltage level (NaI mostly) and Amp
Gain, these settings are read from the template files as baseline values – the spectrum
will be adjusted according to the difference between these baseline values and the Adjust
Control settings during acquisition. CAM_F_LLD is used as the LLD setting when
“LLD Mode” is set to “Auto”. Baseline values are discussed in detail in several of the
following sections.
1. These parameters are normally stored as part of a saved CAM file. If the parameters are not present in the file, the
Pars.exe utility shipped with Genie 2000 can be used to set values for these parameters.
288
Acquisition and Analysis
PHA Mode
The template file is the basic for the spectrum generated for a particular Simulator device. The total counts in the template spectrum (the Integral) is calculated when the
template spectrum is read. The resulting spectrum will produce approximately the
same number of counts per second as the template spectrum.
The elapsed times are also read from the template CAM file, which will be used to
generate correct spectrum activity (i.e., counts per second) and correct dead time display. Note that in all of the spectrum and dead-time generation there is some randomness added to enhance realism.
MCS Mode
Spectrum generation for MCS mode is implemented simply to give some facsimile of
results. The Integral and ROI Modes use the same template spectrum as the PHA
mode. The activity of the template spectrum is used in MCS mode to generate the correct number of events per unit time.
Integral Mode uses the entire template spectrum to calculate activity, and ROI mode
uses the channels specified between ROI Start and ROI End. In TTL mode, a spectrum
is created with a few modest peaks to show a different effect, but is not intended to depict realistic results.
Percent Dead Time
The elapsed real and live times are read from the template file and the percent live
time is calculated, which is then used to calculate live time, as percentage of real time,
during acquire. A small amount of randomness is added to give a more realistic appearance. The percent dead time will fluctuate slightly during acquire, as would be expected with an actual device.
Amp Gain
Amp Gain is one of several settings that affect the generated spectrum. When the template file is read, the composite amp gain – the product of coarse gain, fine gain and
super fine gain – is also read (CAM parameter CAM_F_AMPGAIN). This is used as
the baseline amp gain. The ratio of the current composite amp gain (as defined by the
current Amp Gain settings) to the baseline is calculated, and the spectrum is shifted
up/down according to this ratio. This allows for the dynamic shift in spectrum in response to change in gain, which is the behavior expected in a real device.
If the current Amp Gain setting equals the baseline value then the ratio equals 1.0 and
the spectrum will not be shifted at all – thus the reason for the term “baseline” value.
289
The InSpector 2000 Simulator
LLD
The LLD value is used to clip the lower end of the spectrum as in a real device. If
LLD Mode is set to Manual, the current LLD setting is used. If LLD Mode is Auto,
the LLD value from the template file (CAM parameter CAM_F_LLD) is used. The
purpose for this behavior of LLD Auto Mode is simply to give the user different feedback based on different adjust control settings.
Voltage
The voltage status (On/Off) and voltage level are maintained and used by the Simulator. For NaI detectors, the energy input from the detector varies exponentially with the
voltage level setting. Accordingly, the Simulator reads the “baseline” voltage level
from the template file (CAM parameter CAM_F_VOLTAGE), and shifts the spectrum
up/down with respect to the difference between the current (via adjust control setting)
and baseline voltage levels.
The Ge spectrum does not respond to the voltage level as the NaI spectrum does. The
only requirements for germanium are that the voltage level ≥1300 V and that the
HVPS be On.
Finally, when voltage is turned on or off or when voltage level is adjusted, the Simulator will wait for a period of time to simulate the voltage ramping process. Gamma
Analysis will display the “Wait” message in the adjust control window. As with an actual device, the wait time is proportional to the change in voltage.
Digital Stabilizer
The Digital Stabilizer adjusts the spectrum up or down in order to maintain the specified Gain Ratio at the Centroid. Every five seconds (actually five times the Gain Rate
Divisor set in MID), the stabilizer samples the spectrum windows as defined by the
Gain Centroid, Gain Window and Gain Spacing controls, and calculates the ratio of
events (counts) in the two windows. It then adjusts the spectrum’s stabilizer gain up or
down accordingly. It continues adjustments until this ratio is equivalent to the specified Gain Ratio. If the Gain Factor should, over significant time, fall outside of the allowable 10% or 1% range, then a fault is triggered. The fault is cleared only when the
stabilizer is turned off.
If Gain Mode is set to Hold, the stabilizer will maintain the current stabilizer gain. If
the stabilizer is turned off, the gain is reset to 1.0 and therefore has no effect on the
spectrum.
Note that since the spectrum is not affected by thermal effects in hardware components
as would a real InSpector 2000, the only way to test the Stabilizer, for training purposes for instance, would be to manually change the Amp Gain or Voltage slightly
during acquisition.
290
Acquisition and Analysis
Filter, Digital Oscilloscope and Pole/Zero
The Simulator supports the Digital Oscilloscope, Pole/Zero Assistant, and the Filter
settings Rise Time and Flat Top. The Simulator creates an approximate trapezoidal
pulse from the current Rise Time and Flat Top settings. It uses the Pole/Zero setting to
adjust the overshoot or undershoot relative to baseline of the pulse’s trailing edge. It
also uses the energies of the simulated spectrum “events” to adjust the height of each
pulse. Therefore, as the Amp Gain and Voltage are changed, the average height of the
pulses will change accordingly. All the Oscilloscope controls, “Vertical Scale”,
“Smoothing Factor” etc., affect the displayed pulse appropriately.
When the voltage goes too low to generate a valid spectrum, the message “Count rate
too low” is flashed on the Oscilloscope. Likewise, an FDisc Setting of 0.0 will cause a
“Count rate too high” message to be displayed.
The Filter and Pole/Zero settings do not affect the spectrum, as they would in a real
device.
Other MID and Adjust Controls
The MID and Adjust Control settings which have not been specifically mentioned generally fall into one of three categories, and are summarized in the following table.
• Settings which can be written to the device and read back (for display in Status Screen only), but have no corresponding “simulation” or effect on the
spectrum. Examples of these settings include LT Trim, LTC Mode and
Standby Delay in the Power Manager.
• Settings which are read-only, which would normally come from a real hardware device. These are for display only. One such example is the Battery
Voltage. For these a reasonable value is assumed.
• Settings, such as the various polarities, which are MID settings only (not contained in the Adjust Windows in Gamma) and are used only for verification
purposes. These may in some cases cause certain faults. Some polarity values
as set to a predetermined value.
291
The InSpector 2000 Simulator
HVPS
Reset
This is implemented, but currently there is
no method to cause a voltage fault.
Inhibit Signal Polarity
Polarity
Power Manager
Standby Delay
Gain
PUR Guard
FDisc Setting
FDisc Mode (Auto)
Input Polarity
Inhibit Polarity
Inhibit Mode
Inhibit Setting
ICR
Gain Attenuator
LT Trim
LTC Mode
LLD Mode (Auto)
Filter
BLR mode
FDisc Shaping
Preamp Type
Trigger Select (Inhibit)
292
This is used (see LLD section) but does not
simulate an actual Auto Mode
F. Line Activity Consistency Evaluator
The activities calculated for all associated energies (line activities) for a given
multi-line radionuclide should be the same, within statistical variation. The Line Activity Consistency Evaluator (LACE) facilitates analysis of this characteristic and
helps in assessing how to improve the gamma analysis. LACE first searches the analysis file for nuclides with multiple gamma lines (e.g., 60Co, 134Cs, 152Eu, 59Fe, 235U,
238U+equilibrium progeny, 226Ra+equilibrium progeny, 232Th+equilibrium progeny).
For each of these multi-line nuclides, the ratios between each line activity and a reference activity (weighted mean and key line) are calculated. The energy vs. line activity
ratios are then plotted on a log-log scale, showing the best weighted linear fit to the
data. The activity ratios are used rather than absolute activities to enable consistent,
relative scaling.
When the same activity is determined at all energies, the fitted slope would be zero
with all activity ratios being unity. However, if line activities differ, there could be a
variety of causes for the discrepancy:
• Statistical variation allows for about 32% of all normally distributed data to
fall outside of the one standard deviation error bars that are plotted. Note that
since this is a ratio, there are two statistical uncertainties involved, but points
well outside the line with small uncertainties are likely to have other causes.
• If a single data point is too high or low, there are several possible causes:
u
Incorrect peak fit – use Interactive Peak Fit (IPF) to resolve poor multiplet
deconvolution or bad FWHM calibration
u
Wrong background, possibly caused by another peak or Compton edge
very close
u
Part or all of this peak belongs to another nuclide, data point will always
be high due to poor energy calibration, unresolved multiplet or because
this line is part of an interference set
Note: interference correction improves the weighted mean activity but
does not change the line activity that is used in LACE. So if that line is
part of an interference correction set, and the other nuclide has no real
activity, the data point will be high.
u
Gamma abundance wrong – review library
• If points trend together, but not in a straight and level line this is because efficiency calibration doesn’t match sample
You should first investigate the causes of individual peak errors, fixing those which
cause errors in the nuclide activity. Where the line activity ratios indicate a statistically
discernable trend with energy, LACE can assist you to qualitatively evaluate the
correlation between the efficiency calibration and the sample emission rate. The shape
293
Line Activity Consistency Evaluator
of the LACE curve can help determine the type and general magnitude of discrepancy
between the efficiency calibration and the measured sample.
When LACE shows a discrepancy between the efficiency calibration and the results
for a given sample measurement, you can improve the correlation and enhance accuracy by either performing a new calibration that better matches the sample measurement or changing the sample conditions to better match the existing calibration. When
a sourceless efficiency calibration (ISOCS/LabSOCS) is used, the efficiency calibration parameters can be quickly altered until a match is achieved. In either case, the
LACE output must be properly interpreted to direct required changes.
LACE Analysis
A variety of parameters must be considered when investigating possible discrepancies
between an efficiency calibration and the actual conditions during sample measurement. These parameters include the dimensions, densities and materials used for both
the source matrix and absorbers between the source and detector, as well as the distance between the source and detector. While it is possible that multiple parameters
may have discrepancies confounding the analysis, it is likely that the scope of analysis
can be limited by understanding which parameters might not be well known. Therefore, it is worthwhile isolating and investigating the effect of individual parameter discrepancies.
Figures 201 through 207 each address a different parameter, showing the effects of a
range of discrepancies for analyzing a simulated measurement. Each figure addresses
changes to only one parameter of the measured sample, keeping all of the other parameters at nominal values. These nominal values are:
• Source matrix thickness: 5 cm
• Source matrix material: aluminum
• Source matrix density: 2.7 g/cm3
• Absorber thickness: 1 cm
• Absorber material: aluminum
• Absorber density: 2.7 g/cm3
• Source-detector distance: 10 cm
Each figure includes the reference nominal case with variations above and below to
show the resulting trends. The energy range is 45–7000 keV and the activity ratios
reference the weighted mean activity.
Figure 201 shows how the activity ratio changes when the sample matrix thickness is
different from the calibration matrix thickness of 5 cm. A negative slope indicates that
the measured sample matrix thickness is less than the calibration matrix thickness,
294
LACE Analysis
while a positive slope indicates that the measured sample matrix thickness is greater
than the calibration matrix thickness.
Figure 201 Simulating Discrepancies in Matrix Thickness
Figure 202 shows how the activity ratio changes when the sample matrix density is
different from the calibration matrix density of 2.7 g/cm 3. A negative slope indicates
that the measured sample matrix density is less than the calibration matrix density,
while a positive slope indicates that the measured sample matrix density is greater than
the calibration matrix density.
295
Line Activity Consistency Evaluator
Figure 202 Simulating Discrepancies in Matrix Density
Figure 203 shows how the activity ratio changes when the sample absorber thickness
is different from the calibration absorber thickness of 1 cm. A negative slope indicates
that the measured sample absorber thickness is less than the calibration absorber thickness, while a positive slope indicates that the measured sample absorber thickness is
greater than the calibration absorber thickness.
Figure 203 Simulating Discrepancies in Absorber Thickness
296
LACE Analysis
Figure 204 shows how the activity ratio changes when the sample absorber density is
different from the calibration absorber density of 2.7 g/cm 3. A negative slope indicates
that the measured sample absorber density is less than the calibration absorber density,
while a positive slope indicates that the measured sample absorber density is greater
than the calibration absorber density.
Figure 204 Simulating Discrepancies in Absorber Density
Figure 205 shows how the activity ratio changes when the sample matrix material type
is different from the calibration matrix material type of aluminum. Upward concavity
indicates that the measured sample matrix material type has a lower atomic number
than the calibration matrix material type, while downward concavity indicates that the
measured sample matrix material type has a higher atomic number than the calibration
matrix material type.
297
Line Activity Consistency Evaluator
Figure 205 Simulating Discrepancies in Matrix Material Type
Figure 206 shows how the activity ratio changes when the sample absorber material
type is different from the calibration absorber material type of aluminum. Upward
concavity indicates that the measured sample absorber material type has a lower
atomic number than the calibration absorber material type, while downward concavity
indicates that the measured sample absorber material type has a higher atomic number
than the calibration absorber material type.
Figure 206 Simulating Discrepancies in Absorber Material
Type
298
LACE Analysis
Figure 207 shows how the activity ratio changes when the sample source-detector distance is different from the calibration source-detector distance of 10 cm. A LACE
analysis is not very sensitive to this discrepancy. In general, changes in geometry affect all energies equally.
Figure 207 Simulating Discrepancies in Source-Detector
Distance
In general, a negative slope indicates that the material attenuation accounted for in the
efficiency calibration is greater than that of the measured sample while a positive slope
indicates that the material attenuation accounted for in the efficiency calibration is less
than that of the measured sample. Excessive concavity can indicate a significant difference in the atomic number between the efficiency calibration and the measured sample. Upward concavity indicates that the efficiency calibration has a higher atomic
number than the measured sample while a downward concavity indicates that the efficiency calibration has a lower atomic number than the measured sample.
LACE Example
To illustrate how LACE could be used with an actual measurement, a 20 mL scintillation vial containing an epoxy matrix with a 152Eu source and an intervening thin (1.63
mm) copper absorber was measured. Using these nominal parameters, a LabSOCS efficiency calibration was calculated and the LACE results are shown in Figure 208. The
relatively flat curve (slope: 0.005 ± 0.030) indicates a reasonably good match between
the efficiency calibration and sample. However, the effects of a mismatch between the
calibration and sample for certain parameters can be seen in subsequent figures.
299
Line Activity Consistency Evaluator
Figure 208 LACE Results with Nominal Parameters
Figures 209 and 210 show the effect of halving (to 0.815 mm) and doubling (to 3.26
mm) the nominal absorber thickness of 1.63 mm in the calibration. Positive slope indicates the absorber thickness is lower in the calibration than in the sample while negative slope indicates the absorber thickness is higher in the calibration than in the
sample.
300
LACE Analysis
Figure 209 LACE Result with Absorber
Thickness Halved
Figure 210 LACE Result with Absorber
Thickness Doubled
301
Line Activity Consistency Evaluator
Figures 211 and 212 show the effect of halving (to 0.575 g/cm 3) and doubling (to 2.30
g/cm3) the nominal matrix density of 1.15 g/cm 3 in the calibration. Positive slope indicates the matrix density is lower in the calibration than in the sample while negative
slope indicates the matrix density is higher in the calibration than in the sample.
Figure 211 LACE Result with Matrix Density
Halved
302
LACE Analysis
Figure 212 LACE Result with Matrix Density
Doubled
Finally, Figures 213 and 214 show the effect of using much lower (aluminum) and
higher (cadmium) atomic mass metals (but at the same nominal density) for the copper
absorber in the calibration. Downward concavity indicates the absorber atomic number
is lower in the calibration than in the sample while upward concavity indicates the absorber atomic number is higher in the calibration than in the sample.
303
Line Activity Consistency Evaluator
Figure 213 LACE Result with Absorber
Changed to Aluminum
Figure 214 LACE Result with Absorber
Changed to Cadmium
304
Launching the Viewer
To enhance the range and power of a LACE analysis, it is possible to combine different nuclides if they are related and the relative abundances are known. For instance,
radium, thorium, and 238U can be combined with respective progeny nuclides when
they are in secular equilibrium. In addition, nuclides that are always found in the same
ratio can be combined, such as 235U and 238U in natural uranium. Implementing these
composite nuclides for LACE analysis requires that such composite nuclides be defined (via the Nuclide Library Editor) in the library used for the NID processing, with
appropriately modified gamma abundances.
If a problem with a gamma analysis is found using LACE analysis, fix the problem
and then reanalyze. Such fixes may include using Interactive Peak Fit to optimize peak
areas, correcting inaccurate energy and/or FWHM calibrations, and examining library
files referenced for proper gamma abundances. Finally, change the measured sample
and/or the efficiency calibration so that they are more closely matched, as directed by
the LACE analysis. While possible with standard (source-based) efficiency calibrations, changing the efficiency calibration is most easily implemented using a
sourceless (ISOCS/LabSOCS) calibration. LACE and ISOCS/LabSOCS synergistically combine to become a powerful tool in determining the physical characteristics of
a sample with uncertain parameters.
Launching the Viewer
Genie 2000 includes an LACE viewer that allows you to view LACE analysis results
for datasource files that already have been processed by the LACE algorithm.
To launch the viewer double click on the LACE application in the directory
EXEFILES or type LACE at the command line.
When you press ENTER, you’ll see a window similar to the one in Figure 215.
305
Line Activity Consistency Evaluator
Figure 215 The LACE Viewer
The LACE viewer can only be used to view files that already have been processed by
the LACE algorithm in Genie.. Once this is done you can also start the viewer with a
file loaded by typing, for instance:
lace
c:\genie2k\camfiles\nbsstd.cnf
Or you can launch the editor, then use the File | Open command to open an existing
LACE processed file for viewing. Figure 216 shows the viewer with a file loaded.
306
Launching the Viewer
Figure 216 A File Opened for Viewing
The graph shows the data points and curve for a single calculated equation. The nuclide list (to the right of the graph) lists all nuclides in the datasource. Clicking on a
nuclide name will select the nuclide for display. Clicking on Next or Previous buttons
will select the next or previous nuclide name in the list. The Weighted Mean or Key
Line curve, whichever button is selected, will be displayed along with the data points
defined by the Energy/Ratio pairs, where the Ratio is the Weighted Mean or Key Line
ratio. The error bars are the calculated ratio uncertainties.
The equation defining the displayed curve is shown just below the graph. This equation corresponds to the selected Ratio type. The screen controls are defined below:
Ratio
Select Weighted Mean or Key Line curve for display. The Weighted Mean button is
disabled if NID w/Interf Correction was not run on this datasource.
Y Scale
Includes edit boxes for specifying the Y-axis limits for viewing. Clicking Auto allows
LACE to calculate limits based on the data points for the displayed nuclide.
307
Line Activity Consistency Evaluator
X Scale
Includes edit boxes for specifying the X-axis limits for viewing. Clicking Auto allows
LACE to calculate limits based on the data points for the displayed nuclide.
View
When checked LACE displays X and/or Y grid lines on the graph.
Save Preferences
Saves the user options/preferences (Ratio, X Scale, Y Scale and View) to the
registry, which are then reloaded when LACE is later run again. These settings will
be stored in registry location:
“HKEY_LOCAL_MACHINE\SOFTWARE\Canberra Industries, Inc.\LACE\Preferences”.
Print Graph
Prints a hard-copy of the graph.
When you change the graph’s Y scale limits so that one or more points fall outside
those limits, those “outlying” points will be plotted along the edge of the graph in order to show their existence. The graph shown in Figure 217 shows an “outlying” point
at the top edge.
Figure 217 Changing the Graph's Y Scale Limits
308
LACE Report
As mentioned previously, the File and Option menus are displayed only when LACE
is executed manually, i.e. not automatically by LACE itself. The menu options are described below.
File Menu
Select Open to open a CAM file for viewing. Close will close the currently opened
file. Exit will quit the LACE.
Options Menu
Auto Size
Selecting this option will cause the graph to grow/shrink in proportion to the Viewer
window. Controls maintain their positions relative to the Viewer window so that they
are always visible. Disabling Auto Size will cause the graph and other controls to
maintain their current size and position.
Color
The colors of the various graph elements; background, label, data points and curve can
be changed.
LACE Report
Below is a sample report generated by the LACE using Lace.tpl.
Note that all “identified” nuclides are listed in the report. Nuclides which are rejected
because of single-line or no key line will appear anyway - the rejection criteria is evident from the report.
309
Line Activity Consistency Evaluator
7/17/02
2:04:55
LACE v1.0
Page 1
*******************************************************************************
*
**** L I N E
A C T I V I T Y
C O N S I S T E N C Y
E V A L U A T O R ****
*******************************************************************************
*
===============================================================
Analysis using Weighted Mean Activities
===============================================================
Filename: C:\GENIE2K\CAMFILES\AP3TOPDN.CNF
Equation used to calculate plot: ln(Ratio) = A + B*ln(Energy)
where: Ratio = Activity/WM Activity
Notes:
* All uncertainties quoted at 1.00 sigma
Nuclide Energy Activity
Name
(keV) (uCi/Unit)
——————— —————— —————————
ANNIH
511.0 5.42E-007
radium
310
74.8
77.1
186.0
242.0
295.2
352.0
609.3
768.4
1120.3
1238.1
1377.7
1764.5
2204.2
1.13E-005
7.44E-006
4.89E-006
4.01E-006
2.04E-006
1.97E-006
2.18E-006
1.90E-006
1.85E-006
2.22E-006
1.33E-006
1.91E-006
1.29E-006
Activity
%Uncert*
————————
4.895
31.849
28.537
14.700
7.732
6.310
4.947
4.070
12.520
5.874
9.690
16.633
5.331
13.929
WM Activ
[%Uncert]
—————————
1.99E-006
[ 2.049]
Ratio[%Uncert]
A
—————————————
———
5.702[31.915]
3.737[28.610]
2.460[14.842]
2.014[ 7.999]
1.028[ 6.635]
0.988[ 5.355]
1.094[ 4.557]
0.956[12.687]
0.932[ 6.221]
1.116[ 9.904]
0.666[16.759]
0.958[ 5.712]
0.648[14.079]
1.72
B
[uncert]
————————
-0.254
[ 0.030]
LACE Report
7/17/02
2:04:55
LACE - Weighted Mean Results
Nuclide Energy Activity
Name
(keV) (uCi/Unit)
——————— —————— —————————
Activity
%Uncert*
————————
WM Activ
[%Uncert]
—————————
Ratio[%Uncert]
thorium
4.03E-006
[ 1.351]
1.852[32.044]
1.120[28.625]
K-40
—————————————
74.9
77.1
7.46E-006
4.51E-006
32.015
28.593
129.1
238.6
6.54E-006
4.80E-006
17.861
5.054
1.624[17.912]
1.191[ 5.232]
270.2
277.4
300.1
4.51E-006
4.70E-006
4.58E-006
10.992
20.131
14.530
1.119[11.075]
1.166[20.176]
1.136[14.593]
328.0
338.3
409.5
5.11E-006
4.82E-006
3.40E-006
11.137
5.859
17.548
1.269[11.219]
1.196[ 6.013]
0.844[17.600]
463.0
583.2
727.2
794.9
860.5
911.1
964.8
969.0
1587.9
1620.6
2614.5
1460.8
4.50E-006
4.81E-006
2.66E-006
4.85E-006
4.57E-006
4.01E-006
4.38E-006
4.04E-006
3.51E-006
2.28E-006
4.15E-006
1.76E-005
8.364
3.848
6.340
6.788
10.129
4.013
6.815
4.388
9.023
16.919
3.895
2.812
1.115[ 8.472]
1.194[ 4.078]
0.660[ 6.482]
1.202[ 6.921]
1.135[10.218]
0.994[ 4.235]|
1.086[ 6.948]
1.002[ 4.592]
0.871[ 9.123]
0.566[16.972]
1.030[ 4.123]
Page 2
A
———
0.69
B
[uncert]
————————
-0.096
[ 0.021]
311
Line Activity Consistency Evaluator
*******************************************************************************
*
**** L I N E A C T I V I T Y C O N S I S T E N C Y E V A L U A T O R ****
*******************************************************************************
*
===============================================================
Analysis using Key Line Activities
===============================================================
Filename: C:\GENIE2K\CAMFILES\AP3TOPDN.CNF
Equation used to calculate plot: ln(Ratio) = A + B*ln(Energy)
where: Ratio = Activity/KL Activity
Notes:
‘∧’ Denotes Key Line energy
* All uncertainties quoted at 1.00 sigma
312
Nuclide Energy Activity
Activity
(keV) (uCi/Unit) %Uncert*
——————— —————— ————————— ————————
ANNIH
511.0 ^ 5.42E-007
4.895
Ratio[%Uncert]
—————————————
—————
radium
5.213[32.108]
3.417[28.826]
2.249[15.253]
1.841[ 8.738]
0.940[ 7.509]
0.904[ 6.406]
1.000[ 5.756]
0.874[13.165]
0.852[ 7.146]
1.020[10.510]
0.609[17.124]
0.876[ 6.708]
0.592[14.511]
1.81
74.8
1.13E-005
77.1
7.44E-006
186.0
4.89E-006
242.0
4.01E-006
295.2
2.04E-006
352.0
1.97E-006
609.3 ^ 2.18E-006
768.4
1.90E-006
1120.3
1.85E-006
1238.1
2.22E-006
1377.7
1.33E-006
1764.5
1.91E-006
2204.2
1.29E-006
31.849
28.537
14.700
7.732
6.310
4.947
4.070
12.520
5.874
9.690
16.633
5.331
13.929
A
B
[uncert]
————————
-0.281
[ 0.033]
LACE Report
7/17/02
2:04:55
LACE - Key Line Results
Page 2
Nuclide Energy Activity
(keV) (uCi/Unit)
——————— —————— —————————
Activity
%Uncert*
————————
Ratio[%Uncert]
A
—————————————
—————
Thorium
0.77
K-40
74.9
77.1
7.46E-006
4.51E-006
32.015
28.593
1.864[32.266]
1.127[28.873]
129.1
238.6
270.2
6.54E-006
4.80E-006
4.51E-006
17.861
5.054
10.992
1.634[18.306]
1.198[ 6.454]
1.126[11.702]
277.4
300.1
328.0
4.70E-006
4.58E-006
5.11E-006
20.131
14.530
11.137
1.174[20.527]
1.143[15.074]
1.277[11.838]
338.3 4.82E-006
409.5 3.40E-006
463.0 4.50E-006
583.2 4.81E-006
727.2 2.66E-006
794.9 4.85E-006
860.5 4.57E-006
911.1 ^4.01E-006
964.8 4.38E-006
969.0 4.04E-006
1587.9 3.51E-006
1620.6 2.28E-006
2614.5 4.15E-006
5.859
17.548
8.364
3.848
6.340
6.788
10.129
4.013
6.815
4.388
9.023
16.919
3.895
1.204[ 7.102]
0.850[18.001]
1.122[ 9.277]
1.202[ 5.560]
0.664[ 7.504]
1.210[ 7.886]
1.142[10.895]
1.000[ 5.676]
1.093[ 7.909]
1.008[ 5.947]
0.877[ 9.875]
0.569[17.388]
1.037[ 5.593]
1460.8 ^1.76E-005
2.812
B
[uncert]
————————
-0.108
[ 0.026]
313
Index
A
Acquire
Setup command . . . . . . . . . . . . . . . 47
Start command. . . . . . . . . . . . . . . . 47
Stop command. . . . . . . . . . . . . . . . 47
Acquisition
Delay control . . . . . . . . . . . . . . . . 56
Parameters, defining . . . . . . . . . . . . . 47
Phase . . . . . . . . . . . . . . . . . . . . 123
Acquisition data overview. . . . . . . . . . . 170
Activity units
Certificate . . . . . . . . . . . . . . . . . 193
Library, DAC limit . . . . . . . . . . . . . 185
Library, MPC. . . . . . . . . . . . . . . . 183
Report . . . . . . . . . . . . . . . . . . . 157
Activity units, choosing . . . . . . . . . . 66, 82
ADC
Adjustment of . . . . . . . . . . . . . . . . 49
Conversion gain . . . . . . . . . . . . . . . 50
LLD . . . . . . . . . . . . . . . . . . . . . 50
ULD . . . . . . . . . . . . . . . . . . . . . 50
Zero . . . . . . . . . . . . . . . . . . . . . 50
Adding
A line to a certificate file . . . . . . . . . . 198
A nuclide . . . . . . . . . . . . . . . . . . 180
An ROI . . . . . . . . . . . . . . . . . . . 112
Adding an MCA . . . . . . . . . . . . . . . . 23
Adjust
ADC . . . . . . . . . . . . . . . . . . . . . 49
Amplifier . . . . . . . . . . . . . . . . . . 53
Programmable controls . . . . . . . . . . . 49
Stabilizer. . . . . . . . . . . . . . . . . . . 51
The amplifier's PUR/LTC . . . . . . . . . 277
Advance sample changer . . . . . . . . . . . . 59
AEF files . . . . . . . . . . . . . . . . . . . 268
Amplifier
Adjustment . . . . . . . . . . . . . . . . . 53
Coarse gain . . . . . . . . . . . . . . . . . 53
Fine gain . . . . . . . . . . . . . . . . . . . 53
Pole/zero. . . . . . . . . . . . . . . . . . . 54
PUR control . . . . . . . . . . . . . . . . . 53
Shaping control . . . . . . . . . . . . . . . 53
Super-fine gain . . . . . . . . . . . . . . . 53
Analysis data overview . . . . . . . . . . . . 171
Analysis engine files . . . . . . . . . . . . . 268
Analysis sequence
Defining a . . . . . . . . . . . . . . . . . 161
Deleting a step . . . . . . . . . . . . . . . 163
Deleting a step . . . . . . . . . . . . . . . 201
Execute . . . . . . . . . . . . . . . . 122, 167
Inserting a step . . . . . . . . . . . . 163, 201
Loading. . . . . . . . . . . . . . . . . . . 166
Select an algorithm . . . . . . . . . . . . . 201
Select an algorithm . . . . . . . . . . . . . 163
Setting up an algorithm in . . . . . . 163, 202
Storing . . . . . . . . . . . . . . . . . . . 167
Analysis Sequence File editor . . . . . . . . . 199
Area correction
Critical level test . . . . . . . . . . . . . . 139
Standard background subtract . . . . . . . 139
Area preset . . . . . . . . . . . . . . . . 48, 124
Assay date, setting . . . . . . . . . . . . . 66, 82
Assembling a system . . . . . . . . . . . . . 239
Asterisk
In the hardware status report . . . . . . . . 58
Auto function
Efficiency calibration . . . . . . . . . . . . 91
Energy recalibration . . . . . . . . . . . . . 72
Energy recalibration . . . . . . . . . . . . . 70
Automatic
Gain adjust. . . . . . . . . . . . . . . . . . 98
HVPS turn on . . . . . . . . . . . . . . . . 55
pole/zero . . . . . . . . . . . . . . . . . . . 54
VFS command . . . . . . . . . . . . . . . 110
B
Background subtract algorithm . . . . . . . . 139
Baseline restorer control . . . . . . . . . . . . 53
Basic nuclide library data . . . . . . . . . . . 178
Batteries, status report entry. . . . . . . . . . 283
Battery power modes . . . . . . . . . . . . . . 55
BLR control. . . . . . . . . . . . . . . . . . . 53
Buildup type, sample info . . . . . . . . . . . 161
C
Calibration
Efficiency . . . . . . . . . . . . . . . . . . 89
Energy, cursor method . . . . . . . . . . . 70
Energy, full . . . . . . . . . . . . . . . 63, 69
Energy, marker method . . . . . . . . . . . 70
Load . . . . . . . . . . . . . . . . . . . . 161
Preferences . . . . . . . . . . . . . . . . . 60
Settings . . . . . . . . . . . . . . . . . . . 60
Setup function . . . . . . . . . . . . . . . . 60
315
Calibration data overview . . . . . . . . . . . 172
Cascade correction
Data library. . . . . . . . . . . . . . . . . 207
Prerequisites . . . . . . . . . . . . . . . . 206
Cascade summing correction
explanation of . . . . . . . . . . . . . . . 284
Certificate
Partial file . . . . . . . . . . . . . . . . 65, 81
Save as. . . . . . . . . . . . . . . . . . 65, 81
Certificate file
Adding a new line . . . . . . . . . . . . . 198
Creating a new . . . . . . . . . . . . . . . 198
Deleting an entry . . . . . . . . . . . . . . 198
Editing the line data . . . . . . . . . . . . 197
Energy units . . . . . . . . . . . . . . . . 194
Extracting energy lines . . . . . . . . . . . 193
Full . . . . . . . . . . . . . . . . . . . 65, 81
Header data. . . . . . . . . . . . . . . . . 196
Library extract . . . . . . . . . . . . . . . 193
Line data . . . . . . . . . . . . . . . . . . 196
Opening a . . . . . . . . . . . . . . . . . 195
Printing . . . . . . . . . . . . . . . . . . . 198
Certificate File editor . . . . . . . . . . . . . 192
Changing energy units. . . . . . . . . . . . . 205
Changing the integration settings . . . . . . . 220
Checking geometry validity . . . . . . . . . . 221
Clear
Data/time automatically . . . . . . . . . . 124
HVPS latches . . . . . . . . . . . . . . . . 55
Closing a datasource . . . . . . . . . . . . . . 43
Coarse gain, amplifier . . . . . . . . . . . . . 53
Coefficients, energy . . . . . . . . . . . . . . 63
Compare
command . . . . . . . . . . . . . . . . . . 110
Moving the spectrum. . . . . . . . . . . . 111
Off command. . . . . . . . . . . . . . . . 111
VFS command . . . . . . . . . . . . . . . 112
Compare another datasource . . . . . . . . . 158
Computational preset . . . . . . . . . . . 48, 124
Computer system requirements . . . . . . . . 239
Configuration database, runtime . . . . . . . . 37
Configuration file, network . . . . . . . . . . 270
Configuring the geometry composer . . . . . 230
Continuum
Function, peak area. . . . . . . . . . . . . 134
Peak area . . . . . . . . . . . . . . . . . . 134
Selecting type of. . . . . . . . . . . . . . . 61
Control panel
Expand off . . . . . . . . . . . . . . . . . 109
Expand on button . . . . . . . . . . . . . 109
Control panel mode . . . . . . . . . . . . . . 117
Conventions, typographic . . . . . . . . . . . 11
Conversion factor, Bq to Ci . . . . . . . . . . 193
Conversion gain, ADC . . . . . . . . . . . . . 50
316
Correcting for cascade summing
explanation of . . . . . . . . . . . . . . . 284
Counts preset . . . . . . . . . . . . . . . 48, 124
Creating
A new certificate file . . . . . . . . . . . . 198
A new nuclide library . . . . . . . . . . . 190
Creating a geometry definition . . . . . . . . 209
Critical level test, area correction . . . . . . . 139
Critical level test, peak area . . . . . . . . . . 135
Crossover function . . . . . . . . . . . . . . . 90
Current database, viewing the . . . . . . . . . 37
D
Data plotting . . . . . . . . . . . . . . . . . . 44
Database
Viewing the current . . . . . . . . . . . . . 37
Datasource
Closing a. . . . . . . . . . . . . . . . . . . 43
Menu . . . . . . . . . . . . . . . . . . . . 174
Opening a . . . . . . . . . . . . . . . . . . 41
Saving a . . . . . . . . . . . . . . . . . . . 43
Show all . . . . . . . . . . . . . . . . . . 175
Using more than one. . . . . . . . . . . . . 41
Datasource overview
Acquisition information . . . . . . . . . . 170
Analysis information . . . . . . . . . . . . 171
Calibration information . . . . . . . . . . 172
Datasources
comparing . . . . . . . . . . . . . . . . . 158
Defining
an MCA . . . . . . . . . . . . . . . . . . . 26
Delay
Acquisition . . . . . . . . . . . . . . . . . 56
Standby . . . . . . . . . . . . . . . . . . . 56
Deleting
A certificate file entry . . . . . . . . . . . 198
An ROI . . . . . . . . . . . . . . . . . . . 112
Deleting a sequence step . . . . . . . . . 163, 201
Deleting an MCA . . . . . . . . . . . . . . . . 25
Detection limits, MDA, Currie and KTA . . . 147
Device setup . . . . . . . . . . . . . . . . . . 26
Display
All plot channels . . . . . . . . . . . . . . 159
Preferences . . . . . . . . . . . . . . . . . 113
Selecting the scale . . . . . . . . . . . . . 110
Display menu . . . . . . . . . . . . . . . . . 108
Display update rate . . . . . . . . . . . . . . 116
Drop peak function . . . . . . . . . . . . . . . 72
DSA2000 MCA setup . . . . . . . . . . . . . 27
E
Edit colors . . . . . . . . . . . . . . . . . . . 113
Editing
A nuclide library . . . . . . . . . . . . . . 177
a remote VDM. . . . . . . . . . . . . . . . 17
An MCA Definition . . . . . . . . . . . . . 36
An MID Definition . . . . . . . . . . . . . 36
Sample information . . . . . . . . . . . . 160
The certificate file line data . . . . . . . . 197
the energy list . . . . . . . . . . . . . . . 219
Editing a sequence file . . . . . . . . . . . . 200
Editor
materials library . . . . . . . . . . . . . . 222
Efficiency
data points, generating . . . . . . . . . . . 222
Efficiency calibration . . . . . . . . . . . . . . 89
Efficiency calibration
Crossover point . . . . . . . . . . . . . . . 90
Data sets, total used . . . . . . . . . . . . . 90
generic characterizations not suitable . . . 210
Efficiency calibration auto function . . . . . . 91
Efficiency correction
Dual method . . . . . . . . . . . . . . . . 141
Empirical method . . . . . . . . . . . . . 142
Linear method . . . . . . . . . . . . . . . 142
phase . . . . . . . . . . . . . . . . . . . . 141
Effluent/DAC
Units . . . . . . . . . . . . . . . . . . . . 185
Values . . . . . . . . . . . . . . . . . . . 185
Energy
Calibrate, cursor method . . . . . . . . . . 70
Calibrate, marker method . . . . . . . . . . 70
Coefficients calibration . . . . . . . . . . . 63
Drop peak function . . . . . . . . . . . . . 72
Energy only calibration . . . . . . . . . . . 61
Full calibration . . . . . . . . . . . . . 63, 69
Order of the polynomial . . . . . . . . . . . 73
Recalculate . . . . . . . . . . . . . . . . . 71
Recalibration, auto function . . . . . . . 70, 72
Tolerance units . . . . . . . . . . . . . . . 60
Units selection . . . . . . . . . . . . . . . . 60
Energy lines, certificate, extracting . . . . . . 193
Energy lines, extracting . . . . . . . . . . . . 182
Energy list
editing . . . . . . . . . . . . . . . . . . . 219
Energy units
Certificate file . . . . . . . . . . . . . . . 194
Nuclide library . . . . . . . . . . . . . . . 183
Preferences . . . . . . . . . . . . . . . . . 116
Energy units, changing . . . . . . . . . . . . 205
Environment variables
Analysis engine files . . . . . . . . . . . . 268
Genie-2000 . . . . . . . . . . . . . . . . . 264
Report template files . . . . . . . . . . . . 268
Error multiplier in analysis reporting phase . . 156
Execute analysis sequence . . . . . . . . . . 122
Expand
command . . . . . . . . . . . . . . . . . . 108
Off command. . . . . . . . . . . . . . . . 109
Explanation of the status screen . . . . . . . . 282
Export report to PDF . . . . . . . . . . . . . . 45
External Start/Stop . . . . . . . . . . . . . . . 48
Extracting
A certificate . . . . . . . . . . . . . . . . 194
A nuclide library . . . . . . . . . . . . . . 193
Certificate file energy lines . . . . . . . . 193
Nuclide library energy lines . . . . . . . . 182
F
File formats . . . . . . . . . . . . . . . . . . 268
File info . . . . . . . . . . . . . . . . . . . . . 44
File menu . . . . . . . . . . . . . . . . . . . . 41
Files, analysis engine . . . . . . . . . . . . . 268
Find
Nuclide energy . . . . . . . . . . . . . . . 189
Nuclide mass number . . . . . . . . . . . 189
Nuclide name. . . . . . . . . . . . . . . . 188
Fine gain, amplifier . . . . . . . . . . . . . . . 53
Fit singlets, peak area . . . . . . . . . . . . . 135
Fixed parameters, peak area . . . . . . . . . . 135
Font customization . . . . . . . . . . . . . . 273
Full certificate file . . . . . . . . . . . . . 65, 81
Full channel plot display . . . . . . . . . . . 159
Full energy calibration . . . . . . . . . . . 63, 69
G
Gain
Centroid control . . . . . . . . . . . . . . . 52
Mode, stabilizer . . . . . . . . . . . . . . . 52
Spacing, stabilizer . . . . . . . . . . . . . . 52
Window, stabilizer. . . . . . . . . . . . . . 52
Gain evaluator . . . . . . . . . . . . . . . . . 94
analysis phase . . . . . . . . . . . . . . . 155
Generating
efficiency data points. . . . . . . . . . . . 222
Generic detector characterizations
for cascade correction . . . . . . . . . . . 211
not for LabSOCS and ISOCS . . . . . . . 210
Genie 2000 font customization . . . . . . . . 273
Genie-2000
Environment variables . . . . . . . . . . . 264
Software installation . . . . . . . . . . . . 241
Geometry composer
configuring . . . . . . . . . . . . . . . . . 230
Geometry definition
creating . . . . . . . . . . . . . . . . . . . 209
Geometry information, entering . . . . . . . . 212
Geometry template
317
selecting . . . . . . . . .
Geometry validity, checking
Geometry, file types . . . . .
Group
Next . . . . . . . . . . .
Previous . . . . . . . . .
. . . . . . . . . 209
. . . . . . . . . 221
. . . . . . . . . 221
peak . . . . . . . . . . . . . . . . . . . . 114
spectrum . . . . . . . . . . . . . . . . . . 116
Library area
More parameters . . . . . . . . . . . . . . 137
Setup . . . . . . . . . . . . . . . . . . . . 136
Library locate
More parameters . . . . . . . . . . . . . . 128
Library peak locate
Gamma-M . . . . . . . . . . . . . . . . . 127
Simple . . . . . . . . . . . . . . . . . . . 129
Line Activity Consistency Evaluator . . 149, 293
Line data
Certificate file . . . . . . . . . . . . . . . 196
Nuclide library . . . . . . . . . . . . . . . 180
Linear
Continuum . . . . . . . . . . . . . . . . . . 61
VFS command . . . . . . . . . . . . . . . 110
LLD control, ADC . . . . . . . . . . . . . . . 50
Load
Calibration . . . . . . . . . . . . . . . . . 161
Command . . . . . . . . . . . . . . . . . . 59
Multiple definitions . . . . . . . . . . . . . 39
ROIs . . . . . . . . . . . . . . . . . . . . 112
Log VFS command . . . . . . . . . . . . . . 110
Low tail
Curve values . . . . . . . . . . . . . . . . . 68
Selection of . . . . . . . . . . . . . . . . . 61
. . . . . . . . . 174
. . . . . . . . . 175
H
Hardware status
asterisk in . . . . . . . . . . . . . . . . . . 58
clearing an error . . . . . . . . . . . . . . . 58
report . . . . . . . . . . . . . . . . . . . . 58
updating . . . . . . . . . . . . . . . . . . . 58
Header data, certificate file . . . . . . . . . . 196
High voltage
Automatic turn on . . . . . . . . . . . . . . 55
Clear latches . . . . . . . . . . . . . . . . . 55
ICB latch reset . . . . . . . . . . . . . . . . 55
Inspector reset . . . . . . . . . . . . . . . . 55
Settings . . . . . . . . . . . . . . . . . . . 31
Status . . . . . . . . . . . . . . . . . . . . 55
Voltage control . . . . . . . . . . . . . . . 55
HVPS
See High voltage
I
Input definition
Loading multiple . . . . . . . . . . . . . . 39
Using . . . . . . . . . . . . . . . . . . . . 37
Input definition, printing . . . . . . . . . . . . 37
Input settings . . . . . . . . . . . . . . . . . . 34
Inserting a sequence step . . . . . . . . . . . 201
InSpector 2000 simulator . . . . . . . . . . . 287
Inspector power manager adjustments . . . . 282
Installing
Genie-2000 software . . . . . . . . . . . . 241
Software options . . . . . . . . . . . . . . 243
Standard Genie-2000 installation . . . . . 243
Windows . . . . . . . . . . . . . . . . . . 240
Integral preset. . . . . . . . . . . . . . . . . . 48
Integral preset . . . . . . . . . . . . . . . . . 124
Integration settings, changing . . . . . . . . . 220
Interactive NID option . . . . . . . . . . . . 167
K
Key parameters . . . . . . . . 161, 264 - 265, 267
Keyboard access . . . . . . . . . . . . . . . . 11
L
Labels
318
M
Manual
Pole/zero, setting . . . . . . . . . . . . . . 278
VFS command . . . . . . . . . . . . . . . 110
Marker info status page . . . . . . . . . . . . 119
Mass number, search for . . . . . . . . . . . 189
Master nuclide libraries . . . . . . . . . . . . 191
Materials library editor . . . . . . . . . . . . 222
MCA
Database . . . . . . . . . . . . . . . . . . . 37
Defining in the MID . . . . . . . . . . . . . 26
Editing a definition . . . . . . . . . . . . . 36
Menu. . . . . . . . . . . . . . . . . . . . . 47
Runtime configuration database . . . . . . . 37
Using an MID definition . . . . . . . . . . 22
MCA input definition
MID Wizard . . . . . . . . . . . . . . . . . 18
MCA input definition, MID wizard . . . . . . 17
MCA-only menus . . . . . . . . . . . . . . . 117
MCS
Preset . . . . . . . . . . . . . . . . . . 49, 124
MDA confidence factor . . . . . . . . . . . . 145
MID editor
MID wizard . . . . . . . . . . . . . . . . . 18
MID editor
adding an MCA . . . . . . . . . . . . . . . 23
Basic concepts of . . . . . . . . . . . . . . 22
Creating a new definition . . . . . . . . . . 37
Defining an MCA . . . . . . . . . . . . . . 26
Definition summary . . . . . . . . . . . . . 35
Deleting an MCA . . . . . . . . . . . . . . 25
Editing a definition . . . . . . . . . . . . . 36
Entry, defining. . . . . . . . . . . . . . . . 23
MID wizard . . . . . . . . . . . . . . . . . 17
New definition. . . . . . . . . . . . . . . . 37
starting the . . . . . . . . . . . . . . . . . . 22
Summary view. . . . . . . . . . . . . . . . 35
Using an MCA definition . . . . . . . . . . 22
MID wizard . . . . . . . . . . . . . . . . 17 - 18
Modes, power manager . . . . . . . . . . . . . 55
More parameters
Library area . . . . . . . . . . . . . . . . 137
Library locate . . . . . . . . . . . . . . . 128
Moving
The compare spectrum . . . . . . . . . . . 111
MPC
Units . . . . . . . . . . . . . . . . . . . . 183
Values . . . . . . . . . . . . . . . . . . . 184
Multiple MCA configurations . . . . . . . . . 22
Line data . . . . . .
Mass number, find .
Master libraries. . .
MPC units . . . . .
MPC values . . . .
Name, search for . .
Optional limit data .
Search commands .
Nuclide Library editor.
.
.
.
.
.
.
.
.
.
.
.
.
.
.
.
.
.
.
.
.
.
.
.
.
.
.
.
.
.
.
.
.
.
.
.
.
.
.
.
.
.
.
.
.
.
.
.
.
.
.
.
.
.
.
.
.
.
.
.
.
.
.
.
.
.
.
.
.
.
.
.
.
.
.
.
.
.
.
.
.
.
.
.
.
.
.
.
.
.
.
.
.
.
.
.
.
.
.
.
.
.
.
.
.
.
.
.
.
180
189
191
183
184
188
178
188
176
O
Opening
A certificate file . . . . . . . . . . . . . . 195
A datasource . . . . . . . . . . . . . . . . . 41
Opening a sequence file . . . . . . . . . . . . 200
Operating parameters . . . . . 161, 264 - 265, 267
Operator name. . . . . . . . . . . . . . . . . 167
Optional
Nuclide limit data . . . . . . . . . . . . . 178
Software, installing. . . . . . . . . . . . . 243
Order of the polynomial, full energy . . . . . . 73
Overrange, clearing . . . . . . . . . . . . . . . 52
P
N
Network configuration file . . . .
New certificate file, creating . . .
Next
Group. . . . . . . . . . . . . .
Nuclide identification
Interference correction method.
MDA confidence factor . . . .
Standard method . . . . . . . .
Tentative method . . . . . . . .
Nuclide library
Action level units. . . . . . . .
Action level values . . . . . . .
Adding a line . . . . . . . . . .
Adding a nuclide . . . . . . . .
Basic data . . . . . . . . . . .
Changing an entry . . . . . . .
Creating a new . . . . . . . . .
Deleting a line . . . . . . . . .
Deleting an entry . . . . . . . .
Editing . . . . . . . . . . . . .
Editing a Line . . . . . . . . .
Editor options . . . . . . . . .
Effluent/DAC units. . . . . . .
Effluent/DAC values . . . . . .
Energy units . . . . . . . . . .
Energy, search for . . . . . . .
Extracting energy lines . . . . .
. . . . . . 270
. . . . . . 198
. . . . . . 174
.
.
.
.
.
.
.
.
.
.
.
.
.
.
.
.
.
.
.
.
.
.
.
.
145
145
143
142
.
.
.
.
.
.
.
.
.
.
.
.
.
.
.
.
.
.
.
.
.
.
.
.
.
.
.
.
.
.
.
.
.
.
.
.
.
.
.
.
.
.
.
.
.
.
.
.
.
.
.
.
.
.
.
.
.
.
.
.
.
.
.
.
.
.
.
.
.
.
.
.
.
.
.
.
.
.
.
.
.
.
.
.
.
.
.
.
.
.
.
.
.
.
.
.
.
.
.
.
.
.
186
187
182
180
178
180
190
182
180
177
180
182
185
185
183
189
182
Partial certificate file . . . . . . . . . . . . 65, 81
Peak area
Library method . . . . . . . . . . . . . . . 136
Region . . . . . . . . . . . . . . . . . . . 134
Sum/non-linear LSQ method. . . . . . . . 133
Peak labels. . . . . . . . . . . . . . . . . . . 114
Peak locate
Gamma-M method . . . . . . . . . . . . . 127
Simple library method . . . . . . . . . . . 129
Unidentified second difference method . . 124
User specified method . . . . . . . . . . . 126
Peak-to-Total
Background compensation . . . . . . . . . 73
Calibration curve fitting . . . . . . . . . . . 73
Establishing a crossover energy . . . . . . . 77
Guidelines . . . . . . . . . . . . . . . . . . 73
Performing the calibration. . . . . . . . . . 76
PTEG parameters . . . . . . . . . . . . . . 75
Selecting the background spectra . . . . . . 75
Perform cascade correction checkbox . . . . . 91
Phase
Acquisition . . . . . . . . . . . . . . . . . 123
Area correction . . . . . . . . . . . . . . . 138
Detection Limits . . . . . . . . . . . . . . 147
Efficiency correction . . . . . . . . . . . . 141
Gain evaluator . . . . . . . . . . . . . . . 155
Nuclide identification . . . . . . . . . 143, 145
Peak area . . . . . . . . . . . . . . . . . . 133
319
Peak locate . . . . . . . . . . . . . . . . . 124
Post NID processing . . . . . . . . . . . . 152
Reporting . . . . . . . . . . . . . . . . . . 156
Plot command . . . . . . . . . . . . . . . . . 44
Plotting all channels . . . . . . . . . . . . . . 159
Pole/zero
Automatic . . . . . . . . . . . . . . . . . . 54
Setting manually . . . . . . . . . . . . . . 278
Polynomial order
Efficiency cal default . . . . . . . . . . . . 92
Energy full. . . . . . . . . . . . . . . . . . 73
Populate energy recal box . . . . . . . . . . . 71
Post NID processing, menu command . . . . 152
Power manager
Modes . . . . . . . . . . . . . . . . . . . . 55
Power Manager
Acquisition delay . . . . . . . . . . . . . . 56
Standby delay . . . . . . . . . . . . . . . . 56
Status screen entry . . . . . . . . . . . . . 282
Power manager, adjustments . . . . . . . . . 282
Power mode control . . . . . . . . . . . . . . 55
Preferences
Calibration . . . . . . . . . . . . . . . . . . 60
Display . . . . . . . . . . . . . . . . . . . 113
Preset
Area . . . . . . . . . . . . . . . . . . 48, 124
Computational . . . . . . . . . . . . . 48, 124
Counts . . . . . . . . . . . . . . . . . 48, 124
Integral . . . . . . . . . . . . . . . . . 48, 124
MCS . . . . . . . . . . . . . . . . . . 49, 124
Sweep counts. . . . . . . . . . . . . . 49, 124
Time . . . . . . . . . . . . . . . . . . 48, 123
Previous
Group. . . . . . . . . . . . . . . . . . . . 175
Print spectrum command . . . . . . . . . . . 157
Printing
A certificate file . . . . . . . . . . . . . . 198
Printing an input definition . . . . . . . . . . . 37
PUR control. . . . . . . . . . . . . . . . . . . 53
PUR/LTC, adjusting the. . . . . . . . . . . . 277
R
RAM batt back, status report entry . . . . . . 283
Recalculate, energy . . . . . . . . . . . . . . . 71
Ref peak function . . . . . . . . . . . . . . . . 69
Reject zero area peaks . . . . . . . . . . . . . 135
Release notes files . . . . . . . . . . . . . . . 241
Remote VDM note . . . . . . . . . . . . . . . 17
Report window options . . . . . . . . . . . . 173
Reporting
Phase . . . . . . . . . . . . . . . . . . . . 156
Reporting activity units . . . . . . . . . . . . 157
Reporting an input definition . . . . . . . . . . 37
320
Requirements, minimum system . . . . . . . 239
Reset pulse width, setting the . . . . . . . . . 281
Resetting the HVPS. . . . . . . . . . . . . . . 55
ROI limits, peak area . . . . . . . . . . . . . 136
ROIs
Adding . . . . . . . . . . . . . . . . . . . 112
Automatically adding . . . . . . . . . . . 112
Deleting . . . . . . . . . . . . . . . . . . 112
Loading. . . . . . . . . . . . . . . . . . . 112
Storing . . . . . . . . . . . . . . . . . . . 112
Runtime configuration database . . . . . . . . 37
Runtime database
Adding an MCA to . . . . . . . . . . . . . 23
definition of . . . . . . . . . . . . . . . . . 37
Deleting an MCA from . . . . . . . . . . . 25
Unloading a definition from . . . . . . . . . 39
S
Sample changer
Advancing . . . . . . . . . . . . . . . . . . 59
Sample info
Buildup type . . . . . . . . . . . . . . . . 161
Editing . . . . . . . . . . . . . . . . . . . 160
Text fields . . . . . . . . . . . . . . . . . 161
Save as certificate. . . . . . . . . . . . . . 65, 81
Saving a datasource. . . . . . . . . . . . . . . 43
Scale
Display . . . . . . . . . . . . . . . . . . . 110
Menu . . . . . . . . . . . . . . . . . . . . 110
Screen update rate . . . . . . . . . . . . . . . 116
Search for
Mass number . . . . . . . . . . . . . . . . 189
Nuclide energy . . . . . . . . . . . . . . . 189
Nuclide name. . . . . . . . . . . . . . . . 188
Section name in analysis reports . . . . . . . 156
Security key, installing . . . . . . . . . . . . 240
Selecting
a base template . . . . . . . . . . . . . . . 209
a geometry template . . . . . . . . . . . . 209
Selecting an analysis algorithm . . . . . 163, 201
Sequence file
Editing a . . . . . . . . . . . . . . . . . . 200
Opening a . . . . . . . . . . . . . . . . . 200
Sequence preferences . . . . . . . . . . 164, 202
Set up device . . . . . . . . . . . . . . . . . . 26
Setting
the assay date . . . . . . . . . . . . . . 66, 82
the high voltage . . . . . . . . . . . . . . . 55
The pole/zero manually . . . . . . . . . . 278
The TRP reset pulse width . . . . . . . . . 281
Up an analysis algorithm . . . . . . . 163, 202
Settings
High voltage . . . . . . . . . . . . . . . . . 31
Input . . . . . . . . . . . . . . . . . . . . . 34
Stabilizer. . . . . . . . . . . . . . . . . . . 29
Settings, calibration. . . . . . . . . . . . . . . 60
Setup, calibration . . . . . . . . . . . . . . . . 60
Shaping control, amplifier . . . . . . . . . . . 53
Show
All datasources . . . . . . . . . . . . . . . 175
Efficiency calibration . . . . . . . . . . . . 93
Energy coefficients . . . . . . . . . . . . . 72
Simulator, InSpector 2000 . . . . . . . . 17, 287
Smooth
Function . . . . . . . . . . . . . . . . . . 169
How it works . . . . . . . . . . . . . . . . 170
Spectrum labels . . . . . . . . . . . . . . . . 116
Spectrum, plotting a . . . . . . . . . . . . . . 44
Split command . . . . . . . . . . . . . . . . 229
Stabilizer
Adjustment of . . . . . . . . . . . . . . . . 51
Gain centroid . . . . . . . . . . . . . . . . 52
Mode controls . . . . . . . . . . . . . . . . 52
Overrange condition . . . . . . . . . . . . . 52
Spacing controls . . . . . . . . . . . . . . . 52
Status screen entry . . . . . . . . . . . . . 282
Window controls . . . . . . . . . . . . . . 52
Zero centroid . . . . . . . . . . . . . . . . 52
Stabilizer Settings. . . . . . . . . . . . . . . . 29
Standard Genie-2000 installation . . . . . . . 243
Standby delay . . . . . . . . . . . . . . . . . . 56
Start/Stop, external . . . . . . . . . . . . . . . 48
Starting data acquisition . . . . . . . . . . . . 47
Status
hardware . . . . . . . . . . . . . . . . . . . 58
HVPS control . . . . . . . . . . . . . . . . 55
Status bar, enabling . . . . . . . . . . . . . . 229
Status page
Marker info. . . . . . . . . . . . . . . . . 119
Status report
Entries explained . . . . . . . . . . . . . . 282
Step continuum . . . . . . . . . . . . . . . . . 61
Stopping data acquisition . . . . . . . . . . . . 47
Store ROIs. . . . . . . . . . . . . . . . . . . 112
Strip function . . . . . . . . . . . . . . . . . 169
Summary of MID definitions . . . . . . . . . . 35
Super-fine gain . . . . . . . . . . . . . . . . . 53
Supplemental nuclide libraries . . . . . . . . 191
Sweep counts preset . . . . . . . . . . . . . . 49
System
Assembly sequence . . . . . . . . . . . . 239
Minimum requirements for . . . . . . . . 239
T
Time preset . . . . . . . . . . . . . . . . 48, 123
Tolerance values, use of . . . . . . . . . . . . 60
Toolbar setup, Preferences . . . . . . . . . . 117
Toolbar, enabling . . . . . . . . . . . . . . . 229
TRP preamp
Reset pulse width, setting . . . . . . . . . 281
Setup. . . . . . . . . . . . . . . . . . . . . 54
U
ULD control, ADC . . . . . . . . . . . . . . . 50
Unidentified second difference peak locate . . 124
Units
Action level . . . . . . . . . . . . . . . . 186
Effluent/DAC . . . . . . . . . . . . . . . 185
Unloading a database definition . . . . . . . . 39
User specified peak locate. . . . . . . . . . . 126
Using
the Analysis Sequence Editor . . . . . . . 199
the Certificate File editor. . . . . . . . . . 192
the Keyboard . . . . . . . . . . . . . . . . 11
the Nuclide Library Editor . . . . . . . . . 176
Using an input definition . . . . . . . . . . . . 37
V
Validating the geometry definition . . . . . . 221
Values
Action level . . . . . . . . . . . . . . . . 187
Effluent/DAC . . . . . . . . . . . . . . . 185
MPC . . . . . . . . . . . . . . . . . . . . 184
VDM, editing a remote . . . . . . . . . . . . . 17
VFS
Auto . . . . . . . . . . . . . . . . . . . . 110
Linear . . . . . . . . . . . . . . . . . . . 110
Log . . . . . . . . . . . . . . . . . . . . . 110
Manual . . . . . . . . . . . . . . . . . . . 110
Voltage, HVPS, output control . . . . . . . . . 55
W
Windows, installling . . . . . . . . . . . . . 240
Workspace file format. . . . . . . . . . . . . 271
Z
Zero
ADC control . . .
Centroid control .
Mode control . .
Spacing control .
Window control .
.
.
.
.
.
.
.
.
.
.
.
.
.
.
.
.
.
.
.
.
.
.
.
.
.
.
.
.
.
.
.
.
.
.
.
.
.
.
.
.
.
.
.
.
.
.
.
.
.
.
.
.
.
.
.
.
.
.
.
.
.
.
.
.
.
.
.
.
.
.
50
52
52
52
52
Tail curve, selection of . . . . . . . . . . . . . 61
Template name in analysis reports . . . . . . 156
321
Canberra (we, us, our) warrants to the customer (you, your) that for a period of ninety (90) days from the date of
shipment, software provided by us in connection with equipment manufactured by us shall operate in accordance
with applicable specifications when used with equipment manufactured by us and that the media on which the
software is provided shall be free from defects. We also warrant that (A) equipment manufactured by us shall be
free from defects in materials and workmanship for a period of one (1) year from the date of shipment of such
equipment, and (B) services performed by us in connection with such equipment, such as site supervision and
installation services relating to the equipment, shall be free from defects for a period of one (1) year from the date of
performance of such services.
If defects in materials or workmanship are discovered within the applicable warranty period as set forth above, we
shall, at our option and cost, (A) in the case of defective software or equipment, either repair or replace the
software or equipment, or (B) in the case of defective services, reperform such services.
LIMITATIONS
EXCEPT AS SET FORTH HEREIN, NO OTHER WARRANTIES OR REMEDIES, WHETHER STATUTORY,
WRITTEN, ORAL, EXPRESSED, IMPLIED (INCLUDING WITHOUT LIMITATION, THE WARRANTIES OF
MERCHANTABILITY OR FITNESS FOR A PARTICULAR PURPOSE) OR OTHERWISE, SHALL APPLY. IN NO
EVENT SHALL CANBERRA HAVE ANY LIABILITY FOR ANY SPECIAL, EXEMPLARY, PUNITIVE, INDIRECT
OR CONSEQUENTIAL LOSSES OR DAMAGES OF ANY NATURE WHATSOEVER, WHETHER AS A RESULT
OF BREACH OF CONTRACT, TORT LIABILITY (INCLUDING NEGLIGENCE), STRICT LIABILITY OR
OTHERWISE. REPAIR OR REPLACEMENT OF THE SOFTWARE OR EQUIPMENT DURING THE
APPLICABLE WARRANTY PERIOD AT CANBERRA'S COST, OR, IN THE CASE OF DEFECTIVE SERVICES,
REPERFORMANCE AT CANBERRA'S COST, IS YOUR SOLE AND EXCLUSIVE REMEDY UNDER THIS
WARRANTY.
EXCLUSIONS
Our warranty does not cover damage to equipment which has been altered or modified without our written
permission or damage which has been caused by abuse, misuse, accident, neglect or unusual physical or
electrical stress, as determined by our Service Personnel.
We are under no obligation to provide warranty service if adjustment or repair is required because of damage
caused by other than ordinary use or if the equipment is serviced or repaired, or if an attempt is made to service or
repair the equipment, by other than our Service Personnel without our prior approval.
Our warranty does not cover detector damage due to neutrons or heavy charged particles. Failure of beryllium,
carbon composite, or polymer windows, or of windowless detectors caused by physical or chemical damage from
the environment is not covered by warranty.
We are not responsible for damage sustained in transit. You should examine shipments upon receipt for evidence
of damage caused in transit. If damage is found, notify us and the carrier immediately. Keep all packages,
materials and documents, including the freight bill, invoice and packing list.
When purchasing our software, you have purchased a license to use the software, not the software itself. Because
title to the software remains with us, you may not sell, distribute or otherwise transfer the software. This license
allows you to use the software on only one computer at a time. You must get our written permission for any
exception to this limited license.
BACKUP COPIES
Our software is protected by United States Copyright Law and by International Copyright Treaties. You have our
express permission to make one archival copy of the software for backup protection. You may not copy our
software or any part of it for any other purpose.
Revised 1 Apr 03