1
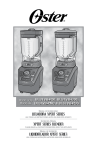
® MD
VERSATM
PERFORMANCE
BLENDER
MÉLANGEUR
PERFORMANCE
VERSAMC
The Power to
Blend Everything
La puissance pour
tout mélanger
User Manual / Manuel d’utilisation
Visit us at www.oster.ca
P.N. 173011
IMPORTANT SAFEGUARDS
When using your blender, you should always follow basic safety precautions,
including the following:
• Readallinstructionsbeforeuse.
• Toprotectagainstelectricalhazards,donotimmersethecord,plugormotorbasein
waterorotherliquids.
• A lwaysusetheproductonaclean,flat,hard,drysurface.Thereshouldbeno
materialsuchasatableclothorplasticbetweentheunitandsurface.
• FlashingcontrolbuttonLEDlightindicatesreadytooperate.Avoidanycontactwith
bladesormoveableparts.
• Keephandsandutensilsoutofjarwhileblendingtoreducetheriskof:
–Severepersonalinjury.
–Damagetotheblender.
• Ifscrapingisnecessary,turnthepowerOFF,unplugfromtheelectricaloutlet,and
usearubberspatulaonly.
• Donotusetheappliance:
–Withadamagedcordorplug.
–Aftertheunitfailstoworkcorrectly.
–Afteryoudropordamagetheproductinanyway.
ReturntheproducttoyournearestAuthorizedOsterTMApplianceServiceCenterfora
safetycheck,adjustmentorrepair.Callourtoll-free,automatedphonelinetofindthe
ServiceCenternearesttoyou.
• The6PointStarBladeissharp.Handleitcarefully.Toreducetheriskofinjury,
neverplacethebladeassemblyonthebasewithoutajarproperlyattached.
• Alwaysputthelidonthejarbeforeoperatingtheblender.
• Donotuseoutdoors.
• Donotallowthecordtotouchhotsurfacesorhangovertheedgeof
atableorcounter.
• TurnallcontrolstoOFFandunplugtheblenderwhenitisnotinuse,beforetaking
offorputtingonparts,andbeforecleaning.
• Neverleavetheapplianceunattendedwhileitisrunning.
• Youriskpersonalinjury,fireorelectricshockifyouuseattachments,jars
orpartsotherthanthoserecommendedbytheOster®brand.
• Supervisechildrencloselywhentheyuseorarenearbyappliances.
• Theuseofattachments,includingcanningorordinaryjarandprocessingassembly
parts,isnotrecommendedbyJardenConsumerSolutionsandmaycauseriskor
injurytopersons.
• Thecontainershouldnotbemorethan2/3fullwhenthetamperisleftinwhile blending.Donotexceed20secondsofcontinuousblendingwiththetamperinplace.
• W henmakingnutbuttersoroilbasedfoods,donotprocessformorethanoneminute
afterthemixturestartscirculating.Over-processingcancausedangerousoverheating.
• Whenprocessinghotliquids:the2-partlidmustbesecurelylockedinplace.Thisallows
steamtoescapenaturally,andwillpreventthelidfromcomingoffwhenthemachineis
turnedon.Alwaysstarthotliquidson“Low”,thenincreasetothedesiredspeedinthe
recipe.Neverstarton“High”withhotliquids.Usecautionwithhotliquids.
• N everputnon-fooditemsintothepitchertoblend.
2
SAVE THESE INSTRUCTIONS
This product is for household use only.
• T
hemaximumratingmarkedontheproductisbasedontheattachmentthat
drawsthegreatestload.Otherattachmentsmaydrawlesspower.
Power Cord Instructions:
Pleasefollowtheinstructionsbelowtoensurethesafeuseofthepowercord.
• TheOster® Versa™PerformanceBlendercomesequippedwithathree-prong
(grounding)plug.Ifyoudonothaveathree-prongoutlet,youcanusewith
anadaptertobeabletousewithastandardtwo-prongoutlet.Donotcutor
removethethirdprongfromtheplugonthepowercord.
• Trytopositiontheblendernearthepowersourcetoreducethehazards
associatedwithpowercords(suchasbecomingentangledortrippingover
alongpowercord).
• Donotpull,twistorotherwiseabusethepowercord.
• Donotwrapthepowercordaroundthemainbodyoftheblenderduring
orafteruse.
• Donotuseanextensioncordwiththisproduct.
This symbol has been placed in specific areas of the User Guide portion of
this book. Its purpose is to help you easily identify instructions that require
your special attention.
D
3-PRONG GROUNDED PLUG
This appliance must be grounded while in use to protect the operator from
electric shock. This product is for use on 120 volts. The cord has a plug (A)
as shown. An adapter (C) (not included) is available for connecting threeblade grounding-type plugs to two-slot receptacles (B). The green grounding
lug extending from the adapter must be connected to a permanent ground
such as a properly grounded outlet box. The adapter should not be used if a
three-slot grounded receptacle is available.
DO NOT ATTEMPT TO MODIFY THIS PLUG OR DEFEAT THIS SAFETY FEATURE
IN ANY WAY.
3
Table of Contents
English
Important Safeguards .......................................................................................................2
Power Cord Instructions ..................................................................................................3
Features and Assembly ....................................................................................................5
Using the Product Control Panel .....................................................................................6
Using your Product ..........................................................................................................7
Blending Tips ..................................................................................................................8
Caring for Your Product ...............................................................................................9
Cleaning .......................................................................................................................9
Storing .........................................................................................................................9
7 Year Limited Warranty ............................................................................................... 10
How to Obtain Warranty Service .............................................................................. 10
Français
Précautions de sécurité importantes ............................................................................... 11
Instructions concernant le cordon électrique..................................................................12
Caractéristiques et montage ...........................................................................................13
Utilisation du tableau de commande de votre appareil .................................................. 14
Utilisation de votre appareil ...........................................................................................15
Conseils de mélange........................................................................................................ 16
Entretien de votre appareil ............................................................................................. 17
Nettoyage .................................................................................................................... 17
Rangement .................................................................................................................. 17
Garantie limitée de 7 ans ............................................................................................... 18
Comment bénéficier de la garantie .............................................................................. 18
4
Welcome
Congratulations on the purchase of your Oster® Versa™ Performance Blender.If
youhaveanycomments,questionsorinquiriesaboutthisrevolutionaryproduct,
pleasecall1-800-667-8623.
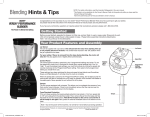
Learning About Your Product Features and Assembly
1. Filler Cap – 2oz/60mlfillercap
BLSTVB-RV0-033
BLSTVB-000-033
doublesasameasuringcup.Align
notch with the hole to insert in lid;
1
turnclockwisetosecureinplace.
Removefromlidtoaddingredients
whileblending.
2. Lid (Flap goes on opposite side of
2
pour spout) – Sealsthejar.
3. Jar & Blade Assembly –
BPA-freeplasticjarwith
permanentlyattachedblade
assembly.
4.Jar Sensor-Unitwillnotoperate
unlessthejarisfullyseatedonbase
andthejarsensorisengaged.
3
5. Control Panel –Includesspeeddial,
64oz/1.9L
3programmedsettingsandpulse.
68oz/2L
6. Power Cord –3-prongpowercord.
4
7. Fuse –Incorporatedtoprotectthe
motorfromoverheating.Ifthemotor
shutsoffwhileinuse:Turncontrol
knobto“Off”andunplugfromthe
5
wall.Removejarfrombaseandfree
6
bladeofanyobstructions.Wait307
45minutesfortheunittocool.Press
8
externalresettablefusebuttononthe
bottomofthebase.
8. Cord Storage –Spaceonthebottomof
the base to store the cord while not in
use.
9.Tamper –Afterblendinghasstarted,removethefillercapand
9
placethetamperthroughtheopeninginthelidtoassistwith
pushingthefooddowntotheblade.
Note–thetamperisnotlongenoughtoreachtheblade.
MED
MOY
PRO
OFF
ÂRRET
GRA
WARN
ING:
MM
ED
PUL / PROGRA
SE /
MM
IMP
É
ULS
ION
S
RED
FLASHI
NG LIGHT
HI
HAU
T
INDICA
TES READY
TO OPERA
TE. DO
NOT
IMPU
LSION
S
TOUCH
BLADE
S. AVERTI
SSEME
NT: LE
PULS
E
VOYAN
T SCINTI
LLANT
SOUP
E
SMOO
THIE
ROUGE
EST SIGNE
TREM
TARTIPETTE
NADE S/
S
SOUP
DE PRÊT
ME
MOYD
À L'EMPL
OI. NE
PROG
RAMM
ED
NGS
GRA
WARN
ING:
PAS TOUCH
ER AU
DIPS/
SETTI
PRO
/ RÉGL
AGES
SPRE
OFF
ADS
ÂRRET
COUTE
AU
PROG
MM
ÉS
ED
PUL / PROGRA
SE /
MM
IMP
É
ULS
ION
S
RED
RAMM
FLASH
ING LIGHT
INDIC
ATES
HI
HAUT
READ
Y TO
OPERA
TE. DO
IMPU
LSIO
NS
NOT
TOUC
H BLADE
S. AVERT
ISSEM
ENT:
PUL
SE
SMO
OTHI
LE VOYA
NT SCINT
ILLAN
T ROUG
E EST
SOU
SIGNE
PE
DE
TREM
TART PETT
INAD ES/
ES
E
SOU
P
PROG
RAM
MED
DIPS
SPRE /
ADS
SETT
INGS
/ RÉGL
AGES
PRÊT
À L'EMP
LOI. NE
PAS TOUC
HER AU
COUT
EAU
PROG
RAM
MÉS
Before you use the product for the first time, separate the
Tamper,Lid,FillerCap,andJar.Washinwarm,soapywater.Rinseanddry
well.
5
ME
MO D
Using Your Product Control Panel
A. Speed Dial–Turndialclockwisetochoosefrommanualspeed
settingsfrom“Low”to“High”.Onceyouselectaspeed,theblender
willrununtilyouturnitbackto“Off.”
B. Programmed Settings–Inordertoactivatetheprogrammedbuttons,
firstturnthespeeddialcounter-clockwisetotheProgrammed/Pulse
Setting.Thenselecttheprogrammedbuttonyouwouldliketouse.
Theyhavebeendevelopedforoptimalusewhenblendingthosetypes
offoods.
Soup:20secondrampupto“Medium”,5minuteson“High”.
Dips/Spreads:2(10-second)pulsesat“Medium-low”,30secondson“High”.
Smoothie:10secondstorampupto“Medium”,20secondson“High”.
NOTES:
1.Ifyouwouldliketostoptheblenderinthemiddleofaprogrammed
cycle,simplypressanybutton.
2.Forsomeblendingtasks,itmaybenecessarytosupplementthe
programmedsettingwithadditionalblendingtime.
C. Pulse–Turnthespeeddialcounter-clockwisetotheProgrammed/
PulseSetting.Thenpressthe“Pulse”buttonforthedesiredtime.
D. LED Lights–Thelightsaroundtheselectedprogrammedbuttonswill
pulsewhentheunitisoperatinginthatmode.
E. Flashing Light–WhenspeeddialisturnedtotheProgrammed/Pulse
setting,thePulsebuttonlightwillflashredtoindicatetheunitis
readytooperate.Warning:Flashinglightindicatesreadytooperate.
Donottouchtheblade.
A
B
D
E
C
6
Using your Product
Tamper –Thetamperallowsyoutoacceleratetheprocessofverythickand/
orfrozenmixturesthatcannotbeprocessedinaregularblender.Iffoodisnot
circulatingthemachinemaybeoverloadedormayhaveatrappedairbubble.
Usingthetamperhelpstomaintaincirculationbypreventingairpocketsfrom
forming.Whilethemachineisrunning,removethefillercap,andthroughthe
holeinthelidinsertthetamperanduseittopressingredientsontothebladesas
youmakefrozenicecreams,nutbutters,etc.
Thecontainershouldnotbemorethan2/3fullwhenthetamperisused
duringblending.
Donotusetamperformorethan30consecutiveseconds(toavoidstressing
themotor).
Youmayneedtomovethetampernotonlyupanddown,butalsosidetoside.
Jar Sensor –Theunitissuppliedwithajarsensoronthebase.Thiswillprevent
themotororthecontrolpanelfromstartingiftheblenderjarisnotproperly
placedonthebase.
Ifthejarisremovedfromthebaseduringoperationtheunitwillstop.Torestart
theblender,turnthespeeddialto“Off”,placethejarontheblenderbaseand
selectthepreferredspeedtobeginagain.
NOTE:ThemotorwillnotrestartunlesstheunitisturnedOFFfirst.
7
Blending Tips
•Donotoperateformorethan10minutesatatime.
•Jarshouldbeatleast25%fullatalltimesforoptimalperformance.
•Fillercapshouldalwaysbeassembledtothelidandlockedwhenblending
hotliquids.
•UseHighspeedsasmuchaspossibleforwholefruit/vegetablejuices,soups,
shakes,frozenmixtures,makingpuréesandnutbutters.Processingtimes
willgenerallybelessthanoneminute(mosttakelessthan30 seconds).Highspeedprovidesthebestqualityofrefinement,breakingdown
ice,frozenfruit,wholefruitsorvegetablestoasmoothlump-freeconsistency.
•Neverblendwithoutthelidfirmlyinplaceonthejar.
•IfonHighspeedthefoodisnotcirculating,tryusingthetamper.Ifthisisalso
notworking,tryusingaslowerspeed.Oncethefoodbeginstocirculateagain,
youcanswitchbacktoaHighspeed.
•AQuickResponsecodeislocatedonthebackofthebaseoftheunit.Usingthe
Microsoft®Tagapplicationonyoursmartphone,scanthattagtobedirected
totheproductpagetofindpertinentproductinformationsuchasinstruction
manuals,replacementparts,customerservice,recipes,etc.
•Duetothepowerofthemachine,itisnormalforittobefairlyloudduring
operation.Throughtheblendingcycle,thenoisesmaychange,butthereisno
needtobeconcerned.
I ceCrushing:Foroptimalicecrushing,fillthejarwithpreferredamountofice.
Thenfillwithwaterjustabovewheretheicestops.Usethespeeddialtoblend
onHighforafewseconds.Thendrainouttheexcesswaterandyouareleft
withajarfilledwithgreatconsistentice!
Troubleshooting:
1.
If the blender does not turn on:
1.Turncontrolknobto“OFF”positionandunplugfromelectricaloutlet.
2.Makesurethebladeisfreeofanyobstruction.
3.Plugtheunitbackin.
4. Make sure jar is securely placed on the blender base.
5.Restartunitbyturningcontrolknobtodesiredsetting.
2. If the blender stops during operation:
1.Fuse/OverloadProtectionactivated
1.Themotorisdesignedtoprotectitselffromoverheating;when
neccesary,themotorwillturnitselfoff.
2.Resetthemotorby:
1.Turncontrolknobto“OFF”andunplugfromelectricaloutlet.
8
2.Removethejarfromthebaseandfreethebladeofanyobstructions.
3.Wait30-45minutesfortheunittocool.
4.Presstheresettablefusebuttonlocatedonthebottomofthebase.
2.JarSensoronbasereleased
1.Torestarttheunit,turncontrolknobto“OFF“position.
2.Makesurethejarissecurelyplacedontheblenderbase.
3.Restarttheblenderbyturningthecontrolknobtothedesiredsetting.
If the warning light flashes and the motor will not run with the jar in place,
the unit has not cooled sufficiently. Turn the control knob to “Off” and wait
another 10-20 minutes before trying again.
Caring for Your Product
Cleaning
Base:Firstturnthecontrolto“Off”andunplugthepowercord.Thenwash
outsidesurfacewithadampsoftclothorspongeusingmildsoapandwarm
water.Neverimmersethemotorbaseinwaterorotherliquid.
Jar:Fillthecontainerhalffullwithwarmwaterandadd2dropsofliquidsoap.
Closethejarwiththelidandfillercap.TurnSpeedDialtoa“Low”speedand
thenincreaseto“High”.Runfor30-60seconds.TurnthemachineOFF,rinse
thejaroutwithrunningwaterthendry.
Lid&Fillercap:Separatethe2piecesandwashinwarmsoapywater.Rinse
cleanunderrunningwater,thendry.
NOTE-Donotputlid,fillercaporjarinthedishwasher.
Storing
Aftercleaning,storewithlidnotclosedcompletelytoallowairtocirculateand
preventcontainerodors.
WARNING: Never put the jar or any other parts in a microwave.
Never store foods or drinks in the jar.
9
7 Year Limited Warranty
Sunbeam Products, Inc. doing business as Jarden Consumer Solutions or if in Canada, Sunbeam
Corporation (Canada) Limited doing business as Jarden Consumer Solutions (collectively “JCS”) warrants
that for a period of seven years from the date of purchase, this product will be free from defects in
material and workmanship. JCS, at its option, will repair or replace this product or any component of
the product found to be defective during the warranty period. Replacement will be made with a new or
remanufactured product or component. If the product is no longer available, replacement may be made
with a similar product of equal or greater value. This is your exclusive warranty. Do NOT attempt to repair
or adjust any electrical or mechanical functions on this product. Doing so will void this warranty.
This warranty is valid for the original retail purchaser from the date of initial retail purchase and is
not transferable. Keep the original sales receipt. Proof of purchase is required to obtain warranty
performance. JCS dealers, service centers, or retail stores selling JCS products do not have the right
to alter, modify or any way change the terms and conditions of this warranty.
This warranty does not cover normal wear of parts or damage resulting from any of the following:
negligent use or misuse of the product, use on improper voltage or current, use contrary to the operating
instructions, disassembly, repair or alteration by anyone other than JCS or an authorized JCS service
center. Further, the warranty does not cover: Acts of God, such as fire, flood, hurricanes and tornadoes.
What are the limits on JCS’s Liability?
JCS shall not be liable for any incidental or consequential damages caused by the breach of any
express, implied or statutory warranty or condition.
Except to the extent prohibited by applicable law, any implied warranty or condition of merchantability
or fitness for a particular purpose is limited in duration to the duration of the above warranty. JCS
disclaims all other warranties, conditions or representations, express, implied, statutory or otherwise.
JCS shall not be liable for any damages of any kind resulting from the purchase, use or misuse of,
or inability to use the product including incidental, special, consequential or similar damages or loss
of profits, or for any breach of contract, fundamental or otherwise, or for any claim brought against
purchaser by any other party. Some provinces, states or jurisdictions do not allow the exclusion or
limitation of incidental or consequential damages or limitations on how long an implied warranty lasts,
so the above limitations or exclusion may not apply to you.
This warranty gives you specific legal rights, and you may also have other rights that vary from
province to province, state to state or jurisdiction to jurisdiction.
How to Obtain Warranty Service
In the U.S.A.
If you have any question regarding this warranty or would like to obtain warranty service, please call
1-800-334-0759 and a convenient service center address will be provided to you.
In Canada
If you have any question regarding this warranty or would like to obtain warranty service, please call
1 800-667-8623 and a convenient service center address will be provided to you. In the U.S.A., this
warranty is offered by Sunbeam Products, Inc. doing business as Jarden Consumer Solutions located
in Boca Raton, Florida 33431. In Canada, this warranty is offered by Sunbeam Corporation (Canada)
Limited doing business as Jarden Consumer Solutions, located at 20 B Hereford Street, Brampton,
Ontario L6Y 0M1. If you have any other problem or claim in connection with this product, please write
our Consumer Service Department.
PLEASE DO NOT RETURN THIS PRODUCT TO ANY OF THESE ADDRESSES
OR TO THE PLACE OF PURCHASE.
Printed in China
10
TM
Forproductquestionscontact:
SunbeamConsumerService
USA:1.800.334.0759
Canada:1.800.667.8623
www.oster.ca
©2013SunbeamProducts,Inc.doingbusinessasJardenConsumerSolutions.
Allrightsreserved.InCanada,importedanddistributedbySunbeamCorporation(Canada)
LimiteddoingbusinessasJardenConsumerSolutions,20BHerefordStreet,Brampton,
OntarioL6Y0M1.
Pourlesquestionsdeproduit:
ServiceauxconsommateursSunbeam
États-Unis:1.800.334.0759
Canada:1.800.667.8623
www.oster.ca
©2013SunbeamProducts,Inc.faisantaffairessouslenomdeJardenConsumerSolutions.
AuCanada,importéetdistribuéparSunbeamCorporation(Canada)
LimitedfaisantaffairesouslenomdeJardenConsumerSolutions,
20BHerefordStreet,Brampton(Ontario)L6Y0M1.
PrintedinChinaImpriméenChine
GCDS-OST31679-LL