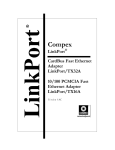
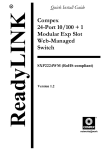
1
Quick Install Guide
24-Port 10/100/1000Mbps
Web-Managed Gigabit
Ethernet Switch
GSC2024WM 1a
GSC2024WM 6a (RoHS compliant)
Table of Contents
1:
2:
Introduction ..................................................................................1
Packaging Content............................................................................... 2
Let’s Get Going-Hardware Setup ...............................................3
Desktop installation .............................................................................. 3
Rack installation.................................................................................... 4
3:
Utility Installation...........................................................................6
4:
Accessing to web-based interface .........................................10
5:
Troubleshooting ..........................................................................12
6:
Panel Views and Descriptions...................................................13
7:
Technical Specifications ...........................................................16
8:
TCP/IP Configuration..................................................................18
For Windows 95/98/98SE/ME/NT ........................................................ 18
For Windows XP/2000.......................................................................... 21
Warranty Registration Card ..............................................................25
i
Chapter 1
Introduction
1: Introduction
The Compex GSC2024WM is a
24-port
10/100/1000Mbps
Web-managed
Gigabit
Ethernet Switch designed for
high performance solution for
enterprises. It allows legacy
LANs to be upgraded to Gigabit LAN, without wasting company’s existing
investment in hardware, software, and trained personnel.
The Compex GSC2024WM supports Port-based VLAN for improving network
performance and increasing security. Other advanced features include Port
Mirroring, QOS and Trunking which can be easily configured using its userfriendly management interface.
The Compex GSC2024WM is a high density and high performance managed
switch that caters to all your enterprise needs.
1
Chapter 1
Introduction
Packaging Content
Actual product appearance may slightly differ depending on the hardware
version.
1 x Compex GSC2024WM unit
1 x Power cord
2 x Bracket
8 x Screws
1 x Product CD
4 x rubber feet
2
Chapter 2
Let’s Get Going - Hardware Setup
2: Let’s Get Going-Hardware Setup
Compex GSC2024WM can be installed as a desktop unit or mounted on a 19inch rack. Detailed installation process will be listed as shown below.
Desktop installation
Attach the rubber feet on the bottom
of the metal chassis. These rubber feet
prevent the switch from shock and
vibration.
Use a RJ45 Ethernet cable
connect it to any of the ports.
and
Insert the power cord into the socket
at the back of Compex GSC2024WM
and connect the other end to the
power point.
Check that the POWER LED at the front
panel of Compex GSC2024WM has
lighted up. The unit is now ready for
use.
3
Chapter 2
Let’s Get Going - Hardware Setup
Rack installation
Secure the brackets to the holes
located at both sides of Compex
GSC2024WM. Fasten it with the
screws provided in the packaging.
Align the brackets holes with the
rack holes. Fasten both brackets to
the rack using the screws provided.
Insert one end of an RJ45 network
cable into any of the ports in
Compex GSC2024WM and the
other end of your cable to the
network adapter of your PC.
Insert the power cord into the
socket at the back of Compex
GSC2024WM and connect the
other end to the power point.
Check that the POWER LED at the
front panel of Compex GSC2024WM
has lighted up. The unit is now ready
for use.
4
Chapter 2
Let’s Get Going - Hardware Setup
The surface to place the Compex GSC2024WM should be clean,
smooth, level and sturdy. Ensure there is enough spacing around
the unit to allow attachment of network cables.
Please allow at least 4 inches of clearance in front and behind the
switch for proper ventilation. This is especially important for an
enclosed rack installation.
5
Chapter 3
Utility Installation
3: Utility Installation
This utility is specially designed for easy configuration of Compex GSC2024WM.
It allows you to upgrade your firmware, change your administrative password,
configure your switch and also access to the web-based interface.
Insert the Product CD into your CD-ROM drive.
Click on the Utility section and the following screen will appear:
Follow the instructions stated on the screen.
6
Chapter 3
Utility Installation
Once the installation is complete, the following screen will appear. Click on
Run GSC2024WM Utility.exe and click on the OK button to run the utility
program.
Alternatively, you may also go to Start, Programs, GSC2024WM-1A Utility and
select GSC2024WM-1A Utility to activate the program.
7
Chapter 3
Utility Installation
The following screen will appear. Ensure that your switch is correctly
connected to your PC.
Click on the Discovery button and allow your system to detect the device that
is connected to your PC. Once detected, the device information will be listed
in the Discovery List section.
8
Chapter 3
Utility Installation
Select the entry for the device and click on the Add to monitor list button to
start monitoring the device.
From here, you can start to configure your Compex GSC2024WM either
through this utility or from the web-based interface of the switch.
For details on using this utility, kindly refer to the User’s Manual in the Product
CD.
9
Chapter 4
Accessing to web-based interface
4: Accessing to web-based interface
You can access to the web-based interface via the utility program. Simply click
on the Web access button and the Internet browser will lead you to the
authentication page of your Compex GSC2024WM.
Alternatively, you can also access to the Internet browser manually by directly
entering the URL Address, http://192.168.100.128 in the address bar of your
Internet browser.
Enter the default password as password and click on Login. Please note that
the password is case-sensitive.
To change your password, you can either access to the web-interface or use
the utility provided. Kindly refer to the user’s manual for detail on how to
change and login password using the web-based interface.
After logging in, the main page of Compex GSC2024WM will appear as
shown:
10
Chapter 4
Accessing to web-based interface
A brief description of the individual functions of Compex GSC2024WM are
listed below:
Switch Status
Lists out the information such as flow control, speed, priority, and also displays
information on connectivity, port trunking, port mirroring and VLAN.
Port Statistics
Lists out detailed statistics for all the ports, such as the total number of packets
received/transmitted, the number of packets received/transmitted in different
sizes, and also the number of errors found while receiving/transmitting the
packets.
Port Configuration
Configures the flow control, priority and speed of individual ports.
Trunk Configuration
Extends the bandwidth of cascaded switches up to a maximum of 2.4Gbps in
full duplex mode.
Kindly note that ports 1 to 4 have trunking capability and that only 3 trunking
groups are allowed per Compex GSC2024WM switch.
VLAN Configuration
Groups individual ports into small virtual networks. You can configure up to 24
VLAN groups.
Mirror Configuration
Duplicates a port's traffic on to another port without interfering with the
original port.
Misc Configuration
Allows you to change your Compex GSC2024WM’s IP address, password, idle
timeout; to make a backup copy of your configuration and to reset the
settings to their factory default values.
Support
Make enquiries if you encounter problems while setting up the device.
Logout
Exit out of web-based interface environment.
11
Chapter 5
Troubleshooting
5: Troubleshooting
Compex GSC2024WM 24-Port 10/100/1000Mbps Web-Managed Gigabit
Ethernet Switch is designed with LED indicators to indicate the operating status
such as: Power ON/OFF, Port Activity Status (Transmit/and Receive), Duplex
status and 10/100/1000Mbps connection status.
The LEDs may help to identify the source of the problem during troubleshooting.
LED indicators
Description of Function
POWER LED
SYSTEM LED
POWER/SYSTEM LED (Green)
If the Power LED does not light up, check that:
Plug/cord is properly inserted into the socket.
Main switch on the power point is ON.
Link/ACT LEDs
LINK/ACT LEDs (Green)
STEADY Green light indicates a good link is
established.
If the Link/ACT LEDs do not light up, check that:
RJ-45 cable is fully inserted (You hear a click
sound if the cable is well inserted into the port.)
The PC is powered up with the correct TCP/IP
Configuration.
Please contact our technical support group if you experience further difficulties.
12
Chapter 6
Panel Views and Descriptions
6: Panel Views and Descriptions
Features
POWER LED
SYSTEM LED
Link/ACT LED
Status and Indication
Steady Green
Power is supplied to the device.
Off
No power is supplied to the device.
Steady Green
The device is ready to operate.
Off
The device is either not powered up or a
problem has occurred.
Steady Green
The respective port has successfully
connected to Compex GSC2024WM.
Blinking
The respective port is transmitting or
receiving data.
Off
No connection is established.
13
Chapter 6
Panel Views and Descriptions
Features
1000Mbps LED
Status and Indication
Steady Green
Off
The respective port is connected at the
speed of 1000Mbps.
No network connection is established
The respective port is connected at the
speed of 10Mbps or 100Mbps.
When both 100Mbps and 1000Mpbs LEDs
do not light up, this means that the switch is
operating at the speed of 10Mbps.
100Mbps LED
Steady Green
Off
The respective port is connected at the
speed of 100Mbps.
No network connection is established
The respective port is connected at the
speed of 10Mbps or 1000Mbps.
When both 100Mbps and 1000Mpbs LEDs
do not light up, this means that the switch is
operating at the speed of 10Mbps.
14
Chapter 6
Panel Views and Descriptions
AC power
connector
Power
switch
Reset
button
Features
Status and Indication
24 RJ45 ports
Each port supports
Auto negotiable 10/100/1000Mbps
Auto MDI/MDIX crossover detection.
Reset button
Reset all settings to factory default. Once you have
pressed the reset button, Compex GSC2024WM will
set all configurations back to their default values.
Note: Your current configuration will NOT be saved.
AC power connector
Supports input voltage range from 100 to 240 VAC at
50-60Hz.
Power switch
Activate or deactivate power supplied to Compex
GSC2024WM.
15
Chapter 7
Technical Specification
7: Technical Specifications
Network Protocol, Standards and Electrical Emissions
Industry Standards
Safety Certifications
Network Protocol
Complies with
IEEE 802.3 10Base-T
IEEE 802.3u 100Base-TX
IEEE 802.3ab 1000Base-T
IEEE 802.3x Flow Control
CE Mark
FCC Class A
Gost
UL
CSMA/CD
Interface Options
24 RJ45 Ports
Network Cables
24 x 10/100/1000Mbps Auto MDIX RJ45 ports
10 Base-T: 2-pair UTP Cat 3,4,5; up to 100m
100 Base-TX: 2-pair UTP Cat 5; up to 100m
1000 Base-T: 4-pair UTP Cat 5; up to 100m
Network Management
In Band and Out of Band
Web-based HTTP
Port Mirroring
16
Chapter 7
Technical Specification
Performance
Transmission Method
Data Transfer Rate
Store and Forward
10 Base-T Ethernet: 10Mbps (Half Duplex);
20Mbps (Full Duplex)
100Base-TX Fast Ethernet: 100Mbps (Half
Duplex); 200Mbps (Full Duplex)
1000 Base-T Gigabit Ethernet: 2000Mbps (Full
Duplex)
Filtering Address Table
8K entries per switch
MAC Address Learning
Automatic update
RAM Buffer
512K bytes per switch
Virtual LAN
Priority Queuing
Port-based VLAN
Up to 24 VLAN groups
2 levels
Physical and Environment
Environmental
Requirements
Operating temperature
Storage temperature
Operating humidity
Storage humidity
RH = Relative Humidity
Physical Dimension
440mm x 210mm x 44mm (W x H x D)
Power Consumption
Maximum of 35 Watts
AC Inputs
100-240V AC, 50/60
17
: 0ºC to 40ºC
: -10ºC to 70ºC
: 10% to 90% RH
: 5% to 90% RH
Chapter 8
TCP/IP Configuration
8: TCP/IP Configuration
Once the hardware has been set up, you need to assign an IP address to your
PC so that it will be in the same subnet as Compex GSC2024WM. By default,
Compex GSC2024WM’s IP address is 192.168.100.128; and its subnet mask is
255.255.255.0. You need to configure your PC’s IP address to 192.168.100.xxx;
and its subnet mask is 255.255.255.0, where xxx can be any number from 1 to
254 excluding 128. Simply follow the procedures stated below to configure the
TCP/IP settings of your PC.
For Windows 95/98/98SE/ME/NT
Please note the following instructions are based on Windows 98.
From your desktop, choose
Network Neighborhood icon and
select Properties.
Choose the network adapter that
you are using; right click and
select Properties.
Highlight the TCP/IP and click on
Properties button.
18
Chapter 8
Select the radio button
Specify an IP address.
TCP/IP Configuration
for
Enter the IP Address and Subnet
Mask as 192.168.100.xxx and
255.255.255.0, where xxx can be
any number from 1 to 254,
except for 128. In this example,
we are using 192.168.100.160 as
the static IP Address.
From the DNS Configuration Tab,
select Disable DNS.
Press OK to close all windows and
allow your computer to reboot.
19
Chapter 8
TCP/IP Configuration
In order to check if the IP address
has been assigned correctly to
your PC, simply go to the Start
menu, select Run, and enter the
command winipcfg.
Select your respective Ethernet
Adapter from the drop down list
and click OK.
Now, your PC is now ready to configure Compex GSC2024WM. Please refer to
the user’s manual in the Product CD for more details on configuring Compex
GSC2024WM.
20
Chapter 8
TCP/IP Configuration
For Windows XP/2000
Go to your desktop, click on My Network Places icon and select Properties.
Go to your network adapter icon,
right click and select to Properties.
Highlight Internet Protocol (TCP/IP)
and click on Properties button.
21
Chapter 8
TCP/IP Configuration
Select the radio button for Use the
following IP address. Enter the IP
Address and Subnet Mask as
192.168.100.xxx and 255.255.255.0,
where xxx can be any number from
1 to 254, except for 128. In this
example,
we
are
using
192.168.100.160 as the static IP
Address.
Click on OK to close all windows.
22
Chapter 8
TCP/IP Configuration
Next, in order to check if the IP address has been correctly assigned to your
PC, go to Start menu, Accessories, select Command Prompt and type the
command ipconfig/all.
Your PC is now ready to configure Compex GSC2024WM. Please refer to the
user’s manual in the Product CD for more details on configuring Compex
GSC2024WM.
Further Information References
If you are using a different Windows operating systems or broadband Internet
account, please refer to the User’s Manual in the accompanying Product CD.
This document may become superseded, in which case you may find its latest
version at: http://www.compex.com.sg/prodspec.asp?f=Manual&s=1
23
Disclaimer: Compex, Inc. provides this guide without warranty of any kind, either expressed or implied,
including but not limited to the implied warranties of merchantability and fitness for a particular
purpose. Compex, Inc. may make improvements and/or changes to the product and/or specifications
of the product described in this guide, without prior notice. Compex, Inc will not be liable for any
technical inaccuracies or typographical errors found in this guide. Changes are periodically made to
the information contained herein and will be incorporated into later versions of the guide. The
information contained is subject to change without prior notice.
Trademark Information: Compex®, ReadyLINK® and MicroHub® are registered trademarks of Compex,
Inc. Microsoft Windows and the Windows logo are the trademarks of Microsoft Corp. NetWare is the
registered trademark of Novell Inc. All other brand and product names are trademarks or registered
trademarks of their respective owners.
Notice: Copyright © 2005 by Compex, Inc. All rights reserved. Reproduction, adaptation, or translation
without prior permission of Compex, Inc. is prohibited, except as allowed under the copyright laws.
Manual Revision by Daniel
Manual Number: M-0490-V1.1C
Version 1.1, October 2006
FCC NOTICE: This device has been tested and found to comply with the limits for a Class A digital
device, pursuant to Part 15 of the FCC Rules. These limits are designed to provide reasonable
protection against harmful interference in a residential installation. This device generates, uses and can
radiate radio frequency energy and, if not installed and used in accordance with the instructions, may
cause harmful interference to radio communications. However, there is no guarantee that interference
will not occur in a particular installation. If this device does cause harmful interference to radio or
television reception, the user is encouraged to try to correct the interference by one or more of the
following measures:
Increase the separation between the
Reorient or relocate the receiving
computer and receiver.
antenna.
Consult the dealer or an experienced radio/TV
Connect the computer into an outlet on a
technician for help.
circuit different from that to which the
receiver is connected.
Caution: Any changes or modifications not expressly approved by the grantee of this device could
void the user's authority to operate the equipment.
FCC Compliance Statement: This device complies with Part 15 of the FCC Rules. Operation is subject to
the following two conditions:
(1)
This device may not cause harmful interference, and
(2)
This device must accept any interference received, including interference that may cause
undesired operation.
ICES 003 Statement
This Class A digital apparatus complies with Canadian ICES-003
DECLARATION OF CONFORMITY: Compex, Inc. declares that the product:
Product Name: Compex 24-Port 10/100/1000Mbps Web Managed Gigabit Ethernet Switch
Model No.: GSC2024WM 1a conforms to the following Product Standards:
Radiated Emission Standards: EN55022A, FCC Part 15 Class A
Conducted Emission Standards: EN60555Pt2 conducted emission; EN55022A conducted emission, LVD
60950 standard, FCC Part 15 Class A
Immunity Standards: IEC 801-2; IEC 801-3; IEC 801-4
Low Voltage Directive: EN 60 950:1992+A1: 1993+A2: 1993+A3; 1995+A4; 1996+A11: 1997.
Therefore, this product is in conformity with the following regional standards: FCC Class A ⎯ following
the provisions of FCC Part 15 directive; CE Mark ⎯ following the provisions of the EC directive.
Manufacturer’s Name: Compex, Inc.
European Contact & Technical Support
Address: 840 Columbia Street, Suite B,
ReadyLINK Networktechnology GmbH,
Albert Einstein Straβe 34/M21,
Brea, CA92821, USA
63322 Rödermark, Germany
Fax: ++49 (60) 749-0668
24
WARRANTY REGISTRATION CARD
[M-0088-V2.4C]
Register via the Internet at http://www.cpx.com
or http://www.compex.com.sg
To activate the warranty, please complete this card and return to Compex
within ninety (90) days from the date of purchase.
Please e-mail this warranty card to [email protected].
Product:
Purchase Date:
Name:
Model:
Serial No:
E-mail:
Company:
Address:
Postal/Zip Code:
Phone: (
Country:
)
Note:
For purchases within U.S.A and Canada, please fax to Compex, Inc. at
(714) 482 0332
For purchases outside U.S.A and Canada, please fax to Compex Systems Pte
Ltd at (65) 6280-9947
25
Manual Number:
M-0490-V1.1C
Version 1.1
October 2006