1
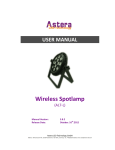
USER MANUAL
Water-Resistant Spotlight
(AL7-W-Series)
Manual Version:
Release Date:
3.4.21
th
May. 15 , 2012
Astera LED Technology GmbH
Address : Nahestrasse 68-70, 55593 Rüdesheim an der Nahe, Germany Tel.: +49(0)6536-355361 Email: [email protected]
1
1
2
3
4
5
6
7
8
9
Table of Contents
Table of Contents .................................................................................................... 2
Safety .................................................................................................................... 3
Specifications: ........................................................................................................ 4
Quick Start ............................................................................................................. 5
4.1 Advantages .............................................................................................................. 5
4.2
Overview ................................................................................................................. 6
4.2
LCD Display .............................................................................................................. 6
4.3
Buttons .................................................................................................................... 7
4.4
Technical Data .......................................................................................................... 8
Advanced Operation ............................................................................................... 9
5.1 Targeting Lamps ....................................................................................................... 9
5.2
Stretching Programs ............................................................................................... 10
5.3
DMX Operation ...................................................................................................... 10
Settings of the MENU ............................................................................................ 11
Troubleshooting.................................................................................................... 15
Disposal ............................................................................................................... 16
Appendix : Overview of Programs .......................................................................... 17
2
2
Safety
Before you operate the unit, read this manual carefully.
Make sure to keep the manual, in case you need to consult this
manual again or you give the unit to another person.
Always make sure to include this manual if you hand out the unit to
another person.
Keep in mind that this manual cannot address all possible dangers
and environments. Please use your own
caution when operating.
Only qualified personnel may repair this product.
Don't open the case.
Do not operate the unit in areas where the high temperature condition or outdoors. It will cause abnormal function or damage the
product.
The Li-ion is built in, please avoid bumping or plunging, it will cause
FIRE or EXPLOSION.
Never store the battery when fully drained. Always recharge immediately when empty.
Make sure to fully charge all AL7-W units before storing them. Partially charged batteries will lose capacity.
3
3
Specifications:
a)
Wireless spot lamp, for Indoor and outdoor use
b)
Extra bright 3W LED chips with 25degree lenses
c)
Displays more than 16 million colors.
d)
Low power consumption
e)
Controllable by wireless Remote control ARC2, wireless DMX transmitter
ART3 and can also get controllable via DMX512 cable connection
f)
Build in Controller, the light effects also can get programmed directly via the
integrated keyboard and LCD display
g)
8-24 hours operation time without recharging the battery.
h)
Up to 300 meter operation distance of the remote control
i)
RGB LEDs combined with white LEDs for a better color mixing and color
appearance.
4
4
Quick Start
This rugged spotlamp is made for uncomplicated event illumination and for decorative lighting. Due to its integrated battery and wireless module it can be quickly set up. The AL7-W
can be used as standalone unit that is controlled with its integrated control pad or with the
ARC2 Remote Control. For a larger setup, the AL7-W can be grouped and paired with other
Astera wireless lamps and can be integrated into DMX setups.
To start the AL7, hold first and fourth button for 3 seconds. To power the unit off, press the
same buttons shortly.
The AL7-W can display basic programs (light effects) which can later be customized with different colors, speed, fade, brightness etc. To change the displayed program press the PROG
button, select a program with + and – and confirm with ENTER. To Change colors of a program press the COLOR button, then use + and – to select any of the 4 color chanels you want
to change, select a color and confirm with ENTER. To change speed and brightness, press the
respective buttons, select a value and confirm with ENTER. These functions are only possible
when at the main navigation and NOT when inside the menu.
It is also possible, to synchronize several units, and to spread programs over more than 1
unit. So for example the RAINBOW effect will be stretched over two or more units.
The AL7-W is suitable for shopping window, house, party, hotel, display room...Illuminating
walls, curtains and objects in the room.
Most advanced functions can be found inside the menu (see Chapter 6)
4.1
Advantages
Wireless design --- The AL7-W is easy for installation due to its integrated battery and RF receiver.
Smart programing --- The AL7-W not only displays complex color-changing programs but also
gives you the possibility to use your own customized colors for these programs. The AL7-W
can be used as a standalone unit or grouped and paired with other Astera lamps and be controlled with an ARC2 RF Remote Control.
Energy saving design --- Low working voltage, low power consumption and additional white
LEDs helps to save up to 80% energy so it can reach a maximum operation time of up to 24
hours.
5
4.2
Overview
7-pin multi socket
for charging and DMX
battery indicator
LCD display
turn unit on/off
press -back one level
hold - enter menu
save value /
choose menu point
navigate through menu, adjust values
4.2
LCD Display
(1) - Receiving (on controller units only)
(4) -Settings are stored in the internal memory.
(this will be shown via a short blinking of this symbol )
(8) - Battery status
6
4.3
Buttons
First button: Go back one level.
MENU/COLOR If pressed >1 second: enter menu.
For details on the menu, see Chapter 6
Second Button - Change the speed of the light effect. A time between 0.09
seconds and 9 minutes 11 seconds can be set. It reflects the
/SPEED
duration of the selected program.
When in the menu: Navigate and adjust values
Third Button
+/BRIGHT
The brightness of the LEDs can be changed from 0%-100% in
10% intervals by pressing the +/- buttons.
When in the menu: Navigate and adjust values
Fourth Button Change program (color transitions).
ENTER/PROG
When in the menu: Choose menu item, save edited value or
start sending a value.
Fifth Button
ON/OFF
To turn the unit on, hold button for 3 seconds
To turn the unit off, press button shortly
7
4.4
Technical Data
Light Sources
Light Sources
SMD LED chips with 25 degree beam angle
Amount or LEDs
AL7-WXL: 18 (12xRGB, 6xW)
AL7-WXXL: 36 (24xRGB, 12xW)
total LED Power
ALW-WXL: 54W
AL7-WXXL: 108W
Power Supply
Power supply unit
External power supply shipping with the AL7-W
Input power of charger
AC 100-240V, 50/60Hz
Output power of charger
AL7-WXL: DC 28V, 2.5A
AL7-WXXL: DC48V, 2A
Battery type
Lithium Nickel Mangan Cobalt
Battery operational time
8 – 24h (depending on selected colors, brightness, programs)
Wireless Module
Available remote contro
RF(radio frequency), IR(infra-red)
Range
IR: up to 5m
RF: 50m up to 300m
RF Frequency
Europe: 868.000 MHz – 869.750 MHz
US: 902MHz – 928 Mhz
Housing
Material
metal housing and clear PMMA cover
Size
L180mm x H280mm x W170mm (L7.1” x H11.0” x W6.7”)
Weight
AL7-WXL: 5100g (11.2b)
AL7-WXXL: 6200g (13.7lb)
Environmental Requirements
Operational Temperature
0 ~ 50 °C work temperature
Environment
Indoor and Outdoor (splash-proof, IP54)
8
5
Advanced Operation
The AL7-W offers a wide range of advanced settings for professional users. Many options like
Strobe lighting, group-building, color calibration etc can found in the menu and are discussed
in Chapter 6. Other advanced functions can only be operated with the ARC2 Remote Control.
As there are numerous settings, it is recommended to reset each unit as well as the remote
controller to its Factory Default settings before they are set-up (again). This can be done by
entering the menu (hold first key key for one second) and go to FACTORY RESET, and confirm
with YES.
5.1
Targeting Lamps
There are several ways to control only a selection of units, rather than all units at once. The
functions are launched with the ARC2 Remote Control but can be prepared at the AL7-W itself.
Target Lamps by GROUPS
Each lamp can be set to belong to one of four groups (G1, G2, G3 or G4). Then each groups
can be controlled individually, or groups can be linked together. If groups are linked, the program pattern stretches over them. New lamps or reset lamps are set to group 1
Groups can be set in the menu under AUTO SETTINGS > GROUPS
Target lamps by SET
Lamps can be assigned to one of 255 possible set-addresses. Also, more than one lamp can
be assigned to one set #. In practice, usually a set of lamps will be assigned one set #. Each of
these sets can be controlled individually.
Groups can be set in the menu under AUTO SETTINGS > SET SIZE and POS IN SET
Target lamps by TAPPING THEM
Select this option with the ARC2 Remote Control and confirm the selection with the AL7-W's
ENTER button
Target lamps by TYPE
If you want to use the ARC2 to address all AL7-WXL or AL7-WXXL units in range, select this
option.
Target lamps by SERIAL NUMBER
To use the ARC2 Remote Control to target one specific unit, select this function.
You can check a unit's serial number under INFO > SERIAL
9
5.2
Stretching Programs
Chain adressing, Group adressing and Set adressing can each stretch the displayed programs
over several units of lamps. For example, if two lamps are assigned into a set, the rainbow
effect will stretch over both lamps.
In order to stretch the programs correctly, it is necessary to determine how many units
should be connected If for example a wall has to be illuminated with 8 AL7-W, the SET SIZE
(or CHAIN SIZE) can be set to 4 so that the lamps can display a color chaser or full rainbow.
For Groups, this value does not have to be set but is determined automatically.
When planning to address several units quickly, it is recommended to program them in 1
Group or Set. A set has the advantage that it can also become part of a Group or Chain, and
take 1 position of this Group or Chain while still remaining to be individually addressable.
To create a chain, enter the MENU select AUTO SETTINGS then CHAIN SIZE and POS IN
CHAIN. For building Groups and Sets, refer to chapter 5.1 or the ARC2 manual.
5.3
DMX Operation
All Wireless Astera products can alternatively be controlled by wireless DMX or standard
wired XLR DMX. This type also have this two functions.
Hold down MENU for 1 second, display INPUT SELECT, then use the second button to select
the input signal :DMX/WIRELESS DMX
When units are controlled by WIRELESS DMX, they can be setup to offer different number of
channels features to suit almost any application:
1. Normal mode: every pixel can be controlled by three or four DMX channels, RGB and optionally S(stroboscope).
2. Effect mode: the build in effect engine that is usually controlled by the remote control can
also be used with WIRELESS DMX. In this mode, the four user colors can either be controlled
by three DMX channels each, RGB, or by only one channel by color. Then a set predefined set
of colors can be accessed: “Index Colors”, this might be useful as a scanner profile with 4
“gobo-wheels” can be defined in a light control desk.
10
6
Settings of the MENU
Hold the first key for 1 second to enter the menu. When in the menu, use the 4 buttons to
navigate through the menu. While the system is waiting for a selection you cannot go up
one level.
INPUT SELECT
XLR DMX
The unit uses the input signal of the XLR connector socket
WIRELESS DMX
The unit uses the RF signal sent by the Wireless DMX Transmitter ART3
REMOTE CONTROL
The unit uses the RF signal sent by the ARC2 Remote Control
STANDALONE
The unit ignores all incoming signals and can only be operated through its
control panel
AUTO
The unit operates in auto mode and chooses any incoming signal
AUTO SETTING
PROGRAM
Chooses one of 20 pre-defined programs that can be customized with
colors, intensity, power scheme, speed, fade, directions, etc.
INTENSITY
Sets the brightness of the LEDs
SPEED
Sets the speed of the programs
FADE
Sets the Fade between program steps
DIRECTION
Adjusts direction and looping of programs
FFW+LOOP
Programs run in normal (forward) direction, when a program is finished,
it starts again
REV+LOOP
Programs run in reversed direction, when a program is finished,
It starts again.
FWD
Programs run in normal (forward) direction, when a program is finished,
execution is stopped
11
REV
Programs run in reversed direction, when a program is finished, it stops
CHASER
Set different color chasers
CHASER SPEED
Sets the speed of the color chaser
GROUPS
Assigns the lamp to 1 of 4 groups so they can easily targeted
OFFSET
Offset defines where the LOCAL GROUP starts. Usually this is set
automatically by the lamp, depending how many other lamps are in a group.
CHAIN SIZE
Choose how long the chain should become (see Chapter 5.2)
PCS IN CHAIN
Choose the position the unit should take in the chain (see Chapter 5.2)
SET SIZE
Choose how long the set should become (see Chapter 5.2)
POS IN SET
Choose the position the unit should take in the set (see Chapter 5.2)
USER COLORS
Settle RGB colors and the brightness.
SOUND TRIG
Enable Sound trig or disable.
DMX SETTINGS
DMX ADDRESS
Sets the DMX-address
CHANNELS
Sets the amount of channels that is used to control 1 unit. 1 RGB channel means that
all LEDs have the same color.
DMX TAB
Several different DMX tables can be chosen
RGB S RGB S..
For each pixel there are three channels RGB and one channel stroboscope.
RGB RGB S S ..
For each pixel there are three channels RGB and one channel stroboscope.
EFFECT MODE FIX
The 4 user colors are controlled by one channel per color (generates basic colors)
EFFECT MODE RGB
The 4 user colors are controlled by three DMX channels each.
STROBE
Sets a series of strobe effects
SINGLE
One DMX channel is supplied for the control of the stroboscope function and all pixels
will strobe identical. When using this setting, DMX TAB should not be set to RGB S
12
RGB S..
MULTIPLE
For each pixel, the stroboscope can be controlled individually.
OFF
Stroboscope is turned off globally.
One DMX channel is supplied for the control of the stroboscope function and all pixels
will strobe Identical.
When using this setting, DMX TAB should not be selected.
DMX FAIL
This model is capable of detecting a loss of AC power (if plugged in).
It might be desirable to make the unit react on those conditions:
HOLD
The output keeps unchanged, the last received DMX frame is displayed.
EMERGENCY LIGHT
LEDs turn white until AC power is restored.
BLACKOUT
LEDs turn dark in case of AC power loss.
AUTO PROGRAM
plays the program specified in AUTO SETTINGS > PROGRAMS
GERNERAL SETTINGS
LED POWER
Three different power schemes can be set to optimize the playback
MAXIMUM RUNTIME
the lamps are less bright but the battery will last up to 24 hours
NORMAL
the lamps are normal brightness and the battery will last at least 8 hours
HIGH BRIGHTNESS
The lamps are set to a brightness that is stronger than usual but will drain the
battery quickly
BELONGS TO SET
Assigns the lamp to 1 of 255 sets so they can easily targeted
WHITE CORRECTION
turns the white correction on or off
WHITE CALIB RED
adds or reduces the amount of red when displaying white light
WHITE CALIB GREE
adds or reduces the amount of green when displaying white light
WHITE CALIB BLUE
adds or reduces the amount of blue when displaying white light
AC FAILURE
sets the behaviour when no AC signal is detected (power outage etc)
Emergency Light
13
If no AC signal is detected, the light turns white
NO ACTION
The playback continues as before
BLACKOUT
If no AC signal is detected, all lights are turned off
CONTRAST
sets the contrast of the display between 1 and 48
INFO
SERIAL
shows the serial number of the unit
FIRMWARE VERSION
shows the firmware version or the unit
HOURS
shows the number of hours the unit has been played (P) and charged (C)
RF LINK
an advanced function for testing the signal strength together with the ARC2
RADIO PIN
The Radio Pin makes it possible for different customers to operate their lamps
at the same place without influencing other lamps. The 4-digit pin can be set
to a unique value and paired with selected lamps. To activate the radio pin,
choose a pin on lamps and remote control, then press PAIR WITH LAMPS.
FACTORY RESET
Resets all settings of the menu to its factory defaults.
Confirm with fourth button or abort with the first button
14
7
Troubleshooting
Faulty condition
Cause
Troubleshooting
The display of a unit is showing BLACKOUT,
and there is no light output.
Either the unit is set to BLACKOUT mode, or
DMX-FAILURE/AC FAILURE is set to BLACKOUT and one of these conditions persist.
Press SEND button or change PROGRAM.
No LED light when the unit is switched on
Due to the vast number of settings, one can
not always predict behavior of the units, if
setup was already done earlier.
Set the brightness to other value.
Units behave incorrectly
Due to the vast number of settings, one can
not always predict behavior of the units, if
setup was already done earlier.
Do FACTORY RESET on units and/or remote
control.
Couldn’t turn on the system
Maybe the battery is run out.
Plug the AC input, and put the system
charge 1 hour more, then can turn ON
Units will go out of battery after only 6
hours of operation.
The AL7-W may last only 8 hours with COLD
WHITE, if the LED POWER is set to NORMAL.
For HIGH BRIGHTNESS the run time may be
shorter than 8 hours.
Adjust LED POWER and/or see manual of the
unit.
DMX cable is plugged in but the LEDs don't
react according to the DMXsignal, and the
LCD does not display DMX LINK OK.
The DMX signal is not received
Change another XLR cable, and make sure
there is no problem on the DMX signal output device.
Unit is not charging when I connect it to the
charger.
If the unit is on and charging at the same
time it can get very hot. When reaching
You only have to wait. Once the charging
process is shut off, the battery will cool
down within 20-30 minutes and once the
50°C internal temperature the charging
process is shut off to prevent damaging the
battery.
When connected with the charger, the units
go shortly on, than off, then on, then off but
refuse to charge the battery.
temperature reaches about 40°C charging
will resume.
The battery is completely empty and not
While the LEDs are on, switch off the unit by
strong enough to light up and charge units at pressing its power button. Charging it for
the same time.
30mins will give it enough battery power to
light up and charge at the same time.
15
8
Disposal
Follow local ordinances and/or regulations for disposal!
PACKAGING:
The unit is shipped in protective packaging.
This packaging can be recycled!
UNIT:
Don't throw the unit into the garbage at the end of its lifetime.
Make sure to dispose is according to your local ordinances and/or
regulations, to avoid polluting the environment!
BATTERIES:
Don't throw empty batteries into the garbage!
Bring them to a collecting point for used batteries!
16
9
Appendix : Overview of Programs
Name
ONE COLOR STATIC
TWO COLOR STATIC
THREE COLOR STATIC
FOUR COLOR STATIC
ONE COLOR FADE
TWO COLOR FADE
THREE COLOR FADE
FOUR COLOR FADE
SIMPLE RUNNING
DOUBLE RUNNING
TWO COL RUNNING
FLAG RUNNING
DOUBLE FLAG RUNNING
SPIRAL 4 COLORS
SPIRAL 2 COLORS
RAINBOW
FIRE
ROTOR
ROTOR SPLIT 2
ROTOR SPLIT 4
Light Effect
All pixels show the same color
Same as ONE COLOR STATIC, but not all
pixels show the same color, they are
divided into 2, 3 or 4 parts.
All pixels show the same color, but the
color changes between all four USER
COLORS.
Same as ONE COLOR FADE, but not all
pixels show the same color, they are
divided into 2, 3 or 4 parts.
All pixels have C1 color, except one, that
is running over them with C2.
Same as SIMPLE RUNNING, but two
pixels are running over the background,
in opposite directions.
Same as DOUBLE RUNNING, but the two
pixels are of different color.
A “flag” consisting of three color stripes
is running over the background.
Same as FLAG RUNNING, but two flags
are running in opposite directions.
The color of all pixels is changing pixel by
pixel from one color to the next. If the
geometry of the unit allows it, the
direction is circular.
Same as SPIRAL 4 COLORS, but the
movement starts at both and in opposite
directions, and moves back after all pixels
are changed.
A moving rainbow is shown on the units.
A flickering fire-like effect is displayed. C1
is the background color, randomly pixels
flash and flicker with C2.
The rotor programs are much like the
FADE programs, but if the units are of
tower-like shape, then a clockwise
running rotor can be seen.
Same as ROTOR, but two rotors in
opposite directions are running.
Same as ROTOR, but four rotors in
opposite directions are running.
17
Used colors
C1
C1 C2
C1 C2 C3
C1 C2 C3 C4
C1 C2 C3 C4
C1 C2 C3 C4
C1 C2 C3 C4
C1 C2 C3 C4
C1 C2
C1 C2
C1 C2 C3
C1 C2 C3 C4
C1 C2 C3 C4
C1 C2 C3 C4
C1 C2
none
C1 C2
C1 C2 C3 C4
C1 C2 C3 C4
C1 C2 C3 C4
This instruction manual is part of the device and persons operating the device must have access to it at any time.
Safety precautions mentioned in the instruction manual have to be observed. If the device is being sold, this instruction
manual has to be included.
Translations
If the device is being sold, this instruction manual has to be translated into the national language of the destination country.
If discrepancies occur in the translated text, the original instruction manual has to be used to solve them for the manufacturer has to be contacted.
©2012, Astera Led Technology GmbH
All rights reserved
Rüdesheim an der Nahe, Germany
18