1
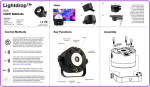
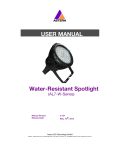
USER MANUAL Lightdrop (AL3-Series) Manual Version: Release Date: 3.2.20 July. 23rd.2010 Astera LED Technology GmbH Address : Nahestrasse 68-70, 55593 Rüdesheim an der Nahe, Germany Tel.: +49(0)6536-355361 Email: [email protected] 1 Table of Contents 1 Table of Contents ................................................................................................... 2 2 Safety ...................................................................................................................... 3 3 Specifications ......................................................................................................... 4 3.1 Technical Data ................................................................................................... 5 4 Quick Start .............................................................................................................. 6 4.1 Overview ........................................................................................................... 6 4.2 Advantages ....................................................................................................... 7 4.3 Button and Operation ........................................................................................ 7 5 Battery Runtime ...................................................................................................... 8 6 Troubleshooting ..................................................................................................... 9 7 Disposal ................................................................................................................ 10 2 Safety Before you operate the unit, read this manual carefully. Make sure to keep the manual, in case you need to consult this manual again or you give the unit to another person. Always make sure to include this manual if you hand out the unit to another person. Keep in mind that this manual cannot address all possible dangers and environments. Please use your own caution when operating. Only qualified personnel may repair this product. Don't open the case. Do not operate the unite in areas where the high temperature condition or outdoors . It will cause abnormal function or damage the product. The Li-ion is inbuild, please avoid bumping or plunging, it will cause FIRE or EXPLOSION. Never store the battery when fully drained. Always recharge immediately when empty. Make sure to fully charge all AL3 units before storing them. Partially charged batteries will loose capacity. 3 Specifications a) Wireless spot light, for Indoor and outdoor use b) Narrow light beam angle can be widened with diffuser lens c) Displays more than 16 million colors. d) Low power consumption e) Controllable by Radio Frequency Remote Control f) DMX integration via ART3 wireless DMX Transmitter g) 8-24 hours operation time without recharging the battery. h) Up to 300 meter operation distance of the remote control i) High brightness LEDs j) RGB LEDs combined with white LEDs for a better color mixing and color appearance 3.1 Technical Data Light Sources Light Sources 5mm bullet LEDs with 15 degree beam angle Amount or LEDs AL3-S: 16 (4xR, 4xG, 4xB, 4xW) AL3-M: 96 (24xR,24xG, 24xB, 24xW) LED Power AL3-S: 1.7W AL3-M: 10.2W Power Supply Power supply unit Shipping with the Lightdrop Input power AC 100-240V, 50/60Hz, 0.3A Output power DC 5V, 0.5A Rechargeable Battery AL3-S: 3.7V, 0.85AH AL3-M: 5V, 0.65AH Battery operational time 8 – 24h (depending on selected colors, brightness, programs) Wireless Module Available versions RF(radio frequency), IR(infra-red) Range IR: up to 10m RF: 50m up to 300m RF Frequency Europe: 868.000 MHz – 869.750 MHz US: 902MHz – 928 Mhz Housing Material POM housing and clear PMMA cover Size AL3-S: Ø 59mm x H 48mm (Ø 2.3” x H 1.9”) AL3-M: Ø 90mm x H 58mm (Ø 3.5” x H 2.3”) Weight AL3-S: 140g (0.31lb) AL3-M: 480g (1.06b) Environmental Requirements Operational Temp 0 ~ 50 °C work temperature Environment Indoor and Outdoor (splash-proof) 4 Quick Start This Lightdrop is designed for event illumination and decorative lighting. Due to its integrated battery and wireless module it offers an uncomplicated setup without the need to lay out cables for control and power supply. The Lightdrop offers several mounting possibilities. Through its magnetic back it can be quickly attached at walls, ceilings or under tables and chairs. It can also be used to light up a range of optional decorative objects. An AL3 can be used as standalone lamp since basic illumination can be started with the touch button. However, for betters setting of colors and programs and additional functions it is recommended to use it together with the ARC2 remote control or the IR Remote Control. For a larger setup, AL3s can be grouped and paired with other AL3 units and other wireless Astera lamps. This can be done with the ARC2 remote control or the ART3 Wireless DMX transmitter. 4.1 Overview AL3-S AL3-M LED light sources window for IR reception indicator LED touch button (heat sensitive) 4.2 Advantages Wireless design --- The AL3 is easy for installation due to its integrated battery and RF receiver. Smart programing --- The AL3 not only displays complex color-changing programs but also gives you the possibility to use your own customized colors for these programs when controled by an ARC2 Remote Control. The AL3 can be used as a standalone unit or grouped and paired with other Astera lamps and be controlled with an ARC2 RF Remote Control. Energy saving design --- Low working voltage, low power consumption and additional white LEDs helps to save up to 80% energy so it can reach a maximum operation time of up to 24 hours. 4.3 Button and Operation To power on the unit, hold the on/off button for 2-3 second. To power off, press the on/off button shortly. To choose basic colors or a rainbow effect, turn the unit on, then hold down the button and keep the finger until the lamp turns into the blue blinking mode. Push the button several times to cycle through the basic colors until the rainbow effect. When the desired color is displayed, hold the button until the LEDs stop blinking and the lamp turns into normal operation. To do a Factory Reset, turn the unit on. Then hold down the button and keep the finger until: unit turns off → turns on blue blinking → turns off again When the unit turns off for the second time, a factory reset was done. While powered up, the indicator LED will show the battery charge state: red – orange – green corresponding to the charge state While charging, the LED will blink in green. 5 Battery Runtime The work temperature is 0~60 Celsius degree. When you switch on but it's not working and the red light is keep shining means you need recharge the battery. The LED POWER modes description: When we use maximum runtime, we setting the LED power is 50% full power, the LED will run longer time, but the brightness is just 50% also When we use normal brightness, we setting the LED power is 70% full power , the LED will run time is our normal time. When we use high brightness, we setting the LED power is 100% full power, then the LED will more bright, but the run time will be shorter then the nornal brightness or maximum runtime mode. Here are estimated battery runtimes: 6 Troubleshooting Faulty condition Cause Troubleshooting LED no light when you switch on Due to the vast number of settings, one can not always predict behavior of the units, if setup was already done earlier. Set the brightness to other value. Units behave incorrectly Due to the vast number of settings, one can not always predict behavior of the units, if setup was already done earlier. Do FACTORY RESET on units and/or remote control. Couldn’t turn on the system Maybe the battery is run out. Plug the AC input, and put the system charge 1 hour more, then can turn ON The indicator not blinking when charging DC plug or AC input not settled well or battery is already full Discharge the battery a little or check wether the DC has been plugged or wether the AC input has any problem. Units will go out of battery after only 6 hours of operation. The units last only 8 hours with COLD WHITE, if the LED POWER is set to NORMAL. For HIGH BRIGHTNESS the run time is shorter than 8 hours. Adjust LED POWER and/or see manual of the unit. When connected with the charger, the units go shortly on, than off, then on, then off but refuse to charge the battery. The battery is completely empty and not strong enough to light up and charge units at the same time. While the LEDs are on, switch off the unit by pressing its power button. Charging it for 30mins will give it enough battery power to light up and charge at the same time. 7 Disposal Follow local ordinances and/or regulations for disposal! PACKAGING: The unit is shipped in protective packaging. This packaging can be recycled! UNIT: Don't throw the unit into the garbage at the end of its lifetime. Make sure to dispose is according to your local ordinances and/or regulations, to avoid polluting the environment! BATTERIES: Don't throw empty batteries into the garbage! Bring them to a collecting point for used batteries! This instruction manual is part of the device and persons operating the device must have access to it at any time. Safety precautions mentioned in the instruction manual have to be observed. If the device is being sold, this instruction manual has to be included. Translations If the device is being sold, this instruction manual has to be translated into the national language of the destination country. If discrepancies occur in the translated text, the original instruction manual has to be used to solve them tor the manufacturer has to be contacted. ©2010, Astera LED Technology GmbH All rights reserved Rüdesheim an der Nahe, Germany