1
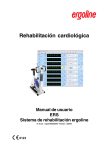
ergoscan Ambulatory Bloodpressure System ergoscan duo ABP with Spo2 recording User manual 201000098000 • version 2013-09 • english This manual was written with the utmost care. Should you still find details that do not correspond with the system, please let us know and we will correct the issue as soon as possible. We reserve the right to modify the design and technical features of the device and are not bound by the information and illustrations provided in this manual. All trademarks appearing in this document are trademarks of their respective owners. Their protection is acknowledged. No part of this manual may be reprinted, translated or reproduced without the manufacturer's written permission. This manual is not subject to any change order service. Please contact the manufacturer for the latest document revision. ergoline GmbH Lindenstraße 5 72475 Bitz Germany Tel.: +49-(0) 7431 98 94 - 0 Fax: +49-(0) 7431 98 94 - 128 e-mail:[email protected] http: www.ergoline.com Printed in Germany Contents Declaration of Conformity 5 General Information 7 Intended Use 8 Safety Information 9 Installation PC-Software Settings Settings GDT Network installation Connecting the ergoscan recorder 11 11 13 18 21 22 Ergoscan recorder 23 Operation controls LCD display with all symbols and display options Power supply Connecting the Cuff to the Recorder Ergoscan Cuffs 23 24 25 26 27 Ergoscan Duo recorder 29 Operation controls LCD display with all symbols and display options Power supply Connecting the SpO2-Sensor to the Recorder Connecting the cuff to the Recorder Ergoscan Cuffs 29 30 31 32 33 33 Initiate 24h BP measurement Connecting the recorder Starting the Program Select a Patient Adding a new patient Editing patient data Programming the Recorder Attaching the cuff and recorder Attaching the cuff and recorder 34 34 34 34 35 35 36 38 39 -3- Test measurement Instructing the patient Key functions ergoscan Key functions ergoscan duo 40 41 43 43 Reading measurement data from Recorder Starting the Program 44 44 Analysis of measuremenet results Start Program Find / Delete measurement results Representation Single values graph Overview / Statistics Hourly mean values graph and table Comparison graph and table Findings report Printing PDF-Export GDT-Export to Patient File systems CSV-Export 45 45 45 46 46 47 48 48 48 49 49 49 49 Error Codes 50 Cleaning and Maintenance Cleaning and disinfection of device surface Cleaning and disinfection of cuffs Cleaning and disinfection of SpO2 SoftTip sensors Cleaning of cables Maintenance and validity check prior to any use Measurement technical check Calibration mode Disposing of the device 51 51 51 Technical data 56 Battery Charger 58 -4- 52 54 54 54 55 55 Declaration of Conformity -5- -6- General Information • The product ergoscan carries the CE mark CE-0123 in accordance with European Council Directive 93/42/EEC in relation to medical devices and complies with the fundamental requirements stated in Appendix I of this Directive. The device has an internal power source and comes within Class IIa (MDD).. • The device has an application part of the type BF (defribrillator protected). • Standard EN 60601-1 ‚Medical electrical equipment, Part 1: General Requirements for Safety‘ is complied with, as well as the immunity requirements of standard EN 60601-1-2 ‚Electromagnetic Compatibility - Medical Electrical Equipment‘.. The device is interference-free in accordance with EN 55011 - Class B. and understand the content of this manual, before using or work on it. Paragraphs with special symbols are of particular importance. • Please read through the whole manual carefully, since information that is relevant to several sections is only provided once. • The printed text of this manual is in accordance with the version of the device, as well as the relevant safety instructions standards, at the time that this manual was printed. All industrial property rights are reserved in relation to any devices, circuits, processes, software programs and names described in this manual. • The ERGOLINE quality management system complies with the standards ISO 9001: 2000 and EN ISO 13485: 2003. • The safety information given in this manual is classified as follows: • The symbol means: Consult accompanying documents. It indicates points which are of particular importance in the operation of the device. Danger • This manual forms part of the device. It should always be kept near to the device. Correctly observing the manual ensures that the device will be used in an appropriate manner and for the purpose it is intended. It will also ensure the health and safety of users and patients dependent on it.. • Observance of the safety information protects from injuries and prevents inappropriate use of the device. All equipment users and persons responsible for assembly, maintenance, inspection and repair of the device must read -7- indicates an imminent hazard. If not avoided, the hazard will result in death or serious injury. Warning indicates a hazard. If not avoided, the hazard may result in minor injury and/or product/ property damage. Caution indicates a potential hazard. If not avoided, the hazard may result in minor injury and/or product/property damage. Biocompatibility • To ensure patient safety, the specified measuring accuracy, and interference-free operation, we recommend using only original ERGOLINE accessories. The user is responsible if nonERGOLINE accessories are used. The parts of the product described in this manual, including all accessories that come in contact with the patient during the intended use, fulfill the biocompatibility requirements of the applicable standards if applied as intended. • ERGOLINE is responsible for the safety, reliability, and performance of the equipment, only if If you have questions in this matter, please contact ERGOLINE or a representative. - modifications and repair are carried out by ergoline GmbH or by an organization expressly authorized by ergoline GmbH - the equipment is used in accordance with the instructions given in this operator's manual. Intended Use Applicable Laws, Regulations and Directives • 93/42/EEC (Medical Device Directive of the EU) • 89/336/EEC (Electromagnetic Compatibility Directive of the EU) Ergoscan and ergoscan duo are manually-operated blood pressure measuring devices, carried by the patient for long-term measurement of noninvasive blood pressure and for the recording of oxygen saturation values (ergoscan duo only). They can be used for adults, children and infants by applying the corresponding cuffs and sensors. Ergoscan must not be used for newborn babies and is not suitable for use in Intensive Care Units. Ergoscan can be used to take blood pressure measurements at various intervals for up to 30 hours and is able to store the measurement results Ergoscan duo additionally allows the recording of SpO2 values in programmable sampling intervals. • EN 1060-1 Non-invasive sphygmomanometers, Part 1: General requirements • EN 1060-3 Non-invasive sphygmomanometers, Part 3: Supplementary requirements for electro-mechanical blood pressure measuring systems ergoline GmbH Lindenstrasse 5 72475 Bitz Germany Tel.: Fax: email: http: -8- +49-(0)-7431 - 9894 -0 +49-(0)-7431 - 9894 -128 [email protected] www.ergoline.com / www.ergoline.eu Safety Information Danger Warning • Explosion Hazard • • Patient Hazard, Equipment Damage • The device is not designed for use in areas where an explosion hazard may occur. Explosion hazards may result from the use of flammable anesthetics, skin cleansing agents or disinfectants. Users must be familiar with how to operate the device. Medico-technical devices should only be used by suitably-qualified or experienced persons, who can ensure that the device is used correctly. The device does not contain any components that need to be replaced by users. Never open the casing of the device (please contact the Service Department) Warning • Patient Hazard, Equipment Damage • The device should only be used together, or in combination with components of other equipment, when you have ensured that this connection does not adversely affect the health and safety of patients and users, or the environment. If the information provided with the device is not clear on how to make a safe connection that will ensure the health and safety of patients, users, as well as the environment, then please contact the manufacturer or consult a technical expert. At all times, observe standard IEC 60601-1-1. · The ergoscan Recorder can be connected to, and operated from, a PC on which ErgoScanWin software has been installed. Please note that no patient should be connected to the ergoscan recorder as long as it is connected to the PC. Before using the device on a patient, the user should check that the device functions safely and as intended. -9- - 10 - Installation PC-Software • Insert the Ergoscan CD into the CD-ROM drive • The installation starts automatically, if the „autostart function“ of the CD drive is activated. If not: - start the Windows-Explorer - select the CD drive - doubleclick on start.exe Installation language select menu • Select the installation language. (The program language can later be changed under „Settings“): • The installation starts. Software Installation • First, the installation of the USB driver (virtual COM port) is launched -please confirm the license agreement and follow the hints given on screen. USB driver installation - 11 - • C:\Program Files\ErgoscanWin is used as the default installation folder. By using [Browse] it is possible to change the installation path. Folder for Porgram Installation • Before the installation finally starts, all parameters are displayed on screen. Confirm by [Install] to start the process. Summary for Installation • After the installation is completed, the ergoscan program is started and all needed settings can be configured. Installation complete and program start - 12 - Settings After starting the program the main screen appears. Click on „Settings“ to configure the software. Main Screen with Button Settings The different settings are split onto 4 tabs [System], [GDT], [Print / Export] and [Parameter]. Tabs for different Settings System Settings All settings for the standard use of the ergoscansystem are performed on this tab. Settings System • It is recommended to activate the automatical identification of the recorder connection. In case of technical problems or if different recorders are used, it is possible to fix the used COM ports. - 13 - Recorder Connection • The folder for the ergoscan database may be changed (see also Network Installation). Folder/Path for Database • [EXPORT] stores the complete ergoscan database to a special backup folder. By using [IMPORT] the database is restored. Backup of Database Caution • Data loss • IMPORT of a stored database will OVERWRITE the actual database ! • Select program language and date/time format. Language, date- /time format - 14 - Settings Print/Export On this tab all settings for printing and data export are set. Settings Print / Export Print • Selecting standard print pages., print preview and coloured printout (e.g.. for ink jet printers). Configuration of printout • Headings that should be included with every print-out page.. Header for print pages - 15 - Export The ergoscan program can store the printout pages as a PDF file and export the measurement values in a file (CSV format).for later analysis (e.g. Excel). The filename contains all necessary informations:: P^<type>_<workstation>^<slot#>_<id>^<last>^<first>_<StartTime>_<exportTime> . PDF / .TXT ^ <type> <workstation> <slot#> <id> <last> <first> <StartTime> <exportTime> = = = = = = = = = block separator “REPORT” for printout workstation name 1 (slot number of workstation) patient-ID last name first name starttime of ergoscan recording in format YYYYMMDDHHMMSS time of PDF export in format YYYYMMDDHHMMSS e.g..: P^REPORT_Comp^1_12345^Smith^Peter_20031216104632_20040318153145.pdf • Activation of PDF export and selection of standard pages. Settings for PDF Export • Select folder for PDF files and CSV files Folder for Data- and PDF export - 16 - Settings Parameter On this tab the standard values for analysis of the data are set. It is possible to adapt these parameters individually for every evaluation. Day-/ nightphase • The standard time ranges for dayphase and nightphase are set. Time range for dayphase / nightphase Critical values • Set critical values for day and night. These values will be displayed as lines in the grafic representation of the evaluation and are used for statistical calculations. Critical values for Day-/Nightphase Oxygen saturation / desaturation • Set standard values for analysis of SpO2 measurements. Analyse-Parameter SpO2 (nur für ergoscan duo) - 17 - Settings GDT The GDT interface is a standard produced by the German Quality Assurance Medical Software (QMS – ‚Qualitätsring Medizinische Software‘) for system-independent data transfer between medical devices and general practice IT systems. The ErgoscanWin software has an integrated GDT interface (‚Device Data Carrier interface‘ – ‚Geräte-Daten-Träger‘) and therefore allows for easy data transfer with a general practice IT system or a hospital information system. GDT Settings Please contact your IT dealer to find out what the correct settings of the GDT interface are in relation to the relevant IT system. All standard settings in the GDT standard (Version 2.0) can be adjusted on an individual basis. Operation This settings enable / disable the GDT software interface. If activated, the software checks at start for an existing GDT file (with the defined folder/ filename) and interprets this file. If no such file exists, a „normal“ program start is performed. Hint If GDT operation is activ, the manual admission of new patients should be inactiv to avoid patientname or patient-ID mismatch between ergoscan software and IT system. - 18 - Activating the GDT interface Identification This ID is an unique identification (1 to 8 characters) of the ergoscan software to be used by the IT system. File names The filenames for the data exchange between ergoscan software and IT system are defined in this box. The filenames are combined by a token (1..4 characters - e.g. ERGO) for the device and another token for the IT system (e.g. EDV1). GDT Identification / Filenames The filenames for data transmit and receive are combinations of these tokens, the filename extensions are fixed to *. GDT. Folder for communication files The folder for the data transfer files can be defined. To avoid mismatch in a network environment, each workstation should use another folder. Folder for communication files HINT: The GDT file written by ergoscan software has to be read and deleted by the IT system - otherwise no new GDT file can be generated by the ergoscan software. Character set The used characterset can be selected (ASCII or ANSII). Chracaterset - 19 - Data transfer Selct the results to be transfered to the IT system. If the pDF export is activated, the GDT file contains a link to the simultaneously generated PDF file. Selection of data to be transfered Example Summary (one line) ABPM: Day 112/ 69/ 79 - Night 94/ 59/ 74 = -15/-14/-7 % Example Table 24 h ABPM Average: Ps[mmHg] Pd[mmHg] HR[P/min] Dayphase 06:00-21:59 Nightphase 22:00-05:59 Difference Day / nightphase 94 59 74 -15.4% -14.4% - 6.8% 112 69 79 - 20 - Network installation The ErgoscanWin-Software may be installed in a computer network, e.g. patient data and evaluations can be stored on a server and accessed by all connected workstations. Define a database folder on the server and enable access for all workstations. The perform a local software installation on all workstations used for ergoscan program. Change the database folder under [Settings] to the previously defined server folder: Folder / Path for database - 21 - Connecting the ergoscan recorder TIn order to start the recorder and read information from it, the recorder must be connected to the PC via an USB cable. This USB cable is connected to a free USB port on the computer. The USB cable also needs to be plugged into the mini USB port, which is located at the back of the casing of the device. Please ensure that the plug is in the right position when connecting it: Connecting the mini usb cable - 22 - Ergoscan recorder Operation controls 1 Cuff connector 2 LC display to display all relevant information 3 Day/Night button to change the measurement interval between day and night interval 4 Info button to display the most recently measured values. The following values will be displayed respectively: - Systolic value ‚S/mmHg‘ - Diastolic value ‚D/mmHg‘ - Pulse frequency ‚HR/min-1‘. 5 Start/Stop button to initiate additional measurements and to interrupt a measurement in process. 6 On- / Off-Switch 7 Battery compartement lid Operation controls 8 Connecting port for PC connecting cable 9 Label with serial number etc. - 23 - LCD display with all symbols and display options M · Flashes for every detected oscillation Displayed constantly when measure- ment data has been stored · Flashes when batteries are running out Continuous display when batteries are empty and no measurements can be made Day phase selected Night phase selected Time display The integrated clock is automatically set to the actual PC system time whenever the recorder is started with a new patient. No manual setting of the integrated clock possible. - 24 - LC-Display of Ergoscan Recorder Power supply The Ergoscan Recorder requires either two nickel metal hydride rechargeable batteries. The use of alkaline batteries is not recommended. When starting the recorder via the ErgoscanWin software, please ensure that the relevant power source has been selected. In addition, the device also has a built-in lithium cell to indicate the time. The capacity of two fully-charged rechargeable batteries or two new batteries ensures at least 30 hours of operation or 200 measurements Hint • • Battery capacity reduces in line with increased use. If the capacity of the two fullycharged rechargeable batteries clearly falls below 24 operating hours, then you need to replace them. Always insert two fully-charged rechargeable batteries, before taking a new measurement. . Inserting Batteries The battery compartment is located on the underside of the recorder. In order to open this compartment, use your thumb to move the battery compartment lid approx. 6 mm backwards and then remove the lid in an upward direction: Open the battery compartment Please ensure that the batteries are inserted correctly!! CAUTION: Polarity - 25 - Function control The PhysioQuant recorder will automatically carry out a self-test when it is switched on, which will activate all symbols and segments of the LCD display. The device will then check the inserted (rechargeable) batteries and will display the available capacity. In this context, e.g. ‚C100‘ refers to a 100% (rechargeable) battery capacity (fully charged) and ‚C50‘ refers to a 50% (rechargeable) battery capacity (half empty). In order to carry out a 24 hour measurement, the capacity needs to be at least 90%. If the capacity is below 90%, then you will need to insert new batteries or fully-charged rechargeable batteries. When the self-test has been completed successfully, the following information will appear on the display after the power supply test: • The actual time • The measurement phase (day/night) • Whether any measurement data has been stored („M“ displayed) Connecting the Cuff to the Recorder To connect the blood pressure cuff to the recorder, plug the metal connection of the cuff as far as possible into the connection point at the recorder, until it clearly clicks into place. The cuff can be removed again from the recorder by pulling back the external metal plug cover - 26 - Ergoscan Cuffs Various cuff sizes are available for the Ergoscan recorder (standard, large and children size). Caution Please select the correct cuff size (see printed text on the cuff) • Wrong measurement • Cleaning and desinfection of the cuffs are described in the chapter „Cleaning and Maintanance“. Cuffs that are too small will result in measurements that are too high. Cuffs that are too large will result in measurements that are too low. Replace the cuffs at regular intervals. Damaged Velcro fasteners may lead to incorrect measurements. - 27 - - 28 - Ergoscan Duo recorder Operation controls 1 SpO2 sensor connector 2 Cuff connector 3 Start/Stop button to initiate additional measurements and to interrupt a measurement in process. 4 LC display to display all relevant information 5 Combined Day/Night and Info-Button: Day/Night button to change the measurement interval between day and night interval Info button to display the most recently measured values. The following values will be displayed respectively: - Systolic value S/mmHg‘ - Diastolic value D/mmHg‘ - Pulse frequency HR/min-1‘. 6 On- / Off-Switch 7 Battery compartement lid 8 Connecting port for PC connecting cable (USB) 9 Label with serial number etc. - 29 - Operation controls LCD display with all symbols and display options The LC display of the ergoscan duo recorder shows all measurement results and important informations. · Flashes when batteries are running out. Continuous display when batteries are empty and no measurements can be made LC-Display of Ergoscan duo Recorder Night phase selected Recorder time The integrated clock is automatically set to the actual PC system time whenever the recorder is started with a new patient. No manual setting of the integrated clock possible. - 30 - Power supply Hint The Ergoscan duo Recorder requires two nickel metal hydride rechargeable batteries - it is not possible to use batteries. • In addition, the device also has a built-in lithium cell to indicate the time. • . Battery capacity reduces in line with increased use. If the capacity of the two fullycharged rechargeable batteries clearly falls below 24 operating hours, then you need to replace them. Always insert two fully-charged rechargeable batteries , before taking a new measurement. Inserting Batteries The battery compartment is located on the underside of the recorder. In order to open this compartment, use your thumb to move the battery compartment lid approx. 6 mm backwards and then remove the lid in an upward direction: Open the battery compartment Please ensure that the batteries are inserted correctly!! CAUTION: Polarity - 31 - Function control The Ergoscan duo recorder will automatically carry out a self-test when it is switched on, which will activate all symbols and segments of the LCD display. The actual version of the recorder software is displayed (e.g. „P10“ for software version 1.0). The device will then check the inserted rechargeable batteries and will display the available capacity in percent (e.g. 100% fully charged / 50% half empty). In order to carry out a 24 hour measurement, the capacity needs to be at least 90%. If the capacity is below 90%, then you will need to insert fully-charged rechargeable batteries. The recorder is now in standby and the display shows a running line with the percent symbol. Standby Display Connecting the SpO2-Sensor to the Recorder Plug the connector of the SpO2 Softip sensor into the appropriate jack of the recorder. Connecting the SpO2 sensor - 32 - Connecting the cuff to the Recorder To connect the blood pressure cuff to the recorder, plug the metal connection of the cuff as far as possible into the connection point at the recorder, until it clearly clicks into place. The cuff can be removed again from the recorder by pulling back the external metal plug cover Connecting the cuff Ergoscan Cuffs Caution Various cuff sizes are available for the Ergoscan recorder (standard, large and children size). • Wrong measurement • Cuffs that are too small will result in measurements that are too high. Cuffs that are too large will result in measurements that are too low. Please select the correct cuff size (see printed text on the cuff) Cleaning and desinfection of the cuffs are described in the chapter „Cleaning and Maintanance“. - 33 - Replace the cuffs at regular intervals. Damaged Velcro fasteners may lead to incorrect measurements. Initiate 24h BP measurement Connecting the recorder • Connect the Ergoscan Recorder to the PC and switch on the recorder. The on/off switch is located beneath the lid of the battery compartment. Following self test and battery capacity the display shows the PC symbol: PC Starting the Program After the Ergoscan software has started, the main screen appears. To programme the recorder, click on the ‚Start‘ tab to open the relevant menu: Main screen: Start Select a Patient The selection window of the patient database appears: Selection window Patient - 34 - In the ‚NAME‘ field, enter the first letter of the patient‘s surname. All patients whose names start with this letter will then be displayed (e.g. those beginning with M ):. Select the required patient, by double clicking on the relevant line Select all patients with „M“ Adding a new patient If the required patient is not in the database, then you can directly enter new patient data. To do so, open the entry screen with the [NEW] button. Enter all the required data and save it to the database with [Save]: Adding a new Patient Editing patient data Patient data that has been entered can be edited and updated at any time ([Edit] button in the Patient selection window). EXCEPTION: Patient ID cannot be changed once it has been entered and saved! - 35 - Programming the Recorder After you have selected the patient, a window will appear for configuring and programming the Ergoscan Recorder. Measurement (ergoscan duo only) Select, if the ergoscan duo recorder should record bloodpressure only, SpO2 only or both parameters. Number of measurement intervals Up to 4 different measurement intervals can be selected. The standard setting is at 2 intervals (day and night phase). Setting Measurement Parameter Power supply The type (normal battery or rechargeable battery) that is used for long-term measurements is set.. Ergoscan duo needs rechargeable batteries. Bloodpressure measurement From ... To ... The beginning and end of selected intervals can be set in hours. Measurement interval exact: measurements are taken at the exact intervals in minutes that have been set. approx.: measurements randomly vary at approx. +/- 2 minutes around the times set. Minutes The interval between subsequent measurements can be programmed to range between 2 and 90 minutes. Max. pump pressure Limits the max. cuff pressure to the value set between 200 mmHg and 280 mmHg. - 36 - Number The number of all programmed measurements will be displayed for each measurement interval and a summary is provided for each 24 hours.. CAUTION • Mix-up of patients • The recorder has to be started by the ErgoscanWin software. If not, the new measurement is added to the former patient. Activate display The results of a bloodpressure measurement are displayed on the recorder or not. Only when a new long-term measurement is started, the recorder deletes all old patient data and measurement values. Activate keylock The day / night button on the recorder keyboard is activ or not. ergoscan duo only: Measurement SpO2 from.. to... Start and end of SpO2 recording Sampling intervall The intervall between two SpO2 measurements is defined. Standard The [Standard] button will reset the parameters to the following values: 2 measurement intervals: Interval 1 (day phase): 06:00 - 21:59 Exact every 15 min. 250 mmHg Interval 2 (night phase): 22:00 - 05:59 Exact every 30 min.250 mmHg SpO2 measurement: 22:00 - 05:59 intervall 2 sec - 37 - After saving the selected configuration, the starting sequence of the recorder will commence by clicking on the [Start] button. The recorder will first check whether there are any previous measurements that have not yet been read. If this is the case, then a warning will be displayed. If this is not the case, then the recorder will be switched off and the new patient data and measurement intervals are stored in the recorder. CAUTION Attaching the cuff and recorder • Risk to patients • The Ergoscan recorder must not be connected to the PC, while it is being attached to a patient. Please remove the connecting cable to the PC. Attach the cuff to the arm that is less used by the patient. For adults: approx. 2 finger widths above the elbow. For children: slightly closer to the elbow. Ensure that the cuff does not rise up when the arm is being bent. Please ensure that: • the connecting tube points upwards to the shoulder • the side of the cuff with ‚Patient‘ written on it makes contact with the skin • the arrow lies over both the arteria brachialis and arteria femoralis • the cuff is attached tightly and closely surrounds the tissue, but exerts no pressure on the veins. Switch on the Ergoscan Recorder and place it in the carrier bag. Attaching the cuff - 38 - Attaching the cuff and recorder Place the index finger into the SoftTip sensor. The cable should run on top of the hand. After some seconds the actual SpO2 value is displayed on the recorder display (alternating with the actual heart rate). Use the belt to attach the bag to the body of the patient. For hygienic reasons, the bag should not come into direct contact with the skin. Place the cuff tube and -with ergoscan duo- the cable of the SpO2 sensor around the patients neck in order to release any strain and connect it to the recorder. Ensure that the tube cannot become disconnected while the measurement is being taken. - 39 - Attaching the Sensor Test measurement A test measurement must always be carried out after the cuff has been attached and the recorder connected. The automatic measurements will not start, if START/STOP has not been activated. In order to avoid any incorrect measurements, please ensure that the patient remains calm while the measurement is being taken. The patient may stand up or sit down. Begin the measurement by pressing: or After a brief moment, the device will inflate the cuff. Once the required inflation pressure has been reached, the device will gradually decrease the pressure. Cuff pressures are displayed. Once the measurement has been taken, the following information is displayed sequentially: • systolic value (S/mmHg) • diastolic value (D/mmHg) • pulse rate (HR/min-1). If an error message is displayed instead of the measurement value, e.g. ‚E 08‘ (insufficient recognition of oscillation), then attach the cuff more firmly and press the Start/Stop button again. If the test measurement has been successful, then the device is ready for automatic measurement. - 40 - Instructing the patient Explain to the patient how the device works (automatic blood pressure measurement at regular intervals) and make the following points: • Stay calm during the measurement, so that there will be no incorrect readings as a result of any movement by the patient; • During the night, it is best to place the PhysioQuant Recorder in its carrier bag on the bedside table; • It is possible to manually switch between the day phase and the night phase; • Record any unusual events in the patient diary and also carry out an additional measurement with the Start/Stop button if this happens; • At any time, measurement can be interrupted via the Start/Stop button. Cuff pressure will then decrease; • Do not open the battery compartment. CAUTION • Risk for patients • Cancel the measurement with the Start/Stop button, if the cuff remains inflated for more than approx. 2 minutes Take off the cuff if it remains inflated after pressing the Start/Stop button. It may be that the tube has been disconnected. Further measurements should only be carried out after the cuff has been correctly attached again. - 41 - Important measurement information For the first measurement, the device will inflate the cuff to approx. 160 mmHg (starting pressure). For subsequent measurements, the inflation pressure will be 25 mmHg above the last measured systolic value (minimum 120mmHg). If the measurement value is in excess of the inflation pressure, then additional inflation of 50 mmHg will take place. A manual measurement can be taken at any time between automatic measurements. This will be indicated by ‚+‘ in the measurement value table. After an incorrect measurement, the measurement will be repeated after 2 minutes. An error message is only displayed in the error table with its corresponding error code after 3 incorrect measurements. After the error messages ‚E04‘ (Empty battery/rechargeable battery), ‚E07‘ (Inflation time finished) and ‚E10‘ (200 measurements carried out), the measurement will not be repeated. After error message ‚E07‘, the subsequent measurement will again take place according to the selected measurement cycle. After error messages ‚E04‘ and ‚E10‘ have been displayed, the device will switch to a power-saving mode, in order to avoid complete discharge of the rechargeable batteries. This mode can only be cancelled by switching the device on and off. - 42 - Key functions ergoscan Ergoscan recorder buttons have the following functions during long-term blood pressure measurements: is used too begin and end a measurement. is used to display the most recent measured values or the most recent error message. is used to manually switch the measurement intervals from the day to night phase, and vice versa. Hint Key functions ergoscan duo Manually switch between day and night phase is possible, when 2 measurement intervals only have been programmed via the ErgoscanWin software when the starting sequence of the recorder was commenced and the keylock is not activated. Ergoscan duo recorder buttons have the following functions during long-term blood pressure measurements: If more or less measurement intervals have been programmed, then the Day/Night button has no effect on the measurement intervals. is used too begin and end a measurement. pressed once is used to display the most recent measured values or the most recent error message. pressed twice is used to manually switch the measurement intervals from the day to night phase, and vice versa. - 43 - Reading measurement data from Recorder • Connect the Ergoscan Recorder to the PC and switch on the recorder. The on/off switch is located beneath the lid of the battery compartment. Following self test and battery capacity the display shows the PC symbol: PC Starting the Program After the Ergoscan software has started, the main screen appears. To read the data from the recorder, click on the ‚Import‘ tab. Main screen: Import The measurement values are imported from the recorder and assigned to the relevant patient. The graphical representation of the measurement results is also displayed - 44 - Analysis of measuremenet results Start Program After the ErgoScan software has started, the main screen appears. To request saved measurement results, click on the [Analysis] tab to open the relevant screen: Main screen: Analysis Find / Delete measurement results The selection window of the patient database is displayed. Select the required patient. The measurement result selection window appears for those patients whose data have been stored in the database. You can request the relevant saved measurement results by double clicking on the relevant data in the selection window. Selection mask for measurements Deleting measurements In order to delete a specific measurement result from the database, you need to click on the relevant date line in the selection window (the line will appear in blue). Then click on [Delete]. After a confirmation message appears, the result will be deleted.. - 45 - Representation The saved measurement values can be represented in various ways, by clicking on the relevant tabs Single values graph This graph displays the results of all individual measurements. The set critical values for the day and the night phase (see „Settings“) are displayed as red lines. A ergoscan duo measurement additionally shows the grafic representation of the recorded SpO2 values. Single values graph Zoom function The integrated zoom function allows a more detailled view. The screen can be moved in adjustable steps (10min - 4h). A click into the grafic activates the zoom - a second click returns to the complete display. Zoom All other representations are displayed by clicking on the relevant tab. Select representation - 46 - Overview / Statistics The overview displays a numerical summary of the long-term blood pressure measurements, as well as the statistical measurement results, for the whole monitoring period, according to day and night phase. Overview / Statistics Single values table All measurement results are listed by date/time, systole, diastole, heart rate and mean pressure. Additional measurements (that have been carried out manually by using the Start/Stop button) are displayed behind the time indication and marked with the ‚+‘ symbol. Deleting individual measurements In order to delete individual measurements, you need to click on the relevant line (the line will appear in blue). Then click on [Delete]. After a confirmation message appears, the measurement will be deleted. - 47 - Single values table Hourly mean values graph and table In order to ensure a clear representation, only the calculated hourly mean values are displayed as a graph and a table. Comparison graph and table Two measurements of the same patient can be compared directly on the screen, either as a grafic or as a table. Comparison of 2 measurements Findings report You can create a small report in relation to the findings of the long-term blood pressure measurements. This text will be summarised and can – when activated – also be forwarded to the general practice IT system.. - 48 - Printing You can print every page displaying measurement results by using the [Printing] button. The size of the printout can be determined on an individual basis. You can define a standard format under ‚Settings“ The integrated printing preview allows you to view the selected pages prior to printing. Select printout pages PDF-Export Die Schaltfläche [PDF-Export] erzeugt PDFDateien aus den Druckseiten – der Dateiname enthält alle Patienteninformationen. Der Umfang der PDF-Dateien lässt sich jeweils individuell festlegen, ein Standardformat kann unter „Einstellungen“ vordefiniert werden GDT-Export to Patient File systems If the GDT interface between ergoscan software and the general practice IT system interface has been activated, you can create a GDT export file in accordance with the selected settings by using the [GDT export] tab - the file will be saved in the configured directory. CSV-Export In representation [single values] [table] the button [CSV-Export] will generate a formatted textfile with all results. This file is generated in the defined export folder (see „Settings“), the filename contains all necessary patient information. - 49 - Error Codes E 03 Internal hardware error (contact the Service Department). E 04 Batteries are empty. This is displayed as soon as the batteries have insufficient capacity to carry out measurements. E 05 Measurement time has elapsed. This is displayed when measurement time (without inflation time) exceeds 60 seconds.. E 06 This error code will be displayed when: • the actual cuff pressure exceeds the maximum allowable inflation pressure of 280 mmHg; • the device is not inflating beyond the set maximum pressure and is waiting for the next measurement time. E 07 The maximum inflation time of 60 seconds has elapsed. Error refers to a loose cuff or tube, or another faulty sealing. E 08 Insufficient oscillations have been detected: At least 8 oscillations need to be detected for a correct measurement. The cuff should be attached sufficiently tightly (you should be able to put one finger beneath the cuff, but not two). Ergoscan will regulate the deflation rate for follow-up measurements accordingly. E 10 Memory full. 200 blood pressure measurements have been carried out and the memory of the device is full. E 11 Movement during diastole recognition. E 12 Diastole is outside of the measurement range. E 20 Systole is outside of the measurement range. (E12 and E20 are displayed when the calculated systole or diastole values are outside the range in which the oscillations are recorded.) E 21 Systole is below the measurement range. E 22 Systole is above the measurement range E 24 Difference between systole and diastole is too small (10 mmHg or less) E 23 Movement during systole recognition. Air deflation speed is too high, e.g. as a result of leakage. - 50 - Cleaning and Maintenance CAUTION Cleaning and disinfection of device surface • Danger of electric shock • Always disconnect the device from your PC before cleaning it. • Switch off the Ergoscan recorder • Use only a moist cloth and ensure that no fluid enters the device. The most commonly used cleaning and disinfection agents in practices and clinics can be used. • Damage of device • Do NOT use any disinfection agents that contain phenol and peroxide for disinfecting the surface of the device! If any fluid has entered the device, then it should only be used again after having been checked and approved by the Service Department. Cleaning and disinfection of cuffs • Light stains can be removed by using a moist cloth. • For heavier stains, rinse the cuff with soapsuds or disinfected cleaning agent (not in the washing machine!). No fluid should enter the cuff inflation section or the connecting tube (therefore please remove the inflation section when cleaning the cuff). • After you have cleaned the cuff, you need to rinse it thoroughly with water and let it dry at room temperature for approx. 15 hours. • You can also use any of the following to disinfect the device: isopropyl alcohol 70%, ethanol 70%, Microzid; Burazon liquid, Sporicidin or Cidex. After you have disinfected the cuff, rinse it thoroughly with water and leave it to dry at room temperature.. - 51 - Cleaning and disinfection of SpO2 SoftTip sensors Aids for cleaning / disinfection: • Approved cleaning and disinfecting agent without protein-fixing effect (always observe the recommendations of the manufacturer when mixing). • Compressed air • Soft, disposable cloths • Automated cleaning brushes • Demineralised water Commercially available cleaning and disinfecting agents approved for this purpose and based on aldehydes, alcohols, amines, bases or quaternary ammonium compounds are suitable for cleaning and disinfecting the SpO2 sensors as long as they exhibit similar active ingredient compositions and concentrations to the examples listed below. Hint The user must ensure that the process used to prepare the sensors for reuse is suitable for achieving the necessary results, including with regard to the suitability of resources, materials and personnel. National standards and laws require compliance with validated preparation processes according to modern technological principles. Productname Manufacturer use Gigasept Instru AF (Glycoderivat) Schülke & Mayr GmbH www.schuelke-mayr.com Manual cleaning and disinfection Gigasept FF (Aldehyd) Perfektan TB Manual cleaning and disinfection Dr. Schumacher GmbH www.schumacher-online.com Descoton forte (Aldehyd) Neodisher LM2 Manual disinfection Manual disinfection Chem. Fabrik Dr. Weigert GmbH & Co. KG www.drweigert.de Tested alkaline cleaning and disinfecting agents - 52 - Manual cleaning Safety information applicable standards Manuelle Reinigung, Desinfektion des SoftTip Sensors 1. The sensor must be carefully cleaned or disinfected after every use, and before use with a different patient. It is recommended that sensors be prepared for reuse immediately after use since dried residue can be difficult to remove. Avoid overfilling instrument sieves and wash trays. • SoftTip sensors are NOT suitable for being autoclaved or machine cleaning. • SpO2 sensors must not be cleaned in ultrasound baths. This process will destroy the sensors. • Cleaners that react with silicone must not be used to prepare the sensors for reuse. • Observe the instructions provided by the manufacturer for the cleaning and disinfecting device, the cleaning and disinfecting agents and the autoclave or steriliser. • DIN EN ISO 17665-1 2006/11 – Sterilization of health care products. • DIN EN 556-1 2002/03 – Sterilization of medical devices. • Requirements for observing good hygiene practices and the respectively applicable procedures and rules. 3 Disconnect the sensor from the monitor before cleaning or disinfecting. 4. Thoroughly rinse the sensor to remove surface dirt 5. Clean all surfaces of the sensor (inside and outside) with a brush or disposable cloth and cleaning agent or disinfectant (observe manufacturer‘s instructions). We recommend turning the silicone housing of the sensor inside out for cleaning of the inside surfaces. The SoftTip sensors can be submersed in cleaning liquid (see Tab: List of approved cleaning agents). 6. Now rinse the sensor for at least 1 minute in approximately 200 ml of fully demineralised water. When doing so, the water must flow into the connector and the connector/socket holes must be repeatedly filled and emptied. 7 Ensure that all residue has been cleaned off the sensor. 8. If necessary, repeat the entire manual cleaning process. 9. A lint-free cloth can be used for manual drying, if necessary. Sensor cavities must be dried with sterile compressed air. - 53 - Inspection and function test Visually inspect the sensors for damage. Worn, deformed, porous or otherwise damaged sensors must not be reused. Cleaning of cables • Disconnect the cable from the device. • Clean the cables with a moist cloth (soapsuds). NEVER dip the cables into any fluid. Maintenance and validity check prior to any use • Prior to using the device, manually check the device for any mechanical damage. • If you notice any damage or functional errors, which may endanger the safety of the patient and user of the device, then you should only use the device again after it has been repaired. Measurement technical check The ergoscan is a measuring device in accordance with the German ‚Medical Device Code Operation V‘ (‚MP Betrieb V‘) § 11/ Appendix 2. As a result, the device must undergo a measurement technical check‘ every 2 years. The first of these checks should take place on the date indicated on the calibration mark. - 54 - Calibration mode To check for example for any leakages in the pneumatic cycle, the ergoscan recorder can be switched into a calibration mode: • Connect the pump ball over the T-piece between the supplying tube and cuff. • Roll up the cuff tightly. • Switch the device off and on. • Wait until the display shows the time or a running bar (ergoscan duo). • Press the INFO button 3 times: the display shows an internal value, which should be between 25 and 100. If the displayed value is outside this range, then the ergoscan Recorder must be sent in for maintenance. • Press the Start/Stop button: The display shows ‚0‘ (current pressure in mmHg). Create a test pressure of 200 mmHg and measure the decrease in pressure after waiting a minimum of 30 seconds. (Decreases in pressure of 3…5 mmHg are normal. Decreases in pressure > 6 mmHg indicate the presence of an unacceptable leakage. In such an event, the ergoscan Recorder will need to be sent in for repair). • You can exit the calibration mode by pressing the Start/Stop button. Disposing of the device At the end of its useful life, you need to dispose the device described in this manual, including all its accessories, in accordance with the disposal regulations for devices of this type. If you have any questions in relation to disposal, then please contact egoline GmbH or one of its representatives. - 55 - Technical data Bloodpressure measurement Measurement Measurement method Measurement duration Data preservation Measurement intervals Capacity oscillometric 30 – 45 sec. (depends on patient) unlimited 2 – 90 min., programmable 200 measurements or 30 hours Measurement range Systole Diastole Heartrate 60 – 260 mmHg 40 – 220 mmHg 35 – 240 beats/min Cuff Connection Size Cuff pressure Metal locking device available in different sizes 300 mmHg maximum, adjustable SpO2 measurement (ergoscan duo only) Measurement range SpO2 Heartrate 45 - 100 % 20 – 300 beats/min Accuracy SpO2 Heartrate +/- 2 % (70 - 100 %) +/- 1 Digit (<= 100/min) +/- 1% (> 100/min) Measurement method SpO2 ChipOx ® technology (Split Pulse Wave with Fuzzy Logic Control) Sampling rate Interval every 1, 2, 5 sec SpO2 sensor Connector Sensor MiniMed connector Envitec SoftTip® sensor - 56 - Display / Operation controls Patient display Operation controls LCD (measurement values, error codes) Keypad (Start/Stop, Day/Night, Info) Interface PC connection digital interface (USB) Miscellaneous Dimensions (L x W x H) Weight Operating temperature Rel. humidity Air pressure Power supply approx. 11 cm x 8.0 cm x 2.7 cm 190 g (incl. batteries) +10° to +40° 30 - 75 % (non-condensing) 700 - 1060 hPa 2 NiMH rechargeable batteries (type Mignon AA, 1800 mAh) Alkaline batteries not recommended! - 57 - Battery Charger Charger / Charging Batteries Charge Batteries with the VARTA Charger Caution Equipment damage, risk to patients — – The charger is not a medical device. It must not be used in the patient environment. – The contact surface of the NiMH batteries and of the charger must always be kept clean. – The charger is to be used indoors only and must be protected against oil, grease, aggressive detergents and solvents to prevent damage. – If the charger is damaged in any way, e.g. after a drop or when the mains pins are bent, the local authorized dealer must be contacted immediately. – High temperatures affect the charging process. Ideally, the room temperature should not exceed 40 °C (104 °F). Fig. 2 – After quick charging, please wait for some Battery symbols and bars in the charger display Insert 4 or 2 batteries, observing their polarity. To charge minutes before another quick charge. only 2 batteries, insert them in the two compartments on Otherwise the temperature sensors will not the right or on the left. The batteries take up to 3 hours to function correctly. recharge. Once the batteries are inserted, battery symbols If the recorder is powered by rechargeable batteries (4 of them are shipped with the equipment), they should be recharged immediately after use (24 hours). Use only the original charger supplied. It consists of an AC power will appear in the charger display where each symbol corresponds to one of the charger compartments (Fig. 2). During the charge cycle, the corresponding bar in the battery symbols blinks. Note: If the battery symbols and bar do not light up, only one battery may be inserted or adapter and the charging unit itself. the batteries are inserted the wrong way round. When the batteries are charged, the bars are permanently illuminated. The charging unit now trickle-charges the battery to compensate for self-discharging. The battery temperature is monitored in the charger. When the temperature is too high, the bar in the battery symbol is permanently illuminated and the charger switches to trickle-charging. If the batteries are correctly inserted and the displayed battery symbols show no bars, the charger has identified Fig. 1 a battery problem. The charging current to the AC power adapter compartment concerned will be cut off. Remove the y Check that the voltage ratings on the nameplate of the charging unit match those of your local power line. battery and discard, observing the applicable wastedisposal regulations. y Connect the cable of the AC power adapter to the charging unit and plug the AC power adapter into the wall outlet. - 58 - ergoline GmbH Lindenstraße 5 72475 Bitz Germany Tel.: Fax: e-mail: http: +49-(0) 7431 98 94 - 0 +49-(0) 7431 98 94 - 128 [email protected] www.ergoline.com