1
Callisto~
Installation and Operation Guide
See last page for copyright and document information
Callisto-Pi ~ Installation and Operation Guide
Table of Contents
Introduction ......................................................................................................................... 1
Section 1. Install the RPi Hardware ....................................................................................... 3
Section 2. Prepare a Windows PC for Communications with Callisto-Pi ................................. 5
Section 3. System Housekeeping .......................................................................................... 7
Section 4. Edit Launcher ....................................................................................................... 9
Section 5. Setup the Callisto PC to Send FITS Files to Callisto-Pi ........................................... 11
Section 6. Setup a Webserver to Receive Images from Callisto-Pi......................................... 12
Section 7. Install a USB Flash or Hard Drive ......................................................................... 13
Section 8. Ordering Callisto-Pi ............................................................................................ 18
Section 9. References and Web Links .................................................................................. 19
Appendix A. Change Callisto-Pi from DHCP to Static IP Address ........................................... 20
Appendix B. Install Wireless LAN (WLAN) ........................................................................... 25
Appendix C. Backup and Restore Procedures....................................................................... 32
Appendix D. Raspbian Configuration ................................................................................... 35
Document Information ....................................................................................................... 36
See last page for copyright and document information, File: Reeve_Callisto-Pi_Setup.doc, Page 0
Callisto-π ~ Installation and Operation Guide
Whitham D. Reeve
Introduction
Abbreviations
CPi: Callisto-Pi
FTP: File Transfer Protocol
IP: Internet Protocol
LAN: Local Area Network
NAS: Network Attached Storage
RPi: Raspberry Pi
SSH: Secure SHell
URL: Uniform Resource Locator
WLAN: Wireless LAN
Description: Callisto-Pi is an application of the Raspberry Pi computer platform
that produces spectrogram images in near real-time from Callisto FITS files and
sends these images to a web server and archive storage. This guide provides Callisto-Pi installation and
operation instructions and is intended to be read and followed in order. Do not skip any steps. In this guide, RPi
generally refers to the hardware and Callisto-Pi refers to the system including the hardware and software. The
Callisto-Pi Package consists of an RPi model B+ or model 2 in an aluminum enclosure, 8 or 16 GB
preprogrammed memory card and 5 Vdc, 10 W ac power adapter with interchangeable worldwide ac input
plugs. See Section 8 for ordering information.
Note: Callisto-Pi is not plug-and-play. Callisto-Pi will not work until it is setup for the user’s specific environment.
Do not be impatient and do not expect it to work without following this guide.
Note: Internet links in braces { }
Operation: For a general description of Callisto-Pi, see [Reeve-CPi]. The
and references in brackets [ ] are
provided in section 9.
operational sequence is as follows:
CALLISTO instrument PC sends FITS file to Callisto-Pi using File Transfer Protocol (FTP)
Callisto-Pi produces a spectrograms as a Portable Network Graphics (PNG) file from the FITS file
Callisto-Pi optimizes the PNG file
Callisto-Pi sends the spectrogram PNG file using FTP to a web server for viewing
Callisto-Pi renames the PNG file with the original FITS file time/date stamp
Callisto-Pi archives the stamped PNG file to a USB flash or hard drive or Network Attached Storage (NAS)
Callisto-Pi deletes the PNG file and waits for arrival of new FITS file
The production time for a spectrogram image is about 1 minute after Callisto-Pi receives a new FITS file.
Optimization requires another 4 minutes. Therefore, Callisto-Pi requires approximately 5 minutes from the time
it receives a new FITS file to the time it sends the PNG file to a web server. Archiving usually requires less than 1
minute. The RPi model 2 has higher performance than the model B or B+ and reduces the total processing time
by a couple minutes. The frequency axis of the Callisto-Pi spectrogram is automatically scaled between 10 and
870 MHz according to the frequency range in the FITS file.
Documentation: The only documentation that exists for the Callisto-Pi application is this guide and [Reeve-CPi].
Online documentation for the Raspberry Pi including its operating systems is available at {RPiDoc} and {RPiHub}.
There also are numerous online forums that have information related to RPi.
Hardware: The configuration described here has been tested with the Raspberry Pi model B+ and Raspberry Pi
2, both referred to here as RPi. The RPi is used in its stock hardware configuration with no modifications. The
RPi board is installed in an aluminum enclosure and is held in the enclosure by its connectors. The board may
move slightly or rattle if shaken. The hardware is not designed for mobile applications or environments where it
is subjected to even the slightest physical abuse. The enclosure is not weather resistant and the operating
See last page for copyright and document information, File: Reeve_Callisto-Pi_Setup.doc, Page 1
temperature range of the onboard components is limited to 0° to +70° C. A fan-cooled enclosure is available for
use where higher temperatures may be encountered.
Software: The RPi uses a memory card that includes the operating system, application software and libraries.
The operating system is based on a Raspbian distribution. The Callisto-Pi software image is pre-installed on a
micro-SD memory card. When the RPi is powered ON, the software will load and run automatically.
Installation Overview: All setup is performed from a PC running a Secure Shell (SSH) terminal program. A
display, keyboard and mouse are not required on the RPi for installation and are not recommended. This guide
assumes the user has a Windows PC and uses PuTTY as the SSH terminal. Installation will require about 30
minutes, most of which is reading and understanding this guide. The basic steps are:
Section 1 Setup the RPi hardware including memory card, LAN connection and power supply
Section 2 Prepare a Windows PC for console communications with the RPi
Section 3 Perform system housekeeping
Section 4 Edit launcher.sh for the user’s specific Callisto-Pi environment. Launcher.sh is a function in the
Callisto-Pi software that controls the RPi actions
Section 5 Setup the CALLISTO instrument PC to send FITS files to Callisto-Pi
Section 6 Setup a webserver to receive images from Callisto-Pi for viewing in a browser
Section 7 Install a USB flash or hard drive for archive storage of Callisto-Pi spectrogram images
Archive Storage Requirements: As Callisto-Pi produces spectrogram images, it will copy them to a NAS or USB
drive, or both. A new file typically is produced every 15 minutes during daylight hours, and on average roughly
1500 files will be produced every month. Each spectrogram image file is approximately 300 kB, so monthly
storage is about 450 MB and yearly storage is about 5.4 GB. Therefore, an 8 GB USB drive can easily hold images
spanning 1 year. Most NAS are 500 GB or higher and, therefore, can archive a much longer time period.
Security: Callisto-Pi is designed to be installed in a secured local area network environment and to be
inaccessible from outside that network. Callisto FITS files are sent as an anonymous FTP user from the Callisto
instrument PC to Callisto-Pi and the design assumes both are on the same secured LAN. Spectrogram images are
sent to a secure web server requiring a username and password. It is recommended for security reasons that
Callisto-Pi not be exposed to outside the LAN and that you change its user password.
Radio frequency interference: Preliminary measurements indicate the RPi produces some narrow spectral
emissions with a few spectral spikes between 875 and 958 MHz. Minor emissions also were observed in the
Callisto frequency range 45 to 870 MHz. Measurements were made with a spectrum analyzer, low noise
amplifier and 50 mm magnetic loop probe and electric field probe. The UHF emissions were apparent even with
the loop probe 30 cm from the RPi enclosure.
If radio frequency interference from Callisto-Pi is suspected, it could be that the connecting cables are radiating
conducted noise currents. In this case, installing ferrite beads on all connecting cables may effectively reduce the
RFI.
See last page for copyright and document information, File: Reeve_Callisto-Pi_Setup.doc, Page 2
Section 1. Setup the RPi Hardware
Refer to the layouts below showing the RPi model B+ without the enclosure. The images are for reference; do
not remove the RPi from the enclosure.
Power & Activity LEDs
USB Connectors x4
Top View
RPi B+ PCB
Ethernet Connector
micro-USB Power Connector
HDMI Connector
micro-SD Memory
Card Slot
Composite Video and Stereo Audio Connector
Bottom View
RPi B+ PCB
Memory card: Install the memory card. The RPi model B uses a full-size memory card carrier in an ordinary pushto-insert/pull-to-release slot connector. The model B+ uses a micro-SD memory card in a push-to-insert/push-torelease slot connector.
The micro-SD card is small so extra instructions follow: First, remove the micro-SD card from the
carrier/adapter. With the RPi enclosure upside down – bottom facing you with memory card slot
to the left – turn the memory card so its top faces you as shown right (upper, not to scale). Insert
the card into the connector slot, contacts first, until it is flush with the enclosure; it should slide
into the connector slot with very little resistance. The card should latch and when you release
finger pressure it should not spring out. The card cannot be fully inserted if it has the wrong
orientation; DO NOT force it. The contact side of a micro-SD card is shown right (lower) for
reference.
LAN Connection: Initial setup requires a wired Ethernet connection to the LAN. A wireless access device (also
called Wi-Fi dongle or WLAN dongle) may be added as described later. Connect the RPi to your LAN using a highquality Cat5 cable. The RPi supports 10/100BaseT and automatically negotiates 10 or 100 Mb/s speeds with the
LAN interface. By default, Callisto-Pi uses DHCP to obtain an IP address from your LAN router. See Appendix A to
setup a static IP address but first finish setting up Callisto-Pi as described in the following sections.
Power Supply: Before connecting a 5 V power supply, read this first: DO NOT attempt to power Callisto-Pi using
a USB port on a desktop or laptop PC or handheld device.
See last page for copyright and document information, File: Reeve_Callisto-Pi_Setup.doc, Page 3
Power measurements of Callisto-Pi on the RPi model B including the switch-mode ac power adapter showed a 4
W load. Similar measurements with the same ac adapter on the model B+ showed a xx W load. Nothing was
connected to the USB ports on either system during these measurements. The dc power load is close to the ac
load because the adapter used in the measurements is very efficient.
The Callisto-Pi dc load is more than can be reliably supplied by a standard USB port on a PC. Therefore, it is
necessary to use an external power supply or power adapter with RPi. If you purchased the Callisto-Pi Package, it
includes a suitable power supply and you can skip the next paragraph. If you purchased only the Callisto-Pi
memory card and are supplying your own RPi hardware and power supply, please read the following.
If no USB peripherals are used with the RPi, it can be powered by a well-regulated, low ripple, electrically quiet
power source rated ≥ 1.0 A at 5.0 Vdc (≥ 5 W). If the RPi USB ports supply power to peripherals (such as a Wi-Fi
dongle) a 10 W or higher power source should be equipped. Using a poor quality power supply will lead to
unreliable operation so be sure it meets these requirements. One of the most common problems users have
with the RPi is inadequate power supply current. To minimize electrical noise, it is recommended that ferrite
beads be installed on the power cable (image below).
AC wall power adapter with North American ac input plug. One or more
clamshell ferrite beads on the dc power lead may help reduce radio
frequency interference from the switch-mode power supply. This image
shows one bead on the right with three windings of the power lead. The
Raspberry Pi uses a micro-USB connector for power. (Image © 2014 W.
Reeve)
Power connection: Connect the 5 V power supply to the micro-USB connector on the RPi. Watch the LEDs which
are visible through the ventilating holes in the enclosure. The red Power LED will immediately turn on and stay
on; the green Activity LED will flash as Callisto-Pi boots up. If the red LED does not illuminate, there is a problem
with the power supply. If the green Activity LED turns on and stays on, the memory card may be corrupted.
When boot-up is complete, the red Power LED will be steady and the Activity LED will occasionally blink. The
LEDs on the Ethernet network connector function as follows:
Left LED (yellow), On for 100 Mbps connection, Off for 10 Mbps connection
Right LED (green), On if link established, flashes for port activity if link established, Off if no link is
established
WLAN: See Appendix B to install a Wi-Fi dongle but first finish setting up Callisto-Pi using the wired network
connection as described in the following sections.
Backup and restore: The memory card used in Callisto-Pi should be backed up before any changes are made. See
Appendix C for backup and restore procedures.
See last page for copyright and document information, File: Reeve_Callisto-Pi_Setup.doc, Page 4
Section 2. Prepare a Windows PC for Communications with Callisto-Pi
To make changes to the Callisto-Pi software image for your specific environment, it is necessary to log into the
RPi console. This is done from a Windows PC that is on the same network as the RPi. The RPi uses secure shell
(SSH) for console communications so it is necessary to install an SSH client application such as {PuTTY} or
{TeraTerm} on your PC. Do this now. All instructions in this guide are based on PuTTY.
The Raspbian distribution uses DHCP (Dynamic Host Configuration Protocol) to automatically obtain an IP
address. To use an SSH terminal, first determine the IP address assigned to the RPi by your internet router.
Procedures vary widely and it is best to read your router user manual or search for online help. The RPi host
name is “Callisto-Pi” (without quotes) and will be identified as such in your router’s local network status screen.
An alternate, and perhaps quicker, method is to download and install on a Windows PC a network scan program
as described at {RPiNet}.
Open PuTTY and enter the RPi IP address into the Host Name or IP address field. Don not change the port (22)
or Connection type (SSH). Enter a name for the session (example, Callisto-Pi) in the Saved Sessions field. You also
can customize the user interface by clicking on the various entries in the Category window but you can do this
later. Click the Save button to save the session settings.
Upper-left: Screenshot of PuTTY configuration window with
the IP address for a test setup. Your installation will have
use a different address. Upper-right: Upon first connection,
PuTTY asks for authentication; click Yes. Lower-left: When
PuTTY is connected, the window changes to a simple
command line interface. After login, you can make changes
to the RPi as described in this guide. (Images © 2014 W.
Reeve)
See last page for copyright and document information, File: Reeve_Callisto-Pi_Setup.doc, Page 5
Click Open. After authentication you will see the RPi login prompt in the command line interface. Enter the
username and then the password. You will not see characters on the console as you enter the password.
Default username: pi
Default password: Callisto-Pi
After logging into RPi, you will see the prompt
pi@Callisto-Pi - $
At any time you can right-click the bar at the top of the PuTTY window to see the menu. Click Change Settings ...
if you would like to revise the user interface and session settings.
In the next section, you will change the default password. You will need the new password to log into Callisto-Pi
using the SSH client.
See last page for copyright and document information, File: Reeve_Callisto-Pi_Setup.doc, Page 6
Section 3. System Housekeeping
After logging into the RPi, a few housekeeping measures are required:
Change password: Log into the Callisto-Pi and at the prompt enter the following command:
passwd
Callisto-Pi responds with:
Changing password for pi
(current) UNIX password:
Enter the current (default) password. See previous section. No characters will be displayed while entering the
password. Enter the new password and confirm it when Callisto-Pi responds with:
Enter new UNIX password:
Retype new UNIX password:
After Callisto-Pi accepts the new password you will see the following. The new password will take effect
immediately:
passwd: password updated successfully
Updates: The RPi firmware and Raspbian distribution should be regularly updated. The RPi model B+ shipped
with the Callisto-Pi Package will have the latest updates as of the shipment date. If you plan to use your own RPi
model B or B+, you should update it before installing the Callisto-Pi memory card.
Log into the RPi and enter the following commands from the SSH terminal. These commands apply to an RPi
model B+ (see next paragraph for upgrading an existing Callisto-Pi from model B+ to model 2). The
update/upgrade can require several minutes if a new distribution has become available after the last update:
sudo
sudo
sudo
sudo
rpi-update
apt-get update
apt-get upgrade
reboot
If upgrading an existing Callisto-Pi from an RPi model B+ to model 2, enter the following commands while the
memory card is installed in the model B+. After completing these commands, install the card in the model 2:
sudo
sudo
sudo
sudo
sudo
apt-get
apt-get
apt-get
apt-get
reboot
update
upgrade
dist-upgrade
install raspberrypi-ui-mods
Date, time and time zone: By default, the Raspbian distribution uses Network Time Protocol (NTP) to
automatically set the RPi time and date when it is connected to the internet. The RPi platform does not have a
real-time clock or battery backup, so it must be running and connected to the internet to correctly set time and
date.
See last page for copyright and document information, File: Reeve_Callisto-Pi_Setup.doc, Page 7
Callisto-Pi does not specifically use the time and date except to stamp its logs and file activities. The archived
spectrogram images use the date/time stamps of the original FITS files.
Callisto-Pi is setup for Coordinated Universal Time (UTC). To confirm the date, time and time zone (UTC), enter
the following at the RPi prompt on the SSH terminal:
date
It is recommended that the Callisto-Pi time zone not be changed. However, it may be changed by entering the
following. The displayed instructions will lead you through the reconfiguration:
sudo dpkg-reconfigure tzdata
Backup: You should backup your memory card before and after any changes. You will need this backup if you
corrupt the program so badly that it will not boot. There are several ways to run a backup. If you are a Windows
user, you can use Win32 Disk Imager {WDImg} to Read the image and copy it to your Windows PC. Windows
cannot properly read the image on the memory card unless you use a special image read/write program such as
the Win32 Disk Imager.
This backup method requires removing the memory card from the RPi and then inserting it into a card reader
connected to a Windows PC. See Appendix C for backup and restore procedures. Be sure to properly shutdown
the RPi before removing the memory card (see next item).
Shutdown the RPi: To avoid corrupting the Callisto-Pi software image, the system must be properly shutdown
before removing power (just like a Windows PC). Never remove power without first shutting down. To
shutdown, log into Callisto-Pi using the SSH terminal and at the prompt enter:
sudo shutdown –h now
or
sudo halt
All LED indicators except the red power LED on the RPi board will extinguish when the shutdown is complete,
requiring only a moment. Power may then be removed followed by the memory card.
See last page for copyright and document information, File: Reeve_Callisto-Pi_Setup.doc, Page 8
Section 4. Edit Launcher
Launcher is a shell program that executes whenever the RPi is powered up or rebooted. It includes a set of
instructions that are carried out to control Callisto-Pi activities. It is necessary to edit the launcher.sh for your
specific environment including the web server and local archive storage NAS (a USB flash or USB hard drive also
may be used, if desired, but it is described in a later section). Folders and directories are case-sensitive, so be
sure to enter text with the proper uppercase and lowercase (capital letters and small letters).
Be very careful that you do not make inadvertent changes to the text in launcher.sh. Only change the fields or
parameters described here. Any mistakes will render Callisto-Pi inoperative or cause it to produce unpredictable
or incorrect results. Also, be sure that the typed characters are correct. The keyboard mapping is set to United
States and a non-US keyboard may produce the wrong characters.
The changes described here use the built-in nano editor {nano}. This is a very simple editor, but it does not work
like Notepad or other Windows text editors. It uses the keyboard arrow keys for navigation and allowable CTRL
characters and their functions are shown at the bottom of nano window. For the simple changes described here,
simply follow the instructions as given.
Open launcher.sh in the built-in nano editor:
sudo nano launcher.sh
The cursor is at the upper-left. Use the keyboard arrow keys to move the cursor to the location you wish to edit.
Move the cursor down to the shaded text shown below and edit it to include your website FTP server and
network attached storage server IP addresses and login details:
ftp –n –i “Website_FTP_Server” <<EOCS
user “username” “password”
binary
cd “FTP_Server/Callisto/”
See last page for copyright and document information, File: Reeve_Callisto-Pi_Setup.doc, Page 9
Change only the text in quotation marks and delete the quotation marks as you edit each field. For example, say
the following information applies to your installation:
Website server is located at URL “www.xyz.com”
The website FTP username and password are “my_name” and “my_password”
The directory on the website server is “server/Callisto/”
For this example, the edits would look like this:
ftp –n –i www.xyz.com <<EOCS
user my_name my_password
binary
cd server/Callisto/
A similar process is required to send the image to a local NAS for archiving. Edit the shaded text shown below
according to your website FTP server and network attached storage server IP addresses and login details:
ftp –n –i “NAS_FTP_Server” <<EOCS
user “username” “password”
binary
cd “NAS_directory”
For example, say the required information is:
The NAS is located at local IP address “10.0.0.72”
The NAS FTP username and password are “NAS_user” and “NAS_password”
The NAS directory is “CallistoArc/”
For this example, the edits would look like this:
ftp –n –i 10.0.0.72 <<EOCS
user NAS_user NAS_password
binary
cd CallistoArc/
Since your website and NAS directory structures are different, you will need to determine specific addresses,
paths and login details beforehand, and some experimentation may be needed. This is where a backup will save
you a lot of trouble if something goes wrong.
When finished with the above edits, press CTRL-X (Exit), Y (Yes) and ENTER to save your changes and close the
editor.
See last page for copyright and document information, File: Reeve_Callisto-Pi_Setup.doc, Page 10
5. Setup the CALLISTO Instrument PC to Send FITS Files to Callisto-Pi
The FTP client on the Windows PC that is connected to the CALLISTO instrument must be configured to send
each new FITS file to the FTP server running on Callisto-Pi.
The setup is similar to sending the FITS files to FHNW except the logins and destinations are different. Refer to
the Callisto Software Setup Guide [CallistoSoft] for setting up PERL-FTP or FTP-WatchDog. Individual documents
can be found here at {PERLFTP} and {FTPWD}.
You need to determine the following information to setup PERL-FTP or FTP-WatchDog for sending FITS files to
Callisto-Pi:
Source:
Callisto data directory on the Windows PC (for example, C:\Callisto\Data)
Destination:
/callisto (the Callisto-Pi directory that receives FITS files)
User login:
anonymous (the Callisto-Pi FTP username)
Password:
anything (the Callisto-Pi FTP password)
Time interval: Varies, but 3 to 10 minutes is suggested for FITS data covering 15 minute interval
File type:
.fit
An example setup for FTP-WatchDog is shown below.
See last page for copyright and document information, File: Reeve_Callisto-Pi_Setup.doc, Page 11
6. Setup a Webserver to Receive Images from Callisto-Pi
You will need to setup a directory (or folder) on your web server to hold the spectrogram picture.png image file
sent by Callisto-Pi. Each new picture.png file overwrites the previous one at (typically) 15 minute intervals, so
the webpage will need to be setup to render the image and update it at regular intervals. The actual setups will
vary considerably and are beyond the scope of these instructions.
See last page for copyright and document information, File: Reeve_Callisto-Pi_Setup.doc, Page 12
7. Install a USB Flash or Hard Drive on the RPi
Callisto-Pi can send spectrogram images to a USB flash or hard drive (USB storage device) instead of or in
addition to a NAS. Callisto-Pi includes the NTFS-3G for USB hard drives and FAT for USB flash drives.
Callisto-Pi has a directory called /media/CallistoArc that is used to represent the USB drive. For simplicity it is
recommended you use this directory.
If not logged into Callisto-Pi, do so now.
A. In this step you will find your drive on the system. Start with the USB drive disconnected from the Callisto-Pi
USB port. There should be no devices connected to any USB port. Type the command:
ls /dev/
Now connect the USB drive and type the command again:
ls /dev/
Compare the devices from the first and second list. There should be a new device called sdX (and sdX1),
where X can be a, b, c, .... The device most likely will be sda (and sda1). Write down the device. In the PuTTY
console screenshot below, a USB drive designated sda and sda1 may be seen near the middle.
B. Already installed on Callisto-Pi is a program called USBMount that automatically mounts the USB drive when
it is plugged in, but some additional changes are needed. You will need to know the files system used on the
USB drive. Generally, if the USB drive is a flash (or “thumb”) drive, it will use FAT file system. If the drive is a
hard drive, such as a Western Digital myBook, it probably uses NTFS. Of course, there are exceptions. Both
FAT and NTFS can be used on a Windows PC, and Callisto-Pi is setup to use them in the steps below.
Type the command:
sudo nano /etc/fstab
See last page for copyright and document information, File: Reeve_Callisto-Pi_Setup.doc, Page 13
Note the two lines near the middle of the window
# /dev/sda1
/media/CallistoArc/
ntfs-3g
# /dev/sda1
/media/CallistoArc/
vfat
defaults
0
0
defaults,umask=000
0
0
Both lines are commented out (ignored) with the hash symbol comment character #. The first line applies to
a USB drive that uses the NTFS file system and the second applies to a USB drive that uses the FAT file
system. If your USB drive uses NTFS, go to step 1 below; if your drive uses FAT, go to step 2.
1. USB drive uses NTFS: Move the cursor down to the first line. Delete the comment character # at the
beginning of the line. Change the device so that /dev/sda1 is changed to the value X discovered in step A
above. For example, if your X = b (as in sdb and sdb1), then the line should be changed to look like this:
/dev/sdb1
/media/CallistoArc/
ntfs-3g
default
0
0
Note: If your device is sda (sda1), then no changes are required except to remove the comment character.
When finished, press CTRL-X (Exit), Y (Yes) and ENTER to save your changes and close the editor. Go to
step C.
2. USB drive uses FAT: Move the cursor down to the second line. Delete the comment character # at the
beginning of the line. Change the device so that /dev/sda1 is changed to the value X discovered in step A
above. For example, if your X = b (as in sdb and sdb1), then the line should be changed to look like this:
/dev/sdb1
/media/CallistoArc/
vfat
defaults,umask=000
0
0
Note: If your device is sda (sda1), then no changes are required except to remove the comment character.
When finished, press CTRL-X (Exit), Y (Yes) and ENTER to save your changes and close the editor. Go to
step C.
See last page for copyright and document information, File: Reeve_Callisto-Pi_Setup.doc, Page 14
C. Reboot the RPi by entering at the prompt:
sudo reboot
D. Log into Callisto-Pi. Be sure the USB drive is plugged in. At the prompt enter:
cd /media/CallistoArc/
There should be no error messages and you should be able to see files on the drive, if any. You can view the
Callisto-Pi directories with WinSCP {WinSCP}, which is described later in this section.
E. Edit the Callisto-Pi launcher again. This time you will adjust the settings to copy the spectrogram image to the
USB drive. At the prompt, enter:
sudo nano launcher.sh
When the editor opens, scroll down to the line preceded by the # comment character shown here:
#
cp $fit_basename.png /media/CallistoArc/
Delete the leading # character but retain the spaces. Do not make any other changes. The line should look
like this after editing:
cp $fit_basename.png /media/CallistoArc/
Press CTRL-X (Exit), Y (Yes) and ENTER to save your changes and close the editor.
This completes the changes to the file system table, fstab, and launcher.sh. Now it is time to check your
work.
Check file transfers to the USB drive: After Callisto-Pi produces the spectrogram images, it copies them to the
NAS or USB drive or both, depending on your setup. To see if the image files have been copied to the USB drive,
first change to the media directory by entering at the prompt:
cd /media/CallistoArc
dir
You should see files with names of the form ALASKA_20150124_234500_59.png, where the various fields
indicate the CALLISTO Instrument, date, time and focus code. Your files will have different values. The main
thing is that .png files appear in the/media/CallistoArc directory.
The conversion and optimization processes require about 4 minutes after Callisto-Pi receives a new FITS file
from the CALLISTO instrument PC. Remember that spectrogram image files are produced only after the
CALLISTO instrument PC has sent a FITS file to Callisto-Pi; generally, this is only during daylight hours. Therefore,
if you are working on these changes outside of daylight hours, you may not see FITS files in the /upload/callisto/
directory or spectrogram image files in the /media/CallistoArc directory.
Using WinSCP, you can simulate live data transfers to the /home/pi/upload/callisto directory on Callisto-Pi and
then view the directories and spectrogram image files. If not already installed, install and then open WinSCP.
The login window will appear.
See last page for copyright and document information, File: Reeve_Callisto-Pi_Setup.doc, Page 15
Enter the login details (same as for PuTTY). You can save the configuration with or without the password. Click
the Login button and a window similar to Windows Explorer will open. You can navigate the directories in the
normal way. You may need to collapse a directory and then expand it to see sub-directories and files.
Note the directory tree home/pi/upload/callisto/images in the screenshot below. This shows the directories
referred to above.
See last page for copyright and document information, File: Reeve_Callisto-Pi_Setup.doc, Page 16
Simply drag a FITS file from a Windows folder to /home/pi/upload/callisto. It will be processed in about 4
minutes after which you should see a new picture.png image file in /home/pi/upload/callisto/images directory
and a new date- and time-stamped image file in the /media/CallistoArc directory. Use F5 function key to refresh
the directories or click the refresh button (directories do not automatically refresh in WinSCP).
If all goes well, your Callisto-Pi is now processing images. Congratulations!
If all does not go well, you will need to retrace your steps and do some simple troubleshooting:
Confirm FITS files are being sent successfully by the CALLISTO instrument PC. Check the FTP logs.
Confirm FITS files are arriving in the proper Callisto-Pi directory. Check the /home/pi/upload/callisto
directory
Confirm picture.png files are appearing in the proper Callisto-Pi directory. Check the
/home/pi/upload/callisto/images directory
Confirm .png files with instrument, date and time in the filename are appearing in the proper Callisto-Pi
directory. Check the /media/CallistoArc directory
If Callisto-Pi encounters a problem, it will place a description of the problem in the pi file in the
/var/mail/ directory. To view the file, enter at the prompt cat /var/mail/pi. Alternately, you can view the
pi file in WinSCP by right-clicking it and selecting Open. This will open the file in your default text editor
You may view syslog and other log files in the /var/log directory using the same methods as in the
previous item. Studying the logs will help reveal a problem
See last page for copyright and document information, File: Reeve_Callisto-Pi_Setup.doc, Page 17
8. Ordering Callisto-Pi
A Calllisto-Pi Package may be ordered by sending an email inquiry to the address
right; be sure to put something meaningful in the email Subject line or else the
email will be automatically deleted by the server.
The Callisto-Pi Package includes the RPi model B+ in an aluminum enclosure, preprogrammed 8 GB memory card
and 10 W power supply with interchangeable worldwide ac input plugs. The preprogrammed memory card also
is available without the RPi hardware. The memory card is supplied as a micro-SD memory card in a full-size SD
card carrier, so it will work in either the model B or B+.
Prices:
Callisto-Pi Package:
Callisto-Pi memory card:
143 USD plus postage
20 USD plus postage.
See last page for copyright and document information, File: Reeve_Callisto-Pi_Setup.doc, Page 18
9. References and Web Links
[Reeve-CPi]
[CallistoSoft]
{FTPWD}
{nano}
{NetScan}
{PERLFTP}
{PuTTY}
{RPiDoc}
{RPiHub}
{RPiNet}
{SDFormatter}
{TeraTerm}
{WDImg}
{WinSCP}
Reeve, W., Callisto-Pi: Callisto Spectrograms from Raspberry Pi:
http://www.reeve.com/Documents/Articles%20Papers/Reeve_Callisto-Pi.pdf
Reeve, W., Callisto Software Setup Guide:
http://www.reeve.com/Documents/CALLISTO/CALLISTOSoftwareSetup.pdf
http://www.reeve.com/Documents/CALLISTO/FTP-WatchDog_v3Setup.pdf
http://www.nano-editor.org/
https://www.softperfect.com/products/networkscanner/
http://www.reeve.com/Documents/CALLISTO/PERL-FTP_Instructions.pdf
http://www.putty.org/
http://www.raspberrypi.org/documentation/
http://elinux.org/RPi_Hub
http://www.cpdforteachers.com/resources/finding-the-ip-address-of-your-raspberry-pi
https://www.sdcard.org/downloads/formatter_4/
http://ttssh2.sourceforge.jp/index.html.en
http://sourceforge.net/projects/win32diskimager/
http://winscp.net/eng/index.php
See last page for copyright and document information, File: Reeve_Callisto-Pi_Setup.doc, Page 19
Appendix A ~ Change Callisto-Pi from DHCP to Static IP Address
To log into the RPi console, you need its IP address. By default, RPI obtains the address automatically from the
LAN router using DHCP. However, the address can change whenever the RPi is removed from the network or
turned off. It may be preferable to operate the RPi with a static IP address, an address that never changes. For
one thing, it simplifies connection to the RPi console from an SSH terminal because the address is always known.
The following steps assume the RPi is connected to the LAN through a wired Ethernet interface. As you go
through the following steps, take screenshots before and after making changes – this will help in case you need
to reverse your changes.
A.1. Check the existing setup
Log into the RPi using PuTTY and enter the following at the Callisto-Pi prompt. The default user and password is
“pi” and “Callisto_X!” without quotes:
cat /etc/network/interfaces
Note the line that indicates the interface named eth0 uses DHCP:
iface eth0 inet dhcp
Enter the following at the prompt:
ifconfig
See last page for copyright and document information, File: Reeve_Callisto-Pi_Setup.doc, Page 20
Note the information to the right of eth0:
eth0
Link encap:Ethernet
inet addr:10.0.0.11
HWaddr b8:27:eb:13:40:76
Bcast:10.0.0.255 Mask:255.255.255.0
In the above example:
inet addr: 10.0.0.11 (current IP address, example)
Bcast:
10.0.0.255 (broadcast IP range, example)
Mask:
255.255.255.0 (subnet mask, example)
Your console screen most likely will show different values. Copy the following details from your console:
inet addr:
________________ (your current IP address)
Bcast:
________________ (your broadcast IP range)
Mask:
________________ (your subnet mask)
Now enter the following at the prompt:
netstat -nr
See last page for copyright and document information, File: Reeve_Callisto-Pi_Setup.doc, Page 21
Note the information shown in the Destination and Gateway columns:
Destination: 10.0.0.0 (network destination)
Gateway:
10.0.0.1 (gateway address)
Your console screen most likely will show different values. Copy the following details from your console:
Destination: _____________________ (your network destination)
Gateway:
_____________________ (your gateway address)
A.2. Edit the network configuration
Use the built-in editor nano to edit the network interface configuration file:
sudo nano /etc/network/interfaces
Using the keyboard cursors, move to the end of the line that reads:
iface eth0 inet dhcp
Replace dhcp with static, as in:
iface eth0 inet static
Directly below the iface line uncomment (delete the # character) the following lines and replace the address
parameters with those you obtained previously. Do not enter the text in parentheses below:
# address 10.0.0.11
(use the inet address)
# netmask 255.255.255.0
(use the subnet mask)
# network 10.0.0.0
(use the network destination)
# broadcast 10.0.0.255
(use the broadcast IP range)
# gateway 10.0.0.1
(use the gateway address)
The address field is the static IP address to be assigned to Callisto-Pi. It does not necessarily have to be the
address originally assigned by the LAN router but it must be within the router’s network range.
See last page for copyright and document information, File: Reeve_Callisto-Pi_Setup.doc, Page 22
Your console should look similar to above but it will have your parameter values.
Now press CTRL+X (Exit), Y (Yes) and then ENTER to save the changes.
Reboot the RPi so the changes can take effect:
sudo reboot
A.3. Check Static IP Configuration
After the RPi reboots, restart the PuTTY session (right-click the title bar at top of PuTTY window and select
Restart Session), log into Callisto-Pi and enter:
ifconfig
See last page for copyright and document information, File: Reeve_Callisto-Pi_Setup.doc, Page 23
Double-check your work by pinging the gateway (the -c 5 command line switch indicates to ping 5 times. Note:
Without the –c 5 switch the address will be pinged continuously. To stop continuous ping, press CTRL+C). Also,
be sure to use the IP address of your gateway (router) and not the one shown here:
ping 10.0.0.1 -c 5
The pings should be successful with no packet loss. If not successful, then your setup is incorrect. Recheck each
step above. If necessary, you can revert to DHCP by reversing the steps or by looking at your screenshots before
the changes.
You must reboot after making any interface changes:
sudo reboot
Alternately, instead of reboot, you also can simply stop and restart the RPi network:
sudo /etc/init.d/networking stop
sudo /etc/init.d/networking start
See last page for copyright and document information, File: Reeve_Callisto-Pi_Setup.doc, Page 24
Appendix B ~ Install Wireless LAN (WLAN)
Adding a wireless LAN connection to the RPi requires only a USB wireless access device (also called WLAN dongle
and Wi-Fi dongle) and some changes to the network interface configurations. Note: A USB BlueTooth dongle is
physically identical to the Wi-Fi dongle but is not compatible with this application. Most Wi-Fi dongles are
marked 802.11n.
The following steps assume the RPi is initially connected to the LAN through a a wired Ethernet cable. DO NOT
plugin the Wi-Fi dongle until told to do so. As you go through the following steps, take screenshots before and
after making changes – this will help in case you need to reverse your changes.
It should be remembered that a Wi-Fi dongle derives power from the RPi USB port and this power is in addition
to that required by the RPi itself. The dongle should be plugged into the USB port BEFORE power is applied to
the RPi; otherwise, the RPi will reboot because of the momentary voltage drop on its power bus. This is a design
deficiency in the RPi and can result in program corruption.
B.1. WLAN Dongle
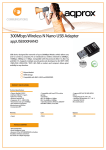
WLAN dongles are inexpensive and easy to obtain; for example, the Edimax EW7811Un Nano, 150Mbps 802.11n Wi-Fi USB Adapter costs 7 USD. These devices have a
very small antenna so their range is limited but ≥ 3 m between the dongle and a
wireless router or wireless access point should be achievable in most situations.
Caution: Some WLAN dongles use power management by default and they will go into sleep mode after a period
of inactivity. Sleep mode is manifested as a “dead” Wi-Fi connection from which the device will not recover
without rebooting the RPi. This is a well-known problem when these devices are used in the RPi, and the
solution depends on the chipset used in the dongle itself. The Callisto-Pi software image includes a configuration
file that solves this problem for the RealTek 8192cu/RTL8188CUS chipset used in many Wi-Fi dongles. If your WiFi dongle has that chipset, you should not have any problems. If your WLAN device does not operate reliably
then you will have to revert to a wired network connection.
B.2. Wi-Fi Setup Details
Check the configuration of the Wi-Fi access point to which you plan to connect. You will need to determine:
SSID
Password (or key)
Encryption type and method (for example, WPA and TKIP shared-key encryption)
Procedures for determining these parameters vary widely so you will need to refer to the wireless access point
user guide or do online research. The setup described in the following paragraphs assumes your Wi-Fi network
broadcasts the SSID (Service Set Identifier).
See last page for copyright and document information, File: Reeve_Callisto-Pi_Setup.doc, Page 25
B.3. Setup W-Fi Configuration
Do not yet plug in the Wi-Fi dongle. Log into Callisto-Pi and enter the following commands:
sudo nano /etc/network/interfaces
Note the following lines. Do not change them:
auto lo
iface lo inet loopback
iface eth0 inet static
The above form the basic wired network interface configuration in which the RPi uses a static IP address (see
Appendix A). The lines that immediately follow show the static IP configuration. If your Callisto-Pi is setup to use
DHCP, the third line of text will read as follows and there will be no addressing:
iface eth0 inet dhcp
Also note the following lines, which provide basic WLAN configuration details. Do not change them. The WLAN
configuration is defined by the wpa_supplicant.conf file:
allow-hotplug wlan0
iface wlan0 inet dhcp
wpa-conf /etc/wpa_supplicant/wpa_supplicant.conf
iface default inet dhcp
Press CTRL+X (Exit) to exit the nano editor.
It is necessary to edit the configuration file. At the Callisto-Pi prompt, enter the following command:
sudo nano /etc/wpa_supplicant/wpa_supplicant.conf
See last page for copyright and document information, File: Reeve_Callisto-Pi_Setup.doc, Page 26
Note the following two lines. Do not change them:
ctrl_interface=DIR=/var/run/wpa_supplicant GROUP=netdev
update_config=1
The configuration file supplied with the Callisto-Pi software image includes a number of additional lines, all
commented out (deactivated) with the # character. Use the keyboard arrow keys to navigate the text and then
make the changes necessary for your wireless network. The first two parameters, ssid and psk, are the SSID and
PASSWORD values, and proto, key_mgmt, pairwise and auth_alg are the Encryption type and method
mentioned in par. B.2. To activate the WLAN, delete the # character and edit the values shown according to your
network details. When finished, the configuration file should look something like this:
See last page for copyright and document information, File: Reeve_Callisto-Pi_Setup.doc, Page 27
When done editing the file, press CTRL+X (Exit), Y (Yes) and ENTER to save and exit the configuration file.
If you have more than one Wi-Fi network at your station, you can add the details for each network in the
wpa_supplicant.conf file. Callisto-Pi will then connect to the one with the best signal. For a setup with multiple
networks, the text lines “network = { additional network details }” will need to be determined and specified for
each network.
Now, shut down the Callisto-Pi:
sudo halt
All LED indicators on the RPi board except the red power LED will extinguish when the shutdown is complete.
When the shutdown is complete, remove power.
B.4. Install the WLAN Dongle
With power disconnected from the RPi, unplug the Ethernet cable and plug the WLAN dongle into any USB port
on the RPi. Connect power to RPi. As it boots, the power LED (red) will be steady and the Activity LED should
flash. After a moment, the RPi should automatically connect to your wireless access point. The RPi is setup to
use DHCP and will request an IP address from the router. Most WLAN dongles have a status LED, which should
flash when initialized. The LED will flash at about 1 Hz rate with occasional shorter, irregular flashes indicating
activity. If the status LED does not light at all or continues to flash at only 1 Hz rate for more than a minute (with
no occasional flashes), there may be a problem in your setup.
You will not be able to log into Callisto-Pi until you determine the wireless IP address and then setup the SSH
client (PuTTY) to use that address. Check your router or use a network scanning program (for example,
See last page for copyright and document information, File: Reeve_Callisto-Pi_Setup.doc, Page 28
SoftPerfect Network Scanner, {NetScan}) to find the hostname Callisto-Pi (same hostname as the wired network
connection but this time it most likely will have a different IP address).
If Callisto-Pi fails to appear on the network, you can plug the Ethernet cable back in, log into the wired Ethernet
interface and double-check the above steps. You most likely made a typing error. After finding and fixing the
error, you can either restart the network interface or reboot the RPi. To restart the network interface (without
rebooting the RPi), at the prompt enter
sudo /etc/init.d/networking restart
Disconnect the wired Ethernet cable and log into the wireless interface using the wireless IP address.
Remember, do not insert or remove the WLAN dongle with power applied to the RPi, but it is okay to remove
and install the wired LAN connection with power on.
It is recommended that either wireless LAN or wired LAN be used but not both at the same time. If wired LAN is
to be used, remove the WLAN dongle (with RPi power off). If wireless LAN is to be used, remove the wired LAN
connection. No changes are required to Callisto-Pi configuration files or launcher.sh setup.
After logging into RPi, you can check the wireless connection quality. At the Callisto-Pi prompt, enter:
iwconfig
To the right of the wlan0 interface the details include the SSID, frequency, bit-rate, link quality, signal level and
noise level plus other information about the wireless connection. To see packet information and IP addresses for
all connected interfaces enter (in the following example, both the wired and wireless connections are active):
ifconfig
See last page for copyright and document information, File: Reeve_Callisto-Pi_Setup.doc, Page 29
You also can obtain information about your network. At the prompt type:
netstat –nr
At the bottom of the window is a routing table. In this example, the wired Ethernet cable was left connected so
it shows both the wired Ethernet (eth0) and wireless LAN connection (wlan0).
The following commands also can be used to check the quality of the wireless connection:
sudo iwlist wlan0 scan
See last page for copyright and document information, File: Reeve_Callisto-Pi_Setup.doc, Page 30
See last page for copyright and document information, File: Reeve_Callisto-Pi_Setup.doc, Page 31
Appendix C ~ Backup and Restore Procedures
Callisto-Pi should be backed up before any changes are made. There are many ways to backup and restore the
Callisto-Pi software image; however, the method described here is simple and has the least risk of corrupting the
image beyond repair.
Note: Not all secure digital memory cards of a given size (say, 8 GB) actually have the same storage space even if
the cards are made by the same manufacturer. A backup from one card and restore to another card may not be
possible if the restore card is slightly smaller than the backup card. On the other hand, memory cards of exactly
the same model from a given manufacturer will have the same space. Callisto-Pi uses a partition that is
approximately 3.5 GB and is supplied on a 4 or 8 GB card. While it is possible to prepare a backup of the supplied
8 GB card and then restore to a 4 GB card, the procedures for doing so are not provided here. It is
recommended that the backup be restored to an 8 GB or larger memory card.
First, install Win32 Disk Imager {WDImg} on a Windows PC. Next, connect a card
reader/writer to the PC that is suitable for the type of card in your Callisto-Pi. Note:
Some micro-SD cards and card reader/writers are incompatible, so it is best to install
the micro-SD card in the full-size SD card carrier or adapter and insert the carrier into
the reader.
Backup:
Shutdown Callisto-PI:
sudo halt
After the RPi has completely shutdown, remove power from it. Remove the memory card and install it in the
card reader/writer. Open Win32 Disk Imager (run it as Administrator):
The drive letter for the memory card is shown in the Device field in upper-right. If you have more than one
device plugged into the PC, select the letter corresponding to your memory card (drive letter E: in example
above).
Click the folder icon to right of the Image File input field. Windows Explorer will open (below). Navigate to the
location where the Callisto-Pi image is to be saved and enter Callisto-Pi.img in the File name field of the Explorer
window. In the example below, the image file is to be saved to the Desktop. Click Open.
See last page for copyright and document information, File: Reeve_Callisto-Pi_Setup.doc, Page 32
At this time you will be returned to the Win32 Disk Imager user interface. Click the Read button. After a moment
the Progress bar will show the Read operation. The read operation will require several minutes so be patient.
When the Read process finishes, a Success window will pop up.
Restore:
To restore the Callisto-Pi image:
Insert an 8 GB or larger memory card in the reader/writer. Any data on the card will be overwritten
Open Win32 Disk Imager and select the memory card drive letter under Device. If the card is not
recognized it may need to be formatted. Use SD Formatter to format the card {SDFormatter}
Navigate to the Callisto-Pi.img File at the location where it was saved and select it
Click Open
Click the Write button on the Win32 Disk Imager user interface
See last page for copyright and document information, File: Reeve_Callisto-Pi_Setup.doc, Page 33
After a moment you will see the Write Progress bar advance as the image is written to the memory card. The
write operation will require several minutes (much longer than Read). Upon completion a Write Successful
window will pop up. The memory card then may be ejected from the Reader/Writer and installed in the RPi.
Remember, do not insert or remove the memory card with power on the RPi.
See last page for copyright and document information, File: Reeve_Callisto-Pi_Setup.doc, Page 34
Appendix D ~ Raspbian Configuration
The Raspbian distribution used on Callisto-Pi is preconfigured for United States English language (locale) and the
associated United States keyboard layout. If this guide is followed step-by-step, there is no need to change the
settings when Callisto-Pi is used in any other country. Locale and keyboard settings were made by
sudo raspi-config
sudo nano /etc/default/keyboard (xkblayout=”us”)
See last page for copyright and document information, File: Reeve_Callisto-Pi_Setup.doc, Page 35
Notes:
1. Install USBMount to automatically mount a USB flash drive. USBMount replaces the current RPi configuration
and automatically mounts USB drives on /media/ with a unique name and limited permissions. The USB flash
drive will be mounted as usb0, usb1 and so on:
sudo apt-get install usbmount
Enter, Y, Enter. After installation
sudo reboot
2. The default permissions on a FAT formatted USB flash drive are different than an NTFS drive. To set USB flash
drive owner, group, user permissions to rwxrwxrwx, edit the file system table:
sudo nano /etc/fstab
Add or edit the line
/dev/sda1
/media/CallistoArc/
vfat
defaults,umask=000
0
0
3. To prevent a WLAN dongle from going to sleep due to power management (from which it will not wakeup
without reboot), create a new file:
sudo nano /etc/modprobe.d/8192cu.conf
Add the following two lines:
# Disable power management
options 8192cu rtw_power_mgnt=0 rtw_enusbss=0
When finished editing, CTRL-X (Exit), Y (yes), Enter to save and close nano. After saving the file
sudo reboot
4. To read the manual for a command or package
man [package name]
5. To search for a package
apt-cache search [package name]
6. To change hostname, edit name associated with address 127.0.0.1 in
sudo nano /etc/hosts
Next, replace name in
sudo nano /etc/hostname
See last page for copyright and document information, File: Reeve_Callisto-Pi_Setup.doc, Page 36
Document information
Author:
Whitham D. Reeve
Copyright: © 2015 W. Reeve
Revision: 0.0 (Original draft started, 04 Jan 2015)
0.1 (Substantial updates and changes, 06 Jan 2015)
0.2 (Numerous changes and added backup/restore, 08 Jan 2015)
0.3 (1st draft completed, 10 Jan 2015)
0.4 (Revised backup procedures, 12 Jan 2015)
0.5 (Edits to clarify bootup and package details, added Operation details, 20 Jan 2015)
0.6 (Added frequency scale, 22 Jan 2015)
0.7 (Revised fstab and launcher.sh procedures, 25 Jan 2015)
1.0 (Final revisions and distribution, 26 Jan 2015)
1.1 (Added to hardware description and Appendix D, 02 Feb 2015)
1.2 (Added binary mode FTP, added Notes, 06 Feb 2015)
1.3 (Added RP1 2, 22 Jul 2015)
See last page for copyright and document information, File: Reeve_Callisto-Pi_Setup.doc, Page 37