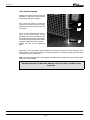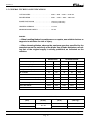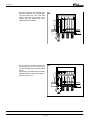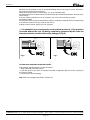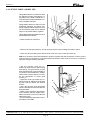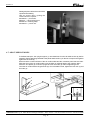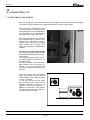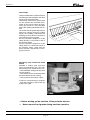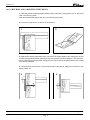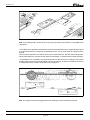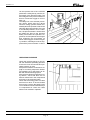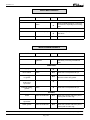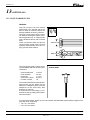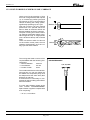
1
Instruction Manual
Ediction 1.4
INGLESE
Published by:
GIBENIMPIANTI S.p.A.
UFFICIO DOCUMENTAZIONE TECNICA
All rights reserved. This publication may not be reproduced, wholly or in part in any form, by any
means, or for any purpose. It may not be given to third parties, and its contents may not be used by
or in any way divulged to third parties without previous written approval by GIBENIMPIANTI S.p.A..
In no circumstances may GIBENIMPIANTI S.p.A. be held responsible to third parties for any damages incurred as a result of the use of this publication. Trademarks are the proprety of their respective
owners.
Index
INDEX
1.GENERAL SUPPLY SPECIFICATIONS . . . . . . . . . . . . . . . . . . . . . . . . . . . . . . . .
Pag. 1
1.1. GENERAL INFORMATION . . . . . . . . . . . . . . . . . . . . . . . . . . . . . . . . . . . . . . . . . . . . . . . .
1.2. IDENTIFICATION DATA . . . . . . . . . . . . . . . . . . . . . . . . . . . . . . . . . . . . . . . . . . . . . . . . . .
1.3. GENERAL SAFETY WARNINGS . . . . . . . . . . . . . . . . . . . . . . . . . . . . . . . . . . . . . . . . . . .
1.4. SAFETY BARIERS . . . . . . . . . . . . . . . . . . . . . . . . . . . . . . . . . . . . . . . . . . . . . . . . . . . . . . . .
Pag. 1
Pag. 2
Pag. 2
Pag. 5
2.DESCRIPTION OF THE MACHINE . . . . . . . . . . . . . . . . . . . . . . . . . . . . . . . . . .
Pag. 8
2.1. GENERAL DESCRIPTION . . . . . . . . . . . . . . . . . . . . . . . . . . . . . . . . . . . . . . . . . . . . . . . . .
2.2. TERMINOLOGY . . . . . . . . . . . . . . . . . . . . . . . . . . . . . . . . . . . . . . . . . . . . . . . . . . . . . . . . . .
Pag. 8
Pag. 9
3.TECHNICAL DESCRIPTION . . . . . . . . . . . . . . . . . . . . . . . . . . . . . . . . . . . . . . . .
Pag. 10
3.1. MODEL SP OVERALL DIMENSION . . . . . . . . . . . . . . . . . . . . . . . . . . . . . . . . . . . . . . . .
3.2. MODEL SPT OVERALL DIMENSION . . . . . . . . . . . . . . . . . . . . . . . . . . . . . . . . . . . . . . .
3.3. PRISMATIC SP SUPPORT POINTS . . . . . . . . . . . . . . . . . . . . . . . . . . . . . . . . . . . . . . . . . .
3.4. PRISMATIC SPT SUPPORT POINTS . . . . . . . . . . . . . . . . . . . . . . . . . . . . . . . . . . . . . . . .
3.5. GENERAL TECHNICAL SPECIFICATIONS . . . . . . . . . . . . . . . . . . . . . . . . . . . . . . . . .
3.6. PRISMATIC WEIGHT . . . . . . . . . . . . . . . . . . . . . . . . . . . . . . . . . . . . . . . . . . . . . . . . . . . . .
3.7. PRISMATIC SP OPERATING CYCLE . . . . . . . . . . . . . . . . . . . . . . . . . . . . . . . . . . . . . . .
3.8. PRISMATIC SPT OPERATIONAL CYCLE . . . . . . . . . . . . . . . . . . . . . . . . . . . . . . . . . . .
3.9. PAINT COLOURS . . . . . . . . . . . . . . . . . . . . . . . . . . . . . . . . . . . . . . . . . . . . . . . . . . . . . . . . .
3.10. SAFETY AREA . . . . . . . . . . . . . . . . . . . . . . . . . . . . . . . . . . . . . . . . . . . . . . . . . . . . . . . . . .
3.11. MODEL SP ELECTRICAL CONNECTIONS . . . . . . . . . . . . . . . . . . . . . . . . . . . . . . . . .
3.12. MODEL SPT ELECTRICAL CONNECTIONS . . . . . . . . . . . . . . . . . . . . . . . . . . . . . . .
Pag. 10
Pag. 11
Pag. 12
Pag. 13
Pag. 14
Pag. 16
Pag. 17
Pag. 20
Pag. 22
Pag. 23
Pag. 24
Pag. 25
4.CONFORMITY TO STANDARDS DOCUMENTATION . . . . . . . . . . . . . . . . . .
Pag. 26
4.1. DUST EMISSION . . . . . . . . . . . . . . . . . . . . . . . . . . . . . . . . . . . . . . . . . . . . . . . . . . . . . . . . .
4.2. NOISE EMISSION . . . . . . . . . . . . . . . . . . . . . . . . . . . . . . . . . . . . . . . . . . . . . . . . . . . . . . . . .
4.3. EEC CERTIFICATES . . . . . . . . . . . . . . . . . . . . . . . . . . . . . . . . . . . . . . . . . . . . . . . . . . . . . .
Pag. 26
Pag. 27
Pag. 28
5.INSTALLATION . . . . . . . . . . . . . . . . . . . . . . . . . . . . . . . . . . . . . . . . . . . . . . . . . . . .
Pag. 30
5.1. WARNINGS . . . . . . . . . . . . . . . . . . . . . . . . . . . . . . . . . . . . . . . . . . . . . . . . . . . . . . . . . . . . . .
5.2. MACHINE WEIGHT . . . . . . . . . . . . . . . . . . . . . . . . . . . . . . . . . . . . . . . . . . . . . . . . . . . . . .
5.3. MACHINE LIFTING AND TRANSPORT . . . . . . . . . . . . . . . . . . . . . . . . . . . . . . . . . . . .
5.4. LEVELLING THE MACHINE . . . . . . . . . . . . . . . . . . . . . . . . . . . . . . . . . . . . . . . . . . . . . .
5.5. PRELIMINARY CLEANING . . . . . . . . . . . . . . . . . . . . . . . . . . . . . . . . . . . . . . . . . . . . . . . .
5.6. REMOVING THE CLAMPING BLOCKS . . . . . . . . . . . . . . . . . . . . . . . . . . . . . . . . . . . . .
Pag. 30
Pag. 30
Pag. 31
Pag. 34
Pag. 36
Pag. 36
6.INSTALLING THE MACHINE UNIT . . . . . . . . . . . . . . . . . . . . . . . . . . . . . . . . . .
Pag. 38
6.1. INSTALLING THE PUSHER UNIT . . . . . . . . . . . . . . . . . . . . . . . . . . . . . . . . . . . . . . . . . .
6.2. ADJUST THE HEIGHT OF THE GRIPPERS . . . . . . . . . . . . . . . . . . . . . . . . . . . . . . . . .
6.3. PANEL TRANSPORT ROLLERS . . . . . . . . . . . . . . . . . . . . . . . . . . . . . . . . . . . . . . . . . . . .
6.4. LIFTING TABLE (MODEL SPT) . . . . . . . . . . . . . . . . . . . . . . . . . . . . . . . . . . . . . . . . . . . .
6.5. ELECTRONIC COUNTER UNIT (MOD. SPT) . . . . . . . . . . . . . . . . . . . . . . . . . . . . . . . .
6.6. PHOTOELECTRIC BARRIERS . . . . . . . . . . . . . . . . . . . . . . . . . . . . . . . . . . . . . . . . . . . .
6.7. AIR CUSHION TABLES . . . . . . . . . . . . . . . . . . . . . . . . . . . . . . . . . . . . . . . . . . . . . . . . . . .
6.8. FENCES . . . . . . . . . . . . . . . . . . . . . . . . . . . . . . . . . . . . . . . . . . . . . . . . . . . . . . . . . . . . . . . . . .
6.9. FIXING THE PANEL SAW TO THE FOOR . . . . . . . . . . . . . . . . . . . . . . . . . . . . . . . . . . .
6.10. CONNECTING---UP THE AIR GENERATOR . . . . . . . . . . . . . . . . . . . . . . . . . . . . . . .
Pag. 38
Pag. 39
Pag. 40
Pag. 41
Pag. 43
Pag. 44
Pag. 45
Pag. 46
Pag. 47
Pag. 48
GIBENIMPIANTI S.p.A 40065 PIANORO --- BOLOGNA--- ITALIA Ph+39/051/6516400 Fax+39/051/6516425 E--- mail:[email protected]
I
Index
7.CONNECTING---UP . . . . . . . . . . . . . . . . . . . . . . . . . . . . . . . . . . . . . . . . . . . . . . . .
Pag. 49
7.1. ELECTRICAL EQUIPMENT . . . . . . . . . . . . . . . . . . . . . . . . . . . . . . . . . . . . . . . . . . . . . . .
7.2. PUSHER . . . . . . . . . . . . . . . . . . . . . . . . . . . . . . . . . . . . . . . . . . . . . . . . . . . . . . . . . . . . . . . . .
7.3. LIFTING TABLE (MOD.SPT) . . . . . . . . . . . . . . . . . . . . . . . . . . . . . . . . . . . . . . . . . . . . . . .
7.4. COMPRESSED AIR CONNECTION . . . . . . . . . . . . . . . . . . . . . . . . . . . . . . . . . . . . . . . . .
7.5. DUST EXTRACTION EQUIPMENT . . . . . . . . . . . . . . . . . . . . . . . . . . . . . . . . . . . . . . . . .
Pag. 49
Pag. 50
Pag. 50
Pag. 51
Pag. 52
8.SAFETY DEVICE . . . . . . . . . . . . . . . . . . . . . . . . . . . . . . . . . . . . . . . . . . . . . . . . . . .
Pag. 54
8.1. CHECKING THE OPERATION OF SAFETY DEVICE . . . . . . . . . . . . . . . . . . . . . . . .
8.2. LABELS LAY---OUT . . . . . . . . . . . . . . . . . . . . . . . . . . . . . . . . . . . . . . . . . . . . . . . . . . . . . . .
8.3. WARNING LABELS UNIT . . . . . . . . . . . . . . . . . . . . . . . . . . . . . . . . . . . . . . . . . . . . . . . . .
Pag. 54
Pag. 56
Pag. 57
9.CONTROL PANEL AND STARTING THE MACHINE . . . . . . . . . . . . . . . . . . .
Pag. 66
9.1. CAUTION . . . . . . . . . . . . . . . . . . . . . . . . . . . . . . . . . . . . . . . . . . . . . . . . . . . . . . . . . . . . . . . .
9.2. CONTROL PANEL . . . . . . . . . . . . . . . . . . . . . . . . . . . . . . . . . . . . . . . . . . . . . . . . . . . . . . . .
9.3. PRISMATIC SP --- PROGRAMMING . . . . . . . . . . . . . . . . . . . . . . . . . . . . . . . . . . . . . . .
9.4. PRISMATIC SPT --- PROGRAMMING . . . . . . . . . . . . . . . . . . . . . . . . . . . . . . . . . . . . . . .
9.5. OPTIONALS . . . . . . . . . . . . . . . . . . . . . . . . . . . . . . . . . . . . . . . . . . . . . . . . . . . . . . . . . . . . . .
9.6. REMOTE CONTROL FUNCTIONS (OPTIONAL) . . . . . . . . . . . . . . . . . . . . . . . . . . . .
Pag. 66
Pag. 66
Pag. 67
Pag. 69
Pag. 70
Pag. 73
10.ADJUSTING THE MACHINE . . . . . . . . . . . . . . . . . . . . . . . . . . . . . . . . . . . . . . .
Pag. 74
10.1. TESTING . . . . . . . . . . . . . . . . . . . . . . . . . . . . . . . . . . . . . . . . . . . . . . . . . . . . . . . . . . . . . . . .
10.2. CHECKING AND ADJUSTING THE FENCES . . . . . . . . . . . . . . . . . . . . . . . . . . . . . .
10.3. ADJUSTING MAIN BLADE . . . . . . . . . . . . . . . . . . . . . . . . . . . . . . . . . . . . . . . . . . . . . . .
10.4. CHECKING BLADE AND MACHINE TABLE SQUARENESS . . . . . . . . . . . . . . . . .
10.5. ADJUSTING BLADE AND CUTTING LINE PARALLELISM . . . . . . . . . . . . . . . . .
10.6. SCORING SAW . . . . . . . . . . . . . . . . . . . . . . . . . . . . . . . . . . . . . . . . . . . . . . . . . . . . . . . . . .
10.7. ELECTRICAL ADJUSTMENT OF SCORING SAW (OPTIONAL) . . . . . . . . . . . . .
10.8. MANUAL ADJUSTMENT THE SCORING SAW . . . . . . . . . . . . . . . . . . . . . . . . . . . . .
10.9. ADJUSTING PUSHER PINION PLAY . . . . . . . . . . . . . . . . . . . . . . . . . . . . . . . . . . . . . .
Pag. 74
Pag. 75
Pag. 76
Pag. 77
Pag. 80
Pag. 85
Pag. 86
Pag. 87
Pag. 89
11.MAINTENANCE . . . . . . . . . . . . . . . . . . . . . . . . . . . . . . . . . . . . . . . . . . . . . . . . . .
Pag. 90
11.1. PRESSURE BEAM . . . . . . . . . . . . . . . . . . . . . . . . . . . . . . . . . . . . . . . . . . . . . . . . . . . . . . .
11.2. DRIVE CHAIN AND IDLING SPROCKET . . . . . . . . . . . . . . . . . . . . . . . . . . . . . . . . . .
11.3. SAW CARRIAGE . . . . . . . . . . . . . . . . . . . . . . . . . . . . . . . . . . . . . . . . . . . . . . . . . . . . . . . . .
11.4. CHANGING THE MAIN SAW BLADE . . . . . . . . . . . . . . . . . . . . . . . . . . . . . . . . . . . . .
11.5. CHANGING THE SCORING SAW BLADE . . . . . . . . . . . . . . . . . . . . . . . . . . . . . . . . . .
11.6. REPLACING BLADE HUB BEARINGS . . . . . . . . . . . . . . . . . . . . . . . . . . . . . . . . . . . .
11.7. REPLACING SCORER HUB BEARINGS . . . . . . . . . . . . . . . . . . . . . . . . . . . . . . . . . .
11.8. BELT REPLACEMENT . . . . . . . . . . . . . . . . . . . . . . . . . . . . . . . . . . . . . . . . . . . . . . . . . . .
11.9. PUSHER GUIDE CLEANING PADS . . . . . . . . . . . . . . . . . . . . . . . . . . . . . . . . . . . . . . . .
11.10. LIFTING TABLE . . . . . . . . . . . . . . . . . . . . . . . . . . . . . . . . . . . . . . . . . . . . . . . . . . . . . . . .
11.11. BLADES . . . . . . . . . . . . . . . . . . . . . . . . . . . . . . . . . . . . . . . . . . . . . . . . . . . . . . . . . . . . . . .
11.12. REGULAR MAINTENANCE . . . . . . . . . . . . . . . . . . . . . . . . . . . . . . . . . . . . . . . . . . . . .
11.13. LUBRICATION . . . . . . . . . . . . . . . . . . . . . . . . . . . . . . . . . . . . . . . . . . . . . . . . . . . . . . . . .
Pag. 90
Pag. 92
Pag. 92
Pag. 93
Pag. 94
Pag. 96
Pag. 98
Pag. 99
Pag. 101
Pag. 101
Pag. 102
Pag. 103
Pag. 108
12.FAULT FINDING . . . . . . . . . . . . . . . . . . . . . . . . . . . . . . . . . . . . . . . . . . . . . . . . . .
Pag. 110
12.1. INTRODUCTION . . . . . . . . . . . . . . . . . . . . . . . . . . . . . . . . . . . . . . . . . . . . . . . . . . . . . . . .
12.2. FAULT FINDING PRISMATIC2 SP / SPT MODEL . . . . . . . . . . . . . . . . . . . . . . . . . . . .
12.3. VARIANTS FOR PRISMATIC SPT MODELS . . . . . . . . . . . . . . . . . . . . . . . . . . . . . . . .
Pag. 110
Pag. 112
Pag. 116
13.OPTIONALS . . . . . . . . . . . . . . . . . . . . . . . . . . . . . . . . . . . . . . . . . . . . . . . . . . . . . .
Pag. 117
13.1. POST---FORMING UNIT . . . . . . . . . . . . . . . . . . . . . . . . . . . . . . . . . . . . . . . . . . . . . . . . . .
13.2. POST---FORMING SCORER ON SAW CARRIAGE . . . . . . . . . . . . . . . . . . . . . . . . . .
13.3. CLAMP LOCKING DEVICE . . . . . . . . . . . . . . . . . . . . . . . . . . . . . . . . . . . . . . . . . . . . . . .
Pag. 117
Pag. 121
Pag. 122
GIBENIMPIANTI S.p.A 40065 PIANORO --- BOLOGNA--- ITALIA Ph+39/051/6516400 Fax+39/051/6516425 E--- mail:[email protected]
II
Prisma2-- 1
1.
GENERAL SUPPLY SPECIFICATIONS
1.1. GENERAL INFORMATION
The description and illustration contained in this instruction manual are not binding in any way.
GIBENIMPIANTI S.p.A. reserves the right to make any changes it believes necessary without prior
notice.
IT IS ABSOLUTELY FORBIDDEN TO CARRY OUT, AND/OR AGREE TO THE CARRYING
OUT OF, ANY MODIFICATIONS OF WHATEVER EXTENT TO ANY PART OR PARTS OF
OUR MACHINES, BE THEY MECHANICAL, ELECTRIC OR ELECTONIC. WITHOUT
WRITTEN AUTHORIZATION FROM US.
FAILURE TO COMPLY WITH THIS RULE SHALL RELIEVE OUR COMPANY OF ANY LIABILITY ARISING FROM SUCH MODIFICATION OR MODIFICATIONS.
Keep the instructions manual for the machine in good condition, i.e. without total or even partial
erasure of the original text. To this end, keep the manual together with the other enclosures in the
pocket inside the electric cabinet for ready access.
Besides the instructions manual, the customer is also supplied with the Programmer’s manual,
a copy of the electrical diagrams and accompanying replacement parts manual.
The client is supplied with the machine instruction manual, the Programmer manual, a copy of
the wiring diagrams, and the relative spare parts manual.
The aim of the manual should be specified, so that the technician or operator fully understands
the intended use and function of the machine.
The instruction manual describes all parts of the machine and defines its intended use. It also
contains indispensable information to guarantee correct operation and safety of the operator and
other personnel.
MANUAL SYMBOLS :
- Special attention must be paid to parts of the text marked in bold against a light grey
background.
- All safety warnings and recommendations to maintain the panel saw in optimal working
condition are marked with the symbol ..
MANUAL TERMINOLOGY :
- The term ”Maintenance technician” refers to an operator who has attended the
Giben training course.
- The term ”Operator” refers to a general operator qualified to use the machine , and who
has been instructed regarding the machine functions and risks associated with operation.
. Read the operation and maintenance manual carefully prior to start ---up,
adjustment or maintenance operations, etc.
The manufacturer declines all responsibility for damage or physical injury caused by failure to
observe safety standards.
GIBENIMPIANTI S.p.A 40065 PIANORO --- BOLOGNA--- ITALIA Ph+39/051/6516400 Fax+39/051/6516425 E--- mail:[email protected]
Pag. 1
Prisma2-- 1
1.2. IDENTIFICATION DATA
Every machine is identified by a plate
riveted to the left side of the electrical
cabinet,indicating:
A --- MODEL
Made in Italy
R
B
A
B --- SERIAL NUMBER
MODEL
C --- INPUT VOLTAGE
C
D --- ELECTRICAL POWER
CONSUMPTION
D
SERIAL
3~
V.
HZ.
A.
KW.
F
E --- REMOTE SWITCHING VOLTAGE
V.
CO
CONTROLLER
F --- P.L.C. INPUT VOLTAGE
G --- WORKS TESTING DATE
V.
TESTING
COD.205011201
E
G
Our Technical Assistance Service will provide customers with any information required,as well as
help to solve electrical or mechanical problems that may arise. When seeking advice always quote
the model and serial number.
1.3. GENERAL SAFETY WARNINGS
The machine has been designed and constructed in keeping with the latest accident prevention
systems.
THE OPERATOR SHOULD READ THE FOLLOWING ADVICE AND CAUTIONS WITH
GREAT CARE
. The machine must only be operated with all casings and fenders in place.
. Always replace any of the flaps on the safety bar that might have been accidentally damaged
during the operating cycle.
. Turn the machine off before performing any adjustments or replacing parts; to ensure that the
machine is not turned on during such operations, the mains switch may be locked
(lock not included).
. Switch off the machine before making any adjustments or changing parts.
. Check the oil level in the lubricator distribution bowl to ensure proper lubrication of all pneumatic components at all times.
. Clear the machine periodically of waste accumulated during cutting.
GIBENIMPIANTI S.p.A 40065 PIANORO --- BOLOGNA--- ITALIA Ph+39/051/6516400 Fax+39/051/6516425 E--- mail:[email protected]
Pag. 2
Prisma2-- 1
. Keep the surrounding floor area clean.
. Follow the manteinance schedule to the letter.
. Always switch off the machine before cleaning.
. Always use blades in faultless condition.
. When wiring the machine to the main switch,make sure that the earth wire is connected correctly,also that the power supply is properly grounded through an efficient earth rod.
. Access to PLC programs, Inverter parameters and calibration of automatic switches is prohibited.
. Bear in mind that the electric cabinet in not equipped with an electric door interlock. Cabinet
doors may only be opened with a special key.
. The term ”Maintenace Engineer” refers to an operator who has been on the Giben training
course.
. The term ”Operator” refers to a general worker who is given the job of using the machine.
. All components and parts indicated as hazardous are difficult to reach and protected by guards
accessible to specialised operators only.
. In case of fire, use a powder extinguisher. Wires employed in the circuit are in any case self---extinguishing.
. In the case of electrical or mechanical overload, the machine will automatically signal a state
of emergency and stop.
. The fixed guards must on no account be removed when the machine is in operation.
. On no account enter the area enclosed by the safety barrier when the machine is in operation.
. Keep the work surface in perfect condition and replace broken or damaged parts immediately.
. Clean the machine regularly to remove all trimmings.
. Start up the machine in strict observance of the manual instructions.
. Never put hands or objects inside live parts, moving parts or inside the electrical cabinet.
. Never leave the machine unsupervised while in operation.
. Never allow unauthorised persons to approach the machine during operation.
. Inform relative maintenance personnel immediately of any device malfunctions.
. Only use material as specified for the machine.
. Before start ---up, ensure that no objects have been left inside the machine.
. The machine must be used according to the methods, times and locations as specified by
national standards and legislation.
GIBENIMPIANTI S.p.A 40065 PIANORO --- BOLOGNA--- ITALIA Ph+39/051/6516400 Fax+39/051/6516425 E--- mail:[email protected]
Pag. 3
Prisma2-- 1
. Keep the floor area surrounding the machine clean at all times.
. When handling blades for maintenance or repairs, use suitable devices or supports to minimise
the risk of injury.
. Wear suitable protective gloves when changing blades.
. Access to the electrical panel is restricted exclusively to qualified personnel.
. Before turning on the machine at the mains switch, ensure that the earth cable is connected
correctly and that the mains is fitted with efficient earthing terminals.
. Never use material other than as specified in the manual, unless previously authorised by the
manufacturer.
. Never use the machine in environments subject to the risk of explosion.
. All tools used on the machine must comply with draft standard prEN 847---1.
. In the event of maintenance or repairs to zones not accessible from ground level, use suitable
means to reach parts in compliance with current safety standards.
. If the machine is installed in---line with other machinery, contact the manufacturer to equip the
machine with suitable interlocks between the machine and for emergency shutdown.
Failure to observe the above exempts the manufacturer from liability for damage or injury to persons caused by installation in line with other machinery.
. Do not under any circumstances use the machine without first switching on the suction system, as the continuous presence of dust around the machine may cause serious injury to the persons working on it and prevent it from functioning correctly.
GIBENIMPIANTI S.p.A 40065 PIANORO --- BOLOGNA--- ITALIA Ph+39/051/6516400 Fax+39/051/6516425 E--- mail:[email protected]
Pag. 4
Prisma2-- 1
1.4. SAFETY BARIERS
BEFORE STARTING THE MACHINE, ENSURE THAT ALL SAFETY GUARDS ARE IN
POSITION.
When assembly of the machine and all its components has been completed,the safety barriers
must be erected around the machine. The safety barriers must prevent access to moving parts
and all potentially dangerous areas of the machine
. Do not go beyond the safety barriers when the machine is operating.
ATTENZIONE
NON ENTRARE PER NESSUN MOTIVO NEL PERIMETRO DELIMITATO
DALLE BARRIERE DI PROTEZIONE CON LA MACCHINA IN FUNZIONE.
WARNING
ON NO ACCOUNT ENTER THE AREA ENCLOSED BY
THE BARRIER WHEN THE MACHINE IS IN OPERATION.
ATTENTION
IL EST FORMRLLEMENT INTERDIT DE FRANCHIR LES
BARRIERES QUAND LA MACHINE EST EN MARCHE.
LET OP!
MEN DIENT OM GEEN ENKELE REDEN VOORBIJ DEZE HEKKEN
TE KOMEN WANNEER DE MACHINE IN WERKING IS.
ACHTUNG
AUF KEINEN FALL DEN VONDEN SCHRANKEN BEGRENZTEN RAUM
BEI FUNKTIONIERENDER MASCHINE BETREN.
ATENCIÓN
MIENTRAS LAS MAQUINAS ESTEN EN FUNCIONAMIENTO
NO REBASEN LAS BARRERAS BAJO NINGUN CONCEPTO.
LET OP!
KOM, WANNEER DE MACHINE IN WERKING IS, OM GEEN
ENKELE REDEN BINNEN HET GEBIED DAT WORDT AFGEBAKEND
DOOR DE BESCHERMINGEN.
INGLESE ---FRANCESE ---FIAMMINGO ---TEDESCO ---SPAGNOLO ---OLANDESE
COD. AA05868.28
GIBENIMPIANTI S.p.A 40065 PIANORO --- BOLOGNA--- ITALIA Ph+39/051/6516400 Fax+39/051/6516425 E--- mail:[email protected]
Pag. 5
Prisma2-- 1
Safety barriers are either bars or grills.
BAR SAFETY BARRIERS
Position the supports (A) of the safety
barrier following the indications given
in the layout diagram.
. The supports must be positioned so that there is a
distance of at least 1 metre
between the safety barrier and
the machine.
B
A
Pass the tubular sections of the safety
barrier (B) through the holes in the top
of the supports (A).
On the supports, first insert the tubular
section (C) into the blind hole and push
it against the opposite surface of the
support. Then insert the tubular section (D) through one of the through
holes and push it against the tubular
section (C).
On end supports, pass the tube
through the blind hole and then push
it against the opposite surface of the
support.
A
C
D
Once you have assembled all components of the safety barrier, fix the
assembly to the floor. Drill holrs in the
floor under the holes in the support plates and then fix the supports in position
using the expanding bolts provided.
Tighten the nuts on the expanding
bolts.
N.B. The ground fixing shown in the diagram is intended as an example only. ground fixing is the
customer’s responsibility.
GIBENIMPIANTI S.p.A 40065 PIANORO --- BOLOGNA--- ITALIA Ph+39/051/6516400 Fax+39/051/6516425 E--- mail:[email protected]
Pag. 6
Prisma2-- 1
GRILL SAFETY BARRIER
Position the support feet (E) along the
perimeter of the area to be cordoned
off following the layout diagram.
First, insert the tubes (F) inside the
support feet and then mount the grills
by passing the tubes through holes (G)
in the grills.
Once you have assembled all components of the safety barrier, fix the
assembly to the floor. Drill holes in the
floor under the holes in the support plates and then fix the supports in position
using the expanding bolts provided.
Tighten the nuts on the expanding
bolts.
F
G
E
Mushroom---head emergency stop pushbuttons are positioned at the service entrances in the
safety barriers. Check the operation of these pushbuttons at regular intervals by following the
instructions given in chapter 8.1.
N.B. The ground fixing shown in the diagram is intended as an example only. ground fixing is the
customer’s responsibility.
BEFORE STARTING THE MACHINE, ENSURE THAT ALL SAFETY GUARDS ARE IN
POSITION.
GIBENIMPIANTI S.p.A 40065 PIANORO --- BOLOGNA--- ITALIA Ph+39/051/6516400 Fax+39/051/6516425 E--- mail:[email protected]
Pag. 7
Prisma2-- 2
2.
DESCRIPTION OF THE MACHINE
2.1. GENERAL DESCRIPTION
1
3
2
4
6
5
7
10
1)
2)
3)
4)
5)
6)
7)
8)
9)
10)
9
8
ELECTRIC PROGRAMMER
PRESURE BEAM
SIDE ALIGNING DEVICE
PNEUMATIC GRIPPERS
PUSHER
ELECTRONIC COUNTER UNIT
LIFTING TABLE
TRAVERSE UNIT
SAW CARRIAGE
AIR CUSHION TABLES
GIBENIMPIANTI S.p.A 40065 PIANORO --- BOLOGNA--- ITALIA Ph+39/051/6516400 Fax+39/051/6516425 E--- mail:[email protected]
Pag. 8
Prisma2-- 2
2.2. TERMINOLOGY
Length cutting
Length cutting of the
same measurement
Length cutting of
different measurements
Length strip cutting
Cross cutting
Cross cutting of the
same measurement
Cross cutting of
different measurements
Cross strip cutting
Trim cuts and squaring
Pile of panels
Stack of panels
One or more head cuts
(shortening panel length before
starting cutting pattern)
LOGICAL CUTTING
PATTERN
OFF ---SET CUTTING
PATTERN
Length cutting
+
Cross Cutting
=
SUBMULTIPLES
GIBENIMPIANTI S.p.A 40065 PIANORO --- BOLOGNA--- ITALIA Ph+39/051/6516400 Fax+39/051/6516425 E--- mail:[email protected]
Pag. 9
Prisma2-- 3
3.
TECHNICAL DESCRIPTION
~ 950
~ 2000
3.1. MODEL SP OVERALL DIMENSION
K
X
Y
2200
3350
6772
3300
3350
6772
3350
6772
4050
7472
4050
7472
4550
7972
5800
9222
3800
4500
2187
X
Y
5700
K
K+2806
GIBENIMPIANTI S.p.A 40065 PIANORO --- BOLOGNA--- ITALIA Ph+39/051/6516400 Fax+39/051/6516425 E--- mail:[email protected]
Pag. 10
Prisma2-- 3
~ 950
~ 2550
3.2. MODEL SPT OVERALL DIMENSION
K
Z
3300
3800
4500
5700
Y
1600
8172
1600
8172
2200
8672
1600
8672
2200
9472
2200
11322
2700
11822
Z
1600
W
3500
4000
W
4500
2200
3500
4000
4500
5700
2700
4000
4500
2187
Y
Z
5700
K
K+2806
GIBENIMPIANTI S.p.A 40065 PIANORO --- BOLOGNA--- ITALIA Ph+39/051/6516400 Fax+39/051/6516425 E--- mail:[email protected]
Pag. 11
Prisma2-- 3
3.3. PRISMATIC SP SUPPORT POINTS
GIBENIMPIANTI S.p.A 40065 PIANORO --- BOLOGNA--- ITALIA Ph+39/051/6516400 Fax+39/051/6516425 E--- mail:[email protected]
Pag. 12
Prisma2-- 3
3.4. PRISMATIC SPT SUPPORT POINTS
GIBENIMPIANTI S.p.A 40065 PIANORO --- BOLOGNA--- ITALIA Ph+39/051/6516400 Fax+39/051/6516425 E--- mail:[email protected]
Pag. 13
Prisma2-- 3
3.5. GENERAL TECHNICAL SPECIFICATIONS
CUTTING AREA . . . . . . . . . . . . . . . . . . . . . . . . . 3300 --- 3800 --- 4500 --- 5700 mm
PUSHER BEAM . . . . . . . . . . . . . . . . . . . . . . . . . . 3350 --- 4050 --- 4550 --- 5800 mm
BLADE PROTRUSION . . . . . . . . . . . . . . . . . . . . 100 mm (ø 400 mm)
. . . . . . . . . . . . . . . . . . . . . . . . . . . . . . . . . . . . . . . . . 115 mm (ø 430 mm)
GRIPPERS OPENING . . . . . . . . . . . . . . . . . . . . . 117 mm
MINIMUM SAWING WIDTH . . . . . . . . . . . . . . . . 70 mm
BLADES
. When handling blades for maintenance or repairs, use suitable devices or
supports to minimise the risk of injury.
. When choosing blades, observe the maximum speed as specified by the
manufacturer on the main body of the blade. Use of blade diameters exceeding that of the original supply is strictly prohibited, as indicated on the
machine.
MAIN BLADE
SCORING BLADE
Diameter ext. (mm)
400
430
215
300
300
Diameter int. (mm)
75
75
50
50
50
Teeth width (mm)
4,4
4,4
4,4
4,4
4,2---4,6
Body thickness (mm)
3,2
3,2
3,2
3,2
2x1,8
N° of teeth
72
96
42
48
2x32
N° of drive holes
4
4
3
3
3
Drive hole diameter (mm)
15
15
15
15
15
Drive hole centre distance (mm)
105
105
80
80
80
Drive hole layout
90°
90°
120°
120°
120°
turn./min. 50 Hz
3754
3491
5034
5034
---
turn./min. 60 Hz
3830
3510
5079
6040
---
DUST EXTRACTION
Diameter
(mm)
115
200
Speed
(m/sec)
30---35
Flow rate
(m3/h)
Pressure drop
(mm w.g.)
1215
110---150
3675
150---200
GIBENIMPIANTI S.p.A 40065 PIANORO --- BOLOGNA--- ITALIA Ph+39/051/6516400 Fax+39/051/6516425 E--- mail:[email protected]
Pag. 14
Prisma2-- 3
ABSORBED POWER FOR 400 VOLT
Motor (Kw)
Absorb. (A)
Motor (Kw)
50 Hz
Absorb. (A)
60 Hz
7.5
14
9
16
11
16
13.2
19
13.2
19
15.9
22
COMPRESSED AIR
---Pressure . . . . . . . . . . . . . . . . . . . . . . . . . . . . . . . 5 --- 6 bar
---Volume . . . . . . . . . . . . . . . . . . . . . . . . . . . . . . . . 20 --- 30 l / min.
SAW BLADE CARRIAGE
---Feed speed . . . . . . . . . . . . . . . . . . . . . . . . . . . 0 --- 130 m / min.
---Return speed . . . . . . . . . . . . . . . . . . . . . . . . . . 130 m / min.
---Traversing motor (BRUSHLESS) . . . . . . . . . . 4,5 Nm
WARNING!
The maximum forward speed (cutting speed) at witch the saw carriage shall be operated is determined by the type and density of the material being cut, by the height of the book, by the type
of blade being used and by it’s degree of sharpness.
The speeds technically attainable by the machine may be excessive given the above mentioned
limiting factors, and may result in damage to equipment and/or injury to personnel.
In determining the most appropriate saw carriage feed speed please refer to the recommendations of your blade manufacturer.
PUSHER
---Fast feed . . . . . . . . . . . . . . . . . . . . . . . . . . . . . . 1---30 m / min. *
---Return . . . . . . . . . . . . . . . . . . . . . . . . . . . . . . . . 70 m / min.
---Traversing motor (BRUSHLESS) . . . . . . . . . . 6,5 Nm
*(1---25) EC standards governing max. speed as specified in prEN 1870.2
WARNING!
The maximum forward speed at which the pusher can operate is technically attainable however,
it is factory at 25 meters/minute for safety reasons.
The maximum forward speed can only be used with automatic off---loading systems that do not
require any manual intervention.
Failure to operate the machine within these limits may result in damage to equipment and/or injury
to personnel.
GIBENIMPIANTI S.p.A 40065 PIANORO --- BOLOGNA--- ITALIA Ph+39/051/6516400 Fax+39/051/6516425 E--- mail:[email protected]
Pag. 15
Prisma2-- 3
THE MACHINE HAS BEEN DESIGNED FOR THE HANDLING, ALIGNMENT AND
CUTTING OF RIGID MATERIALS, RESISTANT TO FRONT OR LATERAL PRESSURE:
SINGLE SHEETS OR STACKS OF PLAIN OR LAMINATED CHIP BOARD,
FIBRE BOARD, MDF, LAMINATE OR PLASTIC MATERIALS.
MAKE SURE THAT THE MACHINE IS USED IN COMPLIANCE WITH THE
OPERATIONS AND LIMITS ILLUSTRATED IN THE ABOVE TECHNICAL DATA.
3.6. PRISMATIC WEIGHT
The following tables indicate the approximate weight of the Prismatic models SP and SPT (T.2700
mm) in relation to the possible cutting capacity (K).
K
Mod.SP [Kg]
Mod.SPT [Kg]
1600
4680
---
2200
5000
---
3300
5590
9950
3800
5860
9980
4500
6240
10920
5700
7150
14660
Maximum weights to observe when handling or lifting auxiliary parts are specified below. These
weights refer to a Prismatic panel saw with loading from table and 5700 mm cutting width.
Lifted part . . . . . . . . . . . . . . . . . . . . . . . . . . . . . . gross weight (kg)
panel saw
mobile table section
fixed table section
pusher guide
pre---loading rollerway
electrical cabinet
monitor enclosure
generator carton on pallet
accessory box
accessory crate
accessory crate
protection mesh pallet
protection mesh straps
4.200
1.150
882
378
134
386
162
65
48
2.460
1.120
195
97
GIBENIMPIANTI S.p.A 40065 PIANORO --- BOLOGNA--- ITALIA Ph+39/051/6516400 Fax+39/051/6516425 E--- mail:[email protected]
Pag. 16
Prisma2-- 3
3.7. PRISMATIC SP OPERATING CYCLE
. Wear suitable gloves when loading, handling and unloading material.
Prismatic SP is a single---blade panel saw for cutting chipboard panels, plastic laminates and
other materials, in single sheets or in stacks.
A1: The operator (at the front of the
machine) pushes the stack for cutting
set on the front table of the machine
against the clamps of the pusher,
which is positioned along the cutting
line.
A1
B1: After clamping the material, the
pusher moves back, carrying the stack
for cutting over the cutting line. An
automatic device stops the reverse run
of the pusher as soon as the material
has completely crossed the cutting
line.
B1
GIBENIMPIANTI S.p.A 40065 PIANORO --- BOLOGNA--- ITALIA Ph+39/051/6516400 Fax+39/051/6516425 E--- mail:[email protected]
Pag. 17
Prisma2-- 3
C1: The operator (at the front of the
machine) pushes the stack for cutting
set on the front table of the machine
against the clamps of the pusher,
which is positioned along the cutting
line.
C1
D1: After clamping the material, the
pusher moves back, carrying the stack
for cutting over the cutting line. An
automatic device stops the reverse run
of the pusher as soon as the material
has completely crossed the cutting
line.
D1
GIBENIMPIANTI S.p.A 40065 PIANORO --- BOLOGNA--- ITALIA Ph+39/051/6516400 Fax+39/051/6516425 E--- mail:[email protected]
Pag. 18
Prisma2-- 3
E1: After clamping the material, the
pusher moves back, carrying the strips
over the cutting line. The count start
device stops the return stroke of the
pusher once the material has completely passed the device.
E1
F1: The pusher will then perform the
crosscutting cycle, in the same manner as the longitudinal cycle described
above.
A manually---operated side pneumatic
alignment device clamps the strips to
the 90° guide fence.
F1
GIBENIMPIANTI S.p.A 40065 PIANORO --- BOLOGNA--- ITALIA Ph+39/051/6516400 Fax+39/051/6516425 E--- mail:[email protected]
Pag. 19
Prisma2-- 3
3.8. PRISMATIC SPT OPERATIONAL CYCLE
. Wear suitable gloves when loading, handling and unloading material.
Prismatic SPT is a single---blade panel saw for cutting chipboard panels, plastic laminates and
other materials, in single sheets or in stacks.
The work cycle consists in longitudinal followed by cross cuts. The machine is designed to cut
panels of commercial dimensions to the desired size.
One or more panels may be cut on the panel saw during the same work cycle.
A: The pusher takes over the stack for
cutting from the lift table. When the
material arrives on the table, it is
immediately aligned and clamped.
A
B: The pusher then moves forward
according to the preset program, stopping and measuring the panels for longitudinal cutting. The stack remains
clamped for the duration of longitudinal cutting, until the pressure beam
descends for the last cut.
B
GIBENIMPIANTI S.p.A 40065 PIANORO --- BOLOGNA--- ITALIA Ph+39/051/6516400 Fax+39/051/6516425 E--- mail:[email protected]
Pag. 20
Prisma2-- 3
C: At the end of the cycle, the pusher
stops on the cutting line, instead of
returning to the rear limit switch.
The operator (still positioned in front of
the machine) moves the cut pieces
against the fence, pushing them
against the transverse clamps.
C
D: After clamping the material, the
pusher moves back, carrying the strips
over the cutting line. An automatic
device stops the return stroke of the
pusher as soon as the material has
completely passed the device.
D
GIBENIMPIANTI S.p.A 40065 PIANORO --- BOLOGNA--- ITALIA Ph+39/051/6516400 Fax+39/051/6516425 E--- mail:[email protected]
Pag. 21
Prisma2-- 3
E: The pusher will then perform the
crosscutting cycle, in the same manner as the longitudinal cycle described
above.A side pneumatic alignment
device clamps the pieces to the 90°
guide fence.
E
3.9. PAINT COLOURS
Two colours are prevalently used on GIBEN machines: turquoise (RAL 5018), used to identify
moving parts (e.g. aligner, clamps, lift table, etc.) and light grey (RAL 7035) to indicate fixed parts
(guards, base, etc.).
GIBENIMPIANTI S.p.A 40065 PIANORO --- BOLOGNA--- ITALIA Ph+39/051/6516400 Fax+39/051/6516425 E--- mail:[email protected]
Pag. 22
Prisma2-- 3
3.10. SAFETY AREA
In the interests of worker safety, it is essential that no obstacle of any kind (e.g. other machinery,
devices, containers, materials, etc.) hamper the panel outfeed zone of the saw.
To this end, make sure an area in front of the panel saw equal to the maximum dimension of the
panel being cut (K) plus two metres (see figure) is kept clear.
Keep a minimum area of 1 m clear to the sides of the panel saw to facilitate adjustment or servicing
operations.
These distances ensure a safety zone and emergency exit area, required to guarantee correct
machine operation.
1m
1m
K
2m
GIBENIMPIANTI S.p.A 40065 PIANORO --- BOLOGNA--- ITALIA Ph+39/051/6516400 Fax+39/051/6516425 E--- mail:[email protected]
Pag. 23
Prisma2-- 3
3.11. MODEL SP ELECTRICAL CONNECTIONS
Diagram of Prismatic2 mod. SP electrical and earth connections.
GIBENIMPIANTI S.p.A 40065 PIANORO --- BOLOGNA--- ITALIA Ph+39/051/6516400 Fax+39/051/6516425 E--- mail:[email protected]
Pag. 24
Prisma2-- 3
3.12. MODEL SPT ELECTRICAL CONNECTIONS
Diagram of Prismatic2 mod. SPT electrical and earth connections.
GIBENIMPIANTI S.p.A 40065 PIANORO --- BOLOGNA--- ITALIA Ph+39/051/6516400 Fax+39/051/6516425 E--- mail:[email protected]
Pag. 25
Prisma2-- 4
4.
CONFORMITY TO STANDARDS DOCUMENTATION
4.1. DUST EMISSION
Document issued by the University of Stuttgart.
GIBENIMPIANTI S.p.A 40065 PIANORO --- BOLOGNA--- ITALIA Ph+39/051/6516400 Fax+39/051/6516425 E--- mail:[email protected]
Pag. 26
Prisma2-- 4
4.2. NOISE EMISSION
. Always use ear protectors
As required by the machinery directive, we have carried out sound level tests on Prismatic2 section switches in compliance with EN ISO 3746 standard.
When the constant K has a value of 8,4 dB(A), sound pressure is LpA 79 dB(A).
The specified noise values refer to noise emission and not necessarily work safety levels.
While emission levels and exposure levels are correlated, they may not be used as the basis for
determining whether further precautions are required.
The factors that influence the actual level of exposure of the operator include the duration of exposure, characteristics of the environment, and other sources of emission, for example the number
of machines and other devices installed in the vicinity of the panel saw. Admissible exposure levels
can also vary according to the country of installation.
However, this information enables the user to judge the relative hazards and risks associated with
this machine.
N.B. If controls are required regarding the accuracy of declared emission values, measurements
must be taken using the same methods and oiperational conditions as used in testing.
GIBENIMPIANTI S.p.A 40065 PIANORO --- BOLOGNA--- ITALIA Ph+39/051/6516400 Fax+39/051/6516425 E--- mail:[email protected]
Pag. 27
Prisma2-- 4
4.3. EEC CERTIFICATES
This machine must not be placed into operation until the manufacturer issues a declaration of conformity to the requirements of the EC Machinery Directive.
If this prescription is not observed, GIBENIMPIANTI declines all liability for any accidents or damages that may occur in relation to the machine.
The following certificate is a facsimile of the original issued by the Certification Institute to confirm
compliance with the requirements of Machinery Directive---Prismatic Spt.
GIBENIMPIANTI S.p.A 40065 PIANORO --- BOLOGNA--- ITALIA Ph+39/051/6516400 Fax+39/051/6516425 E--- mail:[email protected]
Pag. 28
Prisma2-- 4
Document issued by the Italian ICE (European Certificates Institute) Prismatic Sp.
GIBENIMPIANTI S.p.A 40065 PIANORO --- BOLOGNA--- ITALIA Ph+39/051/6516400 Fax+39/051/6516425 E--- mail:[email protected]
Pag. 29
Prisma2-- 5
5.
INSTALLATION
5.1. WARNINGS
. When lifting the machinery, use suitable equipment (bridge crane, lift
truck, ropes) with sufficient capacity.ne Capacity must be greater than the
weight of the part to be handled (see tables, CHAP. 3.6.).
Handling must be carried out exclusively by suitably trained personnel.
. Ensure that no persons are in the vicinity of the suspended load, or the
working area of the crane, lift truck or other lifting/handling equipment.
. Machine lifting must be carried out in strict observance of all safety standards and precautions to avoid the risk of damage or physical injury.
. Avoid use of lift trucks for lifting and handling the panel saw when a crane
or bridge crane is available.
. Before lifting or moving the panel saw, lock the blade carriage in alignment
with the centre of gravity of the machine, following the procedure in chapter
5.6 in reverse order. The blade carriage is locked in position prior to delivery
from the factory and must be locked prior to any further handling operations.
5.2. MACHINE WEIGHT
Refer to the weight of the machine and all auxiliary parts as specified in chapter 3.6. of the present
manual.
GIBENIMPIANTI S.p.A 40065 Pianoro-- Bologna-- ITALIA - Telex 510437 - Fax 051/6516425-- 6516375 - Tel.051/6516400
Pag. 30
Prisma2-- 5
5.3. MACHINE LIFTING AND TRANSPORT
Specify the state of the machine at the moment of delivery.
Auxiliary components are packed separately in a wooden crate, and are protected by special
material to prevent damage during transport. On the machine body, only the most exposed and
delicate parts are protected, while the blade carriage is locked.
Bear in mind that the machine body and accessories have been treated with protective oils and
grease, and therefore must be cleaned thoroughly before assembly.
B
MACHINE BODY LIFTING
To ensure completely safe lifting and
handling procedures, proceed as follows:
--- Locate the four holes (A) present on
the base of the panel saw, sized to fit
the bars supplied.
--- Slacken bar safety stop (D), fit the
bars in holes (A) and refit the stop.
D
A
A
--- Hook the ropes to the crane, and position the latter in alignment with the centre of gravity (G)
of the panel saw.
--- Attach the other end of the ropes to the four bars.
--- Lift the panel saw slowly, taking care to avoid swinging and that the ropes do not slip over the
bar safety stop (B).
Store the bars in the safe place for future handling operations.
G
GIBENIMPIANTI S.p.A 40065 Pianoro-- Bologna-- ITALIA - Telex 510437 - Fax 051/6516425-- 6516375 - Tel.051/6516400
Pag. 31
Prisma2-- 5
Wherever it is not possible to use an overhead travelling crane or other type of crane, the instructions below must be strictly observed :
When the machine leaves our workshops, it is in the following state:
the shearing machine is attached to the footboard with the wooden base boards, next to the machine feet (B)
To lift the shearing machine out of its container, use a fork ---lift truck with long forks.
Proceed as follows :
a) Fit the forks into the space underneath the machine, making sure that the forks are long enough
to include the machine foot (B) in the lift (see FIG.1)
b) Now, lift the machine slowly out of its container.
. It is essential to proceed exactly as described in point a); if the machine
is moved without the foot (B) being completely supported by the forks the
shearing machine could be seriously damaged (Fig.2)
C
C
Fig.2
Fig.1
LIFTING AND HANDLING AUXILIARY PARTS
To lift auxiliary machine parts, proceed as follows:
--- Sling individual packs with ropes;
--- Hook the ropes to the crane, and position the latter in alignment with the centre of gravity of
the part to be lifted;
--- Lift slowly and avoid swinging.
N.B. Refer to the weights specified in chapter 3.6.
GIBENIMPIANTI S.p.A 40065 Pianoro-- Bologna-- ITALIA - Telex 510437 - Fax 051/6516425-- 6516375 - Tel.051/6516400
Pag. 32
Prisma2-- 5
POSITIONING
. The saw must be installed on a level surface with maximum deviations of
30 mm.
. The minimum load of the support surface must be greater than or equal to
the weight of the panel saw.
When positioning the panel saw care must be taken not to knock the edges of the machine base.
Do not rest the machine on the ends A of the base.
Place two lengths of wood 1 cm thick under the base feet B and then rest the machine on these
pieces of wood.
Next, raise the machine by a few centimetres, remove the pieces of wood and then position the
machine as indicated in the paragraphs below.
TRANSPORT
If possible, it is very important that the
machine centre (lifting point) corresponds to the centre of the truck, so
that its stability is kept.
The machine is be anchored to the
support plane of the truck, in order to
avoid any movement in case of sharp
braking or sudden changes of direction.
The anchoring is be carried out by
fastening some wood bases to the
support plane and among the different
components as well.
The machines have always to travel
covered.
E
F
F
E
GIBENIMPIANTI S.p.A 40065 Pianoro-- Bologna-- ITALIA - Telex 510437 - Fax 051/6516425-- 6516375 - Tel.051/6516400
Pag. 33
Prisma2-- 5
5.4. LEVELLING THE MACHINE
. Assembly must be carried out exclusively by qualified personnel.
Levelling is the first operation to be performed during installation.
1
2
4
3
Cross levelling is performed using a perfectly octagonal metal rod and a spirit level in three different points in the blade carriage area (see figure), i.e.:
--- on the internal baseplate of the pressure beam head (1),
--- on the guides next to the pressure beam head area (2) (use metal rod and spirit level)
--- at the end of the guides (3) (use metal rod and spirit level).
For longitudinal levelling, simply position the spirit level on the guides one at a time, approximately
half way along the blade carriage run (4).
GIBENIMPIANTI S.p.A 40065 Pianoro-- Bologna-- ITALIA - Telex 510437 - Fax 051/6516425-- 6516375 - Tel.051/6516400
Pag. 34
Prisma2-- 5
Having established the spirit level positions, proceed as follows.
Place the plates (5) under the feet and
the plates (6) under the four outer supports of the panel saw. Lower the machine into position.
Use a spirit level (sensitivity 0.35mm/
mt.) to level the machine lengthways
and crossways. Turn the four adjuster
screws (7) on the machine base to obtain the required adjustment. When the
machine is level, screw down the four
outer screws (8).
7
5
The plates (5) have holes for the expansion bolts used to fix the machine
body to the floor. The machine must
only be fixed to the floor when assembly, levelling and testing of all machine
units has been completed.
8
6
N.B. The adjuster screws must not project from the plates by more than 20mm. If they project
by more than this amount, increase the thickness of the steel plates.
The screws (8) must be screwed down so that they make contact with the plates (6) without affecting the level of the machine.
GIBENIMPIANTI S.p.A 40065 Pianoro-- Bologna-- ITALIA - Telex 510437 - Fax 051/6516425-- 6516375 - Tel.051/6516400
Pag. 35
Prisma2-- 5
5.5. PRELIMINARY CLEANING
Before proceeding with installation operations, clean off the rust-proof coating used to protect the
machine during despatch and transport.
Use petrol or benzene to clean the horizontal and vertical carriage guides. Clean all machined
contact surfaces.
5.6. REMOVING THE CLAMPING BLOCKS
When the machine was packed ready for delivery at our works, a wooden block was placed under
the blade motor to prevent movement of the saw carriage and to take the load off the saw carriage
pulleys.
The block is fixed in position after the saw
carriage raising solenoid valve has been
de-energised. To prepare the machine for
operation, proceed as follows:
1 --- Raise the saw blade cover.
2 --- Remove the side covers from the base feet.
3 --- Fit the compressed air hose to the
compressed air connector.
4 --- Remove the wooden block C supporting the motor of the main saw blade.
C
GIBENIMPIANTI S.p.A 40065 Pianoro-- Bologna-- ITALIA - Telex 510437 - Fax 051/6516425-- 6516375 - Tel.051/6516400
Pag. 36
Prisma2-- 5
5 --- De---energise the solenoid valve (A) of
the blade hub release.
B
This exercise only needs to be carried out
on machines with automatic saw blade
adjustment.
For machines with manual saw adjustment point 5 is irrelevant as the safety
electrovalve (A) that stops the blade is not
fitted.
6 --- De-energise the saw hub raising solenoid valve by turning the screw (B) anti--clockwise until it stops. At this point the
blade hub is at the end of its downward
stroke.
Immediately prior to delivery, a piece of
black rubber (9) is installed between the
guide wheel (7) and the guide (8) to prevent damage during transport.
Remember to remove the piece and to
clean away any residue before operating
the machine.
Remainder: ensure correct tensioning of
the counter roller spring.
A
7
9
8
N.B. Before activating the blade carriage,
adjust the tension of the pulley spring as
follows: tighten screw (10) slightly, until it
reaches the stop, then slacken through
one turn.
The panel saw is now ready for work.
10
GIBENIMPIANTI S.p.A 40065 Pianoro-- Bologna-- ITALIA - Telex 510437 - Fax 051/6516425-- 6516375 - Tel.051/6516400
Pag. 37
Prisma2-- 6
6.
INSTALLING THE MACHINE UNIT
6.1. INSTALLING THE PUSHER UNIT
First, fix the support uprights to the pusher guides.
On the heads of the panel saw there
are two supports. Each support has a
fixed, calibrated reference pin for locating the guides.
Rest the left and right guides on their
supports and then fix them to their respective heads. Ensure that the hole
and the reference pin are correctly aligned.
A
CHECKING THE SQUARENESS OF THE GUIDES WITH THE CUTTING LINE
Before starting, check that the guides
are positioned correctly: place a spirit
level on the work surface and ensure
the correct vertical and horizontal
alignment of the guides.
Before fixing the guide connecting
beam, check that the measuring plug
fits perfectly into the central and end
zones of the guides. Check that the
guide diagonals are equal (measure
from the rack teeth).
B
B’
90°
GIBENIMPIANTI S.p.A 40065 Pianoro-- Bologna-- ITALIA - Telex 510437 - Fax 051/6516425-- 6516375 - Tel.051/6516400
Pag. 38
Prisma2-- 6
6.2. ADJUST THE HEIGHT OF THE GRIPPERS
If necessary, adjust the height of the grippers. To adjust the gripper height, loosen the the two
bolts (1) holding the gripper to the pusher carriage. Loosen the nut (2) and screw or unscrew the
bolt (3) to adjust the height of the gripper.
2
1
3
GIBENIMPIANTI S.p.A 40065 Pianoro-- Bologna-- ITALIA - Telex 510437 - Fax 051/6516425-- 6516375 - Tel.051/6516400
Pag. 39
Prisma2-- 6
6.3. PANEL TRANSPORT ROLLERS
Fit the mobile table beams to their supports at the foot supports and tighten their retaining bolts.
Fit the roller bar sections (or the polyzene sliding strips) to the ready---drilled holes in the beams.
Check that the roller bar sections are level with the cutting table by resting a strip of wood across
the rollers and the table (see the picture below); the strip of wood must rest uniformly on the rollers
and the table.
Move the pusher to the rear fitting of the roller bars and check the rollers (or the sliding strips).
The rollers (or the polizene strips) must project by 0.2---0.3 mm from the panel support surface
of the gripper.
0,2-- 0,3 mm
If necessary, adjust the height of the
mobile table support beams by loosening the bolts (1) and the nuts (2) and
then adjusting the bolts (3) by an equal
amount. When you have made the necessary adjustments, retighten the
bolts (1) and the nuts (2).
3
2
1
GIBENIMPIANTI S.p.A 40065 Pianoro-- Bologna-- ITALIA - Telex 510437 - Fax 051/6516425-- 6516375 - Tel.051/6516400
Pag. 40
Prisma2-- 6
6.4. LIFTING TABLE (MODEL SPT)
Lifting tables which are 1600 mm wide
are delivered ready---assembled. Lifting tables with a width of 2200 mm or
more are delivered disassembled in order to facilitate transport.
Lifting tables 1600 mm wide must be
positioned following the layout drawings supplied with the machine. Then
join the brackets (that act as material
stops on the mobile table), together.
2
3
1
Lifting tables wider than 2200 mm must
be assembled as follows:
---Place the table on a flat floor.
---Remove the transport plates (1 and 2) and remove the ropes holding the chain in place.
---Open the columns taking care that the chain does not come off the sprockets (3).
N.B. At our works the chain was clamped in position in phase with the sprockets in order to ensure
uniform raising of the table. It is important therefore that the chain does not move on or leave the
sprocket during assembly operations.
---Join the columns using the U --beams (5) and fix these in place using
the bolts (6). The grub screws (7) have
been adjusted during test assembly in
our works to ensure that the U ---beams
will be in the correct position. Do not alter the adjustment of these grub
screws (7).
---Adjust the chain (9) tension by turning the bolts (8). Adjust the chain step
by step until you obtain the desired
tension.
---Use a fork lift truck to lift the mobile
frame of the table until it is level with the
fixing brackets.
---Match up the reference pins between the bracket and the mobile frame,
attach the frame on the four sides and
tighten the bolts.
---Fix the material stop bracket to the fixed frame of the table.
8
5
6
9
6
7
GIBENIMPIANTI S.p.A 40065 Pianoro-- Bologna-- ITALIA - Telex 510437 - Fax 051/6516425-- 6516375 - Tel.051/6516400
Pag. 41
Prisma2-- 6
POSITIONING
The lift table can be positioned by placing screws (11) in the spot faced holes in plates (12).
In this way the front and sides of the lift
table are correctly positioned.
11
12
Mount the lift table taking into account
that it must be positioned 5 mm from
the stops on the bed and must protrude transversally by 15 mm with
respect to point “0” .
15 mm
”0” l
5 mm
GIBENIMPIANTI S.p.A 40065 Pianoro-- Bologna-- ITALIA - Telex 510437 - Fax 051/6516425-- 6516375 - Tel.051/6516400
Pag. 42
Prisma2-- 6
Correct side positioning can be checked by fitting the side stop of material
(13) and making sure that there is one
cutting length from the squares (14).
X=
16
The material stop must be fitted on the
section with the electronic counting
device, i.e. on the longitudinal zero
point.
3800 mm
4500 mm
5700 mm
X
15
LEVELLING
Level the lifting table by turning the adjuster screws on the feet. When the lifting table is in the lower
position there must be a distance of 720mm between the material contact surface of the rollers
and the table surface.
6.5. ELECTRONIC COUNTER UNIT (MOD. SPT)
The counter unit is fitted by fixing the
arm to the machine frame with bolts,
using the tapped holes provided.
1
2 -- 3 mm
The electronic counter unit must be adjusted so that the detector (1) is 2---3
mm under the roller surface to prevent
accidental marking of any panels that
might not be perfectly level.
1
GIBENIMPIANTI S.p.A 40065 Pianoro-- Bologna-- ITALIA - Telex 510437 - Fax 051/6516425-- 6516375 - Tel.051/6516400
Pag. 43
Prisma2-- 6
6.6. PHOTOELECTRIC BARRIERS
Photoelectric barriers are positioned at the rear and the side of the cutter load zone (fig.). These
barriers ensure operator safety during loading operations by preventing contact with moving
parts. In normal working conditions, if a photocell beam is broken, the cutter will shut down and
set to emergency mode.
During loading operations, the operator enables stack entry by means of a
control on the panel.
The push---button on the local board
illuminates together with the flashing
lamp (1). In these conditions, if the
photoelectric ray is broken, the pusher
and table will be stopped only, thereby
allowing loads conforming to safety
standard types.
Once the stack has been loaded and a
check has been made that no---one is
inside the protective nets, restore normal working conditions by pressing
the reset button on the local board (2)
and disable the load from the panel.
1
2
Assembly and maintenance
Make sure that the photocells are arranged as indicated by the machine lay---out.
The photocells have been positioned in compliance with recommendations given in standards
governing the use of photoelectric barriers (Pr EN 999).
Bear in mind that machines with pre---load rollers supplied by the manufacturer will have twin--beam photoelectric barriers; in the case of rollers supplied by the customer, a third beam will be
necessary.
When assembling the photocell barriers, secure the upright supports perfectly vertical, then position the photocells in their respective slots; align the
photocell beams precisely.
When aligning the beams, beam in
mind that:---when the LIGHT is OFF:
beam has been broken;
---with YELLOW LAMP: the beam is
unbroken but signal is weak;
---with GREEN LAMP: beam is unbroken and signal is optimal.
Secure the photocell to the support
when the optimal signal has been
located.
Make sure that the beam remains
active, and that the photocells are not
subjected to movement or knocks
which could alter them from correct
alignment.
GIBENIMPIANTI S.p.A 40065 Pianoro-- Bologna-- ITALIA - Telex 510437 - Fax 051/6516425-- 6516375 - Tel.051/6516400
Pag. 44
Prisma2-- 6
Damaged photocell barriers should be
repaired immediately.
Call our service office, quoting the
codes below as required:
004704401 --- photocells;
AA05141 --- photocell support;
004273101--- flashing lamp;
004704410 --- power unit.
6.7. AIR CUSHION TABLES
To facilitate transport, the upright support (1) was detached from the air table section (2) before
despatch. Before attaching the table to the panel saw therefore, join the two components together
again with the bolts (3).
Ensure that the contact surfaces of the air cushion table and the crosswise panel saw are clean.
Slide the slots of the air cushion table over the bolts (4) already fitted to the machine base.
Place the foot plates (5) under the upright and turn the bolts (4) without tightening them.
Level the air cushion table using the bolts (6). Once the table is level, tighten the lock nuts (7) and
the bolts (4).
1
3
4
2
7
GIBENIMPIANTI S.p.A 40065 Pianoro-- Bologna-- ITALIA - Telex 510437 - Fax 051/6516425-- 6516375 - Tel.051/6516400
Pag. 45
Prisma2-- 6
6.8. FENCES
FRONT FENCE
Fix the bracket A to the air cushion
table. Rest the fence on the bracket A
and on the machine base.
Fit the bolts 1, 2 and 3 but do not tighten. Screw up the adjuster 4 and 5 so
that the machined surfaces of the
fence and of the head are approximately 85 mm apart.
95 mm
Check the squareness of the fence
with the cutting line and adjust if necessary using the adjuster bolts 4 and 5.
Tighten the bolts 1, 2 and 3.
FRONT FENCE
(for machines with Post Forming on
beam head)
Assembly and maintenance are as
specified above.
The mobile section of the fence is activated by a solenoid valve (B) which
must be checked periodically to
ensure correct operation.
NB. During assembly, ensure that the
recess on the fence is aligned with the
centre of the cutting line.
B
GIBENIMPIANTI S.p.A 40065 Pianoro-- Bologna-- ITALIA - Telex 510437 - Fax 051/6516425-- 6516375 - Tel.051/6516400
Pag. 46
Prisma2-- 6
REAR FENCE
Fit the fence on the machine base but
do not lighten the bolts ( 6 and 7 ). Rest
one end of a strip of wood against the
front fence and move the rear fence so
that it makes contact with the other
end.
Use the adjuster bolts ( 8 and 9 ) to
adjust squareness. Once adjustment
is complete, lighten the bolts ( 6 and
7).
6
7
CAUTION!
The fence ends must be 2 --- 3 mm
away from the cutting channel so that
they cannot come into contact with the
saw blade.
2-- 3 mm
2-- 3 mm
6.9. FIXING THE PANEL SAW TO THE FOOR
. Ensure correct anchoring of the machine to ensure minimal vibrations.
. The above must only be carried out after ensuring correct assembly, levelling and operation of all machine parts.
GIBENIMPIANTI S.p.A 40065 Pianoro-- Bologna-- ITALIA - Telex 510437 - Fax 051/6516425-- 6516375 - Tel.051/6516400
Pag. 47
Prisma2-- 6
The holes for the xpanding plugs have to be made in a hard floor. If it is not hard, to create suitable
conditions, make make pits on supporting corners, and fill them by pouring cement.
Drill the holes on the floor to a depth of
90 mm, in alignment with the holes in
plate (1).
Remove all residue from the holes and
insert the expansion bolts until they
come into contact with the plate (if necessary, tap lightly with a hammer to fit
correctly).
Fix the machine parts in the following
order:
--- panel saw support feet
--- guide support feet
--- table feet
--- air cushion surfaces
N.B. These floor fixing instructions are
given as a guide only. Floor fixing of the
machine is the client’s responsibility.
1
6.10. CONNECTING--UP THE AIR GENERATOR
Mount the air generators at the back of the panel saw (under the panel transport rollers) to keep
the work area free. Pass the flexible hose under the panel saw area. Wire the generator cable (1)
to the main electrical control panel. The control switch for the generators is on the electrical control
panel.
Once the generators have been connected up, check that the fan is rotating in the direction of
the arrow on the motor plate. If it is turning in the wrong direction, invert the connections.
Connect the air generator to the air cushion table by attaching the flexible hose provided to the
inlet under the table.
2
GIBENIMPIANTI S.p.A 40065 Pianoro-- Bologna-- ITALIA - Telex 510437 - Fax 051/6516425-- 6516375 - Tel.051/6516400
Pag. 48
Prisma2-- 7
7.
CONNECTING---UP
7.1. ELECTRICAL EQUIPMENT
Before connecting your machine to the main power supply, ensure that your works mains voltage
is the same as that indicated on the plate rivetted to the electrical control panel.
The cross section of cable to be used
for connecting-up to your mains power
supply depends on the installated power and voltage of your machine and
the length of the cable being used.
Bear in mind that the electric cabinet is
not equipped with an electric door
interlock (for maintenance reasons).
Cabinet doors may only be opened
with a special key to be kept exclusively in the possession of the machine
operator.
To connect-- up, proceed as follows
Pass the power supply cable through
the cableway on the bottom of the electrical cabinet.
Connect the three terminals of the power supply cable to the terminals on
the main switch.
Connect the yellow ---green wire to the
earth terminal. This is the earth connection for the entire machine and
must be connected up with the greatest care.
Press the blade start pushbutton
briefly several times to check that the
blade rotates in the cutting direction,
i.e. anti---clockwise.
e If the main blade does not rotate
anti---clockwise with respect to the
operator positioned in front of the
machine, invert two of the phases.
N.B. The scorer blade must rotate in
the opposite direction with respect to
the main blade (clockwise).
GIBENIMPIANTI S.p.A 40065 PIANORO --- BOLOGNA--- ITALIA Ph+39/051/6516400 Fax+39/051/6516425 E--- mail:[email protected]
Pag. 49
Prisma2-- 7
7.2. PUSHER
Pusher unit has been pre---wired to
simplify its connection to the electrical
control panel. Just connect pusher unit
cables to the terminal board.
Proceed as follows
Take the motor cables and those leaving the junction box and lead them
along the pusher guide to the electrical
cabinet; use the pusher guide cover to
keep the power supply cables separate from the signal cables.
Pass the cables along the cableway
and into the electrical cabinet following
the numbers.
Connect up the cable wires to their
numbered terminals.
7.3. LIFTING TABLE (MOD.SPT)
Connect the wires from the electrical
control panel to the terminal board inside the junction box of the lifting table
motor; follow the wire numbering.
1
Fit the microswitches (1 and 2) and adjust as follows:
4
The cam (3) must trigger the LOWER
position stop microswitch (2) when the
rollers of the lifting table are level with
the preloading rollers (where fitted).
The cam (3) must trigger the UPPER
position stop microswithc (1) when the
rollers of the lifting table are level with
the preloading rollers (where fitted).
The microswitch (4) is used for stopping the table when thin material is
being packed up. This microswitch
must therefore be triggered at 30 mm
below the level of the lengthways sliding surfaces.
3
2
GIBENIMPIANTI S.p.A 40065 PIANORO --- BOLOGNA--- ITALIA Ph+39/051/6516400 Fax+39/051/6516425 E--- mail:[email protected]
Pag. 50
Prisma2-- 7
7.4. COMPRESSED AIR CONNECTION
The compressed air connection points are indicated on the machine layout drawing by the letter
“D”, which correspond to the connection points for the “Filter Regulator Lubricator” (FRL) units.
SAFETY PRECAUTIONS
. Check that nobody is standing near the machine or within the mesh
guards before opening the compressed air circuit.
. Always wear goggles to ensure protection against unexpected blasts of
air.
.
Check the compressed air system for leaks.
Before carrying out any adjustments or cleaning operations:
¡ Turn off the compressed air circuit isolating switch
© Immobilize the isolating switch (7) using the padlock provided.
¢ Remove the key from the lock and retain.
£ Exhaust the compressed air from the circuit.
.
. In the event of a general drop in pressure, unload the machine using the
device (6).
CONNECTION
2
Connection to the compressed air system must be made using a rubber
hose, which is attached to the FRL unit
by way of a ½” BSP fitting.
Connection to the compressed air system must be carried out following the
procedure described below:
---Check that the padlockable isolating
switch is closed.
–Push the rubber hose over the fitting.
–Secure the hose to the fitting with a
metal clip.
–Open the on/off valve of the compressed air supply system.
–Open the lockable isolating switch
upstream of the FRL unit.
4
1
7
3
5
6
GIBENIMPIANTI S.p.A 40065 PIANORO --- BOLOGNA--- ITALIA Ph+39/051/6516400 Fax+39/051/6516425 E--- mail:[email protected]
Pag. 51
Prisma2-- 7
Check that connection has been made properly by reading the pressure indicated on the gauge
(1), which should indicate between 5 and 6 bar (operating pressure of the panel saw), if not, adjust
the pressure regulating valve (2).
Check that the oil level in the lubricator cup never drops below the mark (3). When topping up,
use only the recommended type of oil indicated in the lubrication chart.
Check that the lubricator is operating correctly: oil should be delivered at a rate of one drop every
two cycles. The frequency can be adjusted by turning the screw (4).
Periodically, drain off the condensate that forms inside the filter (5) by turning the drain screw (6).
N.B. It is extremely important that the filter should not be allowed to fill with water. Check the condensate frequently.
The rubber hose, padlock and hose clip are not supplied by Giben.
7.5. DUST EXTRACTION EQUIPMENT
DO NOT USE THE PANEL SAW WITHOUT FIRST TURNING ON THE DUST EXTRACTION EQUIPMENT. A BUILD -- UP OF DUST CAN CAUSE SERIOUS DAMAGE TO THE
MACHINE
. Do not under any circumstances use the machine without first switching
on the suction system, as the continuous presence of dust around the machine may cause serious injury to the persons working on it and prevent it
from functioning correctly.
The machine is supplied with two dust extraction ducts.
The first is situated on the pressure beam, and may be equipped with one or two 115 mm diam.
intakes (A) (A1), according to the cutting capacity of the machine.
A
A1
GIBENIMPIANTI S.p.A 40065 PIANORO --- BOLOGNA--- ITALIA Ph+39/051/6516400 Fax+39/051/6516425 E--- mail:[email protected]
Pag. 52
Prisma2-- 7
The second is situated alongside the cutting line inside the panel saw (B), and has an intake diameter of 200 mm.
A
B
Connect a flexible pipe to the air intakes. Avoid excessive bending of the pipes, which could hamper suction of particles.
The application of a filter is also recommended.
Always turn the suction system on before starting up the panel saw.
GIBENIMPIANTI S.p.A 40065 PIANORO --- BOLOGNA--- ITALIA Ph+39/051/6516400 Fax+39/051/6516425 E--- mail:[email protected]
Pag. 53
Prisma2-- 8
8.
SAFETY DEVICE
8.1. CHECKING THE OPERATION OF SAFETY DEVICE
The machine is tested prior to delivery, and therefore all safety devices should be fully operative;
check that no damage has occurred during transport.
Blade zone guard
The blade operation area is protected
by a guard (1) ; to lift, proceed as follows :
---set the machine in safety mode by
the emergency mushroom head
pushbutton;
---the green blade START pushbutton
starts flashing until microswitch (2) is
released to enable guard opening;
---the blade guard can now be opened.
1
2
. To open the guard in the event of a power failure, disassemble the laeral
guards and use a suitable tool to release the microswitch.
Safety bar
The safety bar is atached to the pressure beam and will operate if it encounters any object it operates a micro--switch thus triggering a saw
emergency condition, whereby the
saw is stopped and the pressure beam
is raised.
Checking safety bar operation :
Insert an object 2---3 cm in height between the work table and the safety bar.
Start the cutting cycle.
As soon as the safety bar comes into
contact with the object, a panel saw
emergency should be triggered ond
the pressure beam shoul be raised.
GIBENIMPIANTI S.p.A 40065 PIANORO --- BOLOGNA--- ITALIA Ph+39/051/6516400 Fax+39/051/6516425 E--- mail:[email protected]
Pag. 54
Prisma2-- 8
Guard Flaps
These are attached to a tubular section
extending the entire length of the rntire
length of the pressure beam.
The rotation of this tube is syncronized
do the upward and donward movements of the pressur beam and prevents any access to the work table
before the rotating saw blades are raised.
Tis means that the guard flaps will not
allow any opening along the cutting
length, thus making it impossible for
anything (such as hands or objects) to
get under the pressure beam.
As the pneumatic equipment of this
safety devices is connected to that of
the pressure beam.
As the pneumatic equipment of this
safety device is connected to that of
the pressure beam, check that the
action of these components is correctly syncronised.
Emergency stop mushroom-- head
button
Simulate a cutting cycle and then
press the emergency stop. The following sequence of events must occur:
---The saw blade carriage will stop in its
current position.
---The blades will be lowered beneath
the work table and stop rotating.
---The pressure beam will be raised.
1
To return to normal working conditions
, reset the emergency stop button by
turing to the rigth.
. Before starting up the machine, fit the protectio barriers.
.
Never remove fixed guards during machine operation.
GIBENIMPIANTI S.p.A 40065 PIANORO --- BOLOGNA--- ITALIA Ph+39/051/6516400 Fax+39/051/6516425 E--- mail:[email protected]
Pag. 55
Prisma2-- 8
8.2. LABELS LAY--OUT
The lay---out shows the positions and codes of the labels that may be on this model of the machine
(See Chapter 8.3. for identification of labels).
AA05868.36
AA05868.37
AA05868.30
AA05868.31
AA05868.01 /
AA05868.13
AA05868.01 /
AA05868.13
2050112
AA0146714
AA0132945
AA0146722
AA05868.32
AA05868.33
AA05868.26
AA05868.27
AA05868.22
AA05868.23
AA05868.34
AA05868.35
AA05868.21
AA06100
AA0146715
AA05868.28
AA05868.29
AA05868.24
AA05868.25
AA0146714
Post Forming
AA0146724
GIBENIMPIANTI S.p.A 40065 PIANORO --- BOLOGNA--- ITALIA Ph+39/051/6516400 Fax+39/051/6516425 E--- mail:[email protected]
Pag. 56
Prisma2-- 8
8.3. WARNING LABELS UNIT
All safety devices, including the hazard notices, must be kept in perfect condition. Replace any
missing or damage safety devices immediatly and notify the Giben service centre of the new code
(all notices bear individual codes located at the bottom left of the label).
WARNING
IMPORTANT SAFETY PROCEDURES AND CONSIDERATION
REED AND UNDERSTAND CLEARLY.
1. Use of the Giben saw by persons who have not
been thoroughly trained is hazardous. Do not
attempt to operate this machine until you have
read and understood the instruction manual and
have been checked out by a qualified supervisor.
2. Never put your hand under the saw beam. Do
not manually remove trim material or off cuts
from anywhere near the cutting line.
3. There are no circumstances which justify
operation of the Giben saw with safety guards
removed, side panel removed or safety switches
by---passed.
4. Failure to observe correct operating procedures during the operation of this machine can
result in severe injury.
5. Keep the area around the saw clean to avoid
tripping on pices of cut off material. Sawdust may
cause the floor to become slippery.
6. Before changing saw blades, install a padlock
on the main power switch so that the saw cannot
be started. This rule also applies when maintenance is performed.
7. Always wear O.S.H.A. eye protection when
operating the saw.
8. Do not make adjustments to, or clean the
machine while it is running.
9. Remove loose articles of clothing such as
neckties, etc.
10. Remove jewelry, such as finger rings,
watches, bracelets, etc.
11. Good judgement, a safety conscious attitude
and alertness are important operator qualifications. Do not attempt to operate the saw while
under the influence of anything that reduces
your alertness.
12. When changing saw blades use caution to
avoid contact with the sharp saw teeth. We recommend the use of heavy gloves to protect the
hands in case you slip while applying pressure to
tighten or loosen blades.
13. Do not climb or sit on the machine.
14. This machine has been assembled and thoroughly tested at the factory.
15. Most accidents, breakages and faults are due
to carelessness during the start of the machine
after setting up.
16. Before starting the machine check to see that
no foreign objects have been left in or on the
machine.
17. Do not cut materials which can cause sparks,
they would flow into the dust extraction channels
with serious fire risks.
18. All safety equipment including warning
labels, must be maintained in original condition
COD. AA05868.05
GIBENIMPIANTI S.p.A 40065 PIANORO --- BOLOGNA--- ITALIA Ph+39/051/6516400 Fax+39/051/6516425 E--- mail:[email protected]
Pag. 57
Prisma2-- 8
ALTA TENSIONE
PERICOLO DI SCOSSA ELETTRICA O BRUCIATURE! TOGLIERE L’ALIMENTAZIONE
GENERALE PRIMA DI LAVORARE ALL’INTERNO.
HIGH VOLTAGE
HAZARD OF ELECTRICAL SHOCK OR BURN! TURN POWER SUPPLYING OFF BEFORE
WORKING INSIDE THIS EQUIPMENT FOLLOWING THE PROPER LOCK OUT PROCEDURE.
HAUTE TENSION
DANGER D’ELECTROCUTION OU DE BRULURE! COUPER
L’ALIMENTATION GENERALE AVANT DE TRAVAILLER À L’INTERIEUR.
HOOGSPANNING
GEVAAR! : KANS OP ELEKTRISCHE SCHOK OF BRANDWONDEN! SCHAKEL
DE HOOFDSTROOMTOEVOER UIT ALVORENS WERKZAAMHEDEN AAN
DE BINNENKANT TE VERRICHTEN.
HOCH SPANNUNG
GEFAHR VON ELEKTRISCHEM SCHLAG UND BRANDWUNDE! SCHALTEN
SIE DIE HAUPTSPEISUNG, BEVOR SIE IM INNEREN ARBEITEN.
ALTA TENSION
PELIGRO DE DESCARGA ELECTRICA O QUEMADURAS! QUITAR LA CORRIENTE
GENERAL ANTES DE TRABAJAR EN EL INTERIOR.
HOOGSPANNING
GEVAAR VOOR ELEKTRISCHE SCHOK OF VERBRANDING! KOPPEL DE
STROOMTOEVOER AF ALVORENS IN HET BINNENSTE VAN DE MACHINE TE WERKEN.
INGLESE ---FRANCESE ---FIAMMINGO ---TEDESCO ---SPAGNOLO ---OLANDESE
COD. AA05868.30
ATTENZIONE
NON METTERE MAI LE MANI ALL’ INTERNO DELL’APERTURA PERICOLO DI SCHIACCIAMENTO!
WARNING
DO NOT PLACE HANDS INSIDE THE OPENING
POSSIBILTY OF INJURY EXISTS!
ATTENTION
NE PAS PLACER LES MAINS DANS L’OVERTURE.
DANGER D’ECRASEMENT!
LET OP!
STEEK UW HANDEN NIET IN DE OPENING OM ONGELUKKEN TE
VOORKOMEN!!
ACHTUNG
FÜHREN SIE NICHT DIE HÄNDE IN DIE ÖFFNUNG EIN:
ZERQUETSCHUNGSGEFAHR!
ATENCIÓN
NO METER LOS MANOS EN EL INTERIOR DE LA ABERTURA PELIGRO
DE APLASTAMIENTO!
LET OP!
KOM NOOIT MET UW HANDEN IN DE OPENING;
GEVAAR VOOR VERBRIJZELING!
INGLESE ---FRANCESE ---FIAMMINGO ---TEDESCO ---SPAGNOLO ---OLANDESE
COD. AA05868.34
GIBENIMPIANTI S.p.A 40065 PIANORO --- BOLOGNA--- ITALIA Ph+39/051/6516400 Fax+39/051/6516425 E--- mail:[email protected]
Pag. 58
Prisma2-- 8
ATTENZIONE
NON METTERE MAI LE MANI SOTTO AL PRESSORE.
WARNING
NEVER PUT YOUR HANDS UNDER THE SAW BEAM.
ATTENTION
NE JAMAIS METTRE LES MAINS SOUS LE PRESSEUR.
LET OP!
HOUD UW HANDEN NOOIT ONDER DE AANDRUKBALK.
ACHTUNG
HÅNDE NIEMALS UNTERHALB DES DRUCKBALKENS.
ATENCIÓN
NO METER NUNCA LAS MANOS DEBAJO DEL PRENSOR.
LET OP!
KOM NOOIT MET UW HANDEN ONDER DE AANDRUKBALK.
INGLESE ---FRANCESE ---FIAMMINGO ---TEDESCO ---SPAGNOLO ---OLANDESE
COD. AA05868.32
ATTENZIONE
NON FARE FUNZIONARE LA MACCHINA QUANDO LA PORTA É APERTA.
WARNING
DO NOT OPERATE MACHINE WHEN DOOR IS OPEN.
ATTENTION
NE PAS FAIRE FONCTIONNER LA MACHINE LORSQUE LA PORTE EST OUVERTE.
LET OP!
DE MACHINE NIET IN BEDRIJF STELLEN WANNEER DE DEUR GEOPEND IS.
ACHTUNG
DIE MASCHINE NICH IN BETRIEB SETZEN, WENN DIE TÜR OFFEN IST.
ATENCIÓN
NO HACER FUNCIONAR LA MAQUINA CUANDO LA PUERTA ESTE ABIERTA.
LET OP!
STEL DE MACHINE NIET IN BEDRIJF WANNEER DE DEUR OPEN IS.
INGLESE ---FRANCESE ---FIAMMINGO ---TEDESCO ---SPAGNOLO ---OLANDESE
COD. AA05868.24
GIBENIMPIANTI S.p.A 40065 PIANORO --- BOLOGNA--- ITALIA Ph+39/051/6516400 Fax+39/051/6516425 E--- mail:[email protected]
Pag. 59
Prisma2-- 8
ATTENZIONE
TOGLIERE L’ALIMENTAZIONE GENERALE (ARIA) SOLO CON
MACCHINA A FINE CICLO DI SEZIONATURA.
WARNING
SWITCH THE MAIN AIR SUPPLY OFF, WHEN THE MACHINE IS
AT THE END OF THE CUTTING CYCLE.
ATTENTION
TOURNER L’ALIMENTATION GENERALE (AIR) SEULEMENT
AVEC MACHINE A LA FIN DU CYCLE DE DECOUPE
LET OP!
SCHAKEL DE HOOFDTOEVOER (LUCHT) ALLEEN UIT WANNEER
DE MACHINE AAN HET EIND VAN DE ZAAGCYCLUS IS.
ACHTUNG
SCHALTEN SIE DIE HAUPTLUFTSPEISUNG AUS, NUR WENN DIE
ANLAGE AM ENDE DES AUFTEILENZYKLUS IST.
ATENCION
CURTAR ALIMENTACION GENERAL (AIRE) SOLAMENTE CON
LA MAQUINA A FINAL CICLO DE CORTE.
LET OP!
SCHAKEL DE HOOFDTOEVOER (LUCHT) ALLEEN UIT WANNEER
DE MACHINE AAN HET EIND VAN DE ZAAGCYCLUS IS.
INGLESE ---FRANCESE ---FIAMMINGO ---TEDESCO ---SPAGNOLO ---OLANDESE
COD. AA05868.22
ATTENZIONE
TOGLIERE L’ALIMENTAZIONE GENERALE PRIMA DI USARE
SALDATRICI ELETTRICHE VICINO ALL’IMPIANTO.
WARNING
BEFORE USING ANY ELECTRICAL WELDING EQUIPMENT NEAR THE
GIBEN SYSTEM, PLEASE SWITCH THE MAIN POWER SUPPLY OFF.
ATTENTION
TOURNER L’ALIMENTATION GENERALE (ELECTRIQUE) AVANT D’UTILIZER
DES SOU DEUSES ELECTRIQUES PRES DE L’INSTALLATION (GIBEN).
LET OP!
SCHAKEL DE HOOFDSTROOMTOEVOER UIT VOORDAT U ELEKTRISCHE
LASAPPARATEN GEBRUIKT IN DE BUURT VAN DE MACHINE.
ACHTUNG
BEVOR SIE ELEKTRISCHE SCHWEISSMASCHINE NEBEN DER ANLAGE
BENUETZEN, SCHALTEN SIE BITTE DEN HAUPTSCHALTER AUS.
ATENCIÓN
CORTAR ALIMENTACION GENERAL ANTES DE UTILIZAR SOLADURA
ELECTRICA PROXIMA A LA INSTALACION.
LET OP!
KOPPEL DE STROOMTOEVOER AF ALVORENS IN DE BUURT VAN DE INSTALLATIE
ELEKTRISCHE LASAPPARATUUR TE GEBRUIKEN.
INGLESE ---FRANCESE ---FIAMMINGO ---TEDESCO ---SPAGNOLO ---OLANDESE
COD. AA05868.26
GIBENIMPIANTI S.p.A 40065 PIANORO --- BOLOGNA--- ITALIA Ph+39/051/6516400 Fax+39/051/6516425 E--- mail:[email protected]
Pag. 60
Prisma2-- 8
ATTENZIONE
CON L’APERTURA DELL’INTERRUTTORE GENERALE, L’ALIMENTAZIONE PNEUMATICA
NON É ISOLATA.
WARNING
WHEN THE MAIN SWITCH IS OPEN THE PNEUMATIC SUPPLY IS NOT ISOLATED.
ATTENTION
EN ACTIONNANT L’INTERRUPTEUR GÉNÉRAL (MARCHE), L’ALIMENTATION
PNEUMATIQUE N’EST PAS ISOLÉE.
LET OP!
WWANNEER DE HOOFDSCHAKELAAR WORDT GEOPEND, IS DE PNEUMATISCHE
VOEDING NIET GEISOLEERD.
ACHTUNG
BEI GEÖFFNETEM HAUPTSCHALTER IST DIE DRUCKLUFTZUFUHR NICHT ISOLIERT.
ATENCIÓN
AL ABRIR EL INTERRUPTOR GENERAL, LA ALIMENTACIÓN NEUMÁTICA NO SE AÍSLA.
LET OP!
WWANNEER DE HOOFDSCHAKELAAR WORDT GEOPEND, IS DE PNEUMATISCHE
TOEVOER NIET GEÏSOLEERD.
INGLESE ---FRANCESE ---FIAMMINGO ---TEDESCO ---SPAGNOLO ---OLANDESE
COD. AA05868.36
R
A
Via Garganelli 24
40065 Pianoro
Bologna -- Italia
B
A MAX. = ( mm )
B = ( mm )
n = ( giri / min )
COD. AA06100
GIBENIMPIANTI S.p.A 40065 PIANORO --- BOLOGNA--- ITALIA Ph+39/051/6516400 Fax+39/051/6516425 E--- mail:[email protected]
Pag. 61
Prisma2-- 8
ATTENZIONE :
TRASMISSIONE A CINGHIA DENTATA !
UN TENSIONAMENTO ECCESSIVO
PUO’ PROVOCARE FUNZIONAMENTI ANOMALI.
PER UN CORRETTO TENSIONAMENTO DELLE CINGHIE
CONSULTARE CON ATTENZIONE IL MANUALE USO E
MANUTENZIONE.
WARNING :
TOOTHED BELT DRIVE !
EXCESSIVE BELT TENSION MAY CAUSE
OPERATIONAL MALFUNCTIONS
FOR CORRECT BELT TENSIONING PLEASE REFER TO
YOUR USER MANUAL.
ATTENTION :
TRANSMISSION PAR COURROIE CRANTÉE!
UNE TENSION EXCESSIVE PEUT PROVOQUER DES
ANOMALIES DE FONCTIONNEMENT.
POUR UNE TENSION CORRECTE DES COURROIES,
CONSULTER ATTENTIVEMENT LE MANUEL D’ENTRETIEN.
ACHTUNG :
ZAHNRIEMENANTRIEB!
ZU HOHE RIEMENSPANNUNG KANN UNREGELMÄSSIGE
FUNKTIONEN HERVORRUFEN.
FÜR EIN RICHTIGES SPANNEN DER ZAHNRIEMEN
BITTE UNBEDINGT NACH VORSCHRIFT DES
HANDBUCHES VORGEHEN.
ATENCIÓN :
TRANSMISION A CORREA DENTADA!
UN TENSIONADO EXCESIVO PUEDE
PROVOCAR FUNCIONAMIENTOS ANOMALOS.
PARA UN TENSIONADO CORRECTO DE LAS CORREAS
CONSULTAR CON ATENCION EL MANUAL DE USO Y MANTENIMIENTO.
INGLESE ---FRANCESE ---FIAMMINGO ---TEDESCO ---SPAGNOLO ---OLANDESE
COD. AA05868.21
Made in Italy
R
MODEL
SERIAL
3~
V.
HZ.
A.
KW.
V.
CO
CONTROLLER
V.
TESTING
COD. 2050112
COD 2050112.01
GIBENIMPIANTI S.p.A 40065 PIANORO --- BOLOGNA--- ITALIA Ph+39/051/6516400 Fax+39/051/6516425 E--- mail:[email protected]
Pag. 62
Prisma2-- 8
ATTENZIONE
NON ENTRARE PER NESSUN MOTIVO NEL PERIMETRO DELIMITATO
DALLE BARRIERE DI PROTEZIONE CON LA MACCHINA IN FUNZIONE.
WARNING
ON NO ACCOUNT ENTER THE AREA ENCLOSED BY
THE BARRIER WHEN THE MACHINE IS IN OPERATION.
ATTENTION
IL EST FORMRLLEMENT INTERDIT DE FRANCHIR LES
BARRIERES QUAND LA MACHINE EST EN MARCHE.
LET OP!
MEN DIENT OM GEEN ENKELE REDEN VOORBIJ DEZE HEKKEN
TE KOMEN WANNEER DE MACHINE IN WERKING IS.
ACHTUNG
AUF KEINEN FALL DEN VONDEN SCHRANKEN BEGRENZTEN RAUM
BEI FUNKTIONIERENDER MASCHINE BETREN.
ATENCIÓN
MIENTRAS LAS MAQUINAS ESTEN EN FUNCIONAMIENTO
NO REBASEN LAS BARRERAS BAJO NINGUN CONCEPTO.
LET OP!
KOM, WANNEER DE MACHINE IN WERKING IS, OM GEEN
ENKELE REDEN BINNEN HET GEBIED DAT WORDT AFGEBAKEND
DOOR DE BESCHERMINGEN.
INGLESE ---FRANCESE ---FIAMMINGO ---TEDESCO ---SPAGNOLO ---OLANDESE
COD. AA05868.28
R
Via Garganelli 24
40065 Pianoro
Bologna -- Italia
Anno di costruzione :
Massa :
COD. AA0132945
GIBENIMPIANTI S.p.A 40065 PIANORO --- BOLOGNA--- ITALIA Ph+39/051/6516400 Fax+39/051/6516425 E--- mail:[email protected]
Pag. 63
Prisma2-- 8
VIETATO SALIRE SUI PIANI
NO GETTING ON THE
TABLES
DEFENSE DE MONTER SUR
LES PLANS
AUF DIE AUFLAGE
TEIGEN VERBOTEN
COD. AA0146722
COD. AA0146715
GIBENIMPIANTI S.p.A 40065 PIANORO --- BOLOGNA--- ITALIA Ph+39/051/6516400 Fax+39/051/6516425 E--- mail:[email protected]
Pag. 64
Prisma2-- 8
COD. AA0146714
COD. AA0146724
GIBENIMPIANTI S.p.A 40065 PIANORO --- BOLOGNA--- ITALIA Ph+39/051/6516400 Fax+39/051/6516425 E--- mail:[email protected]
Pag. 65
Prisma2-- 9
9.
CONTROL PANEL AND STARTING THE MACHINE
9.1. CAUTION
Before connecting the power supply cables to the machine check that power supply voltage and
frequency are the same as those given on the plate on the electrical cabinet. Once the machine
has been connected up, press the START BLADES push---button to start blade rotation and then
stop immediately the machine by pressing the EMERGENCY push---button. While the blades are
rotating, check their direction of rotation. If the blades are not rotating in the correct direction,
invert the two phase wires.
ATTENTION !!
BEFORE STARTING A CUTTING CYCLE, CHECK THAT THE MAIN SWITCH IS ON, AND
NONE OF THE SAFETY DEVICES ARE OPERATING : THE EMERGENCY
PUSH-- BUTTON MUST BE OFF, THE BLADE COVER MUST BE CLOSED AND THE
SAFETY BAR MUST BE UNOBSTRUCTED. IF THE PANEL SAW WILL NOT START, ALSO
CHECK THE AUTOMATIC SWITCHES INSIDE THE ELECTRICAL CABINET; THEY MUST
BE IN POSITION 1 OR ON.
9.2. CONTROL PANEL
The following paragraphs describe
machine functions with the relative
symbols; these will enable rapid consultation by the operator of all functions on machines fitted with the programmer GDrive.
GIBENIMPIANTI S.p.A 40065 Pianoro-- Bologna-- ITALIA - Telex 510437 - Fax 051/6516425-- 6516375 - Tel.051/6516400
Pag. 66
Prisma2-- 9
9.3. PRISMATIC SP - PROGRAMMING
SYMBOL
FUNCTION
MAIN START-- UP
This controls rotation of the main saw and the scoring saw and is essential to
machine functions. No machine commands can be given until the blades have
started.
CUTTING CYCLE START AND BLADE CARRIAGE RETURN
The cycle sequence is as follows : the pressure beam is lowered, the saw blade is raised above the work surface and the saw carriage starts sawing operations. Once cutting operations have been completed the blade is lowered beneath the work surface and the saw carriage returns to its starting position.
To continue cutting operations, press the push button again.
PUSHER FORWARD COMMAND
PUSHER FORWARD COMMAND
EMERGENCY STOP
When this button is pressed, the following sequence occurs : the saw carriage
stops in its current position, the blades are lowered beneath the work surface
and stop rotating, the pressure beam is raised. To return to normal operations,
press the emergency push button once again.
GIBENIMPIANTI S.p.A 40065 Pianoro-- Bologna-- ITALIA - Telex 510437 - Fax 051/6516425-- 6516375 - Tel.051/6516400
Pag. 67
Prisma2-- 9
SYMBOL
FUNCTION
BLADE CARRIAGE STOP IN SCORER ADJUSTMENT POSITION
This stops the saw carriage to the end of the cutting stroke with the blade in
the raised position so that the scoring saw can be adjusted from the outside.
LATERAL ALIGNER FORWARD MOVEMENT
LATERAL ALIGNER REVERSE MOVEMENT
AIR GENERATOR START-- UP
GIBENIMPIANTI S.p.A 40065 Pianoro-- Bologna-- ITALIA - Telex 510437 - Fax 051/6516425-- 6516375 - Tel.051/6516400
Pag. 68
Prisma2-- 9
9.4. PRISMATIC SPT -- PROGRAMMING
SYMBOL
FUNCTION
LIFT TABLE MANUAL ASCENT
LIFT TABLE MANUAL DESCENT
TABLE ROLLER MOVEMENT RIGHT
TABLE ROLLER MOVEMENT LEFT
BARRIER OPEN ENABLE COMMAND
GIBENIMPIANTI S.p.A 40065 Pianoro-- Bologna-- ITALIA - Telex 510437 - Fax 051/6516425-- 6516375 - Tel.051/6516400
Pag. 69
Prisma2-- 9
9.5. OPTIONALS
SYMBOL
FUNCTION
LOADING LEVEL FOR RECESSED LIFT TABLE
The flashing light indicates that the lift table is in the loading position.
ADJUSTABLE PUSH POINTS
Ascent command
ADJUSTABLE PUSH POINTS
Descent command
‘‘A’’
BARRIER SIDE “A” OPEN ENABLE COMMAND
ROLLERWAY -- MOVEMENT RIGHT
GIBENIMPIANTI S.p.A 40065 Pianoro-- Bologna-- ITALIA - Telex 510437 - Fax 051/6516425-- 6516375 - Tel.051/6516400
Pag. 70
Prisma2-- 9
SYMBOL
FUNCTION
ROLLERWAY -- MOVEMENT LEFT
AIR PRESSURE REGULATED ON THE CLAMPS
MAIN STOP
PUSH POINTS ACTIVATION COMMAND FOR MATERIAL WITH PROTRUDING EDGES
PROTECTION PANEL ACTIVATION COMMAND
GIBENIMPIANTI S.p.A 40065 Pianoro-- Bologna-- ITALIA - Telex 510437 - Fax 051/6516425-- 6516375 - Tel.051/6516400
Pag. 71
Prisma2-- 9
SYMBOL
FUNCTION
‘‘A’’
BULKHEAD ‘‘A’’ ENABLING COMMAND
‘‘A’’
BULKHEAD ‘‘A’’ -- OPEN COMMAND
‘‘A’’
BULKHEAD ‘‘A’’ -- CLOSE COMMAND
GIBENIMPIANTI S.p.A 40065 Pianoro-- Bologna-- ITALIA - Telex 510437 - Fax 051/6516425-- 6516375 - Tel.051/6516400
Pag. 72
Prisma2-- 9
9.6. REMOTE CONTROL FUNCTIONS (OPTIONAL)
SYMBOL
FUNCTION
CYCLE STOP
CYCLE START
GIBENIMPIANTI S.p.A 40065 Pianoro-- Bologna-- ITALIA - Telex 510437 - Fax 051/6516425-- 6516375 - Tel.051/6516400
Pag. 73
Prisma2-- 10
10.
ADJUSTING THE MACHINE
10.1. TESTING
Chapter Cap 3.5 of the manual specifies the type of materials that can be used on Giben cutters.
Note however that materials are occasionally internally stressed due to processing techniques
used during panel formation. For this reason, panels that are stored without any special precautions can deform to varying extents.
Bear in mind that during machine testing, panels with less stress and minor
deformation must be used to ensure
that cutting parameter settings are
made correctly. When checking cutting operations, the central area of the
cut pack (fig.) only should be considered.
GIBENIMPIANTI S.p.A 40065 PIANORO --- BOLOGNA--- ITALIA Ph+39/051/6516400 Fax+39/051/6516425 E--- mail:[email protected]
Pag. 74
Prisma2-- 10
10.2. CHECKING AND ADJUSTING THE FENCES
1 ) Take the panels measuring approximately 1500 x 1300 mm, placing them one on top of the
other. Trim the long sides.
Rest the trimmed side against the fence and trim the short sides.
2 ) Turn the top panel over, as shown in the drawing.
1
2
3 ) Rest the two panels against the fence. If the fence is at right angles to the cutting line, the two
A sides of the panels will match perfectly. If they do not match (see the example), correct the positioning of the fence and repeat the cutting test on the short side of the panel until the two A sides
are perfectly matched.
4 ) Once the front fence is at90_ to the trimmed side of the panels, clamp the rear fence in line
with the front one.
3
4
A
A
GIBENIMPIANTI S.p.A 40065 PIANORO --- BOLOGNA--- ITALIA Ph+39/051/6516400 Fax+39/051/6516425 E--- mail:[email protected]
Pag. 75
Prisma2-- 10
10.3. ADJUSTING MAIN BLADE
In order to ensure a straight blade path
during cutting, the blade must not project by more than 25 mm above the cut
panel.
Blade projection must be adjusted in
accordance with the height of the stack
of panels being cut so as to maintain
optimum blade projection.
H
H h
h
H---h = 25 mm
The machine is fitted with a system
which automatically stops raising of
the saw blade in accordance with the
height of the stack of panels being cut.
This function is selected, before starting the cutting cycle, by turning the selector switch to position 1. With the selector switch turned to position 2 (i.e.
automatic adjustment off), the saw blade will be raised to its maximum projection.
1
2
GIBENIMPIANTI S.p.A 40065 PIANORO --- BOLOGNA--- ITALIA Ph+39/051/6516400 Fax+39/051/6516425 E--- mail:[email protected]
Pag. 76
Prisma2-- 10
10.4. CHECKING BLADE AND MACHINE TABLE SQUARENESS
The saw blade must be perpendicular
to the machine table in order to ensure
cut surfaces (1 and 2) that are squared
and at an angle of 90_.
90_
1
2
90_
To check that the blade is correctly squared up to the machine table, proceed as follows:
---Take a wooden panel 40---50 mm thick and cut it lengthways. For the sake of clarity let us imagine that the topside of the panel is white and the underside is black.
---Turn one of the pieces through 180_ on its transverse axis so that you now have one black side
next to one white side.
---Match up the two cut surfaces; if the two surfaces touch all the way along the cut, then the blade
is correctly squared up to the work surface of the machine.
GIBENIMPIANTI S.p.A 40065 PIANORO --- BOLOGNA--- ITALIA Ph+39/051/6516400 Fax+39/051/6516425 E--- mail:[email protected]
Pag. 77
Prisma2-- 10
If on the other hand the cut surface do not touch at the top A or the bottom B of the cut, then the
saw blade is not perpendicular to the work surface.
A
B
N.B. The angles have been exaggerated in the drawings for demonstration purposes.
Blade/machine surface squareness is adjusted by our test personnel before the machine leaves
our works and does not normally require further adjustment. If, however, it becomes necessary
to adjust the machine, proceed as follows:
CHECKING SQUARENESS
---To make the machine safe for
maintenance work, move the saw
carriage (1) to the end of its return
stroke and raise the blade inspection
cover.
GIBENIMPIANTI S.p.A 40065 PIANORO --- BOLOGNA--- ITALIA Ph+39/051/6516400 Fax+39/051/6516425 E--- mail:[email protected]
Pag. 78
Prisma2-- 10
---Energize solenoid valve (A) which enables
the blade hub to lift. To do so, turn screw (1)
clockwise all the way. Once this has been done, blade hub will be at the top end of its stroke.
A
A
B
---Energize solenoid valve (B) which lifts blade hub. Turn screw (2) clockwise all the way.
Once this has been done, blade hub will be
at the top end of its stroke.
2
A
---Remove blade (see instructions 11.4.). Remove the four plates (3).
Lower guard (4) which conveys dust to suction channel and remove it from the side.
4
3
GIBENIMPIANTI S.p.A 40065 PIANORO --- BOLOGNA--- ITALIA Ph+39/051/6516400 Fax+39/051/6516425 E--- mail:[email protected]
Pag. 79
Prisma2-- 10
Loosen screws slightly (5). Turn screw
(6b) in order to adjust blade perpindicularity.
Hub plate is pivoted at point F therefore:
turn screw (6a) clockwise to move the
top of the blade away from the operator
and counterclockwise to move it closer
to the operator.
F
After adjusting tighten screws (5) and
(6b).
Scoring blade perpendicularity can be
adjusted in the same way as the main
blade.
Obviously, to raise scoring blade hub
use the related lift solenoid valve.
5
6a
6b
5
5
5
10.5. ADJUSTING BLADE AND CUTTING LINE PARALLELISM
The saw blade must be parallel with
the cutting line in order to guarantee
clean, chip---free cut surfaces (1 and
2).
To check that the blade is parallel to the
cutting line, proceed as follows:
1
2
---Take two coated panels A and B which are approximately twice as long as the blade diameter
and 20 mm wide. Put them on either side of the cutting line (see the drawing) and trim cut them
with a sharp saw (preferably a new one).
GIBENIMPIANTI S.p.A 40065 PIANORO --- BOLOGNA--- ITALIA Ph+39/051/6516400 Fax+39/051/6516425 E--- mail:[email protected]
Pag. 80
Prisma2-- 10
N.B. Use coated panels. These will show up any chips clearly if the blade is not parallel to the
cutting line.
---If the blade is not parallel in the direction shown in the drawing then the cut panel B will be good
(it is assumed that the scoring saw is operating) but the cut on panel A will be chipped on the
topside.
This is because panel B is cut with the front portion of the blade (i.e. with the teeth cutting downwards) while panel A is cut with the rear portion of the blade (i.e. with the teeth cutting upwards).
---If the blade is out or parallel in the opposite direction to that shown in the drawing, then panel
B will be chipped on the topside and panel A will be cut perfectly. In either case it will be necessary
to readjust the blade so that it is parallel to the cutting line.
N.B. The angles have been exaggerated in the drawings for demonstration purposes.
GIBENIMPIANTI S.p.A 40065 PIANORO --- BOLOGNA--- ITALIA Ph+39/051/6516400 Fax+39/051/6516425 E--- mail:[email protected]
Pag. 81
Prisma2-- 10
Another factor that will help you to understand whether the blade is parallel or not, is to establish
which side of the blade the noise comes from during cutting.
Example X: parallelism is correct. During blade travel the cutting noise can be heard between
point 1 and 2 and between points 3 and 4 (as the blade begins to cut into the panel and as the
blade leaves the panel).
Example Y: parallelism is incorrect in the direction shown in the drawing. The cutting noise will
be heard until the blade has completely left panelA.
Example Z: parallelism is incorrect in the opposite direction. The cutting noise will be heard until
the blade has completely left panel B. The prolongation of cutting noise in examples Y and Z are
indicators that the blade is not parallel and that the teeth are still cutting at the back as the blade
leaves the panels so that the rear coating of the panel is being chipped.
GIBENIMPIANTI S.p.A 40065 PIANORO --- BOLOGNA--- ITALIA Ph+39/051/6516400 Fax+39/051/6516425 E--- mail:[email protected]
Pag. 82
Prisma2-- 10
PARALLELISM ADJUSTMENT
The blade/cutting line parallelism was adjusted at our works prior to despatch and does
not normally require further adjustment. If,
however, it becomes necessary to adjust the
machine, proceed as follows:
---To make the machine safe for maintenance
work, move the saw carriage (1) to the end of
its return stroke and raise the blade
inspection cover.
As described for the adjustment of blade perpendicularity, energize solenoid valve (A)
which enables the blade hub to lift by turning
screw (1) clockwise all the way. Once this has
been done, blade hub will be at the top end
of its stroke.
---Energize solenoid valve (B) which lifts blade hub. Turn screw (2) clockwise all the way.
Once this has been done, blade hub will be
at the top end of its stroke.
---Remove blade (see instructions 11.4.).
Remove the four plates (3). Lower guard (4)
which conveys dust to suction channel and
remove it from the side.
Disassemble the blade (see instructions,
chapter 11.4.) and the blade support plates
(3).
Lower the extraction hood (4) into the dust
conveyor channel and extract from the side.
B
2
A
4
3
GIBENIMPIANTI S.p.A 40065 PIANORO --- BOLOGNA--- ITALIA Ph+39/051/6516400 Fax+39/051/6516425 E--- mail:[email protected]
Pag. 83
Prisma2-- 10
Loosen screws slightly (7). Turn screw
(6a) in order to adjust blade perpindicularity.
Hub plate is pivoted at point F therefore:
turn screw (8a) clockwise to move the
top of the blade away from the operator
and counterclockwise to move it closer
to the operator.
7
7
F
8a
After adjusting tighten screws (7) and
(8b).
Scoring blade perpendicularity can be
adjusted in the same way as the main
blade.
Obviously, to raise scoring blade hub
use the related lift solenoid valve.
7
8b
7
GIBENIMPIANTI S.p.A 40065 PIANORO --- BOLOGNA--- ITALIA Ph+39/051/6516400 Fax+39/051/6516425 E--- mail:[email protected]
Pag. 84
Prisma2-- 10
10.6. SCORING SAW
A : When cutting coated panels, the blade teeth are likely to knock against the side of the
material facing the machine table, as they are
being drawn back, slightly chipping the
panel.
B : To avoid this problem, a second blade has
been added, smaller in diameter to the panel
saw blade, and with truncated conical teeth.
This is known as the scoring blade. It precedes the main blade to cut the panel, so that
by the time the main blade arrives the coating
has already been scored. Obviously if cutting
is to be top quality and there are to be no
chips, the scoring blade must be in perfect
alignment with the main blade and positioned
so as to give the correct cutting depth P. Keep
cutting depth to a maximum of 1.5 mm.
The drawing below shows what happens
when scoring saw is correctly lined up: the
panel is not chipped and bevelling is scarcely
noticeable on either side.
The result of incorrect horiziontal alignment
and incorrect vertical scoring depth are as follows:
A
B
C
C : Scoring depth is insufficient. The panel is
chipped on both sides of the cut.
D : Scoring depth is excessive. The panel is
not chipped, but the two bevels are too deep.
The scoring saw is also being subjected to
excessive strain at this setting.
E : The scoring saw is offset. The panel is
chipped on the side opposite the offset side
and is stepped on the offset side.
D
E
N.B. Bevels, scoring cuts, etc. have been
exaggerated in these drawings for explanatory purposes
GIBENIMPIANTI S.p.A 40065 PIANORO --- BOLOGNA--- ITALIA Ph+39/051/6516400 Fax+39/051/6516425 E--- mail:[email protected]
Pag. 85
Prisma2-- 10
The scoring saw position can be adjusted vertically (see fig. X) and horizontally (see fig. Y).
The scoring saw can be adjusted both
manually and electrically (optional).
10.7. ELECTRICAL ADJUSTMENT OF SCORING SAW (OPTIONAL)
When this option is available on the machine, proceed as follows to make the adjustment:
a) From the pushbutton panel, first
select the “CUTTING CYCLE” (1) command, then when the presser lowers
press the “SCORING SAW ADJUSTMENT” (2) button.
This way the carriage stops after initially moving to perform the cut and
returns to its limit position ready for the
adjustment.
1
2
b) Press the <F7> key on the programmer until the text “SCORING SAW ADJUSTMENT” appears
on the display together with a series of arrows next to the value 0.00 expressed in !/10 mm (FIG.3).
Now press the corresponding arrows on the keyboard to move the scoring wheel, i.e. press <⇒>
to move the scoring wheel to the right or <⇐> to move it to the left (relative to the operator in front
of the blade carriage).
GIBENIMPIANTI S.p.A 40065 PIANORO --- BOLOGNA--- ITALIA Ph+39/051/6516400 Fax+39/051/6516425 E--- mail:[email protected]
Pag. 86
Prisma2-- 10
fig.3
PEZ
Pann.:
MM
X
Altezza Pila:
Caricati:
Job
F7:Velocita’ Carro Lama 40,2 m/min
Da Caric.:
Schema
0.00
0.00
F1: Esec/Sosp/Annulla/Simulare
F10:Menu’ principale/Stato macchina
Each time the key is pressed to perform a horizontal movement of the scoring wheel, the values
0.00 shown on the display change by a fixed amount 0.25 !/10 mm, positive if the movement is
to the right, negative if it is to the left. Similarly for vertical adjustment, the scoring wheel moves
in a positive direction by 2.86 !/10 mm if <⇑> is pressed or in a negative direction if <⇓> is
pressed.
IMPORTANT: The horizontal and vertical adjustments are not saved after quitting the “SCORING
SAW ADJUSTMENT” function; i.e. after adjusting the scoring wheel and performing a cutting test,
the values are reset on returning to scoring wheel adjustment.
c)To return the machine to the working condition after completing the adjustments, simply press
the “SCORING WHEEL ADJUSTMENT” button again (it has remained on during the entire adjustment procedure).
After completing the operations, check that the scoring wheel has been correctly adjusted by performing a cutting cycle.
10.8. MANUAL ADJUSTMENT THE SCORING SAW
Adjustments can be made from the
outside.
Select the scoring saw adjuster selector switch 1 (on the control panel) to
the right. This will stop the blade carriage at the end of its return stroke with
the blade raised and rotating; the blade compartment will be lit up.
Pass the spanner through the tunnel
(1), look through the opening (2) and
then adjust the scoring saw as follows:
2
1
GIBENIMPIANTI S.p.A 40065 PIANORO --- BOLOGNA--- ITALIA Ph+39/051/6516400 Fax+39/051/6516425 E--- mail:[email protected]
Pag. 87
Prisma2-- 10
VERTICAL ADJUSTMENT
Adjust by inserting the Allen key into the screw (3a). To increase scoring saw projection, turn the
Allen key clockwise. To decrease scoring saw projection, turn the Allen key anti-clockwise. The
gear tooth pitch corresponds to an increment of 0.05 mm in scoring width.
3a
HORIZONTAL ADJUSTMENT
Horizontal adjustment centres the scoring saw blade in relation to the main blade. The scoring
saw blade is moved sideways by turning the screw (3b). To adjust, proceed as follows:
Insert the Allen key in the screw (3b). Turn the Allen key clockwise to move the scoring saw unit
in the direction shown by the arrow Z. Turn the Allen key anti-clockwise to move the unit in the
direction indicated by the arrow K.
The gear tooth pitch corresponds to a horizontal shift of 0.025 mm.
K
Z
3b
. Take great care when inserting the key in screw (3).
GIBENIMPIANTI S.p.A 40065 PIANORO --- BOLOGNA--- ITALIA Ph+39/051/6516400 Fax+39/051/6516425 E--- mail:[email protected]
Pag. 88
Prisma2-- 10
10.9. ADJUSTING PUSHER PINION PLAY
The pusher guide wheels are positioned on an eccentric pivot.
In order to check on the play between
the pinion and the rack, one must act
upon the four pivots (1) turning them
with a key.
In this way, the pusher carriage can be
moved vertically.
1
2
3
At the rear of the pusher carriage there is an Aviprene pinion which acts as a counterweight when
the grippers grip the stack of panels to be cut.
This pinion is mounted on an eccentric shaft to enable adjustment of the play between the rack
and the pinion.
To adjust the play between the rack and the pinion, loosen the nut (2) and turn the screw (3) with
a spanner to obtain the play required.
Important! Do not force the pinion onto the rack. Adjust so that they are slightly touching each
other.
GIBENIMPIANTI S.p.A 40065 PIANORO --- BOLOGNA--- ITALIA Ph+39/051/6516400 Fax+39/051/6516425 E--- mail:[email protected]
Pag. 89
Prisma2-- 11
11.
MAINTENANCE
READ THE INSTRUCTIONS IN THE CHAPTER 8. CAREFULLY BEFORE CARRYING OUT
ANY MAINTENANCE WORK.
11.1. PRESSURE BEAM
The pressure beam is operated by four pairs of pneumatic cylinders which ensure uniform pressure distribution. The pressure beam is kept parallel during movement by four interconnected
sprockets controlled by a chain.
. When carrying out operations below the pressure beam, always use plugs
or material spacers (e.g. wood panels) to prevent the pressure beam from falling suddenly. If the machine is not switched on, the pressure beam will only
descend if the compressed air is disconnected.
Guard flaps (1) are attached to a tubular section extending the entire length of the pressure beam.
The rotation of this tube is synchronized to the upward and downward movements of the pressure
beam and prevents any access to the work table before the rotating saw blades are raised.
This means that the guard flaps will not allow any opening along the cutting length, thus making
it impossible for anything (such as hands or objects) to get under the pressure beam.
The guard flaps also offer excellent protection in cases where the pack of panels are at some distance from the fences; in this case the blade does not have to travel along an uncovered section
before it reaches the pack. A cylinder (2) synchronises lowering of the guard flaps and lowering
of the pressure beam; the two movements are therefore interlocked and cannot take place separately.
Always substitute damaged safety bars immediately.
2
1
GIBENIMPIANTI S.p.A 40065 PIANORO --- BOLOGNA--- ITALIA Ph+39/051/6516400 Fax+39/051/6516425 E--- mail:[email protected]
Pag. 90
Prisma2-- 11
On the operator side of the crosswise
panel saw, a safety bar (3) runs the entire length of the pressure beam. The
bar is hinged on the pressure beam so
that its movements trigger a microswitch (4).
The safety bar is an accident prevention device which stops the device
should a cutting cycle be started accidentally while the operator’s hands are
still under the pressure beam. If a cycle
is accidentally started in such a situation, the pressure beam is lowered but
the safety bar (fixed to the pressure
beam) encounters the operator’s fingers first, moves upwards on its hinges
thus triggering the microswitch (4)
which in turn triggers a saw emergency condition, whereby the saw is stopped and the pressure beam is raised.
OPERATING PRESSURE
Check the pressure gauge on the panel saw head that operating pressure
is below 4.5 bar. Recommended operating pressure is 4 bar.
If the pressure beam is lowered too rapidly or too slowly, adjust the discharge regulators (5) on the pistons to obtain the desired lowering speed.
If the pressure beam is lowered in a jerky fashion, check that there are no
kinks or restrictions in the compressed
air hoses to the pressure beam.
Check that all moving parts are clean
and free from dust. To ensure trouble
free running, remove the head covers
once a week and clean inside with a jet
of compressed air. Clean the chain
with a brush soaked in naphtha.
5
GIBENIMPIANTI S.p.A 40065 PIANORO --- BOLOGNA--- ITALIA Ph+39/051/6516400 Fax+39/051/6516425 E--- mail:[email protected]
Pag. 91
Prisma2-- 11
11.2. DRIVE CHAIN AND IDLING SPROCKET
Over long operating periods the chain
may stretch to such an extent that
spring (1) is no longer able to keep it
taut. If this happens, the chain must be
shortened. Do this by removing the necessary number of links for the chain to
return to the values indicated in the
drawing.
Ideal chain tension is shown in the drawing below. The spring must be compressed by its nut so that there is a gap
of approx. 5---6 mm between one turn
of the spring and another:
---Unscrew the lock nut (2).
---To increase spring compression,
tighten the nut (3); to decrease spring
compression, unscrew the nut (3).
---When you have obtained the correct
spring compression, tighten the lock
nut (2).
1
2
3
Excessive chain tension will cause undue strain and lead to abnormal wear of mechanical parts.
If the chain is too slack this will cause irregular carriage trasversing and consequent imperfections
in cutting.
Clean the chain once a month and apply a thin coating of naphtha with a brush.
The idling sprocket is mounted on a sealed, self---lubricating bearing and only requires cleaning.
Clean once a month; remove the cover (5), clean with a jet of compressed air and lubricate with
a thin film of naphtha.
11.3. SAW CARRIAGE
Once a week, remove the side covers
and clean inside the machine with a jet
of compressed air. Thoroughly clean
the vertical columns of the carriage; accumulated dust will interfere with the
smooth operation of the frame and can
cause the blade to stop short of its normal stop position.
Once a month, clean the horizontal
carriage guides (1) using a brush soaked in naphtha; dry with a clean rag.
Regularly check that the felt cleaning
pads (2 and 3) are working efficiently.
Renew if necessary.
2
3
1
GIBENIMPIANTI S.p.A 40065 PIANORO --- BOLOGNA--- ITALIA Ph+39/051/6516400 Fax+39/051/6516425 E--- mail:[email protected]
Pag. 92
Prisma2-- 11
11.4. CHANGING THE MAIN SAW BLADE
. Use suitable protective gloves when changing the blade.
. Replace worn blades with a version featuring the same diameter and thickness (see table, chapter 3.5.).
To make the machine safe for maintenance work, move the saw carriage to the end
of its return stroke and raise the blade
compartment cover (1). The machine and
the saw blade are now safe to work on.
Fit the compressed air hose on the coupling of the blade locking flange. When
the air is turned on, the ring nut is released, making it possible to remove the blade. When removing the blade, take care
not to knock the cutting edge against the
machine.
Before reassembling the blade, carefully
clean the contact surfaces (blade sides,
locking flange and hub flange). Now reassemble the blade following the above procedure in reverse, and making sure that
the teeth are in the correct direction.
Before removing the compressed air hose
from the coupling, turn the locking flange
to the right, until the reference pins of the
locking flange are well in contact with the
slots of the hub flange.
GIBENIMPIANTI S.p.A 40065 PIANORO --- BOLOGNA--- ITALIA Ph+39/051/6516400 Fax+39/051/6516425 E--- mail:[email protected]
Pag. 93
Prisma2-- 11
N.B. To facilitate accurate assembly,
the outer diameters of the locking flange and the hub flange have been marked with reference notches. Ensure
that these notches are aligned with
each other when reassembling the
unit.
11.5. CHANGING THE SCORING SAW BLADE
To make the machine safe for maintenance work, move the saw carriage to
the end of its return stroke and raise
the blade compartment cover (1). The
machine and the saw blade are now
safe to work on.
Fit the compressed air hose on the
coupling of the blade locking flange.
When the air is turned on, the ring nut
is released, making it possible to remove the blade. When removing the blade, take care not to knock the cutting
edge against the machine.
GIBENIMPIANTI S.p.A 40065 PIANORO --- BOLOGNA--- ITALIA Ph+39/051/6516400 Fax+39/051/6516425 E--- mail:[email protected]
Pag. 94
Prisma2-- 11
Before reassembling the blade, carefully clean the contact surfaces (blade
sides, locking flange and hub flange).
Now reassemble the blade following
the above procedure in reverse, and
making sure that the teeth are in the
correct direction.
Before removing the compressed air
hose from the coupling, turn the locking flange to the left, until the reference pins of the locking flange are well in
contact with the slots of the hub flange.
N.B. To facilitate accurate assembly, the outer diameters of the locking flange and the hub flange
have been marked with reference notches. Ensure that these notches are aligned with each other
when reassembling the unit.
GIBENIMPIANTI S.p.A 40065 PIANORO --- BOLOGNA--- ITALIA Ph+39/051/6516400 Fax+39/051/6516425 E--- mail:[email protected]
Pag. 95
Prisma2-- 11
11.6. REPLACING BLADE HUB BEARINGS
To replace the blade hub bearings,
contact a Giben Service centre or suitably qualified personnel for assistance.
In the event of replacement, the air cylinder and springs inside the hub
should also be checked.
Replace the bearings as follows:
a) Position the blade carriage in the
return limit position, lift the blade guard
as described above.
b) Remove the blade as described in
Chapter 11.4.
Remove the belt guard fence, loosen
the motor retaining bolts, and turn the
adjuster screw (see Chapter 11.8 --Belt renewal) to slacken off the belt;
fully unscrew screws (9), withdraw the
complete hub from the plate and
remove the belt.
5
F
With the hub on a work bench, remove
cover (1) and loosen screws (5).
1
5
9
GIBENIMPIANTI S.p.A 40065 PIANORO --- BOLOGNA--- ITALIA Ph+39/051/6516400 Fax+39/051/6516425 E--- mail:[email protected]
Pag. 96
Prisma2-- 11
c) At this point you need to withdraw
shaft (10) as follows: using holes (F)
and two ø 5 dowels, press spacer (4)
until the pack of bearings is withdrawn
from the shaft.
Fully unscrew screws (5), remove the
toothed sprocket (6) and seal (2a).
Proceed with the removal of the bearings (3) from the seat in the hub (11),
pressing on inner ring (A).
Spacers (7) and (8) will also be
removed along with the bearings;
these spacers must be refitted.
d) Install the new oblique bearings (3)
and spacers (7) e (8) in the hub, making sure that the bearings are oriented
as shown in the figure.
F
5
5
6
4
3
11
8
7
2a
10
A
d) Mount the new angular contact
bearings (3) and spacers (7) and (8)
taking care to position the bearings
correctly.
N.B. Press the external ring to fit the
new bearings; apply 9 cc of kluber isoflex super LDS 18 grease or similar uniformly over the bearings.
e) Refit the entire assembly as follows:
Fit seal (2b) in the seat of sprocket (6).
Fit sprocket (6) on the blade hub (11)
without fully tightening screws (5) (we
recommend the use of medium type
thread lockers)
Fit spacer (4) on shaft (10) and then
refit the complete hub assembly, taking care to press on the inner ring of
bearings (3).
Fit cover (1) and fully tighten sprocket
screws (5) through the service holes,
which must then be closed with
M10x10 grub screws.
Finally, refit seal (2a).
4
10
2b
5
5
6
11
8
7
3
2a
1
. Run in the hub by rotating it without load for periods of 6---8 minutes interspersed with pauses of equal length until the temperature stabilises. We recommend 4 such cycles followed by approx. 30 minutes without load before
resuming production.
GIBENIMPIANTI S.p.A 40065 PIANORO --- BOLOGNA--- ITALIA Ph+39/051/6516400 Fax+39/051/6516425 E--- mail:[email protected]
Pag. 97
Prisma2-- 11
11.7. REPLACING SCORER HUB BEARINGS
If the bearings of the blade hub require changing, we recommend that you contact Giben Customer Service for this operation.
When these bearings are being changed it is also advisable to check the condition of the pneumatic cylinder and the springs inside the locking hub.
To change the scoring blade hub bearings, proceed as follows:
a) Move the saw carriage to the end of its return stroke and raise the blade cvompartment cover;
the machine will now be safe to work on;
b) after removing the blade, extract the belt, loose the screws (8) and take out the complete hub;
c) Slacken nut (1) keeping pin (2) secured in point A by means of a screwdriver;
d) Disassemble the pulley (3). If this is not possible by hand, use puller (E). Secure the puller to
the pulley by means of M5 screws; tighten the central screw (Y) on the puller to enable pulley
removal.
e) Slacken screws (7), remove the gear (6). Fix puller (E) to holes (5), by means of M5 screws.
Tighten central screw (Y) of the puller until hub (4) can be removed. Remove bearings (7).
f) To re---assemble the unit, carry out the above operations in reverse order. When fitting new
double shielded bearings, the external seals on adjacent bearings must be removed (detail X),
to avoid the risk of the unit overheating.
8
6
4
3
1
Y
E
5
2
7
GIBENIMPIANTI S.p.A 40065 PIANORO --- BOLOGNA--- ITALIA Ph+39/051/6516400 Fax+39/051/6516425 E--- mail:[email protected]
Pag. 98
Prisma2-- 11
11.8. BELT REPLACEMENT
Position the blade carriage in the return limit position and lift the blade guard.
MAIN BLADE BELT REPLACEMENT
The replace the main blade belt, proceed
as follows:
B
--- Disassemble guard (A), protecting the
motor belt, and remove the four screws
(1);
--- remove guard (E) by unscrewing the
two screws which secure it to the carriage;
--- disassemble fence (B) by slackening
screws (2).
--- Lower the extraction hood into the dust
conveyor channel and extract from the
side.
E
2
2
1
1
C
A
To remove belt (D) from the motor pulley,
slacken the four fixing screws (3), and turn
screw (4) clockwise to lift the motor and
enable belt removal.
Following the above slacken the blade
hub screws (C) and lift to remove; caution:
the belt withdraws with the hub; detach
manually to remove.
--- Replace the belt with a new version and
proceed with re---assembly in reverse
order of the above.
3
4
D
N.B. Use a medium thread lock for the
hub fixing screws (C).
3
GIBENIMPIANTI S.p.A 40065 PIANORO --- BOLOGNA--- ITALIA Ph+39/051/6516400 Fax+39/051/6516425 E--- mail:[email protected]
Pag. 99
Prisma2-- 11
TENSIONING
Belt tension does not stretch with time
and use and therefore belt tensioning
is only required during replacement.
Ideal tension is obtained when a force
of (a) 6 kg applied halfway between
the motor pulley shaft and the driven
pulley causes the belt to give by (b) 8
mm.
=
a Kg
=
b mm
. With this device in place, over/under tensioning of belt is impossible.
CHANGING THE SCORING SAW
BLADE
Remove motor belt guard.
Loosen nuts (1) slightly and turn screw
(2) clockwise to lift motor. This loosens
belt tension.
Remove the belt and replace it with a
new one. Repeat the procedure in reverse order to return to normal working
conditions.
3
4
3
TENSIONING
Belt tension does not stretch with time and use and therefore belt tensioning is only required during replacement.
Ideal tension is obtained when a force of (a) 1,5 kg applied halfway between the motor pulley
shaft and the driven pulley causes the belt to give by (b) 8 mm.
. With this device in place, over/under tensioning of belt is impossible.
GIBENIMPIANTI S.p.A 40065 PIANORO --- BOLOGNA--- ITALIA Ph+39/051/6516400 Fax+39/051/6516425 E--- mail:[email protected]
Pag. 100
Prisma2-- 11
11.9. PUSHER GUIDE CLEANING PADS
At regular intervals, check that the
pads (1) are keeping the sliding surfaces clean. If the pads (1) are so worn
that they no longer clean properly,
change them immediately.
1
11.10. LIFTING TABLE
Lifting table maintenance is minimal.
Once a week: thoroughly clean the lifting screws; raise the table to its UP position and genereously grease the lifting screws (1) through the grease
nipples (2).
Once a week: clean the chain (3) with
naphta and check chain tensioe; tighten, if necessary, on the adjuster
screws (4).
GIBENIMPIANTI S.p.A 40065 PIANORO --- BOLOGNA--- ITALIA Ph+39/051/6516400 Fax+39/051/6516425 E--- mail:[email protected]
Pag. 101
Prisma2-- 11
11.11. BLADES
GIBEN panel saws can be used to cut various types of material. Each type of material requires
a special blade. Further information on blade types can be obtained from blade manufacturers.
SHARPENING THE BLADES
We recommend that you sharpen the
blades when the edges (1) and (2) have become rounded to a maximum of
0.2 mm, i.e. after two or three hours
work on laminated panel for the main
saw blade or after six to nine hours for
the scoring saw.
A blade can usually be resharpened
approximately 20 times before it must
be changed.
Before sharpening a blade, remove any deposits left by the material cut previously otherwise this
will clog the sharpening wheel. Deposits can be removed by soaking the blades in a very dilute
caustic soda/water solution for several hours.
N.B. The blades must be hung or stacked in the bath so that the solution can reach all parts of
the blade.
GIBENIMPIANTI S.p.A 40065 PIANORO --- BOLOGNA--- ITALIA Ph+39/051/6516400 Fax+39/051/6516425 E--- mail:[email protected]
Pag. 102
Prisma2-- 11
11.12. REGULAR MAINTENANCE
Maintenance periods have been estimated on the basis of a daily shift averaging 8 hours. These
times are intended as a guide only. Maintenance periods vary according to the operating and working conditions (if there is dust in the atmposphere or considerable variations in temperature, etc.)
of each machine and should therefore be varied accordingly. In the sections which follow we have
listed all the regular maintenance operations required to ensure maximum performance from your
machine.
. Turn the machine off before performing any adjustments or replacing
parts; to ensure that the machine is not turned on during such operations, the
mains switch may be locked (lock not included).
. The machine must be switched off before starting any maintenance or
repair work.
. Bear in mind that the electric cabinet in not equipped with an electric door
interlock. Cabinet doors may only be opened with a special key.
NOTE : . . . Drive belts :Adjust the belt tension after the first 50 working hours.
Adjust the tension of a new belt after the first 50 hours.
. . . . . . . . . . . Reducers and reducer motors:The reducers fitted to the machine have been lubri
cated with a long-life grease and should not require further lubrication.
However, if it does become necessary to change the grease for any reason, only
use the grease recommended in the table of lubricants.
KEY --- Personnel
L
= Operator
LL
= Maintenance worker
(See the Chapter 1.3.)
GIBENIMPIANTI S.p.A 40065 PIANORO --- BOLOGNA--- ITALIA Ph+39/051/6516400 Fax+39/051/6516425 E--- mail:[email protected]
Pag. 103
Prisma2-- 11
DAILY MANTENANCE
PART
OPERATION
DESCRIPTION
QUALIF.
GENERAL
Clean
L
Remove sawdust and off---cuts from
the machine, especially from moving
parts.
PNEUMATIC EQUIPM.
Check and top---up
Drain water
L
Check and top---up the oil level in the
lubricators.
L
Drain the water from the filters.
WEEKLY MAINTENANCE
PART
OPERATION
QUALIF.
DESCRIPTION
GENERAL
Checking screw
tightness
L
Check that all screws are tightened,
particularly of moving mechanical
parts.
PANEL SAW
Carriage guides
Clean
L
Clean with a compressed air jet.
Drive chains
Clean
LL
Clean with a compressed air jet.
Felt cleaning pads
on guides
Check
LL
Check that the felt pads follow and
clean the rollers and guides.
Pressure beam
chains and
sprockets
Clean
L
Clean with a compressed air jet.
Carriage raising
guides
Clean
L
Clean with a compressed air jet.
ALIGNER
Guide
Clean and lubricate
Chains and
sprockets
Clean
Roller guides
Clean and lubricate
LL
L
LL
Clean with a brush soaked in petrol
and dry with a cotton rag.
Clean with a compressed air jet.
Clean with a brush soaked in petrol
and dry with a cotton rag.
GIBENIMPIANTI S.p.A 40065 PIANORO --- BOLOGNA--- ITALIA Ph+39/051/6516400 Fax+39/051/6516425 E--- mail:[email protected]
Pag. 104
Prisma2-- 11
PART
OPERATION
DESCRIPTION
QUALIF.
PUSHER
Guide cleaning
pads
Check
Check that the pads follow the guides closely.
LL
PNEUMATIC EQUIPM.
Pneumatic cylinders Check
Where possible, check the operating
speed of the cylinders using the
screws on the rapid discharge valves.
LL
LIFTING TABLE
Raising screws
Chain
Grease
LL
Generously grease the grease nipples.
Clean and check
LL
Clean with petroil and check chain
tension.
MONTHLY MAINTENANCE
PART
OPERATION
QUALIF.
DESCRIPTION
PANEL SAW
Carriage guides
Drive chains
Felt cleaning pads on
guides
Clean and lubrificate
LL
Clean with a brush soaked in
petroil and dry with a cotton
rag.
Check and clean
LL
Check chain tension and adjust if necessary. Clean with a
brush soaked in petroil and
dry with a cotton rag.
Check
LL
Check felt pad efficiency.
Change if worn.
LL
Clean with a jet of compressed air and lightly lubricate
with petroil.
LL
Clean with a brush soaked in
petroil and dry with a cotton
rag.
Pressure beam chains Clean and lubrificate
and sprockets
ALIGNER
Chains and sprockets
Lubricate
GIBENIMPIANTI S.p.A 40065 PIANORO --- BOLOGNA--- ITALIA Ph+39/051/6516400 Fax+39/051/6516425 E--- mail:[email protected]
Pag. 105
Prisma2-- 11
PART
OPERATION
QUALIF.
DESCRIPTION
Clean and lubricate
LL
Clean with a brush soaked in
petroil and dry with a cotton
rag.
Check and lubricate
LL
Check the play between rack
and pinions; adjust if necessary. Clean the rack and pinions with a brush soaked in
petroil and dry with a cotton
rag.
Guide cleaning
pads
Check
LL
Check that the cleaning pads
are efficient. Change worn
pads.
Self---braking motor
Pneumatic clutch
(Ac motor only)
Check
LL
Check that the air gap is 3---4
tenths of a millimetre.
Belts (AC motor only)
Check
LL
Check belt tension and
tighten as necessary.
PUSHER
Guide
Rack and pinions
PNEUMATIC. EQUIPM.
Hoses
Check
LL
Check the compressed air
supply hoses and ensure that
there are no leaks at the connectors.
ELECTRICAL EQUIPM.
Microswitches
Check
LL
Check that all retaining
screws/bolts are tight especially those on the heads and
actuating levers.
Power supply cables
and cableways
Check
LL
Check that all wires and cables are properly insulated
and fixed to cableways with
clips. Check that cable ways
are tight.
Emergency pushbuttons. Safety devices
Check
LL
Check that these devices are
operating correctly.
GIBENIMPIANTI S.p.A 40065 PIANORO --- BOLOGNA--- ITALIA Ph+39/051/6516400 Fax+39/051/6516425 E--- mail:[email protected]
Pag. 106
Prisma2-- 11
ANNUAL MAINTENANCE
PART
OPERATION
QUALIF.
DESCRIPTION
ALIGNER
Rollers
Check
LL
Check roller wear and change if necessary
LL
Check the wear of the Ferodo
lining and change if necessary.
PUSHER
Self---braking motor
Pneumatic clutch
Check
GIBENIMPIANTI S.p.A 40065 PIANORO --- BOLOGNA--- ITALIA Ph+39/051/6516400 Fax+39/051/6516425 E--- mail:[email protected]
Pag. 107
Prisma2-- 11
11.13. LUBRICATION
This panel saw is fitted with self---lubricating bushes and bearings, oil seals and other devices
which mean that regular lubrication has been reduced to the absolute minimum.
The points which require regular lubrication are indicated on the drawing. Check all lubricant at
regular intervals and top---up if necessary. Only use the lubricants specified in the lubricant table
below.
GIBENIMPIANTI S.p.A 40065 PIANORO --- BOLOGNA--- ITALIA Ph+39/051/6516400 Fax+39/051/6516425 E--- mail:[email protected]
Pag. 108
Prisma2-- 11
LUBRICANT TABLE
LUBRICANT
REDUCERS
MAKE
TYPE
IP
TELESIA COMPOUNT A
TOTAL
TOTAL GREASE
AIR LUBRICATOR
MAKE
TYPE
ROL
LR 15
AGIP
OSO 15
ESSO
SPINESS 34
BP
HP 3
SHELL
VITREA
RACK AND PINIONS
PETROL
GIBENIMPIANTI S.p.A 40065 PIANORO --- BOLOGNA--- ITALIA Ph+39/051/6516400 Fax+39/051/6516425 E--- mail:[email protected]
Pag. 109
Prisma2-- 12
12.
FAULT FINDING
12.1. INTRODUCTION
Prismatic2 SP/SPT model panel saws are controlled by the following devices:
A
B
C
D
---------
An electronic programmer
Programmable Logic Control
Input transducers
Output transducers
A ---
The electronic programmer controls panel cutting only and is used to set cutting
patterns and quantities. The electronic programmer communicates exclusively with the
PLC through its inputs and outputs.In the case of panel saws with pushers powered by D.C.
motors, the electronic programmer also supplies the reference voltage for motor
actuation.This reference voltage determines the acceleration slope, maximum speed and
deceleration slope of the motor.
B ---
The Programmable Logic Control (PLC) controls the movements of the machine. The PLC
handles all the information coming from the machine (from the input transducers and the
electronic programmer) and processes it using its own internal program; it then supplies
the output transducers with the signals necessary for machine operation.
It is clear therefore that a particular output (i.e. a particular machine movement) requires
all the necessary inputs requested by the program in order to function properly.
The electrical circuit diagrams of our machines show all PLC inputs and outputs. Inputs are
identified with the symbol I (Klöckner Möller PLC) and outputs with the symbol Q (Klöckner
Möller PLC). All inputs and outputs have LED located on their related input and output con
nectors to indicate that they are ON (LED on) or OFF (LED off).
In order to check, for example, that a transducer connected to an input is working correctly,
the operator must check the LED for that input and also know whether this LED is normally
on or off to indicate normal operation of the input.For example: the pusher forward stroke
limit switch is a microswitch with a contact which is always ON (i.e. with the contact closed)
except when the pusher has not reached the limit switch.
C ---
The input transducers are devices located at specific positions around the panel saw and
indicate the current positions of the moving parts of the machine ( e.g. pressure beam, saw
carriage, aligner, pusher etc.).
This panel saw uses microswitches and limit switches as input transducers.
The machine also has photocells and other microswitches as transducers to indicate the
presence or absence of material.Finally, on the control panel console there are selector
switches used to select and actuate the various panel saw functions.
GIBENIMPIANTI S.p.A 40065 Pianoro-- Bologna-- ITALIA - Telex 510437 - Fax 051/6516425-- 6516375 - Tel.051/6516400
Pag. 110
Prisma2-- 12
D ---
The output transducers, on the other hand, have the task of moving the various moving
parts of the machine in accordance with the instructions of the machine program selected.
In this case the transducers consist of the coils of solenoid valves and interface relays which
in turn actuate switches, lights and other devices.
It is clear therefore that the machine is completely controlled by the PLC and thus the program
installed on the EPROM of the CPU card. A fault can therefore only be traced by analysing the
status of the input and output LEDS.
ELECTRONIC
PROGRAMMER
PLC
INPUT
TRANSDUCERS
OUTPUT
TRANSDUCERS
GIBENIMPIANTI S.p.A 40065 Pianoro-- Bologna-- ITALIA - Telex 510437 - Fax 051/6516425-- 6516375 - Tel.051/6516400
Pag. 111
Prisma2-- 12
12.2. FAULT FINDING PRISMATIC2 SP / SPT MODEL
SAW BLADES WILL NOT START
Check the following:
Ensure that the main switch is on and that no fuses are broken.
Ensure that there is auxiliary voltage on the electrical panel and at the PLC input. Ensure
that safety devices (emergency bar and blade cover) have not been tripped.
Ensure that magnetothermal switches and their related auxiliary contacts are on.
Carefully check the auxiliary contacts. These enable machine movements and if broken
will stop the machine even though the magnetothermal switches are not broken.
SAW BLADE WILL NOT RISE
The blades can only be raised when the presser beam has been lowered.
If the pressure beam has not been lowered, trace the cause.
(See the section ”PRESSER BEAM WILL NOT RISE” below.)
If the pressure beam has in fact been lowered carry out the checks listed here.
Electrical checks.
If the output of the blade raising solenoid valve is OFF, check the input for the saw carriage
lower position.
If the output is ON, check that voltage is reaching the coil of the blade raising solenoid
valve.
If voltage is reaching the coil then there is a fault with the solenoid valve or the pneumatic
system.
Pneumatic checks
Check that mains air is reaching the blade raising solenoid valve; if this is the case try moving the valve manually (with a small screwdriver) to check that it is operating efficiently.
Check the entire length of the hose to ensure there are no leaks or kinks in the hose.
Check that the washers on the rapid discharge valves (mounted on the blade raising cylinders ) are not broken or worn, check that the adjusters on these valves have not been
screwed down completely.Check that the seals on the blade raising cylinders are not leaking.
Mechanical checks
Ensure that no offcuts or shavings are obstructing free upward movement.Check that the
bearings on the vertical blade guides are not seized.
SAW BLADES WILL NOT LOWER
Check that the blade raising output is OFF (in this situation voltage must not be reaching
the solenoid valve coil). If this is not the case, check the input of the cutting limit switch;
this must be pressed when the carriage comes to the end of its travel.
Pneumatic checks
Check the solenoid valve and the rapid discharge valve as described in the section ”SAW
BLADES WILL NOT RISE” above.
IMPORTANT : When the air is switched off, the blades descend under their own weight;
if there are no mechanical obstructions the blades should be lowered.
Mechanical checks
Ensure that no offcuts or shavings are obstructing free downward movement.Check that
the bearings on the vertical blade guides are not seized.
GIBENIMPIANTI S.p.A 40065 Pianoro-- Bologna-- ITALIA - Telex 510437 - Fax 051/6516425-- 6516375 - Tel.051/6516400
Pag. 112
Prisma2-- 12
BLADE CARRIAGE WILL NOT MOVE FORWARDS
Electrical checks
The blade carriage will only move forward when it is in the raised position and the pressure beam is lowered. Check therefore that these signals are reaching the PLC correctly.
Since there is no check for the ”presser beam down” condition, it is therefore necessary
to check the inverse condition, i.e. that the pressure beam is not up.
Also, check the signal for the maximum cut limit switch.If the input information is correct
then the output for the blade carriage forward movement will be ON.
At this point check the interface relay for the carriage blade forward output.
Next, check the interface relay for this output.
This interface relay enables the inverter which controls the traversing motor.Check the
power supply to the inverter.
Switch on the power supply to the traversing motor.
Pneumatic checks
Ensure that air is reaching the solenoid valve. Check that the solenoid valve is working
correctly (see the test instructions in ”SAW BLADE WILL NOT RISE” above) and that the
adjuster screws on the rapid discharge valves have been opened sufficiently.
Also check that the air supply valve is opened sufficiently.
Mechanical checks
Check that there is oil in the hydraulic variator and that it is the correct grade. Check
that the oil is the correct grade also for the ambient temperature.
BLADE CARRIAGE WILL NOT MOVE BACKWARDS
Electrical checks
The blade carriage is only enabled for the return stroke when it is in the lowered position.
The only input to be checked therefore is the ”blade carriage lower position” input.
At this point the blade carriage return stroke must be ON.
If the carriage (even with the input at ON) will not move backwards, carry out all the electrical, pneumatic, and mechanical checks explained in ”SAW BLADES WILL NOT
LOWER” above.
PRESSURE BEAM WILL NOT RISE
Electrical checks
Pressure beam raising is only enabled when the blade carriage is in its lower position.
In the majority of cases this fault is due to a failure of the blade carriage to return; this
is because both the pressure beam and the blade carriage depend on the ”blade carriage lower position” proximity switch.
If this proximity switch is broken or if its reference bar is too far away, then the machine
will be stopped with the pressure beam in the lower position and the blade carriage at the
forward stroke limit switch.Check that the pressure beam output is OFF.
If the output is OFF, check that the coil of the pressure beam descent solenoid valve
is not receiving voltage.
If, on the other hand, the output is ON check the output for the blade carriage input
as described above.
Pneumatic checks
Ensure that air is reaching the solenoid valve. Check that the solenoid valve is efficient
by operating it manually using a screwdriver.
Check that the piston seals are efficient.
Check that the seal on the rapid discharge valve is not broken and that the adjuster on
this valve has not been screwed down completely.
Mechanical checks
Check that the presser beam is not clogged with dust.
Ensure that the chains are correctly engaging with the pulleys.
GIBENIMPIANTI S.p.A 40065 Pianoro-- Bologna-- ITALIA - Telex 510437 - Fax 051/6516425-- 6516375 - Tel.051/6516400
Pag. 113
Prisma2-- 12
PRESSURE BEAM WILL NOT LOWER
Electrical checks
Check that the presser beam descent output is ON and that voltage is reaching the solenoid valve coil.If this is the case, check the operation of the solenoid valve manually using
a screwdriver.
Pneumatic and mechanical checks
Follow the instructions in ”PRESSER BEAM WILL NOT RISE”.
If the pressure beam descent output is not ON this will only be because the panel saw
main switch is off and the related PLC input is also off.
PUSHER WILL NOT MOVE FORWARDS
Electrical checks
Pusher forward movement is enabled when:
---the blade carriage is in the lower position
---the pressure beam is raised
---the pusher forward stroke limit switch is not pressed
If the pusher will not move forward it will therefore be necessary to check the PLC inputs
for these items.
Forward movement is also prevented when the pusher is 500 mm from the cutting line
and there is no signal from the side aligner in the upper position on the pusher side.
If these inputs are operating correctly ( which means that the ”pusher forward” outputs
must be on ), then check the interface relay and the switches controlling the self---braking
feed motor.
At the same time also check that voltage (as shown on the electrical diagram) reaches the
motor coil and that the motor brake is released.
Mechanical checks
Check belt tension. Check the operation of the pneumatic brake as specified in the GIBEN
instructions.
PUSHER WILL NOT MOVE BACKWARDS
Electrical checks
The only condition which will prevent pusher return is a malfunction of the pusher backwards limit microswitch.
This microswitch must always be ON (i.e. with contacts closed) and will only be OFF
when the pusher actually is at the backwards limit switch (OFF signal).
If the PLC output for pusher backwards is ON but the pusher will not return then check
the interface relay and the control switches for the motor and the brake as explained in
”PUSHER WILL NOT MOVE FORWARDS” above.
Mechanical checks
As explained in ”PUSHER WILL NOT MOVE FORWARDS” above.
SIDE ALIGNER WILL NOT LOWER
Electrical checks
The side aligner will only descend if there is material present and if its input is ON.
If the side aligner descent outputs (operator and pusher sides) are both ON then check that
voltage is reaching the related coils.
If voltage is arriving but the side aligner still will not lower, check the operation of the solenoid valve ( using a screwdriver ) and the pneumatic circuit.
GIBENIMPIANTI S.p.A 40065 Pianoro-- Bologna-- ITALIA - Telex 510437 - Fax 051/6516425-- 6516375 - Tel.051/6516400
Pag. 114
Prisma2-- 12
SIDE ALIGNER WILL NOT MOVE FORWARDS
Electrical checks
The side aligner moves forward after it reaches its lower position; check the input for this
position.
If the input is ON and the side aligner forward output is also ON then check that voltage
is reaching the solenoid valve.
If voltage is arriving but the side aligner still will not lower check the operation of the solenoid valve manually (using a screwdriver) and the pneumatic circuit.
SIDE ALIGNER WILL NOT MOVE BACKWARDS
Electrical checks
The side aligner rises, reaches its upper position and then commences its return stroke.
If the microswitch for the upper position of the side aligner (on both the operator side and
the pusher side) is not pressed then the side aligner will not move backwards.Check the
relevant inputs.
If these inputs are ON then check that voltage is reaching the coil of the solenoid valve
for the aligner return stroke.If the fault persists then check the operation of the solenoid
valve manually (using a screwdriver) and the pneumatic circuit.
GIBENIMPIANTI S.p.A 40065 Pianoro-- Bologna-- ITALIA - Telex 510437 - Fax 051/6516425-- 6516375 - Tel.051/6516400
Pag. 115
Prisma2-- 12
12.3. VARIANTS FOR PRISMATIC SPT MODELS
THE PANEL COUNTER UNIT WILL LOWER
Electrical Checks
The panel counter unit will only be lowered: if there is material on the lifting table; if the
pusher is at its return stroke limit switch; and if, with the machine switched to AUTOMATIC, a ‘raise table’ impulse is given on the selector switch.
If the counter unit will not lower then check these signals on the PLC input card.
Next check that the lower proximity switch for the detector is operating correctly; with the
detector in the upper position, check that the corresponding input is OFF.
Mechanical Checks
If the PLC output for detector lowering is ON then check that voltage is reaching the
coil of the solenoid valve.
If voltage is reaching the coil, check the coil and operate the solenoid valve manually (using
a screwdriver) and check the pneumatic circuit.
THE PANEL COUNTER UNIT WILL NOT RISE
Electrical checks
The panel counter can only rise if it has transmitted the panel stack size to the electronic
programmer and if the programmer has transmitted the STOP TABLE signal to the PLC.
If the table is stopped and the panel counter continues not to rise, check the related outputs on the PLC and check also that voltage is reaching the coil of the solenoid valve.
Pneumatic checks
If voltage is reaching the solenoid valve coil, check the operation of the solenoid valve
manually, check the pneumatic cylinder and the rapid discharge valves.
THE LIFTING TABLE WILL NOT RISE
Electrical Checks
The lifting table will only rise: if there is material on the lifting table; if the pusher is at its
return stroke limit switch; and if, with the machine switched to AUTOMATIC, a ‘raise table’
impulse is given on the selector switch.
Check the PLC input card for these inputs.
Next, check that the PLC output ‘raise the lifting table’ is ON. Check that voltage is reaching the contactor controlling the lifting motor.If the problem persists after these checks,
check that voltage is reaching the lifting motor.
Mechanical Checks
Check that the screw drives are correctly located.
THE LIFTING TABLE WILL NOT LOWER
Electrical Checks
That the lower limit switch of the lifting table is operating correctly and that the related input
on the PLC is ON.
Check the operation of the ‘lower table’ selector and the related input on the PLC.
Check that the ‘lower lifting table’ output is ON and that voltage is reaching the coil of the
raising contactor.
Check that power is reaching the motor and that the motor is functioning correctly.
Mechanical Checks
Ensure that there is nothing under the table; offcuts could be preventing the table
from being lowered.
GIBENIMPIANTI S.p.A 40065 Pianoro-- Bologna-- ITALIA - Telex 510437 - Fax 051/6516425-- 6516375 - Tel.051/6516400
Pag. 116
Prisma2-- 13
13.
OPTIONALS
13.1. POST--FORMING UNIT
GENERAL
This unit is used to cut post ---formed
panels and is an optional which can
also be fitted to machines which are
already installed at clients’ premises.
The post ---forming unit can be used to
cut stacked rectangular panels (max.
stack height 85 mm) or single panels
(max. thickness 50mm) with rounded
ends.
There is a selector switch for this unit
on the mobile control panel; the unit
operates automatically once the cutting cycle has been started.
MAX 85 mm
MAX 50 mm
The scoring saw blade consists of two
coupled blades with the following characteristics:
-----------
external diameter
hole diameter
thickness
thickness of teeth
number of teeth
115 mm
45 mm
1,7 mm
2,2 mm
18
AC045104000
3,9
The combined thickness of the two blades must be 3,9 mm. When the two
blades are sharpened (they must be
sharpened at the same time) their
thickness is reduced.
It will therefore be necessary to compensate for this by adding shims S between the blades.
To order spare blades, please quote code number AC045104000. Spare blades supplied complete with a kit comprising :
--- Nº 3, 0,1 mm shims
--- Nº 3, 0,2 mm shims.
GIBENIMPIANTI S.p.A 40065 PIANORO --- BOLOGNA--- ITALIA Ph+39/051/6516400 Fax+39/051/6516425 E--- mail:[email protected]
Pag. 117
Prisma2-- 13
TENSIONING THE DRIVE BELTS
Check belt tension at regular intervals. The belt should ”gige” by 10 ÷ 15 mm when pressed halfway between the two pulleys. To adjust belt tension:
--- loosen the four nut (1)
--- turn the nuts (2) by equal amounts
--- once the desired tension has been obtained, tighten the nuts (1).
1
2
CHANGING THE BELT
Unscrew the nuts (2) by equal amounts so that the motor moves downwards slackening the belt
which can then be removed. Fit a new belt and tension.
. The tension of a new belt must checked and adjusted after the first 50 working hours and then once a month or every 200 hours thereafter.
CLEANING
Once a week, clean the areas indicated by the arrows (3) using a jet of compressed air.
Accumulations of dust can interfere
with the travel of the frame on the guides.
GIBENIMPIANTI S.p.A 40065 PIANORO --- BOLOGNA--- ITALIA Ph+39/051/6516400 Fax+39/051/6516425 E--- mail:[email protected]
Pag. 118
Prisma2-- 13
CHANGING THE POST ---FORMING BLADES
Open the inspection cover.
The post ---forming unit is already in
position ready for removal of the blades.
Unscrew the bolts (1) and remove the
support (2).
1
2
Insert the pin (3) in the hole in the side of the hub (4) stop it turning. Use the spanner (5) to release
the ring nut (6). Remove the ring nut (6) and the blades (7) taking care not to damage the cutting
edges.
To fit new blades, reverse the procedure just described.
Ensure that all contact surfaces are clean (blade sides,ring nut (6), hub flange) and that the cutting
direction of the teeth is correct.
GIBENIMPIANTI S.p.A 40065 PIANORO --- BOLOGNA--- ITALIA Ph+39/051/6516400 Fax+39/051/6516425 E--- mail:[email protected]
Pag. 119
Prisma2-- 13
ALIGNING THE POST ---FORMING SCORING SAW
The scoring saw of the POST---FORMING unit must be aligned with the
main saw blade to ensure a perfect
post ---forming panel cut. If the scoring
saw is off---centre, the board will be
chipped on the side opposite to the
misalignment.
To centre the post ---forming scoring saw on the main blade, proceed as follows :
--- Loosen the lock nut (1). Use a screwdriver to turn the threaded pin (2) clockwise to move the
scoring saw to the right and anti---clockwise to move the scoring saw to the left. When the adjustment has been completed tighten the lock nut (1).
GIBENIMPIANTI S.p.A 40065 PIANORO --- BOLOGNA--- ITALIA Ph+39/051/6516400 Fax+39/051/6516425 E--- mail:[email protected]
Pag. 120
Prisma2-- 13
13.2. POST--FORMING SCORER ON SAW CARRIAGE
Jump scorer for the execution of chip
free cuts of edge banded with square
(1) or rounded (2) profiles (post and
soft formed). A pre cut of the profile is
carried out during the cutting phase,
significantly speeding up the cycle.
This unit is used to cut post ---formed
panels and is an optional which can
also be fitted to machines which are
already installed at clients’ premises.
The post ---forming unit can be used to
cut stacked rectangular panels (max.
stack height 50 mm) or single panels
(max. thickness 50mm) with rounded
ends.
There is a selector switch for this unit
on the mobile control panel; the unit
operates automatically once the cutting cycle has been started.
The scoring saw blade consists of two
coupled blades with the following characteristics:
--- external diameter
300 mm
--- hole diameter
50 mm
--- number of teeth
2x32
1)
MAX 50 mm
2)
MAX 50 mm
INCISOREX000605
4,2 / 4,6 mm
The combined thickness of the two blades must be 4,2 / 4,6 mm. When the
two blades are sharpened (they must
be sharpened at the same time) their
thickness is reduced.
It will therefore be necessary to compensate for this by adding shims S between the blades.
To order spare blades, please quote
code number INCISOREX000605.
Spare blades supplied complete with
a kit comprising :
--- Nº 4, 0,1 mm shims
GIBENIMPIANTI S.p.A 40065 PIANORO --- BOLOGNA--- ITALIA Ph+39/051/6516400 Fax+39/051/6516425 E--- mail:[email protected]
Pag. 121
Prisma2-- 13
13.3. CLAMP LOCKING DEVICE
The clamp locking device used on
panel saws in the event of hazardous
cutting operations.
1
This unit enables processing of specially sized panels (less than 25 mm)
and prevents the cut panel from bloking the blade during cutting.
Activation and deactivation of this unit
is by means of the pushbutton located
on the control console.
If an MCL programmer is fitted on the
machine, the clamp locking device
must be activated manually as required; on machines fitted with GDrive
programmers, this devices is operated
automatically.
GIBENIMPIANTI S.p.A 40065 PIANORO --- BOLOGNA--- ITALIA Ph+39/051/6516400 Fax+39/051/6516425 E--- mail:[email protected]
Pag. 122