1
Operation and Safety Manual
™
Installing the
slicer
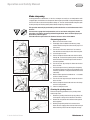
Positioning the slicer
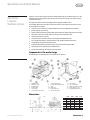
No matter where you put the slicer, you must allow at least as much space as the overall dimensions indicate. Allowing an additional minimum of 20cm either side of the slicer will make access
for cleaning and maintenance easier.
Make sure that the surface that you intend placing the slicer on is solid, flat, level, dry and
smooth. Ideally, the surface should be between 80cm and 90cm high.
Electrical connections
The slicer connects to either a single phase 240 Volts power supply using the power cord supplied. Simply connect the plug on the end of the power cord to the power point.
Cleaning and function check
Before you use the slicer, we recommend that you clean all exposed surfaces with a soft cloth
that has been placed in clean warm water and light detergent and squeezed dry. This will remove
any traces of machine oil, dirt or grit picked up during manufacture or storage.
Before you clean the machine, make sure that the thickness control is set to zero so that
the slicer blade edge is shielded, and make sure that the power is turned off.
Once the slicer is clean you can check that it is functioning correctly.
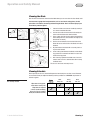
1. Make sure that the slicer is switched off by pressing the
button at the front of the machine.
2. Ensure that all the supplied guards and blade shields are correctly fitted.
3. Check that the meat table carriage moves easily and that it does not stick at any point along
its travel.
If the carriage is difficult to move or seems to stick now and then refer to the Maintenance
section for instructions on lubrication.
4. Check that the meat grip moves freely along the length of its travel
If the meat grip is difficult to move or seems to stick now and then refer to the Maintenance
section for instructions on lubrication.
5. Check that the thickness control operates smoothly. Be sure to return it to the zero mark
before proceeding.
6. Switch the slicer on by pressing the
button at the front of the machine. Immediately the
thickness control will light up, showing power is on, and the blade will spin in an anti-clockwise direction.
7. Switch off the machine by pressing the
button.
Your slicer is now ready to use.
Introduction
L Series Vertical Slicers