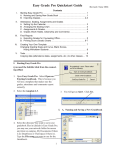
Download GradeCam for Edusoft
Transcript
GradeCam for Edusoft User Manual DRAFT Version 0.4 GradeCam for Edusoft User Manual v01 Contents What is GradeCam? ................................................................................................................................. 3 Installing the GradeCam Plug-in ............................................................................................................... 4 Choosing Your Camera Settings ............................................................................................................... 7 Managing GradeBook Settings ................................................................................................................. 8 Creating a GradeCam Assessment ............................................................................................................ 9 Print GradeCam Answer Sheet ............................................................................................................... 13 Resolve and Align a GradeCam Assessment ........................................................................................... 15 Administering an Assessment with GradeCam in Edusoft ...................................................................... 16 Editing a GradeCam Assessment ............................................................................................................ 18 Editing an Incorrect Answer Selection .................................................................................................... 19 Using GradeCam to Enter Scores into an Electronic Gradebook............................................................. 20 GradeCam Student View ........................................................................................................................ 21 Copyright © 2013 2 GradeCam for Edusoft User Manual v01 What is GradeCam? GradeCam is a feature that has been integrated in Edusoft that allows classroom teachers equipped with the proper camera accessory to instantly scan and grade multiple-choice assessments. The student responses are immediately available for transmission into Edusoft for scoring and reporting. Features Create assessments with GradeCam and save them to Edusoft Use a web or document camera to immediately capture student responses. Use GradeCam to copy and paste scores or grades into a third-party gradebook. Provide students immediate feedback by allowing students to scan their own assignments or assessments using Student View. Create and print answer forms on plain paper. Create a generic answer document and laminate it for use all year long. Copyright © 2013 3 GradeCam for Edusoft User Manual v01 Installing the GradeCam Plug-in Review the information in the following subsections and take all necessary actions BEFORE you begin the installation procedure Before you begin.... GradeCam must be enabled for your district and school. If GradeCam has not been enabled, you will not see the option to download the plug-in, and you will not see the links to create or print a GradeCam assessment. You must have the ability to download and install software on your computer. If you don't have rights to download and install software, the GradeCam plug-in may need to be installed by your system administrator. Recommended Best Practices Before installing the GradeCam plug-in, install any necessary drivers for your web or document camera, then connect your camera and turn it on. Notes: Your camera may not work with GradeCam if multiple tabs, including other camera applications, are open (i.e., Gmail). If you have problems installing the GradeCam plug-in, try closing all open browsers, and then download through a browser with a single tab open. If your camera does not load, try clearing your browser's cache. (For instructions on clearing the web browser cache for your specific version or browser, search your browser's Help menu for "clear cache". After clearing your browser's cache, exit or quit your browser completely before attempting to access the site again.) Copyright © 2013 4 GradeCam for Edusoft User Manual v01 Installation Procedure Follow these steps to download and install the plug-in from the Edusoft interface: 1. Login to Edusoft as a TEACHER. a. Click the Edusoft Admin tab b. In the GradeCam Settings subsection, click Download/Test GradeCam Plugin (refer to the screen capture below). . Copyright © 2013 5 GradeCam for Edusoft User Manual v01 The GradeCam website opens in a separate window (refer to the screen capture below). 2. On the GradeCam website, under Install GradeCam, click the Download button (refer to the screen capture below). Note: A green check mark appears next to each step as it is completed. 3. Install the GradeCam plug-in by running the executable (.exe) file. In the dialog box which appears, click Run (refer to the screen capture below). 4. An on-screen notification will confirm that the plug-in has installed; you then have the option to return to the GradeCam webpage to print and scan a test page. Copyright © 2013 6 GradeCam for Edusoft User Manual v01 Choosing Your Camera Settings Use this function to configure your camera before scanning answer documents with GradeCam. If you have multiple camera drivers installed on your computer, use the Select Camera dropdown menu to choose from the available cameras. Configure your camera before scanning answer documents with GradeCam; the camera image must be right-side up to scan (refer to the screen capture below). To flip the image that appears in the camera window, simply click the Flip Image checkbox. To save your changes, click Save. Copyright © 2013 7 GradeCam for Edusoft User Manual v01 Managing GradeBook Settings GradeCam scores can be transferred to your electronic gradebook. You may find that you need to adjust some default settings to match those of your gradebook; The Edusoft link “GradeBook Settings” allows you to access GradeCam settings, and customize them to match your electronic gradebook. GradeBook settings are accessed from the Admin tab of the Edusoft webpage; in the GradeCam Settings subsection of the menu, click GradeBook Settings (refer to the screen capture below). The GradeBook Settings dialog box appears (refer to the screen capture below). The following options can be set: Name Sorting: Name order on the GradeCam scan page (set to match the order of the names in your gradebook). HotKey: A “hot” key (default is F8) to transfer grades to your gradebook. Speed: Speed of transfer. Return Key: A “return key” to advance to the next line. Missing Assignments: Decide handling of missed assignments (skip or assign zero). Note for MAC users: The function keys on your system must be set to operate as normal function keys. On Mac platforms, you may need to check the system settings for the keyboard. Some keyboards may have a function-key lock that introduces special behavior; if you have problems with gradebook entries, check your function-key settings. Copyright © 2013 8 GradeCam for Edusoft User Manual v01 Creating a GradeCam Assessment In Edusoft, the Create New GradeCam Assessment link is available on both the Teacher Tools tab and the Benchmark Exam tab, in the GradeCam Resources subsection (refer to the screen capture below). Note: You must be logged in as a teacher to use GradeCam; if you are not logged in as a teacher, you will not see the GradeCam options. Follow these steps to create a GradeCam Assessment: 1. In the GradeCam Resources subsection of either the Teacher Tools or the Benchmark Exam tab, click Create New GradeCam Assessment; the Create GradeCam Assessment dialog box appears (refer to the screen capture below). Enter the general test information, and then click the Continue button. If you checked the Align to Standards box, the Align a Test dialog box appears (refer to the screen capture below). If the user does not click the Align to Standards checkbox, skip to step 8. Copyright © 2013 9 GradeCam for Edusoft User Manual v01 2. Navigate to the appropriate standards folders and select the standards using the dropdown menus, then click the Continue button. The dialog box reflects your entries and selections, and provides Properties checkboxes for options. 3. Review the entries and the Properties options, then click the Continue button. A Choose standards category dialog box is presented, with dropdown selection options (refer to the screen capture below). 4. Choose the appropriate selections and click the Continue button; the Choose Specific Standards dropdown then appears (refer to the screen capture below). 5. Select the specific standards and click the Continue button; a confirmation message appears (refer to the screen capture below). Copyright © 2013 10 GradeCam for Edusoft User Manual v01 6. Review the confirmation and either click Add More Standards, or click the Continue button. The Start a section dialog box appears (refer to the screen capture below). 7. Default values are entered for the Section Name, and values for the number of questions has already been determined, as well as the question type. Select the number of possible choices, and the default value for each question, and then click the Continue button. The dialog box displays the list of questions in the section, the standards with which the questions are aligned (or dropdown selection menus), and the possible correct answers for the assessment. 8. Enter the correct answer for each of the questions, and then click the Continue button. The Assessment (or, answer sheet) is displayed for review (refer to the screen capture below). Copyright © 2013 11 GradeCam for Edusoft User Manual v01 9. At this point, clicking the Step 2: Scan bar in the graphic (or, the Next box on the right-hand edge of the screen) will display the Student List. Scanning of the students’ test answer sheets can begin immediately. Copyright © 2013 12 GradeCam for Edusoft User Manual v01 Print GradeCam Answer Sheet In Edusoft, the Print GradeCam Answer Sheet link is available on both the Teacher Tools tab and the Benchmark Exam tab, in the GradeCam Resources subsection (refer to the screen capture below). The Print GradeCam Answer Sheet feature can be used to print a single GradeCam answer sheet (to create an answer key), or answer sheets for an entire class of students (to administer the test). 1. Click the Print GradeCam Answer Sheet link; the Print GradeCam Answer Sheets dialog box appears (refer to the screen capture below). 2. Select the number of questions using the dropdown menu. 3. To modify the number of student ID digits for the form, click the the Form Settings dialog box (refer to the screen capture below). Copyright © 2013 13 icon to display GradeCam for Edusoft User Manual v01 4. Click the “+” box to open the Advanced Options dialog box. Options are available to: a. Create alternating answer choices “Odd” and “Even” rows. b. Change the font size. 5. Choose to either print a blank form (to create an answer key), or to print blank answer sheets for the class. To print answer sheets with pre-filled student names and IDs, from the dropdown menu, select a class. 6. Click the Print button to print your selection. Copyright © 2013 14 GradeCam for Edusoft User Manual v01 Resolve and Align a GradeCam Assessment In Edusoft, the Resolve and Align a GradeCam Assessment link is available on both the Teacher Tools tab and the Benchmark Exam tab, in the GradeCam Resources subsection (refer to the screen capture below). 1. Click on Either the Teacher Tools or Benchmark Tab 2. Click on the Resolve and Align Existing GradeCam Test. You will see all unresolved GradeCam Test that you have scanned in within the last 72 hours. (refer to the screen capture below 3. Click the radio button for the desired test, then click the Resolve Button. The user will then need to follow steps 2-7 listed in the “Creating a GradeCam Assessment” section of this manual, to resolve and align an assessment by assigning standards to the questions. Note: Users cannot change the default point value for each question while resolving and aligning a GradeCam Assessment. The user must resolve and align the assessment first, then they can go in and edit the point value for each question through the standard Edusoft Edit Assessment flow. Copyright © 2013 15 GradeCam for Edusoft User Manual v01 Administering an Assessment with GradeCam in Edusoft Follow these steps to Administer an assessment using GradeCam: 1. Locate and open the Assessment page from the Benchmark or Teacher Tools Tab and click the “View Details” button. 2. Click the Print GC Answer Sheets Button from the Test Details Page (refer to the screen capture below) The answer key and scan window is displayed(refer to the screen capture below). Copyright © 2013 16 GradeCam for Edusoft User Manual v01 3. In the upper-right corner of the answer key, click the Forms box (refer to the screen capture below). 4. In the dialog box which appears, choose a class for which to print answer sheets; optionally, select the sheets to be pre-populated with the student name and ID. 5. Click Print, and then close the print window to return to the answer sheet. 6. Click Scan (refer to the screen capture below); the student list is displayed. 7. From the dropdown list, select the class. 8. Place the first student answer sheet in the camera view, and wait for the confirmation tone; continue scanning answer sheets until the class is complete. 9. When you have completed scanning, click Next or Summary. The GradeCam Item Analysis report is displayed, summarizing how students responded to each question (refer to the screen capture below). 10. Click Done. The scanned results will be reflected in the Edusoft Application. Copyright © 2013 17 GradeCam for Edusoft User Manual v01 Editing a GradeCam Assessment You can edit an assessment created in GradeCam or one that has been enabled for GradeCam. The Standard Edusoft Assessment Editing rules will apply Note: not all fields can be edited. Changes you cannot make: Add sections. Add questions or change the question type, or label. Delete questions. Move questions. Follow these steps to edit the assessment: 1. Search for and open the assessment overview. Select Edit Assessment; the Edit Answer Sheet Assessment page opens. 2. Make the desired changes. 3. Click Save Changes. The answer key and point values can be edited in GradeCam. Follow these steps to edit the answer key or “point value" 1. From the Assessment Overview page, follow the link for Assessment Options. Click the link Begin scanning with GradeCam; the GradeCam answer key is displayed (refer to the screen capture below). 2. 3. 4. 5. Copyright © 2013 Click the bubble to deselect the original answer choice. Click the bubble to select the new answer choice. Type in the new point value (if desired). Click Next. 18 GradeCam for Edusoft User Manual v01 Editing an Incorrect Answer Selection You can edit an incorrect answer selection in an answer key after scanning your student responses. Update and then re-scan the answer key to change incorrect answer(s); the new answer selections will override the earlier answer choices. The students’ raw score and percentage-correct values will also be updated, reflecting the answer key rescan. The assessment will be scored based on the updated and re-scanned answer key (and the number of points assigned per question). Copyright © 2013 19 GradeCam for Edusoft User Manual v01 Using GradeCam to Enter Scores into an Electronic Gradebook GradeCam will transfer scores for the student answer sheets you have scanned into your electronic gradebook. Follow these steps to transfer scores from GradeCam to your gradebook: 1. Open your gradebook and create an assignment. 2. In your gradebook. Position your cursor at the top of the assignment column in the cell where you would enter a score for the first student listed in your gradebook. 3. Press F8 on the keyboard. 4. GradeCam will enter scores for the students whose tests you have scanned. If you need to change GradeCam's defaults, navigate to Admin Tab, then click on the Gradebook Settings Link under GradeCam Settings. Copyright © 2013 20 GradeCam for Edusoft User Manual v01 GradeCam Student View Selecting Student View allows students to scan their own answer documents. Note: Selecting Student View displays the student scoresheet within the Edusoft application. While students are reviewing their own answer documents, ensure they don’t click Edusoft navigation features, and after they review their own performance, they then walk away, rather than linger to view other students’ performance. Follow these steps to use Student View. 1. In the Scan window, click the Student View box (refer to the screen capture below). 2. Have the student place his/her document in the camera viewing area. 3. Tell the students to wait to hear a confirmation sound, indicating that the assessment has scanned. After scanning the answer document, each student can view the number of questions he/she answered correctly, as well as the number missed, and the percentage correct. 4. To exit Student View, press the Escape key on the keyboard. Copyright © 2013 21


