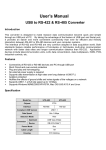
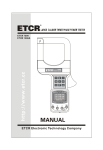
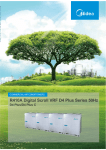
1
Air-cooled screw chiller technical manual MCAC-CTSM-2014-02 Contents I. Safety precautions ...................................................................................................... 2 1. 2. 3. Installation safety considerations............................................................................................ 2 Maintenance safety considerations ......................................................................................... 2 Repair safety considerations ................................................................................................... 3 II. Product ......................................................................................................................... 5 1. 2. 3. 4. 5. 6. 7. 8. 9. General Information................................................................................................................... 5 Feature ........................................................................................................................................ 7 Specification............................................................................................................................... 9 Outline dimension ................................................................................................................... 11 Refrigeration system ............................................................................................................... 19 Key parts list ............................................................................................................................ 21 Application ............................................................................................................................... 22 Capacity table........................................................................................................................... 25 Accessories .............................................................................................................................. 29 III. Controls ...................................................................................................................... 30 1. 2. 3. 4. 5. 6. 7. 8. Control flow chart ..................................................................................................................... 30 Energy adjustment ................................................................................................................... 31 Start/stop process .................................................................................................................... 31 Sensors ..................................................................................................................................... 34 Parts control ............................................................................................................................. 34 HMI operation............................................................................................................................ 41 Control screen menu structure............................................................................................... 56 Safety protection ...................................................................................................................... 57 IV. Electrical control ....................................................................................................... 58 1. Electrical data........................................................................................................................... 58 2. Electrical components introduction ...................................................................................... 58 3. Electrical components parameter setting ............................................................................. 60 4. Field wiring................................................................................................................................ 63 V. Installation.................................................................................................................. 67 1. Unit installation......................................................................................................................... 67 2. Water pipeline system installation ........................................................................................ 70 3. Wiring installation .................................................................................................................... 74 VI. Commissioning.......................................................................................................... 76 1. Pre start-up ............................................................................................................................... 76 2. Start-up ...................................................................................................................................... 79 VII. Maintenance ............................................................................................................... 82 1. Daily maintenance .................................................................................................................... 82 2. Maintenance .............................................................................................................................. 82 VIII. 1. 2. Troubleshooting .................................................................................................. 85 List of failures .......................................................................................................................... 85 Common troubleshooting ....................................................................................................... 88 IX. Appendix 1 ................................................................................................................. 94 Manufacture reserves the right to discontinue, or change at any time, specifications or designs without notices and without incurring obligations. 1 Air-cooled screw chiller technical manual MCAC-CTSM-2014-02 I. Safety precautions Before use, read through the operating instructions to ensure proper using. Please keep it well so that the professional technician can refer to it anytime. 1. Installation safety considerations Access to the unit must be reserved to authorized personnel, qualified and trained in monitoring and maintenance. The access limitation device must be installed by the customer. After the unit has been received, when it is ready to be installed or reinstalled, and before it is started up, it must be inspected for damage. Check that the refrigerant circuit(s) is (are) intact, especially that no components or pipes have shifted (e.g. following a shock). If in doubt, carry out a leak tightness check and verify with the manufacturer that the circuit integrity has not been impaired. If damage is detected upon receipt, immediately file a claim with the shipping company. Strongly recommend employing a specialized company to unload the machine. The units can be lifted with slings, using only the designated lifting points marked on the unit. Use slings with the correct capacity, and always follow the lifting instructions on the certified drawings supplied with the unit. Safety is only guaranteed, if these instructions are carefully followed. If this is not the case, there is a risk of material deterioration and injuries to personnel. Ensure that the valves are correctly installed, before operating the unit. In certain cases the relief valves are installed on isolating valves. These valves are factory-supplied lead-sealed in the open position. This system permits isolation and removal of the relief valves for checking and replacing. The relief valves are designed and installed to ensure protection against overpressure caused by fire. Ensure good ventilation, as accumulation of refrigerant in an enclosed space can displace oxygen and cause asphyxiation or explosions. Inhalation of high concentrations vapour is harmful and may cause heart irregularities, unconsciousness, or death. Vapour is heavier than air and reduces the amount of oxygen available for breathing. These products cause eye and skin irritation. Decomposition products are hazardous 2. Maintenance safety considerations Engineers working on the electric or refrigeration components must be authorized, trained and fully qualified to do so. All refrigerant circuit repairs must be carried out by a trained person, fully qualified to work on these units. He must have been trained and be familiar with the equipment and the installation. All welding operations must be carried out by qualified specialists. Any manipulation (opening or closing) of a shut-off valve must be carried out by a qualified and authorized engineer. These procedures must be carried out with the unit shut-down. NOTE: The unit must never be left shut down with the liquid line valve closed, as liquid refrigerant can be trapped between this valve and the expansion device. (This valve is situated on the liquid line before the filter drier box.) During any handling, maintenance and service operations the engineers working on the unit must be equipped with safety gloves, glasses, shoes and protective clothing. Never work on a unit that is still energized. Never work on any of the electrical components, until the general power supply to the unit has been cut using the disconnect switch(es) in the control box(es). 2 Air-cooled screw chiller technical manual MCAC-CTSM-2014-02 If any maintenance operations are carried out on the unit, lock the power supply circuit in the open position ahead of the machine. If the work is interrupted, always ensure that all circuits are still deenergized before resuming the work. ATTENTION: Even if the unit has been switched off, the power circuit remains energized, unless the unit or circuit disconnect switch is open. Refer to the wiring diagram for further details. Attach appropriate safety labels. At least once a year thoroughly inspect the protection devices (valves). If the machine operates in a corrosive environment, inspect the protection devices more frequently 3. Repair safety considerations All installation parts must be maintained by the personnel in charge, in order to avoid material deterioration and injuries to people. Faults and leaks must be repaired immediately. The authorized technician must have the responsibility to repair the fault immediately. Each time repairs have been carried out to the unit, the operation of the safety devices must be re-checked. If a leak occurs or if the refrigerant becomes contaminated remove the complete charge using a recovery unit and store the refrigerant in mobile containers. Repair the leak detected and recharge the circuit with the total R-134a charge, as indicated on the unit name plate polyolester oil. Do not use oxygen to purge lines or to pressurize a machine for any purpose. Oxygen gas reacts violently with oil, grease, and other common substances. Never exceed the specified maximum operating pressures. Verify the allowable maximum high- and low-side test pressures by checking the instructions in this manual and the pressures given on the unit name plate. Don’t weld or flame cut the refrigerant pipelines or any refrigerant circuit component until all refrigerant (liquid and gas) has been removed from chiller. Traces of vapour should be displaced with dry air nitrogen. Refrigerant in contact with an open flame produces toxic gases. The necessary protection equipment must be available, and appropriate fire extinguishers for the system and the refrigerant type used must be within easy reach. Do not siphon refrigerant. Avoid spilling liquid refrigerant on skin or splashing it into the eyes. Use safety goggles. Wash any spills from the skin with soap and water. If liquid refrigerant enters the eyes, immediately and abundantly flush the eyes with water and consult a doctor. Never apply an open flame or live steam to a refrigerant container. Dangerous overpressure can result. If it is necessary to heat refrigerant, use only warm water. Do not re-use disposable (non-returnable) cylinders or attempt to refill them. It is dangerous and illegal. When cylinders are empty, evacuate the remaining gas pressure, and move the cylinders to a place designated for their recovery. Do not incinerate. Do not attempt to repair or recondition any safety devices when corrosion or build-up of foreign material (rust, dirt, scale, etc.) is found within the valve body or mechanism. If necessary, replace the device. Do not install safety valves in series or backwards. Ensure that you are using the correct refrigerant type before recharging the unit. Charging any refrigerant other than the original charge type (R-134a) will impair machine operation and can even lead to a destruction of the compressors. The compressors operating with this refrigerant type are lubricated with a synthetic ATTENTION: No part of the unit must be used as a walkway, rack or support. Periodically check and repair or if necessary replace any component or piping that shows signs of damage. 3 Air-cooled screw chiller technical manual MCAC-CTSM-2014-02 The refrigerant pipelines can break under the weight and release refrigerant, causing personal injury. Do not climb on a machine. Use a platform, or staging to work at higher levels. Use mechanical lifting equipment (crane, hoist, winch, etc.) to lift or move heavy components. For lighter components, use lifting equipment when there is a risk of slipping or losing your balance. Use only original replacement parts for any repair or component replacement. Consult the list of replacement parts that corresponds to the specification of the original equipment. Do not drain water circuits containing industrial brines, without informing the technical service department at the installation site or a competent body first. Close the entering and leaving water shutoff valves and purge the unit water circuit, before working on the components installed on the circuit (screen filter, pump, water flow switch, etc.). Do not loosen the water box bolts until the water boxes have been completely drained. Periodically inspect all valves, fittings and pipes of the refrigerant and hydronic circuits to ensure that they do not show any corrosion or any signs of leaks. It is recommended to wear ear defenders, when working near the unit and the unit is in operation. 4 Air-cooled screw chiller technical manual MCAC-CTSM-2014-02 II. Product 1. General Information 1). Product line up Model Power Supply Cooling Capacity (kW) Quantity of Compressor Quantity of Fan LSBLGW380/C 380V/3Ph/50Hz 376 1 6 LSBLGW500/C 380V/3Ph/50Hz 496 1 8 LSBLGW600/C 380V/3Ph/50Hz 594 1 10 LSBLGW720/C 380V/3Ph/50Hz 720 1 10 LSBLGW900/C 380V/3Ph/50Hz 902 2 14 LSBLGW1000/C 380V/3Ph/50Hz 996 2 16 LSBLGW1200/C 380V/3Ph/50Hz 1203 2 16 LSBLGW1420/C 380V/3Ph/50Hz 1419 2 20 2). Nomenclature LS B LG W 380 /C C: R134a; omit for R22 380: nominal cooling capability (kW) W: air-cooled condenser LG: Screw compressor B: semi-hermetic compressor LS: water chiller 5 Air-cooled screw chiller technical manual MCAC-CTSM-2014-02 3). External appearance LSBLGW380/C module LSBLGW500/C module LSBLGW600/C LSBLGW720/C module LSBLGW900/C module LSBLGW1000/C LSBLGW1200/C module LSBLGW1420/C module 6 Air-cooled screw chiller technical manual MCAC-CTSM-2014-02 2. Feature Environmental care R134a refrigerant Refrigerant of the HFC group with zero ozone depletion potential. It is environmentally safe and does not have a phase-out date. Economical operation cost Extremely high full load and partial load energy efficiency. New twin-rotor screw compressor equipped with a high-efficiency motor and a variable capacity valve that can adjust the capacity of 25%, 50%, 75% and 100% in 4 stages (Stepless control is optional) and permits exact matching of the cooling capacity to the actual load. Electronic expansion device permits the operation at a lower condensing pressure and improve the utilization of the evaporator heat exchange surface (superheat control). Economizer system with electronic expansion device for increases the cooling capacity. Automatic scheduling of the Chiller's compressors allows the chiller to match the fluctuating cooling load and conserve energy with each unit running at its peak efficiency. Lower operating noise The twin-screw compressor adopts the strong points of gapless-loss, high-efficiency cubage, low-noise, few easy workout parts. Double-wall structure not only compensates the pressure, but also significantly reduces the noise. Cast iron structure of the compressor casing and oil separator can reduce the noise significantly. Low-noise fans, made of a composite material are now even quieter and do not generate intrusive low-frequency noise. Rigid fan mounting avoids start-up noise. Multiple direct drive dynamically balanced propeller fans operate at low tip speeds for maximum 7 Air-cooled screw chiller technical manual MCAC-CTSM-2014-02 efficiency and minimum noise and vibration. A heavy-gauge vinyl-coated fan guard protects each fan. Outstanding reliability Full factory testing of all the units ensures a trouble free start-up. Extensive test makes certain that each safety and operating control is properly adjusted, and operates correctly. The unit has passed full factory test before being delivered to ensure the reliable working on the site. Transport simulation test in the laboratory on a vibrating table. Simple structure, easy Installation The unit can be placed in service after being connected with power supply and water supply during field installation .Standard flange connection and wire mesh to the electrical panel make the installation easy and simple. State of technique, accuracy control The sensors related to control and other assemblies are equipped by factory and strictly tested Intelligent control:The unit is controlled by micro-controller and has the automatic control functions of fault diagnosis, energy management and anti-freezing monitoring, which ensures the high-efficiency operation of the unit, and more convenient in use. The unit with RS485 open protocol communication interface. BMS compatible. The startup and shutdown of each unit is controlled by the host computer, reducing the running cost to the lowest. Complete and safe control system: All electrically control elements are designed and selected with stable quality and reliable function; The unit designed with multiple security measures ensure the safe and reliable running witch including high and low pressure protection, oil pressure difference protection, anti-freezing protection, water flow protection, power protection, overload protection etc. 8 Air-cooled screw chiller technical manual MCAC-CTSM-2014-02 3. Specification Single compressor: LSBLGWXXX/C Cooling capacity Power input COP kW kW 380 376 124 500 496 159 600 594 187 720 720 234 kW/kW 3.03 3.12 3.17 3.07 1 -- 1 -- 1 -- 1 -- Semi-hermetic screw compressor Circuit A Quantity Circuit B Quantity Oil recharge Circuit A Circuit B Refrigerant Circuit A Circuit B Control type Evaporator Water content Water flow Pressure drop Max. design pressure Pipe connection type Water inlet/outlet pipe dim. Condenser Fan Total air flow Fan speed Unit length Unit width Unit height Shipping weight Running weight Safety protection device Type L L Type kg kg Type L m³/h kPa MPa mm Type Quantity m³/h rpm mm mm mm kg kg BSE170 30 -R134a 76 -EXV 222 65.4 39 1 BSE170 BSE170 BSE170 30 30 32 ---R134a R134a R134a 90 105 140 ---EXV EXV EXV Shell and tube heat exchanger(DX) 308 340 520 86 103.2 123.8 54 56 58 1 1 1 Victaulic Coupling 125 125 125 150 Fin-coil Fin-coil Fin-coil Fin-coil 6 8 10 10 23000*6 23000*8 23000*10 23000*10 940 940 940 940 3810 4680 5800 5800 2280 2280 2280 2280 2370 2370 2370 2370 3320 4330 5000 5500 3540 4640 5340 6020 The following safety devices are equipped as standard. High pressure protection; Low pressure protection; Compressor overload protection; Fans overload protection; High discharge temp. protection; Power failure protection; Contactor protection; Water flow protection; Motor protection; Low oil level protection; Differential pressure protection; Note: 1) Nominal cooling capacities are based on the following conditions: Chilled water inlet/outlet temp: 12℃/7℃; Outdoor temp (DB/WB):35℃/24℃. 2) The applicable ambient temperature range of R134a air-cooled screw units is 15℃ ~ 43℃。 3) Water side fouling factor: 0.086m2·°C/kW. 9 Air-cooled screw chiller technical manual MCAC-CTSM-2014-02 Dual compressors: LSBLGWXXX/C Cooling capacity Power input COP kW kW 900 902 285 1000 996 318 1200 1203 381 1420 1419 466 kW/kW 3.16 3.13 3.15 3.04 1 1 1 1 1 1 1 1 Semi-hermetic screw compressor Circuit A Quantity Circuit B Quantity Oil recharge Circuit A Circuit B Refrigerant Circuit A Circuit B Control type Evaporator Water content Water flow Pressure drop Max. pressure Type L L Type kg kg Pipe connection type Water inlet/outlet pipe dim. Condenser Fan Total air flow Fan speed Unit length Unit width Unit height Shipping weight Running weight Victaulic Coupling mm 150 150 200 200 Type Fin-coil Fin-coil Fin-coil Fin-coil Quantity 14 16 16 20 m³/h 23000*14 23000*16 23000*16 23000*20 rpm 940 940 940 940 mm 8800 9640 9640 11700 mm 2280 2280 2280 2280 mm 2430 2430 2430 2430 kg 7750 8900 9100 11100 kg 8370 9500 9870 12010 The following safety devices are equipped as standard. High pressure protection; Low pressure protection; Compressor overload protection; Fans overload protection; High discharge temp. protection; Power failure protection; Contactor protection; Water flow protection; Motor protection; Low oil level protection; Differential pressure protection; Safety protection device Type L m³/h kPa MPa BSE170 30 30 R134a 76 90 EXV 620 154.8 74 1 BSE170 BSE170 30 30 30 30 R134a R134a 90 105 90 105 EXV EXV Shell and tube heat exchanger(DX) 600 770 172 206.4 75 71 1 1 BSE170 32 32 R134a 140 140 EXV 910 244.2 69 1 Note: 1) Nominal cooling capacities are based on the following conditions: Chilled water inlet/outlet temp: 12℃/7℃; Outdoor temp (DB/WB):35℃/24℃. 2) The applicable ambient temperature range of R134a air-cooled screw units is 15℃ ~ 43℃。 3) Water side fouling factor: 0.086m2·°C/kW. 10 Air-cooled screw chiller technical manual MCAC-CTSM-2014-02 4. Outline dimension (1) LSBLGW380/C Unit (mm) Control box Foundation Unit bottom Foundation bolt M14 Weight to be supported by spring isolator(kg) Model LSBLGW380/C A B C D 869 901 869 901 11 Air-cooled screw chiller technical manual MCAC-CTSM-2014-02 (2) LSBLGW500/C Unit (mm) Control box Foundation Unit bottom Foundation bolt M14 Weight to be supported by spring isolator(kg) Model LSBLGW500/C A B C D E F 633 855 832 633 855 832 12 Air-cooled screw chiller technical manual MCAC-CTSM-2014-02 (3) LSBLGW600/C Unit(mm) Control box Foundation Unit bottom Foundation bolt M14 Weight to be supported by spring isolator(kg) Model LSBLGW600/C A B C D E F 815 934 921 815 934 921 13 Air-cooled screw chiller technical manual MCAC-CTSM-2014-02 (4) LSBLGW720/C Unit(mm) Control box Foundation Unit bottom Foundation bolt M14 Weight to be supported by spring isolator(kg) Model LSBLGW720/C A B C D E F G H 687 765 800 758 687 765 800 758 14 Air-cooled screw chiller technical manual MCAC-CTSM-2014-02 (5) LSBLGW900/C unit Unit(mm) Control box Unit bottom Foundation bolt M14 Foundation Weight to be supported by spring isolator(kg) Model LSBLGW900/C A B C D E F G H I J 814 944 947 747 733 814 944 947 747 733 15 Air-cooled screw chiller technical manual MCAC-CTSM-2014-02 (6) LSBLGW1000/C Unit(mm) Control box Unit bottom Foundation bolt M14 Foundation Weight to be supported by spring isolator(kg) Model LSBLGW1000/C A B C D E F G H I J K L 726 912 917 732 731 732 726 912 917 732 731 732 16 Air-cooled screw chiller technical manual MCAC-CTSM-2014-02 (7) LSBLGW1200/C Unit(mm) Control box Unit bottom Foundation bolt M14 Foundation Weight to be supported by spring isolator(kg) Model LSBLGW1200/C A B C D E F G H I J K L 789 912 905 779 777 773 789 912 905 779 777 773 17 Air-cooled screw chiller technical manual (8) LSBLGW1420/C MCAC-CTSM-2014-02 Unit(mm) Control box Unit bottom Foundation bolt M14 Foundation Weight to be supported by spring isolator(kg) Model LSBLGW1420/C A 794 B 925 C 954 D 936 E 800 F 798 G 798 H 794 I 925 J 954 K 936 L 800 M 798 N 798 18 Air-cooled screw chiller technical manual MCAC-CTSM-2014-02 5. Refrigeration system 1). Refrigeration system diagram 380/500/600/720kW 19 Air-cooled screw chiller technical manual MCAC-CTSM-2014-02 900/1000/1200/1420kW 20 Air-cooled screw chiller technical manual MCAC-CTSM-2014-02 6. Key parts list No Name 1 4 Compressor Fan Picture Model CSH series Brand Bitzer Germany RZLC-9.0P3 0S6BGE-C RAINBOW China SRA Series LIANGJIANG China 5 Drier filter 7 Electric expansion valve ETS250 Danfoss Denmark 8 Solenoid valve FDF8MJ-10 STF China 12 Safety valve SFV25 T325(2416+ 187) Danfoss Denmark 21 Air-cooled screw chiller technical manual MCAC-CTSM-2014-02 7. Application 1).Operating Range Content Running range Ambient Temp. 15℃~43℃(T1) Leaving water Temp. 5℃~15℃ Water flow volume Rating flow volume±20% Max inlet/outlet water Temp. difference 8℃ Fouling factor (m2.℃/kW) 0.086 Voltage tolerance Rating Voltage±10% Phase tolerance ±2% Power supply frequency Rating frequency±2% Evaporator max working pressure on water side 1.0MPa Compressor max. start count 4 times/h High corrosive environment and high humidity Environment quality should be avoided. The height of water drainage should not be Drainage system higher than the base of the unit on the spot -25℃~55℃ Storage and transport temperature In + 40℃ does not exceed 50%, + 25℃ no RH(relative air humidity) more than 90% Applicable altitude range: No more than 1000m 2).Water Flow – Water Drop Pressure Curve Balance the chilled water flow through the evaporator. The flow rates must fall between the minimum and maximum values shown in the below table. Flow rates below the minimum values shown will result in laminar flow which will reduce efficiency, cause erratic operation of the electronic expansion valve and could cause low temperature cutouts. On the other hand, flow rates exceeding the maximum values shown can cause erosion on the evaporator water connections and tubes, even piping breaking. Variable chilled water flow through the evaporator while the compressor(s) are operating is not recommended. The chiller control set points are based upon a constant flow and variable temperature. Unit Model MIN. FLOW RATE SIZE 3 m /h LSBLGW380/C MAX. FLOW RATE GPM 3 m /h GPM 53 233 79 348 LSBLGW500/C 69 304 104 458 LSBLGW600/C 83 365 124 546 LSBLGW720/C 99 436 149 656 LSBLGW880/C 124 546 186 819 LSBLGW1000/C 138 608 207 912 22 Air-cooled screw chiller technical manual MCAC-CTSM-2014-02 LSBLGW1200/C 165 727 248 1092 LSBLGW1420/C 196 863 293 1290 23 Air-cooled screw chiller technical manual MCAC-CTSM-2014-02 3).Minimum volume in pipeline system How to calculate minimum volume in pipeline system: W=QgT/CP▽t W — Minimum water volume(kg); Qg — Total cooling/heating capacity of the terminal(kW); T — Thermal stability time requirement,Take(8~10)×60s; CP — Water specific heat at constant pressure,4.187kj/(kg·℃); ▽t — Water temperature fluctuation required value,take 5℃。 For system, Qg is calculated according to the lowest load so that it operates steadily. It can also calculated according to 0.5Q(50%). T takes 8 minutes, the shortest time that the unit running. That is 480s. Cp=4.18kj/kg, ▽t =5℃ According to the above formula, the result is as following: W=0.5Q*480/(4.18*5)=11.48Q kg Note: The above formula is only for reference, different factor should be adopted to suit for different condition. 24 Air-cooled screw chiller technical manual MCAC-CTSM-2014-02 8. Capacity table Model Outlet Temp. 380 500 15 20 Ambient temperature 30 25 35 40 43 Cooling Capacity /kW Power Input /kW Cooling Capacity /kW Power Input /kW Cooling Capacity /kW Power Input /kW Cooling Capacity /kW Power Input /kW Cooling Capacity /kW Power Input /kW Cooling Capacity /kW Power Input /kW Cooling Capacity /kW Power Input /kW 5 6 7 8 9 10 11 12 13 14 15 418.0 436.0 453.9 471.9 489.8 507.8 525.8 543.7 561.7 579.6 597.6 93.0 94.5 96.0 97.5 99.0 100.4 101.9 103.4 104.9 106.4 107.9 397.3 414.3 431.3 448.3 465.3 482.3 499.3 516.3 533.3 550.3 567.3 101.4 103.0 104.5 106.1 107.6 109.2 110.7 112.2 113.8 115.3 116.9 380.6 396.6 412.6 428.6 444.7 460.7 476.7 492.8 508.8 524.8 540.8 108.1 109.7 111.3 112.9 114.5 116.1 117.7 119.3 120.9 122.5 124.1 362.3 376.9 392.0 407.0 422.1 437.2 452.2 467.3 482.3 497.4 512.5 115.7 117.3 119.0 120.6 122.3 123.9 125.6 127.2 128.9 130.6 132.2 349.8 362.5 376.0 390.7 404.8 417.2 433.1 447.2 461.3 475.4 490.5 120.8 122.4 124.0 125.8 127.5 129.0 131.0 132.7 134.4 136.1 138.0 324.3 337.5 350.6 363.8 376.9 390.1 403.2 416.3 429.5 442.6 455.8 130.8 132.6 134.3 136.1 137.8 139.6 141.4 143.1 144.9 146.7 148.4 310.1 322.0 334.5 347.1 359.7 370.7 384.9 397.5 410.0 422.6 436.0 137.1 138.8 140.6 142.4 144.2 145.7 147.7 149.5 151.3 153.1 155.0 5 527.4 120.7 504.5 131.3 489.1 139.4 470.0 148.9 461.8 154.7 431.7 167.6 413.1 175.3 6 552.2 122.1 527.8 132.8 510.5 141.2 489.6 150.7 478.4 156.8 447.9 169.8 428.7 177.8 7 576.9 123.4 551.1 134.3 532.3 143.0 509.9 152.7 496.0 159.0 465.3 172.3 445.4 180.3 8 601.6 124.7 574.5 135.8 554.0 144.7 530.3 154.7 515.6 161.5 482.7 174.7 462.2 182.8 9 626.3 126.0 597.8 137.3 575.8 146.5 550.6 156.7 534.3 163.8 500.1 177.2 478.9 185.3 10 651.0 127.3 621.2 138.8 597.6 148.3 570.9 158.7 550.5 165.8 517.5 179.6 493.2 187.5 11 675.7 128.7 644.5 140.3 619.4 150.0 591.2 160.7 571.5 168.5 535.0 182.1 512.4 190.4 12 700.4 130.0 667.8 141.8 641.2 151.8 611.6 162.7 590.2 170.8 552.4 184.5 529.2 192.9 13 725.0 131.3 691.2 143.3 663.0 153.6 631.9 164.7 608.8 173.2 569.8 187.0 545.9 195.4 14 749.7 132.6 714.5 144.8 684.7 155.3 652.2 166.7 627.4 175.5 587.2 189.4 562.6 197.9 15 774.3 133.9 737.9 146.4 706.9 157.1 673.3 168.8 647.5 178.0 605.9 192.1 580.6 200.6 Note: The inlet/outlet water temperature difference is 5°C. 25 Air-cooled screw chiller technical manual Model Outlet Temp. 600 15 MCAC-CTSM-2014-02 20 Ambient temperature 30 25 35 40 43 Cooling Capacity /kW Power Input /kW Cooling Capacity /kW Power Input /kW Cooling Capacity /kW Power Input /kW Cooling Capacity /kW Power Input /kW Cooling Capacity /kW Power Input /kW Cooling Capacity /kW Power Input /kW Cooling Capacity /kW Power Input /kW 5 6 7 8 9 10 11 12 13 14 15 634.0 653.3 674.0 694.6 715.3 735.9 756.6 777.2 797.9 818.5 840.6 133.6 135.9 138.5 141.2 143.8 146.4 149.1 151.7 154.3 157.0 159.9 609.2 627.9 647.9 667.9 687.9 705.4 727.9 747.9 767.9 787.9 809.2 147.7 150.1 152.8 155.5 158.2 160.2 163.5 166.2 168.9 171.6 174.6 591.0 609.5 629.3 649.1 668.9 688.7 708.5 728.3 748.1 767.9 789.0 159.7 162.0 164.6 167.2 169.8 172.4 175.0 177.6 180.2 182.8 185.4 569.4 587.5 606.9 626.3 645.7 665.1 684.4 703.8 723.2 742.6 763.2 172.7 175.1 177.6 180.2 182.8 185.4 188.0 190.6 193.1 195.7 198.5 557.4 575.2 594.0 614.5 634.1 651.3 673.4 693.1 712.8 732.4 753.5 182.6 184.8 187.0 189.5 191.9 194.0 196.6 199.0 201.3 203.7 206.2 526.4 543.7 562.2 580.7 599.3 617.8 636.3 654.9 673.4 691.9 711.7 198.7 201.2 203.7 206.3 208.8 211.4 213.9 216.5 219.0 221.6 224.3 507.2 524.0 541.8 559.7 577.5 593.2 613.2 631.1 648.9 666.8 685.7 208.6 211.1 213.8 216.5 219.2 221.6 224.5 227.2 229.9 232.6 235.4 5 767.1 177.6 744.1 189.9 717.3 204.2 690.5 218.7 676.9 227.9 636.8 247.1 611.2 259.2 6 790.8 180.9 767.3 193.6 739.5 207.8 711.8 222.1 697.9 230.8 657.0 250.3 630.8 262.6 7 815.4 184.8 791.4 197.4 763.2 211.5 735.1 225.6 720.0 234.0 678.5 253.9 650.9 266.3 8 840.0 188.6 815.5 201.1 787.0 215.1 758.4 229.1 744.1 237.6 699.9 257.5 671.1 269.9 9 864.6 192.4 839.6 204.9 810.7 218.7 781.8 232.6 767.3 241.0 721.3 261.2 691.2 273.5 10 887.3 195.2 863.7 208.6 834.4 222.3 805.1 236.1 787.8 243.7 742.8 264.8 709.9 276.7 11 913.7 200.1 887.8 212.4 858.1 226.0 828.5 239.6 813.5 247.8 764.2 268.4 731.4 280.8 12 938.3 203.9 911.9 216.1 881.8 229.6 851.8 243.1 836.6 251.3 785.7 272.1 751.5 284.5 13 962.9 207.7 936.0 219.9 905.6 233.2 875.1 246.6 859.7 254.7 807.1 275.7 772.5 288.4 987.5 211.6 960.1 223.6 929.3 15 1013.0 215.9 985.2 227.3 954.5 Note: The inlet/outlet water temperature difference is 5°C. 236.8 898.5 250.1 882.8 258.1 828.5 279.4 751.7 268.9 240.5 923.8 253.7 907.4 261.9 851.2 283.4 773.6 272.9 720 14 26 Air-cooled screw chiller technical manual Model Outlet Temp. 900 15 MCAC-CTSM-2014-02 20 Ambient temperature 30 25 35 40 43 5 6 7 8 9 10 11 12 13 14 15 Cooling Capacity /kW 900.8 936.7 976.6 1016.5 1056.4 1096.3 1136.2 1176.1 1216.0 1255.9 1295.8 Power Input /kW 222.9 225.7 227.8 229.8 231.9 234.6 237.2 239.5 241.7 243.6 246.2 Cooling Capacity /kW 886.6 921.0 959.6 998.2 1036.8 1075.4 1114.0 1152.6 1191.2 1229.8 1268.4 Power Input /kW 235.5 236.9 239.5 242.2 244.8 247.5 250.2 252.8 255.5 258.1 262.1 Cooling Capacity /kW 864.6 900.8 938.2 975.6 1013.1 1050.5 1087.9 1125.4 1162.8 1200.2 1237.7 Power Input /kW 249.9 252.9 256.0 259.1 262.2 265.2 268.3 271.4 274.4 277.5 280.6 Cooling Capacity /kW 842.4 878.5 914.6 950.6 986.7 1022.8 1058.9 1095.0 1131.0 1167.1 1203.2 Power Input /kW 267.1 270.2 273.6 277.0 280.5 283.9 287.3 290.7 294.1 297.6 301.3 Cooling Capacity /kW 820.0 854.0 902.0 921.9 955.8 989.8 1023.8 1057.7 1091.7 1125.6 1159.6 Power Input /kW 277.7 281.2 285.0 289.1 293.1 297.1 301.0 305.0 308.9 312.9 317.2 Cooling Capacity /kW 778.6 808.0 837.3 866.7 896.0 925.4 954.8 984.1 1013.5 1042.8 1072.2 Power Input /kW 300.7 304.7 308.8 313.0 317.1 321.2 325.3 329.4 333.6 337.7 341.9 Cooling Capacity /kW 743.9 771.9 800.0 828.1 856.1 884.2 912.3 940.3 968.4 996.5 1024.6 Power Input /kW 314.9 318.8 323.0 327.2 331.4 335.6 339.8 344.0 348.2 352.4 357.0 5 1047.0 244.0 1002.7 264.9 975.8 280.5 940.2 298.8 929.6 309.6 869.0 335.4 831.3 351.3 6 1107.1 246.2 1058.0 267.4 1024.5 283.6 983.2 302.4 961.8 313.7 900.6 339.9 861.2 355.8 7 1156.0 248.3 1104.1 269.9 1067.2 286.8 1022.8 306.1 996.0 318.0 934.0 344.6 893.4 360.7 8 1204.9 250.3 1150.3 272.4 1110.0 290.0 1062.5 309.8 1033.4 322.8 967.5 349.4 925.5 365.5 9 1253.8 252.4 1196.4 274.9 1152.7 293.1 1102.1 313.5 1069.2 327.3 1001.0 354.2 957.7 370.4 10 1302.8 254.5 1260.9 277.5 1195.5 296.3 1141.8 317.2 1105.0 331.9 1034.4 358.9 985.3 374.5 11 1351.7 256.6 1288.6 280.0 1238.2 299.5 1181.4 320.9 1140.9 336.4 1067.9 363.7 1022.0 380.2 12 1400.6 258.7 1334.8 282.5 1280.9 302.6 1221.1 324.6 1176.7 341.0 1101.4 368.4 1054.1 385.0 13 1449.6 260.8 1380.9 285.0 1323.7 305.8 1260.7 328.3 1212.5 345.5 1134.8 373.2 1086.3 389.9 1498.5 262.9 1427.0 287.5 1366.4 15 1536.3 264.9 1464.0 290.1 1403.2 Note: The inlet/outlet water temperature difference is 5°C. 308.9 1300.4 331.9 1248.3 350.1 1168.3 378.0 1118.4 394.8 312.1 1336.7 335.8 1286.7 355.0 1203.6 383.0 1152.8 400.1 1000 14 27 Air-cooled screw chiller technical manual Model Outlet Temp. 1200 15 MCAC-CTSM-2014-02 20 Ambient temperature 30 25 35 40 43 Cooling Capacity /kW Power Input /kW Cooling Capacity /kW Power Input /kW Cooling Capacity /kW Power Input /kW Cooling Capacity /kW Power Input /kW Cooling Capacity /kW Power Input /kW Cooling Capacity /kW Power Input /kW Cooling Capacity /kW Power Input /kW 5 6 7 8 9 10 11 12 13 14 15 1316.6 1367.3 1417.8 1468.3 1518.8 1569.3 1619.8 1670.3 1720.8 1771.3 1821.6 271.8 274.4 276.9 279.4 282.0 284.5 287.0 289.6 292.1 294.7 297.1 1260.9 1308.5 1356.1 1403.7 1451.3 1498.9 1546.5 1594.1 1641.7 1689.3 1736.9 299.9 303.0 306.1 309.2 312.3 315.4 318.4 321.5 324.6 327.7 330.8 1216.0 1259.8 1304.3 1348.8 1393.3 1437.8 1482.3 1526.8 1571.3 1615.8 1661.0 323.3 327.2 331.0 334.9 338.7 342.6 346.5 350.3 354.2 358.0 361.9 1165.7 1206.0 1247.5 1289.0 1330.5 1372.0 1413.5 1455.0 1496.5 1538.0 1580.7 350.3 354.6 359.1 363.6 368.1 372.7 377.2 381.7 386.2 390.8 395.5 1131.1 1166.1 1203.0 1242.7 1281.0 1315.1 1357.6 1395.8 1434.1 1472.4 1513.1 370.7 375.7 381.0 386.8 392.3 397.1 403.3 408.9 414.4 419.9 425.8 1065.1 1098.5 1134.0 1169.5 1205.0 1240.5 1276.0 1311.5 1347.0 1382.5 1420.0 402.6 408.1 413.9 419.7 425.6 431.4 437.3 443.1 449.0 454.8 461.0 1024.8 1056.8 1090.7 1124.5 1158.4 1188.5 1226.2 1260.0 1293.9 1327.8 1363.6 422.0 427.7 433.7 439.7 445.8 451.1 457.8 463.8 469.9 475.9 482.3 5 1516.8 353.6 1469.6 378.0 1416.0 406.7 1362.3 435.6 1331.3 453.7 1255.0 492.3 1206.7 516.6 6 1562.6 360.0 1515.5 385.4 1460.4 413.8 1405.3 442.3 1375.8 459.7 1296.5 498.7 1245.4 523.4 7 1610.9 367.5 1563.1 392.7 1507.4 421.0 1451.6 449.2 1419.0 466.0 1339.2 505.9 1285.2 530.6 8 1659.2 375.0 1610.7 400.1 1554.3 428.1 1497.9 456.1 1468.8 473.3 1381.8 513.1 1325.0 537.8 9 1707.6 382.5 1658.3 407.5 1601.3 435.3 1544.2 463.0 1515.3 480.2 1424.4 520.3 1364.7 545.0 10 1755.9 390.0 1705.9 414.9 1648.2 442.4 1590.5 469.9 1561.8 487.0 1467.1 527.5 1404.5 552.1 11 1804.2 397.5 1753.5 422.2 1695.2 449.6 1636.7 476.9 1608.3 493.8 1509.7 534.7 1444.2 559.3 12 1852.6 405.0 1801.1 429.6 1742.1 456.7 1683.0 483.8 1654.8 500.7 1552.3 541.9 1484.0 566.5 13 1900.9 412.5 1848.7 437.0 1789.1 463.8 1729.3 490.7 1701.3 507.5 1595.0 549.1 1525.4 574.3 1949.2 420.0 1896.3 444.3 1836.0 15 2000.1 428.5 1945.7 451.7 1885.5 Note: The inlet/outlet water temperature difference is 5°C. 471.0 1775.6 497.6 1747.8 514.3 1637.6 556.3 1491.7 535.5 478.1 1825.3 504.8 1794.5 521.6 1681.4 564.3 1538.1 543.9 1420 14 28 Air-cooled screw chiller technical manual MCAC-CTSM-2014-01 9. Accessories Standard accessories NO. Name Quantity 1 Qualified certification 1 2 User manual 1 3 Water flow switch connectors 1 4 Packing list 1 Optional accessories No. Name Model Introduction Picture Installed on evaporator outlet pipe to prevent heat exchange pipe from frost 1 Water flow switch WFS-1001-H crack. (Honeywell) To avoid vibration and noise, it must be used between base and foundation 2 Vibration damper MHD Series when install the unit. Can be installed in the control room. Through the cable connected to the unit 3 Remote cabinet control YCKZ-P touch screen, it can display all states information and complete all the operations of unit (startup/shutdown, error confirm, etc.) 29 Air-cooled screw chiller technical manual MCAC-CTSM-2014-01 III. Controls 1. Control flow chart 2 Compressors Double-Head 380VAC 3P+N+PE M ~ M ~ Moulded Case Circuit Breaker Moulded Case Circuit Breaker Phase Sequence Protector Miniature Circuit Breaker Compressor Thermorelay Compressor Thermorelay Compressor Contactor Compressor Star-Delta Start Contactor 星三角启动 Star-Delta Start Main base HMI 6 to 10 Fans 14 to 20 Fans Double-Head M ~ M ~ Fan Thermorelay Fan Thermorelay Fan Contactor Fan Contactor controller Terminal for External Signal e.g. Temp. Pressure Terminal for Output Action e.g. Solenoid Valve Main base controller gathers signals through input terminals, such as pressure, temperature and the state of protection switches and ensures unit’s current condition. At the same time, according to input signal from HMI, such as starting signal, controller performs the logical operations and outputs signals. These signals act on components, time relay, contactors and so on. HMI+ Main base controller: 30 Air-cooled screw chiller technical manual 2. MCAC-CTSM-2014-01 Energy adjustment The unit can adjust capacity by chilled water, please see above picture. Energy adjustment is districted when starting high pressure is too high. High pressure unloading 17Bar 15Bar 3. Normal adjusting Start/stop process 31 Air-cooled screw chiller technical manual MCAC-CTSM-2014-01 1).Cooling start Power-on YES Clear failure Detect fault NO Start on Pump on Water flow switch protection YES Stop.Clear failure NO Water temp is ok.Oil heating time is enough. Stop time is enough. NO Stand by YES Fan motor on Compressor 25% SV on Compressor Y-△ start Compressor 50% SV on 25% SV off Compressor 75% SV on 50% SV off Loading Energy adjust Stand by Unload Water temp.is ok. Stop 32 Air-cooled screw chiller technical manual 2).Cooling stop MCAC-CTSM-2014-01 stop NO Running is enough. time Stand by YES Unload to 50% step Unload to 25% step Compressor off Fan motor off Compressor 25%SV off Chilled pump off 33 Air-cooled screw chiller technical manual 4. MCAC-CTSM-2014-02 Sensors 1). Temperature sensors The temp. sensors use NTC thermistors, they including chilled leaving water temp., chilled entering water temp., ambient temp., condenser fin temp., discharge temp., EXV suction temp.. NO. Name Type Remark 1 Chilled entering water temp. NTC,10k@25℃ Emerson 2 Chilled leaving water temp. NTC,10k@25℃ Emerson 3 Ambient temp. NTC,10k@25℃ 4 Discharge temp. NTC,5k@90℃ 5 EXV suction temp. NTC,10k@25℃ CGQ-PQI Carel 2). Pressure sensors The pressure sensors are pressure transmitters, including high pressure, low pressure, EXV suction pressure transmitters. Danfoss AKS3000 are used. Water temp. thermistor 5. Ambient or pipe temp. thermistor Pressure transmitter AK3000 Parts control 1). Oil heater control In unit sand by period, oil heater is energized to keep normal oil temperature. When unit starts, it is turned off. Oil heating time limits: When cooling water inlet temperature >= 35°C (real time value), oil heating time for first startup is 0.5h. If power down happens during operation and downtime is less than 8hrs, no heating time delay is needed when unit restarts. If it exceeds 8hrs, 0.5h heating time is need. When cooling water inlet temperature >= 30°C (real time value), oil heating time for first startup is 1h. If power down happens during operation and downtime is less than 5hrs, no heating time delay is needed when unit restarts. If it exceeds 5hrs, 1h heating time is need. When cooling water inlet temperature >= 25°C (real time value), oil heating time for first startup is 2hrs. If power down happens during operation and downtime is less than 3hrs, no heating time delay is needed when unit restarts. If it exceeds 3hrs, 0.5h heating time is need. If it exceeds 5hrs, 2hrs heating time is need. 34 Air-cooled screw chiller technical manual MCAC-CTSM-2014-02 2). Fan Control The number of operating fan as required is according to the discharge pressure. For example, for LSBLGW500/C, there are 8 fans, divided into 5 groups. Opening condition as follow: 3). Solenoid valve control a. Compressor suction injection solenoid valve control Compressor suction injection solenoid valve control is opened when running discharge temperature is higher than setting value(default 100℃).it is closed when discharge temperature is lower than setting value(default 90℃). b. Compressor central injection solenoid valve control Compressor central injection solenoid valve control is opened when running discharge temperature is higher than setting value(default 85℃).it is closed when discharge temperature is lower than setting value(default 75℃). c. Economizer solenoid valve control Economizer solenoid valve is opened after unit started. 4). Pressure sensor control a. High pressure control High pressure stop 18Bar 17Bar unloading 14Bar 15Bar Normal adjusting 35 Air-cooled screw chiller technical manual MCAC-CTSM-2014-02 b. Low pressure control low pressure on 1.5Bar 1Bar stop 5). EXV controller control a. EXV controller wiring principle 24V DC Alarm output to controller CAREL EXV controller EVD Start/stop relay From controller Suction pressure transmitter EXV Suction temp. thermistor EXV controller is started by main base controller.it detects suction pressure and suction temperature and calculate suction superheat. Then it control EXV opening depending on super heat. If it is wrong, EXV will output alarm signal to main base controller. b. Controller display The interface of EXV controller can not display and set parameter on unit, it only displays running status. LED Extinguish OPEN Light Can be connected to the network Open the valve - Flicker Communication failure Disable the drive CLOSE Close the valve - Disable the drive Activate the alarm The drive is not connected to power supply - NET Drive power Not connected - If parameters need to be displayed and set, the interface should be changed. 36 Air-cooled screw chiller technical manual MCAC-CTSM-2014-02 Remove cover Change display Display Button Prg Esc UP/DOWN Enter 1 Display suction superheat 2 Display EXV opening 3 Relay output status 4 Alarm 5 Start of the protection 6 Control state Function Open the display screen, enter the password to enter the programming mode • In the alarm state, the display alerts the queue; • When the "producer" level under the rolling parameters, the display shows the interface • To exit the programming (maintenance / producer) and display mode; • set a parameter, the exit without saving changes • Display screen navigation; • Increase / decrease the value • from the parameter setting mode, the display switches to • Confirm the list of parameters and return the value 37 Air-cooled screw chiller technical manual Running status MCAC-CTSM-2014-02 Display all status Press Press Esc button b. Controller parameter checking and changing. Checking or changing repair parameters step: ①Press one or more Esc to switch to the standard display interface; ②Press Prg: display interface input password; ③Press ENTER input repair level password: 22, starting from the rightmost digit, each input a digital, confirm with ENTER ; ④ If the password is correct, will display the first parameters can be modified: network address; ⑤Press UP/DOWN to select parameters should be set up; ⑥Press ENTER to move to the parameter value; ⑦ Press UP/DOWN to modify the parameter value; ⑧Press ENTER to save the new parameter values; ⑨Repeat the above 5, 6, 7, 8 step change other parameters; ⑩ Press Esc to exit the repair parameters modify the program. 38 Air-cooled screw chiller technical manual MCAC-CTSM-2014-02 The following shows the detailed settings: 13 pages Drive hardware configuration 1/13 Drive hardware configuration Refrigerant type R134a Valve type Danfoss ETS 250 2/13 Drive hardware configuration Type of probe S1 User-defined Unit type Fin coil evaporator air-conditioner 3/13 Drive hardware configuration Type of probe S1 NTC Carel Auxiliary control type Disabled 4/13 Drive hardware configuration Type of probe S3 Unused Relay configuration Generate alarms 5/13 Drive hardware configuration Type of probe S4 Unused DI1 configuration Start/stop SH control 6/13 Drive hardware configuration Language Chinese DI2 configuration Disabled 7/13 Control parameter settings Overheat degree Valve opening upon start Pre-positioning duration 8/13 6.0K 50% 30s Control parameter settings Hot air by-pass temperature Hot air by-pass temperature EPR back pressure 9/13 ------- Control parameter settings LowSH LOP MOP 10/13 2.0K -50°C 50°C 11/13 0 Control parameter settings HiTcond threshold Constant temperature adjustment point Constant temperature adjustment variance 12/13 80.0°C Network address 198 Control parameter settings Enable manual valve positioning Manually set the valve position 0stp Control parameter settings DC power supply mode 0°C 0.1K 13/13 1 39 Air-cooled screw chiller technical manual MCAC-CTSM-2014-02 Checking or changing manufacturer parameters step: ①Press one or more Esc to switch to the standard display interface; ②Press Prg: display interface input password; ③Press ENTER input manufacturer password, starting from the right most digit, each input a digital, confirm with ENTER ; ④ If the password is correct, it will display the following parameter type list: - Configuration parameters - Sensor parameters - Control parameters - The special parameters - Alert configuration parameters - Valve parameters ⑤Press UP/DOWN button to select the category, and then press ENTER to enter the first class number ⑥Press UP/DOWN to select parameters to be set, and then press ENTER to move to the parameter value; ⑦Press UP/DOWN to modify the parameter value; ⑧Press ENTER to save the new parameter values; ⑨Repeat the above 6, 7, 8 step change other parameters; ⑩ Press “Esc” to exit the manufacturer parameter modification program. Unit Type Refrigerant Setting parameters R134a Valve Danfoss ETS250 Sensor S1 4-20 mA; 0-10.0 V Control mode shell-and-tube unit Overheat degree Valve opening upon start Check parameters 380,500,600,720,900,1000, 1200,1420 Automatically brought out by subsequently set parameters 6 6 Valve opening in standby state 0 Power supply mode Enable manual valve positioning 1 Auxiliary control Selected based on the refrigerant type of the unit 50% Pre-positioning delay Manually set the valve position Remarks Available values include: (1) 0: 24 V AC (2) 1: 24 V DC; default value: 0 0 0 Invalid 40 Air-cooled screw chiller technical manual Relay settings DI2 settings Alarm relay Invalid Variable 1 on the display Overheat degree Variable 2 on the display Valve opened Sensor S1 alarm management Valve at a fixed position Sensor S2 alarm management Valve at a fixed position S1: calibration offset 0 S1: calibration gain, 4–20 mA 1 Pressure sensor S1: minimum value 0 Set based on the actual sensor Pressure sensor S1: maximum value Pressure sensor S1: minimum value for alarmssensor S1: maximum value Pressure 30 Set based on the actual sensor 0 Set based on the actual sensor 30 Set based on the actual sensor for alarms Sensor S2 Language Measurement unit CAREL NTC English °C (K), bar g PID: proportional gain 80 PID: integration time 40 PID: derivation time 1.5 350 Minimum number of valve steps 6. MCAC-CTSM-2014-02 Maximum number of valve steps Number of steps for valve closing 3810 Valve rate Low SH protection: threshold 250 Low SH protection: integration time 2.5 LOP protection: threshold -50 3970 1 LOP protection: integration time 4 MOP protection: threshold 50 MOP protection: integration time Low overheat degree alarm delay (Low SH, 0 = no alarm) Low evaporation temperature alarm delay (LOP, 0 = no alarm) High evaporation temperature alarm delay (MOP, 0 = no alarm) Low air suction temperature alarm threshold Low air suction temperature alarm delay (0 = no alarm) 10 300 300 600 -50 300 HMI operation 1) Initial Startup Before power up for the first time,make sure that the wiring is firm between the control box and the main switch , the insulation resistances reach the requirements ,and the earth wire has been properly installed. The wiring might be loose due to the factors such as long-distance transport. Carry out complete inspection for the bolts of all wiring terminals for looseness 。 Be sure that the distribution capacity is compliant with the power of the unit and the diameter of the selected cable can bear the maximum working current of the unit. 1) Inspect whether the red emergency stop button on the control box is in natural state. Introduction of Control Screen: 41 Air-cooled screw chiller technical manual MCAC-CTSM-2014-02 1 2 4 3 1) 【Home page】 Power indicator (yellow), which is on when display is powered on; it is off when powered off. 2) Status indicator (green), which flashes at low frequency when display is normally operative, otherwise it is off. 3) Communication indicator (red), which flashes at high frequency when display and controller communicate normally, otherwise it is off. 4) Controller and touch screen procedure version: showing the number of controller and touch screen procedure version used by the current unit. Basic Interface and Operations: Indicate that the system is initializing. (last about 30 seconds , flash After the system initializing is completed, please clink on button, and the “Password Input” dialog will be popped up, please input the User Password(58806) or User Manage Password (40828),and click “ENTER” into the next interface (Mode Setting Page) 42 Air-cooled screw chiller technical manual MCAC-CTSM-2014-02 Mode setting page Password input page 1 2 3 4 【Mode setting page】 Control mode and working mode are to be set in this page: 1. Control mode and running mode which have been selected currently for units are displayed here, and this position will correspondingly vary according to the choices of customers when selection of modes is changed. 2. Selection of unit control modes, including three modes: “LOCAL”, “REMOTE”, “TIMED”, i.e. local control, remote control, timing control. 3. Selection of unit operation modes, including three modes: “PUMP”, “COOLING”, i.e. pump mode, cooling mode. 4. Click on “PgDn” to enter the next page (Main Page). 5. Click on “BACK”, return to the homepage of units. Note: ① The control mode and running mode can be selected optionally in standby status, while only the control mode can be switched in running status. ② Control Mode: The selection of the ways of Unit starting/stopping. “LOCAL” indicates you can only start or stop the unit through “Start/Stop” button in touch screen. “REMOTE” indicates you can only achieve the unit starting or stopping though the “Remote Start” and “Remote Stop” hardware interfaces; “TIMED” indicates the unit can achieve timing start/stop according to the time set by the user. Main Page 43 Air-cooled screw chiller technical manual MCAC-CTSM-2014-02 5 1 2 6 3 4 7 1. 8 9 10 11 【Main page】 System Status: Current system status of units is displayed here. The status of system possibly displayed is as follows: 1) Standby status: in normal condition, displaying “Standby status” after the unit is powered on. 2) Running status: indicating that starting of unit compressors has been finished (entering the running status after double-head Start of one compressor), and it has entered the process of automatic energy adjustment from this point. 3) Pause status:The unit enters “Pause” status when the current detection water temperature (chilled outlet water temperature in single-unit or chilled inlet water temperature in Multi-units) is lower than the setting temperature of unit pause. The compressor start to run until the current detection temperature is higher than the setting temperature of compressor start, then the unit enter “Running” status. 4) Shutting down status: the status display “shutting down” after the unit has been confirmed to execute shutdown action. After finished, the unit enters “Standby” Status. 5) Protection status: indicating that the unit is in a failure status currently, click on "alarm information" to see alarm details. 2. Control mode and running mode: the current mode will be displayed here. For example, the current page displays that the unit is in a “LOCAL MODE”, and the running mode is “PUMP MODE”. 3. Detection Mode: Leaving water control is by default only in the single-unit mode, with entering water control not allowed; entering water control is by default in the multi-units combination mode, with setting of leaving water control not allowed。 4. Combination Mode: indicates “Single-unit” when the unit isn’t in the case of multi-combination control and indicates “Multi-Units” when the unit is in Multi-combination control. (Note: When the system has only one unit, please don’t set to multi-unit control) 5. This position is the unit alarm display area, and alarm information of failure content will be displayed here in a mobile mode in case of any failure in units. 6. Functional key area of units. It has the functional keys of “SETTING”, “ALARM”, “STATUS” and “Multi-Unit” through which different operating interfaces are accessible. Introduction of their functions will be detailed hereafter. 7. Start is required upon completion of unit set-up, directly click on “START” button on the lower left, and 44 Air-cooled screw chiller technical manual MCAC-CTSM-2014-02 the following dialog box will be popped up at this moment: click on “CANCEL” if you don’t expect to execute the start. 【Ensure unit start-up】 8. The sign “Failure to start, please check the status” will appear when the conditions of compressor stating can’t be required. 9. There is a rotate button with a key beside the touch screen. When the units need to be maintained by the user or after sale service personnel while expecting to see parameters from the touch screen, the user may rotate the button to the service point, and “System under maintenance, please don’t start up!” will be displayed below main page at that moment. Start operation is not allowed at this moment. Any action of maintenance or power operation shall not be taken in the absence of personnel who have been specially trained and certified! 10. Help information, abbreviation of words in units will be explained in detail in help interface. 11. Click on “BACK”, return to previous page of units------mode selection interface. Note: button disappear when the combination mode is “Single-unit”. Click button to query the current unit status. Starting Operation The system is in pause state when the water pump has been completed to open, but the compressor is unable to start because some other factors can’t satisfy the condition of compressor starting, the interface indicates “Failure to start, please check the status”. The starting conditions include oil heating time 、restart delay、the temperature of compressor starting. In this case, only when all of the conditions have been meet, the unit starts to operate the compressor, otherwise the sign “Failure to start, please check the status” will keep displaying in the main page. Note: Clicking on button is invalid when the unit is in failure. The unit can start normally only when all of the alarm have been eliminated and reset manually on the touch screen interface. When the current ambient temperature is beyond the allowed running range, the below page will be popped up: 45 Air-cooled screw chiller technical manual MCAC-CTSM-2014-02 If the current temperature return to the rage, click to the“OK”and the unit will start to run normally. Shutting down operation Click on button , and the “Confirm Shutdown” dialog will be popped up. Click on “Confirm” if you ensure execution of Shutdown action, the system status indicates “Shutting down”. (Note: The system status indicates “shutting down” even the requirements of shutting down the compressor are not meet. The unit will execute shutdown action automatically after all of the requirements have been satisfied. ) The action of 4 functional keys in main page will be detailed in subsequent sections: Setting Click on in main page to enter the password page. Click on the dialog box of password input, an input keyboard will be popped up in the interface, input user manage password “ 40828”, then click on “Enter” in numeric keyboard, the dialog box disappears, click on “ENTER” to enter “User Parameter Setting Page”. 【User parameter setting page 】 46 Air-cooled screw chiller technical manual MCAC-CTSM-2014-02 Password error page “Password Error Page” will be popped up when the password is wrong, click on button to return “Password Input Interface”, input the password again to enter the next page. Note: ① “Max” in the upper left indicates the upper limit of the setting parameter; “Min” in the upper right indicates the lower limit. ② “Automatic On/Off”: Only displaying under Timed mode. Explanation: ① Target Temp. (Chilled Leaving Water): The target temperature of the chiller leaving water ② Temp. / Compressor start (Chilled Leaving Water): One of the compressor starting conditions required to be achieved for the chilled leaving water temperature. The compressor can start only at the current chilled leaving water temperature > the setting value in cooling mode, or the current chilled leaving water temperature < the setting value in heating mode. ③ Temp. Adjustment Period: The time interval between two temperature detections. Clock setting 47 Air-cooled screw chiller technical manual MCAC-CTSM-2014-02 Manual input is allowed Clock setting Click on the numerical box, the numeric keyboard will appear, input the time, click “ENT” to save and take effect. Click “ESC” to cancel the input value. Note: Please pay special attention in setting of time and date to the fact that setting of non-existent date or time is not allowed, and we assume no liability or responsibility for setting of non-existent date or time and consequence resulting from this setting. Adjust screen User can increase and reduce the brightness and contrast of screen by clicking on “+”and “-” in this page. User can also open and close the keypad tone of screen by clicking on “ON” and “OFF”. User can modify the time of backlight by clicking on the numeric box following the time of backlight. Electric control capacity displays the battery capacity of PLC whose battery is used for supplying power for PLC interior time in the case of failure to engage PLC. Reset of PLC interior event will be resulted from too long power-fail time of PLC module without battery. Automatic On/Off If the automatic on/off function is needed, please switch to “TIMED” mode in control mode (as shown in Picture 2) firstly, then enter user parameters setting page, click on button to enter the following page ,and set the starting times and shutdown times. 48 Air-cooled screw chiller technical manual MCAC-CTSM-2014-02 Manual Input Is allowed Inching switch Automatic On/Off setting Any time every day in a week can be selected, and the units will be started or stopped at the time points. When a period of continuous running time (for example from 10:00 Tuesday to 16:00 Thursday) is necessary, you can set the time 10:00 in starting time and 0:00 in shutdown time on Tuesday and click on “ to switch to click on “ , set the time 0:00 in starting time and 16:00 in shutdown time on Thursday and to switch to ,all of the others time buttons are . Pay attention to that the starting time must be before the shutdown time. Since system interior time is used for timing start / stop, please draw attention to check whether the time of the system is correct when you are using this function. Comm. Setting Click on to enter the below page: Note: “1#Comp. ON” “2#Comp. ON” only appear in dual-compressors units. ① Mult-Units: When the unit need to be multiple controlled, please contact the after-sale service engineers to do settings of the unit. After setting well, press the button, it will turn to , then the number of multi units should be set according to the practical situation. ② “1#comp. on” “2#comp. on”: No.1 or No.2 compressor can be selected to work or not, when the compressor meet the conditions it will shut down refer to the stop progress if user want to stop one compressor. Read serial pot information 49 Air-cooled screw chiller technical manual Click on MCAC-CTSM-2014-02 to read serial port information when the unit need to be multiple controlled. Status Click on in main page to check the current unit status information. Status information The upper left in the page display the refrigerant type; the upper right display the station number address, the station number of master is set to 1. Note: To start up, following conditions are required: ① “Restart Delaying” need to display “NO” ,if “YES”, it indicates the delaying period has not achieved. ② ”Water Temp. Allow Compressor Start” need to display “YES”, if “NO”, it indicates the current temperature is not able to meet the compressor starting condition. ③ “Remaining Oil Heating Time” need to display “0”, if more than 0, it indicates the oil heating is in process. To shut down, the following condition is required: ① ”Min. Running Time Elapsed” need to display “YES”, if ‘NO’, it indicates the shortest running period has not achieved. Current data display Please click on button to enter the current data interface, the interface indicates current detection data. User can enter this interface to query the temperature information when there are alarms such as temperature too high or too low. 50 Air-cooled screw chiller technical manual MCAC-CTSM-2014-02 Current data display Input Input status “ON” as displayed indicates the input point is closed; “OFF” as displayed indicates the input point is open. Note: ① “Remote Start/Stop” is available only under REMOTE mode. ② “Water Switch”: indicating that current water flow status of chilled water system. “OFF” displayed in no water flow state, otherwise “ON”. ③ “Contactor Protection”: indicating that when the compressor start to run, the contactor act normally, “OFF” switch to “ON”. ④ All of protection switch is “ON” in normal condition and “OFF” in failure status. Output status 51 Air-cooled screw chiller technical manual MCAC-CTSM-2014-02 Output “ON” as displayed indicates the output point is energized; “OFF” as displayed indicates the output point is de-energized. Alarm Alarm information page Click on button in Main Page to enter the alarm information page. If there is any alarm, the unit will execute alarm procedure action. The unit alarm status can’t be removed until all of the alarms have been eliminated and alarm shutdown process has been finished. Click on button and “Fault” in main page disappear, the unit returns to normal. If the warning message is more, please click on to check. These in red color indicate the alarms which have not been eliminated; these in white color indicate the alarms which have been eliminated. Note: 1. High-Pressure Protection is unable to reset in alarm information page, manual reset in the high pressure switch (installed in the discharge pipe) is needed. 2. Compressor and fan overload protection are unable to reset automatically, please check the relevant thermal relay in the control box to reset manually. History Alarm Information Click on button in Alarm Page to enter history alarm information query information, as 52 Air-cooled screw chiller technical manual MCAC-CTSM-2014-02 shown in Picture 8.2. Max.5 warning messages can be recorded meanwhile. The messages will be updated automatically if there are more messages. History alarm information query Note: 1. The history alarm information record the unit operating parameters when there happen unit alarms during the compressor running. NO. Interface in English 1 Water flow fault 2 Anti-freeze Protection 3 1# High-pressure protection 4 1# Low-pressure protection 5 1# Compressor Motor Protection 6 1# Low Oil Level Protection 7 1# Contactor protection 8 1# Oil differential pressure protection 9 1# Compressor overload 10 1# Fans overload 11 Power Failure Protection 12 Entering water temp. sensor failure 13 Leaving water temp. sensor failure 14 Ambient temp. sensor failure 15 1# Fin temp. sensor failure 16 1# Discharge temp. sensor failure 17 2# Fin temp. sensor failure 18 2# Discharge temp. sensor failure 19 1# Suction pressure failure 20 1# Discharge pressure failure 21 2# Suction pressure failure 22 2# Discharge pressure failure 23 1# High discharge temp. protection 24 1# High Fin temp. protection 25 1# Differential pressure protection 26 1# Low Suction Pressure protection 27 2# High discharge pressure protection 28 1# Mode switch failure 53 Air-cooled screw chiller technical manual MCAC-CTSM-2014-02 29 Mode water temp. protection 30 1# EXV module failure 31 2# High pressure protection 32 2# Low pressure protection 33 2# Compressor motor protection 34 2# Oil level protection 35 2# Contactor protection 36 2# Oil differential pressure protection 37 2# Compressor overload 38 2# Fans overload 39 2# High discharge temp. protection 40 2# High Fin temp. protection 41 2# Differential pressure protection 42 2# Low Suction Pressure protection 43 2# High discharge temp. protection 44 2# Mode switch failure 45 2# EXV module failure 46 Invalid Address Number Multi-units status Multi units status In this page, you can query the status of different modules through choosing the corresponding module button, also can check the status of all modules meanwhile through master-monitoring. Master-monitoring page Click on to enter the next page, it will show the information of all connected units as following: The communication, alarm information, status, refrigerant type of each unit can be inquired in the following pages. 54 Air-cooled screw chiller technical manual Click on MCAC-CTSM-2014-02 to enter the next page. Note: ① Max.8 units can achieve combination control, the unconnected unit can access the combination control system at any time as long as the unit is powered on and connected with the system by communication cable. ② The “Status” displays “Run” until the unit finish the starting action and enter the process of automatic energy adjustment, otherwise displayed “shutdown” 55 Air-cooled screw chiller technical manual 7. MCAC-CTSM-2014-02 Control screen menu structure Touch screen tree diagram Homepage Mode Setting Main Page Setting (Password Input) Multi-Status User Parameter Setting Multi Units Status Module Choose Clock Setting Adjust Screen Automatic On/Off Alarm Information Status Information 1 Comm. Setting Status Alarm Status Information History Alarm Information Query Status Information 2 Current Data Display Input Output 56 Air-cooled screw chiller technical manual 8. MCAC-CTSM-2014-02 Safety protection Name Code Brand Setting Range Low-pressure Switch YK-0.03/0.10O-R-7000 JUNLE 0.03~0.10MPa High-pressure Switch 1 YK-2.1/1.7-CR-7000 JUNLE 1.7~2.1MPa High-pressure Switch 2 YK-2.2/1.8-CR-7000 JUNLE 1.8~2.2MPa Low-pressure Sensor(For main control board) AKS33 Danfoss -1~12bar High-pressure Sensor AKS3000 Danfoss 0~30bar Location Note: Manual reset is needed for high-pressure switch. 57 Air-cooled screw chiller technical manual MCAC-CTSM-2014-02 IV. Electrical control 1. Electrical data LSBLGWXXX/C Standard voltage Voltage range Max. running current Max. power consumption Rated current Compressor A Locked rotor Amps. Max. allowed current Rated current Rated power Compressor B Locked rotor Amps. Max. allowed current Rated current Rated power Fan Full load Amps.(each) Power input(each) Total input Crankcase heater Voltage Total input Total Amps. 380 500 600 720 900 1000 1200 1420 380V 3Ph 50Hz 340~420 523 655 368 234 285 318 398 483 542 824 381 650 1046 466 796 V V A kW A 287 124 212 368 159 271 412 187 319 A A A kW 586 370 187 109.6 805 450 239 139.8 805 450 278 163 917 480 358 210 586 370 187 109.6 805 450 239 139.8 805 450 292 171.3 917 480 358 210 A A A kW ----- ----- ----- ----- 805 450 239 139.8 805 450 239 139.8 805 450 292 171.3 917 480 358 210 A kW kW 5.6 2.4 14.4 5.6 2.4 19.2 5.6 2.4 24 5.6 2.4 24 5.6 2.4 33.6 5.6 2.4 38.4 5.6 2.4 38.4 5.6 2.4 48 V kW A 220 0.3 1.36 220 0.3 1.36 220 0.3 1.36 220 0.3 1.36 220 0.6 2.72 220 0.6 2.72 220 0.6 2.72 220 0.6 2.72 NOTE: 1.Customer to specify the exact nominal power supply available at site so that electrical components are selected accurately. 2.Main power must be supplied from a single field supplied and mounted fused circuit breaker. 3.The compressor crankcase heaters must be energized for hours before the unit is initially started or after a prolonged power disconnection. 4.All field wining must be in accordance with local standards. 5.Neutral line required on 380V-3Ph-50Hz(5 wires) power supply. 6.Rated load Amps values are on nominal conditions. 7.The ±10% voltage variation from the nominal is allowed for a short time, not permanent. 2. Electrical components introduction 1) Moulded case circuit breaker The mould case circuit breaker is mainly used in a non-frequently operated low voltage distribution line or used as a power switch in the switch cabinet. It can connect or disconnect a load circuit, isolate power, and provide protection for circuits, electric devices, and motors. In the case of overcurrent, overload, or short circuit, the circuit breaker disconnects the circuit automatically. The applied mould case circuit breaker 58 Air-cooled screw chiller technical manual MCAC-CTSM-2014-02 provides overload and short circuit protection. 2) Power protector This module is used to detect power supply and provide protection in case of phase loss, phase sequence, and under voltage of incoming line power, so as to prevent damage to the compressor or other components caused by power failure. Some models also provide protection for overvoltage and three phase imbalance. 3) Time relay and intermediate relay The time relay is an automatic switch device which performs delayed control based the electromagnetic or mechanical principles. It controls the star delta switching time for the compressor contactor. The preset time is star operation time (6s). The coil voltage is AC 220V. The rated contact current is usually low and is used for controlling the loop only. The intermediate relay delivers intermediate signals among control circuits to increase the number and capacity of contacts. Normally, the main control board output controls starting and stopping of loads such as motor and water pump by using the intermediate relay to drive the contactor coil. The coil power supply can be DC or AC. Our standard screw compressor model uses the AC220V coil. 4) Compressor and fan thermal overload relay The thermal overload relay works based on the principle of heating effect of electric current. With inverse time limit action feature which is similar to the permissible overload feature of the motor, it is used to provide overcurrent protection for the compressor and fan. For compressor overload protection, the major loop current of the motor is converted to an AC 0-5 A current signal by the current mutual inductor. Then the thermal overload relay performs overload protection. For fan overload protection, the thermal overload relay is connected in series with the major loop. 6) .Current transformer and transducer The current transformer transforms primary current with a larger value to secondary current with a smaller value for the purpose of protection or measurement. A current transformer with transformation ratio of 400/5 can transform 400A current to 5A. A transducer transduces the measured current to DC voltage or DC current. After the current transformer transforms the current to AC 0-5 A current signals, the transducer outputs 4-20 mA analog signal based on the linear scale to the main control board. 7) Electronic expansion valve The electronic expansion valve is equipped with a stepping motor which controls the valve status. A special-purpose electronic expansion valve control module is required to drive the electronic expansion valve. 8) Solenoid valve When the solenoid valve is energized, the electromagnetic coil generates electromagnetic force to pull up the closed component from the valve seat and the valve is open. When the solenoid valve is powered off, the spring pushes the closed component to the valve seat once the electromagnetic force disappears and the valve is closed. Voltage of the solenoid valve washer is AC220V, and it is driven directly by the main control board output. 59 Air-cooled screw chiller technical manual 3. MCAC-CTSM-2014-02 Electrical components parameter setting 1)Moulded case circuit breaker TEST key: to press to test whether the breaker is normal in stop condition Unit Type 380 500 600 720 900 1000 1200 1420 Remarks:/ Compressor Startup Current 586 805 805 917 586+805 805+805 805+805 917+917 Tripping value Maximum Running Current of the Entire Unit 287 368 412 523 655 368+368 412+412 523+523 Value Ir 320 500 500 630 320+400 500+500 500+500 630+630 Class. 5 5 5 1 (Ir) 5 5 5 1 (Ir) Isd 6 5 5 7 6 5 5 5 2) Power protector U: 380V T: 6S < U : -10% Power LED ,on lighting Running LED normal lighting; fault off Power protector use Schneider RM17TU type. ① Select the voltage class. For standard units, the voltage is 380 V. ② Set the delay to 6s. ③ Set the under voltage value to 10%. Note: Set the processing parameters only when the system is powered off. 60 Air-cooled screw chiller technical manual MCAC-CTSM-2014-02 3) Time Relay Time’s up LED Up display green Power LED On display red T: 6S Time relay use Omron H3Y type. 4) Compressor and fan thermal overload relay Thermal overload relay takes advantage of heating effect to protect the compressor and fans. TEST key: to press to test whether the overload relay is normal in stop condition Reset key: to press to reset the overload relay if there is compressor overload protection Current setting panel: to set the protection current value. Note:Compressor overload relay, only apply to 3UA series of Siemens brand Reset key: to press to reset the overload relay if there is compressor overload protection TEST key: to press to test whether the overload relay is normal in stop condition Stop key: to press to make the output in off-state Current setting panel: to set the protection current value Note:Fan overload relay, only apply to LRD series of Schneider brand Compressor thermal relay value: The calculation of compressor overload value (transformation ratio of current mutual inductor is A/B) is as follows: (Maximum running current of compressor/current mutual inductor A) x B = Thermal relay value of compressor For example, if the maximum running current of compressor is 250 A, and the transformation ratio of current mutual inductor is 300/5, Thermal relay value = (250/300) x 5 = 4.17 Note: Use a value that is smaller than the calculated one. For example, in the preceding calculation, the 61 Air-cooled screw chiller technical manual MCAC-CTSM-2014-02 calculated value is 4.17; in practice, set the value to 4.15. Unit Type Maximum Running Current of Compressor 380 261 500 331 600 369 720 473 900 261+331 1000 331+331 1200 369+369 1420 473+473 Fan motor thermal relay value: Unit Type Fan quantity Transformation Ratio of Current Transformer 300/5 400/5 400/5 600/5 300/5+400/5 400/5 300/5 400/5 Maximum Running Current of fan motor 380 6 5.6 500 8 5.6 600 10 5.6 720 10 5.6 900 14 5.6 1000 16 5.6 1200 16 5.6 1420 20 5.6 4) Main base controller DIP setting Thermal Relay Value of Compressor 4.5 4.3 4.6 3.9 4.5/4.3 4.3 4.6 3.9 Thermal Relay Value of fan motor 4.5 4.3 DIPs S1, S2, and S3 62 2# Alarm mode indication 1# Alarm Water pump Multiple communication water flow switch Remote stop Cooling run output Indication Alarm Pump Multi-units communication interface Flow switch Remote Stop Remote Start 4. Remote start Air-cooled screw chiller technical manual MCAC-CTSM-2014-02 Field wiring 1) Wiring diagram PE N L3 L1 L2 [380&500&600&720kW] [900&1000&1200&1420kW] 63 Air-cooled screw chiller technical manual MCAC-CTSM-2014-02 2) Recommended cable and mould case circuit breaker Electric cable (mm2) Type 380 500 600 720 900 1000 1200 1420 Phase line PE line Capacity of breaker (A) 120 240 240 2*185 185+240 2*240 240+300 2*400 70 120 120 2*120 120+120 2* 120 120+150 2* 240 330 500 500 630 830 1000 1000 1260 Note: It is recommended that only copper-conductor cables are used in this unit. In high-altitude areas with high temperature, temperature derating should be considered, the capacity of breaker device should be increased properly. Note: The length of leading-in power cables in the unit cannot exceed 180 m. 3) Pump wiring Control cabinet wiring terminal Contactor Intermediate relay Pump motor 4) Water flow switch wiring Typically, a water flow switch is installed in the pipe of cooling water system to monitor the flow status of cooling water in real time. Once the cooling water stops flowing, the water flow switch sends an alarm signal to the controller, which will perform timely processing to prevent accidents from occurring. Note: A water flow switch is only a protection switch and cannot be used as a signal for unit power-on or power-off. 64 Air-cooled screw chiller technical manual Water flow normal Connect the CDM NC of the water flow switch to customer terminals 5 and 6. Water flow switch Alert status MCAC-CTSM-2014-02 6) Combination wiring Combination connection method 1# Unit 8# Unit 2# Unit Customer terminals or the last unit Customer terminals Customer terminals ○1 . Terminal 9 is A+, terminal 10 is B-, terminal 11 is common ground, and terminal 12 is for grounding. ○2 . Communication cables must be connected in series. The adoption of any other topology may cause unstable communication or communication failure. ○3 . For the first unit and the last unit in a series circuit, a 120 ohm resistor must be connected between terminal 9 and terminal 10, as shown in the preceding figure. ○4 . Dual-head unit is considered a unit. A maximum of eight units can be connected. DIP settings for main base controller S1 Unit connection method Combination Double 1 2 1 2 0-8 OFF ON ON 0 1# OFF OFF ON OFF 0 2# OFF ON ON OFF 0 ON OFF ON OFF Corresponding address (2-8) 1# OFF OFF ON OFF Corresponding address (2-8) 2# OFF ON ON OFF 0 Single Slave Double S3 ON Single Master unit S2 Notes: ○1 Please power off the system after DIP settings. Note: To use the combination function, software configuration is also required except for unit connection. Click “Parameter Setting” on the homepage to access a new page (for password settings). 7) Others wiring 65 Air-cooled screw chiller technical manual MCAC-CTSM-2014-02 The wiring ports for remote start/stop, flow switch, water pump linked control, alarm indication, etc. are reserved in the electrical cabinet of the unit, with the numbers shown in the diagram below. Only double head Customer wiring terminal Inside electric control cabinet 1 2 3 4 5 6 7 8 Inside electric control cabinet 13 14 15 16 17 18 19 20 21 22 23 24 2# alarm lamp Refrigeration lamp 1# alarm lamp Flow switch Remote Stop Remote Start Pump intermediate relay 2 1 Remote start/stop switch need to use inching switch. Lamp input 220VAC. 66 Air-cooled screw chiller technical manual V. Installation 1. Unit installation MCAC-CTSM-2014-02 1).Lifting ○1 Hoist the unit according to the following chart strictly. The steel rope shall wind the lifting hook one circle to prevent steel rope slipping and causing danger when the weight is unbalanced. ○2 Must use enlargement pole prevent sling damage to the unit ○3 Security guard circle should be set up when hoist the unit, and also abide by the local safety regulations when hoist the unit. Prohibit non-staff from entering the security guard circle or staying under the unit and the hoisting crane. 2) Foundation The installation foundation shall be designed by professionals according to the site conditions. The installation foundation of the unit must be of a cement or steel structure, and shall bear the operating weight of the machine, and this face must be horizontal. Please refer to the Diagram for Installation Foundation of Unit, place the steel plate and anti-vibration bush on the foundation accurately, and execute secondary grouting after installing the unit and foundation bolts together. The foundation bolts are generally 60 mm higher than the installation surface. Bolt Unit Base (Channel Steel) Drain Groove Installation Surface Cement Mortar (Secondary Grouting) Nut Washer Link Kit Anti-vibration Bush Steel Plate Concrete If the unit will be installed on the top of the building which vibration level should be restricted. It is recommended to use spring isolators as absorber, please refer to following diagram: Unit Bottom Spring Shock Absorber Foundation 67 Air-cooled screw chiller technical manual MCAC-CTSM-2014-02 3) Dimensions& Vibration Isolators Vibration isolators are recommended for all roof mounted installations or wherever vibration transmission is a consideration. Neoprene Isolation is optional, it is recommended for normal installations and provides good performance in most applications for the least cost. Spring isolators are level adjustable, spring and cage type isolators, mounted under the unit base rails. Deflection may vary slightly by application. Isolator model Midea code Brand Spring isolator MHD-850 202502301043 Mei Huan (Yan Cheng City) Spring isolator MHD-1050 202502301044 Mei Huan (Yan Cheng City) The housing of MHD series with aluminum-magnesium alloy material could prevent the vibration isolator from rustiness forever and enlarge the use life. The structure also has new improvement with an anti-side-force function for better stability and safety of unit. It can be freely adjusted as per balancing situation of unit to guarantee its work under all situations. Technical data of MHD LOAD (kg) 850 1050 MODEL MHD-850 MHD-1050 MODEL MHD-850 MHD-1050 A 165 165 B 200 200 LOAD (N) 8330 10290 C 13 13 DEFLECTION (mm) 25 25 OUTER SIZE (mm) ΦE F H S1 12.5 147 165 M12*25 12.5 147 165 M12*25 VERTICAL (kg/mm) 34.00 42.00 S2 M20*60 M20*60 ΦD 104 104 68 Air-cooled screw chiller technical manual MCAC-CTSM-2014-02 4).Spaces Reserve the spaces required for unit installation, operation and maintenance. The installation place of the unit shall be free from the effects of fire, inflammables, corrosive gas or waste gas as much as possible; the ventilation space shall be reserved there; proper measures shall be taken to reduce noise and vibration whenever possible. When the units are installed on the horizontal plane without obstacles, the longitudinal distance between the units shall be kept above 1m, the transverse distance between the units shall be kept above 1.8 m, and such distances shall be as large as possible; if there are obstacles at both sides of the unit, the distance between the unit and obstacles shall be kept above 1.8 m; if there are obstacles above the unit, the distance between the unit and obstacles shall be kept above 2.5 m. The removable post for compressor service access must not be blocked at either side of the unit. There must be no obstruction under the fans. 69 Air-cooled screw chiller technical manual MCAC-CTSM-2014-02 2. Water pipeline system installation 1) Water quality control When industrial water is used as chilled water, little furring may occur; however, well water or river water, used as chilled water, may cause much sediment, such as furring, sand, and so on. Therefore, well water or river water must be filtered and softened in softening water equipment before flowing into chilled water system. If sand and clay settle in the evaporator, circulation of chilled water may be blocked, and thus leading to freezing accidents; if hardness of chilled water is too high, furring may occur easily, and the devices may be corroded. Therefore, the quality of chilled water should be analyzed before being used, such as PH value, conductivity, concentration of chloride ion, concentration of sulfide ion, and so on. ※ Applicable standard of water quality for the unit PH value Total hardness Conductivity Sulfide ion Chloride ion Ammonia ion Sulfate ion Silicon Iron content Sodium ion Calcium ion 7~ 8.5 <50ppm <20μV/cm(2 5℃) No <50ppm No <50ppm <30ppm <0.3ppm No requirement <50ppm 2) Performance adjustment factors The antifreeze must be required according to anyone condition as following: 1. The outlet water temperature is below 5℃; 2. The ambient temperature is below 0 ℃; 3. Don’t start up the unit for a long time. 4. The power supply was cut off and needn’t change the water in system. Ethylene and Propylene Glycol Factors A glycol solution is required when the unit with condition as mentioned. The use of glycol will reduce the performance of the unit depending on concentration. Ethylene Glycol modification coefficient Quality of glycol(%) Cooling capacity modification Power modification Water resistance Water flow modification 1.000 0.993 0.984 0.975 0.969 0.961 1.000 0.997 0.994 0.989 0.984 0.978 1.000 1.013 1.149 1.343 1.624 2.026 1.000 1.019 1.051 1.092 1.145 1.213 0 10% 20% 30% 40% 50% Freezing point ℃ 0 -4 -9 -16 -23 -35 Propylene Glycol Quality of glycol (%) 0 10% 20% 30% 40% 50% Modification coefficient Cooling capacity modification Power modification Water resistance Water flow modification 1.000 0.99 0.979 0.964 0.95 0.925 1.000 0.992 0.983 0.975 0.967 0.96 1.000 1.029 1.167 1.364 1.648 2.056 1.000 1.013 1.035 1.063 1.098 1.145 Freezing point ℃ 0 -3 -7 -13 -21 -33 Units operating with glycol solutions are not included in the ARI Certification Program. Altitude correction factors Performance tables are based at sea level. Elevations other than sea level affect the performance of the unit. The decreased air density will reduce condenser capacity and reduce the unit’s performance. For 70 Air-cooled screw chiller technical manual MCAC-CTSM-2014-02 performance at elevations other than sea level refer to below table Maximum allowable altitude is 1800meters. Evaporator temperature drop factors Performance tables are based on a 5oC temperature drop through the evaporator. Adjustment factors for applications with temperature ranges from 3℃ to 6℃ in follow table. Temperature drops outside this range can affect the control system’s capability to maintain acceptable control and are not recommended. Fouling Factor Fouling Factor ALTITUDE (m) Sea level 600 1200 1800 0.018m2 ℃ /kW 0.044m2 ℃ /kW 0.086m2 ℃ /kw 0.172m2 ℃ /kw C P C P C P C P 1.042 1.027 1.014 1.000 1.028 1.037 1.050 1.060 1.029 1.014 1.001 0.987 1.020 1.029 1.041 1.052 1.000 0.986 0.973 0.960 1.000 1.009 1.021 1.031 0.977 0.964 0.951 0.938 0.995 1.004 1.016 1.026 C--Cooling capacity P—Power 3) Design of the store tank in the system a. kW is the unit for cooling capacity, L is the unit for (G) minimum water flow volume in the formula. Comfortable type air conditioner G= cooling capacity×2.6L Process type cooling G= cooling capacity×7.4L b. In certain occasion (especially in manufacture cooling process), for conforming the system water content requirement, it’s necessary to mount a tank equipping with a cut-off baffle at the system to avoid water short-circuit, Please see the following schemes: Error Error Recommendation Recommendation Recommendation Error 4) Water pipeline installation Fig.4-4 Due to the variety of piping practices, it is advisable to follow the recommendations of local authorities. The installation and insulation of the water pipelines of the air conditioning system shall be designed and guided by design professionals, and confirm to the corresponding provisions of the HVAC installation specifications. Recommendation Basically,Error the piping should be designed with a minimum number of bends and changes in elevation to Fig.4-4 keep system cost down and performance up. 71 Air-cooled screw chiller technical manual MCAC-CTSM-2014-02 1) The water inlet pipeline and drain pipeline shall be connected according to the requirements of markings on the unit. Generally, the refrigerant pipe side of the evaporator is the chilled water outlet side. 2) The chilled water pipeline system must be provided with the soft connection, thermometer, pressure gauge, water filter, electronic scale remover, check valve, target flow controller, discharge valve, drain valve, stop valve, expansion tank, etc. 3) The water system must be fitted with the water pump with appropriate displacement and head, so as to ensure normal water supply to the unit. The soft connection shall be used between the water pump, unit and water system pipelines, and the bracket shall be provided to avoid stress on the unit. Welding work for installation shall avoid damage to the unit. (1) Determination of water pump flow: Flow (m3/h) = (1.1 ~ 1.2) * Unit Cooling Capacity (kW)/5.8 (2) Determination of water pump head: Head (m) = (Unit Resistance (see product parameters) + Resistance at Maximum End of Pressure Drop (see product parameters) + Pipeline Resistance (length of the least favorable loop pipe * 0.05) + Local Resistance (length of the least favorable loop pipe * 0.05 * 0.5)) * (1.1 ~ 1.2) 4) The flow switch must be arranged on the drain pipe of the evaporator. The flow switch shall be interlocked with the input contact in the control cabinet. Its installation requirements are as follows: (1) The flow switch shall be installed on the pipe vertically. (2) The straight pipe section at each side of the flow switch shall have a length that is at least 5 times the pipe diameter; do not install it near the elbow, orifice plate or valve. (3) The direction of the arrow on the flow switch must be consistent with the direction of water flow. (4) In order to prevent vibration of the flow switch, remove all air in the water system. 72 Air-cooled screw chiller technical manual MCAC-CTSM-2014-02 (5) Adjust the flow switch to keep it in open state when the flow is lower than the minimum flow (the minimum flow is 70% of the design flow). When the water flow is satisfied, the flow switch shall keep in closed state. 5) The water filter must be installed before the water inlet pipeline of the unit, which shall be provided with a 25-mesh screen. This will aid in preventing foreign material from entering and decreasing the performance of the evaporator. 6) A strainer should be placed for enough upstream to prevent cavitation at the pump inlet (consult pump manufacturer for recommendations). The use of a strainer will prolong pump life and help maintain high system performance levels 7) The flushing and insulation of the water pipelines shall be carried out before it is connected with the unit, so as to prevent dirt from damaging the unit. 8) The design water pressure of the water chamber is 1.0Mpa. Use of the water chamber shall be not exceeding this pressure in order to avoid damaging the evaporator. 9) The expansion tank shall be installed 1~1.5m higher than the system, and its capacity accounts about 1/10 of the water amount in the whole system. 10) The drain connection is arranged on the evaporator cylinder. The drain outlet has been equipped with a 1/2’’ plug. 11) The auto discharge air valve is arranged between the high point of the pipeline and the expansion tank. 12) The thermometer and pressure gauge are arranged on the straight pipe sections of the water inlet pipeline and drain pipeline, and their installation places shall be far away from the elbows. The pressure gauge installed shall be vertical to the water pipe, and the installation of the thermometer shall ensure that its temperature probe can be inserted into the water pipe directly. 13) Each low point shall be fitted with a drain connection so as to drain the remaining water in the system. Before operating the unit, connect the stop valves to the drain pipeline, respectively near the water inlet connection and drain connection. The by-pass pipeline shall be provided between the water inlet pipe and drain pipe of the evaporator, convenient for cleaning and maintenance. Use of flexible connections can reduce vibration transfer. 14) The chilled water pipeline and expansion tank shall be subjected to insulation treatment, and the maintenance and operation part shall be reserved on the valve connections. 15) After the air-tightness test is carried out, and the insulation layer is applied on the pipeline, so as to avoid heat transfer and surface condensation; the insulation layer shall be covered by moisture-proof seal. 16) Any water piping to the unit must be protected to prevent freezing. There are reserved terminals for the auxiliary electrical heater. Logic in PLC will transmit ON/OFF signal by checking the leaving evaporator water temperature. Note: The unit only supply ON/OFF signal, but not the 220V power. If a separate disconnect is used for the 220V supply to the cooler heating cable, it should be clearly marked so that it is not accidentally shut off during cold seasons 17) If the unit is used as a replacement chiller on a previously existing piping system, the system should be thoroughly flushed prior to unit installation and then regular chilled water analysis and 73 Air-cooled screw chiller technical manual MCAC-CTSM-2014-02 chemical water treatment is recommended immediately at equipment start-up. 18) Power on the chilled water pump, and inspect its rotation direction. The correct rotation direction shall be clockwise; if not, re-inspect the wiring of the pump. 19) Start the chilled water pump to circulate water flow. Inspect the water pipelines for water leakage and dripping. 20) Commission the chilled water pump. Observe whether the water pressure is stable. Observe the pressure gauges at the pump inlet and outlet, and the readings of the pressure gauges and the pressure difference between the inlet and outlet change slightly when the water pressure is stable. Observe whether the operating current of the pump is within the range of rated operating current; inspect whether the resistance of the system is too large if the difference between the operating current and rated value is too big; eliminate the system failures until the actual operating current is satisfied. 21) Inspect whether the water replenishing device for the expansion tank is smooth, and the auto discharge air valve in the water system enables auto discharge. If the discharge air valve is a manual type, open the discharge valve of the chilled water pipeline to discharge all air in the pipeline. 22) Adjust the flow and inspect whether the water pressure drop of the evaporator meets the requirement of the unit’s normal operation. The pressure at the chilled water inlet and outlet of the unit shall be kept at least 0.2MPa. 23) The total water quantity in the system should be sufficient to prevent frequent “on-off” cycling. A reasonable minimum quantity would allow for a complete water system turnover in not less than 15 minutes. 3. Wiring installation WARNING: In order to prevent any accident of injury and death during the site wiring, the power supply shall be cut off before the line is connected to the unit. Wiring must comply with all applicable codes and ordinances. Warranty is voided if wiring is not in accordance with specifications. An open fuse indicates a short, ground, or overload. Before replacing a fuse or restarting a compressor or fan motor, the trouble must be found and corrected. (1) Copper wire is required for all supply lines in field connection to avoid corrosion and overheat at the connection of terminals. The lines and control cables shall be separately paved and equipped with protective pipes to avoid intervention of supply line in control cable. (2) Power section: It is required to connect the power supply cable to the control cabinet of the unit, when it arrives at the jobsite. The power supply cable is connected to the terminals of L1, L2, L3, N and PE and the terminals need to be fixed again after 24h running (the minimum allowed time). Please seal the entering wiring hole after users installed the main power wires, in order to avoid the dust entering into electric control cabinet. Caution: it is suggested that to use appropriate tools to make sure there is a enough height to install the main power wires if the basement is higher than 200 mm. (3) Breaking isolation switches should be added between the power cord of users and the unit. The 74 Air-cooled screw chiller technical manual MCAC-CTSM-2014-02 capacities of the breaking isolation switches recommended are as follows. (4) Attention: refrigerant selection: the previous software settings are replaced by the current hardware settings to avoid the possibility of improper operation of the software leading to wrongly selected refrigerant and damage to the unit. (5) Short circuit 1X:35/1X:36 on the wiring terminal 1X in the cabinet and set R22 refrigerant for the unit, or, R134a is used for the unit. (6) In order to avoid wrong control in field connection, the liquid control circuit (24 V) shall not be in the same conduit with the lead wire of the voltage higher than 24 V. (7) The control circuits of various units are all 220 V, and for the wiring ways of the control circuits, please refer to the wiring diagrams supplied along with the units. (8) A unit consists of master compressor and slave compressor communicating via shield wire protected by sleeve and separated from supply line. (9) The control output cable to be connected on site shall be AC250V-1mm2, and 0.75mm2 shield wire (24 V) shall be used for control signal line. (10) Attentions: Read the electrical wiring principle diagram and connect the wires strictly according to the wiring terminal diagram. Three-core shield cable (RVVP3×0.75mm2) shall be used for the connection of the temperature sensor. Common two-core cable (RVV2×0.75mm2) shall be used for the connection of flow switch to connect to the NO contact of the switch, i.e. the opening point when waterless. Two buttons can be connected to the external of remote start and stop. (11) If the customer desires the linked control of the water pump, connect the water pump as shown in the diagram, where an intermediate relay is required. If the function of linked control of water pump is not needed, ensure that the water pump is started before starting the machine. CAUTION: An independent power supply box needs to be equipped with the power supply of the water pump. (12) The wiring ports for remote start/stop, flow switch, cool/warm switch, water pump linked control, alarm indication, etc. are reserved in the electrical cabinet of the unit, with the numbers shown in the diagram below. (13) Passive inching button is used for remote start and stop, and the flow switch must be connected to the NO contact, or the machine cannot be started. Passive holding switch is used for cool/warm switch, e.g. common selection switch. Controls of large power electrical appliances such as water pump and user electric heating must be interfaced with a relay, or the PLC might be burned. Other outputs can be directly connected to indicator lamps or alarms. 75 Air-cooled screw chiller technical manual MCAC-CTSM-2014-02 VI. Commissioning 1. Pre start-up (1) Electrical system inspection Inspect whether power distribution capacity is compliant with the power of the unit before the first start-up, and whether the diameter of the selected cable can bear the maximum working current of the master compressor. The max economical conveying distance: 2) The max loading time in a year(h) Copper core length(m) <3000h 3000~5000h >5000h 264 294 331 Inspect whether the electric mode is compliant with that of the unit, three-phase five-line (three phase lines, one zero line and one earth wire, 380V±10%). 3) Inspect whether the maximum phase voltage unbalance is compliant with the requirement, 2% for the maximum permissible phase voltage unbalance and 5% for the phase current balance. The machine must not be started up when the phase voltage unbalance exceeds 2%. If the measured unbalance% is excess, the power supply sector shall be informed of immediately. 4) Inspect whether the supply circuit is the compressor is firmly and properly connected, and tighten it if there is any looseness. The screws might be loose due to the factors such as long-distance transport and hoisting of the master compressor. Or, the electrical elements (e.g. air switch, AC contactor, etc.) in the control cabinet of the master compressor and the compressor might be damaged. 5) Carefully inspect all the electrical lines with a multimeter, and whether the connections are properly installed. Carry out measurement in mega ohm and ensure that there is no short circuit at the shell. Inspect whether the earth wire is properly installed, and whether the insulation resistance to ground exceeds 2MΩ. And inspect whether the supply line meets the requirement of capacity. 6) Inspect whether disconnection switch is installed to the supply line of the supply unit. 7) Carry out complete inspect for all connections of the main circuit in the control cabinet and all external connections of the control circuit before power connection (e.g. oil heater, compressor electronic protection, circulatory water temperature sensor, target-type flow switch connection, water pump linked control, communication line connection, etc.); inspect the bolts of the wiring terminal for looseness. Inspect whether various electric meters and appliances are properly installed, complete and available. Inspect the interior and exterior of the electrical cabinet, especially various wiring ports, for cleanness. If the communication lines of the controller and control screen are damaged, refer to the diagram below. 8) After the inspection for all the above items is complete, connect the control cabinet and the supply indication lamp will light up, indicating that the oil heater is working. Observe whether the phase loss protection is in normal condition, if it is (green light on), close the single-pole switch (QF2) in the control cabinet, then the control circuit begins working, and the touch screen and controller are used 76 Air-cooled screw chiller technical manual MCAC-CTSM-2014-02 in operating. (2) Refrigeration System Inspection 1) The discharge line valve and suction line valve of the compressor must be fully open (turn anticlockwise to open) and the cores shall be tightly locked to prevent leakage of refrigerant. 2) Inspect whether moisture content of the system exceeds the limit Excessive moisture content in the refrigerant system of the unit might cause ice block, copper plating, etc. that would seriously affect the safety of the unit. Therefore, the dryness of the refrigerant system of the unit shall be inspected from the sight glass before and during operation of the unit, purple indicating dry, and pink moist, as shown in the below figure. When the color turns to red, the filter core in the unit shall be replaced with a dry one. 3) Sufficient lubricating oil in the oil tank (not lower than 1/2 of the oil level in the high oil immersion lens), and no deterioration (blackness). Inspect the oil level and quality before start-up for the two factors have direct impact on the performance and reliability of the unit. There must be sufficient lubricating oil in the unit. And during the shutdown of the unit, the high oil immersion lens must be full of oil. When the unit is in stable operation, the oil level in the high oil immersion lens should be at least above the 1/2 position. And there shall be no deterioration (blackness) of the lubricating oil, or else, qualified lubricating oil shall be changed before operating the unit. 4) Coil fin cooling fan shall rotate in correct direction without reverse rotation or shutdown. Before operation of the unit ,Inspect whether the fan networks are deformed under stress, whether there is friction and collision between the networks and the blades, whether there are foreign matters in the network, and whether the fin is deformed or damaged caused by collision. There should be no deformation of the fan guard or foreign matters in it. Operate the fans one by one before operating the unit, and inspect whether there is abnormal noise in the fan caused by poor lubrication of the bearing or friction of foreign matters, and whether the fan rotates reversely or does not rotate. 5) Inspect whether the directional elements such as one way valve, solenoid valve, electronic expansion valve, etc. are installed properly. The directions of the one way valve and solenoid valve are indicated on the valves. As for the thermostatic expansion valve and electronic expansion valve, if the valves are upward, the direction is generally high-in and low-out. 6) Inspect whether the pressure sensor stop valve, dry filter front/rear angle valve, liquid/air sampling stop valve and injection stop valve, etc. are all open. When the unit stops, the high and low voltages shall be almost the same. After the start-up, the low voltage decreases, and the high voltage increases. If there is no voltage change certain time after 77 Air-cooled screw chiller technical manual MCAC-CTSM-2014-02 the start-up, inspect whether the liquid/air sampling stop valve is open. 7) After the unit is installed and before connected, it is required to tighten the connections in the electrical cabinet of the unit one by one. 8) Inspect the bolts of the unit for looseness. After the unit is transported and installed, it is required to inspect whether the fixing bolts of the unit (e.g. fixing bolts at compressor base angle, at post and beam of the unit, and at pipe clamp, etc.) and of the electrical elements (e.g. fixing bolts of PLC and of insulating transformer, and connection bolts of upper/lower terminals of AC contactor, etc.) are firmly fixed. 9) Inspect the looseness of the connections in the electrical cabinet, especially the electric part in the cabinet. The parts connected by bolts might be loose due to transportation. If there is any looseness, tighten it to avoid burnout of circuit or element caused by poor contact. Inspect the looseness of the terminals and poor contact caused by vibration and collision during transportation and installation (especially the electric part; ensure ofthe points of all All terminals all connection heat terminals are firm and reliable before electrification). relays of the fan must be firm and reliable. All connection points of terminals must be firm and reliable. Inspect all terminals for firmness and reliability before electrification. Inspect whether there is poor contact and short circuit caused by dust, moisture, etc. in the electrical cabinet, and whether the values of all temperature sensors are normal. During the shutdown of the machine, the indicated temperatures of discharge, fin, and the environment shall be almost the same, and the entering and leaving chilled water temperatures shall be almost the same. 10) Before the unit leaves the factory, the control cabinet is well connected with main motor, electrical actuator, and sensor elements of pressure temperature, etc. Therefore, the wiring on site for the user is very simple. Only the chilled water flow switch line and chilled water pump linked control line (control contact is active) need to be connected. For the detailed connection way, please refer to the circuit wiring diagram in the operation manual for the unit. (The attached circuit diagram represents the case of air-cooled heat pump unit for user’s reference, as for the details, the operation manual supplied with the unit shall be final.) 11) Target-type flow switch is set on the chilled water pipeline which shall be installed at the outlet of the chilled water. The NO contact of the target-type flow switch shall be connected to the control circuit as per the wiring diagram. Note: Disordered water flow may lead to wrong action of the flow switch; therefore, the control cabinet will command the unit to stop after receiving continuous disconnection signals during 10 s. 12) The tube where the temperature sensing probe is installed shall be filled with lubricating oil or other grease that will not freeze at the temperature of the leaving chilled water for the convenience of heat 78 Air-cooled screw chiller technical manual MCAC-CTSM-2014-02 transfer. Thermostatic insulation and enclosing measures shall be taken for the temperature sensing device. Inspect whether there is temperature deviation for the entering and leaving water temperature sensor caused by insufficient heat transfer oil in the thermostatic pipe. 2. Start-up 1) High/low voltage value of the system. In the case of the unit shut-down and waterless in a long time, the liquid and gas of the system shall be equivalent and close to the saturation pressure corresponding to the current ambient temperature. The correlation of saturation temperatures and pressures (the pressures in the list are gage pressures, among which, the atmospheric pressure is 0.1MPa) of R134a refrigerant is shown in appendix 1: In shutdown status, the high and low voltages shall be the same and equal to the saturation pressure corresponding to the current temperature. In the pressure gauge scale, taking the right figure for example: the outside values are pressure values (unit: bar), and the inside values indicate saturation temperatures of refrigerant R134a respectively under the relative pressure. The types of refrigerants indicated in different pressure gauges might differ. [Table 1] Refrigerant temperature ℃ R134a refrigerant pressure (Gage pressure) MPa Refrigerant temperature ℃ R134a Refrigerant pressure (Gage pressure) MPa 0 0.19 25 0.57 5 0.25 30 0.67 10 0.32 35 0.79 15 0.39 40 0.92 20 0.47 If the high/low voltage deviates much from the saturation pressure corresponding to the current temperature (more than 2bar), maybe there is leakage or insufficient refrigerant in the system. 2) Inspect whether the oil heating of the unit is normal. Before start-up, it is necessary to inspect whether the oil heating in the unit is available, and whether there is the condition that the oil heater does not work because of no power supply. It is particularly important in winter when the temperature is low and the failure of oil heating might lead to poor lubrication of the unit. The optimum working temperature for current types of lubricating oil is generally around 40℃. 79 Air-cooled screw chiller technical manual MCAC-CTSM-2014-02 Compressor oil heater is working when the unit is electrified. 3) Inspect whether there is alarm for trouble of the display screen. if there is, the trouble must be corrected. 4) Inspect the electronic expansion valve control module for alarm trouble. 5) Inspect whether various temperature points displayed on the display screen are within the normal range. Before the operation of the unit, the showed temperatures of discharge、fin and the ambient temperature are close to the current actual ambient temperature, and whether the entering and leaving water temperatures are close to the water temperature at the user side. If there is any obvious deviation of the above temperatures, inspect whether the temperature sensor is in normal condition and whether the connection is firm and reliable. Values of various temperature and pressure points showed in the main page of the unit. 6) Start on pump. Inspect whether the flow in the water pump meets the requirements of the unit. 7) Inspect whether the power supply of the unit is stable. 8) Start on chiller. 9) Running parameters The maximum range of parameters for normal operation of R134a refrigerant unit. See below table for the maximum range of performance parameters of R134a refrigerant: 80 Air-cooled screw chiller technical manual MCAC-CTSM-2014-02 Working Condition Optimal range Limit Range Discharge temp. ℃ 60~80 <110 Suction temp. ℃ 3~12 -- Condensation temp. ℃ 46~51 <65 Evaporation temp. ℃ -1~4 <15 Suction super-heating degree ℃ 4~8 ~ Discharge pressure MPa 1.2~1.4 <1.8 Suction pressure MPa Discharge super-heating degree ℃ 0.28~0.38 10~30 <0.38 Super-cooling degree ℃ 2~8 81 Air-cooled screw chiller technical manual VII. MCAC-CTSM-2014-02 Maintenance In order to ensure the long term safe operation, to extend the service life of unit, reduce the failure and repair, should be regularly maintained and checked on the unit 1. Daily maintenance 1). Switch machine daily by local and remote two modes, the local switch unit set see previous page 1 HMI operation local switch part, HMI key to open for local mode switch machine, electric control box on the door of the emergency stop switch used in machine repair, debugging or emergency shutdown, usually do not use. 2). During operation of the unit, should irregularly check the water temperature, oil level of compressor, high and low pressure, voltage, current and so on, such as abnormal timely find out the reasons, troubleshooting. 2. Maintenance 1).Schedule Maintenance items I. General II. Appearance III. Compressor Anytime Vibration Anytime Voltage Clean Anytime Anytime rust Anytime Calm Insulation material flakes Anytime Judge whether there is abnormal sound by hearing; Watch whether the swings of distribution pipes and components are too large Rated voltage is within ±10% Keep it clean anytime using an iron brush to remove rust, besmear again the antirust paint Lock each snail Anytime Using adhesives sticky Water leak Once/ Month Noise Anytime Insulation resistance Once/ Year Shockproof rubber gets old Once/ Year Medium check V. Shell-and-tube heat exchanger Qualify standards (Settlement) Noise Medium check IV. Fin heat exchanger Maintenance frequency Fan Clean situation Water flow of the user side Temperature Antifreeze concentration Once/3000 hours Once/6000 hours Anytime Once/Month Watch from one meter away from the center of the Chiller; Check whether the exhaust water pipe is blocked Whether there is abnormal sound when starts up, runs or stops Above 5MΩ is required when testing with DV500V high resistance meter Flexible when pressed with hands is qualified Pay attention to the noise libation and oil level Confirm the action of safety device and protection device Normal wind amount, high pressure within the normal range Normal wind amount, high pressure within the normal range Anytime Within ±5% of the standard Anytime Within the standard Make sure it is set above the set concentration Once/Month Note Water quality Once/Month Within the standard Purity Anytime The low pressure is within the standard when refrigerating Refer to water quality furring relations drawing 82 Air-cooled screw chiller technical manual Maintenance frequency Qualify standards (Settlement) Note Drainage Anytime Drain all the water if it is not used for a long time Drain water in the distribution pipe Action Once/Month Check according to ‘Protection Devices Action Value’ Whether the match point is good Maintenance items VI. High and low pressure switch VII. Pressure Gauge VIII. Globe valve IX. Refrigeration circle X. Electrical machine control MCAC-CTSM-2014-02 Refrigeration media leak Once/Month Insulation resistance Once/Month Wire contact Once/Month Assistant relay Time-limited relay Once/Month Compare with correct pressure gauge Smooth action on globe valve switch Check whether there is refrigeration media leakage inside the Chiller or at the distribution pipe connecting points. Let out all the water inside the shell-and-tube heat exchanger, and check whether there is any leakage at the water inlet or outlet. Above 5MΩ is required when testing with DV500V high resistance meter Insulation layer of the wire must be under good contact condition, without damage, bolt well fixed. No abnormal action Once/Month Act according to the time set Finger Action Once/ Half of a year Once/Month Use the electronic leak detector, or blowtorch leak detector, or soap water. 2). Please have the qualification of the after sale service engineer to check: (1).Inspection unit control and protection setting value. (2). Check the electrical wiring is or not loose, if loose to timely fastening (3). Check the reliability of electrical components, should be promptly replaced unreliable or failure parts (4).check compressor oil system. (5).check pump and water system. 3) Replacing dry filter Before replacing dry filter core filter, directly close the angle valves at both ends to discharge the residual refrigerant in the dry filter. After the replacement, fix the end cover tight, extract vacuum, and then add 2~3kg refrigerant. 83 Air-cooled screw chiller technical manual MCAC-CTSM-2014-02 If only to clean the dry filter, but not to replace it, before removal of the filter, ensure that the refrigerant in the dry filter is completely discharged and the dry filter has remained not in use for a time (to ensure the temperature of the dry filter core is close to the ambient temperature) so that the removed dry filter core with low temperature would not cause the moisture in the air to immediately reach to the dew point to condense and absorb water. Protective measures shall be taken to the removed filter to prevent it from directly contacting with the air. If the dry filter core is dirt or has absorbed too much moisture, it must be replaced with a dry one. During the operation, inspect whether the dry filter is blocked and whether the temperatures at the dry filter inlet and outlet are close in normal conditions. If there is obvious temperature difference (above 5℃) between the front and end of the filter, or even that frost exists at the end of the filter, it is likely to block the dry filter. Seriously blocked dry filter must be cleaned or replaced. If frost exists at the end, the dry filter is seriously blocked. If the temperature difference between dry filter front and end exceeds 5℃, the dry filter is likely blocked. 84 Air-cooled screw chiller technical manual MCAC-CTSM-2014-02 VIII. Troubleshooting 1. List of failures Failure display Flow switch failure Name of failure Flow switch failure Source of failure Flow switch Freeze protection Freeze alarm Antifreez e Switch High-press ure alarm High-press ure alarm High-pres sure switch Low-press ure alarm Low-press ure alarm Low-pres sure switch Compress or internal protection Compress or internal protection Motor protector Oil level protection Oil level protection Oil level switch Oil differential pressure protection Oil differential pressure protection Oil differenti al pressure switch Contactor failure Contactor failure Contactor Control logic The flow switch will be detected in 3 minutes of pump running. If the flow switch of unit module is off all the time for 5S successively, it shall be reported for flow switch protection. Execute this failure unit in the failure stop procedure; save the content of failure. Confirm this failure manually on touch screen as required after resetting the flow switch (detection will not be carried out in the period of stop, nor started until the pump runs for 3 minutes) When leaving water temperature in a unit modular unit is less than or equal to 3℃ and the mechanical antifreeze switch is switched off, report freeze protection, immediately stop this unit in the failure stop procedure, and save the content of failure. Save the content of failure. Do not switch on the unit modular unit (to be detected during both stop and running) in accordance with the conditions of temperature and time until this failure is confirmed manually on touch screen as required after failure is eliminated. To be detected during both stop and running. Switch off the high-pressure switch when discharge pressure of the system is higher than 20Bar, report high-pressure protection, stop the module immediately in the failure stop procedure, and save the content of failure. Reset will not be allowed until system pressure is lower than the setting value after protection occurs. Do not switch on the units in accordance with the conditions of temperature and time until this failure is confirmed manually on touch screen as required after failure is eliminated. To be detected during both stop and running. Switch off the low-pressure switch when discharge pressure of the system is lower than 1Bar, report low-pressure protection, stop the module immediately in the failure stop procedure, and save the content of failure. To be detected during both stop and running. Switch off the protection switch in compressor in the case of high temperature of compressor winding, or high compressor discharge temperature, or phase sequence error of compressor power, or phase lack. Stop the units immediately in the failure stop procedure and save the content of failure. Do not switch on the units in accordance with the conditions of temperature and time until this failure is confirmed manually on touch screen as required after failure is eliminated. To be continuously monitored prior to start, report oil level protection in case of continuous switch-off of oil level switch for 3S, and start of compressor is not allowed; to be detected in running, switch off the oil level switch in case of continuous switch-off of oil level switch of compressor for 60S during running of compressor. Then report oil level switch protection. Immediately stop the units in the failure stop procedure, and save the content of failure. To be detected in running, switch off the oil differential pressure switch when the difference between oil pressure and discharge pressure of compressor is higher than the setting value during running of compressor. The indicator of oil differential pressure switch in input interface will be out. Do not switch on the units in accordance with the conditions of temperature and time until this failure is confirmed manually on touch screen as required after switch resetting. To be detected after start of master, report the contactor failure in case of incorrect pull-in of contactor. Do not switch on the units in accordance with the conditions of temperature and time until this 85 Air-cooled screw chiller technical manual MCAC-CTSM-2014-02 failure is confirmed manually on touch screen as required after switch resetting. Report compressor overload protection when the current value of unit compressor is greater than the setting value and energy accumulated to result in thermo relay trip. Stop the module immediately in the failure stop procedure, and save the content of failure. Do not switch on the units in accordance with the conditions of temperature and time until this failure is confirmed manually on touch screen as required after failure is eliminated. Compress or overload Compress or overload Compres sor overload relay Fans overload Fans overload Fans overload relay Power Failure Power Failure Phase sequence protector High Fin temp. High temp. Fin Fin temp. sensor High Discharge temp. Leaving water temp. sensor failure Entering water temp. sensor failure Fin temp. sensor failure Ambient temp. sensor failure Discharge temp. sensor failure Suction temp. sensor failure Low-press ure alarm High Discharge temp. Leaving water temp. sensor failure Entering water temp. sensor failure Fin temp. sensor failure Ambient temp. sensor failure Discharge temp. sensor failure Suction temp. sensor failure Low-press ure alarm Discharg e temp. sensor Leaving water temp. sensor Low-pres sure switch Do not restart the units until confirming manually on touch screen as required when the suction pressure detected by the system is lower than the setting value for continuously 1s. High-press ure alarm High-press ure alarm High-pres sure switch Do not restart the units until confirming manually on touch screen as required when the discharge pressure detected by the system is lower than the setting value for continuously 1s. Report fans motor overload protection when the current value of unit fans is greater than the setting value and energy accumulated to result in thermo relay trip. Stop the compressors and fans (simultaneously) immediately for this module, and save the content of failure. Do not switch on the units in accordance with the conditions of temperature and time until this failure is confirmed manually on touch screen as required after switch resetting. To be detected at any time, report power failure in cases of high / low voltage of power or phase unbalance and phase lack. Failure will be eliminated after power gets right. Notes: phase lack / phase stagger of power will be detected during both initial stage of power-on and unit running. To be detected in running, the fin temperature of the system is higher than 65℃, and the failure record indicates that the fin temperature is too high. To be detected in running, the discharge temperature of the system is higher than 110℃, and the failure record indicates that the discharge temperature is too high. Entering water temp. sensor Fin temp. sensor Ambient temp. sensor Switch off compressors in case of failure of the sensor itself. Switch-off of pump and fans will be delayed. The failure indicator of display board will be on, and a corresponding alarm mark will be displayed in “Failure Query”. The compressors will not be restarted until the failure of sensor is eliminated, and the failure signal must be cleared manually, otherwise it cannot be cleared. Discharg e temp. sensor Suction temp. sensor 86 Air-cooled screw chiller technical manual MCAC-CTSM-2014-02 Differential pressure alarm Differential pressure alarm Differenti al pressure switch To be detected in running. Currently, there are two modes, one is direct use of differential pressure switch, namely that when the difference between high pressure and low pressure of the system is smaller than the setting value of 4Bar, the differential pressure switch will be switched off, and the indicator of differential pressure switch of input interface will be out. The other is PLC calculation, namely that an alarm will be given if the differential pressure is smaller than 4Bar. Low Suction Pressure Low Suction Pressure Low-pres sure sensor To be detected in running, report protection of too low suction pressure when the refrigeration suction pressure is lower than 1Bar, and the units will not be restarted until it is confirmed manually on touch screen as required. High Discharge Pressure High Discharge Pressure High-pres sure sensor To be detected in running, report protection of high discharge pressure when the discharge pressure is higher than 20Bar, and the units will not be restarted until it is confirmed manually on touch screen as required. Beyond the operation range Beyond the operation range The system will be automatically stopped when the ambient temperature detected by the system exceeds that set by the system for continuously 5 minutes. Mode water temp. protection Mode water temp. protection Ambient temp. sensor, entering water temp. sensor Entering / Leaving water temp. sensor EXV module failure EXV module failure EXV Control Module Start detection upon power-on of units, and report immediately failure of EXV module when the alarm output point of EXV control module is switched off. Detect water temperature in the refrigeration mode after start for 5 minutes, and report mode water temp. protection when leaving water temperature is not lower than entering water temperature for continuously 5s. 87 Air-cooled screw chiller technical manual 2. MCAC-CTSM-2014-02 Common troubleshooting 1) High voltage protection High voltage protection Yes Yes Adjust operation mode Reversed cooling and heating No Blower stops rotating or rotates in reversed direction when cooling; water pump is not open or the flow insufficient when heating Yes Inspect the blower or open the water pump. No Yes Expansion valve can not be started. Replace the expansion valve. No Yes Press controller is in trouble. Replace the press controller. No Yes Fin heat exchanger for cooling is too dirty or aged; or, too heavy encrustation in tube shell for heating. Replace the heat exchanger. No Yes One way valve is blocked. Replace the one way valve. No Yes Air exists in system (generally likely after service of the unit) Empty the air, re-extract vacuum if necessary. No Yes False alarm of controller Inspect whether it is frequent, if is, replace PCB. No Inform the customer service center. 88 Air-cooled screw chiller technical manual 2) MCAC-CTSM-2014-02 Low voltage protection Low voltage protection Yes Yes Reversed cooling and heating Adjust operation mode No Yes Compressor suction stop valve is not open. Open the suction stop valve. No Yes Blower stops rotating or rotates in reversed direction when cooling; water pump is not open or the flow insufficient when heating Inspect the blower or open the water pump. No Yes Replace the expansion valve. Expansion valve cannot open (broken capillary pipe or leakage). No Yes Inspect and maintain solenoid valve coil, valve body and wiring. Solenoid valve is not open. No Yes Fin heat exchanger for cooling is too dirty or aged; or, too heavy encrustation in tube shell for heating. Clean heat exchanger. No Yes Replace the one way valve. One way valve is blocked. No Water pipeline is not properly designed. When it is closed at the end, the water flow is smaller. Yes Adjust the water pipeline system. No No Leakage of refrigerant Yes Inspect and repair the leakage point and then add refrigerant. No Yes False alarm of No controller Inspect whether it is frequent, if yes, replace PCB. No Inform the customer service center. 89 Air-cooled screw chiller technical manual 3) MCAC-CTSM-2014-02 Overheat discharge temperature protection Overheat discharge temperature Yes Yes Inspect and repair the leakage point and then add refrigerant. Leakage of refrigerant No Yes Expansion valve can not open (broken capillary pipe or leakage). Replace the expansion valve. No Yes Replace the one way valve. One way valve is blocked. No Yes Wrong discharge temperature sensor package is used (generally likely after service of the unit). Install correct temperature sensor package. No Yes False alarm of controller Inspect whether it is frequent, if is, replace PCB. No Inform the customer service center. 90 Air-cooled screw chiller technical manual 4) MCAC-CTSM-2014-02 Compressor overload protection Compressor overload Yes Yes Replace the protection module. Compressor protection module is in trouble. No Inform the customer service center. 5) Differential pressure alarm Differential pressure alarm Yes Yes Reduce water flow for air conditioning by around 60% and restart up the machine, and then adjust it to the normal flow. Ambient temperature in winter is too low for starting cooling. No Yes Pressure sensor is in trouble. Replace pressure sensor. No Yes False alarm of controller Inspect whether it is frequent, if yes, replace PCB. No Inform the customer service center. 91 Air-cooled screw chiller technical manual 6) MCAC-CTSM-2014-02 Flow switch failure Flow switch failure No Yes Water pump is not open. Open the water pump. No Yes Install or Inspect the installation of water flow switch. Water flow switch is not installed or properly installed. No Yes Water flow switch is in trouble. Service the water flow switch. No Yes False alarm of controller Inspect whether it is frequent, if yes, replace PCB. No Inform the customer service center. 92 Air-cooled screw chiller technical manual 7) MCAC-CTSM-2014-02 Power failure Power failure Yes Yes Wrong power phase sequence Adjust wiring. No Yes Phase loss Inspect power supply. No Yes Failure of phase loss protection False alarm of controller Replace phase loss protection. Inspect whether it is frequent, if yes, replace PCB. Inform the customer service center. 93 Air-cooled screw chiller technical manual MCAC-CTSM-2014-02 Appendix 1 IX. 1. Temperature-Resistance characteristic sheet for discharge temperature sensor NTC sensor characteristic sheet Temp. Ratio Temp. Unit:Temp:℃--K.Ratio:KΩ,5K@90℃ Ratio Temp. Ratio Temp. Ratio -20 542.7 20 68.66 60 13.59 100 3.702 -19 511.9 21 65.62 61 13.11 101 3.595 -18 483 22 62.73 62 12.65 102 3.492 -17 455.9 23 59.98 63 12.21 103 3.392 -16 430.5 24 57.37 64 11.79 104 3.296 -15 406.7 25 54.89 65 11.38 105 3.203 -14 384.3 26 52.53 66 10.99 106 3.113 -13 363.3 27 50.28 67 10.61 107 3.025 -12 343.6 28 48.14 68 10.25 108 2.941 -11 325.1 29 46.11 69 9.902 109 2.86 -10 307.7 30 44.17 70 9.569 110 2.781 -9 291.3 31 42.33 71 9.248 111 2.704 -8 275.9 32 40.57 72 8.94 112 2.63 -7 261.4 33 38.89 73 8.643 113 2.559 -6 247.8 34 37.3 74 8.358 114 2.489 -5 234.9 35 35.78 75 8.084 115 2.422 -4 222.8 36 34.32 76 7.82 116 2.357 -3 211.4 37 32.94 77 7.566 117 2.294 -2 200.7 38 31.62 78 7.321 118 2.233 -1 190.5 39 30.36 79 7.086 119 2.174 0 180.9 40 29.15 80 6.859 120 2.117 1 171.9 41 28 81 6.641 121 2.061 2 163.3 42 26.9 82 6.43 122 2.007 3 155.2 43 25.86 83 6.228 123 1.955 4 147.6 44 24.85 84 6.033 124 1.905 5 140.4 45 23.89 85 5.844 125 1.856 6 133.5 46 22.89 86 5.663 126 1.808 7 127.1 47 22.1 87 5.488 127 1.762 8 121 48 21.26 88 5.32 128 1.717 9 115.2 49 20.46 89 5.157 129 1.674 10 109.8 50 19.69 90 5 130 1.632 11 104.6 51 18.96 91 4.849 12 99.69 52 18.26 92 4.703 13 95.05 53 17.58 93 4.562 14 90.66 54 16.94 94 4.426 15 86.49 55 16.32 95 4.294 16 82.54 56 15.73 96 4.167 17 78.79 57 15.16 97 4.045 18 75.24 58 14.62 98 3.927 19 71.86 59 14.09 99 3.812 94 Air-cooled screw chiller technical manual MCAC-CTSM-2014-02 2. Temperature-Resistance characteristic sheet for water temp. sensor, ambient temp. sensor, oil temp. sensor. Unit:Temp:℃--K . Ratio:KΩ,10K@25℃ NTC sensor characteristic sheet Temp. Ratio Temp. Ratio Temp. Ratio Temp. Ratio -20 103.882 20 12.598 60 2.383 100 0.623 -19 97.868 21 12.023 61 2.296 101 0.605 -18 92.246 22 11.478 62 2.213 102 0.587 -17 86.987 23 10.961 63 2.134 103 0.570 -16 82.065 24 10.470 64 2.057 104 0.553 -15 77.457 25 10.005 65 1.984 105 0.537 -14 73.106 26 9.564 66 1.913 106 0.521 -13 69.031 27 9.146 67 1.846 107 0.506 -12 65.211 28 8.749 68 1.781 108 0.492 -11 61.629 29 8.372 69 1.718 109 0.478 -10 58.270 30 8.013 70 1.659 110 0.464 -9 55.099 31 7.669 71 1.601 -8 52.123 32 7.342 72 1.546 -7 49.328 33 7.031 73 1.492 -6 46.703 34 6.735 74 1.441 -5 44.235 35 6.453 75 1.392 -4 41.896 36 6.183 76 1.346 -3 39.697 37 5.927 77 1.301 -2 37.628 38 5.683 78 1.258 -1 35.682 39 5.450 79 1.217 0 33.849 40 5.228 80 1.177 1 32.115 41 5.016 81 1.139 2 30.483 42 4.813 82 1.101 3 28.944 43 4.620 83 1.066 4 27.494 44 4.436 84 1.031 5 26.126 45 4.261 85 0.998 6 24.833 46 4.092 86 0.966 7 23.613 47 3.932 87 0.935 8 22.461 48 3.778 88 0.906 9 21.373 49 3.632 89 0.877 10 20.344 50 3.492 90 0.850 11 19.365 51 3.357 91 0.823 12 18.438 52 3.229 92 0.798 13 17.563 53 3.106 93 0.773 14 16.734 54 2.989 94 0.749 15 15.950 55 2.876 95 0.727 16 15.205 56 2.769 96 0.704 17 14.500 57 2.666 97 0.683 18 13.831 58 2.568 98 0.662 19 13.198 59 2.473 99 0.643 95 Air-cooled screw chiller technical manual MCAC-CTSM-2014-02 3. Temperature-Resistance characteristic sheet for EXV temp. sensor. Unit:Temp:℃--K. Ratio:KΩ10K@25℃ NTC Sensor characteristic sheet Temp. Ratio Temp. -20 67.74 20 -19 64.54 21 -18 61.52 -17 58.66 -16 Ratio Temp. Ratio Temp. Ratio 12.09 60 3.02 100 0.97 11.63 61 2.92 101 0.94 22 11.20 62 2.83 102 0.92 23 10.78 63 2.75 103 0.90 55.95 24 10.38 64 2.66 104 0.87 -15 53.39 25 10.00 65 2.58 105 0.85 -14 50.96 26 9.63 66 2.51 106 -13 48.65 27 9.28 67 2.43 107 0.83 0.81 -12 46.48 28 8.94 68 2.36 108 0.79 -11 44.41 29 8.62 69 2.29 109 0.77 -10 42.25 30 8.31 70 2.22 110 0.75 -9 40.56 31 8.01 71 2.16 -8 38.76 32 7.72 72 2.10 -7 37.05 33 7.45 73 2.04 -6 35.43 34 7.19 74 1.98 -5 33.89 35 6.94 75 1.92 -4 32.43 36 6.69 76 1.87 -3 31.04 37 6.46 77 1.81 -2 29.72 38 6.24 78 1.76 -1 28.47 39 6.03 79 1.71 0 27.28 40 5.82 80 1.66 1 67.74 41 5.63 81 1.62 2 26.13 42 5.43 82 1.57 3 25.03 43 5.25 83 1.53 4 23.99 44 5.08 84 1.49 5 22.99 45 4.91 85 1.45 6 22.05 46 4.74 86 1.41 7 21.15 47 4.59 87 1.37 8 20.29 48 4.44 88 1.33 9 19.40 49 4.30 89 1.30 10 18.70 50 4.16 90 1.26 11 17.96 51 4.02 91 1.23 12 17.24 52 3.90 92 1.20 13 16.55 53 3.77 93 1.16 14 15.90 54 3.65 94 1.13 15 15.28 55 3.53 95 1.10 16 14.68 56 3.42 96 1.08 17 14.12 57 3.31 97 1.05 18 13.57 58 3.21 98 1.02 19 13.06 59 3.11 99 0.99 96 Air-cooled screw chiller technical manual MCAC-CTSM-2014-02 Temperature-Resistance characteristic sheet for EXV temp. sensor. Unit:Temp:℃--K. Ratio:KΩ 50K@25℃ NTC Sensor characteristic sheet Temp. Ratio -40 1630,77 -35 1178,11 -30 860,97 -25 636,08 -20 474,78 -15 357,83 -10 272,18 -5 208,83 0 161,56 5 125,97 10 98,96 15 78,29 20 62,37 25 50,00 30 40,34 35 32,73 40 26,71 45 21,92 50 18,08 55 14,99 60 12,48 65 10,44 70 8,78 75 7,41 80 6,28 85 5,34 90 4,56 95 3,91 100 3,37 105 2,91 110 2,52 115 2,19 120 1,91 125 1,67 130 1,46 135 1,28 140 1,13 145 1,00 150 0,89 Temp. Ratio Temp. Ratio Temp. Ratio 97