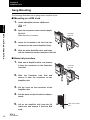
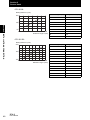
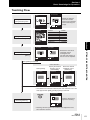
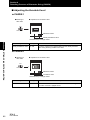
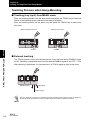
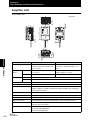
1
Z240-E2-01+ZFV+UsersManual.qxd
13.01.2006
08:43
Seite 1
Cat. No. Z240-E2-03
Cat. No. Z240-E2-03
ZFV-C Smart Sensor with Ultra-High-Speed Color CCD Cameras
User´s MANUAL
Authorised Distributor:
Cat. No. Z240-E2-03
Note: Specifications subject to change without notice.
Printed in Europe
ZFV-C
Smart Sensor
with Ultra-High-Speed Color
CCD Cameras
User´s Manual
Introduction
This manual provides information regarding functions, performance and operating methods that are
required for using the sensor.
When using the ZFV-C Smart Sensor, be sure to observe the following:
• The ZFV-C Smart Sensor must be operated by personnel knowledgeable in electrical engineering.
• To ensure correct use, please read this manual thoroughly to deepen your understanding of the product.
• Please keep this manual in a safe place so that it can be referred to whenever necessary.
SECTION 1 FEATURES
SECTION 2 INSTALLATION & CONNECTION
SECTION 3 FUNCTIONS AND OPERATIONS TO BE USED
SECTION 4 SETTING OF INSPECTION CONDITION
SECTION 5 SETTING ADDITIONAL FUNCTIONS
SECTION 6 APPENDIX
SECTION 7 APPLICATION AND SETTING
User’s Manual
Smart Sensor
with Ultra-High-Speed Color CCD Cameras
ZFV-C Series
Introduction Section 1 Section 2 Section 3 Section 4 Section 5 Section 6 Section 7
INTRODUCTION APPLICATION CONSIDERATIONS (Please Read)
Introduction
Introduction
READ AND UNDERSTAND THIS DOCUMENT
Please read and understand this document before using the products. Please consult your OMRON
representative if you have any questions or comments.
WARRANTY
OMRON’s exclusive warranty is that the products are free from defects in materials and workmanship for
a period of one year (or other period if specified) from date of sale by OMRON.
OMRON MAKES NO WARRANTY OR REPRESENTATION, EXPRESS OR IMPLIED, REGARDING
NON-INFRINGEMENT, MERCHANTABILITY, OR FITNESS FOR PARTICULAR PURPOSE OF THE
PRODUCTS. ANY BUYER OR USER ACKNOWLEDGES THAT THE BUYER OR USER ALONE HAS
DETERMINED THAT THE PRODUCTS WILL SUITABLY MEET THE REQUIREMENTS OF THEIR
INTENDED USE. OMRON DISCLAIMS ALL OTHER WARRANTIES, EXPRESS OR IMPLIED.
LIMITATIONS OF LIABILITY
OMRON SHALL NOT BE RESPONSIBLE FOR SPECIAL, INDIRECT, OR CONSEQUENTIAL
DAMAGES, LOSS OF PROFITS OR COMMERCIAL LOSS IN ANY WAY CONNECTED WITH THE
PRODUCTS, WHETHER SUCH CLAIM IS BASED ON CONTRACT, WARRANTY, NEGLIGENCE, OR
STRICT LIABILITY.
In no event shall responsibility of OMRON for any act exceed the individual price of the product on which
liability is asserted.
IN NO EVENT SHALL OMRON BE RESPONSIBLE FOR WARRANTY, REPAIR, OR OTHER CLAIMS
REGARDING THE PRODUCTS UNLESS OMRON’S ANALYSIS CONFIRMS THAT THE PRODUCTS
WERE PROPERLY HANDLED, STORED, INSTALLED, AND MAINTAINED AND NOT SUBJECT TO
CONTAMINATION, ABUSE, MISUSE, OR INAPPROPRIATE MODIFICATION OR REPAIR.
2
ZFV-C
User’s Manual
Introduction
THE PRODUCTS CONTAINED IN THIS DOCUMENT ARE NOT SAFETY RATED. THEY ARE NOT
DESIGNED OR RATED FOR ENSURING SAFETY OF PERSONS, AND SHOULD NOT BE RELIED
UPON AS A SAFETY COMPONENT OR PROTECTIVE DEVICE FOR SUCH PURPOSES.
Please refer to separate catalogs for OMRON’s safety rated products.
Introduction
SUITABILITY FOR USE
OMRON shall not be responsible for conformity with any standards, codes, or regulations that apply to
the combination of products in the customer’s application or use of the product.
At the customer’s request, OMRON will provide applicable third party certification documents identifying
ratings and limitations of use that apply to the products. This information by itself is not sufficient for a
complete determination of the suitability of the products in combination with the end product, machine,
system, or other application or use.
The following are some examples of applications for which particular attention must be given. This is not
intended to be an exhaustive list of all possible uses of the products, nor is it intended to imply that the
uses listed may be suitable for the products:
• Outdoor use, uses involving potential chemical contamination or electrical interference, or conditions or
uses not described in this document.
• Nuclear energy control systems, combustion systems, railroad systems, aviation systems, medical
equipment, amusement machines, vehicles, safety equipment, and installations subject to separate
industry or government regulations.
• Systems, machines, and equipment that could present a risk to life or property.
Please know and observe all prohibitions of use applicable to the products.
NEVER USE THE PRODUCTS FOR AN APPLICATION INVOLVING SERIOUS RISK TO LIFE OR
PROPERTY WITHOUT ENSURING THAT THE SYSTEM AS A WHOLE HAS BEEN DESIGNED TO
ADDRESS THE RISKS, AND THAT THE OMRON PRODUCT IS PROPERLY RATED AND INSTALLED
FOR THE INTENDED USE WITHIN THE OVERALL EQUIPMENT OR SYSTEM.
PERFORMANCE DATA
Performance data given in this document is provided as a guide for the user in determining suitability and
does not constitute a warranty. It may represent the result of OMRON’s test conditions, and the users
must correlate it to actual application requirements. Actual performance is subject to the OMRON
Warranty and Limitations of Liability.
CHANGE IN SPECIFICATIONS
Product specifications and accessories may be changed at any time based on improvements and other
reasons.
It is our practice to change model numbers when published ratings or features are changed, or when
significant construction changes are made. However, some specifications of the product may be
changed without any notice. When in doubt, special model numbers may be assigned to fix or establish
key specifications for your application on your request. Please consult with your OMRON representative
at any time to confirm actual specifications of purchased products.
ZFV-C
User’s Manual
3
Introduction
Introduction
DIMENSIONS AND WEIGHTS
Dimensions and weights are nominal and are not to be used for manufacturing purposes, even when
tolerances are shown.
ERRORS AND OMISSIONS
The information in this document has been carefully checked and is believed to be accurate; however, no
responsibility is assumed for clerical, typographical, or proofreading errors, or omissions.
PROGRAMMABLE PRODUCTS
OMRON shall not be responsible for the user’s programming of a programmable product, or any
consequence thereof.
COPYRIGHT AND COPY PERMISSION
This document shall not be copied for sales or promotions without permission.
This document is protected by copyright and is intended solely for use in conjunction with the product.
Please notify us before copying or reproducing this document in any manner, for any other purpose. If
copying or transmitting this document to another, please copy or transmit it in its entirety.
4
ZFV-C
User’s Manual
Introduction
Meanings of Signal Words
Introduction
Meanings of Signal Words
The following signal words are used in this manual.
Indicates a potentially hazardous situation which, if not avoided, will
result in minor or moderate injury, or may result in serious injury or
death. Additionally there may be significant property damage.
Meanings of Alert Symbols
The following alert symbols are used in this manual.
Indicates general prohibitions for which there is no specific symbol.
Indicates the possibility of laser radiation.
Alert Statements in This Manual
The following alert statements apply to the products in this manual. Each alert statement also
appears at the locations needed in this manual to attract your attention.
This product is not designed or rated for ensuring safety of persons.
Do not use it for such purposes.
Since ZFV-SC50 emits a visible light that may have an adverse affect on
the eyes, do not stare directly into the light emitted from the sensor head.
If a specular object is used, take care not to allow reflected light enter
your eyes.
ZFV-C
User’s Manual
5
Introduction
Precautions for Safe Use
Introduction
Precautions for Safe Use
Please observe the following precautions for safe use of the products.
(1) Installation Environment
• Do not use the product in environments where it can be exposed to inflammable/
explosive gas.
• Install the Amplifier Unit in such a way that the ventilation holes are not blocked.
• To secure the safety of operation and maintenance, do not install the product close to
high-voltage devices and power devices.
• During installation, make sure that screws are tightened firmly.
(2) Power Supply and Wiring
• The supply voltage must be within the rated range (DC24 V + 10 %, –15 %).
• Reverse connection of the power supply is not allowed.
• Open-collector outputs should not be short-circuited.
• Use the power supply within the rated load.
• High-voltage lines and power lines must be wired separately from this product. Wiring
them together or placing them in the same duct may cause induction, resulting in malfunction or damage.
(3) Others
• Do not attempt to dismantle, repair, modify, pressurize or incinerate the product.
• Dispose of this product as industrial waste.
• Should you notice any abnormalities, immediately stop use, turn OFF the power supply, and contact your OMRON representative.
6
ZFV-C
User’s Manual
Introduction
Precautions for Correct Use
Introduction
Precautions for Correct Use
Please observe the following precautions to prevent failure to operate, malfunctions, or
undesirable effects on product performance.
(1) Installation Location
Do not install the product in locations subjected to the following conditions:
• Ambient temperature outside the rating
• Rapid temperature fluctuations (causing condensation)
• Relative humidity outside the range of 35 to 85 %
• Presence of corrosive or flammable gases
• Presence of dust, salt, or iron particles
• Direct vibration or shock
• Reflection of intense light (such as other laser beams or electric arc-welding
machines)
• Direct sunlight or near heaters
• Water, oil, or chemical fumes or spray
• Strong magnetic or electric field
(2) Power Supply and Wiring
• Supply power from a DC power supply unit that has a countermeasure (safety ultralow voltage circuit) built-in for preventing high voltages from occurring.
• When using a commercially available switching regulator, make sure that the FG terminal is grounded.
• If surge currents are present in the power lines, connect surge absorbers that suit the
operating environment.
• Before turning ON the power after the product is connected, make sure that the power
supply voltage is correct, there are no incorrect connections (e.g. load short-circuit)
and the load current is appropriate. Incorrect wiring may result in breakdown of the
product.
• Before connecting/disconnecting the Sensor Head, make sure that the Smart Sensor
is turned OFF. The Smart Sensor may break down if the Sensor Head is connected or
disconnected while the power is ON.
• Use extension cord ZFV-XC_B(R)V2 sold separately for extending the cord between
the sensor head and amplifier unit. Two ZFV-XC_B(R)V2 cords can be coupled
together to extend the cord length. In addition, use a robot cable type extension cord
(ZFV-XC_BRV2) at locations where the cord bends, to prevent damage to the cord.
• Use only combinations of Sensor Heads and Sensor Controllers specified in this manual.
• Do not turn OFF the power in the following cases.
- Immediately after the mode is switched from MENU or ADJ mode to RUN mode
- While teaching operation using the parallel signal is in progress
Do not turn off the power until the ENABLE signal is turned ON. Failure to do so may
initialize the bank data.
ZFV-C
User’s Manual
7
Introduction
Precautions for Correct Use
Introduction
• Although the LCD display panel is manufactured by precision technology, it may have
a minute amount of faulty pixels. This is due to the panel structure, and the panel is
not faulty.
(3) Orientation when Installing the Amplifier Unit
To improve heat radiation, install the Sensor Controller only in
the orientation shown below.
Right
Do not install the Amplifier Unit in the following orientations.
Wrong
Wrong
(4) Maintenance and Inspection
• Do not use thinner, Alcohol, benzene, acetone or kerosene to clean the Sensor Head
and Amplifier Unit.
• If large dust particles adhere to the front filter of the Sensor Head, use a blower brush
(used to clean camera lenses) to blow them off. Do not blow the dust particles with
your mouth.
• To remove smaller dust particles, wipe gently with a soft cloth. Do not use excessive
force to wipe off dust particles. Scratches on the filter may cause errors.
• Should you notice any abnormalities, immediately stop use, turn OFF the power supply, and contact your OMRON representative.
(5) Ventilation Film
• Do not peel off or probe the ventilation film with a sharp-pointed object. If you do, the
specifications of the protective structure may no longer be satisfied.
• Do not block the ventilation film. Doing so might cause the front panel to be condensed.
(6) Optional Lighting Connector
When no optional lighting unit is used, make sure that the connector is covered with the
cap. If no, the specifications of the protective structure may no longer be satisfied.
8
ZFV-C
User’s Manual
Introduction
Precautions for Correct Use
Introduction
Editor’s Note
Page Format
Title of each section
Header
Overview
Section 5
Setting Bank Related Conditions
Cross-header
Setting Bank Related Conditions
Overview of the
cross-header
ZFV-C can hold up to eight sets of settings. These settings can be switched externally
when changing the device setup. A set of these settings is called a “bank”.
Setting the Bank Switching Method
Index label
Select how to switch banks.
MENU mode-[SYS1]-[BANK SET]-[SWITCH]
Description
KEY (default)
Banks are switched by the control keys on Amplifier Unit.
I/O
Banks are switched by the control keys on Amplifier Unit and by external signals.
Switching by external signals is enabled only in the RUN mode.
Switching to Another Bank p.58
To switch the bank using a command via USB/RS-232C, select [SWITCH]-[KEY].
Copying banks
Copy the settings of other bank numbers to an already selected bank number.
The following example shows the procedure for copying the settings of BANK 1 to BANK 2.
Section 5 SETTING ADDITIONAL FUNCTIONS
Setting
Indicates the section
number and title.
Explanation of options
Movement through menus
up to setting items
MENU mode-[SYS1]-[BANK SET]-[COPY]
Clearing Banks
“Clearing” deletes the settings of the currently selected bank number.
MENU mode-[SYS1]-[BANK SET]-[CLEAR]
[SYS1], [SYS2] settings and RUN mode display settings will not be cleared.
ZFV-C
User’s Manual
55
Supplementary Explanation
Helpful information regarding operation and reference
pages are introduced here using symbols.
*This page has been made purely for explanatory purposes and does not exist.
ZFV-C
User’s Manual
9
Introduction
Precautions for Correct Use
Introduction
■ Meaning of Symbols
Menu items that are displayed on the Amplifier Unit’s LCD screen are enclosed by
brackets [aa].
■ Visual Aids
Indicates points that are important to ensure full product performance, such as operational
precautions and application procedures.
Indicates pages where related information can be found.
Indicates information helpful in operation.
Indicates functions that can be set only when the setup menu has been switched to
EXP menu.
10
ZFV-C
User’s Manual
Introduction
CONTENTS
Meanings of Signal Words
5
Meanings of Alert Symbols
5
Alert Statements in This Manual
5
Precautions for Safe Use
6
Precautions for Correct Use
7
Editor’s Note
9
Page Format
CONTENTS
Menu Hierarchy
9
11
16
Section 1 FEATURES
19
Features
20
System Configuration
21
Part Names and Functions
24
Operation Mode
27
Setting Flow
28
Section 2 INSTALLATION & CONNECTION
31
About Installation and Connection
32
Amplifier Unit
32
Installing the Amplifier Unit
32
Gang-Mounting
36
About the I/O Cable
39
Timing Charts
42
Sensor Head
45
Affixing LED Warning Labels
45
Installing the Mounting Fixture
45
Installing the Sensor Head
47
Connecting the Sensor Head
51
ZFV-C
User’s Manual
CONTENTS Section 1 Section 2 Section 3 Section 4 Section 5 Section 6 Section 7 Section 8 Section 9
CONTENTS
11
Introduction
CONTENTS
CONTENTS
Section 3 FUNCTIONS AND OPERATIONS TO BE USED
Switching the Display Content
Characters Displayed on the LCD Monitor and Their Meanings
54
55
Key Operations for RUN Mode
57
Switching to Another Bank
58
Section 4 SETTING OF INSPECTION CONDITION
Basic Knowledge for Operation
59
60
Displays of MENU/ADJ Mode and Key Operations
60
Teaching Flow
61
Inspecting by Pattern (PATTERN)
62
Basic Setting Procedure
63
CUSTOM Menu
64
Inspecting by the Size (Area)
66
Basic Setting Procedure
68
CUSTOM Menu
69
Inspecting by Color (HUE)
Basic Setting Procedure
Inspecting by Width (WIDTH)
70
70
72
Basic Setting Procedure
72
CUSTOM Menu
73
Inspecting by Position (POSITION)
75
Basic Setting Procedure
75
CUSTOM Menu
76
Inspecting by Count (COUNT)
78
Basic Setting Procedure
78
CUSTOM Menu
79
Inspecting by Brightness (BRIGHT)
ZFV-C
81
Basic Setting Procedure
81
CUSTOM Menu
82
Detecting Presence of Character String (CHARA)
12
53
84
Basic Setting Procedure
85
CUSTOM Menu
87
User’s Manual
Introduction
CONTENTS
91
Setting Image Acquisition Conditions
92
Adjusting Light Intensity and Shutter Speed
92
Changing the Image Display Position (Partial Function)
93
Increasing the Sensor Head Sensitivity
93
Setting Conditions Related to Bank
94
Copying Banks
94
Clearing Banks
95
Setting the Bank Switching Method
95
Setting the System Environment
96
Changing the Measurement Speed
96
Selecting the Measurement Timing
97
Selecting the Teaching Mode from an External Device
97
Setting Screen Display
97
Setting/Cancelling the Eco Mode
98
Changing Image Capture Timing on Teaching Screen
98
I/O Monitor Function
99
Correcting White Balance
100
Initializing the Setup Data
100
Initializing Measurement Data
101
Switching the Language
101
Checking the Version
101
Setting USB/RS-232C Communication Specifications
102
USB Connection
102
RS-232C Connection
103
Restricting Operations (Lock Function)
105
Setting the Lock Function
105
Starting/Cancelling the Lock Function
106
Lock Function during Gang-Mounting
106
Changing OUTPUT Signal Output Conditions
CONTENTS Section 1 Section 2 Section 3 Section 4 Section 5 Section 6 Section 7 Section 8 Section 9
Section 5 SETTING ADDITIONAL FUNCTIONS
107
Selecting the ON Conditions
107
One-shot Output
107
Setting the ON Delay Time
108
Setting the OFF Delay Time
109
ZFV-C
User’s Manual
13
Introduction
CONTENTS
CONTENTS
Setting for Amplifier Unit Gang-Mount
Specifying the Amplifier Unit to Input the Trigger
111
Setting the Presence of Sensor Head
111
Setting Output Content
111
Rules of Gang-Mounting
112
Data Route
113
Teaching Process when Gang-Mounting
114
Integrating Judgment Output
115
Restrictions when Gang-Mounting Amplifier Units
116
Section 6 APPENDIX
117
Troubleshooting
118
Error Messages and Corrective Actions
119
Q&A
120
Specifications and External Dimensions
121
Sensor Head
121
Amplifier Unit
126
Panel Mount Adapters
128
Control Link Unit
129
Extension Cord
130
RS-232C Cable
131
Lighting Unit (Option)
132
LED Safety Precautions for Using Laser Equipment
135
Requirements from Regulations and Standards
136
Summary of Requirements to Manufactures
136
Summary of Requirements to User
138
Definitions of Laser Classification
139
Updating the Firmware
14
110
140
Flow of Firmware Update
140
Version upgrade information
145
Index
146
ZFV-C
User’s Manual
Introduction
CONTENTS
149
Inspecting for the Presence of Electronic Components (Pattern)
150
Detecting Mixed Varieties of Campaign Seals (Area)
152
Inspecting Entry of Workpieces of Wrong Color (HUE)
156
Explanation of Color Related Functions
158
Color Pickup Function
158
Hue Indication Number
159
Revision History
CONTENTS
Section 7 APPLICATION AND SETTING
160
ZFV-C
User’s Manual
15
Introduction
Menu Hierarchy
Introduction Menu Hierarchy
Menu Hierarchy
Items indicated by
are displayed only when the EXP menu is selected.
MENU mode
TEACH
Settings
ITEM
REG.
PICK (*1)
CUSTM
[PATTERN/SEARCH]
[PATTERN/MATCH]
[AREA]:[AREA1/2]
[AREA]:[AREA3]
Default
-
SEARCH, MATCH
p.62
AREA
-
AREA1, AREA2, AREA3
HUE
-
-
WIDTH
-
-
p.66
p.70
p.72
POSITION
-
-
p.75
COUNT
-
-
p.78
BRIGHT
-
-
p.81
CHARA
-
CHARA1, CHARA2
p.84
SIZE
-
,
p.61
MOVE
-
,
p.61
PICKAREA
-
-
PICKCOL
-
-
FILTER
AUTO
SEARCH AREA
-
p.61
p.61
AUTO, RED, YELLOW, GREEN,
CYAN, BLUE, MAGENTA, GRAY
,
COL JUGE
OFF
OFF, ON
LIGHT TEACH (*2)
ON
OFF, ON
FILTER
AUTO
Same as [PATTERN/SEARCH/FILTER] p.65
SEARCH AREA
-
COL JUGE
OFF
OFF, ON
LIGHT TEACH (*2)
ON
OFF, ON
p.64
p.65
p.65
LIGHT TEACH
ON
OFF, ON
p.65
FILTER
AUTO
Same as [PATTERN/SEARCH/FILTER] p.65
COLOR
WHITE
WHITE, BLACK
BINARY
-
0 to 255, BLACK
p.69
p.69
p.74
,
20 ,
30 ,
p.65
p.65
, SIZE, MOVE
COL MODE
FILTER
PICKUP, FILTER
FILTER (*4)
AUTO
Same as [PATTERN/SEARCH/FILTER] p.65
EDGE MODE
LIGHT
DARK, LIGHT
,
p.74
p.74
LIGHT TEACH (*3)
ON
OFF, ON
p.65
p.74
COL MODE
FILTER
PICKUP, FILTER
FILTER (*4)
AUTO
Same as [PATTERN/SEARCH/FILTER] p.65
EDGE SENSE
NORMAL
SENSITIVE, NORMAL, ROUGH
EDGE MODE
LIGHT
DARK, LIGHT
LIGHT TEACH (*3)
ON
OFF, ON
p.65
COL MODE
FILTER
PICKUP, FILTER
p.74
FILTER (*4)
AUTO
Same as [PATTERN/SEARCH/FILTER] p.65
EDGE MODE
LIGHT
DARK, LIGHT
p.80
ON
OFF, ON
p.80
p.65
LIGHT TEACH (*3)
User’s Manual
p.77
p.77
p.77
DIRECTION
ZFV-C
45
p.64
10
DIRECTION
16
p.64
,SIZE, MOVE
10 ,
p.65
ROTATION
DIRECTION
[COUNT]
Page
PATTERN
[WIDTH]
[POSITION]
Selection/Setting Range
Introduction
Menu Hierarchy
[CHARA]:[CHARA1]
MODE DTL
Default
Selection/Setting Range
Page
FILTER
AUTO
Same as [PATTERN/SEARCH/FILTER]
METHOD
DENAVE
DENAVE, DENDEV
p.65
p.83
FILTER
AUTO
Same as [PATTERN/SEARCH/FILTER]
p.65
MODE
NONE
NONE, MODEL, EDGE
MODEL
-
-
p.88
p.88
EDGE MODE
DARK
LIGHT, DARK
p.89
SEARCH AREA
-
-
p.89
p.90
FILTER
AUTO
Same as [PATTERN/SEARCH/FILTER]
p.65
MODEL DIV
1LINE NORMAL 1LINE SHORT, 1LINE NORMAL
1LINE, LONG, 2LINE SHORT
2LINE NORMAL
p.87
DIRECTION
[CHARA]:[CHARA2]
MODE DTL
MODE
EDGE
NONE, MODEL, EDGE
p.88
MODEL
-
-
EDGE MODE
DARK
LIGHT, DARK
p.88
p.89
p.89
SEARCH AREA
-
-
p.90
STABLE
OFF
OFF, ON
p.90
BANK
BANK1
BANK1 to BANK8
p.94
AUTO (default)
-
-
p.92
FIX
SHUTTER
LIGHT (0000 to 5555)
p.92
SHUTTER (1/500(*6), 1/1000,
1/1200, 1/1400, 1/1500, 1/2000,
1/2500, 1/3000, 1/4000, 1/8000)
p.92
DIRECTION
BANK
IMAGE
SYSTEM 1
CONTRAST
BANKSET
DISP COL
DISP POS(*7)
-
-
p.93
GAIN
x1
x1, x1.5, x2
p.93
COPY
-
BANK1 - BANK8
p.94
CLEAR
-
-
SWITCH
KEY
KEY, I/O
p.95
p.95
SPEED
NORMAL
NORMAL, FAST, MAX
p.96
MEAS TYPE
TRIG
TRIG, CONTINUE
TEACH TYPE
STATIONARY
STATIONARY, MOVE
p.97
p.97
OK
GREEN
GREEN, RED, YELLOW, BLUE,
WHITE
p.97
NG
RED
GREEN, RED, YELLOW, BLUE,
WHITE
p.97
NORMAL
WHITE
GREEN, RED, YELLOW, BLUE,
WHITE
p.97
BACK
BLUE
GREEN, RED, YELLOW, BLUE,
WHITE, BLACK
p.97
ECO MODE
ON
ON, OFF
p.98
Introduction Menu Hierarchy
Settings
[BRIGHT]
(*1) Displayed when [ITEM] - [AREA] is selected or when [ITEM] - [WIDTH], [POSITION] or [COUNT]
is selected and then [CUSTOM] - [COL MODE] - [PICKCOL ] is selected.
(*2) Displayed when [COL JUGE] - [ON] is selected.
(*3) Displayed when [COL MODE] - [PICKCOL] is selected.
(*4) Displayed when [COL MODE] - [FILTER] is selected.
(*5) This menu is not displayed if ZFV-SC150/SC150W is connected.
(*6) “1/500” can be set only when the light intensity is set to “0000”.
(*7) Displayed when [SPEED] - [FAST] or [MAX] is selected.
ZFV-C
User’s Manual
17
Introduction
Menu Hierarchy
Introduction Menu Hierarchy
Settings
SYSTEM 2
OUTPUT
COM
LOCK
LINKSET (*8)
Default
Selection/Setting Range
ON STATUS
NG ON
ONE SHOT
OFF
OFF, ON
p.107
p.107
ON DELAY
0
0 to 255
p.108
OFF DELAY
0
0 to 255
p.109
OUTPUT TIME
0
0 to 255
p.108
TEACH IMAGE
THROUGH
THROUGH, FREEZE
p.98
I/O MON
-
-
p.99
LENGTH
8
7, 8
PARITY
OFF
OFF, ODD, EVEN
p.102
p.102
STOP BIT
1
1, 2
p.102
BAUDRATE
38400
9600, 19200, 38400, 57600,
115200
p.102
NODE
0
0 to 16
DELMIT
CR
CR, LF, CR+LF
p.102
p.102
WHITE BALANCE
-
-
p.100
ALL CLEAR
-
-
p.100
MEAS CLEAR
-
-
p.101
LANGUAGE
-
ENGLISH, JAPANESE
p.101
VERSION
-
-
p.101
MODE SWITCH
LOCK OFF
LOCK OFF, LOCK ON
p.105
KEY
LOCK OFF
LOCK OFF, LOCK ON
p.105
TEACH IN
LOCK OFF
LOCK OFF, LOCK ON
p.105
PASS NUMBER
0000
0~9999
p.105
OUTPUT
EACH
ALL, EACH
TRIG
I/O
I/O, LINK
p.111
p.111
HEAD
USE
USE, NOT USE
p.111
OK ON, NG ON
(*8) This menu is displayed only when Amplifier Units are gang-mounted.
18
ZFV-C
User’s Manual
Page
Section 1 FEATURES
Section 1
FEATURES
Features
20
System Configuration
21
Part Names and Functions
24
Operation Mode
27
Setting Flow
28
ZFV-C
User’s Manual
19
Section 1
Features
Features
Section 1 FEATURES
The ZFV-C sensor recognizes objects by its “surface”. Updating from the conventional
monochrome sensor to this color sensor not only widens the choice of applications but
also enables stable measurement.
The ZFV-C also uses a 250,000-pixel CCD equivalent to that of a conventional machine
vision sensor. This allows presence detection and recognition of different objects, which
have up till now been performed by a human, to be executed fast and accurately.
Example: Inspection of Campaign Seals
AREA2
OK
1
point
AREA2
NG
1
1
point
point
1
point
AREA2
1
point
20
ZFV-C
User’s Manual
1
NG
point
1
point
Section 1
System Configuration
System Configuration
Sensor Head
Detects workpieces as images.
• Narrow view type (Field of vision 5 to 9 mm) ZFV-SC10
• Standard view type (Field of vision 10 to 50 mm) ZFVSC50/SC50W
• Wide view type (Field of vision 50 to 90 mm) ZFVSC90/SC90W
• Ultra wide view type (Field of vision 90 to 150 mm)
ZFV-SC150/SC150W
Lighting Unit (Option)
Used when the amount of light by the built-in type
lighting device is insufficient or when another lighting
method like back lighting is required.
This unit can be mounted to the sensor head ZFVSC50/SC50W/SC90/SC90W with a single motion,
and no power supply is required for the unit.
• Bar lighting ZFV-LTL01
• Bar double-lighting ZFV-LTL02
• Bar low-angle lighting ZFV-LTL04
• Light Source for Through-beam Lighting ZFV-LTF01
Section 1 FEATURES
Peripheral Device
Basic Configuration
Sensor Head Extension Cable
ZFV-XC3BV2(3 m)/XC8BV2*(8 m)/XC3BRV2 (Robot
cable type, 3 m)
Used between a Sensor Head and Amplifier Unit.
Up to two extension cords can be coupled together
for each sensor head to extend the cord length.
There are no restrictions on combinations of the two
extension cords.
* “ZFV-XC8BV2” can be used with the sensor heads
“ZFV-SC10”, “-SC50” and “-SC50W” only.
Amplifier Unit
Used for confirming images
and menus, performing
measurement processing, and
outputting the result of
processing.
ZFV-CA40/CA45
Personal Computer
USB
• Communication by commands
• Saving/loading setting data and
image data by Smart Monitor ZFV
Tool
Power Supply
24 VDC (+10%, -15%)
Recommended OMRON power
supply
(1) When 1 amplifier unit is
connected S82K-03024
(DC24V, 1.3A)
(2) When 2 or more amplifier
units are connected The
power supply given in (1)
must be provided for each
amplifier unit.
For the Smart Monitor ZFV Tool,
please contact your OMRON
representative.
RS-232C
[For connecting a
programmable controller]
ZS-XPT2
[For connecting a PC]
ZS-XRS2
Programmable Controller
Communication
by commands
ZFV-C
User’s Manual
21
Section 1
System Configuration
■ Amplifier unit expansion
Section 1 FEATURES
When amplifier units are gang-mounted, a wider range of applications can be supported by simultaneous processing of multiple areas and combination of measurement
items can be combined.
Setting for Amplifier Unit Gang-Mount p.110
● Example 1
In this configuration, multiple areas in an image from a single Sensor Head are
inspected and multiple inspection items are performed.
Example) Inspection of the number of leads
AMP 1
AMP 2
SEARCH
OK
SEARCH
OK
SEARCH
OK
SEARCH
NG
SEARCH
NG
SEARCH
OK
AMP 1
AMP 2
● Example 2
In this configuration, multiple sensor heads are used to simultaneously inspect multiple
locations on a workpiece.
When the TRIG signal is input to an amplifier from a single specified Amplifier Unit, the
connected Amplifier Unit starts sensing immediately. The results of sensing are integrated on the Amplifier Unit to which the TRIG signal was input, and a total judgment
result is output.
Example) Alignment of products
AMP 3
NG
SEARCH
NG
SEARCH
NG
SEARCH
NG
SEARCH
OK
Vita
SEARCH
NG
SEARCH
OK
SEARCH
OK
SEARCH
OK
22
ZFV-C
User’s Manual
AMP 3
Vitamin C
AMP 2
Vitamin C
Vita
AMP 1
Vitamin C
AMP 2
Vita
Vita
AMP 1
SEARCH
Section 1
System Configuration
Data Storage Unit
Personal Computer
Section 1 FEATURES
● Example 3
Measurement images can be logged by connecting to data storage unit ZS-DSU. Set
NG occurrence as a trigger to log before/after images and measurement values. This is
useful for investigating the cause of defectives. Logged data is saved to the memory
card inserted into the data storage unit, and can be easily loaded to a computer.
ZFV-C
In addition, up to 128 bank data can be saved in the memory card inserted into the data
storage unit. Bank data can be transferred from the data storage unit to ZFV as needed
for the device setup.
For details, refer to the data storage unit ZS-DSU User’s Manual.
ZFV-C
User’s Manual
23
Section 1
Part Names and Functions
Part Names and Functions
Section 1 FEATURES
The following describes the names and functions of parts on the Amplifier Unit and Sensor
Head.
■ Amplifier unit
(9) Sensor Head connector
(1) OUTPUT indicator
(2) RUN indicator
(3) ERR indicator
(4) READY indicator
OUTPUT
RUN
ERR
READY
(8) LCD monitor
A
B
C
D
TEACH
/VIEW
(7) Control keys
ADJ
STD EXP MENU RUN
(5) Menu selector switch
ESC
SET
(6) Mode selector switch
(10) Coupler
(13) RS-232C connector
(12) USB port
(11) I/O cable
No.
Name
Description
(1)
OUTPUT indicator
The Output indicator lits when the OUTPUT signal turns ON.
(2)
RUN indicator
The RUN indicator turns ON in the RUN mode.
(3)
ERROR indicator
The ERROR indicator turns ON when an error is generated.
(4)
READY indicator
The READY indicator lits after the amplifier unit starts up correctly.
(5)
Menu selector switch
This switch is for the setup menu.
STD .......Standard menu. Select this when setting the minimum required
items for measurement.
EXP .......Expert menu. Select this item when making a more detailed
setup.
(6)
Mode selector switch
This switch selects the operating mode.
MENU ....Select this mode when setting measurement conditions.
ADJ........Select this mode when adjusting the judgment threshold value.
RUN.......Select this mode when performing measurement.
The judgment results is output from the I/O cables only when
the RUN mode is currently selected.
(7)
Control keys
The Control Keys are for setting measurement conditions and other information.
Key Operations p.57, p.60
(8)
24
ZFV-C
User’s Manual
LCD monitor
The LCD monitor displays setup menus and images captured from the
Sensor Head.
Section 1
Part Names and Functions
No.
Name
Description
Sensor Head connector
This connector connects the Sensor Head.
(10)
Coupler
This connector is used to connect two or more Amplifier Units. It is
located on both sides of the Amplifier Unit.
(11)
I/O cable
The I/O cable connects the Amplifier Unit to the power supply and external devices, such as timing sensors or programmable controllers.
(12)
USB port
To connect a personal computer, connect a USB cable to this connector.
Before connecting/disconnecting the USB cable, make sure that no measurement is in progress.
(13)
RS-232C connector
To connect a programmable controller or personal computer, connect a
RS-232C cable to this connector. The following dedicated RS-232C cable
shown below must be used. Use of a RS-232C other than the one given
below may result in malfunction or damage.
[For connecting a programmable controller]
ZS-XPT2
[For connecting a PC]
ZS-XRS2
Section 1 FEATURES
(9)
■ Sensor Head
ZFV-SC10
(5) Focus adjustment
control
(1) Lighting part
(6) Ventilation
film
(2) Receiver part
(3) Connector
(4) Sensor Head
mounting fixture
ZFV-SC50/SC50W
(1) Lighting part
(6) Ventilation film
(2) Receiver part
(3) Connector
(5) Focus
adjustment
control
(7) Optional lighting
connector
(4) Sensor Head
mounting fixture
ZFV-SC90/SC90W
(7) Optional lighting
connector
(1) Lighting part
(6) Ventilation film
(2) Receiver part
(4) Sensor Head
mounting fixture
(5) Focus adjustment
control
(3) Connector
ZFV-C
User’s Manual
25
Section 1
Part Names and Functions
■ ZFV-SC150/SC150W
Section 1 FEATURES
(6) Ventilation film
(1) Lighting part
(5) Focus adjustment control
(2) Receiver part
(3) Connector
(6) Ventilation film
No.
Name
Description
(1)
Lighting part
This area emits light.
(2)
Receiver part
This area captures a image.
(3)
Connector
This connector is connected to the Amplifier Unit.
(4)
Sensor Head mounting
fixture
This fixture is for mounting the Sensor Head.
This fixture can be mounted on all of the four mounting surfaces.
(5)
Focus adjustment control This control is used for adjusting the focus of the image.
(6)
Ventilation film
This film prevents the front panel from condensation.
• Do not peel off or probe the ventilation film with a sharppointed object. If you do that the protective structure rating
may no longer be satisfied.
• Do not cover the ventilation film rating. Doing so might cause
the front panel to be condensed.
(7)
Optional lighting connector
This connector is used to connect an optional lighting unit. (ZFV-SC50,
ZFV-SC90)
When no optional lighting unit is used, make sure that the connector is covered with the cap. If not, water-resistant performance will be deteriorated.
26
ZFV-C
User’s Manual
Section 1
Operation Mode
Operation Mode
ADJ
ESC
MENU RUN
Mode
Section 1 FEATURES
There are 3 ZFV-C operating modes as follows. Switch to the mode that you meet, before
you start operation.
To switch the operating mode, use the mode switch.
Description
MENU mode
This mode is for executing teaching or setting up the measurement conditions.
ADJ mode
This mode is for setting the judgment threshold values.
RUN mode
This mode is for performing actual measurement.
There are two setup menus in the MENU mode. Switch the menu according to your specific requirements.
To switch the menu, use the menu selector switch.
STD EXP
Setup Menu
Description
STD menu
This is the standard menu.
First, set the measurement conditions in this menu.
EXP menu
This is the expert menu.
Switch to this menu to make a more advanced setup.
Top Screen
Menu Hierarchy Differences by Menus p.16
ZFV-C
User’s Manual
27
Section 1
Setting Flow
Setting Measurement Conditions, Checking
Settings and Starting Measurement
Section 1 FEATURES
Preparation for Measurement
Setting Flow
Installation and Connection
Connect the sensor head and amplifier
unit.
Section 2
INSTALLATION & CONNECTION p.32
Turn ON the power.
Adjustment of Image
Adjusts the image’s focus.
Executing Teaching
Execute teaching, and set the
judgment criteria.
Adjusting Threshold Values
Adjust the threshold values used to
make judgment on measured values.
Performing Measurement
Section 2
INSTALLATION & CONNECTION p.49
Section 4
SETTING OF INSPECTION CONDITION
Teaching Flow p.61
Section 7
APPLICATION AND SETTING p.149
Section 4
SETTING OF INSPECTION CONDITION p.59
Section 3
FUNCTIONS AND OPERATIONS TO BE USED p.54
Measurement conditions that you have set are saved to the amplifier unit “when external TEACH signal
teaching is successful” or “when switched to RUN mode”. When the TEACH key is pressed at the teaching screen to teach, conditions that you have set will not be saved unless switched to RUN mode once.
Changed contents including teaching results are cleared when switching off without saving.
28
ZFV-C
User’s Manual
Making Settings When Required
Other Functions
Customizing Measurement
conditions
Section 4
SETTING OF INSPECTION CONDITION p.59
Changing Image Acquisition
Conditions
Section 5
SETTING ADDITIONAL FUNCTIONS p.92
Setting Banks
Section 3
FUNCTIONS AND OPERATIONS TO BE USED
Switching to Another Bank p.58
Use two or more banks for setup
changes.
Section 1 FEATURES
Advanced Operation
Section 1
Setting Flow
Section 5
SETTING ADDITIONAL FUNCTIONS
Setting Conditions Related to Bank p.94
Setting the System
Environment
Section 5
SETTING ADDITIONAL FUNCTIONS p.96
Changing OUTPUT Signal
Output Conditions
Section 5
SETTING ADDITIONAL FUNCTIONS p.107
Setting USB/RS-232C
Communications Specifications
Section 5
SETTING ADDITIONAL FUNCTIONS p.102
Switching the Display Content
Section 3
FUNCTIONS AND OPERATIONS TO BE USED p.54
Clearing Data
Section 5
SETTING ADDITIONAL FUNCTIONS
Initializing the Setup Data p.100
Initializing Measurement Data p.101
Clearing Banks p.95
Troubleshooting
When the Smart Sensor Does Not
Operate Correctly
Troubleshooting p.118
When an Error Message Appears
Error Messages and Corrective
Actions p.119
When You are Not Sure
Q&A p.120
ZFV-C
User’s Manual
29
Section 1
Setting Flow
MEMO
Section 1 FEATURES
30
ZFV-C
User’s Manual
Section 2
INSTALLATION & CONNECTION
32
Amplifier Unit
32
Installing the Amplifier Unit
32
Gang-Mounting
36
About the I/O Cable
39
Timing Charts
42
Sensor Head
45
Affixing LED Warning Labels
45
Installing the Mounting Fixture
45
Installing the Sensor Head
47
Connecting the Sensor Head
51
ZFV-C
User’s Manual
Section 2 INSTALLATION & CONNECTION
About Installation and Connection
31
Section 2
About Installation and Connection/Amplifier Unit
About Installation and Connection
■ Checking the installation environment
Read “Precautions for Safe Use” at the beginning of this manual, and check the installation environment.
Section 2 INSTALLATION & CONNECTION
■ Checking the installation place
Read “Precautions for Correct Use” at the beginning of this manual, and check the
installation place.
■ About the power supply
Before installing and connecting the Smart Sensor, be sure to turn it OFF.
Also read “Precautions for Safe Use” and “Precautions for Correct Use” at the beginning of this manual, and check the power supply and wiring.
Amplifier Unit
This section describes installation of Amplifier Unit, and connection of the I/O cable.
Before connecting/disconnecting peripheral devices, make sure that the Smart Sensor is turned OFF.
The Smart Sensor may break down if the Sensor Head is connected or disconnected while the power is
ON.
Installing the Amplifier Unit
■ Installing on the DIN track
Amplifier Units can be easily mounted on the 35 mm DIN track.
DIN track (sold separately)
PFP-100N (1 m)
PFP-50N (0.5 m)
PFP-100N2 (1 m)
Ferrite core
End plate (sold separately)
PFP-M
Attach the ferrite core (provided with the Smart Sensor) to the I/O cable of the Amplifier Unit.
32
ZFV-C
User’s Manual
Section 2
Amplifier Unit
● Installation procedure
1.
Hook the connector end of the Amplifier
Unit onto the DIN track.
Hook on connector
end
Push the Amplifier Unit down onto the
Hook on I/O cable
end
DIN track until the hook on the I/O cable
side is locked.
Push down until you hear it snap into
place.
Always hook the connector end of the Amplifier Unit on the DIN track first. Hooking the I/O cable end
on the DIN track first may impair the mounting strength of the DIN track attachment.
● Removal procedure
The following describes how to remove the Amplifier Unit from the DIN track.
1.
Section 2 INSTALLATION & CONNECTION
2.
Pull the hook on the I/O cable end of the
Amplifier Unit downwards.
2.
Lift up the Amplifier Unit from the I/O
cable end, and remove it from the DIN
Hook on I/O cable
end
track.
ZFV-C
User’s Manual
33
Section 2
Amplifier Unit
■ Mounting on a panel
The Panel Mount Adapters (sold separately ZS-XPM1) can be used to mount the
Amplifier Unit on a panel.
Panel Mount Adapters p.128
Section 2 INSTALLATION & CONNECTION
1.
Push out the Amplifier Unit from the rear
Panel
of the panel towards the front.
2.
Install the short Panel Mount Adapters
on the four holes on the Amplifier Unit.
3.
Short panel mount
adapters
Short panel mount
adapters
Install the long Panel Mount Adapters on
the two holes on the short Panel Mount
Long panel
Mount Adapters
Adapter.
Long panel
Mount Adapters
34
ZFV-C
User’s Manual
Section 2
Amplifier Unit
4.
Install the Amplifier Unit with Mount
Adapters attached onto the panel from
Panel
the front.
Take care not to pinch the I/O cable.
Hook the hooks of the mounting bracket
onto the two holes of the smaller Mount
Adapters and tighten the screws.
6.
Mounting
bracket
Section 2 INSTALLATION & CONNECTION
5.
Make sure that the Amplifier Unit are
firmly fixed on the panel.
ZFV-C
User’s Manual
35
Section 2
Amplifier Unit
Gang-Mounting
The following describes how to gang-mount Amplifier Units.
■ Mounting on a DIN track
1.
Install a Amplifier Unit on a DIN track.
Section 2 INSTALLATION & CONNECTION
p.33
2.
Open the connector cover of each Amplifier Unit.
Controller
Link Unit
Slide the cover to remove.
3.
Insert the Controller Link Unit into the
connector on the one of Amplifier Units.
4.
Slide the other Amplifier Unit, and insert
into the connector on the Controller Link Unit.
■ Removal procedure
1.
Slide one of Amplifier Units, and remove
it from the connector on the Controller
Link Unit.
2.
Slide
the
Controller
Link
Unit
Controller
Link Unit
and
remove it from the connector on the
Amplifier Unit.
3.
Put the cover on the connector of the
Amplifier Unit.
4.
Pull the hook on the I/O cable end downwards.
5.
Lift up the Amplifier Unit from the I/O
cable end, and remove it from the DIN
track.
36
ZFV-C
User’s Manual
Hook on I/O cable
end
Section 2
Amplifier Unit
● Mounting on a panel
The Panel Mount Adapters (sold separately ZS-XPM1/XPM2) can be used to mount
the Amplifier Unit on a panel.
Panel Mount Adapters p.128
Install a Amplifier Unit on a DIN track.
p.33
When mounting on a panel, be sure to install the DIN track on the rear side of the Amplifier
Unit for support.
2.
Push out the Amplifier Unit from the rear
of the panel towards the front.
Panel
3.
Section 2 INSTALLATION & CONNECTION
1.
Install the small Mount Adapters on the
four holes on the Amplifier Unit.
Panel mount
adapters
Panel Mount Adapter Install the small Mount
Adapters on all gang-mounted Amplifier Units.
Panel mount
adapters
ZFV-C
User’s Manual
37
Section 2
Amplifier Unit
4.
Install the long Mount Adapters on the
Panel Mount Adapters
two holes on the small Mount Adapter.
Install the long Mount Adapters only on both
sides of gang-mounted Amplifier Units.
Section 2 INSTALLATION & CONNECTION
Panel Mount Adapters
5.
Install the Amplifier Unit with Mount
the front.
Take care not to pinch the I/O cable.
ZF
V
ZF
V
6.
Hook the hooks of the mounting fixture
onto the two holes of the smaller Mount
Adapters and tighten the screws.
Attach two mounting fixtures each on all gangmounted Amplifier Units.
7.
Make sure that the Amplifier Unit are
firmly fixed on the panel.
38
Panel
Adapters attached onto the panel from
ZFV-C
User’s Manual
Mounting
bracket
Section 2
Amplifier Unit
About the I/O Cable
The following shows the leads that comprise the I/O cable.
(1) Power supply
Blue
(2) GND
Black
(3) OUTPUT*1
Orange
(4) ENABLE
Light blue (5) ERROR
Yellow
(6) TEACH*1
Pink
(7) TRIG*1
Gray
(8) BANK1*1
Green
(9) BANK2*1
Red
(10) BANK3*1
Purple
White
Unused
Unused
*1: Enabled only in the RUN mode
(1)
Power Supply
This connects the power supply.
Use a DC power supply with safe extra-low-voltage circuits to prevent high voltage.
Section 2 INSTALLATION & CONNECTION
Brown
Recommended power supply unit p.21
Wire the power supply separately from other devices. Wiring them together or placing
them in the same duct may cause induction, resulting in malfunction or damage.
(2)
GND
The GND terminal is the 0 V power supply terminal.
(3)
OUTPUT (control output)
This outputs judgment results. This lead is interlocked with OUTPUT LED.
(4)
ENABLE (enable output)
This turns ON when the sensor is ready for measurement.
(5)
ERROR (error output)
This turns ON when an error is generated. This lead is interlocked with ERR LED.
Error Messages and Corrective Actions p.119
ZFV-C
User’s Manual
39
Section 2
Amplifier Unit
(6)
TEACH (teaching input)
There are two teaching modes, workpiece stop teaching and workpiece move teaching. These teaching modes can be selected in the menu.
Selecting the Teaching Mode from an External Device p.97
(7)
TRIG (measurement trigger input)
Section 2 INSTALLATION & CONNECTION
There are two measurement modes, synchronous measurement and continuous
measurement. Which mode of measurement is to be performed in is selected in the
menu.
Selecting the Measurement Timing p.97
(8)
BANK1 (bank switching input 1)
(9)
BANK2 (bank switching input 2)
(10) BANK3 (bank switching input 3)
The bank No. can be switched when BANK1 to BANK3 are connected as follows.
Bank No.
BANK1
BANK3
OFF
OFF
OFF
BANK2
ON
OFF
OFF
BANK3
OFF
ON
OFF
BANK4
ON
ON
OFF
BANK5
OFF
OFF
ON
BANK6
ON
OFF
ON
BANK7
OFF
ON
ON
BANK8
ON
ON
ON
Timing Charts p.42
40
BANK2
BANK1
ZFV-C
User’s Manual
Section 2
Amplifier Unit
■ I/O Circuit diagrams
● NPN output type (ZFV-CA40)
Brown Power (24 VDC)
Black
OUTPUT
Load
Orange ENABLE
Load
Internal circuit
Light blue ERROR
24 VDC
Blue
GND(0V)
Yellow TEACH
Pink
TRIG
Gray
BANK1
Green BANK2
Red
BANK3
Section 2 INSTALLATION & CONNECTION
Load
● PNP output type (ZFV-CA45)
Brown Power (24 VDC)
Yellow TEACH
Pink
TRIG
Gray
BANK1
Internal circuit
Green BANK2
Red
BANK3
Blue
GND(0 V)
Light blue ERROR
24 VDC
Orange ENABLE
Load
Black
OUTPUT
Load
Load
ZFV-C
User’s Manual
41
Section 2
Amplifier Unit
Timing Charts
The following shows the timing charts when communication is performed with external
devices.
■ Measurement
Section 2 INSTALLATION & CONNECTION
● Continuous measurement
Measurement is performed continuously for the duration that the TRIG signal is ON.
The measurement result is updated, and output to external devices at each measurement cycle.
TRIG
OFF
ON
OUTPUT
OFF
ON
ENABLE
OFF
ON
Tout
Tout: Measurement cycle
The measurement cycle changes
depending on the setting.
● Synchronous measurement
Measurement is performed only once in synchronous with the change in TRIG signal
state from OFF to ON, and the result is output.
OFF
ON
TRIG
Tout
OUTPUT
OFF
ON
ENABLE
OFF
ON
Tout: Measurement time.
The measurement time changes
depending on the setting.
• The minimum ON time width of the TRIG signal is 1 ms.
• The OUTPUT signal is held until the measurement result is updated.
Note, however, when one-shot output is set, the OUTPUT signal is held for the preset
time.
One-shot Output p.107
42
ZFV-C
User’s Manual
Section 2
Amplifier Unit
■ Teaching
● Workpiece stop teaching
Teaching processing is performed according to TRIG signal input after the TEACH signal is input.
Measurement is not performed while teaching is being performed. Do not move the
workpiece until teaching is completed.
OFF
ON
TRIG
OFF
ON
ENABLE
OFF
ON
ERROR
OFF
ON
(1)
Section 2 INSTALLATION & CONNECTION
TEACH
(8)
(4)
(5)
(2)
Teaching in progress
(6)
(7)
(1)
Turn the TEACH signal ON.
(2)
Confirm that the ENABLE signal has turned OFF.
(3)
Make sure that the workpiece to be taught is in the teaching area.
(4)
Input the TRIG signal.
(5)
The ENABLE signal turns ON after teaching is completed. At this timing, check
the state of the ERROR signal.
(6)
When teaching has been completed successfully, the ERROR signal stays OFF.
(7)
When teaching fails, the ERROR signal turns ON.
(8)
Turn the TEACH signal OFF, and end teaching processing.
When teaching fails, the state before teaching was initiated is returned to. Perform teaching again.
If the TEACH signal is turned OFF midway, teaching is disabled.
ZFV-C
User’s Manual
43
Section 2
Amplifier Unit
● Workpiece move teaching
Use this teaching mode when the object cannot be stopped. Teaching processing is
divided up and performed in synchronous with the TRIG signal input after the TEACH
signal is input.
Teaching must be processed eight times. Measurement is not performed while teaching is being performed.
Min.150ms
Section 2 INSTALLATION & CONNECTION
TEACH
OFF
ON
TRIG
OFF
ON
ENABLE
ERROR
OFF
ON
OFF
ON
(1)
(8)
(3)
(2)
(4)
Teaching in progress
(5)
(6)
(7)
(1)
Turn the TEACH signal ON from the outside.
(2)
Confirm that the ENABLE signal has turned OFF.
(3)
Input the TRIG signal at the timing for measuring the workpiece to be taught.
(4)
Repeat the input in step (3) eight times. (Trigger inputs from the ninth time
onwards are ignored.)
(5)
The ENABLE signal turns ON after teaching is completed. Check the state of the
ERROR signal at this timing.
(6)
When teaching has been completed successfully, the ERROR signal stays OFF.
(7)
When teaching fails, the ERROR signal turns ON.
(8)
Turn the TEACH signal OFF, and end teaching processing.
When teaching fails, the state before teaching was initiated is returned to. Perform teaching again.
If the TEACH signal is turned OFF midway, teaching is disabled.
44
ZFV-C
User’s Manual
Section 2
Sensor Head
Sensor Head
This section describes how to install and connect the Sensor Head.
Affixing LED Warning Labels
• Label affixing example
Warning label
Warning label
WARNING
LED RADIATION
DO NOT STARE
INTO BEAM
Max.5mW 1msec
400-700nm
Section 2 INSTALLATION & CONNECTION
Affix warning labels (supplied with the sensor) to appropriate positions (e.g. cable) near
the sensor. (ZFV-SC50/SC50W/SC90/SC90W only)
CLASS 2 LED PRODUCT
IEC 60825-1:1993+A1:1997
+A2:2001
Installing the Mounting Fixture
Attach the mounting fixture (provided with the Smart Sensor) to the side of the Sensor
Head.
No mounting bracket is needed for the ZFV-SC150/SC150W sensor heads since it is integrated.
■ Installation procedure
The mounting fixture can be installed on all of the four mounting surfaces.
Mounting fixture
ZFV-C
User’s Manual
45
Section 2
Sensor Head
1.
Align the two hooks on one side of the
Grooves
mounting fixture with the two grooves on
the Sensor Head body (light emitting
side).
Section 2 INSTALLATION & CONNECTION
2.
Hook
Push the other hook.
Push down until you hear it snap into
place.
3.
Make sure that the mounting fixture is
firmly fixed on the Sensor Head.
■ Removing a mounting fixture
Insert a screwdriver into the gap (one of the two gaps) between the mounting fixture
and the Sensor Head case, and remove the mounting fixture.
Mounting fixture
46
ZFV-C
User’s Manual
Section 2
Sensor Head
Installing the Sensor Head
This section describes how to install the Sensor Head.
■ Setting distance
Workpiece
• ZFV-SC10
Setting distance L
Detection range H
Setting distance L (mm)
100
30
4
Detection range H (mm) Setting distance L (mm)
5
34
6
37
7
40
8
44
9
49
Section 2 INSTALLATION & CONNECTION
The following graphs show the relationship between detection range and setting distance for each model of Sensor Head.
Values differ according to each model of Sensor Head, so check the model before
using these graphs.
10
Detection range H (mm)
• ZFV-SC50
Setting distance L (mm)
Detection range H (mm) Setting distance L (mm)
190
100
30
9 10
50
Detection range H (mm)
10
31
15
51
20
70
25
90
30
109
35
128
40
148
45
167
50
187
ZFV-C
User’s Manual
47
Section 2
Sensor Head
• ZFV-SC90
Setting distance L (mm)
Detection range H (mm) Setting distance L (mm)
160
100
Section 2 INSTALLATION & CONNECTION
40
40
70
100
Detection range H (mm)
67
55
76
60
86
65
95
70
104
75
114
80
123
85
132
90
142
• ZFV-SC150
Setting distance L (mm)
Detection range H (mm) Setting distance L (mm)
240
180
100
80
120
160
Detection range H (mm)
48
50
ZFV-C
User’s Manual
90
115
95
124
100
134
105
143
110
152
115
162
120
171
125
180
130
190
135
199
140
208
145
218
150
227
Section 2
Sensor Head
■ Adjusting the Sensor Head Focus
1.
Set the menu selector switch to “STD
ADJ
menu” and the mode selector switch to
“MENU mode”.
Section 2 INSTALLATION & CONNECTION
2.
MENU RUN
Set the reference workpiece in place.
Reference
workpiece
3.
Place the cursor on
and press the
MENU
SET Key.
TEACH
4.
Adjust the camera’s setting distance.
Refer to the graph and set the camera in a
position so that the area to be checked is
within the detection area (LCD monitor).
Detected distance (L)
Detection range (H)
ZFV-C
User’s Manual
49
Section 2
Sensor Head
5.
Turn the focus adjustment control to the
Focus
adjustment
control
left and right to adjust the focus.
For ZFV-SC10/SC50/SC50W
Section 2 INSTALLATION & CONNECTION
• Turn to right: Focuses to the far side.
• Turn to left: Focuses to the near side.
Default is focus set at furthest point.
First turn the focus adjustment control slightly to the left and right, to make sure that the Focus
adjustment control is not at the upper or lower limit positions. The focus adjustment control is
a multi-turn potentiometer. However, the control stops turning at the upper or lower limit positions. Do not exert unnecessary force to turn the control at the upper or lower limit positions
as this might damage the control.
For ZFV-SC90/SC90W/SC150/SC150W
• Turn to right: Focuses to the near side.
• Turn to left: Focuses to the far side.
Default is focus set at nearest point.
The focus adjustment control is a multi-turn potentiometer. However, the control stops turning
at the nearest position. Do not exert unnecessary force to turn the control as this might damage the control. It turns free at the farthest position.
If the workpiece is glossy, install the Sensor Head at an angle to prevent mirror
reflection light from being picked up by the
sensor.
Mirror reflection light
6.
Check the image.
TEACH/SEARCH
TEACH/SEARCH
ABCDE
ABCDE
ITEM
50
ZFV-C
User’s Manual
REG.
ITEM
REG.
Section 2
Sensor Head
Connecting the Sensor Head
This section describes how to connect the Amplifier Unit.
• Before connecting/disconnecting the Sensor Head, make sure that the Amplifier Unit is turned OFF.
The Smart Sensor may break down if the Sensor Head is connected or disconnected while the power
is ON.
■ Connecting the Sensor Head
Insert the Sensor Head connector into the Sensor Head connector of the Amplifier Unit.
Ferrite core
Attach the ferrite cores on the cable of the Sensor Head.
Make sure that one ferrite core is attached to the connector side as well as to the body side.
Section 2 INSTALLATION & CONNECTION
• Do not touch the terminals inside the connector.
■ Disconnecting the Sensor Head
Pull out the Sensor Head connector while pressing the hooks on both sides of the Sensor Head connector.
ZFV-C
User’s Manual
51
Section 2
Sensor Head
■ Connecting the Optional Lighting Unit
This optional lighting unit can be mounted to the rear connector of the sensor head
(ZFV-SC50/SC50W/SC90/SC90W) with a single motion, and no power supply is
required for the unit.
Section 2 INSTALLATION & CONNECTION
52
Connector of the
optional lighting unit
ZFV-C
User’s Manual
Remove the cap from the LIGHT connector
on the rear of the sensor head.
Section 3
FUNCTIONS AND OPERATIONS TO
BE USED
54
Key Operations for RUN Mode
57
Switching to Another Bank
58
ZFV-C
User’s Manual
Section 3 FUNCTIONS AND OPERATIONS TO BE USED
Switching the Display Content
53
Section 3
Switching the Display Content
Switching the Display Content
Display contents on the LCD monitor can be changed in the RUN mode. Content is
switched in the following order each time the TEACH/VIEW key is pressed. Display the
measured values suitable for your application.
The measurement time differs according to the type of display image. The measurement time for “only
image display” is the fastest. The number in parentheses ( ) serves as a guideline when “only image display” is taken as the reference.
When the image is switched during measurement, the measurement time changes. For this reason,
Section 3 FUNCTIONS AND OPERATIONS TO BE USED
monitor the ENABLE signal, wait for the ENABLE signal to turn ON, and then input the TRIG signal.
● Only image
display
● Judgment result
SEARCH
OK
● Teaching area
SEARCH
OK
+
● Teaching area
and Measurement result (*1)
SEARCH
OK
+
SCORE : 98
TH
: 60
(image only display + 9 ms)
● Measurement
result (*3)
SEARCH
OK
JG
: OK
SCORE :
98
TH
:
60
AVE
:
0
DRANGE : 0-100
MCONT :
2
NG%
: 1.000
TIME
:
144
● Enlargement of measurement result and
control bar (*2)
SEARCH
OK
JG :
SCORE :
(image only display + 26 ms)
(image only display + 60 ms)
● Teaching area and
control bar (*2)
SEARCH
OK
+
98
(image only display + 240 ms)
(image only display + 95 ms)
(image only display + 60 ms)
(*1) In the case of [BRIGHT], the display can be switched (average density value, density distribution value)
by the LEFT/RIGHT keys.
(*2) The control bar shows the measurement result and judgment threshold value.
(*3) The measurement time (TIME) indicated here is the shortest measurement time in “only image display”.
In the displays showing an image, the image type (color/monochrome) is switched each time the [A]
function key is pressed.
54
ZFV-C
User’s Manual
Section 3
Switching the Display Content
Characters Displayed on the LCD Monitor and Their
Meanings
Characters in parentheses are the characters that are displayed in the enlarged display
mode.
■ Items displayed in common at [ITEM]
Display
Characters
Details
Judgment result (OK/NG)
TH
Judgment threshold value
In the case of the upper/lower limits, XX - YY (lower limit - upper limit) is displayed.
AVE
Average value of measurement result
DRANGE
Min. and max. of measurement result
XX - YY (min. value - max. value)
MCONT
Measurement count (1 to 9999999)
NG%
NG occurrence ratio (NG count/measurement count)
TIME
Measurement time
The shortest measurement time when the display image is set to “Display only image”.
■ Items displayed individually
● SEARCH, MATCH, CHARA2
Display
Characters
SCORE
Details
Correlation values of measured model
If [COL JUGE] is set to [ON] in the CUSTOM menu in the case of [SEARCH] and
[MATCH], the correlation value will be “0” when the measured area is NG.
● AREA
Display
Characters
AREA
Section 3 FUNCTIONS AND OPERATIONS TO BE USED
JG
Details
Area value (value obtained by normalizing with area value taken during teaching as
100)
● HUE
Display
Characters
DIFF
Details
Difference between reference color and measured color
Hue Indication Number p.159
● WIDTH
Display
Characters
WIDTH
Details
Edge width
ZFV-C
User’s Manual
55
Section 3
Switching the Display Content
● POSITION
Display
Characters
GAP
Details
Deviation from reference position
● COUNT
Display
Characters
CNT
Details
Count number
● BRIGHT
Section 3 FUNCTIONS AND OPERATIONS TO BE USED
56
Display
Characters
Details
DENAVE
Density average value
DENDEV
Density distribution value
● CHARA1
Display
Characters
DENDEV
ZFV-C
User’s Manual
Details
Density distribution value
Section 3
Key Operations for RUN Mode
Key Operations for RUN Mode
Control keys
Description
TEACH/VIEW key
Function keys
Switches the display content.
A
B
C
D
A: Switches the image display conditions.
B: (Not used)
C: Performs measurement again.
D: (Not used)
← LEFT key
→ RIGHT key
In [BRIGHT], the display content is switched between “average density value” and “density distribution value”.
↑UP key
↓ DOWN key
Not used.
SET key
Not used.
ESC key
Not used.
ZFV-C
User’s Manual
Section 3 FUNCTIONS AND OPERATIONS TO BE USED
Key
57
Section 3
Switching to Another Bank
Switching to Another Bank
ZFV-C can hold up to eight sets of settings. These settings can be switched externally
according as inspection condition. A set of these settings is called a “bank”.
A bank also contains the threshold value set in ADJ mode.
• What is a Bank?
Each set of measurement settings is
Threshold
Registered as a bank.
Threshold
Section 3 FUNCTIONS AND OPERATIONS TO BE USED
BANK1
BANK2
BANK3
■ Switching to another bank by control keys
1.
Switch to MENU mode.
2.
Select
ADJ
MENU RUN
.
MENU
BANK
3.
Select the desired bank number.
BANK
1.BANK1
2.BANK2
3.BANK3
4.BANK4
5.BANK5
6.BANK6
7.BANK7
8.BANK8
■ Switching to another bank by the external signal
A bank can be switched from one to another by combining BANK input signals 1 to 3.
This is possible with RUN mode only.
Wiring p.39
The setting for the bank switching method must be changed.
Setting the Bank Switching Method p.95
Bank switching is also possible by CompoWay/F or by entering a non-procedural command.
58
ZFV-C
User’s Manual
Section 4
SETTING OF INSPECTION CONDITION
Basic Knowledge for Operation
60
60
Teaching Flow
61
Inspecting by Pattern (PATTERN)
62
Inspecting by the Size (Area)
66
Inspecting by Color (HUE)
70
Inspecting by Width (WIDTH)
72
Inspecting by Position (POSITION)
75
Inspecting by Count (COUNT)
78
Inspecting by Brightness (BRIGHT)
81
Detecting Presence of Character String (CHARA)
84
ZFV-C
User’s Manual
Section 4 SETTING OF INSPECTION CONDITION
Displays of MENU/ADJ Mode and Key Operations
59
Section 4
Basic Knowledge for Operation
Basic Knowledge for Operation
Displays of MENU/ADJ Mode and Key Operations
Make setups by the control keys while looking at the menus and the image displayed
on the LCD monitor.
The details that are displayed differ according to the operating mode.
• MENU mode
• ADJ mode
Bank No. and measurement item
Setting item
TEACH/SEARCH
Section 4 SETTING OF INSPECTION CONDITION
ITEM
Settings
TH
The currently selected
item is displayed with
black in white background
OK
80
60]
[
Judgment
Threshold value or
measurement result
Key operation
Control keys
Key
Description
← LEFT key
→ RIGHT key
The function of these keys differs according to the operating mode.
In MENU mode: Moves through menus.
In ADJ mode: Changes the adjustment item (type of threshold value).
↑UP key
↓ DOWN key
The function of these keys differs according to the operating mode.
In MENU mode: Moves between menus, selects parameters, and sets
numerical values.
In ADJ mode: Changes numerical values.
TEACH/VIEW key
The function of these keys differs according to the operating mode.
In MENU mode: Executes teaching.
In ADJ mode: Switches the screen display.
SET key
• Selects menus
• Selects items
ESC key
Returns to the previous menu.
Function keys
60
REG.
SEARCH
ZFV-C
User’s Manual
A
B
C
D
A: Switches the image display conditions. (effective in the displays
showing an image)
B: (Not used)
C: (Not used)
D: Sets the detailed color selection conditions (effective in the color
pickup screen).
Section 4
Basic Knowledge for Operation
Teaching Flow
TEACH/SEARCH
MENU
Adjust the image's
focus and sensor
head's mount position
while monitoring the
image.
Activating the MENU mode and
opening the teaching screen
ITEM
TEACH
TEACH/ITEM
REG.
Selecting the inspection item
[ITEM]
PATTERN
TEACH/REG.
PTRN
AREA
HUE
WID
POSI
CNT
BRGT
CHARA
TEACH/REG.
Enclose the area to be
inspected using a
rectangular box.
The size and position of
the box can be adjusted.
Area adjustment
[REG.]
SIZE
MOVE
When [AREA] is Selected
Color Selection
Select [PICK].
TEACH/AREA1
ITEM
REG.
PICK
Specify the desired
selection area in
[PICKAREA].
TEACH/PICK
Select the desired
candidate color in
[PICKCOL].
TEACH/PICK
MOVE
SEL
Section 4 SETTING OF INSPECTION CONDITION
Pattern
Area
Hue
Width
Position
Count
Brightness/dirt
Character
:VOID
D: HIST
Candidate color
* If the EXP menu has been selected, the color selection menu will
also appear when [WID], [POSI] or [CNT] is selected.
TEACH/SEARCH
Press the TEACH key
to perform teaching.
Executing teaching
ITEM
REG.
* Teaching cannot be performed with the area adjustment and
color selection screens.
ZFV-C
User’s Manual
61
Section 4
Inspecting by Pattern (PATTERN)
Inspecting by Pattern (PATTERN)
Inspects “presence/absence” of the workpiece and judges whether the type of
workpiece is correct.
There are two measurement items for [PATTERN]: [SEARCH] and [MATCH].
● Search
Judgment is performed by whether the registered model is or is not in the inspected
area. This item works with workpieces tilted to an angle of ±45°.
Example: Inspection of upside down orientation, and color of electronic components
SEARCH
OK
OK
ABCDE
A
B
C
D
E
C
NG judgment will
also be made if the
workpiece is placed
upside down.
B
ABCDE
NG
A
SEARCH
If the workpiece is placed
in wrong orientation, NG
judgment will be made
since “ ” is not detected
in the teaching area.
A
B
C
D
E
Section 4 SETTING OF INSPECTION CONDITION
NG
SEARCH
● Match
Select this item for inspecting shapes and recognizing different objects. Judgment is
performed by comparing the degree of match between a registered model and the target workpiece. Compared with [SEARCH], more detailed inspection is possible, and
larger workpieces can be inspected. Note, however, that this item does not work with
tilted workpieces.
Example: Inspection of wrong model and color of electronic components
MATCH
OK
OK
ABCDE
MATCH
NG
NG due to wrong
characters
E
D
C
B
A
AFGHI
ABC
DE
MATCH
AF
GH
I
NG
E
CD
AB
“NG” due to inclination of the workpiece
AB
CD
E
AB
CD
E
62
ZFV-C
User’s Manual
Section 4
Inspecting by Pattern (PATTERN)
Basic Setting Procedure
■ Teaching
The area to be inspected needs to be enclosed by a rectangular box, then teach it. The
selected image in the area is registered as the inspection reference (model).
Measurement is unstable when there are two or more of the same pattern. Register
unique pattern in the screen or restrict the search range.
Inspection area
setting
SEARCH
Teaching
OK
ABCDE
■ Adjusting the threshold level
Threshold values are adjusted to determine the range for OK judgment. Adjust the
threshold values referring to the current indicated measurement results. Adjustment of
the threshold values must be done in ADJ mode.
● Switching to ADJ mode
● Adjustment of area value
● Adjustment of correlation
value
SEARCH
OK
SEARCH
OK
ADJ
ABCDE
ABCDE
MENU RUN
TH
[
80
60]
Measured
values
Correlation value
Upper/lower limit
80
L: [ 80] H:[ 120] B
Lower limit
Measured
values
Upper limit
Section 4 SETTING OF INSPECTION CONDITION
Application and Setting Examples p.150
LEFT/RIGHT keys: Select upper limit/lower limit.
UP/DOWN keys: Change values.
Setting item
Range
Details of Adjustment
Correlation
value
0 to 100
This is the lower limit of the correlation value with the teaching model. This
value or above is judged as OK.
Area value
0 to 999
Displayed when [COL JUGE] - [ON] is selected in the CUSTOM menu. “Area
of the largest color group” is registered as the reference area when teaching
is performed. Set the range for OK judgment with the registered area as
“100”.
ZFV-C
User’s Manual
63
Section 4
Inspecting by Pattern (PATTERN)
CUSTOM Menu
Items that can be customized
Items that can be customized
Page
Items Related to
pattern
Changing the search area
p.64
Setting the rotation range of a workpiece (only when [SEARCH] is selected)
p.64
Items related to
color
Changing the filter color
p.65
Performing color check
p.65
Teaching brightness
p.65
■ Items related to pattern
Section 4 SETTING OF INSPECTION CONDITION
64
● Changing the search area
Change the area to search the model in. Specify the top left and bottom right of the
search area.
Search area
Model
ABCDE
X MENU mode-[TEACH] -[CUSTM] -[SEARCH AREA]
● Setting the rotation range of a workpiece (only when [SEARCH] is selected)
Set this item when even a tilted workpiece is to be set as a non-defective item.
X MENU mode-[TEACH]-[CUSTM]-[ROTATION]
Setting
±10° (default), ±20°, ±30°, ±45°
ZFV-C
User’s Manual
Details
Set the range of acceptable tilt.
The wider the rotation range, the longer the measurement time.
Section 4
Inspecting by Pattern (PATTERN)
■ Items related to color
● Changing the filter color
By default (AUTO), a color filter that increases the contrast of “area of the largest color
group” and “area of the second largest color group” located inside the area will be
selected automatically.
If the contrast of the desired image is not increased with [AUTO], the filter color can be
changed to suit the image.
X MENU mode-[TEACH]-[CUSTM]-[FILTER]
Setting
Details
A color filter that increases the contrast of “area of the largest color group”
and “area of the second largest color group” located inside the area will be
selected automatically.
RED, GREEN, BLUE,
YELLOW, CYAN, MAGENTA
Select the color filter that is suitable for the image to be inspected.
MONOCHROME
Disables the color filter to convert the image to a monochrome image.
● Performing color check
For more stable judgment, inspection is performed using color information in addition to
pattern information.
X MENU mode-[TEACH]-[CUSTM]-[COL JUGE]
Setting
Details
OFF (default)
“Area of color” is not checked. Only “degree of similarity to model shape” is
checked.
ON
The area of the color is checked, and the correlation value will be “0” if the result is
NG.
● Teaching Brightness
If this function is set to [ON] (default), even if the brightness changes due to fluctuation
of surround lighting, the sensor works well, thereby this function is useful to prevent
color pickup problems that may occur due to lighting fluctuation.
If this function is set to [OFF], workpieces whose brightness and vividness differ from
those of the workpiece that was “taught” first can be identified.
Section 4 SETTING OF INSPECTION CONDITION
AUTO (default)
X MENU mode-[TEACH]-[CUSTM]-[LIGHT TEACH]
Setting
Details
ON (default)
The brightness/chromaticness range for color selection is changed during teaching.
OFF
The brightness/chromaticness range for color selection is not changed during
teaching.
ZFV-C
User’s Manual
65
Section 4
Inspecting by the Size (Area)
Inspecting by the Size (Area)
Select this item to inspect objects by size (area).
There are two measurement items for [AREA]: [AREA1] and [AREA2].
● AREA1
Make a judgment based on the total area of the picked-up colors (max. 4 colors).
This method is useful when the workpiece is not stationary and it has halation or
printed characters.
Example: Inspection of shortages in confectionery
Section 4 SETTING OF INSPECTION CONDITION
AREA1
OK
AREA1
NG
OK
NG due to insufficient area
● AREA2
Make a judgment based on the area of each picked-up color (max. 4 colors). The judgment will be “OK” if the area of every color is within the specified threshold. This
method is suitable when some colors are missing or the colors are different.
Example: Campaign labels inspection
AREA2
OK
OK
1
point
AREA2
NG
1
point
NG because the area
of the background
color differs from the
reference area
1
point
1
point
AREA2
NG
1
point
66
ZFV-C
User’s Manual
NG because the
area of the “1 Point”
color differs from the
reference area
1
point
Section 4
Inspecting by the Size (Area)
● AREA3
Measure the area by specifying the measurement target according to brightness, not
color, difference. (Binary image)
This method is suitable when detecting a glossy metal surface and making a presence/
absence judgment according to the brightness difference, not to the color difference.
Example: Detection of presence of screw holes
AREA3
OK
AREA3
NG
OK
NG due to insufficient black area
Section 4 SETTING OF INSPECTION CONDITION
ZFV-C
User’s Manual
67
Section 4
Inspecting by the Size (Area)
Basic Setting Procedure
■ Teaching
Teaching is performed after the object and color to be inspected are specified.
Inspection
area setting
AREA2
Color Selection
OK
TEACH/PICK
1
1
point
ITEM
Teaching
point
REG.
PICK.
SEL
:VOID
D:HIST
Application and Setting Examples p.152
Section 4 SETTING OF INSPECTION CONDITION
■ Adjusting the threshold level
Threshold values are adjusted to determine the range for OK judgments.
Adjust the threshold values referring to the currently indicated measurement results.
Adjustment of the threshold values must be performed in ADJ mode.
● AREA1/AREA2/AREA3
● Switching to ADJ
mode
AREA1
OK
ADJ
MENU RUN
1
point
80
L: [ 80] H:[ 120] B
Upper/lower limit
Setting item
Area value
68
● Adjusting of area value
ZFV-C
User’s Manual
Range
0 to 999
Lower limit
Measured values
Upper limit
LEFT/RIGHT keys: Select upper limit/
lower limit.
UP/DOWN keys: Change values.
Details of Adjustment
This is the range for OK when the value at teaching is taken to be 100 %.
If AREA2 is selected, the same judgment conditions will be used for all the four
colors. Judgment is made based on the color, among the four colors, that has the
largest difference from the reference value.
Section 4
Inspecting by the Size (Area)
CUSTOM Menu
Items that can be customized
Items that can be customized
Page
Items related to color
Teaching brightness
p.65
Items related to monochrome
(When AREA3 is selected)
Selecting the target color
p.69
Setting binary levels
p.69
■ Items Related to Monochrome
This CUSTOM menu is provided when AREA3 is selected.
X MENU mode-[TEACH]-[CUSTM]-[COLOR]
Setting
WHITE (default)
Details
Select which part of the measurement area is to be set as white pixels.
BLACK
● Setting binary levels
Set the level for converting the color image captured from Sensor Head to a binary
image.
X MENU mode-[TEACH]-[CUSTM]-[BINARY]
Setting
0 to 255
Details
Adjust the binary level so that the measuring area is the target color.
Section 4 SETTING OF INSPECTION CONDITION
● Selecting the target color
Reverse the currently displayed binary image.
As white pixels are targeted for measurement, select which part of the measured area
is to be set to white pixels.
CUSTM/BINARY
L: [ 80] H:[ 120]
Upper/lower limit
Lower limit
Upper limit
LEFT/RIGHT keys: Select upper limit/lower limit.
UP/DOWN keys: Change values.
ZFV-C
User’s Manual
69
Section 4
Inspecting by Color (HUE)
Inspecting by Color (HUE)
This item inspects color difference of plain-colored workpieces. If there are two
or more colors in the area, the color of the largest area will be the subject of
inspection.
Example: Cap color inspection
HUE
OK
HUE
NG
OK
Section 4 SETTING OF INSPECTION CONDITION
NG due to wrong
color
Basic Setting Procedure
■ Teaching
Enclose the area to be inspected using a square box, and then perform teaching.
Inspection area
setting
Teaching
TEACH/HUE
Application and Setting Examples p.156
70
ZFV-C
User’s Manual
Section 4
Inspecting by Color (HUE)
■ Adjusting the threshold level
● Switching to
ADJ mode
● Adjusting the
Threshold Level
HUE
OK
ADJ
MENU RUN
TH
[
5
10]
Measured values
Threshold
UP/DOWN keys: Change values.
Setting item
0 to 509
Details of Adjustment
Threshold for color difference needs to be set. The judgment will be OK if the
measured color difference is below the threshold.
Hue Indication Number p.159
ZFV-C
User’s Manual
Section 4 SETTING OF INSPECTION CONDITION
Color difference
Range
71
Section 4
Inspecting by Width (WIDTH)
Inspecting by Width (WIDTH)
This item inspects the width or gap of workpieces.
It is suitable for applications such as checking lead bend and label position.
Example: Inspection of capacitor lead gap
Section 4 SETTING OF INSPECTION CONDITION
WIDTH
OK
WIDTH
NG
WIDTH
NG
OK
NG due to too wide
lead gap
NG due to too
narrow lead gap
Basic Setting Procedure
■ Teaching
Enclose the area to be inspected using a rectangular box and then perform teaching.
Inspection area
setting
WIDTH
Teaching
OK
Set so that there are two changes in brightness such as “light to dark” or “dark to light” in the inspection area.
72
ZFV-C
User’s Manual
Section 4
Inspecting by Width (WIDTH)
■ Adjusting the threshold level
● Switching to
ADJ mode
● Adjustment of
edge width
WIDTH
● Adjustment of
edge width
WIDTH
OK
OK
Edge level
ADJ
MENU RUN
120
L: [ 100] H:[ 150]
Upper/lower limit
Lower limit
Measured
values
:LEV
:SEL
EDGE LEV [ 50]
Upper limit
Edge level
• When edge detection direction is ←→
LEFT/RIGHT keys: Switch edge.
UP/DOWN keys: Change values.
LEFT/RIGHT keys: Select upper limit/lower limit.
UP/DOWN keys: Change values.
Setting item
Range
Details of Adjustment
Edge width
0 to 999
This is the range for OK when the width at teaching is taken to be 100 %.
Edge level
0 to 100
This is the density level judged to be an edge.
Adjust this level when measurement is unstable.
Teaching area
Max. density value
Edge level
Min. density value
CUSTOM Menu
Section 4 SETTING OF INSPECTION CONDITION
• When edge detection direction is ↑↓
UP/DOWN keys: Switch edge.
LEFT/RIGHT keys: Change values.
Items that can be customized
Items that can be customized
Page
Items related to
edge detection
Selecting the color of edge
p.74
Selecting the edge detection direction
p.74
Items related to
color
Changing the color mode (default: FILTER)
p.74
Changing the filter color (only when [FILTER] is selected in [COL MODE])
p.65
Teaching Brightness (only when [PICKUP] is selected in [COL MODE])
p.65
ZFV-C
User’s Manual
73
Section 4
Inspecting by Width (WIDTH)
■ Items related to edge detection
Set the direction in which edges are searched and the density level.
Example)
Teaching area
To inspect this width
EDGE MODE: DARK
DIRECTION: ←→
● Selecting the color of edges
Select the direction of density change for the edge to be detected.
Section 4 SETTING OF INSPECTION CONDITION
X MENU mode-[TEACH]-[CUSTM]-[EDGE MODE]
Setting
Details
DARK
Dark areas shown in the filtered monochrome image are assumed to be
edges.
LIGHT (default)
Light areas shown in the filtered monochrome image are assumed to be
edges.
● Selecting the edge detection direction
Select the direction in which edges are searched.
X MENU mode-[TEACH]-[CUSTM]-[DIRECTION]
Setting
Details
↑ ↓
Searches in the vertical direction.
← → (default)
Searches in the horizontal direction.
■ Items related to color
● Changing the color mode
ZFV-C has two color inspection modes as follows.
X MENU mode-[TEACH]-[CUSTM]-[COL MODE]
Setting
74
Details
FILTER (default)
A color filter is used to increase the contrast with the background.
When [AUTO] filter is selected, a color filter that increases the contrast in the
area will be selected automatically.
It is also possible to select a filter that suits the workpiece.
PICKUP
Select the color to be checked from a list of colors.
ZFV-C
User’s Manual
Section 4
Inspecting by Position (POSITION)
Inspecting by Position (POSITION)
This item is used to check the position of the workpiece. The edge of the workpiece is detected, and judgment is performed by comparing those edge coordinates against reference coordinates. This item is suitable for applications such
as checking presence/position of sealing tape and checking label position.
Example: Inspection of label presence/position
OK
OK
POSITION
NG
NG due to incorrect
tape edge position
POSITION
NG
NG due to no tape
edge position
Basic Setting Procedure
■ Teaching
Enclose the area to be inspected using a rectangular box and then perform teaching.
Inspection
area setting
POSITION
Teaching
Section 4 SETTING OF INSPECTION CONDITION
POSITION
OK
Set so that there is one change in brightness such as “light to dark” or “dark to light” in the inspection
area.
ZFV-C
User’s Manual
75
Section 4
Inspecting by Position (POSITION)
■ Adjusting the threshold level
● Switching to
ADJ mode
● Adjustment of edge
position
● Adjustment of
edge level
Edge level
POSITION
OK
POSITION
OK
ADJ
MENU RUN
GAP
120
[ 150]
Measured
values
Threshold
Amount of shift
:LEV CHANGE
EDGE LEV [ 50]
Edge level
• When edge detection direction is →
UP/DOWN keys: Change values.
UP/DOWN keys: Change values.
Section 4 SETTING OF INSPECTION CONDITION
• When edge detection direction is ↓
LEFT/RIGHT keys: Change values.
Setting item
Range
Details of Adjustment
Edge position
0 to 468
Amount of shift from reference position
Edge level
0 to 100
This is the density level judged to be an edge.
Adjust this level when measurement is unstable.
p.73
CUSTOM Menu
Items that can be customized
Items that can be customized
Items related to Selecting the color of edges
edge detection Selecting the edge detection direction
Changing edge sensitivity
Items related to Changing the color mode (default: [FILTER])
color
Changing the filter color (only when [FILTER] is selected in [COL MODE])
Teaching Brightness (only when [PICKUP] is selected in [COL MODE])
76
ZFV-C
User’s Manual
Page
p.77
p.77
p.77
p.74
p.65
p.65
Section 4
Inspecting by Position (POSITION)
■ Items related to edge detection
Set the direction in which edges are searched and the change in density.
Example)
To detect this position
EDGE MODE: DARK
DIRECTION: →
● Selecting the color of edges
Select the direction of density change for the edge to be detected.
X MENU mode-[TEACH]-[CUSTM]-[EDGE MODE]
Details
DARK
Dark areas shown in the filtered monochrome image are assumed to be
edges.
LIGHT (default)
Light areas shown in the filtered monochrome image are assumed to be
edges.
● Selecting the edge detection direction
Select the direction in which edges are searched.
X MENU mode-[TEACH]-[CUSTM]-[DIRECTION]
Setting
Details
↑
Searches from bottom to top.
↓
Searches from top to bottom.
→ (default)
Searches from left to right.
←
Searches from right to left.
Section 4 SETTING OF INSPECTION CONDITION
Setting
● Changing edge sensitivity
Change sensitivity when a stable edge cannot be located.
X MENU mode-[TEACH]-[CUSTM]-[EDGE SENSE]
Setting
SENSITIVE
Details
Edge sensitivity is high.
Select this when contrast is low and a stable edge cannot be located.
NORMAL (default)
Standard sensitivity.
ROUGH
Edge sensitivity is low.
Select this when something like dust is mistakenly detected as the edge.
ZFV-C
User’s Manual
77
Section 4
Inspecting by Count (COUNT)
Inspecting by Count (COUNT)
Select this item when counting the number of workpieces. The edges in the
teaching area are detected, and judgment is performed by comparing the number of edges with a reference value. This item is suitable for applications such as
inspecting the number of cookies in a box, checking the number of leads and
counting cables.
Example: Checking the number of lead
Section 4 SETTING OF INSPECTION CONDITION
COUNT
OK
OK
COUNT
NG
NG due to the number of lead is few
Basic Setting Procedure
■ Teaching
Enclose the area to be inspected using a rectangular box and then perform teaching.
Inspection
area setting
COUNT
Teaching
OK
A change in brightness such as “light to dark to light” or “dark to light to dark” is counted as “1”.
In the above example, the count is 5.
78
ZFV-C
User’s Manual
Section 4
Inspecting by Count (COUNT)
■ Adjusting the threshold level
● Switching to
ADJ mode
● Adjustment of
edge level
● Adjustment of
count
COUNT
OK
COUNT
OK
ADJ
MENU RUN
L:[
5]
Lower limit
5
5]
H:[
Measured
values
: LEV CHANGE
EDGE LEV: [ 50]
Edge level
Upper limit
• When edge detection direction is →
UP/DOWN keys: Change values.
UP/DOWN keys: Change values.
• When edge detection direction is ↓
LEFT/RIGHT keys: Change values.
Range
Details of Adjustment
Count
0 to 255
Threshold level for counting.
Edge level
0 to 100
This is the density level judged to be an edge.
Adjust this level when measurement is unstable.
p.73
CUSTOM Menu
Items that can be customized
Items that can be customized
Page
Items related to
edge detection
Selecting the color of edge
p.80
Selecting the edge detection direction
p.80
Items related to
color
Changing the color mode (default: [FILTER])
p.74
Changing the filter color (only when [FILTER] is selected in [COL MODE])
p.65
Changing Brightness during teaching (only when [PICKUP] is selected in [COL
MODE])
p.65
Section 4 SETTING OF INSPECTION CONDITION
Setting item
■ Items related to edge detection
Set the direction in which edges are searched and the density level.
Example)
To detect this number
+ + + + +
EDGE MODE: DARK
DIRECTON: →
ZFV-C
User’s Manual
79
Section 4
Inspecting by Count (COUNT)
● Selecting the color of edges
Select the direction of density change for the edge to be detected.
X MENU mode-[TEACH]-[CUSTM]-[EDGE MODE]
Setting
Details
DARK
Dark areas shown in the filtered monochrome image are assumed to be
edges.
LIGHT (default)
Light areas shown in the filtered monochrome image are assumed to be
edges.
● Selecting the edge detection direction
Select the direction in which edges are searched.
X MENU mode-[TEACH]-[CUSTM]-[DIRECTION]
Section 4 SETTING OF INSPECTION CONDITION
80
Setting
Details
↓
Searches from top to bottom.
→ (default)
Searches from left to right.
ZFV-C
User’s Manual
Section 4
Inspecting by Brightness (BRIGHT)
Inspecting by Brightness (BRIGHT)
Select this item to detect brightness (density) or scratches/dirt on plain workpieces.
It is suitable for applications such as checking for dirt on battery surface,
scratches on sheets and checking whether LEDs light up properly.
Example: Inspection for Dirt on Battery Surface
OK
OK
BRIGHT
NG
NG due to dirt
Basic Setting Procedure
■ Teaching
Enclose the area to be inspected using a rectangular box and then perform teaching.
Inspection area
setting
BRIGHT
Section 4 SETTING OF INSPECTION CONDITION
BRIGHT
Teaching
OK
ZFV-C
User’s Manual
81
Section 4
Inspecting by Brightness (BRIGHT)
■ Adjusting the threshold level
● Switching to
ADJ mode
● Adjustment of density deviation value
● Adjustment of average density value
BRIGHT
OK
BRIGHT
OK
ADJ
MENU RUN
200
L: [ 200] H:[ 220] A
Upper/lower limit
Lower limit
Measured
values
Upper limit
Upper/lower limit Lower limit
Section 4 SETTING OF INSPECTION CONDITION
82
Range
Measured
values
Upper limit
LEFT/RIGHT keys: Select upper limit/
lower limit.
UP/DOWN keys: Change values.
LEFT/RIGHT keys: Select upper limit/
lower limit.
UP/DOWN keys: Change values.
Setting item
50
L: [ 30] H:[ 60] D
Details of Adjustment
Average
0 to 255
density value
Threshold level for the average density in the teaching area.
Density devi- 0 to 127
ation value
Threshold level for the density deviation in the teaching area.
CUSTOM Menu
Items that can be customized
Items that can be customized
Page
Items related to
brightness
Changing the detection content
p.83
Items related to
color
Changing the filter color
p.65
ZFV-C
User’s Manual
Section 4
Inspecting by Brightness (BRIGHT)
■ Items related to brightness
● Changing the detection content
Select the content to be inspected.
X MENU mode-[TEACH]-[CUSTM]-[METHOD]
Setting
Details
AVERAGE (default)
Inspect by brightness (average density value).
Whether an object is lighter or darker is detected by referring to the density at teaching.
DEVIATION
Inspect by (density deviation) in density.
Select this to detect scratches or dirt.
Teaching image
Section 4 SETTING OF INSPECTION CONDITION
When [AVERAGE] is selected
OK
NG
NG
NG judged when density is different
When [DEVIATION] is selected
OK
OK
OK judged if there is no density
change even if density is different
NG
NG
NG judged if there is density
change
ZFV-C
User’s Manual
83
Section 4
Detecting Presence of Character String (CHARA)
Detecting Presence of Character String (CHARA)
Select this item to check for presence of character strings.
There are two measurement items for [CHARA]: [CHARA1] and [CHARA2].
● CHARA1
Select this item to check for presence of the entire character string printed on plain
background. Judgment is performed by monitoring changes in density (brightness) of
the registered character string. Errors in characters, missing dots, etc. cannot be
detected. This item is suitable for applications such as detection of presence of prints
on chips and presence of entire characters of the best-before date.
Example: Detection of presence of prints on chip
CHARA1
OK
OK
Section 4 SETTING OF INSPECTION CONDITION
505
CHARA1
NG
NG due to absence
of characters
50
5
50
5
50
5
50
5
● CHARA2
Select this item to detect omission of single characters.
Errors in single characters, missing dots, etc. cannot be detected. This item is suitable
for applications such as detection of missing character in character strings such as the
best-before date.
Example:
CHARA2
OK
OK
505
CHARA2
NG
NG due to absence
of a character
50
50
5
50
5
50
50
5
50
5
84
ZFV-C
User’s Manual
Section 4
Detecting Presence of Character String (CHARA)
Basic Setting Procedure
■ Teaching
Enclose the area to be inspected using a rectangular box and then perform teaching.
Inspection area setting
CHARA1
Teaching
OK
50
505
Teaching area for [CHARA]
For the teaching area when the printing position is out of position, set to an area in which the characplain background.)
If an area very close to the character string without any margin is set, the sensor will not be able to
track any shift in the printing position.
Right
OK
04.07.01
04.07.01
Any shift of the printing position inside the teaching area is judged as OK.
Wrong
NG
04.07.01
04.07.01
When the teaching area is set very close to the character without any margin,
character protrudes from the teaching area and so this is judged as an NG.
ZFV-C
User’s Manual
Section 4 SETTING OF INSPECTION CONDITION
ter string might possibly be printed out of position. (Be sure, however, to set to an area having a
85
Section 4
Detecting Presence of Character String (CHARA)
■ Adjusting the threshold level
●
CHARA1
●Switching to
ADJ mode
● Adjustment of correlation value
CHARA1
OK
ADJ
505
MENU RUN
TH
[
80
60]
Measured values
Density distribution value
UP/DOWN keys: Change values.
Section 4 SETTING OF INSPECTION CONDITION
Setting item
Details of Adjustment
Density distribution value 0 to 100
●
This is the value that is judged as OK when the density deviation
value during teaching is taken to be 100%.
CHARA2
● Switching to
ADJ mode
● Adjustment of correlation value
CHARA2
OK
ADJ
505
MENU RUN
TH
[
80
60]
Measured values
Correlation value
UP/DOWN keys: Change values.
Setting item
Correlation value
86
Range
ZFV-C
User’s Manual
Range
0 to 100
Details of Adjustment
This is the lower limit of the correlation value with the teaching model.
This value or above is judged as OK.
Section 4
Detecting Presence of Character String (CHARA)
CUSTOM Menu
Items that can be customized
Items that can be customized
Items related to char- Setting the model registration conditions for characters (Only when
acter
[CHARA2] is selected)
Selecting whether or not to perform position compensation
Items related to color
Page
p.87
p.88
Changing the search area
p.90
Raising detection stability (Only when [CHARA2] is selected)
p.90
Changing the filter color
p.65
■ Items related to character
two lines.
Selection guidelines
• 8 characters, 1 line
2004/09/24
1LINE NORMAL
2004/09/24
18 : 25 ADR
2LINE NORMAL
• 8 characters, 2 line
Section 4 SETTING OF INSPECTION CONDITION
● Setting the model registration conditions for characters
This item is displayed only when [CHARA2] is set.
Select the number of characters in the preset teaching area.
Select the number of characters being within a certain number of characters on one or
X MENU mode-[CUSTM]-[MDL DIV]
Setting
1LINE SHORT
Details
Select this when the character string consists of 1 line, 6 characters or less.
1LINE NORMAL (default) Select this when the character string consists of 1 line, 8 characters or less.
1LINE LONG
Select this when the character string consists of 1 line, 15 characters or less.
2LINE SHORT
Select this when the character string consists of 2 lines, 6 characters or less.
2LINE NORMAL
Select this when the character string consists of 2 lines, 8 characters or less.
The number of characters in the above table are for reference only. When there are more characters
than the number of reference characters in the selected item, measurement accuracy drops.
ZFV-C
User’s Manual
87
Section 4
Detecting Presence of Character String (CHARA)
● Selecting whether or not to perform position compensation
Set position compensation for improving detection accuracy in the following instances:
When printed text is out
of position
When there is a pattern in
the detection range
2004/09/24
2004/09/24
X MENU mode-[CUSTM]-[MODE]
Setting
Details
Section 4 SETTING OF INSPECTION CONDITION
NONE
The position is not corrected.
MODEL
The model is used to correct the position.
Select this when there is a characteristics part such as a corner of a text
box.
MODEL
2004/09/24
EDGE
The edge position is used to correct the position.
EDGE
2004/09/24
• Registering models
Registration of model is necessary if [MODEL] has been selected for [MODE].
Specify the top left coordinate and bottom left coordinate of the model.
MODEL
2004/09/24
X MENU mode-[CUSTM]-[MODE DTL]-[MODEL]
88
ZFV-C
User’s Manual
Section 4
Detecting Presence of Character String (CHARA)
• Specifying edge detection conditions
Set the edge detection conditions when [EDGE] is selected for [MODE].
Set the direction in which edges are searched and the density level.
Example)
To correction position by this edge
2004/09/24
EDGE MODE: BLACK
EDGE: ↓
X MENU mode-[CUSTM]-[MODE DTL]-[EDGE MODE]
Setting
Details
DARK (default)
Dark areas shown in the filtered monochrome image are assumed to be edges.
LIGHT
Light areas shown in the filtered monochrome image are assumed to be edges.
• Selecting the edge detection direction
Select the direction in which edges are searched.
X MENU mode-[CUSTM]-[MODE DTL]-[DIRECTION]
Setting
Details
↑ (default)
Searches from bottom to top.
↓
Searches from top to bottom.
→
Searches from left to right.
←
Searches from right to left.
ZFV-C
User’s Manual
Section 4 SETTING OF INSPECTION CONDITION
• Selecting the color of edge
Select the direction of density change for the edge to be detected.
89
Section 4
Detecting Presence of Character String (CHARA)
● Changing the search area
Change the area to search edges or the model.
Specify the top left coordinate and bottom left coordinate of the area.
Search area
Search area
2004/09/24
2004/09/24
X MENU mode-[CUSTM]-[MODE DTL]-[SEARCH AREA]
Section 4 SETTING OF INSPECTION CONDITION
90
When searching edges
Measurement can be performed only when the search area contains an edge. Determine the size
and position of the area taking the movement range of the workpiece into consideration.
● Raising detection stability
This item is displayed only when [CHARA2] is set.
X MENU mode-[CUSTM]-[STABLE]
Setting
Details
OFF (default)
Standard detection method.
ON
Detailed detection method.
The process time is longer than OFF.
ZFV-C
User’s Manual
Section 5
SETTING ADDITIONAL FUNCTIONS
Setting Image Acquisition Conditions
92
Adjusting Light Intensity and Shutter Speed
92
Changing the Image Display Position (Partial Function) 93
Increasing the Sensor Head Sensitivity
93
Setting Conditions Related to Bank
94
94
Clearing Banks
95
Setting the Bank Switching Method
95
Setting the System Environment
96
Changing the Measurement Speed
96
Selecting the Measurement Timing
97
Selecting the Teaching Mode from an External Device 97
Setting Screen Display
97
Setting/Cancelling the Eco Mode
98
Changing Image Capture Timing on Teaching Screen
98
I/O Monitor Function
99
Correcting White Balance
100
Initializing the Setup Data
100
Initializing Measurement Data
101
Switching the Language
101
Checking the Version
101
Setting USB/RS-232C Communication Specifications
102
Restricting Operations (Lock Function)
105
Setting the Lock Function
105
Starting/Cancelling the Lock Function
106
Lock Function during Gang-Mounting
106
Changing OUTPUT Signal Output Conditions
107
Setting for Amplifier Unit Gang-Mount
110
ZFV-C
User’s Manual
Section 5 SETTING ADDITIONAL FUNCTIONS
Copying Banks
91
Section 5
Setting Image Acquisition Conditions
Setting Image Acquisition Conditions
Adjusting Light Intensity and Shutter Speed
The intensity of the light from Sensor Head and shutter speed can be adjusted. [AUTO] is
selected as the default setting.
X MENU mode-[IMAGE]-[CONTRAST]
Setting
Details
AUTO (default)
Light intensity and shutter speed are adjusted automatically.
FIX
LIGHT
The light intensity can be set for each side. 0: Out, 1 to 5: Light intensity
increases according to the number. (0 to 5, default: 5)
This menu is not displayed if ZFV-SC150/SC150W is connected.
SHUTTER
(default)
1/500, 1/1000, 1/1200, 1/1400, 1/1500, 1/2000, 1/2500, 1/3000, 1/4000, 1/8000
(“1/500” can be set only when the light intensity is set to “0000”.)
Section 5 SETTING ADDITIONAL FUNCTIONS
■ Lighting
The light intensity is displayed as a 4-digit number. One digit shows the light intensity
for one of four sides is displayed as a 4-digit number.
Top surface (model printed surface)
B
View
from here
A
C
D
An image of how light is emitted is displayed on screen.
IMAGE/LIGHT
B
A
C
D
LIGHT 5555
5 5 5 5
The light intensity can also be adjusted
partially (A to D).
A B C D
1.
2.
92
ZFV-C
User’s Manual
Select the light intensity by the UP/DOWN keys.
For partial adjustment
• LEFT/RIGHT keys: Select the side that is adjusted.
• UP/DOWN keys:
Select the light intensity.
Press the SET Key to fix the setting.
IMAGE/LIGHT
LIGHT 5555
Section 5
Setting Image Acquisition Conditions
Changing the Image Display Position (Partial Function)
ZFV-C allows you to increase the processing speed by narrowing the image acquisition
area. The image area can be moved, when measurement speed is FAST mode (1/2
screen) or MAX mode (1/4 screen).
Changing the Measurement Speed p.96
The center of the image is
selected just after the measurement speed is
changed.
Can be moved to the
desired position vertically.
X MENU mode-[IMAGE]-[DISP POS]
Move the image area using the UP/DOWN
IMAGE/DISP POS
keys.
2.
Press the SET Key to fix the setting.
MOVE
Increasing the Sensor Head Sensitivity
If the image brightness cannot be increased by either shutter speed or lighting setting,
increase the sensitivity magnification.
X MENU mode-[IMAGE]-[GAIN]
Setting value (magnification)
X1.0
X1.5
X2.0
Quality
Good (small amount of noise)
↑
↓
Bad (larger amount of noise)
Section 5 SETTING ADDITIONAL FUNCTIONS
1.
Image
Dark
↑
↓
Bright
ZFV-C
User’s Manual
93
Section 5
Setting Conditions Related to Bank
Setting Conditions Related to Bank
ZFV-C can hold up to eight sets of settings. These settings can be switched according to
inspection conditions. A set of these settings is called a “bank”.
Copying Banks
Copy the settings of one bank to another bank.
The following example shows the procedure for copying the settings of BANK 1 to BANK 2.
X MENU mode-[SYS1]-[BANK SET]-[COPY]
1.
Make the settings that are required to perform inspection at BANK 1 (copy
source).
Section 5 SETTING ADDITIONAL FUNCTIONS
2.
Switch to MENU mode.
3.
Select
ADJ
MENU RUN
and press the SET key.
MENU
BANK
4.
Select [2. BANK2] and press the SET key.
5.
Select
BANK
1.BANK1
2.BANK2
3.BANK3
4.BANK4
5.BANK5
6.BANK6
7.BANK7
8.BANK8
and press the SET key.
MENU
SYSTEM 1
6.
Select
[1. BANKSET]
-
[1. COPY]
-
[1. BANK1] (copy source).
Press the ESC Key twice to return to
MENU mode.
7.
94
ZFV-C
User’s Manual
Switch to RUN mode and save the settings.
SYSTEM 1
1.BANK SET
2.SPEED
3.MEAS TYPE
4.TCH TYPE
5.DISP COL
6.ECO MODE
Section 5
Setting Conditions Related to Bank
Clearing Banks
“Clearing” deletes the settings of the selected bank number.
X MENU mode-[SYS1]-[BANK SET]-[CLEAR]
Settings
Description
EXECUTE
Executes clear.
CANCEL
Cancels clear.
[SYS1], [SYS2] settings and RUN mode display settings will not be cleared.
Setting the Bank Switching Method
Select how to switch banks.
Setting
Description
KEY (default)
Banks are switched by the control keys on Amplifier Unit.
I/O
Banks are switched by the control keys on Amplifier Unit and by external signals.
Switching by external signals is enabled only in the RUN mode.
Switching to Another Bank p.58
To switch a bank using a command via USB/RS-232C, select [SWITCH]-[KEY].
ZFV-C
User’s Manual
Section 5 SETTING ADDITIONAL FUNCTIONS
X MENU mode-[SYS1]-[BANK SET]-[SWITCH]
95
Section 5
Setting the System Environment
Setting the System Environment
Changing the Measurement Speed
The processing speed can be increased by narrowing the image acquisition area. Change
the measurement speed according to the size of workpiece and required speed.
NORMAL
FAST
MAX
Entire image
1/2
1/4
X MENU mode[SYS1]-[SPEED]
Setting
Section 5 SETTING ADDITIONAL FUNCTIONS
96
Details
NORMAL (default)
Acquires the entire image. (13 ms)
FAST
Narrows the image acquisition area to 1/2. This will increase the measurement
speed. (8 ms)
MAX
Narrows the image acquisition area to 1/4. This will increase the measurement
speed. (5 ms)
• If [FAST] or [MAX] is selected, it is possible to select the part of the screen to be inspected.
Changing the Image Display Position (Partial Function) p.93
• If [FAST] or [MAX] is selected, make sure that the inspection area and color selection area are within
the displayed image.
ZFV-C
User’s Manual
Section 5
Setting the System Environment
Selecting the Measurement Timing
Set the timing that measurement is executed.
X MENU mode-[SYS1]-[MEAS TYPE]
Setting
Details
TRIG (default)
Synchronous measurement
Measurement is performed in synchronous with the change in state of the external TRIG signal from OFF to ON.
CONTINUE
Continuous measurement
Measurement is repeatedly performed for the duration that the TRIG signal is ON.
Selecting the Teaching Mode from an External Device
There are two teaching modes from an external device.
X MENU mode-[SYS1]-[TEACH TYPE]
Details
Teaching is performed with the workpiece in a stationary state. Input of the
external trigger is required for teaching.
MOVING
The teaching is performed with the moving workpiece.
Select this teaching mode only when the workpiece cannot be stopped.
Input of the external trigger is required for teaching.
Timing Charts p.42
Setting Screen Display
The color of characters displayed on the LCD monitor and monitor’s background color can
be changed. Change the color when it is difficult to see the character or figure on the
image.
• Areas whose color can be changed
SEARCH
OK
OK/NG
SYS1/DISP COL
1.OK
2.NG
3.DISP NRML
4.DISP BACK
+
NORMAL
Section 5 SETTING ADDITIONAL FUNCTIONS
Setting
STATIONARY (default)
BACK
NORMAL (color of characters)
X MENU mode -[SYS1]-[DISP COL]
Setting
OK
GREEN (default), RED, YELLOW, BLUE, WHITE
NG
GREEN, RED (default), YELLOW, BLUE, WHITE
NORMAL
GREEN, RED, YELLOW, BLUE, WHITE (default)
BACK
GREEN, RED, YELLOW, BLUE (default), WHITE, BLACK
ZFV-C
User’s Manual
97
Section 5
Setting the System Environment
Setting/Cancelling the Eco Mode
Whether or not to darken the screen when a preset time has passed without any operation.
We recommend setting this mode to [ON] to prevent the brightness of the LCD screen
from being impaired.
X MENU mode-[SYS1]-[ECO MODE]
Setting
Details
ON (default)
Sets the Eco mode.
The screen darkens when three minutes continue without any operation.
OFF
Cancels the Eco mode setting.
Changing Image Capture Timing on Teaching Screen
Select status of image to be displayed on the teaching screen.
Section 5 SETTING ADDITIONAL FUNCTIONS
X MENU mode-[SYS2]-[TEACH IMAGE]
Setting
Description
THROUGH (default)
The latest image taken by the Sensor Head is displayed directly.
FREEZE
Freeze the image and display.
The still image is displayed when the TRIG signal is input.
When amplifier units are gang-mounted, set all amplifier units to the
teaching screen then input the TRIG signal to the amplifier unit (furthest
to the right) where the sensor head is connected.
Images are loaded to all amplifier
units when all amplifier units are
set to the teaching screen.
TRIG signal
Images are not loaded to all amplifier units when the amplifier where
the sensor head is connected is not
set to the teaching screen.
TRIG signal
Images are not loaded to the far left
amplifier when the far left amplifier
is not at the teaching screen.
TRIG signal
98
ZFV-C
User’s Manual
Section 5
Setting the System Environment
I/O Monitor Function
This is a function to check the status of I/O signals.
SYS2/I/O MON
Signal name
:
TRIG
TEACH :
:
BANK
OUTPUT :
ENABLE :
ERROR :
OK
0
0
000
0
0
1
Signal status
(0: OFF, 1: ON)
X MENU mode-[SYS2]-[I/O MON]
Setting
TRIG
Details
Displays ON/OFF status of TRIG signal. (0: OFF, 1: ON)
TEACH
Displays ON/OFF status of TEACH signal. (0: OFF, 1: ON)
BANK
Displays ON/OFF status of BANK signal. (0: OFF, 1: ON)
Expresses BANK1, BANK2, BANK3 sequentially from the right.
Displays ON/OFF status of OUTPUT signal. (0: OFF, 1: ON)
ENABLE
Displays ON/OFF status of ENABLE signal. (0: OFF, 1: ON)
ERROR
Displays ON/OFF status of ERROR signal. (0: OFF, 1: ON)
Put the cursor on OUTPUT, ENABLE and ERROR, then press the SET button key to switch between “0”
and “1”. The external device operations can be checked by switching output OFF/ON when the actual
measurements are not being performed.
ZFV-C
User’s Manual
Section 5 SETTING ADDITIONAL FUNCTIONS
OUTPUT
99
Section 5
Setting the System Environment
Correcting White Balance
Due to influences by sensor head’s surrounding and lighting, the image taken by the camera sometimes contains colors even if the object is white.
The function to correct the color of a white object so that the object is displayed as white is
called white balance.
X MENU mode-[SYS2]-[WHITE BAL]
1.
Display a white object (e.g. paper, cloth) on the monitor.
2.
Press the TEACH/VIEW key while “OK” is displayed at the lower left of the
screen.
White balance will be adjusted.
If a character other than “OK” is displayed at the lower left of the screen, exit from the white
Section 5 SETTING ADDITIONAL FUNCTIONS
balance window and perform above steps again. If “OK” still does not appear, perform the following.
• When “TOO BRIGHT” is displayed
The screen is too bright.
• When “TOO DARK” is displayed
The screen is too dark.
• When “BAD BALANCE” is displayed
The workpiece is not displayed as a white object. First, make sure that the correct white
workpiece is displayed.
Setting Image Acquisition Conditions p.92
Initializing the Setup Data
Return all bank settings and system settings (excluding message display language) to the
factory settings.
The settings of all banks and system settings are initialized regardless of the currently selected bank No.
X MENU mode-[SYS2]-[ALL CLEAR]
Setting
100
Description
EXECUTE
Initialize set up data.
CANCEL
Do not initialize set up data.
ZFV-C
User’s Manual
Section 5
Setting the System Environment
Initializing Measurement Data
Current and past measurement average values, measurement count and other measurement data can be cleared without restarting.
Data to be cleared are the items displayed in the following screen at RUN mode.
SEARCH
OK
JG
: OK
SCORE :
98
TH
:
60
AVE
:
0
DRANGE : 0-100
MCONT :
2
NG%
: 1.000
TIME
:
144
Meaning of display contents p.55
X MENU mode-[SYS2]-[MEAS CLEAR]
Setting
Description
EXECUTE
Initialize measurement data.
CANCEL
Do not initialize measurement data.
Switch the language for displayed messages between Japanese and English.
X MENU mode-[SYS2]-[LANGUAGE]
Setting
Description
ENGLISH
Displays messages in English.
JAPANESE
Displays messages in Japanese.
Checking the Version
Displays the type of Sensor Head, type of Amplifier Unit and system version information of
the software.
Section 5 SETTING ADDITIONAL FUNCTIONS
Switching the Language
X MENU mode-[SYS2]-[VERSION]
ZFV-C
User’s Manual
101
Section 5
Setting USB/RS-232C Communication Specifications
Setting USB/RS-232C Communication Specifications
Set the communication specifications of the Amplifier Unit according to those of external devices.
For details on communication commands, refer to the “Communication Command Reference” (provided
separately).
For the “Communication Command Reference”, contact OMRON sales staff.
Before connecting/disconnecting external devices, make sure that the Amplifier Unit is turned OFF.
Breakdown or accidents may occur if this is done with the Amplifier Unit turned ON.
USB Connection
■ Connection
1.
Section 5 SETTING ADDITIONAL FUNCTIONS
Install the USB driver to the personal computer.
For the USB driver, please contact your OMRON representative.
Installation of the USB driver is necessary only when connecting an external
device to the USB interface for the first time.
2.
3.
Insert one end of the USB cable to the
USB connector on the Amplifier Unit.
Insert the other end of the USB cable to
the USB connector of the external device.
■ Setting communication specifications
Set the communication specifications of the Amplifier Unit according to those of external devices.
X MENU mode-[SYS2]-[COM]
Setting
LENGTH
Description
The settings will be ignored.
PARITY
STOP BIT
BAUDRATE
NODE
DELIMIT
102
ZFV-C
User’s Manual
CR, LF, CR+LF (default: CR)
Section 5
Setting USB/RS-232C Communication Specifications
RS-232C Connection
■ Connection
1.
Insert one end of the RS-232C cable to
the RS-232C connector on the Amplifier
Unit.
2.
Insert the other end of the RS-232C cable
to the RS-232C connector of the external
device.
Section 5 SETTING ADDITIONAL FUNCTIONS
● RS-232C cable for connecting a programmable controller
RS-232C cable
• ZS-XPT2 (cable length: 2 m)
Amplifier unit side
PLC side (Note 1)
Fitting section
10
1
1
2
6
NC
Pin No.
1
Pin No.
1
Signal name
3
7
4
8
5
9
Signal name
NC
SD(TXD)
2
2
SD(TXD)
RD(RXD)
3
3
RD(RXD)
RS(RTS)
4
4
RS(RTS)
CS(CTS)
5
5
CS(CTS)
NC
6
6
NC
NC
7
7
NC
NC
8
8
NC
SG(GND)
NC
9
9
SG(GND)
10
Note 1: A plug type connector is
used for the PLC side.
ZFV-C
User’s Manual
103
Section 5
Setting USB/RS-232C Communication Specifications
● RS-232C cable for connecting a personal computer
• ZS-XRS2 (cable length: 2 m)
Amplifier unit side
PC side (PC/AT compatible) (Note 1)
1
2
3
4
5
Fitting section
10
1
6 7
NC
Pin No.
1
Pin No.
1
Signal name
NC
Signal name
Section 5 SETTING ADDITIONAL FUNCTIONS
104
8 9
SD(TXD)
2
2
RD(RXD)
RD(RXD)
3
3
SD(TXD)
RS(RTS)
4
4
NC
CS(CTS)
5
5
SG(GND)
NC
6
6
NC
NC
7
7
RS(RTS)
NC
8
8
CS(CTS)
SG(GND)
NC
9
9
NC
10
Note 1: A socket type connector
is used for the PC side.
■ Setting communication specifications
Set the communication specifications of the Amplifier Unit according to those of external devices.
X MENU mode-[SYS2]-[COM]
Setting
Description
LENGTH
7, 8 (default)
PARITY
OFF (default), ODD, EVEN
STOP BIT
1 (default), 2
BAUDRATE
9600, 19200, 38400 (default), 57600, 115200
NODE
0 (default) to 16
Node No. indicates a connection group No. viewed from a host device (programmable
controller). Not only ZFV-C but also two or more devices can be connected to the programmable controller. Numbers assigned to the devices connected to the programmable controller are called node Nos.
DELIMIT
CR (default), LF, CR+LF
ZFV-C
User’s Manual
Section 5
Restricting Operations (Lock Function)
Restricting Operations (Lock Function)
Setting the Lock Function
Set the lock function to restrict switch and key operations.
By restricting switch and key operations, unintended changes in settings can be prevented.
Three types of operations, "mode switch", "key input", and "TEACH signal input", can be
locked.
X MENU mode-[SYS2]-[LOCK]
Standard value
Description
Operation of the mode switch (MENU/ADJ/RUN) is restricted.
(Lock OFF (default), Lock ON)
KEY
Operation of keys (SET, ↑ ↓ ← →, TEACH/View, and function keys A through D) is
restricted.
(Lock OFF (default), Lock ON)
TEACH IN
TEACH signal input is restricted.
(Lock OFF (default), Lock ON)
PASS NUMBER
The number for cancelling the lock function is set.
(Default: 0000)
When mode switch operation is enabled, key operation and TEACH signal input cannot be disabled.
ZFV-C
User’s Manual
Section 5 SETTING ADDITIONAL FUNCTIONS
MODE SWITCH
105
Section 5
Restricting Operations (Lock Function)
Starting/Cancelling the Lock Function
Set the [PASS NUMBER] required for cancelling the lock function before starting the function.
■ Starting
1.
In the RUN mode, press the ESC key for at least two seconds.
A start confirmation message will appear.
The start confirmation message will not appear unless an item to be restricted is set.
2.
Select [EXECUTE].
The lock function is started.
A key mark is displayed in the upper-right corner of the screen while the lock function is ON (see the illustration).
SEARCH
OK
Key mark
Section 5 SETTING ADDITIONAL FUNCTIONS
■ Cancelling
1.
Switch to the RUN mode and press the ESC key for at least two seconds.
A cancel confirmation message will appear.
2.
Select [EXECUTE].
The pass number input screen will appear.
3.
Input the pass number.
The lock function is cancelled.
Lock Function during Gang-Mounting
During gang-mounting, the lock function can be started or cancelled only on the host
device. With respect to this function, the client is in the same status as the host device.
106
ZFV-C
User’s Manual
Section 5
Changing OUTPUT Signal Output Conditions
Changing OUTPUT Signal Output Conditions
Selecting the ON Conditions
Set whether to turn the OUTPUT signal ON when OK is judged or when NG is judged.
X MENU mode-[SYS2]-[OUTPUT]-[ON STATUS]
Setting
Details
OK ON
Turns the OUTPUT signal ON when OK is judged.
NG ON (default)
Turns the OUTPUT signal ON when NG is judged.
One-shot Output
● Synchronous measurement
OFF
TRG
ON
OUTPUT
Measurement
OFF
ON
Output time
● Continuous measurement
OUTPUT ON at OK judgment
Judgment NG
Judgment OK
Judgment NG
Section 5 SETTING ADDITIONAL FUNCTIONS
OUTPUT turns ON for only the preset output time from when the OUTPUT signal turns
ON.
OFF
OUTPUT
ON
Output time
ZFV-C
User’s Manual
107
Section 5
Changing OUTPUT Signal Output Conditions
■ Selecting One-Shot output ON/OFF
Set whether or not to enable one-shot output on the OUTPUT signal.
X MENU mode-[SYS2]-[OUTPUT]-[ONE SHOT]
Setting
Details
OFF (default)
One-shot output is not performed.
ON
One-shot output is performed.
When one-shot output is set to [ON], the OFF delay time setting is disabled.
■ Setting the One-Shot output Time
OUTPUT turns ON for the preset time from when the OUTPUT signal turns ON.
This setting is valid only when [ONE SHOT] is set to [ON].
Section 5 SETTING ADDITIONAL FUNCTIONS
X MENU mode-[SYS2]-[OUTPUT]-[OUTPUT TIME]
Setting
0 to 255 (default: 0)
Details
Set the time (ms) that OUTPUT is turned ON.
Setting the ON Delay Time
Set this item to delay the timing that the OUTPUT signal turns ON.
OUTPUT ON at OK judgment in continuous measurement
Judgment NG
OUTPUT
Judgment OK
Judgment NG
OFF
ON
Delay time
X MENU mode-[SYS2]-[OUTPUT]-[ON DELAY]
Setting
0 to 255 (default: 0)
108
ZFV-C
User’s Manual
Details
Set the time (ms) to delay turning OFF of the OUTPUT signal.
Section 5
Changing OUTPUT Signal Output Conditions
Setting the OFF Delay Time
Set this item to delay the timing that the OUTPUT signal turns OFF.
OUTPUT ON at OK judgment in continuous measurement
Judgment NG
OUTPUT
Judgment OK
Judgment NG
OFF
ON
Delay time
X MENU mode-[SYS2]-[OUTPUT]-[OFF DELAY]
Setting
0 to 255 (default: 0)
Details
Set the time (ms) to delay turning OFF of the OUTPUT signal.
Section 5 SETTING ADDITIONAL FUNCTIONS
ZFV-C
User’s Manual
109
Section 5
Setting for Amplifier Unit Gang-Mount
Setting for Amplifier Unit Gang-Mount
The gang-mount related menus are displayed only when Amplifier Unit are gang-mounted.
These settings must be made to each Amplifier Unit.
● Example 1: 1 sensor head + multiple amplifier units
Example of detection of input image from 1 sensor head with multiple amplifier units.
• To detect multiple areas such as a 4-sided POSITION, multiple item SEARCH, etc.
• To detect multiple types such as both SEARCH and AREA judgments.
MENU
Images are transferred
from right-side to leftside amplifier units.
Section 5 SETTING ADDITIONAL FUNCTIONS
AMP1
AMP2
AMP3
TRIG
LINK
I/O
HEAD
NOTUSE
USE
LINKOUT
–
All
AMP3
ENABLE signal
TRIG signal
● Example 2: Multiple sensor heads + multiple amplifier units
Example of synchronizing and detecting multiple points of the same workpiece and
integrating judgments.
MENU
Measured with
images loaded from
each sensor head.
AMP1
AMP2
ENABLE signal
110
AMP1/2
ZFV-C
User’s Manual
AMP3
TRIG signal
AMP1/2
AMP3
TRIG
LINK
I/O
HEAD
USE
USE
LINKOUT
–
All
Section 5
Setting for Amplifier Unit Gang-Mount
Specifying the Amplifier Unit to Input the Trigger
Set whether or not to input the TRIG signal to an Amplifier Unit.
X MENU mode-[SYS2]-[LINKSET]-[TRIG]
Setting
Details
I/O (default)
Set to only the Amplifier Unit to which the TRIG signal is to be input.
LINK
Synchronizes to the TRIG signal from the Amplifier Unit gang-mounted on the
right side.
All the Amplifier Units except for the rightmost one are set to [LINK] automatically.
Setting the Presence of Sensor Head
X MENU mode-[SYS2]-[LINKSET]-[HEAD]
Setting
Details
USE (default)
Select this for Amplifier Unit to which a Sensor Head is currently connected.
Measurement is performed using the input image from the currently connected
Sensor Head.
NOT USE
Select this for Amplifier Unit to which a Sensor Head is currently not connected.
Measurement is performed from the image transferred from the Sensor Head
gang-mounted on the right side.
Setting Output Content
Set the output content of the measurement result output cable.
This item is displayed only the Amplifier Unit whose [TRIG/TRIG] setting is set to [I/O].
Section 5 SETTING ADDITIONAL FUNCTIONS
Set whether or not a Sensor Head is connected.
X MENU mode-[SYS2]-[LINKSET]-[OUTPUT]
Setting
Details
ALL
The measurement results of all gang-mounted Amplifier Units are integrated,
and output as an overall judgment result.
EACH (default)
The measurement result of each Amplifier Unit is output from the respective
Amplifier Unit.
Output image p.115
ZFV-C
User’s Manual
111
Section 5
Setting for Amplifier Unit Gang-Mount
Rules of Gang-Mounting
Item
No. of Amplifier Units connectable
5 or less (power must be supplied to each Amplifier Unit)
No. of mounted sensor heads
Up to the number of amplifier units
TRIG signal input
Only host device is enabled
TEACH signal input
Only host device is enabled
BANK1-3 input
Enabled at each amplifier unit
ENABLE output
Only host device is enabled
OUTPUT output
Depends on the settings (Integrated judgment/Individual judgment)
ERROR output
Enabled at each amplifier unit
MENU/ADJ/RUN
Only host device is enabled
STD/EXP
Enabled at each amplifier unit
All key inputs
Enabled at each amplifier unit
Section 5 SETTING ADDITIONAL FUNCTIONS
112
Rules
Amplifier unit for inputting furthest
right TRIG signal = host device
ENABLE signal
TRIG signal
Amplifier unit without TRIG signal inputs = client device
ZFV-C
User’s Manual
Section 5
Setting for Amplifier Unit Gang-Mount
Data Route
■ Measurement image
The measurement image flows from the right-side amplifier unit towards the left-side.
Image input timing delays do not occur.
■ I/O signal
OUTPUT signal
TRIG signal
ENABLE signal
ZFV-C
User’s Manual
Section 5 SETTING ADDITIONAL FUNCTIONS
The TRIG signal flows from the right-side amplifier unit towards the left-side. Input timing delays do not occur.
In contrast, ENABLE signals and OUTPUT signals combining all amplifying units can
be output from the furthest right amplifier unit as ENABLE signals and OUTPUT signals
flow from the left-side amplifier unit to the right-side.
113
Section 5
Setting for Amplifier Unit Gang-Mount
Teaching Process when Gang-Mounting
■ Teaching (key input) from MENU mode
Enter the teaching screen from the host device and press the TEACH key to teach all
clients in the teaching screen where the host device is added.
Enter the teaching screen for the client only and press the TEACH key to teach only
this client.
Teaching only clients
Batch-teaching all devices
Section 5 SETTING ADDITIONAL FUNCTIONS
TEACH
TEACH
■ External teaching
The TEACH signal is input from the host device. Input the host device ENABLE signal
at ON. Teaching is completed when the host device ENABLE signal is set OFF → ON
after teaching is performed. It is ignored even if a TEACH signal is input to the client.
ENABLE signal
TRIG signal
TEACH signal
The time required to perform the teaching process increases when gang-mounted. In particular,
when performing move teaching, raise the TRIG signal input interval to 200 ms minimum.
114
ZFV-C
User’s Manual
Section 5
Setting for Amplifier Unit Gang-Mount
Integrating Judgment Output
Judgment result output (OUTPUT) of gang-mounted amplifier units can be integrated.
Setting output content p.111
■ When all amplifier unit measurement results are integrated (ALL)
Select [ALL] to integrate measurement results of all gang-mounted amplifier units and
output from amplifier units (host device) where TRIG signals are input. Obtain OUTPUT
signal after ENABLE signal is set to ON.
When any amplifier unit is NG, the integrated judgment is NG.
TRIG signal
ENABLE signal
■ When judgment results are output by each amplifier unit (EACH)
Select [EACH] to output judgment results by each amplifier unit. The host device
ENABLE signal is enabled. Obtain OUTPUT signal after ENABLE signal is set to ON.
Section 5 SETTING ADDITIONAL FUNCTIONS
OUTPUT signal
TRIG signal
OUTPUT signal
ENABLE signal
ZFV-C
User’s Manual
115
Section 5
Setting for Amplifier Unit Gang-Mount
Restrictions when Gang-Mounting Amplifier Units
■ ZFV-A_ _ Gang-mounting units
The ZFV-A_ _ units cannot be gang-mounted.
■ ZFV-CA Gang-mounting multiple units
To use two or more ZFV-CA units by gang-mounting them to each other, the following
hardware and software are required:
Hardware: Amplifier unit with serial number;
ZFV-CA40: 0218206 or bigger
ZFV-CA45: 0003206 or bigger
Software: Firmware version 1.30 or later
■ ZS-DSU Gang-mounting
Section 5 SETTING ADDITIONAL FUNCTIONS
116
To gang-mount the ZS-DSU and ZFV-CA units, the following software is required:
ZS-DSU: Firmware version 2.220 or later
ZFV-CA: Firmware version 1.30 or later
A maximum of five ZFV-CA units can be gang-mounted to a ZS-DSU unit.
Note, however, that any other unit (ZS-HLDC/LDC/MDC, ZFV-A) cannot be connected between the
ZFV-CA and ZS-DSU units.
ZFV-C
User’s Manual
Section 6
APPENDIX
118
Error Messages and Corrective Actions
119
Q&A
120
Specifications and External Dimensions
121
LED Safety Precautions for Using Laser Equipment
135
Requirements from Regulations and Standards
136
Updating the Firmware
140
Version upgrade information
145
Index
146
ZFV-C
User’s Manual
Section 6 APPENDIX
Troubleshooting
117
Section 6
Troubleshooting
Troubleshooting
This section describes countermeasures for temporary hardware problems. Check the
malfunction in this section before sending the hardware for repair.
Problem
Probable cause and possible countermeasure
Page
OUTPUT indicator does not lit.
• Check the setting of [SYS2]-[OUTPUT]-[ONSTATUS].
To lit the indicator (OUTPUT signal ON) when the judgment is OK,
select [OK ON], and to lit the indicator (OUTPUT signal ON) when
the judgment is NG, select [NG ON].
p.107
RUN indicator does not lit.
• Is the operating mode switch set to “RUN”?
p.27
Dark LCD screen
• Is the “Eco” mode function set?
The “Eco” mode is set if pressing any key automatically returns to
the original brightness.
The brightness is maintained when the “Eco” mode setting is canceled. Note, however, that the life of the LCD backlight is shortened. So, we recommend setting the “Eco” mode.
p.98
Images are not displayed.
• Is the Sensor Head connector connected correctly?
• Is the brightness of the LED light set to a dark value?
p.51
p.92
Screen is not displayed when
amplifier units are gangmounted.
• Is power turned ON to all the gang-mounted amplifier units simultaneously?
p.21
Section 6 APPENDIX
Measurement results are not dis- • Is the operating mode switch set to “RUN”?
played.
p.27
The TRIG signal (input signal) is
not accepted.
• Are all cables connected correctly?
• Is the signal line disconnected?
• Is the operating mode switch set to “RUN”?
p.39
The OUTPUT signal is not output.
•
•
•
•
Is the TRIG signal being input?
Are all cables connected correctly?
Is the signal line disconnected?
Is the operating mode switch set to “RUN”?
p.39
The ENABLE signal does not
turn ON.
• Is the operating mode switch set to “RUN”?
p.27
The bank is not switched even if
the bank switching signal is input
from the outside.
• Is the bank switching method set to [I/O]?
When the bank switching method is set to [KEY], the external
inputs of the BANK 1 to 3 are not accepted.
• Is the operating mode switch set to “RUN”?
p.95
• Is the USB cable is connected correctly.
• Is the RS-232C cable connected correctly?
• Are any other applications using the port on the personal computer?
• Are the same communication conditions are set to both personal
computer and Amplifier Unit?
• Has the USB driver been installed?
• Is the Amplifier Unit operating correctly?
p.102
No communications with personal computer.
118
ZFV-C
User’s Manual
p.27
p.27
p.27
Section 6
Error Messages and Corrective Actions
Error Messages and Corrective Actions
Error Message
Cause
Countermeasure
Page
The Sensor Head is not connected
correctly.
Make sure that the Sensor Head is
connected correctly.
p.51
NEIGHBOR UNIT IS
NOT CONNECT
The Amplifier Units are not coupled
correctly.
Make sure that the Amplifier Units are
connected correctly.
p.36
SYSTEM ERROR
Failed to configure FPGA.
Faulty Amplifier Unit Contact your
Failed to initialize LCD.
OMRON representative.
Failed to recognize Amplifier Unit.
Failed to load data from flash memory.
Faulty hardware operation
Faulty software operation
-
TEACHING FAILED
The workpiece is not projected correctly.
The teaching area is not set at the
appropriate position.
Set the area so that the workpiece is
projected in the field-of-view.
Make sure that the appropriate teaching area is set.
p.47
COLOR EXTRACTION FAILED
Teaching cannot be performed since
no color pickup setting has been
made.
Make color pickup setting (color), then p.61
perform teaching again.
p.152
p.158
DIFFERENT PASS
NUMBER
The lock function cannot be cancelled
because of an incorrect pass number.
Input the registered pass number.
p.105
SYSTDATA ERROR
Data saved to the instrument has
been damaged.
The currently set system data is
cleared. Set the system data again.
p.96
BANKDATA ERROR
The current bank data has been damaged.
The currently set bank data is cleared. p.94
Set the bank data again.
HEAD ERROR
Failed to communicate with the sensor Make sure that the sensor head is
head.
connected correctly.
High-voltage lines and power lines
must be wired separately from this
product.
-
Section 6 APPENDIX
HEAD IS NOT CONNECTED
In the following instances, error messages are not displayed, but the ERROR and ERR
lmap turn ON.
Cause
Countermeasure
Page
TRIG was input while ENABLE was OFF.
Wait until ENABLE is turned ON and then input TRIG.
p.42
Failed to teach from external device.
Set the area so that the workpiece is projected in the fieldof-view.
Make sure that the appropriate teaching area is set.
Make sure that TRIG timing is appropriate in the workpiece
move teaching mode.
p.47
p.42
ZFV-C
User’s Manual
119
Section 6
Q&A
Q&A
Question
Can I turn LED light emission of the Sensor
Head OFF?
Answer
Yes, you can.
Set [CUSTM]-[LIGHT] to [0000].
p.92
What should I do to set the measurement
time as short as possible?
There are two ways of setting a shorter measurement time:
• Set [SYS1]-[SPEED] to [MAX]. However, measurable screen
range will be narrowed.
p.96
• Switch the screen display during measurement to “Display only
image”.
The measurement time can be reduced proportionate to the
reduction in display time.
p.54
Teaching is not going well. What should I
do?
Section 6 APPENDIX
• Workpiece move teaching
A probable cause is that the workpiece is not properly in the
teaching area as intended.
Change to the workpiece stop teaching mode or teaching by key
operation.
• A probable cause is that teaching is not successful because an
image is too dark or too bright.
Adjust light emission at [CUSTM]-[LIGHT] so that the workpiece
is projected clearly, and execute teaching again.
p.92
• Is a screen other than the MOVE and SIZE screens displayed
for the teaching area?
Teaching cannot be performed from the MOVE screen or SIZE
screen.
Set the position or size with the SET key, go back 1 screen up
then press the teaching button.
At what timing are set measurement condi- Set measurement conditions are saved to the amplifier unit “when
tions saved to the amplifier unit?
external TEACH signal teaching is successful” or “when switched
to RUN mode.”
When the TEACH key is pressed from the teaching screen to
teach, contents will not be saved unless switched to RUN mode
once. Changed contents, including teaching results, are cleared
when switching off without saving.
Search is performed outside search area
If the custom settings have been changed, perform teaching
even if search area for [SEARCH]/[MATCH] again.
is changed.
120
ZFV-C
User’s Manual
Section 6
Specifications and External Dimensions
Specifications and External Dimensions
Sensor Head
ZFV-SC10 (Narrow View)
(Unit: mm)
1/4-20UNC
Depth 6
33.6
34
20
18.7
34
2-M4 Depth 6
30.1
Mounting hole dimensions
20 ± 0.1
2-M4
67.9
32
4.5 4.5
0.8
5.6
33
Focus adjustment control
17.9
30
6.36
4
8.5
33.6
6.36
12.8
23.3
ZFV-C
User’s Manual
Section 6 APPENDIX
4.5 4.5
32
Heat-resistant PVC shielded cable
5.8 Standard length 2 m
30
A fixing bracket can be
mounted to each side
121
Section 6
Specifications and External Dimensions
ZFV-SC50/SC50W (Standard View)
(Unit: mm)
34
20
34
1/4-20UNC
Depth 6
30.1
38.9
26.5
2-M4
Depth 6
34
20 ± 0.1
A fixing jig can be mounted to each side
2-M4
Mounting hole dimensions
35.2
86
Section 6 APPENDIX
122
ZFV-C
User’s Manual
8.5
3
8
6.2
52.5
39
9.8
30.3
6.36
Heat-resistant PVC shielded cable
6.2 Standard 2 m
6.36
5.6
26.5
35.5
5
52.5
Section 6
Specifications and External Dimensions
ZFV-SC90/SC90W (Wide View)
(Unit: mm)
33
1/4-20UNC
Depth 6
34
20
30.1
38.9
34
2-M4
Depth 6
33
20 ± 0.1
4
M
2-
Mounting hole dimensions
83.7
35.5
33
5.6
30.25
52.5
A mounting bracket can be
mounted to each side
8.5
8.5
52.5
39
35.5
4
6.2
9.8
8.5
7
Heat-resistant PVC shielded cable
6.2 Standard length 2 m
Section 6 APPENDIX
ZFV-C
User’s Manual
123
Section 6
Specifications and External Dimensions
ZFV-SC150/SC150W (Ultra Wide View)
(Unit: mm)
110.2
59.5
140
29
12
35
57
98
2-M4
20 ± 0.1
Mounting hole dimensions
Section 6 APPENDIX
124
ZFV-C
User’s Manual
Heat-resistant PVC shielded cable
6.2 Standard length 2 m
Mounting surface
8.5
8.5
73.2
140
4
8.5
5
7
8.5
33
Section 6
Specifications and External Dimensions
Item
ZFV-SC10
(Narrow View)
ZFV-SC50/SC50W
(Standard View)
ZFV-SC90/SC90W
(Wide View)
ZFV-SC150/SC150W
(Ultra Wide View)
Setting distance (L) 34 to 49 mm (variable)
31 mm to187 mm
(variable)
67 to 142 mm (variable)
115 mm to 227 mm
(variable)
Detection range (H×V) 5 mm × 4.6 mm to
9 mm × 8.3 mm
Detection
(V) (Variable)
range
10 mm × 9.2 mm to
50 mm × 46 mm
(Variable)
50 mm × 46 mm to
90 mm × 83 mm
(Variable)
90 mm × 83 mm to
150 mm × 138 mm
(Variable)
Setting distance
(L)
(L)
(L)
187
mm
142
mm
227
mm
(H)
Setting distance
Relation between
setting distance and (L)
detection range
49
mm
34
mm
31
mm
5 mm
10 mm
9 mm
Detection range (H)
Built-in lens
67
mm
Focus: f15.65
50 mm
Detection range (H)
115
mm
50 mm
90 mm
90 mm
Detection range (H)
Focus: f13.47
Focus: f6.1
36 white LEDs
20 white LEDs
150 mm
Detection range (H)
Object lighting method Pulse lighting
Object light source
Eight white LEDs
Lighting I/F (Option) None
Yes
72 white LEDs
None
1/3-inch color CCD
Shutter
Electronic shutter
shutter time: 1/500 to 1/8000
Power supply voltage
15 VDC (Supplied
from Amplifier Unit.)
15 VDC, 48 VDC (Supplied from Amplifier Unit.)
Current consumption
Approx. 200 mA
Approx. 350 mA [15 V:Approx. 150 mA, 48 V: Approx. 200 mA]
(Including the current consumed when optional lighting is connected)
Dielectric strength
1,000 VAC, 50/60 Hz for 1 min
Vibration resistance (destructive)
10 to 150 Hz, 0.35 mm single amplitude, 10 times each in X, Y, and Z directions for 8 min
Shock resistance
(destructive)
150 m/s2, three times each in six directions (up/down, left/right, forward/backward)
Ambient temperature Operating: 0 to +40 °C, Storage: -20 to +65 °C (with no icing or condensation)
Ambient humidity
Section 6 APPENDIX
Sensing element
Operating and storage: 35 % to 85 % (with no condensation)
Ambient atmosphere Must be free of corrosive gas.
Connection type
Prewired, Standard cable length: 2 m
Degree of protection IP65
(IEC60529)
ZFV-SC_ _ _: IP65
ZFV-SC_ _ _W: IP67
Material
Case: ABS, Mounting bracket: PBT
Weight
Approx. 200 g
(including mounting
bracket and cord)
(When packaged:
Approx. 300 g)
Approx. 270 g
(including mounting
bracket and cord)
(When packaged:
Approx. 350 g)
Approx. 300 g
(including mounting
bracket and cord)
(When packaged:
Approx. 380 g)
Accessories
Mounting bracket
ZFV-XMF (1), Ferrite core (2), Instruction sheet
Mounting bracket ZFVXMF2 (1), Ferrite core
(2), Warning label (1),
Instruction sheet
Mounting bracket ZFV- Ferrite core (2),
XMF2 (1), Ferrite core Instruction sheet
(2), Warning label (1),
Instruction sheet
LED class *1
Class 1
Class 2
Class 2
Approx. 600 g
(including mounting
bracket and cord)
(When packaged:
Approx. 780 g)
Class 1
*1 Applicable standards: IEC60825-1:1993 +A1:1997 +A2:2001, EN60825-1:1994 +A1:2002 +A2:2001
ZFV-C
User’s Manual
125
Section 6
Specifications and External Dimensions
Amplifier Unit
ZFV-CA40/CA45
52.5
4.61
23.2
(Unit: mm)
90
60
4.3
3.9
10.8
Section 6 APPENDIX
11
.7
24.2
18
32.9
13 10
Item
ZFV-CA45
NPN open-collector,
30 VDC, 50 mA max., Residual voltage: 1.2 V max.
PNP open-collector,
50 mA max., Residual voltage: 1.2 V
max.
Input specifications
ON
Short-circuited with 0 V terminal or
1.5 V or less
Supply voltage short-circuited or within
supply voltage -1.5 V max.
OFF
Open (leakage current: 0.1 mA max.)
Open (leakage current: 0.1 mA max.)
USB2.0
1 Port, FULL SPEED [12Mbps], MINI-B
RS-232C
1 Port, 115200 bpsmax.
Serial I/O
126
ZFV-CA40
Output specifications
Inspection items
PATTERN, AREA, HUE(Color), WIDTH, POSITION, COUNT, BRIGHT, CHARA
Teaching area
Rectangular, one area
Teaching area size
• PATTERN, BRIGHT: Any rectangular area (256 × 256 max.)
• AREA, HUE(Color), WIDTH, POSITION, COUNT, CHARA: Any rectangular
area (max. full screen)
Sensing area
Full screen
Resolution
468 (H) × 432 (V) max.
Bank switching
Supported for 8 banks.
Image input interval
13 ms (Standard), 8 ms (1/2 for partial scan), 5 ms (1/4 for partial scan)
Other functions
Control output switching: ON for OK /ON for NG, ON delay / OFF delay,
One-shot output, Eco mode
Output signals
(1) Control output (OUTPUT)
(2) Enable output (ENABLE)
(3) Error output (ERROR)
ZFV-C
User’s Manual
Section 6
Specifications and External Dimensions
Item
ZFV-CA40
ZFV-CA45
Input signals
(1) Simultaneous measurement input (TRIG)/ Continuous measurement input
(TRIG) switched by menu.
(2) Bank selection inputs (BANK1-3)
(3) Workpiece still teaching (TEACH)/Workpiece moving teaching (TEACH)
Switched by menu
Sensor Head interface
Digital interface
Image display
1.8-inch TFT color LCD (557 × 234 pix)
Indicators
•
•
•
•
Judgment result indicator (OUT, orange)
Inspection mode indicator (RUN, green)
Error indicator (ERR, red)
READY indicator (READY, blue)
Operation interface
•
•
•
•
Cursor keys (up, down, left, right) • Setting key (SET) • Escape key (ESC)
Operating mode switching (slide switch) • Menu switching (slide switch)
Teaching/Display switching key (TEACH/VIEW)
Function keys (A to D 4 input)
Power supply voltage
20.4 to 26.4 VDC (including ripple)
Current consumption
800 mA max. (with Sensor Head connected)
Dielectric strength
1,000 VAC, 50/60 Hz for 1 min between leads and Amplifier Unit case
Noise Resistance
1 kV, Pulse rise: 5 ns, Pulse width: 50 ns, Burst duration: 15 ms
Cycle: 300 ms
Vibration resistance (destruc- 10 to 150 Hz, 0.1 mm single amplitude, 10 times each in X, Y, and Z directions
tive)
for 8 min
Destruction: 150 m/s2, three times each in six directions (up/down, left/right, forward/backward)
Ambient temperature range
Operating: 0 to +50 °C, Storage: -25 to +65 °C (with no icing or condensation)
Ambient humidity range
Operating and storage: 35 % to 85 %
Ambient atmosphere
Must be free of corrosive gas.
Degree of protection
IEC60529 IP20
Material
Polycarbonate (PC)
Weight
Approx. 300 g (including cord) (when packaged: approx. 450 g)
Accessories
Ferrite core (1), Instruction sheet, Label (1)
ZFV-C
User’s Manual
Section 6 APPENDIX
Shock resistance (destructive)
127
Section 6
Specifications and External Dimensions
Panel Mount Adapters
ZS-XPM1/XPM2
When mounting on a panel
(60 × n) + 12
60 × n
(Unit: mm)
13
3
Panel
(140)
90
122
DIN Track
Panel
Panel Mount
Adapters
(2) (37.5)
(Note 1)
Note 1: Dimensions when the panel thickness is 2.0 mm
Panel cutout dimensions
116 ± 1
Section 6 APPENDIX
(60 × n) + 8
n: Number of connected controllers (1 to 10)
Item
ZS-XPM1 (for 1st unit)
ZS-XPM2 (for 2nd unit onwards)
Appearance
Vibration resistance (destructive) 10 to 150 Hz, 0.7 mm double amplitude, 80 min each in X, Y, and Z directions
Shock resistance (destructive)
128
300 m/s2 3 times each in six directions (up/down, left/right, forward/backward)
Material
Polycarbonate (PC), etc.
Weight
Approx. 50 g
ZFV-C
User’s Manual
Section 6
Specifications and External Dimensions
Control Link Unit
ZS-XCN
(Unit: mm)
13.4
11.5
18
Item
4.6
ZS-XCN
Ambient temperature
Operating: 0 to +50 °C, Storage: -15 to +60 °C (with no icing or condensation)
Ambient humidity
Operating and storage: 35 % to 85 % (with no condensation)
Vibration resistance (destructive)
10 to 150 Hz, 0.7 mm double amplitude, 80 min each in X, Y, and Z directions
Section 6 APPENDIX
39.5
Shock resistance (destructive) 300 m/s2 3 times each in six directions (up/down, left/right, forward/backward)
Material
Polycarbonate (PC), etc.
Weight
Approx. 10 g
ZFV-C
User’s Manual
129
Section 6
Specifications and External Dimensions
Extension Cord
ZFV-XC_B(R)V2
(Unit: mm)
L (Note 1)
75
13
33
8.5
28
30
36
45.9
2- 3.5
20 pins
Mounting
hole
20 pins
28±0.1
2-M3
Round PVC insulated cable
6.2, 20-wire
Note 1: L=3 m, 8 m (for ZFV-XC_BV2)
L=3 m (ZFV-XC_BRV2)
Mounting hole dimensions
Section 6 APPENDIX
Item
ZFV-XC3BV2
ZFV-XC8BV2
Applicable Amplifier Units
ZFV-C Series
Applicable Sensor Head
ZFV-SC10/SC50/SC50W/SC90/SC90W/SC150/
SC150W
Ambient temperature
Operating: 0 to +40 °C, Storage: -25 to +65 °C (with no icing or condensation)
ZFV-SC10/SC50/SC50W
Ambient humidity
Operating and storage: 35 % to 85 %(with no condensation)
Connection type
Double-sided connector
Material
Case: Polycarbonate (PC)
Weight
Approx. 220 g
Approx. 220 g
Approx. 500 g
Cord length
3m
3m
8m
* Model Nos. appended with R are robot cable types.
130
ZFV-XC3BRV2*
ZFV-C
User’s Manual
Section 6
Specifications and External Dimensions
RS-232C Cable
ZS-XPT2 (for connecting a programmable controller)
(Unit: mm)
2000±150
32.2
(20±5)
41
32.2
24.99
(4)
20
17.6
11.15
5.2
10-pin square connector
8.7
9-pin square connector
Note 1
15
Round vinyl insulated cable 3.89
(Conductor cross-sectional area: 0.013 mm2 /
Insulator diameter: 0.38)
Note 1: Plug type connector
ZS-XRS2 (for connecting a personal computer)
(Unit: mm)
2000±150
41
32.2
24.99
32.2
11.15
17.6
4
20
Note 2
9-pin square connector
10-pin square connector
8.7
15
Round PVC insulated cable 3.89
(Conductor cross-sectional area: 0.013 mm2 /
Insulator diameter: 0.38)
Section 6 APPENDIX
5.2
Note 2: Socket type connector
Item
ZS-XRS2
ZS-XPT2
Applicable Amplifier Units
ZFV-C Series
Ambient temperature
Operating: 0 to +50 °C, Storage: -15 to +60 °C (with no icing or condensation)
Ambient humidity
Operating and storage: 35 % to 85 % (with no condensation)
Dielectric strength
1,000 VAC, 50/60 Hz for 1 min
Insulation resistance
100 MΩ (at 500 VDC)
Vibration resistance
(destructive)
10 to 150 Hz (0.7 mm double amplitude), 80 min each in X, Y, and Z directions
Shock resistance (destruc- 300 m/s2 3 times each in six directions (up/down, left/right, forward/backward)
tive)
Material
Cable sheath: Heat-resistant vinyl chloride (PVC)
Weight
Approx. 50 g
ZFV-C
User’s Manual
131
Section 6
Specifications and External Dimensions
Lighting Unit (Option)
ZFV-LTL01 (bar lighting)
(Unit: mm)
20
62
2 × 3-M3 Depth 5
P5.8 × 9 = 52.2
2000
8 ± 0.1
14 8
29
+100
0
37.4
10.7
20 ± 0.1
Mounting hole dimensions
20
69 ± 0.1
2-M3 Depth 5
69
74
Mounting hole dimensions
ZFV-LTL02 (bar double-lighting)
Section 6 APPENDIX
(Unit: mm)
33
4-M4 (Thru)
140
20
350 +35
0
100
140
165.4
85
85
20
20
P5.8 × 9 = 52.2
62
20
100
20
2000+100
0
100 ± 0.1
100 ± 0.1
Mounting hole dimensions
132
ZFV-C
User’s Manual
3.2
90°
59.9
Section 6
Specifications and External Dimensions
ZFV-LTL04 (bar low-angle lighting)
(Unit: mm)
4-M4(Thru)
165.4
140
33
3.2
62
100
85
P5.8 × 9 = 52.2
20
140
85
165.4
59.9
350 +35
0
20
90°
20
20
100
20
0
2000+100
100 ± 0.1
ZFV-LTF01 (light source for through-beam lighting)
(Unit: mm)
1
103
70
22
74
74
0
0
2000 +10
70
(Emitting surface)
109
(Emitting surface)
Section 6 APPENDIX
100 ± 0.1
Mounting hole dimensions
4-M3 Depth 8
74 ± 0.1
74 ± 0.1
Mounting hole dimensions
ZFV-C
User’s Manual
133
Section 6
Specifications and External Dimensions
Item
Applicable sensor
head
ZFV-LTF01
Pulse lighting
Lighting interval
Fixed (1.1 to 1.4 ms)
ZFV-LTL04
White LEDs
60
Section 6 APPENDIX
134
ZFV-LTL02
ZFV-SC50/SC50W/SC90/SC90W
Lighting method
Light source (Qty.)
ZFV-LTL01
20
Power supply voltage
48 VDC (Supplied from sensor head)
Current consumption
Approx. 160 mA
Approx. 80 mA
40
80
Approx. 120 mA
Approx. 210 mA
Dielectric strength
300 VAC, 50/60 Hz for 1 min
Vibration resistance (destructive)
10 to 150 Hz, 0.35 mm single amplitude, 10 times each in X, Y, and Z directions for 8 min
Shock resistance
(destructive)
150 m/s2, 3 times each in six directions (up/down, left/right, forward/backward)
Ambient temperature
Operating: 0 to +40 °C Storage: -20 to +65 °C (with no icing or condensation)
Ambient humidity
Operating and storage: 35 % to 85 %RH (with no condensation)
Ambient atmosphere
Must be free of corrosive gas
Connection type
Prewired, Standard cable length: 2 m
Degree of protection IEC60529 IP20
Material
SPCC
SPCC, aluminum
Weight
Approx. 500 g
(When packaged:
Approx. 550 g)
Approx. 250 g
(When packaged:
Approx. 300 g)
LED class
Class 1
Applicable standards
ZFV-C
User’s Manual
Approx. 650 g
(When packaged:
Approx. 900 g)
IEC60825-1: 1993 +A1: 1997 +A2: 2001
EN60825-1: 1994 +A1: 2002 +A2: 2001
Approx. 900 g
(When packaged:
Approx. 1,150 g)
Section 6
LED Safety Precautions for Using Laser Equipment
LED Safety Precautions for Using Laser Equipment
For LED devices, class classification to indicate dangerous level and safety standards are
stipulated in respective countries.
Take necessary safety preventive measures according to the standards.
Class category
Standards and Class Classification (*1)
JIS C 6802(Japan)
EN60825/IEC60825-1 (Europe)
Class 2
FDA (USA)
(Exception)
(*1) Safety standards vary with the country in which the instrument is to be used (except for Japan, Europe and
USA). Refer to the safety regulations and standards for laser devices stipulated in the country in which the
instrument is to be used.
■ Labeling on LED use
Warning labels are supplied as accessories with the ZFV-SC50/SC50W/SC90/SC90W.
Affix them to appropriate positions near the sensor where they can be easily noticed.
Section 6 APPENDIX
WARNING
LED RADIATION
DO NOT STARE
INTO BEAM
Max.5mW 1msec
400-700nm
CLASS 2 LED PRODUCT
IEC 60825-1:1993+A1:1997
+A2:2001
ZFV-C
User’s Manual
135
Section 6
Requirements from Regulations and Standards
Requirements from Regulations and Standards
Summary of Requirements to Manufactures
■ For Europe
EN 60825-1 “Safety of Laser Products, Equipment Classification, Requirements and
User’s Guide”
Summary of Manufacturer’s Requirements
Requirements
subclause
Description of
hazard class
Classification
Class 1
Class 1M
Class 2
Class 2M
Class 3R
Class 3B
Class 4
Safe under
reasonably
foreseeable conditions
As for
Class 1
except may
be hazardous if user
employs
optics
Low power;
eye protection normally
afforded by
aversion
responses
As for
Class 2
except may
be more
hazardous
if user
employs
optics
Direct intrabeam viewing may be
hazardous
Direct intrabeam viewing
normally
hazardous
High
power; diffuse reflections may
be hazardous
Protective housing
Section 6 APPENDIX
136
Required for each laser product; limits access necessary for performance of
functions of the products
Safety interlock in
protective housing
Designed to prevent removal of the panel until
accessible emission values are below that for Class
3R
Remote control
Not required
Permits easy addition of
external interlock in laser
installation
Key control
Not required
Laser inoperative when
key is removed
Emission warning
device
Not required
Attenuator
Not required
Give means beside the
On/Off switch to temporarily to block beam
Location controls
Not required
Controls so located that there is no
danger of exposure to AEL above
Classes 1 or 2 when adjustments are
made
Viewing optics
Not
required
Scanning
Scan failure shall not cause product to exceed its classification
Class label
Required wording
Aperture label
Not required
Service entry label
Required as appropriate to the class of accessible radiation
Override interlock
label
Required under certain conditions as appropriate to the class of laser used
ZFV-C
User’s Manual
Designed to prevent removal of the
panel until accessible emission values
are below that for Class 3B
Give audible or visible warning when
laser is switched on or if capacitor bank
of pulsed laser is being charged. For
Class 3R only, applies invisible radiation is emitted
Emission from all viewing systems must be below Class 1M AEL
Figures A required wording
Specified wording required
Section 6
Requirements from Regulations and Standards
Requirements
subclause
Classification
Class 1
Class 1M
Class 2
Class 2M
Class 3R
Class 3B
Class 4
Wavelength range
label
Required for certain wavelength ranges
LED label
Make required word substitutions for LED products
User information
Operation manuals must contain instructions for safe use. Additional requirement apply for
Class 1M and Class 2M
Purchasing and ser- Promotion brochures must specify product classification; service manuals must contain safety
vice information
information
Note: 1. This table is intended to provide a convenient summary of requirements. See text of this standard for complete requirements.
2. For the safety medical laser products, IEC 60601-2-22 applies
3. AEL: Accessible Emission Limit
The maximum accessible emission level permitted within a particular class. For your reference, see ANSI
Z136.1-1993, Section 2.
Symbol and border: black
Background: yellow
Section 6 APPENDIX
Figure A Warning label - Hazard symbol
Legend and border: black
Background: yellow
ZFV-C
User’s Manual
137
Section 6
Requirements from Regulations and Standards
Summary of Requirements to User
■ For Europe
EN 60825-1
Requirements
subclause
Laser safety
officer
Remote interlock
Key control
Beam attenuator
Emission
indicator device
Section 6 APPENDIX
Warning signs
Beam path
Specular
reflection
Eye protection
Protective
clothing
Training
Classification
Class 2M
Class 3R
Class 3B
Class 4
Not
required for
visible
Not required but recommended for applications that
emission
Required
involve direct viewing of the laser beam
Required
for non-visible emission
Connect to room or door
Not required
circuits
Remove key when not in
Not required
use
When in use prevents
Not required
inadvertent exposure
Indicates
laser is
energized
Indicates laser is enerNot required
for non-visi- gized
ble wavelengths
Follow precautions on
Not required
warning signs
Class 1M
Class 2M
Not
as for Class Not
as for
Terminate beam at end of useful length
required
3B
required
Class3B
(see note 2)
(see note 3)
Class 1M
Class 2M
No require- as for Class No require- as for
Prevent unintentional reflections
ments
3B
ments
Class3B
(see note 2)
(see note 3)
Required if engineering
and administrative proceNo requirements
dures not practicable and
MPE exceeded
Specific
Sometimes
No requirements
requirerequired
ments
Class 1M
Class 2M
No require- as for Class No require- as for
Required for all operator and maintements
3R
ments
Class3R
nance personnel
(see note 2)
(see note 3)
Class 1
Class 1M
Class 2
Note: 1. This table is intended to provide a convenient summary of requirements. See text of this standard for complete precautions.
2. Class 1M laser products that failed condition 1 of table10 of the standard. Not required for Class 1M laser
products that failed condition 2 of table10 of the standard. See the text for details.
3. Class 2M laser products that failed condition 1 of table10 of the standard. Not required for Class 2M laser
products that failed condition 2 of table10 of the standard. See the text for details.
138
ZFV-C
User’s Manual
Section 6
Requirements from Regulations and Standards
Definitions of Laser Classification
■ For Europe
Laser Product Classifications
EN
Class
Description
Class 1
Lasers which are safe under reasonably foreseeable conditions of operation.
Class 2
Lasers emitting visible radiation in the wavelength range from 400 nm to 700 nm. Eye protection is normally afforded by aversion responses including the blink reflex.
Class 3A
Lasers which are safe for viewing with the unaided eye. For laser emitting in the wavelength range from 400 nm to 700 nm, protection is afforded by aversion responses including the blink reflex. For other wavelengths the hazard to the unaided eye is no greater than
for Class 1. Direct intrabeam viewing of Class 3A lasers with optical aides (e.g., binoculars,
telescopes, microscopes) may be hazardous.
Class 3B
Direct intrabeam viewing of these lasers is always hazardous. Viewing diffuse reflections is
normally safe (see note).
Class 4
Lasers which are also capable of producing hazardous diffuse reflections. They may cause
skin injuries and could also constitute a fire hazard. Their use requires extreme caution.
Note: Conditions for safe viewing of diffuse reflections for Class 3B visible lasers are: minimum viewing distance of
13 cm between screen and cornea and a maximum viewing time of 10 s. Other viewing conditions require a
comparison of the diffuse reflection exposure with the MPE.
Section 6 APPENDIX
ZFV-C
User’s Manual
139
Section 6
Updating the Firmware
Updating the Firmware
This section describes how to update the firmware of the ZFV-C Series Amplifier Unit.
Warp Engine ZS is used to update the firmware.
For the file for updating, please contact your OMRON representative.
• Never turn OFF the power to the Amplifier Unit during update. Doing so will disable the Amplifier Unit’s
ability to start up correctly.
• When installing Warp Engine ZS, make a login as the administrator or a user, like a computer administrator who has the authority to change system settings.
Flow of Firmware Update
Connecting the amplifier unit to
a personal computer
Correct?
No
Yes
Installing the USB driver
Section 6 APPENDIX
Installing Warp Engine ZS
Starting Warp Engine ZS
Correct?
No
Yes
Setting the connection port
Setting the firmware information
Updating the firmware
Error?
No
Normal end
140
ZFV-C
User’s Manual
Yes
Contact OMRON’s sales representative
Section 6
Updating the Firmware
Connecting the amplifier unit Personal Computer
1.
Connect the Amplifier Unit to the personal Computer with a USB cable.
When connecting the Amplifier Unit to a Personal computer for the first time, the USB
driver must be installed in advance.
Setting USB/RS-232C
Specifications p.102
2.
Communication
Turn ON the power supply to the Amplifier Unit.
• Make sure that power is supplied to the Amplifier Unit. If power is cut off during update, the Amplifier
Unit will be damaged and will not start up correctly.
• When turning the power ON, always make sure that the Amplifier Unit is not connected to other Amplifier Units. If two or more Amplifier Units are connected, Warp Engine ZS will not start.
• Do not start Warp Engine ZS unless the Amplifier Unit is recognized by the Personal Computer properly.
3.
Select
Section 6 APPENDIX
Starting Warp Engine ZS
[Programs]-[OMRON]-[ZFV-C]-
[WarpEngineZS]
From the [Start] menu on the Personal
Computer.
The [WarpEngineZS] window will appear.
If you have failed to start Warp Engine ZS,
a message will appear, followed by the dialog box shown on the right. Skip to “Setting
the Connection Port”.
ZFV-C
User’s Manual
141
Section 6
Updating the Firmware
Setting the Firmware Information
4.
Click the [Controller information] button
if necessary.
The model and version number of the currently connected Amplifier Unit will be displayed.
5.
Click the [Loading file] button to select
the file to be written.
The Amplifier Unit model and version number registered in the file will be displayed.
Performing Firmware Update
6.
Click the [Start upgrade] button in the
Section 6 APPENDIX
[WarpEngineZS] window.
A message indicating that update is about
to start will be displayed.
If a message “Different model” appears when
the [Start upgrade] button is clicked, the currently connected Amplifier Unit does not
match the model information registered in the
file. In this case, never perform update. Doing
so will damage the Amplifier Unit, disabling its
ability to start up correctly any more.
142
ZFV-C
User’s Manual
Section 6
Updating the Firmware
7.
Check the message and click the [OK] button.
Firmware update will start.
Progress of processing will appear during update. Wait until a message informing
completion of update appears (update takes a couple of minutes).
• An error may occur with the Amplifier Unit during update, but ignore it.
• If the update progress bar stops or update is not completed within 10 minutes, there is a
possibility that update has failed.
In this case, contact OMRON’s sales representative about the firmware version before
update and the one in the write file.
8.
The following message will appear when
update
is
complete,
so
follow
the
instructions given on the screen.
Section 6 APPENDIX
9.
Check the message and click the [OK] button.
ZFV-C
User’s Manual
143
Section 6
Updating the Firmware
■ Setting the connection port
If you have failed to start Warp Engine ZS, a message will appear, followed by the dialog box shown on the right.
1.
Select [Settings]-[Control Panel] from the [Start] menu of the personal computer, and then double-click [System].
The [System Properties] dialog box will appear.
2.
Open the [Hardware] tab and click [Device Manager].
The [Device Manager] dialog box will appear.
Section 6 APPENDIX
3.
Open [Ports (COM&LPT)] and check the COM number in “OMRON Smart
Sensor USB COM Drivers (WDM) (COMxx)”.
“COMxx” indicates the connection port of the Amplifier Unit.
4.
Select the connection port of the Amplifier Unit from [COM Port], and click
the [Set] button.
Warp Engine ZS will start.
144
ZFV-C
User’s Manual
Section 6
Version upgrade information
Version upgrade information
Software version upgrade contents are explained.
■
Ver1.00 → Ver1.10
Changes
Addition of [COL JUGE] for pattern inspection
Page
p.65
Addition of horizontal direction ([DIRECTION] ← → ) for width, position and count inspection p.74, p.77, p.80
Addition of workpiece stop teaching function
p.97
Addition of still image teaching function
p.98
■
Ver1.10 → Ver1.20
Changes
Page
Addition of [AREA3] for area inspection
p.67
Addition of [CHARA] for character inspection
p.84
Addition of sensor sensitivity increase function
p.93
Addition of introduction of Smart Monitor ZFV Tool for personal computer
p.21
■
Ver1.20 → Ver1.30
Page
Addition of restrictions on Gang-Mounting Amplifier units
p.116
Addition of Lock function
p.105
ZFV-C
User’s Manual
Section 6 APPENDIX
Changes
145
Section 6
Index
Index
A
D
ADJ mode
27
Adjusting lighting
92
ALL CLEAR
100
Amplifier Unit
Installation
32
Restrictions on
gang-mounting
116
Specifications and External
Dimensions
126
Amplifier unit expansion
22
Amplifier unit gang-mount
110
Area inspection
66
Area value
63, 68
Density average value
82
Density deviation value
82
Density distribution value
86
Detection range
47, 125
DIRECTION
74, 77, 80, 89
DISP COL
97
DISP POS
93
E
ECO MODE
98
Edge level
73, 76, 79
EDGE MODE
74, 77, 80, 89
Edge position
76
Edge related items
Hue
77, 80
Detection direction
74, 77, 80
Sensitivity
77
EDGE SENSE
77
Edge width
73
EXP menu
27
Expert menu
27
Extension Cord
130
B
Section 6 APPENDIX
146
Bank
CLEAR
COPY
Switching
Switching method
Basic Configuration
BINARY
Brightness check
95
94
40, 58
95
21
69
81
C
CHARA
84
CLEAR
95
COL JUGE
65
COL MODE
74
COLOR
69
Color difference
71
Color Pickup Function
158
Color related items
Changing the color mode
74
Changing the filter color
65
Color check
65
Light teaching
65
COM
102, 104
Connecting
RS-232C
103
USB
102
CONTRAST
92
Control keys
57, 60
COPY
94
Correlation value
63, 86
COUNT
78
Count
79
Coupler
25
ZFV-C
User’s Manual
F
Filter
Firmware
Focus adjustment control
65
140, 145
26
G
GAIN
Gang mounting
93
36
H
HEAD
HUE
111
70, 159
I
I/O Circuit diagrams
Initialization
MEAS CLEAR
Measurement Data
Setting Data
Input cable
Input/output
ON conditions
One-shot Output
Inspection contents
Area
Brightness
Count
41
101
101
100
39
107
107
66
81
78
Section 6
Index
Detecting Presence of
Character String (CHARA)
Hue
Pattern
Position
Installation procedure
DIN Track
Gang
Panel
84
70
62
75
Output cable
OUTPUT TIME
P
Part Names
Amplifier Unit
Sensor Head
Partial function
Pattern Inspection
Position check
Power Supply
32
36
34
K
Key Operations
MENU/ADJ mode
RUN Mode
60
60
57
LANGUAGE
LIGHT TEACH
Lighting Unit (Option)
Lock Function
101
65
132
105
ROTATION
RS-232C
Cable external dimensions
Cable wiring
Communication Setting
RUN Mode
87
97
54
96
54
97
27
16
24
24
27
83
88
88
N
Narrow View
125
O
OFF DELAY
OFF delay time
ON DELAY
ON delay time
ON STATUS
One-shot Output
Continuous measurement
Output time
Synchronous measurement
Operation Mode
Operational Flow
OUTPUT
S
109
109
108
108
107
107
108
107
27
61
111
64
131
103
104
27
SEARCH AREA
64, 90
Sensor Head
Affixing LED Warning Labels 45
Connecting the Sensor Head 51
Focus adjustment
49
Installing the Mounting Fixture 45
Sensitivity
93
Setting distance
47
Specifications and External
Dimensions
121
Setting distance
47
SPEED
96
STABLE
90
Standard menu
27
Standard View
125
STD menu
27
SWITCH
95
Section 6 APPENDIX
MDL DIV
MEAS TYPE
Measurement
Measurement time
Speed adjustment
Switching the display content
Timing
MENU mode
Menu Hierarchy
Menu selector switch
Mode selector switch
Menu switching
METHOD
MODE
MODEL
24
25
93
62
75
21
R
L
M
39
108
T
TEACH IMAGE
TEACH TYPE
Teaching
AREA
AREA1
AREA2
BRIGHT
COUNT
HUE
Match
Pattern
POSITION
Search
WIDTH
98
97
68
68
68
81
78
70
63
63
75
63
72
ZFV-C
User’s Manual
147
Section 6
Index
Workpiece move teaching
44
Workpiece stop teaching
43
Threshold
AREA
68
AREA1
68
AREA2
68
BRIGHT
82
COUNT
79
HUE
71
Match
63
Pattern
63
POSITION
76
Search
63
WIDTH
73, 86
Timing Charts
Synchronous measurement 42
Continuous measurement
42
TRIG
111
U
Ultra Wide View
USB
Communication Setting
125
VERSION
101
Warp Engine ZS
WHITE BAL
Wide View
Width Inspection
Wiring
140
100
125
72
39
102
V
Section 6 APPENDIX
148
W
ZFV-C
User’s Manual
Section 7
APPLICATION AND SETTING
Inspecting for the Presence of Electronic Components
(Pattern)
150
Detecting Mixed Varieties of Campaign Seals (Area)
152
Inspecting Entry of Workpieces of Wrong Color (HUE)
156
Explanation of Color Related Functions
158
Section 7 APPLICATION AND SETTING
ZFV-C
User’s Manual
149
Section 7
Inspecting for the Presence of Electronic Components (Pattern)
Inspecting for the Presence of Electronic Components (Pattern)
SEARCH
OK
OK
ABCDE
E
D
C
A
B
NG judgment will also be
made if the workpiece
contained in a case is
placed upside down.
C
B
ABCDE
NG
A
SEARCH
If the workpiece is placed
upside down, NG judgment will be made since
“ ” is not detected inside
the teaching area.
B
NG
A
SEARCH
C
D
E
Adjusting the Camera
1.
Adjust the camera so that the workpiece is displayed on the monitor.
Adjusting the Sensor Head Focus p.49
Setting the Inspection Method
Section 7 APPLICATION AND SETTING
2.
Select
3.
Select [ITEM] and press the SET Key.
and press the SET Key.
MENU
TEACH/SEARCH
ITEM
4.
Select
and press the SET Key.
REG.
TEACH/ITEM
PATTERN
5.
150
ZFV-C
User’s Manual
Select
and press the SET Key.
TEACH/PATTERN
Section 7
Inspecting for the Presence of Electronic Components (Pattern)
Adjusting the Inspection Area
6.
Select [REG.] and press the SET Key.
TEACH/SEARCH
ITEM
7.
Adjust the size of the inspection area and
press the SET Key.
Enlarge/reduce the window’s green frame so
that the inspection area is slightly larger than
than the workpiece.
8.
Zooms in/out
in vertical
direction.
Move the green frame so that the target is centered in the inspection area.
TEACH/REG.
Zooms in/out
horizontal
direction.
SIZE
Adjust the position of the inspection area
and press the SET Key.
REG.
TEACH/REG.
Vertical
direction
Horizontal
direction
MOVE
Registering the Reference Workpiece
9.
Press the TEACH/VIEW key.
TEACH/SEARCH
inspection area.
Teaching is completed when the “+” mark disappears.
ITEM
REG.
SEARCH
OK
Checking Operation
10. Switch the mode switch to “ADJ mode”.
ADJ
MENU RUN
11. Check the measurement results displayed
Section 7 APPLICATION AND SETTING
“+” will begin to blink at the center of the
on the LCD monitor.
TH
99
[ 60]
ZFV-C
User’s Manual
151
Section 7
Detecting Mixed Varieties of Campaign Seals (Area)
Detecting Mixed Varieties of Campaign Seals (Area)
AREA2
OK
OK
1
point
AREA2
NG
1
point
AREA2
NG
1
point
NG because the
area of the background color differs from the
reference area
NG because the
area of the “1 Point”
color differs from
the reference area
1
point
1
point
1
point
Adjusting the Camera
1.
Adjust the camera so that the workpiece is displayed on the monitor.
Adjusting the Sensor Head Focus p.49
Setting the Inspection Method
Section 7 APPLICATION AND SETTING
2.
Select
3.
Select [ITEM] and press the SET Key.
and press the SET Key.
MENU
TEACH/SEARCH
1
point
ITEM
4.
Select
and press the SET Key.
TEACH/ITEM
AREA
5.
152
ZFV-C
User’s Manual
Select
and press the SET Key.
TEACH/AREA
REG.
Section 7
Detecting Mixed Varieties of Campaign Seals (Area)
Adjusting the Inspection Area
6.
Select [REG.] and press the SET Key.
TEACH/AREA2
1
point
ITEM
7.
Adjust the size of the inspection area and
press the SET Key.
Enlarge/reduce the screen’s green frame so
that the inspection area is slightly larger than
than the workpiece.
8.
Zooms in/out
in vertical
direction.
Zooms in/out
horizontal
direction.
Move the green frame so that the target is centered in the inspection area.
TEACH/REG.
1
point
SIZE
Adjust the position of the inspection area
and press the SET Key.
REG.
PICK
TEACH/REG.
Vertical
direction
Horizontal
direction
1
point
SIZE
Selecting the Color to be Inspected
Select [PICK] and press the SET Key.
TEACH/AREA2
1
point
ITEM
10. Select [PICKAREA] and press the SET Key.
REG.
PICK
TEACH/PICK
1
point
11. Adjust the size of the color pickup area and
press the SET Key.
Enlarge/reduce the window’s red frame of the
screen so that the color to be selected is
located inside the area.
PICKAREA
PICKCOL
TEACH/PICK
Zooms in/out
in vertical
direction.
Zooms in/out
horizontal
direction.
Section 7 APPLICATION AND SETTING
9.
1
point
SIZE
ZFV-C
User’s Manual
153
Section 7
Detecting Mixed Varieties of Campaign Seals (Area)
12. Adjust the position of the color pickup area
and press the SET Key.
TEACH/PICK
Vertical
direction
Horizontal
direction
1
point
MOVE
13. Select [PICKUP] and press the SET Key.
TEACH/PICK
Up to four colors are picked up automatically.
1
point
SEL
14. If
there are colors that are not to be
:CHG
D :HIST
TEACH/PICK
selected, use the ↓ key to add a “x” mark.
← → Left/Right Keys: Move to left/right.
1
point
↓ Key: Switches a currently target object to a
non-target object and a currently nontarget object to a target object.
SEL
:CHG
D :HIST
15. Press the SET Key.
The selected colors will be confirmed.
16. Press the ESC Key.
Section 7 APPLICATION AND SETTING
Registering the Reference Workpiece
17. Press the TEACH/VIEW key.
TEACH/AREA2
“+” mark will appear at the center of the
1
inspection area.
point
Teaching is completed when the “+” mark disappears.
ITEM
Checking Operation
18. Switch the mode switch to “ADJ mode”.
ADJ
MENU RUN
154
ZFV-C
User’s Manual
REG.
PICK
Section 7
Detecting Mixed Varieties of Campaign Seals (Area)
19. Check the measurement results displayed
AREA2
OK
on the LCD monitor.
1
point
80
L: [ 80] H:[ 120] G
Section 7 APPLICATION AND SETTING
ZFV-C
User’s Manual
155
Section 7
Inspecting Entry of Workpieces of Wrong Color (HUE)
Inspecting Entry of Workpieces of Wrong Color (HUE)
HUE
OK
HUE
NG
OK
NG due to wrong
color
Adjusting the Camera
1.
Adjust the camera so that the workpiece is displayed on the monitor.
Adjusting the Sensor Head Focus p.49
Setting the Inspection Method
Section 7 APPLICATION AND SETTING
2.
Select
3.
Select [ITEM] and press the SET Key.
and press the SET Key.
MENU
TEACH/SEARCH
ITEM
4.
Select
and press the SET Key.
TEACH/ITEM
HUE
156
ZFV-C
User’s Manual
REG.
Section 7
Inspecting Entry of Workpieces of Wrong Color (HUE)
Adjusting the Inspection Area
5.
Select [REG.] and press the SET Key.
TEACH/HUE
ITEM
6.
Adjust the size of the inspection area and
press the SET Key.
Zooms in/out
in vertical
direction.
REG.
TEACH/REG.
Zooms in/out
horizontal
direction.
SIZE
7.
Adjust the position of the inspection area
and press the SET Key.
Move the green frame so that the target is centered in the inspection area.
TEACH/REG.
Vertical
direction
Horizontal
direction
MOVE
Registering the Reference Workpiece
8.
Press the TEACH/VIEW key.
TEACH/HUE
inspection area.
Teaching is completed when the “+” mark disappears.
ITEM
REG.
Checking Operation
9.
Switch the mode switch to “ADJ mode”.
ADJ
MENU RUN
10. Check the measurement results displayed
HUE
OK
TH:
15
[10]
Section 7 APPLICATION AND SETTING
“+” mark will appear at the center of the
on the LCD monitor.
ZFV-C
User’s Manual
157
Section 7
Explanation of Color Related Functions
Explanation of Color Related Functions
Color Pickup Function
Up to four candidate colors (colors of the four largest areas) are picked up by simply
enclosing the area to be measured.
TEACH/PICK
Color pickup area
Candidate color
SEL
:CHG
D :HIST
■ To check color pickup state
Pickup state of candidate colors can be
viewed in histogram in the color pickup window.
In addition, pressing the [A] function key in a
screen where an image is displayed
switches the image between “color image”,
“pickup image (color)” and “pickup image
(monochrome)”.
Section 7 APPLICATION AND SETTING
158
[D] function key
TEACH/PICK
H
:CHG
D :HIST
SEL
TEACH/PICK
L[ 5] H[ 20]
Color bar and
histogram
■ When color pickup is unstable
If color pickup cannot be performed
properly (e.g. uneven colors), widen
the target color range by monitoring the
color bar and histogram.
TEACH/PICK
TEACH/PICK
H
L[ 5] H[ 20]
H
L[ 1] H[ 25]
Lower limit
ZFV-C
User’s Manual
Upper limit
Section 7
Explanation of Color Related Functions
■ When there are four or more inspection target colors
Adjustment of the target color range is possible.
In this example, orange color can also be a target if the upper
limit is raised.
TEACH/PICK
H
L[ 5] H[ 40]
Upper limit
Hue Indication Number
For color inspection threshold values and upper/limit values (in the color pickup histogram
screen), color range must be specified using hue indication numbers.
359
0
Section 7 APPLICATION AND SETTING
ZFV-C
User’s Manual
159
Section 7
Revision History
Revision History
A manual revision code appears as a suffix to the catalog number at the bottom of the front
and back covers of this manual.
Cat. No. Z240-E2-03
Revision code
Revision code
Date
01
2005. December
02
2006. February
• Functions added as per software version upgrade (Ver1.20)
• Addition of information for optional lighting unit
• Corrections
03
2006. April
• Functions added as per software version upgrade (Ver1.30)
• Corrections
Section 7 APPLICATION AND SETTING
160
ZFV-C
User’s Manual
Revised contents
Original production