1
Deliverable
Project Acronym: Digipay4Growth
Grant Agreement number: 621052
Project Title: " Digipay4Growth: Governments, SMEs and consumers make expenditures
through a digital payment system that stimulates economic growth and job creation by
increasing sales and access to credits for SMEs. "
Deliverable 5.3 Cyclos IT implementation manual
Revision: [final draft December 2014]
Authors:
Hugo van der Zee (Social Trade Organisation)
Roder van Arkel (Social Trade Organisation)
Project co-funded by the European Commission within the ICT Policy Support Programme
Dissemination Level
P Public
C Confidential, only for members of the consortium and the Commission Services
REVISION HISTORY AND STATEMENT OF ORIGINALITY
Revision History
Revision #
Date
Author
Organisation
Description of
revision
n/a
Statement of originality:
This deliverable contains original unpublished work except where clearly indicated otherwise.
Acknowledgement of previously published material and of the work of others has been made
through appropriate citation, quotation or both.
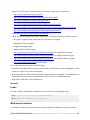
Help administration
General
Help HOW TO
Navigation in Cyclos
Personal settings
User management
Search & register user
My contacts
View connected users
Change profile of user
Make a payment to user
Change credit limit of user
Change group of user
Activate, block, disable, remove users
Manage user passwords
Add user comment (remark)
Assign product to user
Manage access channels of user
Assign broker to user
Upload user document
View configuration of user
Manage advertisements of user
Send message to users
Payments overview
User balances overview
Manage account limits
Account configuration
Currencies
Accounts
Account fees
Transfer types
Transfer fees
Payment fields
Payment status
Payment filters
Payment authorizations
Payment qualifications (feedback)
Scheduled payments
Payment requests
System configuration
Networks
Network wizard
Groups
Products
Configurations
Access channels
Password types
Languages
Advertisements categories
Custom advertisements fields
Web shop
Custom profile fields
Custom image categories
Record types
Agreements
Message categories
User identification methods
Cyclos scripting
Imports
Cyclos license
Content management
Documents
Custom images
Application translation
Data translation
Static content
Menu & pages
Mobile app pages
Banners
Logos
Themes
Reports & Alerts
System reports
System alerts
User alerts
Error logs
General
Help HOW TO
The administration help file can be accessed via the help icon in the functions windows. The help
contains an explanation of all administration features. Directly under the title of each help section the
location where to find the described feature is showed. The location is in italic and has a > sign in
front. For the more complex configurations instruction video's are made and published at this page. New
features might not be covered yet in the video's. We will add video's along the way. Another helpful
resource is the cyclos feature list.
Note: Be aware that you need full administration features to be able to see all the functions that are
explained in the help file and instruction video's.
Navigation in Cyclos
Navigation in Cyclos is done via a main menu (horizontal bar) and sub menus that are shown at the
left or directly under the horizontal menu depending on the screen size. When navigating more than
one level deep (for example: view user profile) Cyclos will show a clickable ‘breadcrumb’ tree directly
under the horizontal menu.
Besides the menu you can use the ‘Quick actions’ that show up at the home page. What actions will
show up at this page can be defined in the the local preferences (Personal > Preferences >
Dashboard ations)
The ‘quick search’ (at the top right) can be used to search quickly for search for users, contacts or
advertisements. Operations that are related to users, for example editing the profile of a user or
setting a credit limit, can be done from the Profile > Actions section of the user profile.
Personal settings
> Menu: Personal
At this section you can change personal settings like changing your password, update your profile,
and view notifications. In the ‘configuration’ section you can define what dashboard actions will show
up at the entry (home) page, and the notifications that can be send to your Cyclos notifications inbox
and/or your email address.
User management
Most administrator actions about users are done from the user profile. These user actions generally
are self explanatory. The actions that need additional explanation are described further in this help
section.
Search users & register user
> Quick search: Search Users
> Menu: Users Management
> Dash board action: Search Users
> Dash board action: Register user
> As guest: Link: Register (top right)
The page where you can search for users has also the option to register new users. This can be
done by selecting the `New` button. If one or more groups exist (and you have permissions to
manage the group) you will have to select the group first.
If public registration is enabled (in the configuration) users can also register themselves via the
option 'Register' at the main page (when not logged in). More information about registration settings
can be viewed at: Manage configurations.
My contacts
> Menu: Users > Management > My contacts
Here you can manage (add & remove) contacts. Selecting a contact of the contact list will bring you
directly to the user profile of the contact. From the profile page you can perform user actions related
to the user (e.g. make payment or send message).
View connected users
> Menu: Users Management Connected users
> Menu: Users Management User profile
An administrator can view all connected users (see location above) of the users he can manage.
From the connected users list an administrator can disconnect them or go into their profile page.
Change profile of user
> Menu: Users Management User profile
From the user profile page you can click the edit icon (next to the username in the title) and update
the user profile fields. From the edit mode page you can also update the user addresses, phones and
profile pictures.
Make a payment to user
> View user profile Banking Payment systemtouser
> Menu: Banking System payment To user
From the above mentioned locations an administrator can perform a payment to a user (from a
system account). If there is more than one origin account you will have to select the system account
the payment will be done from. If there is one or more possible user (destination) account you will
have to chose one. Most systems have only one possible payment type defined. What means no
payment options will be shown.
Change credit limit of user
> View user profile Accounts Account limits
> Menu: System Products Select Member product Account section
> View user profile Banking Account limits
> Menu: System Banking General overviews Account limits
An administrator can define a personal credit limit for an individual user or a credit limit for a whole
group of users. This can be a negative credit limit what means the user can start with a zero balance
and go negative (mutual credit model). For economic models that work with positive balances a
payment coming from a system account will need to be configured in order to provide credit for
users. It is possible to define a default credit limit automatically for new registered users. To set a
negative default credit limit for a group of users go to a Member product with an account, then go to
the Account section and set the 'Max. negative account balance'. A initial positive balance can also
be configured in the Account section of a member product, under the option: Initial credit (you will
have to select a systemtouser transfer type).
Change group of user
> View user profile User management Groups
In the manage group page you can move users to other groups. Be aware that a different group could
have different products, what means the user could get different features and permissions. More
information about groups can be viewed at: manage groups.
Change user status (activate, block, disable, remove)
> View user profile User management (block, disable, remove)
> Menu: Users Connected users
As an administrator you can block or disable users temporary. A user with the 'blocked' status
cannot login via any access channel but will be active in the system, what means other users can
see him/her and he/she can receive payments. Disabled users cannot login and are not visible by
other users in the system (except for brokers and administrators). Removing users is irreversible,
removed users cannot be set as active anymore. They will remain in the database for backup
reasons. When removing users all advertisement and profile pictures will be removed. The user and
transaction data will be kept, but will be only visible for administrators and brokers (with the
permissions).
The user search has a status option where you can filter by the above mentioned status, and also by
the 'pending' status. Pending users are users that have registered at the public registration page and
did not confirm by email yet.
Manage user passwords
> View user profile User management Passwords
An administrator or broker (with the permissions) can manage the passwords of the user from one
page. A password can be blocked and changed. It is also possible to reset the password. What
means a new password will be generated and send by email.
Write user comment (remark)
> View user profile User information Remarks
> Menu: Users User records Remarks
Administrators can insert remarks (comments) for a user from user profile (link 'Remarks') and view a
history of remarks for that specific user. From the menu administrators can search for Remarks
given to all users.
Note: The remark is a 'user record' defined in the default database that comes with Cyclos. Records
is a powerful feature in Cyclos that allows to store and retrieve data in an structured way. A remark is
a very simple example of a user record. More information about user and system records can be
found here.
Assign product to user
> View user profile User management Products
At this page you can view the (permission) products of a user and assign an individual product to a
user. Be aware that usually products are assigned at group or group set level. Information about
permission products can be viewed at the manage products help file.
Manage channels of user
> View user profile User management Channels access
Here you can define what channels the user has access to. This setting will overwrite the channels
defined in the product.
Assign broker to user
> View user profile User management Brokers
An administrator can assign a broker to a user and in the case a user has multiple brokers one
broker can be set as 'main' broker. Information about brokers can be viewed at the manage products
help file.
Upload user document
> View user profile User information Documents
An administrator or broker can upload a document (file) and attached it to a user. A typical individual
document would be a digital copy of a passport. The page will also show the shared documents
documents that are assigned to the user product.
View configuration of user
> View user profile User management Configuration
This page shows the 'active' configuration of the user. The active configuration is the end result of
the combined configurations that are applied to the user. For more information on configurations
please view the configuration help file.
Manage advertisements of user
> View user profile Advertisements View user ads
> Menu: Users Advertisements Search advertisements
Administrators can manage advertisements of a specific user from the user profile. Administrators
can search for advertisements of all users from the User management menu. The advertisement
permissions can be defined in the user product (Advertisements section). The visibility of
advertisements for guests is defined in the configuration (Visible advertisement groups).
Manage references of user
> View user profile User information References
Administrators can manage the references of a user from the user profile. It is possible to edit
existing references. If users exceed a certain number of maximum received or given negative
references an alert can be sent. This can be defined in the configuration (alert section).
Send message to users
> View user profile User information Send message from system
> Menu: Users Messages New message
> Menu: Users Messages Search messages
> Menu: Users Messages Mailing lists
Administrators can send an individual message from the user profile. When sending a message a
message category needs to be selected. From the user management menu (see location) an
administrator can send messages to an individual user or to user groups (mailing). It is possible to
send mailings via different channels, currently SMS and email are supported. A history of sent and
and received messages is available under the Menu: Users Messages Search Messages. When
selecting a mailing form the mailing list it will give information about the mailing (e.g. number of
succesfully sent / failed messages).
Payments overview
> Menu: Banking General overviews Payments
Here you can have a quick overview about all the payments in the system. The latest (most recent)
payments are listed on top. It is possible to search/filter by various criteria.
User balances overview
> Menu: Banking General overviews User balances
This feature provides a way to have a quick overview of users and their account balances. The
feature consists basically list of users with their account balances. There are various search (filter)
options and a 'show on Map' option. The map shows only users that have addresses. The filter
options are mostly the same as the normal user search, and there are some additional filter options.
It is possible to filter on a balance 'range'. This will allow you for example to retrieve a list of all users
with account balances between 500 and 1500.
With the 'yellow range' option you can define colors that will appear in the search result list and the
Map. For example, when the yellow balance range is set '200 to 200' the users balances that fall
within 200 and 200 will show up with as yellow (account balance in list or marker in the Map), users
below 200 will show up as red, and users above 200 as green. A default yellow range can be defined
in the account type. Be aware that the yellow range option does not 'filter' anything, it just defines
that the account balances for the given search result will be shown with colors according to the
balances. When clicking on a marker in the map it opens a popup with the user information (name
and balance) and it has a link to jump to the user profile. You can go back to the map with the
breadcrumb navigation. The map has a full screen option what makes it easier for results with many
users. You can go back from the full screen mode to normal display mode by clicking the 'x' at the
top right of the (full) screen. Above the user balances list some information is displayed (based on the search result). Currently it
displays the total sum of positive/negative balances and average negative/positive balance.
Manage account limits
> Menu: Banking General overviews Account limits
Here you can have a quick overview about account limits. The latest (most recent) limit changes are
listed on top. Entering a account limit detail the limits can be changed. Thee same page has also a
log with the history of account limit changes.
Account configuration
Currencies
> Menu: System Accounts configuration Currencies
Before creating accounts a currency needs to be created. A currency has a format (pre and suffix)
and a symbol. When creating a new account a currency needs to be selected. When a transfer
number is defined in the currency all transactions within the currency realm will get a unique
(generated) transfer number.
Accounts
> Menu: System Accounts configuration Account types
> Menu: System User configuration Product (permissions) Accounts
> Menu: Banking System accounts Account summary
Accounts in Cyclos can be either of the type "System" or "Member". Both types are related to a
currency and can contain units that can be transferred to and from other accounts (if transaction
types between these accounts exist). If a new account with the type "Member" is created it is just an
empty account type and cannot be accessed by members. In order to enable a member account an
administrator will have to enter a member product and associate the new account to the product. By
doing this all members with that product will have such a member account. Even though there is one
member account configured in the sytem each member will have their own account balance and their
own payments. Members can have zero, one or more member accounts (assigned via products), and
make payments between their own accounts, to other member accounts and to system accounts. A
member account can have a generic name visible for all account owners, for example, 'checking
account'. Contrary to a Member account a System account is a single 'stand alone' account, it will just have
one account balance for example. A system account is not directly associated with specific users
but administrators can be given permissions (defined in a product) to make payments from the
account to other system or member accounts. A system account be either 'limited', what means it
can be given a max negative and positive balance, or 'unlimited', what means it can go indefitly
negative or positive.
Account fees
> Menu: System Accounts configuration Account types
> Menu: System User configuration Product (permissions) Accounts
> Menu: Banking System accounts Account summary
Account fees are payments from members to a system account or the other way around. Usually
they are scheduled to run in a period (e.g. monthly) but they can be configured to be run manually as
well (by an administrator). Account fees are related to an account and can be activated for one or
more Member products. When an account fee is levied, all member groups that have been selected
in the account fee configuration will be charged. However, though the word "fee" suggests that
members are paying, an account fee can also be configured that a system account is the paying
party, and that members receive the fee. A typical account fee is a monthly contribution payment
from members to a system account (but it can be the other way around as well). Another example is
"demurrage" or "liquidity tax", where users pay over their positive balance through time, as a sort of
"negative interest". Detailed information about authorizations and roles can be found in the online specification page.
Transfer types
> Menu: System Accounts configuration Account types Transfer types
> Menu: System User configuration Product (permissions) Accounts
> Menu: Banking Account summary Account Transaction details
Transfers that have been done can be viewed in the Account summary page when clicking on a
transfer from the history list. Transfers can happen from or to `system accounts` and `user
accounts`, as explained in the account section above. Each transfer (or payment) will have a
'Transfer type'. The transfer type defines the origin and the destination account type of the payment.
A new transfer is always created from within the origin account (the account of the payer). The
transfer type has many configuration options, for example 'max daily limit' or 'require authorization'.
The 'confirmation text' of a payment will show up in the confirmation dialog window when the user has
to confirm the payment. The transaction type can also be bound to a specific channel. For example,
a transfer type 'mobile payment' could be created and only be associated with the SMS channel. This
way the transfer type will only be available for SMS operations.
Transfer fees
> Menu: System Accounts configuration Account types Transfer types Transfer fees
A transfer fee allows to charge a fee automatically when a specific transaction occurs. For this
reason a transaction fee is configured 'within' a transfer. There are various ways to calculate the fee
(e.g. fixed amount, percentage of payment amount) and there are different options to define who will
be charged and who will receive the fee (destination). For example either the payer or payee can be
charged, or even another (fixed) user. The beneficiary (receiver) of a fee can be the payer or payee, a
system account, a fixed user or the broker of the payer or payee. A typical example of a fee is a transaction fee on a trade transfer. If a broker receives the fee it
could be considered a 'broker commission'. There can be more than one fees attached to a
transaction. Because of the many ways fees can be configured it is not necessarily always a "fee".
For example it is possible to use a fee to "forward" and "distribute" payments to other accounts
(using the percentage option). A normal fee will always be applied 'on top' of the orginal payment. For example, a fee of 3% on a
transction with the amount 100 will result in a total amount of 103 being debited. When using the
'deduct' option the fee amount will be deducted from the original amount. That means in the above
example that the fee charged will also be 3, but the payment amount will be 97. When creating a new
fee you have to specify the 'transaction type' that will be used when the fee is charged. It is common
practice to create a new transacation type for a fee so that user can later filter on fee transfers. Fees
can also be charged within another currency.
Payment fields
> Menu: System Accounts configuration Payment fields
> Menu: System Accounts configuration Account types Transfer types Payment fields
If needed a custom payment field can be added to payment types, with specific validation and other
options. Just as a transfer fee a payment field can be added from within a transfer type. A payment
field needs to be created first in the account configuration (see location above) before they can be
added to a transfer type.
Payment status
> Account history Transaction details Status
> Menu: System Accounts configuration Payment status flows
> Menu: System Accounts configuration Account types Transfer types Transfer type details
It is possible to define status flows for specific transaction types. The first (initial) status of a flow is
set when the payment is performed. Users (with the correct permissions) can search in the account
history by status and each payment details will show the status and a history log with the status
changes. In the payment details page the status can be changed (to the next status) by members,
brokers and administrators, depending on the status flow and permissions. Administrators can create and manage 'status flows'. Each status can have one or more 'possible
next' status. A status that has no 'next' status is considered as final (closed) what means that it
cannot be changed. There can be one or more possible 'initial' status, intermediate status and final
(closed) status per status flow, and there can be none, one, or various status flows per transaction
type. The transaction type will define what status flows it uses, and the initial status of each flow. The status feature is very generic. It can be used for any payment type where you want to followup
actions that can be done (or must be done) after a payment has been made. A simple example of a
status flow would be an initial status 'open', for example when a loan payment is made, and a (final)
status when the loan is repaid. Another example would be a membertomember payment where the
payment receiver can set the payment status to 'product sent', after which the payer can set a final
payment status as 'product received'. These are very simple examples, any type of flow and status
can be configured. Each status flow and/or specific status can have their own permissions (none,
view only, modify). It also possible to implement specific behaviour of status field changes and
possible flows by creating a status extension point that uses a script of the type 'status'.
Payment filters
> Menu: System Accounts configuration Account types Payment filters
It is possible to group transfer types into 'Payment filters'. These filters allow handy grouping together
of certain related transfer types so that you can use it as a filter in the account information list. For
example: different kinds of payments from a user to a system account can be grouped into one filter
with the name "System payments".
Payment authorizations
> Menu: System Accounts configuration Authorization roles
> Menu: System Accounts configuration Account types Transfer type details
> Menu: System User configuration Product (permissions) Accounts Payments authorization
Cyclos can be configured so that payments need to be authorized first before the amount is really
transferred to the receiver's account. As long as the payment is not yet authorized, it will stay in the
"waiting for authorization" status. Both member (payer) and the authorizer will have access to a list
with pending payments that need authorization. The paying member and authorizer will be notified
and the authorizer can authorize (activate) or deny the payment. If you want to enable authorization for a transaction type you have to select check box "requires
authorization" in the transfer type. Once the the transfer type is saved an extra tab called
"Authorization levels" will appear. There are three types of authorizers that can be defined in the
authorization configuration, the payee (reciever of the payment), the broker of the paying user, or an
administator. If you want an administrator to be an authorizer an 'authorizion role' will need to be
created first (see location above). Once an authorization role is created you can use it in an
authorization level. After adding the role to an administrator group the administrators of the group will
be able to authorize the payment (at the level defined). It is possible to have more than one
authorization 'level'. This means that after a payment is authorizated another administrator or broker
would need to authorize. When the last level is autorized the payment will be done and the payer will
receive a notification. Detailed information about authorizations and roles can be found in the online specification page.
Payment qualifications (feedback)
> Menu: System User configuration Product Payment feedback
> Menu: System Accounts configuration Account types Payment type Enable payment
feedback
> Menu: System User configuration Product Payment feedback
> View user profile User informations Feedbacks
It is possible to enable a feedback or 'qualification' for payments. This is defined in the transfer type
and the user product (see above locations). Every time a user makes a payment he will be asked to
qualify the payment/trade. Payment qualifications have many options (defined in product). A user
can view the feedbacks that are given to other users. A user can disable payment feedbacks for
specific users. Qualifications can be disabled for specific users. This is common for frequent trading
partners (as you don't want to be required to qualify every payment).
Scheduled payments
> Menu: System Accounts configuration Account types Transfer type
> Menu: System User configuration Product (permissions) Accounts
> Menu: Banking System accounts Scheduled payments
A transfer type can be configured to allow 'scheduled payments'. A scheduled payment is a transfer
which is to happen in the future, but is already agreed upon and scheduled. It can be scheduled for a
single future date or multiple 'installments'. Upon each installment date the payment is debited from
the payer account. A user or system administrator can see an overview of the outgoing scheduled
payments, and optionally of all incoming scheduled payments as well. Depending on the
configuration a scheduled payment can be canceled, blocked, unblocked and processed in advance.
Payment requests
> Menu: Banking Payment requests
> Menu: System Accounts configuration Account types Transfer type
> Menu: System User configuration Product (permissions) Accounts
> Menu: System User configuration Groups
A payment request is a way to request a payment to another user for a fixed amount and an expiry
date. The person that sends the payment request can also define if the repayment will have to be
paid for the whole amount or if it can be payed back with installments (scheduled payment). The
payment request can be accepted (or denied) by the receiver as long as the expiry date is not
reached. On every action or status change a notification will be sent to the sender and receiver of the
request. Payment requests can be sent to and from members, and to and from system accounts.
Different channels can be enabled for payment requests. For example, it is possible to send a
payment request from a phone by anb SMS. A request can also be sent from the web interface, and
received/accepted by SMS. In case the payment request is sent by SMS the text message will
contain a temporary code that the receiver will have to include in the reply (in order to accept).
System configuration
Networks
> Menu: System System configuration Networks (global administrators only)
Networks are the highest level categorization in Cyclos. The network structure allows running
independent environments (networks) in the same (shared) system. Networks can only managed by
'global' administrators. Users that are in a global administrator group can create and manage new
networks, and give administrators permissions to manage specific networks. Global administrators
typically only define high level system administration such as adding languages, creating networks
and defining properties for networks, such as the network domain/URL. Each network will have a
builtin 'network administrators' group. Administrators that belong to this group have full permissions
over the network. Network administrators can configure a new system with all the available elements
such as products, account types, user groups, group sets, etc. For any user in the system that is not a global administrator (e.g network administrators and normal
users) the network environment will appear as a single system. Running multiple networks in shared
(networked) environments is very similar to running separate Cyclos installations next to each other.
The main difference is that with a shared (networked) solution interaction among networks can be
enabled, for example user searches and payments. A global administrator can also define 'global'
elements such as 'global' accounts, and make them available for specific networks so that they can
interoperate. The network administrators can add the global account to a local product. (see note
below) If your installation runs a single project just one network would be enough. If there is only one
network in the system it will be marked automatically as the ‘default’ network. What means that when
accessing the main URL you will enter automatically in the network scope. If you want to login as
global (system) admin you will be always able to access the system with the global URL path. For
example: www.yourdomain.org/global). If you want to run more than one projects (networks) in a
single Cyclos installation you can just add new networks. In case you run more networks the default
network is usually just to display pages and informations for the ‘umbrella’ organisation. Note: The first versions of Cyclos4 won't support interaction among networks yet. The structure is
prepared for this and it can be added at a later stage. The feature will be incremental. What means
that existing systems with networks can enable interaction when the feature becomes available. Detailed information about networks can be found in the online specification page.
Network wizard
> Menu: System System configuration Networks (global administrators only) New network
Setting up a system from scratch requires a considerable effort. In order to facilitate the setup and
configuration of a network a network wizard feature is available. The wizard will lead you stepbystep
through the setup. Each step has an input form and includes an explanatory text. The settings
defined with the wizard can be modified afterwards going to the specific entity. For example, if you
want to change an account name you can do that in the account configuration. Even though the explanatory texts in the steps should be sufficient to setup a system we suggest to
have a good read through the Account configuration and System configuration sections.
Groups
> Menu: System User configuration Groups
A group is basically a container for users. Groups can be added to a 'group set', which in its turn is
just a container for one or more groups. Because groups contain little information it is a flexible way
to manage users. By editing a group an administrator can define the visibility of that group, this
means what users of other groups it can see. In case of an administrator group you can define what
other groups the administrators of this group can manage. By assigning products to groups (or group
sets) the users of those groups will get their permissions and rules. By adding a configuration to a
group the users of the group get their settings. Note: It is not possible to add products to administration groups. The administration permissions are
defined directly in the group (permissions tab).
Detailed information about networks can be found in the online specification page.
Products
> Menu: System User configuration Products
All the business rules and permissions are defined in 'Products'. Therefore products play a very
central role in the Cyclos system. The product structure allows maintaining rules and permissions in
a single entity. This avoids having to duplicate settings and permissions among various groups. A
product can be assigned to an individual user, a group and a 'group set'. Products are 'cumulative',
this means that if a user has more than one product the sum of all permissions will be applied (in
case of conflicting settings the less restrictive will be applied). An administrator can always see from
the user profile the 'final' (combined) product of the user in the group. There are two types of products. One for normal members and one for brokers. A user of a broker
product can register new users and have some level of access and control over these users. The
broker product defines in which groups the broker can create users and what permissions the broker
has over its users. A user can be assigned more than one broker but there will always be one 'main'
broker. The main broker will typically have more permissions over their users such as receiving a
commission. The name "broker" does not explain the function well because the broker function can
be used for different purposes. For example loan agents of micro finance systems where the agents
can register new members and retrieve information about the loan status of the members. Broker
products contain mostly broker permissions, and cannot have an own account, so if you want a
broker group that has an account you will need to add a member product (with an account) and a
broker product. You can define only one account per member product.
Configurations
> Menu: System System configuration Configurations
> Menu: System User configuration Groups Select group Configuration (tab)
All settings in Cyclos can are defined in a 'configuration' (there are no 'system wide' settings in
Cyclos4). In the user group or group set you can define what configurations will be used (under the
configuration tab). When creating a new configuration you will have to 'extend' an existing one. This
means that a configuration is always part from a hierarchical configuration 'tree'. A lower level
configuration will always inherited the ‘higher’ configurations settings. For example, when a high level
configuration has the ‘Session timeout’ value set to 10 minutes, an administrator editing a lower level
configuration can change (overwrite) the value by selecting the ‘edit icon’ at the right of the session
timeout setting. Once edited a delete icon and a green lock will appear. When selecting the delete
icon the orginal (higher level) value will be restored. Clicking on the green lock the lock will turn
yellow and will be closed. This means that the setting cannot be overwritten by lower level
configurations. When a higher level configuration has blocked a setting in this way a grey lock will be
shown for administrators that view the setting at a lower level configuration, meaning they cannot
change the value. Addresses & Phones
Addresses and phones are also defined in configuration. The options should be self explanatory. The
validation checks for phones and addresses are derived automatically from the localization section. Registration options
In the configuration you can define if user can register themselves and what will be the groups
available for 'public registration'. This can be enabled in the configuration (option: Possible groups for
public registration). Normally you would require email validation when users can register them selves
(in configuration 'Validate email on'). If you don't want users to be directly active after they have
registered you could create an initial group for those users and set the default status 'non active' for
this group. Email and SMS outbound
For a detailed description on email and SMS outbound configuration please view the online
specification page and the SMS quick steps wiki. Content management, Layout
A configuration also defines content mamagenent items (menu, pages, SMS texts) and the layout
(themes, logo). Those elements are accessable via the menu: Content Content Management. Note1: In more complex systems with multiple groups and permission products it is good practice to
chose a clear hierarchical configuration structure. In the higher level configuration you would put all
content and settings that are common for all groups. For example language, layout, content pages,
possible access channel etc. In case you want specific behaviour for a group you can just extend an
existing (higher level) configuration and save it with the addtional changes you want. Once you add
the configuration to the group the new settings or content will be applied for that group. This approach
avoids having duplicated information in multiple configurations. Note2: After changing the configuration settings be sure to save the configuration by clicking the
‘Save’ button at the bottom of the page.
Detailed information about the configurations can be found in the online specification page.
Access channels
> Menu: System Configurations Configuration details Channels
> Menu: System User configurations Password types
Cyclos comes with the following builtin channels: Main web, SMS, and Web services for third party
access. In case of third party access it is good practice to limit access with the IP whitelist option.
This can also be done for system administrators. It is possible to add new channels, this will involve
some programming however. In the channel configuration the password type used to access the
channel can be defined. Cyclos has three predefined passwords (login password, transaction
password, PIN).
Access channel SMS
The SMS channel comes with four builtin operations:
Register: Users can register themselves by sending a message to the system.
Account info: Users can retrieve account information such as account balance and payment
details.
Payment: Users can be to other users or to a system account.
Info text: An info text is an alias (registered in Cyclos) that will return a text messages when users
send an SMS with the alias. When a user sends an SMS with the alias Cyclos will return with
message that contains the text that belongs to the alias. Once SMS info texts are configured in the
Channel an administrator can edit and add SMS texts via the menu: Content Content mamagement
SMS texts. (Make sure that the admin group has the permissions to manage a configuration, or at
least 'Manage configuration Manage content only' permissions) It is also possible to add custom SMS operations (by writing an extension in Java).
In order for the SMS operations to funcion an SMS gateway provider needs to be configured in the
configuration (section: Outbound SMS messages).
Detailed information about the SMS operations and configuration can be found in the online
specification page and the SMS quick steps wiki.
Password types
> Menu: System User configuration Password types
Cyclos comes with built in password types (login password, PIN, transaction password). These can
be enabled for channels. For most systems the built in password types will be sufficient. In case it is
necesary new password types can be created and selected in the channels.
Languages
> Menu: System System configuration Languages
> Menu: System System configuration Configurations Localization
Cyclos comes with built in languages. They are visible in a configuration (see location above). When
creating a new language you can use an existing (builtin) language as template. For any changes to
the Cyclos application translation you need to create a language first.
Advertisements categories
> Menu: System System configuration Advertisement categories
Cyclos comes with a default set of advertisement categories, but they can be changed. It is possible
to create levels of categories (a maximum of 3). When creating a new categories it is possible to
create various (sub) categories at once by putting a category per new line. Categories cannot be
removed when there are advertisements that use the category. What can be done in this case is to
de select the ‘Active’ box. This means that the category won’t show up in the new ad and search ads
pages.
Custom advertisements fields
> Menu: System System configuration Advertisement fields
It is possible to add advertisement fields. Various field types are possible (e.g. text field or date).
The fields will appear when adding a new ad and optionally in the advertisement search.
Web shop
> Menu: System User configuration Member product Advertisements (section)
Users can have a web shop, through which they can sell products. The web shop can be seen as an
enhancement of the advertisements module. Cyclos supports multiple web shops. That means that
every user (with appropriate permissions) can have her/his own web shop. Products offered in a web
shop can be found by potential buyers through searching the advertisements and through the sellers
personal web page. Buyers can add products from the web shop in their shopping cart. When buyers
are done shopping they can checkout their shopping carts and pay for the products. The web shop
module is a large module and there are various possible configurations, for example sellers can
define delivery addresses, and set discounts for certain products. The Web shop managements
comes with stock management and automatic product numbering. The Web shop functionality can
be defined in permission products, when enabled the feature will appear for users under the 'business'
category in the main menu tool bar. Detailed information about the advertisements and web shop can be found in the online specification
page.
Custom profile fields
> Menu: System User configuration Profile fields
It is possible to add custom profile fields. Various field types are possible (e.g. text field or date).
The fields have to be enabled in the user product.
Custom image categories
> Menu: System System configuration Custom image categories
> Menu: System Content management Custom images
An administrator can upload images (pictures) that can be used in the content management (e.g.
header, pages, messages). Before uploading an image a image category needs to be created.
Record types
> Menu: System System configuration Record types
> Menu: System System configuration Shared record fields
> Menu: Reports & data System records
> Menu: Users User records Record name
> View user profile User information User record
Records are a powerful feature to store data in an organized way and be able to search for it. There
are two types of records; 'user' records, that are always bound to a user (member, broker or admin)
and 'system' records, that do not have a related user. A records consist of a group of custom fields.
You can define one or more custom fields for a record type. If you want to share a specific field
among various records you can create a shared record field first and add them to the record. Usually
records have their own (not shared) fields. These can be added directly from within a record. In the permission products an administrator can define who will 'have' user records and who has
permissions to add/modify/delete records. User records can be accessed from the User management
menu or directly from the user profile page. System records can be accessed from the 'Reports &
Data' menu. Records can be displayed in different layout formats (e.g. single page, normal list, tiled
list).
A simple example of a user record is a remark. A remark is a user record with just one text field that
can be modified by users (e.g. admins and brokers). System records can be very usefull in the
combination with the Cyclos scripting module. Detailed information about the user records can be
found in the online specification page.
Agreements
> Menu: System User configuration Agreements
> Menu: System User configuration Member product Agreements
> View user profile Accepted agreements
A registration Agreement is a text that can be shown at the registration page. Users who want to
register MUST select a checkbox stating that they agree with this agreement in order to be able to
submit. Agreements are created by administrators and assigned to products. Once an agreement
has been accepted by a user (upon registration) and an administrator makes any change to the
agreement text a new version number of the agreement will be generated. There is a full history of
accepted agreements (per user) and the version that was accepted. When an agreement is added at
a later stage, or when a agreement text has been changed, existing users will be asked to accept the
agreement upon the first login. This is also the case for existing that are assigned new/other
products with different agreements.
Message categories
> Menu: System System configuration Messages categories
> Menu: Users Messages Search / New message
Message categories are used to organize the communication between members and administrators.
For example if a member wants to send a message to an administrator he/she has to select a
category. This helps to define the right person to answer the question. The categories are created by
the administrator. In the member product is defined what message categories are available of the
users, and in an administrator group permissions you can define what messages (categories) an
administrator can manage.
User identification methods
> Menu: System System configuration User identification methods
The user identification methods define how users can identify themselves in Cyclos. The most
common operation that needs user identification is the login name at the main web channel or mobile
POS (together with a credential like a password or PIN). A payment at a POS (Point of Sale) channel
also requires user indentification, which is typically a card, and third party applications that access
Cyclos also need to pass a user indentifcation. Per channel you can specify what user identifications
methods are allowed. It is possible to 'refine' the possible user identification methods (e.g. different
card types with different rules) per transaction type. There are three types of user identification methods. The first one are the 'builtin' identification
methods: login name, email and mobile phone. The second type are the 'tokens'. A typical token is a
card, which can be a number, QR code or NFC id. For third party access to Cyclos you can create
'access clients'. An access client can be managed by a user (member, broker or admin) in Cyclos. A
member access client will have the same permissions as the member that created it. In case of an
admin access client you would typically create a specific permission product for the access client(s).
Users that will enable their Mobile phone for POS payments will need an access client of type
'Mobile POS'. After creating the POS access client in Cyclos the Mobile POS device can be
activated. Once a POS device is activated it does not need user/password confirmation at startup.
Another advange of using access clients for POS devices is that a user can manage his own
devices, for example (un)blocking them and retreiving information about payments done at a specific
POS. The Cyclos wiki has a Quick steps page for setting op POS, Cards and Access clients in Cyclos.
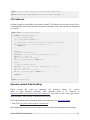
Cyclos scripting
> Menu: System System configuration Tools
the Cyclos scripting module provides an integration layer that allows connecting from Cyclos to third
party software, as well executing custom tasks and operations within Cyclos self. The scripting
engine can access the full Cyclos services layer which makes it a powerful feature. For security
reasons only global administrators can add scripts. Network adminstrators can be given permissions
to bound the scripts to elements such as extension points (eg. payments, user profile), custom
validations (for fields), custom calculations (account fees, transaction fees), custom operations and
scheduled tasks. Detailed information about Cyclos scripting can be found at the Cyclos scripting page
Imports
> Menu: System Tools Imports
> Menu: Banking Tools Import payments
The import functionality can import the following (user) information:
Users together with all profile fields, addresses, phones and profile images
Advertisements
User records
References
Transactions
This information can be imported by clicking on the import button and following the import steps. If
the import button is not visible you need to give the administrators group the permission for this. There are two typical uses for the import of transactions and for the ease of use the import
transaction feature has been split. The first is the migration of users and transactions from one
system to Cyclos. This is typically a one time task and is available under System Tools. Another
typical use is the import of transactions that need to generate transactions in Cyclos, for example
user deposits in conventional currency. The latter function is more operational and is available under
the the Banking menu. Detailed information about user import can be found in the online specification page.
Cyclos license
> Menu: System System configuration License
Cyclos needs a valid license key in order to run. There are three types of licenses: Free, Social and
Commercial.
Selecting 'Update now' will update the license. Commercial users can update the license offline.
For more information about licenses view the Cyclos license page
The license will be visible at the bottom of the user and admin manuals.
Note: The license option is only available in global mode.
Content management
Content management deals with layout and content. For the two first items (Documents and Custom
images) to be used a 'category' needs to be created first (in System System configuration). After
the categories are created you can assign them to admin groups (view or manage permissions in
System System configuration). In order to customize a language (Application translation) an admin
has to extend a builtin language first, and will need to set the permisson in an admin group to
manage the translation (as explained further on). All other Content management items (menus, pages, logos, themes, banners, SMS texts) are part of
a configuration. This means that it is not necesary to create a category and set permissions. When
an admin has permissions to view or manage a configuration he will get automatically the
permissions to access the content items. When an admin selects a content item in the Content
management menu (e.g. Themes) and the admin has permissions to manage more than one
configuration, a list with available configurations will be showed first. Clicking on an configuration in
the list will open the content item for that specific configuration. Documents
> Menu: Content Content management Documents
> Menu: System System configuration Document categories
An administrator can upload static and dynamic documents and assign them to users or to groups. A
document can be assigned to one user (individual document) or to a group of users (shared
document). A 'static' document can be any file, for example a picture or pdf file. It can be either a
shared or individual document. A 'dynamic' document can only be a shared document. It is a way to
have users fill in forms in a predefined format and include user data such as profile fields. A typical
use of a dynamic document is a loan contract that requires user input and user data, and which the
user will print and possibly sign. When a user selects a dynamic document a page will be shown.
This page can include images, (rich) text, profile fields (of the user), variables such as date and time,
and optionally input fields that the user needs to fill in before submitting. After a user submits the
form a result page will be shown with all the data included and formated. A print button will be shown
so that the user can print the document. If you want to enable 'shared' documents you will have to create a document category first: System
System configuraiton Document categories.
Before documents can be added and viewed you need to set the permissions: admin group User
data Individual documents/ Shared documents).
If you want the member be able to see the documents you will have to give permissions in the user
product: Individual documents, View or Manage shared documents with categories.
Custom images
> Menu: Content Content management Custom images
> Menu: System System configuration Custom image categories
An administrator can upload custom images (pictures) that can be used in other content
management items (e.g. pages, footer, messages). Before uploading an image an image category
needs to be created. In order for an amdin to use an image category you will give the permissions:
System User configuration Groups (admin) Content management View/Manage images with
categories)
Application translation
> Menu: Content Content management Application translation
The application translation menu item appears as soon as a local language is defined (see language
section above). The application translation consist of the entire translation of Cyclos (menus, labels,
titles) and all internal messages, emails, notifications. You can search on the original translation and
the current translation (which includes your customized keys). By selecting a key from the list you
can customize the translation. You can import and export customized keys using the buttons at the
search window. For a user of an admin (group) to be able to view/customize translations you need to set the
permissions in: System User configuration Groups Permissions Content management
Application translation.
If an admin can manage more than one translations a list will be show first.
Data translation
> Menu: Content Content management Data translation
Cyclos has many 'dynamic' (non hardcoded) elements that do not exist in the Cyclos code but are
stored in the database. These entities are created by the network wizard or manually by
administrators. Some examples of dynamic entities are: accounts, transactions, password types,
message categories, menu items etc. It would be rather cumbersome to manage multiple
translations of dynamic entities in the entities forms self. The Data translation feature centralizes and
categorizes the translation of the dynamic entities. Note: Currently only the global entities password types and channels can be translated (by global
admins). In future versions support for the other entities will be added, and network level access will
be added.
Static content
> Menu: Content Content management Static content
Cyclos has various 'static' or 'builtin' pages that can be customized. For example the public home
(guests) page, the header, footer and the help pages. When selecting the pages from the 'Static
content' a rich text editor will open. You can insert an image by selecting the image icon (third from
the right). It is possible to insert html format by selecting the html option of the editor. You can
always revert to the original page by stopping customizing the page.
Detailed information about the static content can be found in the online specification page.
Menu & pages
> Menu: Content Content management Main web menu & pages
It is possible to add new menus items and submenus that will open content pages or external pages
(URL's). When creating a sub menu and content you can chose to place it directly in the menu bar or
under an existing menu (group). It is possible to define in the page who can view it (e.g. guests,
logged users) and the location where it is showed.
Detailed information about the static content can be found in the online specification page.
Banners
> Menu: Content Content management Banners
Banners can be added at the left and/or right of the main Cyclos windows. When putting more than
the maximum amount of banners (defined in 'Configuration Display Maximum banners) the
banners will rotate. The rotating time can also be set in the Display section of the configuration. The
content of the banners can be managed with a rich text editor in the same way as the content pages
in the menu section (see above).
Detailed information about the banners can be found in the online specification page.
Mobile app pages
> Menu: Content Content management Mobile pages
It is possible to add pages that will appear in the mobile app. The pages will be shown after selecting
a shortcut icon in the mobile app home page (for logged users). When adding a new page a shortcut
icon can be selected. Detailed information about the mobile app pages can be found in the online specification page.
SMS texts
> Menu: Content Content management SMS texts
> Menu: System Configurations Channels SMS Channel SMS operations
When SMS is activated it is possible to define SMS info texts.
The pages will be shown after selecting a shortcut icon in the mobile app home page (for logged
users). When adding a new page a shortcut icon can be selected. Detailed information about the mobile app pages can be found in the online specification page.
Logos
> Menu: Content Content management Logos
When you upload new logos from this page the existing logos will be replaced automatically. If you
want to change the top section (header) this can be done in the content section.
Detailed information about the logos can be found in the online specification page.
Themes
> Menu: Content Content management Themes
A theme defines the layout (e.g. colors, menu bar size, font style) and system images (e.g. quick
access and remove icons). Any network in the system has a theme applied. This can be a theme
inherited from a higher level, or a theme managed directly at network level. Cyclos comes with
various 'builtin' themes and it is possible to create new themes as well. There are three levels of customizing a theme. The first (easiest) level is done with a color picker.
This allows to create a new theme in a few minutes. The second level is done by changing common
theme elements by predefined LESS variables. Normally variables are used to group layout items
that logically share the same value (e.g. all window borders). The third customization allows to
customize the entire CSS file. When creating a new theme you have to option to create an empty
one, or extend an existing theme. It is also possible to import and export a theme. Detailed information about themes can be found in the online specification page.
Reports & Alerts
System reports
> Menu: Reports & Alerts Reports System reports
At the system reports page you can retrieve overview of with the most important data such as the
number of users, advertisements, trade, and so on. It will basically show data over a period, though
some of the presented data is point data, which means that it can logically only be given on a certain
point in time. Most statistics are self explanatory. Options that might need some explanation are
described here below:
Gross product: the total sum of earned (incoming) units on all accounts, with respect to the group
and payment filters specified, and within the period specified.
Number of transactions: the total number of transactions where at least one of the participating
members belongs to the specified groups in the group filter, and where the transaction belongs to the
specified transfer type in the payment filter, and which took place in the specified period.
Percentage of members not trading: The percentage of members who was not involved in any
incoming or outgoing transaction (with respect to group and payment filters, and inside the specified
period).
System alerts
> Menu: Reports & Alerts Alerts & Logs System alerts
The system alerts will show alerts related to the entire system such as: application started,
scheduled task run, new version of translation file uploaded.
Note: A notification can be generated on system alerts, this can be configured in Menu: Personal
Preferences Notifications.
User alerts
> Menu: Reports & Alerts Alerts & Logs User alerts
Typical user alerts are: failed password attempts, new pending user, expired loan etc.
Note: A notification can be generated on user alerts, this can be configured in Menu: Personal
Preferences Notifications.
Error logs
> Menu: Reports & Alerts Error logs
Errors that occur in Cyclos will show up in this list. An error is typically a software bug and needs to
be solved by the software development team.
Licensed to: Social Trade Organisation
Help
Help HOW TO
Navigation in Cyclos
Update your profile
View your account information
Make a payment
Search for users
Search for advertisements
Place an advertisement
My Advertisement interests
Messages
Notifications
View documents
View & give references
Contacts
Notification settings
Help HOW TO
The help file can be accessed via the help icon in the functions windows. The help contains an
explanation of all administration features. Directly under the title of each help section the location
where to find the described feature is shown. The location is in italic and has a > sign in front.
Navigation in Cyclos
Navigation in Cyclos is done via a main menu (horizontal bar) and submenus that are shown at the
left or directly under the horizontal menu depending on the screen size. When navigating more than
one level deep (for example: view user profile) Cyclos will show a clickable ‘breadcrumb’ tree directly
under the horizontal menu. Besides the menu you can use the ‘Quick actions’ that show up at the
home page. What actions will show up at this page can be defined in the the local preferences
(Personal > Preferences > Dashboard ations) The ‘quick search’ (at the top right) can be used to
search quickly for users, contacts or advertisements. Operations that are related to users can be
done from the Profile > Actions section of the user profile (for example make payment or set
reference).
Update your profile
> Menu: Personal > Profile or Top right menu: Person icon
Click on edit to change profile fields. In order to add & remove Addresses, Phones and images,
please select the corresponding Tab (when in Edit profile mode).
View your account information
> Menu: Banking >My accounts
At this page you can view your account(s) information such as the balance and the payments. In the
advanced option you can filter by specific criteria. Clicking on a payment will open the payment
details.
Make a payment
> Menu: Banking > Payment
At this page you can make a payment to another user or a payment to the system.
Search for users
> Menu: Users > Search or Top menu: Quick Search
From this page you can search for members. The member search will search in all member profile
fields. In the advanced option you can filter by specific criteria. You can use more than one keyword
in the search. You can also search all members by not specifying a keyword.
Search for advertisements
> Menu: Market place > Search advertisements or Top right menu: Quick Search
In this page you can search for advertisements. You can use the keywords search option to search
by more than one keyword. When you leave the keywords field blank all ads will be searched. In
order to view a list of advertisement categories you can select ‘Browse categories’. In the advanced
option you can filter by specific criteria. When clicking on the advertisement you will access the
details of the advertisement. In the details page you can go directly to the profile of the user
(publisher) or post a question about the advertisement.
Place an advertisement
> Menu: Market place > My advertisements > New
At this page you can insert a new advertisement. All fields are self explanatory. Make sure to insert
an image by selecting the ‘image’ link. You can update your advertisements by clicking on the ‘Edit
icon’. The edit mode will have a page (tab) for images. The image at the top of the list will show up in
the main search window.
My Advertisement interests
> Menu: Market place > Advertisements interests
At this page you can define ‘interests’ and receive notifications when somebody posts a new
advertisements that matches your interests. You can define how the notification will be sent in
Preferences > Notifications.
Messages
> Menu: Personal > Information > Messages or Top right menu: Message icon
Cyclos has an internal messaging system. You can send message to users or to the administration
(organisation). When sending a message to the administration you will have to select a message
category (e.g. support, loan request, complaint). Administrators and brokers can send individual
messages and bulk messages (mailings) to groups of users.
Notifications
> Menu: Personal > Information > Notifications or Top right menu: Bell icon
Notifications can be generated in Cyclos when a status is changed or an activity has been
performed. For example: a received payment, balance change, credit limit change, received
reference etc. The notifications can be send as email and in the future other channels will be added
(SMS, USSD).
View documents
> Menu: Personal > Information > Documents
At this page you can view documents. This can be dynamic documents (web forms) or static
documents such as PDF and other files. The documents can be managed by the admin, and
optionally also by the user self (depending on the permissions).
View and give references
> Menu: Personal > Information > References or View user profile > Actions
The references system is a peer review system. User can assign a reference to other users. The
reference consists of a score on a predefined value scale, and a personal comment. User can see
the references to other users, and references given to them.
Contacts
> Menu: Users > Users > My Contacts or Top right menu: Quick Search
Here you can manage (add & remove) contacts. Selecting a contact of the contact list will bring you
directly to the user profile of the contact. From the profile page you can perform user actions related
to the user (e.g. make payment or send message).
Notification settings
> Menu: Personal > Preferences > Notifications or Top right menu: Envelope icon
This page will show a list with a history of your notifications. Notifications can be send on:
Account events: payment received, credit limit modified
Advertisements events: Ad expired, match of advertisement interest
Access events: Password blocked, password disabled
References events: Reference received, reference changed
Licensed to: Social Trade Organisation
Version: Cyclos 4.3 (for the documentation about another version please click here)
Copyright © 2004-2015 Social Trade Organization
Cyclos 4 PRO Documentation
Welcome to the Cyclos 4 PRO Documentation. First, this manual contains the Installation and
maintenance guide. Second, this manual will give a detailed description and some examples
of how to connect to Cyclos using the webservices. Subsequently, this manual explains the
Cyclos scripts, these scripts can be executed by clicking on a menu link, by a scheduled task
or by an extension point on a certain function. These scripts make it possible to add new
functions to Cyclos and customize Cyclos exactly to the needs of your payment system. Finally,
this manual will give an explanation of how to login to Cyclos from an external website. This
can be useful if you have a large CMS as a website and you want to have an integrated login
to Cyclos in this website.
There are some important documentation resources that are not part of this manual, these
can be found here:
• There are two (end user) Cyclos 4 manuals (make sure you are not logged into
communities.cyclos.org):
• Administrator manual
• User manual
• Next to the manuals some functions are described with much more technical details in our
wiki:
• Configurations
• Groups
• Networks
• Advertisements
• Users records
• Transfer_authorization
• SMS
• Imports
• Cyclos instruction videos:
• Cyclos 4 communities
• Cyclos 4 PRO
Table of Contents
1. Installation & maintenance .................................................................................................... 1
1.1. Installation steps .......................................................................................................... 1
System requirements .................................................................................................. 1
Install Java .................................................................................................................... 1
Install PostgreSQL (database) ..................................................................................... 2
Install Tomcat (web server) ........................................................................................ 3
Install Cyclos ................................................................................................................ 4
Startup Cyclos .............................................................................................................. 5
Problem solving ........................................................................................................... 5
1.2. Adjustments (optional) ................................................................................................ 5
Enable SSL/HTTPS ........................................................................................................ 5
Adjust Tomcat/Java memory ...................................................................................... 6
Clustering ..................................................................................................................... 7
1.3. Maintenance ................................................................................................................. 7
Backup .......................................................................................................................... 7
Restore .......................................................................................................................... 7
2. Web services ............................................................................................................................ 8
2.1. Introduction .................................................................................................................. 8
2.2. Java clients .................................................................................................................... 8
Dependencies .............................................................................................................. 8
Using services from a 3rd party Java application ..................................................... 9
Examples ...................................................................................................................... 9
Configure Cyclos .................................................................................................. 9
Search users ...................................................................................................... 10
Search advertisements ...................................................................................... 11
Register user ...................................................................................................... 11
Edit user profile ................................................................................................. 14
Login user .......................................................................................................... 14
Get account information .................................................................................. 16
Perform payment .............................................................................................. 17
2.3. PHP clients .................................................................................................................. 19
Dependencies ............................................................................................................ 19
Using services from a 3rd party PHP application ................................................... 20
Examples .................................................................................................................... 20
Configuration ..................................................................................................... 20
Search users ...................................................................................................... 20
Search advertisements ...................................................................................... 21
Login user .......................................................................................................... 21
Perform payment from system to user .......................................................... 22
Perform payment from user to user ............................................................... 22
Cyclos 4 PRO Documentation
ii
2.4. Other clients ...............................................................................................................
Examples ....................................................................................................................
2.5. Available services and API Changes .........................................................................
3. Scripting .................................................................................................................................
3.1. Scripting engine ..........................................................................................................
Variables bound to all scripts ..................................................................................
3.2. Script types .................................................................................................................
Library .........................................................................................................................
Custom field validation .............................................................................................
Examples ............................................................................................................
Dynamic custom field handling ...............................................................................
Examples ............................................................................................................
Transfer fee calculation ............................................................................................
Examples ............................................................................................................
Account fee calculation .............................................................................................
Examples ............................................................................................................
Password handling ....................................................................................................
Examples ............................................................................................................
Extension points ........................................................................................................
User extension point .........................................................................................
Address extension point ...................................................................................
Phone extension point ......................................................................................
User record extension point ............................................................................
Advertisement extension point ........................................................................
Transaction extension point .............................................................................
Transaction authorization extension point .....................................................
Transfer extension point ...................................................................................
Examples ............................................................................................................
Custom operations ....................................................................................................
Examples ............................................................................................................
Custom scheduled tasks ...........................................................................................
Examples ............................................................................................................
Custom SMS operations ...........................................................................................
Examples ............................................................................................................
Outbound SMS handling ..........................................................................................
Examples ............................................................................................................
Inbound SMS handling ..............................................................................................
Examples ............................................................................................................
Transfer status handling ...........................................................................................
Examples ............................................................................................................
3.3. Solutions using scripts ...............................................................................................
PayPal Integration .....................................................................................................
Cyclos 4 PRO Documentation
23
25
25
27
27
27
29
29
29
30
31
33
33
33
34
34
34
35
35
36
37
37
37
38
38
39
40
40
42
44
46
46
47
48
49
49
50
51
51
52
52
52
iii
Check the root URL ...........................................................................................
Enable transaction number in currency ..........................................................
Create a system record type to store the client id and secret .......................
Create an user record type to store each payment information ...................
Create the library script ....................................................................................
Create the custom operation script .................................................................
Create the custom operation ...........................................................................
Configure the system account from which payments will be performed
to users ..............................................................................................................
Configure the payment type which will be used on payments ......................
Grant the administrator permissions ..............................................................
Setup the PayPal credentials ............................................................................
Grant the user permissions / enable the operation .......................................
Configuring the script parameters ...................................................................
Other considerations ........................................................................................
Loan module ..............................................................................................................
Enable transaction number in currency ..........................................................
Create the transfer status flow ........................................................................
Create the payment custom fields ..................................................................
Configure the system account from which payments will be performed
to users ..............................................................................................................
Create the payment type which will be used to grant the loan .....................
Configure the user account which will receive loans .....................................
Create the payment type which will be used to repay the loan ....................
Create the library script ....................................................................................
Create the custom operation script .................................................................
Create the extension point script ....................................................................
Create the custom operation ...........................................................................
Create the extension point ...............................................................................
Grant the administrator permissions ..............................................................
Enable the custom operation for users which will be able to receive
loans ...................................................................................................................
4. External login .........................................................................................................................
4.1. The following aspects should be considered: ..........................................................
4.2. Important notes .........................................................................................................
4.3. Creating an alternate frontend to Cyclos .................................................................
Cyclos 4 PRO Documentation
53
53
53
54
54
62
63
64
64
64
65
65
65
66
66
67
67
67
68
68
68
68
69
74
74
75
76
76
76
77
77
78
79
iv
1. Installation & maintenance
This is the installation manual for Cylcos 4 PRO. Be aware that Cyclos is server side software.
End users (customers) will be able to access Cyclos directly with a webbrowser or mobile
phone. If you have any problems when installing Cyclos using this manual, you can ask for
help at our forum.
1.1. Installation steps
System requirements
• Operation system: Any OS that can run the Java VM like Windows, Linux, FreeBSD or Mac;
• Make sure you have at least 500Mb memory available for Cyclos (if the OS runs 64 bits, for
32bits 300Mb should be enough);
• Java Runtime Environment (JRE), Java 7 is required;
• Web server: Apache Tomcat 7 or higher;
• Database server: PostgreSQL 9.3
• Cyclos installation package cyclos_version_number.war;
Install Java
You can check if you have Java installed at this site: http://java.com/en/download/installed.jsp
If you don't have Java 7 installed proceed with the steps below:
Linux (Ubuntu)
• Install the openjdk-7-jdk package.
Windows
• Download and install the last Java Development Kit (JDK)
• Install the program to <install_dir> (for windows users e.g. C:\Program Files\Java
\jdk1.7.x_xx).
• Make sure your system knows where to find JAVA, in windows you should make an
environmental variable called "JAVA_HOME" which points to the <install_dir>:
• In windows XP: configuration > System > advanced > environmental variables.
• In windows 7: Control Panel > System and Security > System > Advanced system settings
> Environmental Variable
• To check if Java is correctly installed, go to the windows command line (type cmd and press
enter) and type:
Cyclos 4 PRO Documentation
1
java -version
• Now java will reply which version of it is installed
Install PostgreSQL (database)
Windows
• If using Windows, download the latest version of PostgreSQL and PostGIS:
• PostgreSQL: http://www.postgresql.org/download/windows (for example the graphical
installer)
• PostGIS: http://postgis.net/windows_downloads (PostGIS can also be installed using the
Stack Builder, that starts after PostgreSQL is installed. Also in this case use the default
options.)
• Install both PostgreSQL and PostGIS by following the installer steps (use the default
options).
• Make sure the bin directory is included in the system variables so that you can run psql
directly from the command line:
• Go to: "Start > Control Panel > System and Security > System > Advanced system settings
> Environment Variables…".
• Then go to the system variable with the name "Path" add the bin directory of
PostgreSQL as a value, don`t forget to separate the values with a semicolon, e.g.:
• Variable name: Path
• Variable value: C:\Program Files\PostgreSQL\9.3\bin;
• Go to the windows command line and type the command (you will be asked for the
password you specified when installing PostgreSQL):
psql -U postgres
• If you see "postgres=#" you are in the PostgreSQL command line and you can follow the
instructions: Setup cyclos4 database (common steps for windows and Linux).
Linux
• If using Ubuntu Linux, these instructions are followed, type the following commands in a
terminal:
• Install PostgreSQL and PostGIS (using the official PostgreSQL packages for Ubuntu)
echo "deb http://apt.postgresql.org/pub/repos/apt/ precise-pgdg main" \
| sudo tee /etc/apt/sources.list.d/postgresql.list
wget –quiet -O – https://www.postgresql.org/media/keys/ACCC4CF8.asc | sudo apt-key add -
Cyclos 4 PRO Documentation
2
sudo apt-get update
sudo apt-get install postgresql-9.3 postgresql-contrib-9.3 postgresql-9.3-postgis-2.1 \
postgresql-9.3-postgis-2.1-scripts
• Access the postgresql command line:
sudo -u postgres psql
• If you see "postgres=#" you are in the PostgreSQL command line and you can follow the
instructions below.
Setup cyclos4 database (common steps for windows and Linux)
• Create the user cyclos with the password cyclos. This password and username you will have
to enter in the cyclos.properties file in step 5, so if you do not use the cyclos as password
and username please write them down. Type in the PostgreSQL command line:
CREATE USER cyclos WITH PASSWORD 'cyclos';
• Create the database cyclos4, type in the PostgreSQL command line:
CREATE DATABASE cyclos4 ENCODING 'UTF-8' TEMPLATE template0;
• Make sure the user cyclos can use the database cyclos4, type in the PostgreSQL command
line:
GRANT ALL PRIVILEGES ON DATABASE cyclos4 to cyclos;
• Create the PostGIS extensions on the database, type in the PostgreSQL command line:
\c cyclos4
create extension cube;
create extension earthdistance;
create extension postgis;
• Exit the PostgreSQL command line by entering "\q" (and pressing enter).
Install Tomcat (web server)
• Download Tomcat (7.0.x core) at http://tomcat.apache.org/
• Extract the zipped tomcat file into a folder <tomcat home>.
• Start tomcat: <tomcat home>/bin/startup.bat (Windows) or <tomcat home>/bin/startup.sh
(Linux). You might have to give the startup script file execute permissions.
• Open a browser and go to http://localhost:8080/ and check if tomcat is working.
• The default memory heap size of Tomcat is very low, we recommend increasing it (see
adjustments).
Cyclos 4 PRO Documentation
3
Install Cyclos
Make sure tomcat is working on port 8080 of the local machine (if you don't run Tomcat as
root/admin make sure that the user has write access to the webapps directory)
• Download the latest version of Cyclos from the license server. To download Cyclos from
the license server you first have to register on the license server. Registrering at the license
server allows you to use the free version of Cyclos. Please write down the loginname and
password you chose when registering for the license server (it will be needed later on).
• Unzip the cyclos_<version>.zip into a temporary directory.
• Browse to the temporary directory and copy the directory web (including its contents) into
the webapps directory (<tomcat_home>/webapps) of the tomcat installation.
• Rename this web directory to cyclos. This name will define how users access Cyclos. For
example, if you run the tomcat server on www.domain.com the URL would be http://
www.domain.com/cyclos. Of course it is also possible to run Cyclos directly under the
domain name. This can be done by extracting Cyclos directly in the root of the webapps
directory, or putting an Apache web server in front.
• In the folder <tomcat_home>/webapps/cyclos/WEB-INF/classes you'll find the file cyclosrelease.properties. The first thing to do is to copy this file and give it the name
cyclos.properties. The original name is not shipped, so in future installations you can just
override the entire folder, and your customizations won't be overwritten.
• In the cyclos.properties file you can set the database configuration, here you have to specify
the username and password, by default we use 'cyclos4' as database name and 'cyclos' as
username and password.*
cyclos.datasource.jdbcUrl = jdbc:postgresql://localhost/cyclos4
cyclos.datasource.user = cyclos
cyclos.datasource.password = cyclos
* Some systems do not resolve localhost and the default postgress port directly. In case of
database connectivity problems you might try a URL:
cyclos.datasource.jdbcUrl = jdbc:postgresql://local_ip_address:postgressport/cyclos4
example: cyclos.datasource.jdbcUrl = jdbc:postgresql://192.168.1.1:5432/cyclos4
** Windows might not see linebreaks in the property file, if this is the case we advice you to
download an more advanced text editor such as Notepad++.
*** In windows problems might occur in the Cyclos versions 4.1, 4.1.1, 4.1.2 and 4.2. It can
help to set the cyclos.tempDir variable manual. Point it to the temp directory inside the
WEB-INF directory in Cyclos. E.g. "cyclos.tempDir = C:\Program Files\Tomcat7\webapps\cyclos
\WEB-INF\temp". In some cases even forward slashes need to be used.
Cyclos 4 PRO Documentation
4
Startup Cyclos
• (Re)start tomcat:
• Unix: /etc/rc.d/rc.tomcat stop /etc/rc.d/rc.tomcat start
• Windows: use TomCat monitor (available after tomcat installaton
• You can also start trough <tomcat_home>/bin/startup.bat
<tomcat_home>/bin/startup.sh (Linux).
(Windows)
or
• When tomcat is started and Cyclos initialized browse to the web directory defined in step
5 (for the default this would be http://localhost:8080/cyclos). Be aware starting up Cyclos
for the first time might take quite some time, because the database need to be initialized.
On slow computer this could take up to 3 minutes!
• Upon the first start of Cyclos you will be asked to fill in the license information.
• After submitting the correct information, the initialization process will finish, and you will
automatically login as (global) admininstrator.
Problem solving
• Often problems can be easily detected by looking at the log files, the log files of tomcat can
be found in the logs folder inside tomcat. There are two relevant log files:
• The Catlina log shows all relevant information about the tomcat server itself.
• The Cyclos log shows all relevant information about the services and tasks that run in
Cyclos.
• If the logs can't help you to pin down the problem, you can search the Cyclos forum
(installation issues) if somebody encountered a similar problem.
• If this still has no results, you can post the (relevant) part of the logs to the Cyclos forum
(installation issues), together with a description of the problem.
An example of an error that sometimes occurs is "WARN RequestContextFilter – Couldn’t
write on the temp directory". In this case the user that started tomcat doesn’t have the write
permission. This can be modified in Linux by executing the following commands as root
(normally the name of the user is tomcat):
chown -R tomcat /var/lib/tomcat7/webapps/cyclos
chmod -R 755 /var/lib/tomcat7/webapps/cyclos
1.2. Adjustments (optional)
Enable SSL/HTTPS
Enabling SSL is highly recommended on live systems, as it protects sensitive information,
like passwords, to be sent plain over the Internet, making it readable by eavesdroppers. If
Cyclos 4 PRO Documentation
5
the Tomcat server is directly used from the Internet, to enable SSL / HTTPS you first have to
enable (un-comment) the https connector in the file <tomcat_home>/conf/server.xml
<Connector port="443" maxHttpHeaderSize="8192"
maxThreads="150" minSpareThreads="25" maxSpareThreads="75"
enableLookups="false" disableUploadTimeout="true"
acceptCount="100" scheme="https" secure="true"
clientAuth="false" sslProtocol="TLS" />
Generate a key with the keytool from Java:
$JAVA_HOME/bin/keytool -genkey -alias tomcat -keyalg RSA -keystore /path/to/my/keystore
After executing this command, you will first be prompted for the keystore password.
Passwords are *case sensitive*. You will also need to specify the custom password in
the server.xml configuration file, as described later. Next, you will be prompted for
general information about this Certificate, such as company, contact name, and so on.
This information will be displayed to users who attempt to access a secure page in your
application, so make sure that the information provided here matches what they will expect.
Finally, you will be prompted for the key password, which is the password specifically for this
Certificate (as opposed to any other Certificates stored in the same keystore file). You MUST
use the same password here as was used for the keystore password itself. (Currently, the
keytool prompt will tell you that pressing the ENTER key does this for you automatically). If
everything was successful, you now have a keystore file with a Certificate that can be used
by your server.
Adjust Tomcat/Java memory
The default memory heap size of Tomcat is very low. You can augment this in the following
way:
Windows
In the bin directory of Tomcat create (if it doesn't exist) a file called setenv.bat, edit this file
and add the following line:
set JAVA_OPTS=-Xms128m -Xmx512m -XX:MaxPermSize=128M
Linux
In the bin directory of Tomcat create (if it doesn't exist) a file called setenv.sh, edit this file
and add the following line:
JAVA_OPTS="-Xms128m -Xmx512m -XX:MaxPermSize=128M"
Cyclos 4 PRO Documentation
6
Clustering
Clustering is useful both for scaling (serving more requests) and for high availability (if a server
crashes, the application continues to run). The main reason for configuring a cluster in Tomcat
is to replicate HTTP sessions. Cyclos, however, doesn't use Tomcat sessions, but handles them
internally. This way, there is no special Tomcat configuration to support a Cyclos cluster.
The Cyclos application, however, needs some small configurations to enable clustering.
Cyclos uses Hazelcast to synchronize aspects (such as caches) between cluster servers. To
enable clustering, find in cyclos.properties the line containing cyclos.clusterHandler, and set
it to hazelcast.
Some extra configuration can be performed in the WEB-INF/classes/hazelcast.xml file.
Basically, if the local network runs more than a single Cyclos instance, the group needs to be
configured. Configure all files belonging to the same group with the same group name and
password. It is also possible to change the default multicast to TCP/IP communication. Just
comment the <multicast> tag and uncomment the <tcp-ip> tag, setting up the hosts / ports
which will be part of the cluster. For a TCP/IP cluster, Hazelcast needs the host name / port of
at least one node already in a cluster (it is not necessary to set all other nodes on each node).
To setup high-availability at database (Postgresql) level, please, refer to this document.
1.3. Maintenance
Backup
All data in Cyclos is stored in the database. Making a backup of the database can be done
using the pg_dump command. The only file that you need to back-up (only once) will be the
cyclos.properties configuration file. The database can be backed up manually as follows (in
this example the name of the database is cyclos4 the username cyclos and the command will
prompt for the password cyclos):
pg_dump –username=cyclos –password -hlocalhost cyclos4 > cyclos4.sql
Restore
If you want to start using cyclos with the data from a backup. You can just import the backed
up database. In this example the name of the database is cyclos4 the username cyclos and
command will prompt for the password cyclos the name of the backup is cyclos4.sql make
sure to specify the path if your not in the same directory as the file:
psql –username=cyclos –password -hlocalhost cyclos4 < cyclos4.sql
Cyclos 4 PRO Documentation
7
2. Web services
Here you will find infomation on how to call Cyclos services from 3rd party applications.
2.1. Introduction
The entire service layer in Cyclos 4 is accessible via web services. For a client to use a
web service, currently, he needs to provide the username and password (according to the
password configured on the Channels tab for the user configuration). It is planned for future
versions to have access clients, which will belong to an user, being used instead of the
username / password authentication.
The available service and API change policy is described here. In terms of security, web
services are no more and no less secure than the regular web access, since the service layer
is shared, and the same permissions / authorizations are checked in both cases.
Cyclos offers two types of web services: one for native Java clients and another one which is
client-agnostic, using JSON requests / responses over HTTP. For the latter, a PHP client library
is generated from the services, mirroring all services and methods in a PHP-friendly way.
2.2. Java clients
Cyclos provides native Java access to services, which can be used on 3rd party Java
applications.
Dependencies
In order to use the client, you will need some JAR files which are available in the download
bundle, on the cyclos-4.x.x/web/WEB-INF/lib directory. Not all jars are required, only the
following:
• cyclos-api.jar
• log4j-x.x.x.jar
• jcl-over-slf4j-x.x.x.jar
• slf4j-api-x.x.x.jar
• slf4j-log4j12-x.x.x.jar
• spring-aop-x.x.x.x.jar
• spring-beans-x.x.x.x.jar
• spring-context-x.x.x.x.jar
• spring-core-x.x.x.x.jar
Cyclos 4 PRO Documentation
8
• spring-web-x.x.x.x.jar
• aopalliance.jar
Those jars, except the cyclos-api.jar, are provided by the following projects:
• Spring framework 4.x.x, distributed under the Apache 2.0 license.
• SLF4J logging framework 1.6.x, distributed under the MIT license.
• Apache Log4J 1.2.x, distributed under the Apache 2.0 license.
• AOP Alliance (required by the Spring Framework), which is licensed as Public Domain.
Using services from a 3rd party Java application
The Java client for Cyclos 4 uses the Spring HTTP invokers to communicate with the server and
invoke the web services. It works in a similar fashion as RMI or remote EJB proxies – a dynamic
proxy for the service interface is obtained and methods can be invoked on it as if it were a local
object. The proxy, however, passes the parameters to the server and returns the result back
to the client. The Cyclos 4 API library provides the org.cyclos.server.utils.HttpServiceFactory
class, which is used to obtain the service proxies, and is very easy to use. With it, service
proxies can be obtained like this:
HttpServiceFactory factory = new HttpServiceFactory();
factory.setRootUrl("https://www.my-cyclos.com/network");
factory.setInvocationData(new HttpServiceInvocationData("username", "password"));
AccountService accountService = factory.getProxy(AccountService.class);
In the above example, the AccountService can be used to query account information. The
permissions are the same as in the main Cyclos application. The user may be either a regular
user or an administrator. When an administrator, will allow performing operations over
regular users (managed by that administrator). Otherwise, the web services will only affect
the own user.
Examples
Configure Cyclos
All following examples use the following class to configure the web services:.
import org.cyclos.server.utils.HttpServiceFactory;
import org.cyclos.server.utils.HttpServiceInvocationData;
/**
* This class will provide the Cyclos server configuration for the web service
* samples
*/
public class Cyclos {
Cyclos 4 PRO Documentation
9
private static final String
ROOT_URL = "http://localhost:8888/england";
private static HttpServiceFactory factory;
static {
factory = new HttpServiceFactory();
factory.setRootUrl(ROOT_URL);
factory.setInvocationData(HttpServiceInvocationData.stateless(
"admin", "1234"));
}
public static HttpServiceFactory getServiceFactory() {
return factory;
}
public static HttpServiceFactory getServiceFactory(
HttpServiceInvocationData invocationData) {
HttpServiceFactory factory = new HttpServiceFactory();
factory.setRootUrl(ROOT_URL);
factory.setInvocationData(invocationData);
return factory;
}
}
Search users
import
import
import
import
org.cyclos.model.users.users.UserDetailedVO;
org.cyclos.model.users.users.UserQuery;
org.cyclos.services.users.UserService;
org.cyclos.utils.Page;
/**
* Provides a sample on searching for users
*/
public class SearchUsers {
public static void main(String[] args) throws Exception {
UserService userService = Cyclos.getServiceFactory().getProxy(
UserService.class);
// Search for the top 5 users by keywords
UserQuery query = new UserQuery();
query.setKeywords("John*");
query.setPageSize(5);
Page<UserDetailedVO> users = userService.search(query);
System.out.printf("Found a total of %d users\n",
users.getTotalCount());
for (UserDetailedVO user : users) {
System.out.printf("* %s (%s)\n", user.getName(),
user.getUsername());
}
}
}
Cyclos 4 PRO Documentation
10
Search advertisements
import
import
import
import
org.cyclos.model.marketplace.advertisements.BasicAdQuery;
org.cyclos.model.marketplace.advertisements.BasicAdVO;
org.cyclos.services.marketplace.AdService;
org.cyclos.utils.Page;
/**
* Provides a sample on searching for advertisements
*/
public class SearchAds {
public static void main(String[] args) throws Exception {
AdService adService = Cyclos.getServiceFactory().getProxy(
AdService.class);
BasicAdQuery query = new BasicAdQuery();
query.setKeywords("Gear");
query.setHasImages(true);
Page<BasicAdVO> ads = adService.search(query);
System.out.printf("Found a total of %d advertisements\n",
ads.getTotalCount());
for (BasicAdVO ad : ads) {
System.out.printf("%s\nBy: %s\n%s\n-------\n",
ad.getName(),
ad.getOwner().getName(),
ad.getDescription());
}
}
}
Register user
import
import
import
import
java.util.ArrayList;
java.util.Arrays;
java.util.Collections;
java.util.List;
import
import
import
import
import
import
import
import
import
import
import
import
import
import
import
org.cyclos.model.system.fields.CustomFieldDetailedVO;
org.cyclos.model.system.fields.CustomFieldPossibleValueVO;
org.cyclos.model.users.addresses.UserAddressDTO;
org.cyclos.model.users.fields.UserCustomFieldValueDTO;
org.cyclos.model.users.groups.GroupVO;
org.cyclos.model.users.phones.LandLinePhoneDTO;
org.cyclos.model.users.phones.MobilePhoneDTO;
org.cyclos.model.users.users.RegistrationStatus;
org.cyclos.model.users.users.UserData;
org.cyclos.model.users.users.UserRegistrationDTO;
org.cyclos.model.users.users.UserRegistrationResult;
org.cyclos.model.users.users.UserSearchContext;
org.cyclos.model.users.users.UserSearchData;
org.cyclos.services.users.UserService;
org.cyclos.utils.CustomFieldHelper;
/**
* Provides a sample on registering an user with all custom fields, addresse
Cyclos 4 PRO Documentation
11
* and phones
*/
public class RegisterUser {
public static void main(String[] args) {
// Get the services
UserService userService = Cyclos.getServiceFactory().getProxy(
UserService.class);
// The available groups for new users are obtained in the search data
UserSearchData searchData = userService
.getSearchData(UserSearchContext.REGULAR);
List<GroupVO> possibleGroups = searchData.getInitialGroups();
// Find the consumers group
GroupVO group = null;
for (GroupVO current : possibleGroups) {
if (current.getName().equals("Consumers")) {
group = current;
break;
}
}
// Get data for a new user
UserData data = userService.getDataForNew(group.getId());
// Basic fields
UserRegistrationDTO user = new UserRegistrationDTO();
user.setGroup(group);
user.setName("John Smith");
user.setUsername("johnsmith");
user.setEmail("[email protected]");
user.setAssignPassword(true);
user.setPassword("1234");
user.setSkipActivationEmail(true);
user.setConfirmPassword(user.getPassword());
user.setForcePasswordChange(true);
// Custom fields
List<CustomFieldDetailedVO> customFields = CustomFieldHelper
.getCustomFields(data.getCustomFieldActions());
CustomFieldDetailedVO gender = null;
CustomFieldDetailedVO idNumber = null;
for (CustomFieldDetailedVO customField : customFields) {
if (customField.getInternalName().equals("gender")) {
gender = customField;
}
if (customField.getInternalName().equals("idNumber")) {
idNumber = customField;
}
}
user.setCustomValues(new ArrayList<UserCustomFieldValueDTO>());
// Value for the gender custom field
UserCustomFieldValueDTO genderValue = new UserCustomFieldValueDTO();
genderValue.setField(gender);
for (CustomFieldPossibleValueVO possibleValue : gender
.getPossibleValues()) {
Cyclos 4 PRO Documentation
12
if (possibleValue.getValue().equals("Male")) {
// Found the value for 'Male'
genderValue.setEnumeratedValues(Collections
.singleton(possibleValue));
break;
}
}
user.getCustomValues().add(genderValue);
// Value for id number custom field
UserCustomFieldValueDTO idNumberValue = new UserCustomFieldValueDTO();
idNumberValue.setField(idNumber);
idNumberValue.setStringValue("123.456.789-10");
user.getCustomValues().add(idNumberValue);
// Address
UserAddressDTO address = new UserAddressDTO();
address.setName("Home");
address.setAddressLine1("John's Street, 500");
address.setCity("John's City");
address.setRegion("John's Region");
address.setCountry("BR"); // Country is given in 2-letter ISO code
user.setAddresses(Arrays.asList(address));
// Landline phone
LandLinePhoneDTO landLinePhone = new LandLinePhoneDTO();
landLinePhone.setName("Home");
landLinePhone.setRawNumber("+551133333333");
user.setLandLinePhones(Arrays.asList(landLinePhone));
// Mobile phone
MobilePhoneDTO mobilePhone = new MobilePhoneDTO();
mobilePhone.setName("Mobile phone 1");
mobilePhone.setRawNumber("+5511999999999");
user.setMobilePhones(Arrays.asList(mobilePhone));
// Effectively register the user
UserRegistrationResult result = userService.register(user);
RegistrationStatus status = result.getStatus();
switch (status) {
case ACTIVE:
System.out.println("The user is now active");
break;
case ACTIVE_GENERATED_PASSWORD:
System.out.println("The user is now active, "
+ "and a password has been emailed");
break;
case INACTIVE:
System.out.println("The user is in an inactive group, "
+ "and needs activation by administrators");
break;
case EMAIL_VALIDATION:
System.out.println("The user needs to validate the e-mail "
+ "address in order to confirm the registration");
break;
}
}
Cyclos 4 PRO Documentation
13
}
Edit user profile
import java.util.List;
import
import
import
import
import
import
import
org.cyclos.model.users.fields.UserCustomFieldValueDTO;
org.cyclos.model.users.users.EditProfileData;
org.cyclos.model.users.users.UserDTO;
org.cyclos.model.users.users.UserDetailedVO;
org.cyclos.model.users.users.UserLocatorVO;
org.cyclos.server.utils.HttpServiceFactory;
org.cyclos.services.users.UserService;
public class EditUser {
public static void main(String[] args) {
// Get the services
HttpServiceFactory factory = Cyclos.getServiceFactory();
UserService userService = factory.getProxy(UserService.class);
// Locate the user by username, so we get the id
UserLocatorVO locator = new UserLocatorVO();
locator.setUsername("someuser");
UserDetailedVO userVO = userService.locate(locator);
// Get the profile data
EditProfileData data = (EditProfileData) userService.getData(userVO
.getId());
UserDTO user = data.getDTO();
user.setName("Some modified name");
List<UserCustomFieldValueDTO> customValues = user.getCustomValues();
for (UserCustomFieldValueDTO fieldValue : customValues) {
if (fieldValue.getField().getInternalName().equals("website")) {
fieldValue.setStringValue("http://new.url.com");
}
}
// Update the user
userService.save(user);
}
}
Login user
import java.util.List;
import
import
import
import
import
import
import
import
org.cyclos.model.access.LoggedOutException;
org.cyclos.model.access.channels.BuiltInChannel;
org.cyclos.model.banking.accounts.AccountSummaryVO;
org.cyclos.model.users.users.UserLocatorVO;
org.cyclos.model.users.users.UserLoginDTO;
org.cyclos.model.users.users.UserLoginResult;
org.cyclos.model.users.users.UserVO;
org.cyclos.server.utils.HttpServiceFactory;
Cyclos 4 PRO Documentation
14
import org.cyclos.server.utils.HttpServiceInvocationData;
import org.cyclos.services.access.LoginService;
import org.cyclos.services.banking.AccountService;
/**
* Cyclos web service example: logs-in an user via web services.
* This is useful when creating an alternative front-end for Cyclos.
*/
public class LoginUser {
public static void main(String[] args) throws Exception {
// This LoginService has the administrator credentials
LoginService LoginService = Cyclos.getServiceFactory().getProxy(
LoginService.class);
String remoteAddress = "192.168.1.200";
// Set the login parameters
UserLoginDTO params = new UserLoginDTO();
UserLocatorVO locator = new UserLocatorVO(UserLocatorVO.PRINCIPAL,
"c1");
params.setUser(locator);
params.setPassword("1234");
params.setRemoteAddress(remoteAddress);
params.setChannel(BuiltInChannel.MAIN.getInternalName());
// Login the user
UserLoginResult result = LoginService.loginUser(params);
UserVO user = result.getUser();
String sessionToken = result.getSessionToken();
System.out.println("Logged-in" + user.getName()
+ " with session token = " + sessionToken);
// Do something as user. As the session token is only valid per ip
// address, we need to pass-in the client ip address again
HttpServiceInvocationData sessionInvocationData = HttpServiceInvocationData
.stateful(sessionToken, remoteAddress);
// The services acquired by the following factory will carry on the
// user session data
HttpServiceFactory userFactory = Cyclos
.getServiceFactory(sessionInvocationData);
AccountService accountService = userFactory
.getProxy(AccountService.class);
List<AccountSummaryVO> accounts = accountService.getAccountsSummary(
user, null);
for (AccountSummaryVO account : accounts) {
System.out.println(account.getName() + ", balance: "
+ account.getStatus().getBalance());
}
// Logout. There are 2 possibilities:
// - Logout as administrator:
LoginService.logoutUser(sessionToken);
// - OR logout as own user:
try {
userFactory.getProxy(LoginService.class).logout();
Cyclos 4 PRO Documentation
15
} catch (LoggedOutException e) {
// already logged out
}
}
}
Get account information
import java.math.BigDecimal;
import java.util.List;
import
import
import
import
import
import
import
import
import
import
import
org.cyclos.model.banking.accounts.AccountHistoryEntryVO;
org.cyclos.model.banking.accounts.AccountHistoryQuery;
org.cyclos.model.banking.accounts.AccountSummaryVO;
org.cyclos.model.banking.accounts.AccountVO;
org.cyclos.model.banking.accounttypes.AccountTypeNature;
org.cyclos.model.banking.accounttypes.AccountTypeVO;
org.cyclos.model.users.users.UserLocatorVO;
org.cyclos.model.users.users.UserVO;
org.cyclos.model.utils.CurrencyAmountDTO;
org.cyclos.services.banking.AccountService;
org.cyclos.utils.Page;
/**
* Provides a sample on getting the account information for a given user.
*/
public class GetAccountInformation {
public static void main(String[] args) throws Exception {
AccountService accountService = Cyclos.getServiceFactory().getProxy(
AccountService.class);
// Get the accounts summary
UserLocatorVO user = new UserLocatorVO();
user.setUsername("some-user");
List<AccountSummaryVO> summaries = accountService.getAccountsSummary(
user, null);
// For each account, we'll show the balances
for (AccountSummaryVO summary : summaries) {
CurrencyAmountDTO balance = summary.getBalance();
System.out.printf("%s has balance of %.2f %s\n",
summary.getName(),
balance.getAmount(),
balance.getCurrency());
// Also, search for the last 5 payments on each account
AccountHistoryQuery query = new AccountHistoryQuery();
query.setAccount(new AccountVO(summary.getId()));
query.setPageSize(5);
Page<AccountHistoryEntryVO> entries = accountService
.searchAccountHistory(query);
for (AccountHistoryEntryVO entry : entries) {
AccountVO relatedAccount = entry.getRelatedAccount();
AccountTypeVO relatedType = relatedAccount.getType();
AccountTypeNature relatedNature = relatedType.getNature();
Cyclos 4 PRO Documentation
16
// The from or to...
String fromOrTo;
if (relatedNature == AccountTypeNature.SYSTEM) {
// ... might be the account type name if a system account
fromOrTo = relatedType.getName();
} else {
// ... or just the user name and login name
UserVO relatedUser = (UserVO) relatedAccount.getOwner();
fromOrTo = relatedUser.getName() + " ("
+ relatedUser.getUsername() + ")";
}
// Display the amount, which can be negative or positive
BigDecimal amount = entry.getAmount();
boolean debit = amount.compareTo(BigDecimal.ZERO) < 0;
System.out.printf("Date: %s\n", entry.getDate());
System.out
.printf("%s: %s\n", debit ? "To" : "From", fromOrTo);
System.out.printf("Amount: %.2f\n", entry.getAmount());
System.out.println();
}
System.out.println("**********");
}
}
}
Perform payment
import java.math.BigDecimal;
import java.util.List;
import
import
import
import
import
import
import
import
import
import
import
import
import
import
import
import
import
import
import
import
import
import
import
org.cyclos.model.EntityNotFoundException;
org.cyclos.model.banking.InsufficientBalanceException;
org.cyclos.model.banking.MaxAmountExceededException;
org.cyclos.model.banking.MaxAmountPerDayExceededException;
org.cyclos.model.banking.MaxAmountPerMonthExceededException;
org.cyclos.model.banking.MaxAmountPerWeekExceededException;
org.cyclos.model.banking.MaxTransfersPerDayExceededException;
org.cyclos.model.banking.MaxTransfersPerMonthExceededException;
org.cyclos.model.banking.MaxTransfersPerWeekExceededException;
org.cyclos.model.banking.MinAmountExceededException;
org.cyclos.model.banking.MinTimeBetweenTransfersException;
org.cyclos.model.banking.accounts.AccountOwner;
org.cyclos.model.banking.accounts.SystemAccountOwner;
org.cyclos.model.banking.transactions.PaymentVO;
org.cyclos.model.banking.transactions.PerformPaymentDTO;
org.cyclos.model.banking.transactions.PerformPaymentData;
org.cyclos.model.banking.transactions.TransactionAuthorizationStatus;
org.cyclos.model.banking.transfertypes.TransferTypeVO;
org.cyclos.model.users.users.UserLocatorVO;
org.cyclos.server.utils.HttpServiceFactory;
org.cyclos.services.banking.PaymentService;
org.cyclos.services.banking.TransactionService;
org.cyclos.utils.CollectionHelper;
/**
Cyclos 4 PRO Documentation
17
* Provides a sample on performing a payment between an user and a system
* account
*/
public class PerformPayment {
public static void main(String[] args) {
// Get the services
HttpServiceFactory factory = Cyclos.getServiceFactory();
TransactionService transactionService = factory
.getProxy(TransactionService.class);
PaymentService paymentService = factory
.getProxy(PaymentService.class);
// The payer and payee
AccountOwner payer = new UserLocatorVO(UserLocatorVO.USERNAME,
"user1");
AccountOwner payee = SystemAccountOwner.instance();
// Get data regarding the payment
PerformPaymentData data;
try {
data = transactionService.getPaymentData(payer, payee);
} catch (EntityNotFoundException e) {
System.out.println("Some of the users were not found");
return;
}
// Get the first available payment type
List<TransferTypeVO> types = data.getPaymentTypes();
TransferTypeVO paymentType = CollectionHelper.first(types);
if (paymentType == null) {
System.out.println("There is no possible payment type");
}
// The payment amount
BigDecimal amount = new BigDecimal(10.5);
// Perform the payment itself
PerformPaymentDTO payment = new PerformPaymentDTO();
payment.setType(paymentType);
payment.setFrom(data.getFrom());
payment.setTo(data.getTo());
payment.setAmount(amount);
try {
PaymentVO result = paymentService.perform(payment);
// Check whether the payment is pending authorization
TransactionAuthorizationStatus auth = result
.getAuthorizationStatus();
if (auth == TransactionAuthorizationStatus.PENDING_AUTHORIZATION) {
System.out.println("The payment is pending authorization");
} else {
System.out.println("The payment has been processed");
}
} catch (InsufficientBalanceException e) {
System.out.println("Insufficient balance");
} catch (MaxTransfersPerDayExceededException e) {
System.out.println("Maximum daily amount of transfers "
Cyclos 4 PRO Documentation
18
}
}
}
}
}
}
}
}
}
+ e.getMax()
+ " has been reached");
catch (MaxTransfersPerWeekExceededException e) {
System.out.println("Maximum weekly amount of transfers "
+ e.getMax()
+ " has been reached");
catch (MaxTransfersPerMonthExceededException e) {
System.out.println("Maximum monthly amount of transfers "
+ e.getMax()
+ " has been reached");
catch (MinTimeBetweenTransfersException e) {
System.out
.println("A minimum period of time should be awaited to make "
+ "a payment of this type");
catch (MaxAmountPerDayExceededException e) {
System.out.println("Maximum daily amount of " + e.getMaxAmount()
+ " has been reached");
catch (MaxAmountPerWeekExceededException e) {
System.out.println("Maximum weekly amount of " + e.getMaxAmount()
+ " has been reached");
catch (MaxAmountPerMonthExceededException e) {
System.out.println("Maximum monthly amount of "
+ e.getMaxAmount()
+ " has been reached");
catch (MaxAmountExceededException e) {
System.out.println("Maximum amount of " + e.getMaxAmount()
+ " has been reached");
catch (MinAmountExceededException e) {
System.out.println("Minimum amount of " + e.getMinAmount()
+ " has been reached");
catch (Exception e) {
System.out.println("The payment couldn't be performed");
}
}
}
2.3. PHP clients
To make it easier to integrate Cyclos in PHP applications, a PHP library is provided. The
library uses web-rpc calls with JSON objects internally, handling requests and responses,
as well as mapping exceptions. A PHP class is generated for each Cyclos service interface,
and all methods are generated on them. The parameters and result types, however, are not
generated, and are either handled as strings, numbers, booleans or generic objects (stdclass).
You can download the PHP client for the corresponding Cyclos version here.
Dependencies
• PHP 5.3 or newer
• PHP CURL extension (package php5-curl in Debian / Ubuntu)
• PHP JSON extension (package php5-json in Debian / Ubuntu)
Cyclos 4 PRO Documentation
19
Using services from a 3rd party PHP application
In order to use the Cyclos classes, we first register an autoload function to load the required
classes automatically, like this:
function load($c) {
if (strpos($c, "Cyclos\\") >= 0) {
include str_replace("\\", "/", $c) . ".php";
}
}
spl_autoload_register("load");
Then, Cyclos is configured with the server root URL and authentication details:
Cyclos\Configuration::setRootUrl("http://192.168.1.27:8888/england");
Cyclos\Configuration::setAuthentication("admin", "1234");
Afterwards, services can be instantiated using the new operator, and the corresponding
methods will be available:
$userService = new Cyclos\UserService(); $page = $userService->search(new stdclass());
Examples
Configuration
All the following examples include the configureCyclos.php file, which contains the following:
<?php
function load($c) {
if (strpos($c, "Cyclos\\") >= 0) {
include str_replace("\\", "/", $c) . ".php";
}
}
spl_autoload_register('load');
Cyclos\Configuration::setRootUrl("http://192.168.1.27:8888/england");
Cyclos\Configuration::setAuthentication("admin", "1234");
Search users
<?php
require_once 'configureCyclos.php';
$userService = new Cyclos\UserService();
Cyclos 4 PRO Documentation
20
$query = new stdclass();
$query->keywords = 'Consumer*';
$query->pageSize = 5;
$page = $userService->search($query);
echo("Found a total of $page->totalCount users\n");
if (!empty($page->pageItems)) {
foreach ($page->pageItems as $user) {
echo("* $user->name ($user->username)\n");
}
}
Search advertisements
<?php
require_once 'configureCyclos.php';
$adService = new Cyclos\AdService();
$query = new stdclass();
$query->keywords = 'Computer*';
$query->pageSize = 10;
$query->orderBy = 'PRICE_LOWEST';
$page = $adService->search($query);
echo("Found a total of $page->totalCount advertisements\n");
if (!empty($page->pageItems)) {
foreach ($page->pageItems as $ad) {
echo("* $ad->title\n");
}
}
Login user
<?php
// Configure Cyclos and obtain an instance of LoginService
require_once 'configureCyclos.php';
$loginService = new Cyclos\LoginService();
// Set the parameters
$params = new stdclass();
$params->user = array("principal" => $_POST['username']);
$params->password = $_POST['password'];
$params->remoteAddress = $_SERVER['REMOTE_ADDR'];
// Perform the login
try {
$result = $loginService->loginUser($params);
} catch (Cyclos\ConnectionException $e) {
echo("Cyclos server couldn't be contacted");
die();
} catch (Cyclos\ServiceException $e) {
switch ($e->errorCode) {
Cyclos 4 PRO Documentation
21
case 'VALIDATION':
echo("Missing username / password");
break;
case 'LOGIN':
echo("Invalid username / password");
break;
case 'REMOTE_ADDRESS_BLOCKED':
echo("Your access is blocked by exceeding invalid login attempts");
break;
default:
echo("Error while performing login: {$e->errorCode}");
break;
}
die();
}
// Redirect the user to Cyclos with the returned session token
header("Location: "
. Cyclos\Configuration::getRootUrl()
. "?sessionToken="
. $result->sessionToken);
Perform payment from system to user
<?php
require_once 'configureCyclos.php';
$transactionService = new Cyclos\TransactionService();
$paymentService = new Cyclos\PaymentService();
try {
$data = $transactionService->getPaymentData('SYSTEM', array('username' => 'c1'));
$parameters = new stdclass();
$parameters->from = $data->from;
$parameters->to = $data->to;
$parameters->type = $data->paymentTypes[0];
$parameters->amount = 5;
$parameters->description = "Test from system to user";
$paymentResult = $paymentService->perform($parameters);
if ($paymentResult->authorizationStatus == 'PENDING_AUTHORIZATION') {
echo("Not yet authorized\n");
} else {
echo("Payment done with id $paymentResult->id\n");
}
} catch (Cyclos\ServiceException $e) {
echo("Error while calling $e->service.$e->operation: $e->errorCode");
}
Perform payment from user to user
<?php
require_once 'configureCyclos.php';
//Perform the payment from user c1 to c2
Cyclos 4 PRO Documentation
22
Cyclos\Configuration::setAuthentication("c1", "1234");
$transactionService = new Cyclos\TransactionService();
$paymentService = new Cyclos\PaymentService();
try {
$data = $transactionService->getPaymentData(
array('username' => 'c1'),
array('username' => 'c2'));
$parameters = new stdclass();
$parameters->from = $data->from;
$parameters->to = $data->to;
$parameters->type = $data->paymentTypes[0];
$parameters->amount = 5;
$parameters->description = "Test payment to user";
$paymentResult = $paymentService->perform($parameters);
if ($paymentResult->authorizationStatus == 'PENDING_AUTHORIZATION') {
echo("Not yet authorized\n");
} else {
echo("Payment done with id $paymentResult->id\n");
}
} catch (Cyclos\ServiceException $e) {
switch ($e->errorCode) {
case "VALIDATION":
echo("Some of the parameters is invalid\n");
var_dump($e->error);
break;
case "INSUFFICIENT_BALANCE":
echo("Insufficient balance to perform the payment\n");
break;
case "MAX_AMOUNT_PER_DAY_EXCEEDED":
echo("Maximum amount exeeded today\n");
break;
default:
echo("Error with code $e->errorCode while performing the payment\n");
break;
}
}
2.4. Other clients
For other clients, a "REST level 0", or RPC-like interface is available, using JSON encoded
strings for passing parameters and receiving results from services. Each service responds
to POST requests to the following URL http[s]://cyclos.url/[network/]web-rpc/<short-servicename>, where the short-service-name is the service with the first letter as lowercase. So,
for example, https://my.cyclos.instance.com/network/web-rpc/accountService is a valid URL,
being mapped to AccountService. For authentication, the username and password should
be passed as a HTTP header using the standard basic authentication – a header like:
"Authentication: Basic <Base64-encoded form of username:password>". Additional fields can
Cyclos 4 PRO Documentation
23
be used to identify the user, not only the username, by prepending the "username" with the
following values:
• username:<value> – Identify the user by the login name (same as not using any prefix at
all). For example: username:someuser
• id:<value>: Identify the user by the internal id. For example: id:1234567
• email:<value>: Identify the user by e-mail. For example: email:[email protected]
• mobilePhone:<value> – Identify the user by mobile phone. For example: mobilePhone:
+555199999999
• customField:<field>:<value> – Identify the user by custom field (by internal name) value.
For example: customField:externalId:1234567
• customFieldId:<id>:<value> – Identify the user by custom field (by id) value. For example:
customFieldId:987654:1234567
The request body must be a JSON object with the ‘operation’ and ‘params’ properties, where
operation is the method name, and params is either an array with parameters, or optionally
the parameter if the method has a single parameter (without the array) or even omitted if
the method have no parameters. For objects, the parameters are expected to be the same as
the Java counterparts (see the JavaDocs for a reference on the available properties for each
object).
As result, if the request was successful (http status code is 200), an object with a single
property called result will be returned. The object has the same structure as the object
returned by the service method, or is a string, boolean or number for simple types. Requests
which resulted in error (status code distinct than 200) will have the following structure:
• errorCode: A string generated from the exception java class name. The unqualified class
name has the Exception suffix removed, and is transformed to all uppercase, separated
by underlines. So, for example, for org.cyclos.model.ValidationException, the error code is
VALIDATION; for org.cyclos.model.banking.InsufficientBalanceException, the error code is
INSUFFICIENT_BALANCE, and so on.
• Any other properties (public getters) the thrown exception has will also be mapped as a
property here, for example, org.cyclos.model.ValidationException holds a property called
validation which contains an object representing a org.cyclos.utils.ValidationResult.
Apart from that, all objects, when converted to JSON, will have a property called class, which
represents the fully-qualified Java class name of the source object. Most clients can just
ignore the result. However, when sending requests to classes that expect a polymorphic
object, the server needs to know which subclass the passed object represents. In those cases,
passing the class property, with the fully qualified Java class name is required. An example
is the AdService. When saving an advertisement, it could either be a simple advertisement
(AdvertisementDTO) or a webshop advertisement (AdWebShopDTO). In this case, a class
Cyclos 4 PRO Documentation
24
property with the fully qualified class name is required. Note, however, that in most cases,
the class information is not needed.
Examples
Assuming that <root url> points to correct URL, and that the authentication header is
correctly passed, the following request can be performed to search for users: The same
example call previously shown in Java can be obtained by, posting the following JSON to
https://my.cyclos.instance.com/network/web-rpc/userService (assuming the correct request
headers / authentication):
{
"operation": "search",
"params": {
"keywords": "consumer",
"pageSize": 5
}
}
The resulting JSON will be something like:
{
"result": {
"class": "org.cyclos.utils.PageImpl",
"currentPage": "0",
"pageSize": "20",
"totalCount": "2",
"pageItems": [
{
"class": "org.cyclos.model.users.users.UserDetailedVO",
"id": "-2717327251475675143",
"name": "Consumer 1",
"username": "c1"
},
{
"class": "org.cyclos.model.users.users.UserDetailedVO",
"id": "-2717467988964030471",
"name": "Consumer 3",
"username": "c3"
}
]
}
}
2.5. Available services and API Changes
The available services are documented in the JavaDocs, under each org.cyclos.services
subpackage.
Cyclos 4 PRO Documentation
25
For the full set of API changes, please, refer to the online documentation.
Cyclos 4 PRO Documentation
26
3. Scripting
3.1. Scripting engine
The Cyclos scripting module (available from version 4.2 onwards) provides an integration
layer that allows connecting from Cyclos to third party software, as well executing custom
operations and scheduled tasks within Cyclos self. The scripting module offers an easy way
to customize and extend Cyclos, without losing compatibility with future Cyclos versions. The
scripting engine can access the full Cyclos services layer which makes it a powerful feature.
For security reasons only global administrators can add scripts. Network administrators
can be given permissions to bound the scripts to elements such as extension points
(eg. payment, user profile, advertisement), custom validations (for input fields), custom
calculations (account fees, transaction fees), custom operations and scheduled tasks. Any
internal entity in Cyclos (e.g. user, address, payment, authorization, reference etc.) can be
accessed by the scripts. When developing custom operations it is likely that you want to store
and use new values/entities. It is possible to create specific record types and custom fields
and make them available to the scripts. The record types can be of the type 'system' or 'user'
depending on the requirements.
On this page you will find links with documentation about the available extensions and
examples. In the future we will add a repository of useful scripts. If you wrote a script that
could serve other projects we will be happy to add it. Please post it on our Forum or send
it to [email protected].
Global admins can write and store scripts directly within Cyclos. Each script ‘type’ has its own
functions which have to be implemented. A network admin can chose from the available
scripts and bind them to Cyclos operations and events, or to new operations. The variables
used in the scripts can be managed outside the scripts in the extensions self (by the network
admin). This avoids the need for a global admin having to modify a script every time a new
or different input value is required. It is also possible to define additional information and
confirmation texts that can be displayed to the user when a custom operation is initiated or
submitted.
The scripting language currently supported is Groovy. It offers a powerful scripting language
that is very similar to Java, with a close to zero learning curve for Java developers. It is possible
to write scripts that will be available in a shared script library, so that other scripts within
the same context can make use of it. All scripts are compiled to Java bytecode which makes
them highly performatic. Currently Cyclos requires Java 7 or above. Be aware that JDK 7
versions ranging from 7u21 to 7u55 have bugs are buggy with regards to invokedynamic (see
information here). If you plan to use Cyclos scripting, make sure you either use 7u56+ or JDK 8
Variables bound to all scripts
Cyclos 4 PRO Documentation
27
When running, scripts have a set of bindings, that is, available top-level variables. At runtime,
the bindings will vary according to the script type and context. For example, each extension
point type has one or more specific bindings. On all cases, however, the following variables
are bound:
• scriptParameters: In the script details page, or in every every page where a script is chosen
to be used (for example, in the extension point or custom operation details page) there will
be a textarea where parameters may be added to the script. They allow scripts to be reused
in different contexts, just with different parameters. The text is parsed as Java Properties,
and the format is described here. The library parameters are included first (if any), then the
own script parameters (if any), then the specific page parameters. This allows overridding
parameters at more specific levels.
• scriptHelper: An instance of org.cyclos.impl.system.ScriptHelper. It contains some useful
methods, like:
• wrap(object[, customFields]): wraps the given object in a Map, with some custom
characteristics:
• If the wrapped object contains custom fields, it will allow getting / setting custom field
values using the internal name
• Values will be automatically converted to the expected destination type
• If a list of custom fields are passed, then they are considered. If not, will attempt to
read the current fields for the object, which might not always be available (for example,
when creating a new record) or even no longer active (for example, when the product
of an user just removed a field, and the value is still there)
• Example:
def bean = scriptHelper.wrap(user)
def gender = bean.gender
// gender will be a org.cyclos.entities.system.CustomFieldPossibleValue
// if gender is an enumerated field
def date = bean.customDate
// date will be a java.util.Date if customDate is a date field
def relatedUser = bean.relatedUser
// relatedUser will be an org.cyclos.entities.users.User
// if relatedUser is linked entity field of type user
• bean(class): returns a bean by type. The class reference needs to be passed.
• addOnCommit(runnable), addOnRollback(runnable): Adds callbacks to be executed after
the main database transaction ends, either successfully or with failure. Be aware that
those callbacks will be invoked outside any transaction scope within Cyclos, so things like
scriptHelper.sessionData.loggedUser won't work (because it requires retrieving the User
object from the database). However, it is more efficient, as no new database access needs
to be done. This is mostly useful to notify an external application that some data has
been persisted in Cyclos (after we're 100% sure that the data is persistent). Keep in mind
Cyclos 4 PRO Documentation
28
that there is a (very) small chance that the main transaction is committed / rolled back but
then the server crashes, and the callback weren't yet called. So, when synchronizing with
external systems, it is always wise to do some form of timeout / recovery mechanism.
• addOnCommitTransactional(runnable), addOnRollbackTransactional(runnable): Same
as the non-transactional counterparts, but they are executed inside a new transaction
in Cyclos
• sessionData: The currently bound org.cyclos.impl.access.SessionData.
• formatter: A org.cyclos.impl.utils.formatting.FormatterImpl.
• Services and Handlers: All *ServiceLocal and *Handler objects are bound via simple
names, starting with lowercase characters. Services are bound as 'nameService'
and handlers as 'nameHandler'. For example, org.cyclos.impl.users.UserServiceLocal
is bound as userService, and org.cyclos.impl.access.ConfigurationHandler is bound as
configurationHandler.
3.2. Script types
Library
Libraries are scripts which are included by other scripts, in order to reuse code, and are never
used directly by other functionality in Cyclos.
Each script (including other libraries) can have any number of libraries as dependencies.
However circular dependencies between libraries (for example, A depends on B, which
depends on C, which depends on A) are forbidden (validated when saving a library).
The order in which the code on libraries is included in the final code respects the
dependencies, but doesn't guarantee ordering between libraries in the same level. For
example, if there are both C and B libraries which depend on A, it is guaranteed that A is
included before B and C, but either B or C could be included right after A. So, in the example,
your code shouldn't rely that B comes before C. In this case, the library C should depend on
B to force the A, B, C order.
Contrary to other script types, libraries don't have bound variables per se: the bindings will
be the same as the script including the library.
Also, as libraries are just included in other scripts, no direct examples are provided here. The
provided example scripting solutions, however, use libraries.
Custom field validation
These scripts are used to validate a custom field value. The field can be of any type (users,
advertisements, user records, transactions and so on). The script code has the following
variables bound (besides the default bindings)
Cyclos 4 PRO Documentation
29
• object: The DTO which holds the custom field values. May be an instance of:
• org.cyclos.model.users.users.UserDTO
• org.cyclos.model.marketplace.advertisements.BasicAdDTO
• org.cyclos.model.users.records.UserRecordDTO
• org.cyclos.model.banking.transactions.PerformTransactionDTO
• org.cyclos.model.contentmanagement.documents.ProcessDynamicDocumentDTO
• org.cyclos.model.system.operations.RunCustomOperationDTO
• field: The org.cyclos.entities.system.CustomField.
• value: The actual custom field value. Depends on the custom field type. May be one of:
• String (for single line text, multi line text, rich text or url types)
• Boolean (for boolean type)
• Integer (for integer type)
• BigDecimal (for decimal type)
• org.cyclos.entities.system.CustomFieldPossibleValue (for single selection type)
• org.cyclos.entities.system.CustomFieldPossibleValue (for multiple selection type)
• org.cyclos.model.system.fields.DynamicFieldValueVO (for dynamic selection type)
• org.cyclos.entities.users.User (for user type)
The script should return one of the following:
• A boolean, indicates that the value is either valid / invalid. When invalid, the general "<Field
name> is invalid" error will be displayed;
• A string, means the field is invalid, and the string is the error message. To concatenate the
field name directly, use the {0} placeholder, like: "{0} has an unexpected value";
• Any other result will be considered valid.
Examples
E-mail
To have a custom field which is validated as an e-mail, use the following script:
import org.apache.commons.validator.routines.EmailValidator
return EmailValidator.getInstance().isValid(value)
IBAN account number
To validate an IBAN account number as a custom field, the following script can be used:
Cyclos 4 PRO Documentation
30
import org.apache.commons.validator.routines.checkdigit.IBANCheckDigit
return IBANCheckDigit.IBAN_CHECK_DIGIT.isValid(value.replaceAll("\\s", ""))
CPF Validation
In Brazil, people are identified by a number called CPF (Cadastro de Pessoas Fisicas). It has
2 veryfing digits, which have a known formula to calculate. Here's the example for validating
it in Cyclos:
import static java.lang.Integer.parseInt
def boolean validateCPF(String cpf) {
// Strip non-numeric chars
cpf = cpf.replaceAll("[^0-9]", "")
// Obvious checks: needs to be 11 digits, and not all be the same digit
if (cpf.length() != 11 || cpf.toSet().size() == 1) {
return false
}
int add = 0
// Check for verifier digit 1
for (int i = 0; i < 9; i++) add += parseInt(cpf[i]) * (10 - i)
int rev = 11 - (add % 11)
if (rev == 10 || rev == 11) rev = 0
if (rev != parseInt(cpf[9])) return false
add = 0;
// Check for verifier digit 2
for (int i = 0; i < 10; i++) add += parseInt(cpf[i]) * (11 - i)
rev = 11 - (add % 11)
if (rev == 10 || rev == 11) rev = 0
if (rev != parseInt(cpf[10])) return false
return true
}
return validateCPF(value)
Dynamic custom field handling
These scripts are used to generate the possible values for custom
fields of type 'dynamic selection'. Each possible value is an instance of
org.cyclos.model.system.fields.DynamicFieldValueVO. The field can be of any type (users,
advertisements, user records, transactions and so on).
The script code has the following variables bound (besides the default bindings):
• field: The org.cyclos.entities.system.CustomField
Also, depending on the custom field nature, there are the following additional bindings:
Cyclos 4 PRO Documentation
31
User (profile) fields:
• user: The org.cyclos.entities.users.User. Even when registering an user, will always have
the 'group' property set with the org.cyclos.entities.users.Group instance.
Advertisement fields:
• ad: The org.cyclos.entities.marketplace.BasicAd. Even on inserts, is guaranteed to have the
'owner' property set with the org.cyclos.entities.users.User instance.
Record fields:
• record: The org.cyclos.entities.marketplace.BasicAd. Even on inserts, is guaranteed to have
the 'owner' property set with the org.cyclos.entities.users.User instance.
Transaction fields:
• paymentType: The transaction type, asorg.cyclos.entities.banking.PaymentTransferType
• fromOwner:
The
org.cyclos.model.banking.accounts.AccountOwner
performing
the payment (either org.cyclos.model.banking.accounts.SystemAccountOwner or
org.cyclos.entities.users.User)
• toOwner:
The
org.cyclos.model.banking.accounts.AccountOwner
receiving
payment
(either
org.cyclos.model.banking.accounts.SystemAccountOwner
org.cyclos.entities.users.User)
the
or
Custom operation fields:
• customOperation: The org.cyclos.entities.system.CustomOperation.
• user: The org.cyclos.entities.users.User. Only present if the custom operation's scope is
user.
Dynamic document fields:
• document: The org.cyclos.entities.contentmanagement.DynamicDocument.
In all cases, the script must return either one or a collection of:
• List of array of Strings: In this case, each element will have only values, and the
corresponding labels will be the same values.
• org.cyclos.model.system.fields.DynamicFieldValueVO (or compatible object / Map): The
dynamic field value, containing a value (the internal value) and a label (the display value).
The value must be not blank, or an error will be raised. If the label is blank, will show the
same text as the value. Also, the first dynamic value with 'defaultValue' set to true will show
up by default in the form.
Cyclos 4 PRO Documentation
32
Examples
User profile field – values depending on the user group
This examples returns distinct values according to the user group. It should be used by an
user custom field (also called profile fields).
import org.cyclos.model.system.fields.DynamicFieldValueVO
def values = []
// Common values
values << new DynamicFieldValueVO("common1", "Common value 1")
values << new DynamicFieldValueVO("common2", "Common value 2")
values << new DynamicFieldValueVO("common3", "Common value 3")
if (user.group.internalName == "business") {
// Values only available for businesses
values << new DynamicFieldValueVO("business1", "Business value
values << new DynamicFieldValueVO("business2", "Business value
values << new DynamicFieldValueVO("business3", "Business value
} else if (user.group.internalName == "consumer") {
// Values only available for consumers
values << new DynamicFieldValueVO("consumer1", "Consumer value
values << new DynamicFieldValueVO("consumer2", "Consumer value
values << new DynamicFieldValueVO("consumer3", "Consumer value
}
return values
1")
2")
3")
1")
2")
3")
Transfer fee calculation
These scripts are used to calculate the amount of a transfer fee (a fee triggered by another
transfer). The script code has the following variables bound (besides the default bindings):
• fee: The org.cyclos.entities.banking.TransferFee
• transfer: The org.cyclos.entities.banking.Transfer which triggered the fee.
The script should return a number, which will be rounded to the currency's decimal digits. If
null or zero is returned, the fee is not charged.
Examples
Charging a fee according to an user profile field
This example allows choosing a distinct fee amount based on a profile field of the paying user.
It is assumed a custom field of type single selection with the internal name rank. It should
have 3 possible values, with internal names bronze, silver and gold. The script then chooses
a different percentage according to the user rank.
if (transfer.fromSystem) {
// Only charge users
return 0
}
Cyclos 4 PRO Documentation
33
// Depending on an user custom field, we'll pick the fee amount
def percentages = [bronze: 0.07, silver: 0.05, gold: 0.02]
def from = scriptHelper.wrap(transfer.fromOwner)
def rank = from.rank?.internalName ?: "bronze"
def percentage = percentages[rank]
return transfer.amount * percentage
Account fee calculation
These scripts are used to calculate the amount of an account fee (a fee which is charged
periodically or manually over many accounts, according to the 'charged account fees' setting
in member products). The script code has the following variables bound (besides the default
bindings):
• fee: The org.cyclos.entities.banking.AccountFee
• account: The org.cyclos.entities.banking.UserAccount
• executionDate: The expected fee charge date (of type java.util.Date). When scheduled,
charges usually happen a bit after the exact expected date. For manual account fees, this
will be the time the fee has started.
The script should return a number, which will be rounded to the currency's decimal digits. If
null or zero is returned, the fee is not charged.
Examples
Charge a different amount according to the user rank
This example allows choosing a distinct account fee amount based on a profile field of the
paying user. It is assumed a custom field of type single selection with the internal name rank.
It should have 3 possible values, with internal names bronze, silver and gold.
// Depending on an user custom field, we'll pick the fee amount
def amounts = [bronze: 10, silver: 7, gold: 5]
def user = scriptHelper.wrap(account.owner)
def rank = user.rank?.internalName ?: "bronze"
return amounts [rank]
Password handling
These scripts are used to check passwords. In order to use them, the password type's
password mode needs to be "Script". The script code has the following variables bound
(besides the default bindings):
• user: The org.cyclos.entities.users.BasicUser whose password is being checked
• passwordType: The org.cyclos.entities.access.PasswordType being checked.
• password: The password value being checked (string).
Cyclos 4 PRO Documentation
34
The script should return a boolean, indicating whether the password is ok or not.
Examples
Matching passwords to the script parameters
This is a very simple example, which checks for passwords according to the script parameters.
The parameters can be set either in the script itself or in the password type. This example
is very insecure, and shouldn't be used in production. Normally, scripts to check passwords
would connect to third party applications, but this is just a very basic example.
// Just read the password value from the script parameters
return scriptParameters[user.username] == password
Extension points
These scripts are used on extension points (user, user record, transfer, …), and are attached
to specific events (create, update, remove, chargeback, …). The extension point scripts have
2 functions:
• The data has already been validated, but not saved yet. In this function, we know that the
data entered by users is valid, but the main event has not been saved yet.
• The data has been saved, but not committed to database yet. For example, if the script
code throws an Exception, the database transaction will be rolled-back, and no data will
be persisted.
Here are some example scenarios for performing custom logic, or integrating Cyclos with
external systems using extension points:
• limit. When an user is performing a payment, an extension point of type transaction could
be used, in the function invoked after validation, to check the current balance. It the balance
is not enough for the payment and the user has credit limit, a payment from a system
account could be done automatically to the user, completing the amount for the payment.
• A XA transaction could be done with an external system by creating data in the external
database in the function which runs after validating, then preparing the commit in the
function after the data is saved, and finally registering both a commit and a rollback
listener (see the ScriptHelper in default bindings) to either commit or rollback the prepared
transaction.
• It is also possible to 'bind' Cyclos entities with extension points. For example a payment
could create a new user record of a specific type and set some values in the record. When
a user record value is changed this could trigger another action, for example changing the
(bookkeeping) status of a payment.
• A simple notification of performed payments could be implemented by registering a
commit listener (see the ScriptHelper in default bindings) to implement the notification.
Cyclos 4 PRO Documentation
35
• The profile information of an user needs to be mirrored in an external system. In this
case, an user extension point, with the create / update events can be used to send
this information. Additional information on addresses and phones can use the same
mechanism (they are different extension points). Finally, a change status event for users,
to the status REMOVED indicates that the user has been removed.
• There could be payment custom fields which are not filled-in by users when performing
payments, but by extension points of type transaction. Payment custom fields may be
configured to not show up in the form, only automatically via extension points.
• An extension point on a new Cyclos avertisment could publish the advertisment as well in
an third party system.
These are just some examples. There are many possible uses for the extension points. In the
future we will publish usefull extension points at this site.
All extension points have the following additional variables bound to its execution:
• extensionPoint: The org.cyclos.entities.system.ExtensionPoint
• event: The org.cyclos.model.system.extensionpoints.ExtensionPointEvent. The specific
implementation depends on the extension point type.
• context: A java.util.Map<String, Object> which can be used to store attributes to be shared
between, for example, the script which runs after the data is validaded, and the one which
runs after the data is saved
The following types of extension points exist:
User extension point
Extension points which monitor events on users. Additional bindings:
• user: The org.cyclos.entities.users.User
Events:
• create: An user is being registered. IMPORTANT: When e-mail validation is enabled, the user
will be pending until confirming the e-mail. If you have e-mail confirmation enabled, this
event might not be what you need, but activate instead.
• activate: An user is being activated for the first time. For example, if e-mail validation is
enabled, after the user confirming the e-mail address this event will be triggered. However,
the initial status for users (set in group) might be, for example, disabled. In that case, only
when the user is first activated this event will be triggered.
• update: An user profile (name, username, e-mail or custom fields) is being edited.
Additional bindings:
• currentCopy: A detached copy of the user being edited, as org.cyclos.entities.users.User
Cyclos 4 PRO Documentation
36
• changeGroup: The user's group is being changed.
• oldGroup: The current org.cyclos.entities.users.Group
• newGroup: The new org.cyclos.entities.users.Group
• comments: The comments, as provided by the administrator when changing the group,
as string.
• changeStatus: The user's status is being changed. Argument Map:
• oldStatus: The current org.cyclos.model.users.users.UserStatus
• newStatus: The new org.cyclos.model.users.users.UserStatus
• comments: The comments, as provided by the administrator when changing the status,
as string.
Address extension point
Extension points which monitor events on addresses. Additional bindings:
• address: The org.cyclos.entities.users.UserAddress
Events:
• create:An address is being created.
• update: An address is being updated. Additional bindings:
• currentCopy:
A
detached
copy
org.cyclos.entities.users.UserAddress
of
the
address
being
edited,
as
edited,
as
• delete: An address is being deleted.
Phone extension point
Extension points which monitor events on user phones. Additional bindings:
• phone: The org.cyclos.entities.users.Phone
Events:
• create: A phone is being created.
• update: A phone is being updated. Additional bindings:
• currentCopy:
A
detached
org.cyclos.entities.users.Phone
copy
of
the
phone
being
• delete: A phone is being deleted.
User record extension point
Extension points which monitor events on user records. Additional bindings:
Cyclos 4 PRO Documentation
37
• userRecord: The org.cyclos.entities.users.UserRecord
Events:
• create: An user record is being created.
• update: An user record is being created. Additional bindings:
• currentCopy: A detached copy
org.cyclos.entities.users.UserRecord
of
the
user
record
being
edited,
as
• delete: An user record is being created.
Advertisement extension point
Extension points which monitor events on advertisements. Additional bindings:
• ad: The org.cyclos.entities.marketplace.BasicAd
Events:
• create: An advertisement is being created.
• update: An advertisement is being updated. Additional bindings:
• currentCopy: An advertisement is
org.cyclos.entities.marketplace.BasicAd
being
updated.
Additional
bindings:
• delete: An advertisement is being deleted.
Transaction extension point
Extension points which monitor events on performed transactions.
The following additional bindings are available for both preview and confirm events:
• performTransaction: The org.cyclos.model.banking.transactions.PerformTransactionDTO
• paymentType: The transaction type, as org.cyclos.entities.banking.PaymentTransferType
• fromOwner:
The
org.cyclos.model.banking.accounts.AccountOwner
performing
the payment (either org.cyclos.model.banking.accounts.SystemAccountOwner or
org.cyclos.entities.users.User)
• toOwner:
The
org.cyclos.model.banking.accounts.AccountOwner
receiving
payment
(either
org.cyclos.model.banking.accounts.SystemAccountOwner
org.cyclos.entities.users.User)
the
or
• authorizationLevel: The org.cyclos.entities.banking.AuthorizationLevel of the transaction,
if it would be pending authorization, or null if already processed. For the confirm event, will
only be available in the script which runs after save.
Events:
Cyclos 4 PRO Documentation
38
• preview: The user is previewing the transaction. Note that, as there is nothing really being
saved, both scripts will run at the same time, i.e., there's no phase 'after validate' and 'after
save'. Additional bindings:
• preview: The org.cyclos.model.banking.transactions.TransactionPreviewVO
• confirm: The transaction has been confirmed, that is, is being performed. Additional
bindings:
• transaction: The org.cyclos.entities.banking.Transaction. Only available for the script
which runs after save.
• change status: A scheduled payment status has changed. Additional bindings:
• transaction: The org.cyclos.entities.banking.ScheduledPayment.
• oldStatus:
The
previous
status,
org.cyclos.model.banking.transactions.ScheduledPaymentStatus.
as
• newStatus:
The
new
status,
org.cyclos.model.banking.transactions.ScheduledPaymentStatus.
as
• change installment status: A scheduled payment installment status has changed.
Additional bindings:
• installment: The org.cyclos.entities.banking.ScheduledPaymentInstallment.
• oldStatus:
The
previous
status,
org.cyclos.model.banking.transactions.ScheduledPaymentInstallmentStatus.
as
• newStatus:
The
new
status,
org.cyclos.model.banking.transactions.ScheduledPaymentInstallmentStatus.
as
Transaction authorization extension point
Extension points which monitor transaction authorization actions. Additional bindings:
• transaction: The org.cyclos.entities.banking.Transaction
• currentLevel: The current org.cyclos.entities.banking.AuthorizationLevel
• comment: The comment entered by the user performing the action, as string
Events:
• authorize: The transaction is being authorized. Be careful: there might be more
authorization levels which need to be authorized before the transaction is finally processed.
Additional bindings:
• nextLevel: The next current org.cyclos.entities.banking.AuthorizationLevel. If the transfer
should be processed after the current authorization is saved, this value will be null.
• deny: The transaction is being denied by the authorizer.
• cancel: The transaction is being canceled by the performed.
Cyclos 4 PRO Documentation
39
Transfer extension point
Argument Map (common for all events):
• transfer: The transfer being affected.
Events:
• create: A transfer is being created.
• chargeback: A transfer is being charged-back. Additional bindings:
• chargeback: The org.cyclos.entities.banking.Chargeback. Only available in the script
which runs after the data is saved.
• changeStatus: The transfer is being set to a new status. Additional bindings:
• flow: The org.cyclos.entities.banking.TransferStatusFlow of the status being changed
• oldStatus: The current org.cyclos.entities.banking.TransferStatus
• newStatus: The new org.cyclos.entities.banking.TransferStatus
• comments: The comments, as provided by the administrator when changing the status,
as string.
Examples
Granting extra credit (on demand) before payments
This example allows, with a custom profile field, to define an extra credit limit the user can use
on demand. When performing a payment, if the available balance is not enough, a payment
is performed from a system account to the user, up to the limit specified in that profile field.
Once the payment is done, the profile field is subtracted. This example expects the system
account to have the internal name debitAccount, and it should have a payment transfer type
to the user account. That payment transfer type should have the internal name extraCredit.
Finally, the custom profile field needs to have the internal name availableCredit, and needs
to be of type decimal, and enabled for the user. Then create an extension point of type
Transaction, enabled and for the confirm event.
import
import
import
import
import
import
org.cyclos.entities.banking.Account
org.cyclos.entities.banking.PaymentTransferType
org.cyclos.entities.banking.SystemAccountType
org.cyclos.model.banking.accounts.SystemAccountOwner
org.cyclos.model.banking.transactions.PerformPaymentDTO
org.cyclos.model.banking.transfertypes.TransferTypeVO
// Only process direct payments. Scheduled payments are skipped
if (!(performTransaction instanceof PerformPaymentDTO)) {
return
}
// Get the available credit as a profile field
Cyclos 4 PRO Documentation
40
def payer = scriptHelper.wrap(fromOwner)
BigDecimal availableCredit = payer.availableCredit?.abs()
if (availableCredit == null || availableCredit < 0.01) {
// Nothing to do - no available credit
return
}
// Get the account and balance
Account account = accountService.load(fromOwner, paymentType.from)
BigDecimal availableBalance = accountService.getAvailableBalance(account, null)
BigDecimal needs = performTransaction.amount - availableBalance
if (needs > 0 && needs < availableCredit) {
// Needs some extra credit, and has it available - make a payment from system
// Find the system account and payment type
SystemAccountType systemAccountType = entityManagerHandler.find(
SystemAccountType, "debitAccount")
PaymentTransferType paymentType = entityManagerHandler.find(
PaymentTransferType, "extraCredit", systemAccountType)
PerformPaymentDTO credit = new PerformPaymentDTO()
credit.from = SystemAccountOwner.instance()
credit.to = fromOwner
credit.type = new TransferTypeVO(paymentType.id)
credit.amount = needs
paymentService.perform(credit)
// Now there should be enough credit to perform the payment
// Update the user available credit
payer.availableCredit -= needs
}
Send an e-mail on every payment
This example allows, for the selected payment types in the extension point details, to send
an e-mail to an speficic address.
import javax.mail.internet.InternetAddress
import org.cyclos.model.ValidationException
import org.cyclos.server.utils.MessageProcessingHelper
import org.springframework.mail.javamail.MimeMessageHelper
// Get the e-mail subject and body
def tx = scriptHelper.wrap(transaction)
def vars = [
payer: tx.fromOwner.name,
amount: formatter.format(tx.currencyAmount),
date: formatter.formatAsDate(new Date()),
time: formatter.formatAsTime(new Date())
]
def subject = MessageProcessingHelper.processVariables(scriptParameters.subject, vars)
if (subject == null || subject.empty) {
throw new ValidationException("Missing the 'subject' script parameter")
}
def body = MessageProcessingHelper.processVariables(scriptParameters.message, vars)
if (body == null || body.empty) {
throw new ValidationException("Missing the 'message' script parameter")
Cyclos 4 PRO Documentation
41
}
def toEmail = tx.email
def fromEmail = sessionData.configuration.smtpConfiguration.fromAddress
def sender = mailHandler.mailSender
// Send the message after commit, so we guarantee the transaction is persisted when the e-mail is sent
scriptHelper.addOnCommit {
def message = sender.createMimeMessage()
def helper = new MimeMessageHelper(message)
helper.to = new InternetAddress(toEmail)
helper.from = new InternetAddress(fromEmail)
helper.subject = subject
helper.text = body
// Send the message
sender.send message
}
Custom operations
These scripts are invoked when an user runs a custom operation. A custom operation is
configured to return different data types, and the script must behave accordingly (see System
– Operations for more details).
Custom operations can have different scopes:
• System: Those are executed by administrators (with granted permissions), directly from the
main menu
• User: Custom operations which are related to an user, and can either be executed by
the own user (with granted permissions), from the main menu or run by administrator
or brokers (also, with granted permissions) when viewing the user profile. In both cases,
the custom operation needs to be enabled to users via member products. For example,
there might be operations which applies only to businesses, not consumers, and even
administrators with permission to run them shouldn't be able to run them over consumers.
It is enforced that administrators / brokers will only be able to run custom operations over
users they manage.
Bound variables:
• customOperation: The org.cyclos.entities.system.CustomOperation
• user: The org.cyclos.entities.users.User. Only present if the custom operation's scope is
user.
• inputFile: The org.cyclos.model.utils.FileInfo. Only present if the custom operation is
configured to accept a file upload, and if a file was selected.
• formParameters: A java.util.Map<String, Object>, keyed by the form field internal
name. The value depends on the field type. Could be a string, a number, a
boolean, a date, a org.cyclos.entities.system.CustomFieldPossibleValue or a collection of
org.cyclos.entities.system.CustomFieldPossibleValue.
Cyclos 4 PRO Documentation
42
• currentPage: An integer indicating the current page, when getting paged results. Starts with
zero. Only available if the result type is result page.
• pageSize: An integer indicating the requested page size when getting paged results. Only
available if the result type is result page.
• returnUrl: Only if the custom operation return type is external redirect. Contains the url
(as string) which Cyclos expects the external site to redirect the user after the operation
completes.
• request: The org.cyclos.model.utils.RequestInfo. Only if the custom operation return type is
external redirect. Contains the information about the current request, so the script function
which handles the callback can identify the context to complete the process.
Return value: The required return value depends on the custom operation result type:
• Notification: The script must return a string which will be shown as a notification to the user.
If the string starts with the following special prefixes: [INFO], [WARN] or [ERROR], those
prefixes are removed from the notification and the notification style for the corresponding
types is chosen (for example, shows a yellow notification with a warning icon when [WARN]).
If no such prefixes, assumes an information notificaiton.
• Plain text: The script should return a string, which is interpreted as plain text. The text is
shown in the page body and can be printed by the user.
• Rich text: The script should return a string, which is interpreted as HTML text. The text is
shown in the page body and can be printed by the user.
• File download: The script should return an instance of org.cyclos.model.utils.FileInfo, or an
object or Map with the same properties. The properties are:
• content: Required. The file content. May be an InputStream, a File or a String (containing
the file content itself).
• contentType: Required. The MIME type, such as text/plain, text/html, image/jpeg,
application/pdf, etc.
• name: Optional file name, which will be used by browsers to suggest the file name to
save.
• length: Optional file length, which may aid browsers to monitor the progress of file
downloads.
• Page
results:
The
script
should
return
an
instance
of
org.cyclos.model.system.operations.CustomOperationPageResult, or an object or Map
with the same properties. The properties are:
• headers: Required. A list containing the column headers.
• results: Optional. A list of lists, containing the table cells. The inner lists should have the
same size as the headers.
Cyclos 4 PRO Documentation
43
• totalCount: Optional. The total count of records. For example, if all matching records are
1000, but the page size is 20, the results would normally have 20 records, and the total
count would be 1000. This allows paginating through the results. When not returned, the
results won't be paginable.
• External redirect: The first script function must return a string, representing a valid URL.
That URL will be used to redirect the user to the external site. The second script function
(called after the external site redirects the user back to Cyclos) must return a string, which
will be shown as a notification to the user (with support for the same prefixes as the
Notification result type above). As the return url will make the Cyclos application have no
context (which is maintained as JavaScript in the browser page), the user will see the home
page with that notification.
Examples
Contact us page
This example allows creating a "contact us" page, which sends an e-mail to a specified
address. To use it, you will need the following content in the script parameters box:
[email protected]
[email protected]
subject=Contact form
message=The message was sent.\nThank you for your contact.
mailHeader=An user has sent a contact form with the following data:
mailFrom=From:
mailEmail=E-Mail:
mailSubject=Subject:
mailMessage=Message:
invalidEmail=Invalid e-mail address
Then, use the following script code:
import javax.mail.internet.InternetAddress
import org.cyclos.impl.utils.validation.validations.PropertyValidations
import org.cyclos.model.ValidationException
import org.springframework.mail.javamail.MimeMessageHelper
def sender = mailHandler.mailSender
def message = sender.createMimeMessage()
def helper = new MimeMessageHelper(message)
if (PropertyValidations.email().validate(null, null, formParameters.email)) {
throw new ValidationException(scriptParameters.invalidEmail);
}
helper.to = new InternetAddress(scriptParameters.to)
helper.from = new InternetAddress(scriptParameters.from)
helper.subject = scriptParameters.subject
Cyclos 4 PRO Documentation
44
helper.text = """
${scriptParameters.mailHeader}
${scriptParameters.mailFrom} ${formParameters.from}
${scriptParameters.mailEmail} ${formParameters.email}
${scriptParameters.mailSubject} ${formParameters.subject}
${scriptParameters.mailMessage} ${formParameters.message}
"""
sender.send message
return scriptParameters.message
Returning a string (notification / rich / plain text) and external redirect
Examples of a custom operation which returning a text (a notification in that case) can
be found in the loan solution example. An example of an external redirect is the PayPal
integration example.
Returning a file
This is an example where the user selects a document to download. It is assumed that the
custom operation has a form field of type single selection with internal name file. Then, each
possible value should have the internal name corresponding to a pdf file in a given folder.
Once the user chooses the file, it is downloaded.
import org.cyclos.model.ValidationException
// Assume there is a pdf file for each possible value of the field
String fileName = formParameters.file.internalName
String dir = scriptParameters.dir ?: "/usr/share/documents"
File file = new File(dir, "${fileName}.pdf")
if (!file.exists()) {
throw new ValidationException("File not found")
}
return [
content: file,
contentType: "application/pdf",
name: file.name,
length: file.length(),
lastModified: file.lastModified()
]
Returning a result list
In this example, an user can see the other users he has traded with (either performed or
received payments). The custom operation needs to have user scope and result type list.
import org.cyclos.entities.banking.QTransaction
import org.cyclos.entities.users.QUser
import com.mysema.query.types.QList
QTransaction t = QTransaction.transaction
QUser u = QUser.user
Cyclos 4 PRO Documentation
45
List<Object> results = entityManagerHandler
.from(t)
.innerJoin(u)
.on(t.fromUser().id.when(user.id)
.then(t.toUser().id)
.otherwise(t.fromUser().id)
.eq(u.id))
.where(t.fromUser.eq(user).or(t.toUser.eq(user)))
.groupBy(u.username, u.name)
.orderBy(u.username.asc())
.list(new QList(u.username, u.name, u.id.count()))
return [
headers: [
"Login name",
"Full name",
"Transactions"
],
results: results
]
Custom scheduled tasks
These scripts are called periodically by custom scheduled tasks. See System – Scheduled tasks
for more details.
The bound variables are:
• scheduledTask: The org.cyclos.entities.system.CustomScheduledTask being executed
• log: The org.cyclos.entities.system.CustomScheduledTaskLog for this execution
Return value:
• The script should return a string, which is logged as message, and can be viewed on the
application
Examples
Periodically update a static HTML page
In this example, every time the scheduled task runs, a static HTML file is updated. In the file,
it is written the total number of users and the balances of each system account.
import groovy.xml.MarkupBuilder
import
import
import
import
import
org.cyclos.entities.users.QUser
org.cyclos.model.banking.accounts.AccountSummaryVO
org.cyclos.model.banking.accounts.SystemAccountOwner
org.cyclos.model.users.groups.BasicGroupNature
org.cyclos.model.users.users.UserStatus
def now = new Date()
QUser u = QUser.user
Cyclos 4 PRO Documentation
46
int users = entityManagerHandler
.from(u)
.where(u.status.ne(UserStatus.REMOVED),
u.group.nature.eq(BasicGroupNature.USER_GROUP))
.count()
List<AccountSummaryVO> accounts = accountService.
getAccountsSummary(SystemAccountOwner.instance(), null)
File out = new File("/var/www/html/summary.html")
def sessionData = binding.sessionData
def formatter = binding.formatter
MarkupBuilder builder = new MarkupBuilder(new FileWriter(out))
builder.html {
head {
title "${sessionData.configuration.applicationName} summary"
meta charset: "UTF-8"
}
body {
p {
b "Total users"
span ": ${users}"
}
accounts.each { a ->
p {
b a.name
span " balance: ${formatter.format(a.balance)}"
}
}
br()
br()
br()
p style: "font-size: small", "Last updated: ${formatter.format(now)}"
}
}
return "File ${out.absolutePath} updated"
Custom SMS operations
These scripts are invoked when an user executes a custom sms operation, as configured
in the sms channel in the configuration. The function should implement the logic for that
operation.
Bound variables:
• configuration: The org.cyclos.entities.system.CustomSmsOperationConfiguration. With it,
it is possible to navigate up to the org.cyclos.entities.system.SmsChannelConfiguration.
• phone: The org.cyclos.entities.users.MobilePhone
• sms: The org.cyclos.impl.utils.sms.InboundSmsData, containing the operation alias and the
operation parameters
• parameterProcessor: The org.cyclos.impl.utils.sms.SmsParameterProcessor, which is a
helper class to obtain operation parameters as specific data types
Cyclos 4 PRO Documentation
47
There are no expected return values for this script.
Examples
Pay taxi with an SMS message
In this example SMS operation, users can pay taxi drivers via SMS. It expects a single transfer
type for the SMS operations channel to be enabled, and the user performing the operation
needs to have permission to perform that payment. Besides, a custom profile field with
internal name taxiId of type single line text, and marked as unique needs to be enabled for
the product of taxi owners. Then, in the configuration details, in the channels tab, enable SMS
operations and add an operation with alias taxi and the selected script. Then, customers can
perform the payment by sending an sms in the format: taxi <taxi id> <amount>
import
import
import
import
import
import
import
import
org.cyclos.model.ValidationException
org.cyclos.model.banking.TransferException
org.cyclos.model.banking.transactions.PerformPaymentDTO
org.cyclos.model.banking.transactions.PerformPaymentData
org.cyclos.model.messaging.sms.OutboundSmsType
org.cyclos.model.system.fields.CustomFieldVO
org.cyclos.model.users.fields.UserCustomFieldValueVO
org.cyclos.model.users.users.UserLocatorVO
// Read the parameters
String taxiId = parameterProcessor.nextString("taxiId")
BigDecimal amount = parameterProcessor.nextDecimal("amount")
// Find the user by taxi id
def locator = new UserLocatorVO()
locator.fieldValue = new UserCustomFieldValueVO([
field: new CustomFieldVO([internalName: "taxiId"]),
stringValue: taxiId
])
// Find the payment type
PerformPaymentData data = transactionService.getPaymentData(
phone.user, locator)
if (data.paymentTypes?.size == 0) {
throw new ValidationException("No possible payment types")
}
// Perform the payment
def pmt = new PerformPaymentDTO()
pmt.amount = amount
pmt.from = data.from
pmt.to = data.to
pmt.type = data.paymentTypes[0]
try {
vo = paymentService.perform(pmt)
outboundSmsHandler.send(phone,
"The payment was successful",
OutboundSmsType.SMS_OPERATION_RESPONSE)
// Also notify the taxi, for example, by connecting to the
// taxi company system, which notifies the taxi driver...
Cyclos 4 PRO Documentation
48
} catch (TransferException e) {
outboundSmsHandler.send(phone,
"The payment couldn't be performed",
OutboundSmsType.SMS_OPERATION_RESPONSE)
}
Outbound SMS handling
These scripts are invoked to send SMS messages. By default, Cyclos connects to gateways
via HTTP POST / GET, which can be set in the configuration. However, the sending can be
customized (or totally replaced) via a script. As in most cases the custom sending just wants
to customize some aspects of the sending, not all, it is possible that the script just creates
a subclass of org.cyclos.impl.utils.sms.GatewaySmsSender, customizing some aspects of it
(for example, by overridding the buildRequest method and adding some headers, or the
resolveVariables method to have some additional variables which can be sent in the POST
body).
Bound variables:
• configuration: The org.cyclos.impl.system.ConfigurationAccessor
• phone: The org.cyclos.entities.users.MobilePhone. May be null, if is a reply to an
unregistered user.
• phoneNumber: The international phone number, in the E.164 standard string. Never null.
• message: The SMS message to send
Return value:
• An org.cyclos.model.messaging.sms.OutboundSmsStatus enum value
• A string which represents the exact name of an OutboundSmsStatus enum value
• If null is returned, it is assumed a sending success
Examples
Sending SMS requests as XML
This example posts the SMS message as XML to the gateway, and awaits the response before
returning the status:
import static groovyx.net.http.ContentType.*
import static groovyx.net.http.Method.*
import groovyx.net.http.HTTPBuilder
import java.util.concurrent.CountDownLatch
import org.cyclos.model.messaging.sms.OutboundSmsStatus
// Read the gateway URL from the configuration
Cyclos 4 PRO Documentation
49
def url = configuration.outboundSmsConfiguration.gatewayUrl
// Send the POST request
def http = new HTTPBuilder(url)
CountDownLatch latch = new CountDownLatch(1)
def error = false
http.request(POST, XML) {
// Pass the body as a closure - parsed as XML
body = {
"sms-message" {
"destination-phone" phoneNumber
text message
}
}
response.success = { resp, xml ->
latch.countDown()
}
response.failure = { resp ->
error = true
latch.countDown()
}
}
//Await for the response
latch.await()
return error ? OutboundSmsStatus.SUCCESS : OutboundSmsStatus.UNKNOWN_ERROR
Inbound SMS handling
These scripts are invoked when a gateway sends SMS messages to Cyclos. There are two
functions in this script: one to generate the gateway response and another one to resolve
basic SMS data from an inbound HTTP request. Both functions are optional, defaulting to the
normal behavior (when not using a script).
The common bound variables are:
• configuration: The org.cyclos.impl.system.ConfigurationAccessor for the inbound SMS
• channelConfiguration: The org.cyclos.entities.system.SmsChannelConfiguration
The functions are:
• Resolve basic SMS data: Function used to read an inbound sms request and return an object
containing the phone number, the SMS message and the splitted SMS message into parts.
Only the phone number and SMS message are required. If the message parts are empty,
it will be assumed the message will be split by spaces.
• Bound variables:
• request: The org.cyclos.model.utils.RequestInfo
• Return value:
Cyclos 4 PRO Documentation
50
• An org.cyclos.impl.utils.sms.InboundSmsBasicData instance, or a compatible Object or
Map
• If null is returned, falls back to the default processing
• Generate gateway response: Function used to determine the HTTP status code, headers
and body to be returned to the SMS gateway. It can be called either when the bare minimum
parameters – mobile phone number and sms message – were not sent by the gateway or
when the gateway has sent a valid SMS. Keep in mind that if an operation has resulted in
error, from a gateway perspective, the SMS was still delivered correctly, and the response
should be a successful one. Maybe when the bare minimum parameters weren't send,
the script could choose to return a different message. When no code is given, the default
processing will be done, returning the HTTP status code 200 with "OK" in the body.
• Bound variables:
• request: The org.cyclos.model.utils.RequestInfo Only present if the inbound SMS was
valid (there was a phone number and sms message)
• inboundSmsData: The org.cyclos.impl.utils.sms.InboundSmsData, which contains the
operation alias and parameters
• inboundSms: The org.cyclos.entities.messaging.InboundSms, which is a log of the
incoming message
• Return value:
• An org.cyclos.model.utils.ResponseInfo instance, or a compatible Object or Map
• If null is returned, falls back to the default processing
Examples
Receiving a SMS with a custom format
This example reads the phone number from a request header, and the message from the
request body:
import org.apache.commons.io.IOUtils
import org.cyclos.impl.utils.sms.InboundSmsBasicData
// Read the phone from a header, and the message from the body
InboundSmsBasicData result = new InboundSmsBasicData()
result.phoneNumber = request.headers."phone-number"
result.message = IOUtils.toString(request.body, "UTF-8")
return result
Transfer status handling
These scripts are used to determine to which status(es) a transfer may be set after the current
status. By default, if no script is used, the possible next statuses (as configured in the transfer
Cyclos 4 PRO Documentation
51
status details page) will be available. Using a script, however, allows using finer-grained
controls. For example, an specific status could be allowed only by specific administrators,
or only under special conditions (for example, checking the account balance or any other
condition).
The script code has the following variables bound (besides the default bindings):
• transfer: The org.cyclos.entities.banking.Transfer
• flow: The org.cyclos.entities.banking.TransferStatusFlow of the status being affected.
• status: The org.cyclos.entities.banking.TransferStatus
The script should return one of the following:
• A single org.cyclos.entities.banking.TransferStatus (only that status is available as next);
• An array / list / iterator of org.cyclos.entities.banking.TransferStatus (all are available as
next, possibly empty);
• Null – assumes the default behavior: the possible next configured in the status are
assumed.
Examples
Restricting a specific status for administrators
In this example, any user can change a transfer status in a given flow. However, only
administrators can set a transfer to the status with internal name finished.
import org.cyclos.model.access.Role
// Only administrators can set the status to finished
return status.possibleNext.findAll { st ->
sessionData.hasRole(Role.ADMIN) || st.internalName != "finished"
}
3.3. Solutions using scripts
Examples of solutions that require a single script can be found directly in the specific script
description page (links directly above). Solutions that need several scripts and configurations
can be found in this section.
PayPal Integration
It is possible to integrate Cyclos with PayPal, allowing users to buy units with their PayPal
account. This is done with a custom operation which allows users to confirm the payment
in PayPal and then, once the payment is confirmed, a payment from a system account
is performed to the corresponding user account, automating the process of buying units.
However, keep in mind the rates charged by PayPal, which vary according to some conditions.
Cyclos 4 PRO Documentation
52
To do so, first you'll need a PayPal premium or business account (for testing – using PayPal
sandbox – any account is enough). You'll need to go to the PayPal Developer page to create
an application, and get the client id and secret.
Then several configurations are required in Cyclos. Scripts can only be created as global
administrators switched to a network, so it is advised to use a global admin to perform the
configuration. Carefully follow each of the following steps:
Check the root URL
Make sure that the configuration for users use a correct root url. In System > System
configuration > Configurations, select the configuration set for users and make sure the Main
URL field points to the correct external URL. It will be used to generate the links which will be
sent to PayPal redirect users back to Cyclos after confirming / canceling the operation.
Enable transaction number in currency
This can be checked under System > Currencies select the currency used for this operation,
mark the Enable transfer number option and fill in the required parameters.
Create a system record type to store the client id and secret
Under System > System configuration > Record types, create a new system record type, with
the following characteristics:
• Name: PayPal Authentication
• Internal name: paypalAuth
• Display style: Single form
• Editable: yes
For this record type, create the following fields:
• Client ID
• Internal name: clientId
• Data type: Single line text
• Required: yes
• Client Secret
• Internal name: clientSecret
• Data type: Single line text
• Required: yes
• Token
• Internal name: token
Cyclos 4 PRO Documentation
53
• Data type: Single line text
• Token expiration
• Internal name: tokenExpiration
• Data type: Date
Create an user record type to store each payment information
Under System > System configuration > Record types, create a new user record type, with the
following characteristics:
• Name: PayPal payment
• Internal name: paypalPayment
• Display style: List
• Editable: checked
For this record type, create the following fields:
• Payment ID
• Internal name: paymentId
• Data type: Single line text
• Required: no
• Amount
• Internal name: amount
• Data type: Decimal
• Required: no
• Transaction
• Internal name: transaction
• Data type: Linked entity
• Linked entity type: Transaction
• Required: no
Create the library script
Under System > Tools > Scripts, create a new library script, with the following characteristics:
• Name: PayPal
• Type: Library
• Included libraries: none
Cyclos 4 PRO Documentation
54
• Parameters:
# Settings for the access token record type
auth.recordType = paypalAuth
auth.clientId = clientId
auth.clientSecret = clientSecret
auth.token = token
auth.tokenExpiration = tokenExpiration
# Settings for the payment record type
payment.recordType = paypalPayment
payment.paymentId = paymentId
payment.amount = amount
payment.transaction = transaction
# Settings for PayPal
mode = sandbox
currency = EUR
paymentDescription = Buy Cyclos units
# Settings for the Cyclos payment
amountMultiplier = 1
accountType = debitUnits
paymentType = paypalCredits
# Messages
error.invalidRequest = Invalid request
error.transactionNotFound = Transaction not found
error.transactionAlreadyApproved = The transaction was already approved
error.payment = There was an error while processing the payment. Please, try again.
error.notApproved = The payment was not approved
message.canceled = You have cancelled the operation.\nFeel free to start again if needed.
message.done = You have successfully completed the payment. Thank you.
• Script code:
import static groovyx.net.http.ContentType.*
import static groovyx.net.http.Method.*
import groovyx.net.http.HTTPBuilder
import java.util.concurrent.CountDownLatch
import
import
import
import
import
import
import
import
import
import
import
import
import
import
import
org.apache.commons.codec.binary.Base64
org.cyclos.entities.banking.PaymentTransferType
org.cyclos.entities.banking.SystemAccountType
org.cyclos.entities.users.RecordCustomField
org.cyclos.entities.users.SystemRecord
org.cyclos.entities.users.SystemRecordType
org.cyclos.entities.users.User
org.cyclos.entities.users.UserRecord
org.cyclos.entities.users.UserRecordType
org.cyclos.impl.banking.PaymentServiceLocal
org.cyclos.impl.system.ScriptHelper
org.cyclos.impl.users.RecordServiceLocal
org.cyclos.impl.utils.IdMask
org.cyclos.impl.utils.persistence.EntityManagerHandler
org.cyclos.model.EntityNotFoundException
Cyclos 4 PRO Documentation
55
import
import
import
import
import
import
org.cyclos.model.banking.accounts.SystemAccountOwner
org.cyclos.model.banking.transactions.PaymentVO
org.cyclos.model.banking.transactions.PerformPaymentDTO
org.cyclos.model.banking.transfertypes.TransferTypeVO
org.cyclos.model.users.records.RecordDataParams
org.cyclos.model.users.records.UserRecordDTO
/**
* Class used to store / retrieve the authentication information for PayPal
* A system record type is used, with the following fields: client id (string),
* client secret (string), access token (string) and token expiration (date)
*/
class PayPalAuth {
String recordTypeName
String clientIdName
String clientSecretName
String tokenName
String tokenExpirationName
SystemRecordType recordType
SystemRecord record
Map<String, Object> wrapped
public PayPalAuth(Object binding) {
def params = binding.scriptParameters
recordTypeName = params.'auth.recordType' ?: 'paypalAuth'
clientIdName = params.'auth.clientId' ?: 'clientId'
clientSecretName = params.'auth.clientSecret' ?: 'clientSecret'
tokenName = params.'auth.token' ?: 'token'
tokenExpirationName = params.'auth.tokenExpiration' ?: 'tokenExpiration'
// Read the record type and the parameters for field internal names
recordType = binding.entityManagerHandler
.find(SystemRecordType, recordTypeName)
// Should return the existing instance, of a single form type.
// Otherwise it would be an error
record = binding.recordService.newEntity(
new RecordDataParams(recordTypeId: recordType.id))
if (!record.persistent) throw new IllegalStateException(
"No instance of system record ${recordType.name} was found")
wrapped = binding.scriptHelper.wrap(record, recordType.fields)
}
public String getClientId() {
wrapped[clientIdName]
}
public void setClientId(String clientId) {
wrapped[clientIdName] = clientId
}
public String getClientSecret() {
wrapped[clientSecretName]
}
public void setClientSecret(String clientSecret) {
wrapped[clientSecretName] = clientSecret
}
public String getToken() {
wrapped[tokenName]
Cyclos 4 PRO Documentation
56
}
public void setToken(String token) {
wrapped[tokenName] = token
}
public Date getTokenExpiration() {
wrapped[tokenExpirationName]
}
public void setTokenExpiration(Date tokenExpiration) {
wrapped[tokenExpirationName] = tokenExpiration
}
}
/**
* Class used to store / retrieve PayPal payments as user records in Cyclos
*/
class PayPalRecord {
String recordTypeName
String paymentIdName
String amountName
String transactionName
UserRecordType recordType
Map<String, RecordCustomField> fields
private EntityManagerHandler entityManagerHandler
private RecordServiceLocal recordService
private ScriptHelper scriptHelper
public PayPalRecord(Object binding) {
def params = binding.scriptParameters
recordTypeName = params.'payment.recordType' ?: 'paypalPayment'
paymentIdName = params.'payment.paymentId' ?: 'paymentId'
amountName = params.'payment.amount' ?: 'amount'
transactionName = params.'payment.transaction' ?: 'transaction'
entityManagerHandler = binding.entityManagerHandler
recordService = binding.recordService
scriptHelper = binding.scriptHelper
recordType = binding.entityManagerHandler.find(UserRecordType, recordTypeName)
fields = [:]
recordType.fields.each {f -> fields[f.internalName] = f}
}
/**
* Creates a payment record, for the given user and JSON,
* as returned from PayPal's create payment REST method
*/
public UserRecord create(User user, Number amount) {
RecordDataParams newParams = new RecordDataParams(
[userId: user.id, recordTypeId: recordType.id])
UserRecordDTO dto = recordService.getDataForNew(newParams).getDTO()
Map<String, Object> wrapped = scriptHelper.wrap(dto, recordType.fields)
wrapped[amountName] = amount
// Save the record DTO and return the entity
Long id = recordService.save(dto)
return entityManagerHandler.find(UserRecord, id)
}
Cyclos 4 PRO Documentation
57
/**
* Finds the record by id
*/
public UserRecord find(Long id) {
try {
UserRecord userRecord = entityManagerHandler.find(UserRecord, id)
if (userRecord.type != recordType) {
return null
}
return userRecord
} catch (EntityNotFoundException e) {
return null
}
}
/**
* Removes the given record, but only if it is of the
* expected type and hasn't been confirmed
*/
public void remove(UserRecord userRecord) {
if (userRecord.type != recordType) {
return
}
Map<String, Object> wrapped = scriptHelper
.wrap(userRecord, recordType.fields)
if (wrapped[transactionName] != null) return
entityManagerHandler.remove(userRecord)
}
}
/**
* Class used to interact with PayPal services
*/
class PayPalService {
String mode
String baseUrl
String currency
String paymentDescription
String accountTypeName
String paymentTypeName
double multiplier
SystemAccountType accountType
PaymentTransferType paymentType
private
private
private
private
private
ScriptHelper scriptHelper
PaymentServiceLocal paymentService
IdMask idMask
PayPalAuth auth
PayPalRecord record
public PayPalService(
Object binding, PayPalAuth auth, PayPalRecord record) {
this.auth = auth
this.record = record
Cyclos 4 PRO Documentation
58
scriptHelper = binding.scriptHelper
paymentService = binding.paymentService
idMask = binding.applicationHandler.idMask
def params = binding.scriptParameters
mode = params.mode ?: 'sandbox'
if (mode != 'sandbox' && mode != 'live') {
throw new IllegalArgumentException("Invalid PayPal parameter " +
"'mode': ${mode}. Should be either sandbox or live")
}
baseUrl = mode == 'sandbox'
? 'https://api.sandbox.paypal.com' : 'https://api.paypal.com'
currency = params.currency
if (currency == null || currency.empty) {
throw new IllegalArgumentException(
"Missing PayPal parameter 'currency'")
}
EntityManagerHandler emh = binding.entityManagerHandler
accountTypeName = params.accountType
if (accountTypeName == null || accountTypeName.empty)
throw new IllegalArgumentException(
"Missing PayPal parameter 'accountType'")
paymentTypeName = params.paymentType
if (paymentTypeName == null || paymentTypeName.empty)
throw new IllegalArgumentException(
"Missing PayPal parameter 'paymentType'")
accountType = emh.find(SystemAccountType, accountTypeName)
if (!accountType.currency.transactionNumber?.used) {
throw new IllegalStateException("Currency " + accountType.currency
+ " doesn't have transaction number enabled")
}
paymentType = emh.find(
PaymentTransferType, paymentTypeName, accountType)
multiplier = Double.parseDouble(params.amountMultiplier ?: "1")
paymentDescription = params.paymentDescription ?: ""
}
/**
* Creates a payment in PayPal and the corresponding user record
*/
public Object createPayment(User user, Number amount, String callbackUrl) {
// Create the UserRecord for this payment
UserRecord userRecord = record.create(user, amount)
Long maskedId = idMask.apply(userRecord.id)
String returnUrl = "${callbackUrl}?succes=true&recordId=${maskedId}"
String cancelUrl = "${callbackUrl}?cancel=true&recordId=${maskedId}"
def jsonBody = [
intent: "sale",
redirect_urls: [
return_url: returnUrl,
Cyclos 4 PRO Documentation
59
cancel_url: cancelUrl
],
payer: [
payment_method: "paypal"
],
transactions: [
[
description: paymentDescription,
amount: [
total: amount,
currency: currency
]
]
]
]
// Create the payment in PayPal
Object json = postJson("${baseUrl}/v1/payments/payment", jsonBody)
// Update the payment id
def wrapped = scriptHelper.wrap(userRecord)
wrapped[record.paymentIdName] = json.id
return json
}
/**
* Executes a PayPal payment, and creates the payment in Cyclos
*/
public Object execute(String payerId, UserRecord userRecord) {
Object wrapped = scriptHelper.wrap(userRecord)
String paymentId = wrapped[record.paymentIdName]
BigDecimal amount = wrapped[record.amountName]
BigDecimal finalAmount = amount * multiplier
// Execute the payment in PayPal
Object json = postJson(
"${baseUrl}/v1/payments/payment/${paymentId}/execute",
[payer_id: payerId])
if (json.state == 'approved') {
// Perform the payment in Cyclos
PerformPaymentDTO dto = new PerformPaymentDTO()
dto.from = SystemAccountOwner.instance()
dto.to = userRecord.user
dto.amount = finalAmount
dto.type = new TransferTypeVO(paymentType.id)
PaymentVO vo = paymentService.perform(dto)
// Update the record, setting the linked transaction
wrapped[record.transactionName] = vo
userRecord.lastModifiedDate = new Date()
}
return json
}
/**
* Performs a synchronous request, posting and accepting JSON
*/
Cyclos 4 PRO Documentation
60
private postJson(url, jsonBody) {
def http = new HTTPBuilder(url)
CountDownLatch latch = new CountDownLatch(1)
def responseJson = null
def responseError = []
// Check if we need a new token
if (auth.token == null || auth.tokenExpiration < new Date()) {
refreshToken()
}
// Perform the request
http.request(POST, JSON) {
headers.'Authorization' = "Bearer ${auth.token}"
body = jsonBody
response.success = { resp, json ->
responseJson = json
latch.countDown()
}
response.failure = { resp ->
responseError << resp.statusLine.statusCode
responseError << resp.statusLine.reasonPhrase
latch.countDown()
}
}
latch.await()
if (!responseError.empty) {
throw new RuntimeException("Error making PayPal request to ${url}"
+ ", got error code ${responseError[0]}: ${responseError[1]}")
}
return responseJson
}
/**
* Refreshes the access token
*/
private void refreshToken() {
def http = new HTTPBuilder("${baseUrl}/v1/oauth2/token")
CountDownLatch latch = new CountDownLatch(1)
def responseJson = null
def responseError = []
http.request(POST, JSON) {
String auth = Base64.encodeBase64String((auth.clientId + ":"
+ auth.clientSecret).getBytes("UTF-8"))
headers.'Accept-Language' = 'en_US'
headers.'Authorization' = "Basic: ${auth}"
send URLENC, [
grant_type: "client_credentials"
]
response.success = { resp, json ->
Cyclos 4 PRO Documentation
61
responseJson = json
latch.countDown()
}
response.failure = { resp ->
responseError << resp.statusLine.statusCode
responseError << resp.statusLine.reasonPhrase
latch.countDown()
}
}
latch.await()
if (!responseError.empty) {
throw new RuntimeException("Error getting PayPal token, " +
"got error code ${responseError[0]}: ${responseError[1]}")
}
// Update the authentication data
auth.token = responseJson.access_token
auth.tokenExpiration = new Date(System.currentTimeMillis() +
((responseJson.expires_in - 30) * 1000))
}
}
// Instantiate the objects
PayPalAuth auth = new PayPalAuth(binding)
PayPalRecord record = new PayPalRecord(binding)
PayPalService paypal = new PayPalService(binding, auth, record)
Create the custom operation script
Under System > Tools > Scripts, create a new custom operation script, with the following
characteristics:
• Name: Buy units with PayPal
• Type: Custom operation
• Included libraries: PayPal
• Parameters: leave empty
• Script code executed when the custom operation is executed:
def result = paypal.createPayment(user, formParameters.amount, returnUrl)
def link = result.links.find {it.rel == "approval_url"}
if (link) {
return link.href + "&useraction=commit"
} else {
throw new IllegalStateException("No approval url returned from PayPal")
}
• Script code executed when the external site redirects the user back to Cyclos:
import org.cyclos.entities.users.UserRecord
Cyclos 4 PRO Documentation
62
def recordId = request.parameters.recordId as Long
def payerId = request.parameters.PayerID
// No record?
if (recordId == null) {
return "[ERROR] " +
(scriptParameters.'error.invalidRequest' ?: "Invalid request")
}
// Find the corresponding record
UserRecord userRecord = record.find(applicationHandler.idMask.remove(recordId))
if (userRecord == null) {
return "[ERROR] " +
(scriptParameters.'error.transactionNotFound' ?: "Transaction not found")
}
def wrapped = scriptHelper.wrap(userRecord)
if (request.parameters.cancel) {
// The operation has been canceled. Remove the record and send a message.
record.remove(userRecord)
return "[WARN]" + scriptParameters.'message.canceled'
?: "You have cancelled the operation.\nFeel free to start again if needed."
} else {
// Execute the payment
try {
def json = paypal.execute(payerId, userRecord)
if (json.state == 'approved') {
return scriptParameters.'message.done'
?: "You have successfully completed the payment. Thank you."
} else {
return "[ERROR] " + scriptParameters.'error.notApproved'
?: "The payment was not approved"
}
} catch (Exception e) {
return "[ERROR] " + scriptParameters.'error.payment'
?: "There was an error while processing the payment. Please, try again."
}
}
Create the custom operation
Under System > Tools > Custom operations, create a new one with the following
characteristics:
• Name: Buy units with PayPal (can be changed – will be the label displayed on the menu)
• Enabled: yes
• Scope: user
• Script: Buy units with PayPal
• Script parameters: leave empty
• Result type: External redirect
• Has file upload: no
Cyclos 4 PRO Documentation
63
• Main menu: Banking
• User management section: Banking
• Information text: you can add here some text explaining the process – it will be displayed
in the operation page
• Confirmation text: leave empty (can be used to show a dialog asking the user to confirm
before submitting, but in this case is not needed)
For this custom operation create the following field:
• Name: Amount
• Internal name: amount
• Data type: Decimal
• Required: yes
Configure the system account from which payments will be performed to users
Under System > Accounts configuration > Account types, choose the (normally unlimited)
account from which payments will be performed to users. Then set its internal name to some
meaningful name. The example configuration uses debitUnits as internal name, but it can be
changed. Save the form.
Configure the payment type which will be used on payments
Still in the details page for the account type, on the Transfer types tab, create a new Payment
transfer type with the following characteristics:
• Name: Units bought with PayPal (can be changed as desired)
• Internal name: paypalCredits (can be changed as desired, but this name is used in the
example configuration)
• Default description: Units bought using PayPal (can be changed as desired, is the
description for payments, visible in the account history)
• To: select the user account which will receive the payment
• Enabled: yes
Grant the administrator permissions
Under System > User configuration > Groups, select the Network administrators group. Then,
in the Permissions tab:
• In System > System records, make the Paypal authentication record visible and editable
• In User data > User records, make the Paypal payment visible only (not editable, as it is not
meant to be manually edited)
Cyclos 4 PRO Documentation
64
• Save the permissions
Setup the PayPal credentials
Click Reports & data > System records > Paypal authentication. If this menu entry is not
showing up, refresh the browser page (by pressing F5) and try again. Update the Client ID
and Client Secret fields exactly with the ones you got in the application you registered in the
PayPal Developer page. Remember that PayPal has a sandbox, which can be used to test the
application, and a live environment. For now, use the sandbox credentials. The other 2 fields
can be left blank. Save the record.
Once the record is properly set, if you want to remove it from the menu, you can just remove
the permission to view this system record in the adminitrator group page.
Grant the user permissions / enable the operation
In System > User configuration > Products (permissions), select the member product for users
which will run the operation. In the Custom operations field, make the Buy units with PayPal
both enabled and allowed to run. From this moment, the operation will show up for users in
the banking menu. Also on the Records enable the PayPal payment record.
Configuring the script parameters
In the PayPal library script, in parameters, there are several configurations which can be done.
All those settings can be overridden in the custom operation's script parameters, allowing
using distinct configurations for distinct operations. For example, it is possible to have distinct
operations to perform payments in distinct currencies. In that case, the script parameters for
each operation would define the currency again.
Here are some elements which can be configured:
• Internal names for the records used to store the credentials and payments.
• Paypal mode: the 'mode' settings can be either sandbox or live, indicating that operations
are performed either in a test or in the real environment. To go live, you'll need a premium
or business account in PayPal, and you need to use the live credentials (client ID and client
secret) in Cyclos.
• Payment currency: the 'currency' defines the 3-letter, ISO 4217 code for the currency in
PayPal. Sometimes, according to country-specific laws, the currency used for payments
may be limited. For example, Brazilians can only pay other Brazilians in Reais.
• Description for payments in PayPal: using the 'paymentDescription' setting.
• Amount multiplier: Sometimes it may be desired that the payment performed in Cyclos
isn't of the exact amount of the payment in PayPal. This can normally be resolved using
transfer fees, but it could also be handy to use this multiplier. If left in 1, the payment in
Cyclos will have the same amount as the one in PayPal. If greater / less than 1, the payment
Cyclos 4 PRO Documentation
65
in Cyclos will be greater / less than the one in PayPal. For example, if the multiplier is 1.05,
and the PayPal payment was 100 USD, the payment in Cyclos will have the amount 105.
Or, if the multiplier is 0.95 and the PayPal payment was 200 EUR, the payment in Cyclos
will be of 190.
• System account from which the payment will be performed to users: the 'accountType'
setting is the internal name of the system account type from which payments will be
performed, as explained previously. Make sure it is exactly the same as set in the account
type.
• Payment type: the 'paymentType' setting is the internal name of the payment transfer type
used. Make sure it is exactly the same internal name set in the payment type that was
created in previous steps.
• Messages: several messages (displayed to the user) can be set / translated here.
Other considerations
Make sure the payment type is from an unlimited account, so payments in Cyclos won't
fail because of funds. The way the example script is done, first the payment is executed in
PayPal and, if authorized, a payment is made in Cyclos. If this payment fails, there could be
an inconsistency between the Cyclos account an the PayPal payment. Improvements could
be done to the script, to handle the case where the Cyclos payment failed. To do this, the
ScriptHelper.addOnRollbackTransactional method can be used, for example, to notify some
specific administrator or to refund the PayPal payment. But this handling is outside the scope
of this example.
Loan module
Loan features in Cyclos 4 can be implemented using scripting. As loans tend to be very specific
for each project, having it implemented with scripts brings the possibility to tailor the behavior
to each project.
The example provided works as follows:
• An administrator has a custom operation to grant the loan, setting the amount, number of
installments and first installment date.
• The loan is a payment from a system account to an user. It has a status, which can be either
open or closed.
• The same custom operation also performs a scheduled payment from the user to system,
with each installment amount and due date corresponding to the loan installments. This
scheduled payment has (with a custom field) a link to the original loan. Also, the loan
payment has a link to the scheduled payment, making it easy to navigate between them.
• Each installment will be processed at the respective due date, allowing users to repay the
loan with internal units. The administrator can, however, mark individual installments as
Cyclos 4 PRO Documentation
66
settled, which means the installment won't be repaid internally, but with some other way
(for example, with money or using other Cyclos payments).
• Once the scheduled payment is closed, an extension point updates the status of the original
payment to closed.
In order to configure the loan script, follow carefully each of the following steps:
Enable transaction number in currency
This can be checked under System > Currencies select the currency used for this operation,
mark the Enable transfer number option and fill in the required parameters.
Create the transfer status flow
Under System > Accounts configuration > Transfer status flows, create a new one, with the
following characteristics:
• Name: Loan status (can be changed as desired)
• Internal name: loan (can be changed as desired, but this name is used in the example
configuration)
After saving, create the following statuses:
• Closed (can be changed as desired)
• Internal name: closed
• Open (can be changed as desired)
• Internal name: open
• Possible next statuses: Closed
Create the payment custom fields
Under System > Accounts configuration > Payment fields, create a new one, with the following
fields:
• Loan
• Name: Loan (can be changed as desired)
• Internal name: loan (can be changed as desired, but this name is used in the example
configuration)
• Data type: Linked entity
• Linked entity type: Transaction
• Required: yes
• Repayment
Cyclos 4 PRO Documentation
67
• Name: Repayment (can be changed as desired)
• Internal name: repayment (can be changed as desired, but this name is used in the
example configuration)
• Data type: Linked entity
• Linked entity type: Transaction
• Required: no
Configure the system account from which payments will be performed to users
Under System > Accounts configuration > Account types, choose the (normally unlimited)
account from which payments will be performed to users. Then set its internal name to some
meaningful name. The example configuration uses debitUnits as internal name, but it can be
changed later. Save the form.
Create the payment type which will be used to grant the loan
Still in the system account type details page for the account type, on the Transfer types tab,
create a new Payment transfer type with the following characteristics:
• Name: Loan (can be changed as desired)
• Internal name: loanGrant (can be changed as desired, but this name is used in the example
configuration)
• Default description: Loan grant (can be changed as desired, is the description for payments,
visible in the account history)
• To: select the user account which will receive the payment
• Transfer status flows: Loan status
• Initial status for Loan status: Open
• Enabled: yes
After saving, on the Payment fields tab, add the custom field named Repayment.
Configure the user account which will receive loans
Under System > Accounts configuration > Account types, choose the user account which
will receive payments. Then set its internal name to some meaningful name. The example
configuration uses userUnits as internal name, but it can be changed later. Save the form.
Create the payment type which will be used to repay the loan
Still in the user account type details page, on the Transfer types tab, create a new Payment
transfer type with the following characteristics:
• Name: Loan repayment (can be changed as desired)
Cyclos 4 PRO Documentation
68
• Internal name: loanRepayment (can be changed as desired, but this name is used in the
example configuration)
• Default description: Loan repayment (can be changed as desired, is the description for
payments, visible in the account history)
• To: select the system account which granted the loan
• Enabled: yes
• Allows scheduled payment: yes
• Max installments on scheduled payments: 36 (any value greater than zero is fine)
• Show scheduled payments to receiver: yes
• Reserve total amount on scheduled payments: no
After saving, on the Payment fields tab, add the custom field named Loan.
Create the library script
Under System > Tools > Scripts, create a new library script, with the following characteristics:
• Name: Loan
• Type: Library
• Included libraries: none
• Parameters:
# Loan configuration
loan.account = debitUnits
loan.type = loanGrant
#loan.description =
# Repayment configuration
repayment.account = userUnits
repayment.type = loanRepayment
#repayment.description
# Payment custom fields
field.loan = loan
field.repayment = repayment
# Monthly compound interest rate (zero for none)
monthlyInterestRate = 0
# Transfer status configuration
status.flow = loan
status.open = open
status.closed = closed
# Custom operation configuration
operation.amount = amount
operation.installments = installments
Cyclos 4 PRO Documentation
69
operation.firstDueDate = firstDueDate
# Messages
message.invalidInstallments = The number of installments is invalid
message.invalidLoanAmount = Invalid loan amount
message.invalidFirstDueDate = The first due date cannot be lower than tomorrow'
message.loanGranted = The loan was successfully granted
• Script code:
import
import
import
import
import
import
import
import
import
import
import
import
import
import
import
import
import
import
import
import
import
import
import
import
import
import
import
import
import
org.cyclos.entities.banking.Payment
org.cyclos.entities.banking.PaymentTransferType
org.cyclos.entities.banking.ScheduledPayment
org.cyclos.entities.banking.SystemAccountType
org.cyclos.entities.banking.TransactionCustomField
org.cyclos.entities.banking.Transfer
org.cyclos.entities.banking.TransferStatus
org.cyclos.entities.banking.TransferStatusFlow
org.cyclos.entities.banking.UserAccountType
org.cyclos.entities.users.User
org.cyclos.impl.banking.PaymentServiceLocal
org.cyclos.impl.banking.ScheduledPaymentServiceLocal
org.cyclos.impl.banking.TransferStatusServiceLocal
org.cyclos.impl.system.ConfigurationAccessor
org.cyclos.impl.system.ScriptHelper
org.cyclos.impl.utils.persistence.EntityManagerHandler
org.cyclos.model.ValidationException
org.cyclos.model.banking.accounts.SystemAccountOwner
org.cyclos.model.banking.transactions.PaymentVO
org.cyclos.model.banking.transactions.PerformPaymentDTO
org.cyclos.model.banking.transactions.PerformScheduledPaymentDTO
org.cyclos.model.banking.transactions.ScheduledPaymentInstallmentDTO
org.cyclos.model.banking.transactions.ScheduledPaymentVO
org.cyclos.model.banking.transfers.TransferVO
org.cyclos.model.banking.transferstatus.ChangeTransferStatusDTO
org.cyclos.model.banking.transferstatus.TransferStatusVO
org.cyclos.model.banking.transfertypes.TransferTypeVO
org.cyclos.server.utils.DateHelper
org.cyclos.utils.BigDecimalHelper
class Loan {
Map<String, Object> config
EntityManagerHandler entityManagerHandler
PaymentServiceLocal paymentService
ScheduledPaymentServiceLocal scheduledPaymentService
TransferStatusServiceLocal transferStatusService
ScriptHelper scriptHelper
ConfigurationAccessor configuration
double monthlyInterestRate
SystemAccountType systemAccount
UserAccountType userAccount
PaymentTransferType loanType
PaymentTransferType repaymentType
TransactionCustomField loanField
TransactionCustomField repaymentField
Cyclos 4 PRO Documentation
70
TransferStatusFlow flow
TransferStatus open
TransferStatus closed
Loan(binding) {
config = [:]
def params = binding.scriptParameters
[
'loan.account': 'systemAccount',
'loan.type': 'loanGrant',
'loan.description': null,
'repayment.account': 'userUnits',
'repayment.type': 'loanRepayment',
'repayment.description': null,
'field.loan': 'loan',
'field.repayment': 'repayment',
'monthlyInterestRate' : null,
'status.flow': 'loan',
'status.open': 'open',
'status.closed': 'closed',
'operation.amount': 'amount',
'operation.installments': 'installments',
'operation.firstDueDate': 'firstDueDate',
'message.invalidInstallments':
'The number of installments is invalid',
'message.invalidLoanAmount': 'Invalid loan amount',
'message.invalidFirstDueDate':
'The first due date cannot be lower than tomorrow',
'message.loanGranted':
'The loan was successfully granted to the user'
].each { k, v ->
def value = params[k] ?: v
config[k] = value
}
entityManagerHandler = binding.entityManagerHandler
paymentService = binding.paymentService
scheduledPaymentService = binding.scheduledPaymentService
transferStatusService = binding.transferStatusService
scriptHelper = binding.scriptHelper
configuration = binding.sessionData.configuration
systemAccount = entityManagerHandler.find(
SystemAccountType, config.'loan.account')
if (systemAccount.currency.transactionNumber == null
|| !systemAccount.currency.transactionNumber.used) {
throw new IllegalStateException(
"The currency ${systemAccount.currency.name} doesn't "
+ "have transaction number enabled")
}
loanType = entityManagerHandler.find(
PaymentTransferType, config.'loan.type', systemAccount)
userAccount = entityManagerHandler.find(
UserAccountType, config.'repayment.account')
repaymentType = entityManagerHandler.find(
PaymentTransferType, config.'repayment.type', userAccount)
if (!repaymentType.allowsScheduledPayments) {
throw new IllegalStateException("The repayment type " +
"${repaymentType.name} doesn't allows scheduled payment")
Cyclos 4 PRO Documentation
71
}
loanField = entityManagerHandler.find(
TransactionCustomField, config.'field.loan')
repaymentField = entityManagerHandler.find(
TransactionCustomField, config.'field.repayment')
if (!loanType.customFields.contains(repaymentField)) {
throw new IllegalStateException("The loan type ${loanType.name} "
+ "doesn't contain the custom field ${repaymentField.name}")
}
if (!repaymentType.customFields.contains(loanField)) {
throw new IllegalStateException("The repayment type "
+ "${repaymentType.name} doesn't contain the "
+ "custom field ${loanField.name}")
}
flow = entityManagerHandler.find(
TransferStatusFlow, config.'status.flow')
open = entityManagerHandler.find(
TransferStatus, config.'status.open', flow)
closed = entityManagerHandler.find(
TransferStatus, config.'status.closed', flow)
monthlyInterestRate = config.monthlyInterestRate?.toDouble() ?: 0
}
def BigDecimal calculateInstallmentAmount(BigDecimal amount,
int installments, Date grantDate, Date firstInstallmentDate) {
// Calculate the delay
Date shouldBeFirstExpiration = grantDate + 30
int delay = firstInstallmentDate - shouldBeFirstExpiration
if (delay < 0) {
delay = 0
}
double interest = monthlyInterestRate / 100.0
double numerator = ((1 + interest) **
(installments + delay / 30.0)) * interest
double denominator = ((1 + interest) ** installments) - 1
BigDecimal result = amount * numerator / denominator
return BigDecimalHelper.round(result, systemAccount.currency.precision)
}
def grant(User user, formParameters) {
BigDecimal loanAmount = formParameters[config.'operation.amount']
int installments = formParameters[config.'operation.installments']
Date firstDueDate = formParameters[config.'operation.firstDueDate']
Date minDate = DateHelper.shiftToNextDay(
new Date(), configuration.timeZone)
if (installments < 1 || installments > repaymentType.maxInstallments)
throw new ValidationException(config.'message.invalidInstallments')
if (loanAmount < 1)
throw new ValidationException(config.'message.invalidLoanAmount')
if (firstDueDate < minDate)
throw new ValidationException(config.'message.invalidFirstDueDate')
// Grant the loan
PaymentVO loanVO = paymentService.perform(new PerformPaymentDTO([
from: SystemAccountOwner.instance(),
to: user,
Cyclos 4 PRO Documentation
72
type: new TransferTypeVO(loanType.id),
amount: loanAmount,
description: config.'loan.description'
]))
Payment loan = entityManagerHandler.find(Payment, loanVO.id)
// Ensure the initial status is correct
Transfer loanTransfer = loan.transfer
if (loanTransfer == null) {
throw new IllegalStateException(
"The loan was not processed (probably pending authorization)")
}
TransferStatus currentStatus = loanTransfer.getStatus(flow)
if (currentStatus != open) {
throw new IllegalStateException(
"The initial status for flow ${flow.name} in ${loanType.name} "
+ "is not the expected one: ${open.name}, "
+ "but ${currentStatus} instead")
}
// Perform the repayment scheduled payment
PerformScheduledPaymentDTO dto = new PerformScheduledPaymentDTO()
def bean = scriptHelper.wrap(dto, [loanField])
bean.from = user
bean.to = SystemAccountOwner.instance()
bean.type = repaymentType
bean.amount = loanAmount
bean.description = config.'repayment.description'
bean.installmentsCount = installments
bean.firstInstallmentDate = firstDueDate
bean[loanField.internalName] = loan
// Interest
if (monthlyInterestRate > 0.00001) {
BigDecimal installmentAmount = calculateInstallmentAmount(
loanAmount, installments, new Date(), firstDueDate)
dto.installments = []
Date dueDate = firstDueDate
for (int i = 0; i < installments; i++) {
def installment = new ScheduledPaymentInstallmentDTO()
def instBean = scriptHelper.wrap(installment)
instBean.dueDate = dueDate
instBean.amount = installmentAmount
dto.installments << installment
dueDate += 30
}
bean.amount = installmentAmount * installments
}
ScheduledPaymentVO repaymentVO = scheduledPaymentService.perform(dto)
ScheduledPayment repayment = entityManagerHandler.find(
ScheduledPayment, repaymentVO.id)
// Update the loan with the repayment link
bean = scriptHelper.wrap(loan, [repaymentField])
bean[repaymentField.internalName] = repayment
}
Cyclos 4 PRO Documentation
73
def close(ScheduledPayment scheduledPayment) {
Payment loan = scriptHelper.wrap(scheduledPayment)
[loanField.internalName]
Transfer loanTransfer = loan.transfer
TransferStatus status = loanTransfer.getStatus(flow)
if (status != closed) {
// The loan was not closed: close it
transferStatusService.changeStatus(new ChangeTransferStatusDTO([
transfer: new TransferVO(loanTransfer.id),
newStatus: new TransferStatusVO(closed.id)
]))
}
}
}
Loan loan = new Loan(binding)
Create the custom operation script
Create a new script for the custom operation, with the following characteristics:
• Name: Grant loan
• Type: Custom operation
• Included libraries: Loan
• Parameters: leave empty
• Script code executed when the custom operation is executed:
loan.grant(user, formParameters)
return loan.config.'message.loanGranted'
Create the extension point script
Create a new script for the transaction extension point, with the following characteristics:
• Name: Loan closing
• Type: Extension point
• Included libraries: Loan
• Parameters: leave empty
• Script code executed when the data is saved:
import org.cyclos.model.ValidationException
import org.cyclos.model.banking.transactions.ScheduledPaymentStatus
if (transaction.status == ScheduledPaymentStatus.CANCELED) {
// Should never cancel a loan scheduled payment
throw new ValidationException("Cannot cancel a loan")
} else if (transaction.status == ScheduledPaymentStatus.CLOSED) {
// Close the loan
Cyclos 4 PRO Documentation
74
loan.close(transaction)
}
Create the custom operation
Under System > Tools > Custom operations, create a new one, with the following
characteristics:
• Name: Grant loan (can be changed, is the label displayed to users)
• Enabled: yes
• Scope: User
• Script: Grant loan
• Script parameters: leave empty
• Result type: Notification
• Has file upload: no
• Main menu: Banking
• User management section: Banking
• Information text: you can add here some text explaining the process – it will be displayed
in the operation page
• Confirmation text: add here some text which will be displayed in a confirmation dialog
before granting the loan
After saving, create the following fields:
• Amount
• Internal name: amount
• Data type: Decimal
• Required: yes
• Installment count
• Internal name: installments
• Data type: Integer
• Required: yes
• First due date
• Internal name: firstDueDate
• Data type: Date
• Required: yes
Cyclos 4 PRO Documentation
75
Create the extension point
Under System > Tools > Extension points, create a new of type Transaction, with the following
characteristics:
• Name: Close loan
• Type: Transaction
• Enabled: yes
• Transfer types: Units account – Loan repayment (choose the loan repayment type)
• Events: Change status
• Script: Loan closing
• Script parameters: leave empty
Grant the administrator permissions
Under System > User configuration > Groups, select the Network administrators group. Then,
in the Permissions tab:
• Under User management > Run custom operations over users, check the Grant loan
operation and save
• Under Accounts > Transfer status flows, make Loan visible, but not editable.
Enable the custom operation for users which will be able to receive loans
In System > User configuration > Products (permissions), select the member product for users
which will be able to receive loans. In the Custom operations field, make the Grant loan
operation enabled. Leave the run checkbox unchecked (or users would be able to grant loans
to themselves!).
You can permit users to to repay loan installments anticipated in Units. For this you have to
check in the member product 'process installment' and the user need to have permissions
to make a payment of the transaction type used for the loan repayments.
Cyclos 4 PRO Documentation
76
4. External login
Starting with Cyclos 4.2, using web services together with the right configuration, it is possible
to add a Cyclos login form to an external website. The user types in his/hers Cyclos username
and password in that form and, after a successful login, is redirected to Cyclos, where the
session will be already valid, and the user can perform the operations as usual. After the user
clicks logout, or his/hers session expires, the user is redirected back to the external website.
4.1. The following aspects should be considered:
• It is needed to have an administrator whose group is granted the permission "Login users
via web services". This is needed because the website will relay logins from users their
clients to Cyclos.
• The website needs to have that administrator's username and password configured in
order to make the web services call. It is planned for Cyclos 4.3 the creation of access clients,
which will allow using a separated key instead of the username / password.
• It is a good practice to create a separated configuration for that administrator. That
configuration should have an IP address whitelist for the web services channel. Doing that,
no other server, even if the adminitrator username / password is known by someone else,
will be able to perform such operations.
• The Cyclos configuration for users needs the following settings:
• Redirect login to URL: This is the URL of the external website which contains the login
form. This is used to redirect the user when his session expires and a new login is needed,
or when the user navigates directly to some URL in Cyclos (as guest) and then clicks
"Login";
• URL to redirect after logout: This is the URL where the user will be redirected after
clicking "Logout" in Cyclos. It might be the same URL as the one for redirect login, but
not necessarily.
• Finally, the web service code needs to be created, and deployed to the website. Here is an
example, which receives the username and password parameters, calls the web service to
create a session for the user (passing his remote address), redirecting the user to Cyclos.
<?php
// Configure Cyclos and obtain an instance of LoginService
require_once 'configureCyclos.php';
$loginService = new Cyclos\LoginService();
// Set the parameters
$params = new stdclass();
$params->user = array("principal" => $_POST['username']);
$params->password = $_POST['password'];
$params->remoteAddress = $_SERVER['REMOTE_ADDR'];
Cyclos 4 PRO Documentation
77
// Perform the login
try {
$result = $loginService->loginUser($params);
} catch (Cyclos\ConnectionException $e) {
echo("Cyclos server couldn't be contacted");
die();
} catch (Cyclos\ServiceException $e) {
switch ($e->errorCode) {
case 'VALIDATION':
echo("Missing username / password");
break;
case 'LOGIN':
echo("Invalid username / password");
break;
case 'REMOTE_ADDRESS_BLOCKED':
echo("Your access is blocked by exceeding invalid login attempts");
break;
default:
echo("Error while performing login: {$e->errorCode}");
break;
}
die();
}
// Redirect the user to Cyclos with the returned session token
header("Location: "
. Cyclos\Configuration::getRootUrl()
. "?sessionToken="
. $result->sessionToken);
4.2. Important notes
• In case there is a wrong configuration for the "Redirect login to URL" setting, it won't be
possible anymore to login to Cyclos. In that case, if the configuration problem is within
a network, it is possible to use a global administrator to login in global mode (using the
<server-root>/global/login URL), then switch to the network and fix the configuration. If
the configuration error is in global mode, you can use a special URL to prevent redirect:
<server-root>/global/login!noRedirect=true . However, this flag only works in global mode,
to prevent end-users from using it to bypass the redirect.
• Users should never have username / password requested in a plain HTTP connection.
Always use a secure (HTTPS) connection. Also, just having an iframe with the form on a
secure page, where the iframe itself is displayed in a plain page would encrypt the traffic,
but browsers won't show the page as secure. Users won't notice that page as secure, could
refuse to provide credentials in such situation.
Cyclos 4 PRO Documentation
78
4.3. Creating an alternate frontend to Cyclos
It is possible to not only place a login form in an external website, but to create an entire
fronted for users to interact with Cyclos. At first glimpse, this can be great, but consider the
following:
• It is a very big effort to create a frontend, as there are several Cyclos services involved, and it
might not be clear without a deep analysis on the API which service / method / parameters
should be used on each case.
• The API will change. Even if we try not to break compatibility, it is possible that changes
between 4.x to 4.y will contain (sometimes incompatible) changes to the API.
• You will always have a limited subset of the functionality Cyclos offers. You may think that
only the very basic features are needed, there will inevitably be the need for more features,
and the custom frontend will need to grow. By using Cyclos standard web, all this comes
automatically.
Neverthless, some (large) organizations might find it is better to provide their users with a
single, integrated interface. In that case the application server of that interface will be the
only one interacting with Cyclos (i.e, users won't directly browse the Cyclos interface). The
application will relay web service calls to Cyclos in behalf of users.
To accomplish that, it is needed to first login users in the same way as explained in
the previous section. However, after the login is complete, instead of redirecting users to
Cyclos, the application needs to store the session token, and probably the user id (as some
operations requires passing the logged user id) – both data received after logging in – in
a session (in the interface application server). Then, the next web service requests should
be sent using that session token and client remote address, instead of the administrator
credentials. The way of passing that data depends on the web service access type being used:
• Java clients: Create another HttpServiceFactory, using a stateful HttpServiceInvocationData.
Here is an example:
import java.util.List;
import
import
import
import
import
import
import
import
import
import
import
org.cyclos.model.access.LoggedOutException;
org.cyclos.model.access.channels.BuiltInChannel;
org.cyclos.model.banking.accounts.AccountSummaryVO;
org.cyclos.model.users.users.UserLocatorVO;
org.cyclos.model.users.users.UserLoginDTO;
org.cyclos.model.users.users.UserLoginResult;
org.cyclos.model.users.users.UserVO;
org.cyclos.server.utils.HttpServiceFactory;
org.cyclos.server.utils.HttpServiceInvocationData;
org.cyclos.services.access.LoginService;
org.cyclos.services.banking.AccountService;
/**
* Cyclos web service example: logs-in an user via web services.
Cyclos 4 PRO Documentation
79
* This is useful when creating an alternative front-end for Cyclos.
*/
public class LoginUser {
public static void main(String[] args) throws Exception {
// This LoginService has the administrator credentials
LoginService LoginService = Cyclos.getServiceFactory().getProxy(
LoginService.class);
String remoteAddress = "192.168.1.200";
// Set the login parameters
UserLoginDTO params = new UserLoginDTO();
UserLocatorVO locator = new UserLocatorVO(UserLocatorVO.PRINCIPAL,
"c1");
params.setUser(locator);
params.setPassword("1234");
params.setRemoteAddress(remoteAddress);
params.setChannel(BuiltInChannel.MAIN.getInternalName());
// Login the user
UserLoginResult result = LoginService.loginUser(params);
UserVO user = result.getUser();
String sessionToken = result.getSessionToken();
System.out.println("Logged-in" + user.getName()
+ " with session token = " + sessionToken);
// Do something as user. As the session token is only valid per ip
// address, we need to pass-in the client ip address again
HttpServiceInvocationData sessionInvocationData = HttpServiceInvocationData
.stateful(sessionToken, remoteAddress);
// The services acquired by the following factory will carry on the
// user session data
HttpServiceFactory userFactory = Cyclos
.getServiceFactory(sessionInvocationData);
AccountService accountService = userFactory
.getProxy(AccountService.class);
List<AccountSummaryVO> accounts = accountService.getAccountsSummary(
user, null);
for (AccountSummaryVO account : accounts) {
System.out.println(account.getName() + ", balance: "
+ account.getStatus().getBalance());
}
// Logout. There are 2 possibilities:
// - Logout as administrator:
LoginService.logoutUser(sessionToken);
// - OR logout as own user:
try {
userFactory.getProxy(LoginService.class).logout();
} catch (LoggedOutException e) {
// already logged out
}
}
}
Cyclos 4 PRO Documentation
80
• PHP
clients:
In
the
configuration
file,
instead
of
calling
Cyclos
\Configuration::setAuthentication($username, $password), call the following: Cyclos
\Configuration::setSessionToken($sessionToken)
and
Cyclos
\Configuration::setForwardRemoteAddress(true), which will automatically send the
$_SERVER['REMOTE_ADDR'] value on requests.
• WEB-RPC: If sending JSON requests directly, instead of passing the Authentication header
with the username / password, pass the following headers: Session-Token and RemoteAddress.
Cyclos 4 PRO Documentation
81