1
11 Planning and mounting the charger
This section will provide you information’s about configuring and installing your charger. Make sure
that you are aware of local rules and safety measurements.
11.1 Required power draw
Before connecting your batteries to the charger, always check the required charge current and voltage. As a rule of thumb the charge current should reach about 10% of battery capacity. If your battery
has a capacity of 100Ah a charge current of 10A is perfect.
The charger is protected against overload and short circuit. It will switch off automatically when overload is applied. As ambient temperature is above 20°C the chargers nominal power may be smaller
due to reduced cooling.
Using the charger in high altitudes may also reduce nominal power of the charger because of less
heat discharge. As a rule of thumb, the reduction of nominal power is approximately 1.5% per 100m
elevation.
11.2 Installation
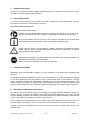
These units must be only installed by qualified, authorized and trained personnel familiar with the
locally applicable standards and taking into consideration all relevant safety guidelines and measures!
Before installing the unit check for correct DC-Voltage and power level of the charger.
The Charger may be installed in any position. Install the charger in a dry, well ventilated and dust free
location. It must be installed out of reach for unauthorized personnel especially children’s. Do not install the charger in the same compartment as the batteries.
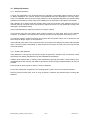
Never use or install the charger in locations where there is gas or explosive danger!
For proper cooling of the Charger ensure that the airflow is not obstructed and keep a clearance distance of 2.5cm to other units. If the charger is installed in a closed compartment the nominal power
may be reduced.
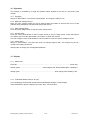
In order to keep the battery cables as short as possible (max. 3m) locate the charger close to the DCDistribution or battery. Be aware that during charging of batteries an explosive gas can be generated.
11.3
Wiring
Position of the switch on the front panel must be OFF.
Caution! First connect the assembled DC-Cables with the battery. Always connect first the negative
wire (black) with the battery!
Red = positive (+)
Black = negative (-)
In a second step connect it with the mains power. The charger must be plugged-in to an earthed
socket outlet.
The way of wiring has influence on the EMC behaviour of the system. Most problems using charger
are because of unprofessional wiring. If problems occur, lay the DC-cables in a metal duct. If this is
not possible the cables should be twisted and lay parallel to a metal bar.
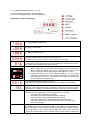
To thin cable or loose connections can cause dangerous overheating of cables or terminals. Always
use DC cables of the correct size to avoid fire and other damage.
If you connect other consumers to the battery contact your dealer.
Manual_EASY_Charger_1245_2423.doc
7/12
Version 2.4