1
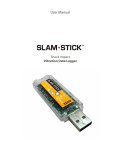
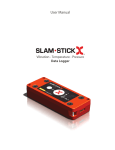
Quick Start Guide
Midé recommends reading the User Manual prior to using the Slam Stick X. This Quick Start Guide may be used as an
overview and reference document on the proper use of the device.
1. Plug in to charge
a. Connect the Slam Stick X to a computer via the USB cable provided.
b. Charge your device - refer to “Charging Instructions.” in the User Manual.
2. Copy files to Computer
Copy Documentation, and Software folders to a directory on your computer. The Documentation folder contains
the User Manual, Data Sheet, and Quick Start Guide.
3. Open software
Open Slam Stick Lab.exe file from the Software folder on your computer.
4. Set rates & triggers
a. Refer to the section entitled “Configuration” in the User Manual for a detailed parameters explanation.
b. Refer to “Configure Device” in the User Manual for instructions and screen views.
5. Mount to surface
Prior to mounting the device, ensure that the intended environment is suitable by referring to the section
entitled “Operational Environment” in the User Manual.
The section entitled “Mounting, Instructions,” in the User Manual provides detailed mounting instructions.
a. The most common form of mounting the device is with the Midé recommended double-sided tape
(provided with your kit). Due to the low mass of the product and the strength of the tape, this mounting
method is sufficient for most applications.
b. Three mounting holes of the Slam Stick X allow it to be mounted with 4-40 bolts (included with your kit),
allowing the user to better align the device in a desired orientation.
6. Press X-button
Press the X-button to begin recording. If you have configured the device to wait for a trigger, the device will
begin waiting after the button is pressed. Refer to the “LED Status” section in the User Manual.
7. Plug in to view data
Following completion, the data recorded by Slam Stick X can be downloaded and viewed using Midé’s Slam
Stick Lab software. Details of the operation of this software are provided in the section entitled “Slam Stick Lab
Overview” in the User Manual.
The Stick Lab software also enables the user to export the data to a CSV file if desired.
www.mide.com
Quick Start Guide
1
LED Status Indication
The LED indicator designates battery life, specifies operating modes, and indicates potential errors.
When Connected to Power
LED
Battery Status
Action
Fully charged.
Disconnect from power and use the device for data
logging.
Charging.
Continue charging.
Battery cannot be charged due
to extreme temperature.
Allow the device to reach the allowed charging
temperature range (0°C to 45°C). If LED indication
persists, contact Midé for assistance.
Device not operating properly,
or not connected correctly.
Check connection, if problem persists, contact Midé for
assistance.
During Battery Check - Hold down button until LED turns off
LED
Battery Charge Level
Action
Above 75%.
The device should be capable to perform as desired.
Between 20 and 75%.
The device will work; but for a reduced period. Charge if
longer recording is desired.
Below 20%
Charge the device before operation or storage.
Battery is dead.
Charge the device before operation or storage.
During Operation
LED
Blinking Mode
Status
Action
No Light
Device is off or sleeping.
Mount the device and press the button,
or store the device.
2 Sec. Blinking Green to Yellow
Device is waiting for a
time-based trigger.
Allow it to wait for trigger or hold
down button to skip to next trigger or
recording.
1 Sec. Blinking Green to Yellow
Device is waiting for a
pressure or temperature
trigger.
Allow it to wait for trigger or hold
down button to skip to next trigger or
recording.
Rapid Blinking Green to Yellow
Device is waiting for an
acceleration trigger.
Allow it to wait for trigger or hold down
button to skip to recording.
Rapid Blinking Green
Device is recording.
Battery level is above 75%.
Allow it to continue recording or press
X-Button to end recording.
Rapid Blinking Yellow
Device is recording.
Battery level is below 75%.
Allow it to continue recording or press
button to end recording.
Rapid Blinking Red
Device is recording.
Battery level is below 20%.
Allow it to continue recording or press
button to end recording.
If you experience any issues, please refer to the “Troubleshooting” section in the User Manual.
www.mide.com
Quick Start Guide
2