1
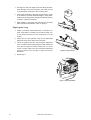
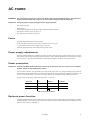
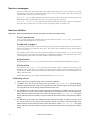
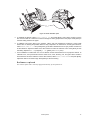
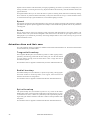
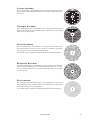
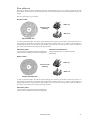
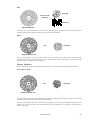
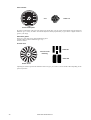
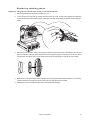
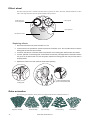
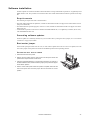
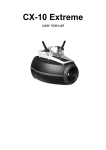
4
See Figure 6. With the nipple on the bulb facing the back,
insert the right end of the new lamp in the socket. Pull up
on the left spring and snap the other end into place.
5
Lift the lamp assembly so that lamp is level with the center
of the reflector. Push the assembly straight in until it seats,
making sure the lamp passes through the reflector opening.
Lock the 4 quarter-turn fasteners.
6
When installing a new lamp, reset the lamp hour and lamp
strike counters as described in “Time” on page 15.
Al ig ni ng t he l amp
1
Switch on the MAC 2000 Performance II and allow it to
reset. Using either a controller or the control module, turn
on the lamp and project an open white beam on a flat
surface.
2
Center the hot spot vertically using the top Allen-head
adjustment screw in the center of the rear plate.
3
If there is significant hot spot, turn the bottom adjustment
screw counterclockwise until the light is evenly distributed.
If the light is brighter around the edge than it is in the
center, or if light output is low, turn the bottom adjustment
screw clockwise until the light is bright and evenly
distributed.
4
Figure 6: Lamp insertion
Repeat step 2.
Figure 7: Lamp adjustment
10
MAC 2000 Performance II