1
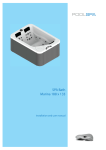
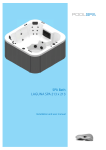
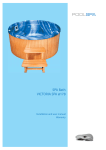
SPA Bath
WATERSPACE SPA 223 x 233
Installation and user manual
Dear customers,
Thank you for trusting us and buying our product!
The POOL-SPA company, one of the leaders in the European hydromassage bath market, has been offering its world
class quality products for many years. The endurance, reliability and safety of our baths has always been of greatest
importance to us; that is why we always use materials and devices from reputable suppliers.
The manual will help yoy learn about the bath installation and its use. In this way, you will be able to use the bath without
any problems for many years to come. Have a great time and enjoy our baths!
2
CONTENTS
Introduction ..........................................................................................................................................................4
PART 1 - INSTRUCTION MANUAL
1.1. Technical specification.....................................................................................................................................6
1.2. Conservation substances ................................................................................................................................7
1.3. Ventilation ........................................................................................................................................................7
1.4. Jets ..................................................................................................................................................................7
1.5. Main functions available on control panel .......................................................................................................9
1.6. Hydromassage (whirl bath) ...........................................................................................................................12
1.7. Water ozonizing .............................................................................................................................................14
1.8. Disinfection ....................................................................................................................................................15
1.9. Thermal cover (additional option) ..................................................................................................................15
1.10. Measurement and treatment formula set.. ..................................................................................................15
PART 2 – INSTALLATION MANUAL
2.1. Transport .......................................................................................................................................................18
2.2. Site preparation .............................................................................................................................................18
2.3. Bath positioning .............................................................................................................................................18
2.4. Assembly/disassembly of the wooden housing ............................................................................................18
2.5. Preparation of water and electrical connections............................................................................................19
2.6. Grounding cable connection..........................................................................................................................19
2.7. Main electrical connection .............................................................................................................................20
2.8. Maintenance of acrylic elements ...................................................................................................................20
2.9. Electrical scheme for Waterspace SPA - standard version ...........................................................................21
GUARANTEE CONDITIONS ...............................................................................................................................25
GUARANTEE SHEET ..........................................................................................................................................26
TECHNICAL PRODUCT SHEET .........................................................................................................................27
3
Introduction
In order to be able to fully use all functions of a SPA Waterspace, please read all sections of this manual.
You should remember that despite the therapeutic and relaxing function of a hydromassage treatment, seriously ill
persons or persons suffering from heart disorder diseases or high blood pressure need to consider special conditions
created inside the SPA baths and consult their physician before using such baths.
We recommend using hydromassage treatments in water of the average temperature of 37 degrees for approximately
20 minutes.
It is recommended that children using the equipment are always accompanied by an adult.
It is prohibited to jump to SPA, to use it after alcohol consumption. It is adviced do not drink the water in SPA. Do not
use chemical means different producers simultanously. Before use of SPA it is recommended to check the water status:
pH level & active axygen or chlorine level. In case of dirty water when bottom is unvisible do not use the SPA. It is recommended to change the water, clean the filter and use coresponding chemical means. It is not allowed to use SPA by
quantity of person bigger than max quantity described by producer.
This manual should be maintained for future reference.
4
PART 1 - INSTRUCTION MANUAL
Congratulations on buying a portable Waterspace SPA!
Hydromassage in the SPA Laguna can be enjoyed by
even 7 people both outside the building and inside a
large bathroom.
The bath is equipped with an ozonator which makes it
easier to keep the water clean and is very effective in
beauty treatment. The qualities of ozone are described
in detail in Part 1.7.
Thanks to the 'antifrost system', it is even possible to
take a bath when the outside temperature is below.
The detailed description of the system is provided in
Part 1.1.
The SPA Waterspace comprises:
- electronic control panel with a display LCD
- additional control panel
- 7 hydromassage aeration regulators
- 3 hydromassage diverters
- 3 kW electric heater, with water temperature control function (6 kW as option)
- 3 hydromassage pumps with power of 2.7 HP (2.0 kW), which one is two-speed for filtration
- water ozonator
- "anti-frost" system - SPA use for outside temperatures below freezing point
- water temperature sensor
- hydromassage jets:
regular mini jets – 41 pcs (D);
regular ozone jet – 1 pcs (L);
rotational big jets with replaced inserts – 15 pcs (EFGBC),
directional big jets with replaced inserts – 11 pcs (HIJK),
large geyser jet – 1 pcs (A)
cascade
- water suction point
- underwater halogen lighting white: 2 pcs.
- underwater multicolour LED light: 2 pcs as option,
- lighting set HYDROLIGHT LED (as option);
- filtration system with replaceable inserts
- water treatment unit;
- wooden steps (mahogany or pine - as option);
- side installed table (mahogany - as option);
- wooden stods (mahogany - as option);
- wooden panel (mahogany or pine - as standard in version without frame);
- plastic panel with floor (colours available: mahogany, pine - for version without alu frame);
- version to build-in - on the alu frame - on demand - without possibility of panel assembly (as option);
- thermal cover (additional option)
- sunshade (freestanding, spreaded - as option)
Accesible version of Waterspace SPA:
According to structure:
- bathtub with wooden/plastic panel based on wooden support (without alu frame);
- bathtub to build-in with alu frame (without panel)
According to electrical connection:
- standard power supply 240V~, needs power line protected with magnetothermal switch 40A;
- optional power supply 3 x 400V~, needs power line protected with magnetothermal switch 32A;
Switching off the electrical supply by means of the test button of the differential-current switch
after bath is emptied is recommended, in order to avoid operation of the hydromassage pumps
without water in bath.
5
1.1. Technical specification
253
Waterspace SPA dimensions:
- length: 2230 mm
- depth: 900 mm
- height: 1080 mm +/- 20 mm
60
0
242
50
0
0
50
0
46
Capacity: 1750 litres
899
370
A
370
A
410
,35
771,59
50
0
Supply voltage:
240V~, 9,5 kW (standard)
3 x 400V~, 12,5 kW (as option)
395
595
Material and construction:
Acrylic strengthened by laminated polyester isolated with polyurethane foam based on wooden support with floor or on
alu frame
610
2330
Weight:
~ 500 kg (empty bath) with panel and cover
400
900
593
598
1080
Nominal power:
- 3 kW electric heater (6 kW as option)
- 2 hydromassage pumps with power of 2,7 Hp (2,0 kW) every
- 1 pump two-speed for hydromassage & filtration with power
of 2,1 kW/0,48 kW
80
2230
Power cable:
3 x 6 mm² protected with magnetothermal switch 40A (standard)
5 x 4 mm² protected with magnetothermal switch 32A (optional)
Dimensions WATERSPACE SPA
Maximum number of people in the bath: 7
Water:
The water should come from the water system and be properly purified and disinfected accordingly to DIN-19643/97 as
well SIA-173.
Well water is inadvisable, unless it has special certificates in compliance with current norms.
ANTIFROST System / Smart Winter Mode
Most important task of SPA electronic system is holding temperature of water within the range between 15 to
400 C. However electronic system has additional feature - winter operation mode (Antifrost/Smart Winter mode) which
protects piping against frozing.
PCB integrated temperature sensor continously controls air temperature which surronds electronic system. If air temperature decrease below 150 C electronic system starts winter mode. In this mode system switches on every pump for 1
minute (one by one). Frequency of pumps operations is connected with surrounding temperature and is presented in the
table below. Water heater works independently of air temperature sensor, it depend only of water temperature sensor.
Temperature 0 C
Operating frequency (min)
12 < t ≤ 15
120
9 < t ≤ 12
60
6<t≤9
30
t≤6
15
• Operation mode ANTIFROST system is marked by ICE symbol on the LCD screen.
• Stand by mode doesn’t affect on ANTIFROST system operations.
• After activating the ANTIFROST system all functions beside water heating are not used.
• All these functions are not available until ICE symbol disappered. Is possible to take a bath but use of any pump.
• If electronic system detects temperature below 150 C degrees of the surrounding air then ANTIFROST systems starts
after 15 minutes from last pump switch off.
• If during filtration mode ANTIFROST system starts, filtration mode will be switch off.
6
1.2. Conservation substances
The acrylic surface of the bath is covered with a thin layer of wax, being the remaining of the polishing process. Metallic elements have been coated with silicone oil for protection purposes. The SPA should be washed off (e.g. with a
dishwashing detergent) prior to filling the bath with water.
1.3. Ventilation
High water temperature during bath in the bath (39°C) causes emitting of big amounts of steam. An efficient ventilation
system should be provided in the room with the bath. Installing of a steam condenser in the room which will maintain
constant air humidity will minimize the risk of dampening of walls and ceiling. An air-conditioning system in the building
allows for elimination of the steam condenser. Such problem does not exist in case of a bath operating in open air conditions.
1.4. Jets
SPA Waterspace is equipped with an innovative jet system:
Jet
Quantity
regular mini jets
41 pcs.
fixed ozone mini jet
1 pcs.
3” adjustable rotating stream
2 pcs.
3” adjustable rotating dual stream
4 pcs.
3” multi-shower multi-massage
2 pcs.
3” pulsating shower galaxy massage
2 pcs.
3” pulsating stream massage
4 pcs.
Picture
7
8
Jet
Quantity
3 3/8” adjustable rotating dual stream
3 pcs.
3 3/8” pulsating stream massage
4 pcs.
5” rotating alternating splash gyro
4 pcs.
5” alternating splash resonator
1 pcs.
big jet geyser
1 pcs.
Picture
1.5. Main functions accessible from the electronic control panel
Waterspace SPA control panel
1.5.1. Switching on/off the pumps
The hydromassage pumps can be switched on/off directly from the electronic control panel. The pumps react differently
depending on whether they are of one-gear or two-gear type. Press the button one time to switch on the one-gear pump
2
(pumps 2 and 3), and press it once again to switch the pump off. After starting the pump, this icon
, will appear on the
display (pump 3 does not have such an icon), and after switching it off, the icon disappears. Two-gear pump switches,
1
pressing the button for the first time the pump over to a low gear (filtration; this icon
blinks on the display). Pressing
1
the button once again the pump switches over to a top gear (massage; this icon
appears on the display). By pressing
the same button again switches the pump off and the icon disappears from the display.
During the filtration or the water heating process in the SPA bath, the pump automatically switches to a low gear after
connetcting it to the power supply.
1
2
The buttons for pumps 1 and 2 are represented on the display by the pump icons
,
. Pump 3 does not have such
a representation. All pumps working in massage mode have automatic time out (20 minutes) from the last button start.
1.5.2. Extra equipment
- unavailable
1.5.3. Switching on/off the lighting
Press this button to switch on the lighting. This icon
appears on the display. Press the same button again to switch
off the lighting, and the icon disappears from the display. The lighting switches off automatically after 2 hours from the
last pressing of the lighting on/off button.
for more than 5 seconds to view from inside the spa the water temperature and time
Press and hold this button
display projection, to read these data.
1.5.4. Setting the right time
The controller is fitted with the RTC system (real-time clock), which works permanently even after disconnecting the
main power. The RTC system makes it easier to use the SPA, since the controller memorize the clock, filtration and the
economy mode setting even after the main power is off. It is not necessary to set the filtration start time and its duration
again. RTC settings are aviable from big panel only.
To change the RTC system setting:
● Press and hold the clock button for about 5 seconds until the clock icon
on the display.
starts blinking and appears permanently
● Set the hour by using the up/down arrow buttons
● Press the clock button once again to set minutes by using the up/down arrow buttons
● Press the clock button once again to save the current setting after the time modification. If no button is pressed for
longer than 5 seconds, the controller returns to its normal mode without saving the setting.
9
1.5.5. Economy mode
After switching on the economy mode (energy saving mode), the controller keeps the temperature 10°C (50°F) lower
than that previously set.
When this mode is working, this icon appears on the display. The economy mode can be activated (the icon is displayed permanently) or suspended for 40 minutes from the moment of switching off the last pump, when at least one pump
is switched on during this mode. Regardless of the temperature previously set, the controller maintains the water temperature not lower than 15°C (59°F).
To enter the economy mode:
● Press this button
● The display will then show „Edx”, where x stands for the economy mode duration (from 0 to 24 hours)
Ed0 – the economy mode is switched off,
Ed24 – the economy mode is working continuously.
● To change the hour, use the up/down arrows
setting.
and use this button
on the control panel to confirm the
● After confirming the settings, the display will show the time when the economy mode is to start.
● Set the hour and minutes using the arrows
● Confirming the minutes with this button
and confirm the setting with this button
.
the economy mode is set. The display returns to its normal status.
The setting of the economy mode is remembered even after the power cut-off.
1.5.6. Filtration
In this system, the filtration process is based on water ozonation. The water is sucked by the skimmer filter and then
mixed with ozone by the injector. After that, the water returns to the SPA bath through the ozone jet. The filtration process
consists on two steps. The first step lasts 1 minute, all three water pumps work at the highest speed, while the heater is
on. When one pump works (pump 1) in a low gear along with the water ozonator and the electric heater. The duration of
filtration depends on the time setting. Filtration mode is indicated by this special icon
on the display. Filtration process can be suspended (the filtration icon is blinking on the display) by switching on any of massage pumps. Filtration
will return to its normal mode after 40 minutes after user last operations. Switching the lighting on does not suspend the
filtration process.
Setting filtration parameters:
● Press the filtration button
● The display will show Fdxx, where xx stands for the filtration duration from 0 to 12 hours.
● If xx is set on 0, the filtration does not work
● Filtration duration can be changed with these arrows
and the selected value is confirmed by pres-
sing the filtration button
● The blinking filtration start time will appear on the display
● Changes are made with these arrows
and confirmed by using the filtration button
● After confirming the selected minutes by pressing the filtration button, the controller memorizes the setting and returns
to its normal work. If no button is pressed for longer than 5 seconds during the setting procedure, the controller will quit
the filtration setting menu and will not remember any changes.
10
1.5.7. Fast filtration (Boost)
The “boo” function enables to make faster water filtration. During this function, all the pumps work for 1 minute. Additionally, pump 1 works in a fast gear for 45 minutes along with the ozonator. The heater works normally during the fast
filtration process. After switching this function on, the „boo” sign appears on the display and is present until this function
is finished. Fast filtration process is triggered by pressing and holding the pump 1 button for 10 seconds. This function
can be switched off earlier by starting any other pumps.
1.5.8. Setting the water temperature
To set the water temperature, press the arrow buttons
on the control panel.
The selected temperature does not have to be confirmed, but only set. The display, after 5 seconds from the last pressing, will return to the previous status and start showing the current water temperature. The controller maintains the set
temperature with an accuracy of ± 0,5°C (1°F). If the water temperature is lower than that previously set, the controller
will start the heater and low gear pump1 (filtration circuit) and keep it on until the water reaches its required temperature.
If the economy mode is on
the controller keeps the water temperature lower by 10 degrees than that previously
set. After the economy mode is off, the controller returns to maintaining the previou set temperature.
1.5.9. Increasing the maximum temperature
This function allows the user to increase the water temperature by two degrees centigrade above 40°C (104°F). To set
the temperature above 40°C, set the maximum temperature and next press and hold the up arrow button
for
5 seconds until the Orx.x sign appears on the display, where x.x signifies how much the temperature value is to be increased above the maximum temperature. This value can be increased half a degree, and the maximum value is two
grades, so the maximum water temperature is 42° C. To return to a normal mode of setting the water temperature, press
the down arrow button
play.
a few times until the normal temperature, ranging from 15 to 40°C, appears on the dis-
1.5.10. “Stand-By” function
This function blocks access to all devices connected to the controller for 60 minutes. This function stop all functions
without need of disconnecting the power supply. To switch off this function, press this button
5 seconds. After swit
ching this function on, the “Sby” sign will appear together with the time left to the end of this function.
There are three methods to end this function:
● Wait 60 minutes until this function stops working.
● Press this button
for longer than 5 seconds when the function works.
● Disconnect the controller from the power supply.
The “Stand-By” function blocks the filtration function. If 40 minutes after going out from “Stand-By” mode SPA still will be
in filtration period Filtration mode will start again.
1.5.11. Control panel keyboard locking
Partial keyboard locking:
● Press and hold this button
. During this operation, the key-shaped icon blinks.
● The LocP sign will appear on the display after pressing this button on the control panel for 3 seconds. Once this sign
has appeared, the function becomes active and the key icon is on permanently. The control panel is locked.
● Release the button (only jets, light, air/aux and optional panel).
To unlock the panel, press and hold this button
for not less than 5 seconds.
The LocP sign will appear on the display if any button is pressed after locking the keyboard. The partial keyboard locking
function is not remembered after a power cut-off.
11
Total keyboard locking:
● Press and hold this button
. The key-shaped icon blinks during this operation.
● The “LocP” sign will appear on the display after pressing this button on the control panel for 3 seconds. Once this sign
has appeared, the function becomes active and the key icon is on permanently. The main and optional control panel is
locked (all of the buttons).
● Keep this button pressed.
● After 5 seconds the LocF sign appears, and since that moment the function is active.
● Release the button.
To unlock the panel, press and hold this button
for not less than 5 seconds.
The LocF sign will appear on the display if any of the locked buttons is pressed after locking the keyboard. The total
keyboard locking function is not remembered after a power cut-off.
1.6. Hydromassage (whirl bath)
Hydromassage is the pressure on defined muscles exerting by stream of water or stream of air and water. Water or air
and water at high pressure bring out from regulated jets and hit on body surface. It tones and relaxes the skin, at the
same time massaging and cleaning it. Hydromassage is recommended for anybody with spine, arthritic or muscle pains,
respiratory system diseases or gynaecological problems.
Water massage system (hydro-massage) is made of the following elements:
- a set of 69 water and air jets, supplying water or a water and air mix of high kinetic power to the water section of the
bath,
- a hydromassage whirl pump, enforcing water circulation,
- 7 regulators of air supply to the hydro-massage jets, installed at the edge of the bath; used for regulation of massage
intensity,
- 3 hydromassage diverters which operate for change massage zone as well as starting of cascade,
- water suction point.
Due to quantity of pumps - 3 pcs and controls - 2 pcs, is adviced to use demanded separate pump or all of them.
The water massage intensity regulation is possible by means of aeration regulators located at the perimeter of the bath
top, by adding air to the water stream coming from the jets. The more air, the stronger the stream is.
Hydromassage intensity is increased by turning the regulator knobs anti-clockwise (towards the "ON" sign)
Hydromassage intensity is decreased by turning the regulator knobs clockwise
(towards the "OFF" sign).
Each of the regulators is responsible for controlling a different jet section.
12
B
D
D
D
4D
B
D
D
D
6
D
D
C
SECTION 1
J
D
H
SECTION 2
G
D
D
D
D
3
D
F
K
D
7D
A
SECTION 3
D
L
D
D
F
D
I
WATERFALL
H
I
D
D
3
C
J
D
D
D
D
5
D
D
SECTION 4
SECTION 5
G
SECTION 6
D
D
D
D
D
E
D
D
WATERFALL
J
2B
C
E
D
C
D
D
D
I
D
F
J
I
SECTION 7
1
F
Aeration regulator control zones
Pump 1
GEYSER
GEYSER + SECTION 3 + WATERFALL
Pump 2
B
SECTION 3 + WATERFALL
D
D
D
D
D
D
SECTION 6
D
6
I
C
J
SECTION 4 + SECTION 5 + SECTION 6
G
D
D
D
3
A
D
F
D
L
D
D
5
D
G
D
D
D
E
D
2B
1
J
E
D
C
I
D
D
F
J
I
SECTION 4 + SECTION 5
D
D
C
K
D
D
7
D
D
D
D
H
D
F
I
WATERFALL
H
D
D
D
3
D
D
D
D
4D
B
C
J
D
D
F
SECTION 1
SECTION 2
SECTION 1 + SECTION 2
Pump 3
Hydromassage zones
13
1.7. Water ozonizing
Oxygen (O2)
Ozone (O3)
O1
Electric
current
or UV light
O3
Oxygen atoms
O2
The ozonized air has, apart from a nice scent, many therapeutic
and antiseptic properties. It greatly helps in keeping the water clean
both in the bath and the plant. Ozone definitely supports maintenance hygiene in the SPA. The heated and ozonized air is pumped
into the air duct system underneath the bath. Operating only during
filtration.
Ozone producing process
Caution: ozoning does not occur during hydromassage!
Ozone is healthy:
– it is more and more popular in beauty treatment,
– helps to remove lacuni, cellulite and wrinkles,
– improves complexion,
– helps to treat varices and skin diseases,
– helps in heart and circulatory system problems,
– soothes problems connected with menopause.
Why is ozone necessary in SPA?
– it has antiseptic properties,
– helps to keep the bathe clean,
– helps to keep water clean, fresh and clear,
– eliminates any unpleasant water smell,
– eliminates fungi and yeast in water,
– refilling with water does not need to be frequent.
Skimmerofiltr
Zespó³
dysz
wodnych
Pompa wodna
Dysza ozonu
Woda + Ozon
Injektor
Ozonator
Ozon
Woda
Filtration system scheme for a Waterspace SPA
The skimmer filter used in the SPA Waterspace has the filtration area 9,2 m2
Filter insert replacement (PD5000075 - filter cartrigde 50 sqft):
1. take out cover A
2. put out B element,
3. screw out cartridge C and D
4. clean or replace for new bath cartridges;
5. Install element B;
6. cleaning relies on rinsing of the insert with warm running water.
Recommended: Rinsing every 2 days replacement not less frequent
than once a year
14
C
D
B
A
The water pump operating in the filtration mode has efficiency at the level of approximately
330 l/min, while operating in the hydromassage mode – at the level of approximately 650 l/min.
The suction point used for SPA Laguna has the efficiency of approximately 46 m3/h and has a special
anti-adhesive structure ensuring safety of operation of the bath.
1.8. Disinfection
Disinfection process in the SPA Waterspace, is ozone based. Ozone is used during filtration (check the duration settings
in part 1.5.6.).
Additionally, the bath is equipped with a START SET of measurement and treatment agents for pH correction and disinfection with active oxygen or set with trichlorine pills with liquid for water purification with measure set (more information
in part 1.10.).
1.9. Thermal cover (additional option)
The Waterspace SPA can be optionally provided with a thermal cover.
We recommend to order the cover in cases when:
- the bath is going to be used outdoors, i.e. in a garden (the cover
prevents the water from excessive cooling down and keeps the bath
clean as well as preventing excessive heating of the bath perimeter
by sun rays),
- when the bath is going to be used very frequently indoors (the cover serves to prevent the water from excessive evaporation).
If the bath is to be exposed to operation in direct
sunlight, it is recommended to use the thermal
cover after taking a bath, to prevent damage resulting from sunlight heat.
1.10. Measurement and treatment formula set
Before the first bath and depending on how frequently the SPA Laguna bath is used, please
check the water pH with the enclosed Dinofresh/pH Tester or measure set Chlorine/pH (option)!!!
(minimum once every 2 weeks)
1.10.1 Water chemical status measurement in SPA Waterspace.
pH value measure for set Dinofresh/ph and Chlorine/pH.
• rinse a test container and fill to the 10 ml mark with pool water,
• add 1 PHENOLRED (fig. 1-13) tablet to the container and close the plug,
• shake the container and dissolve the tablet,
• compare the test water colour with the colours in the column on the left and read the pH of the water sample,
• all pH values below 6.8 make the water turn yellow,
• all pH values above 8.2 make the water turn red,
• ideal values range from 7.2 to 7.6.
Dinofresh measurement:
This is a measurement of the active oxygen concentration contents, informing about the oxygen content level in water.
• Rinse a test container and fill to the 10 ml mark with pool water.
• Add 1 DPD no 4 tablet to the container and close the plug.
• Shake the container and dissolve the tablet.
• Compare the colour of the solution with the colours in the column on the right to read the Dinofresh value of the water sample.
• The recommended values range from 5.0 to 8.0 mg/litre.
Chlorine measurement:
This is a measurement of the chlorine concentration contents, informing about the chlorine content level in water.
• Rinse a test container and fill to the 10 ml mark with pool water.
15
• Add 1 DPD no 1 tablet to the container and close the plug.
• Shake the container and dissolve the tablet.
• Compare the colour of the solution with the colours in the column on the right to read the chlorine value of the water
sample.
• The recommended values range from 0,3 to 0,5 mg/litre.
Start set: test container and DPD and Phenolred tablets
1.10.2. Measurement and treatment formula set based on active oxygen by Dinotec
Important instructions:
• do not touch the tablets! It may distort the test outcome,
• reading of results must take place immediately after the tablet has dissolved in water,
• after each measurement the test container and its lid should be thoroughly rinsed.
Otherwise, it may also distort the results.
The tablet reagents are provided for the purpose of the above described chemical analyses and
should not be used for any other purposes. The tablet reagents must not be handled by children.
If the measured pH is outside the range 7.2 to 7.6 it will be necessary to use SPA Laguna granules to correct the pH value.
1. Dinominus - pH decreasing granules.
Dosage: about 10 g/1000 litres to lower pH by 0.1 (in case of Waterspace 17,5g).
The granules should be poured over water surface as the filtration pump is on. The pH measurement should take place
directly after the correction. Do not add the granules anywhere close to the skimmer.
2. Dinofresh - active oxygen granules for water disinfection to be added to the skimmer.
Dosage: 25g/1000 litres is a start value (44g for Waterspace), and then in 5g doses or multiplied doses to restore the
5÷ 8 mg/l Dinofresh level in water.
3. Dinoclean S - alkaline, liquid and strong chemical to clean the rim of the bath and dissolve fats. It is perfect to clean
any greasy stains from the walls or the rim of the bath, and to remove calciferous deposits. Dosage: spread concentrated or dissolved (1:10) agent on dirty surfaces using a brush. Rinse thoroughly after a short period of time. Do not let
the agent dry before rinsing.
A set of disinfecting agents for SPA Waterspace can be purchased at most showrooms where POOL - SPA products are
offered in the country.
It is a natural phenomenon that in SPA baths the pH value of water tends to increase. However,
very rarely the pH value decrease can be observed. It is then recommended to use Dinoplus
granules, which can be ordered through the showroom of the Waterspace SPA manufacturer.
Set of measurement and treatment agents
16
1.10.3. Dosage of AQUAGARDE chlorine-based chemical agents - OPTION
AquaGarde® ensures clean water by stopping the growth of bacteria, so the user does not have to worry about the
growth of the bacteria in his/her bath. If any bacteria get into the water from the outside source, they will not replicate
and they will be destroyed by the ozonator (or UV-C lamp) or while going through the filter, where the cleaning tablet
dissolves gradually.
AquaGarde® The individual bacteria join each other forming much bigger conglomerates and they are stopped by the
filter, where they stay. It is recommended to keep the filter absolutely clean by putting one cleaning tablet in the injector,
on top of the bath filter, once a month. It is recommended to wash and clean the filter once a week. It is advisable to
have two filters leaving the one to dry during the week before it is used again in the bath.
Application procedure:
1. BEFORE USING THE AGENT, MIX IT THOROUGHLY BY SHAKING. Put the appropriate amount of AquaGarde®
(according to the chart placed on the bottle) into water.
2. Activate the jets to mix AquaGarde® with water.
3. After 2 minutes of mixing, the bath is ready to use.
4. Please make sure that your ozonator or UV-C lap works (follow the manufacturer’s guidelines). If your SPA system is
not equipped with the ozonator or UV-C lamp, put one cleaning tablet into the injector, keep it under the surface of water
in the bath for 20 seconds to release the air bubbles and place it on top of the filter (if your SPA system is equipped with
two filters, put the cleaning tablet in the injector on top of the filter which works continuously).
5. The aforementioned procedure should be repeated once a week.
6. The filter should be cleaned once a week.
NOTE: If you want to keep your filter absolutely clean, the injector and the cleaning tablets must
be used along with the ozonator or UV-C lamp.
How to start:
• After filling the bath with water from the bath tap, add an appropriate amount of AquaGarde®, as indicated on the
backside of the bottle, and then follow the guidelines.
• When chlorinated water has been used, first of all replace the water with fresh one and then follow the guidelines presented above. If the water has been replaced recently, it is possible to use AquaGarde® without changing the water.
Next, follow the guidelines mentioned above.
Storage - AquaGarde® should be stored in the original packaging. Keep it out of the reach of children. The product
should be stored above the freezing temperature. The product should be used within one year from its purchase.
NOTE: The product is safe when diluted. In the event of contact of the undiluted product with
eyes, wash the eyes thoroughly and consult a physician.
Tested and approved by Kerna. Dermatologically tested.
The aforementioned guidelines were taken from the instructions prepared for chemicals made by AQUAGARDE®.
More information available on: www.aquaqarde.com.
AQUAGARDE® chemical agents
17
PART 2 – INSTALLATION MANUAL
2.1. Transport
The bath should only be transported in the original manufacturer’s packaging! After unpacking, the bath can be carried
by the aluminium frame or acrylic elements. The pipes and cables must not be used as handles/grips!!!
2.2. Site preparation
The portable Waterspace SPA may be operated both indoors and outdoors. The site for the bath should comply
with the following conditions:
a) the proper area and the proper transportation routes (in case of closed premises),
b) proper electrical supply and ensured efficiency of the electrical connection in respect of the equipment (for standard
equipment the rated power consumption is ab 9,5 kW, 12,5 kW as option) and is demanded to use wires 3 x 6,0 mm2,
230V~ standard (and 5 x 4,0 mm2 - 3 x 400V~ optional) with regard to the safety of the users, in all cases the supply cable
must be protected by means of a differential-current switch with the standard rated switch off current of 30 mA),
c) water supply and drainage,
d) levelled floor,
e) sufficient ventilation (indoors),
f) in case of a bath installed in closed premises, access to the electrical equipment must be provided for maintenance
or inspection purposes.
2.3. Bath positioning
In order to ensure proper operation conditions, the floor should be very well levelled. Localisation of SPA should ensure
access to mechanical (devices below the SPA rim (near control panel side). All the bath legs should be on a solid and
hard surface. The total weight of the bath with water and four people is about 2800 kg.
2.4. Assembling and dismantling of wooden panel
Both processes consist on slipping under SPA rim all elements (wooden or artificial) and bringing down to fix the aluminium support on the wooden floor bar.
Panel has 4 corners and 4 flat pieces.
SPA Waterspace in version built-in has aluminium frame which is not available in versions with
panels.
18
2.5. Preparation of water and electrical connections
Due to the obligations resulting from legal regulations and due to the fact that individual equipment elements in the SPA
Waterspace are constantly powered, it is recommended to install an electrical line of
three wires (one phase wires, one neutral and one grounding wire) with a suitable manual disconnecting mechanism, forming part of the general electrical installation in the
house.
The electrical connection line needs to be, first of all, protected with a 40A (240V~
standard) or 32A (3 x 400V~ option), safety fuse and then connected to an automatic differential-current switch of the maximal sensitivity of 30 mA.
Both electrical connection safety systems are prepared by the client.
In order to prevent activation of the bath without water, the electrical supply should be A differential-current switch with an
disconnected by pressing the test button of the differential current switch. The
indicated test button
differential current switch does not form part of the bath equipment.
T
The bath can be connected to the water and sewage systems permanently or the bath can be
filled and drained by means of flexible hoses disconnected after each operation. The flexible
hose set of the bath includes a T-pipe with a ½” coupling for filling of the bath through the hydro-massage jets.
The fixed piping system includes release valves located near the skimmer-filter; at the outlets of
which fixed or removable hose connection with the sewage system should be made.
T-pipe with a ½” coupling
SPA Waterspace sewage outlet
2.6. Grounding cable connection
A grounding installation with proper radius wire is necessary for the circuit breaker and safety
mechanisms to work properly. The wire should be connected to the frame as shown.
Place of connection of the earthing wire
19
2.7. Main electrical connection
The power cable must be connected to the fixed power supply to an IP X5 safety level. Socket installation is not permitted. The power installation in the wall can be connected by a junction box. An IP X5 junction box should be in the 3rd
zone, and at least 20 cm above the floor level.
According to current regulations, sockets may not be installed within zones 0,1 and 2.
Zone 0 is the area inside the bath.
Zone 1 is the zone 0 area plus the space up to 2.25 m above the floor.
Zone 2 is the zone 1 area extended by 0.6 m, again up to 2.25 m above the floor.
Zone 3 is the area reaching 2.4 m beyond zone 2, up to 2.25 cm above the floor.
2,4
m
Zone 3
Zone 2
Zone 1
m
Zone 1
Zone 2
2,4
Zone 0
0,2 m
0,6 m
2,25 m
Zone 3
0,6 m
Zone 3
Location of protection zones
Sewage connection
50 mm
Water connection 1/2”
for water filling
240V~ (3 x 6 mm²)
electric connection with
protection of circuit breaker
(30 mA cut-off value)
Location of SPA Watrespace connections
2.8. Maintenance of acrylic elements
Only mild fluids (not containing acetone, abrasive or caustic substances) should be
used to clean the bath. The structure and low level of surface adhesion of acrylic
mean that keeping the bath clean should not be a problem.
Mechanically damaged gloss acrylic (small, shallow scratches) can be easily repaired. In the case of small scratches, a small amount of wax-free car-polish should
be used. Deeper scratches may be removed by sandpaper in order of grain 800,
1200, 2000 followed by the car-polish mentioned earlier. In order for the surface to
be smooth it should be ground in a circular motion, followed by a wax car polish
(which provides a high level of shine). Repairs can be made with a repair kit available at the dealer shops; however we recommend using the services of our
authorized POOL-SPA service staff.
The repair kit for SPA baths
20
L/LO N PE
L1 L2 L3 N PE
PUMP 2
PUMP 2
INPUT VOLTAGE
R91
R90
R89
R88
HEATER
3kW 230VAC
L/HI N PE
MAINS
SUPPLY
400VAC 50Hz
L1: 2kW
L2: 4kW
L3: 3kW
2
wire: 5 x 4mm
MASSAGE PUMP 2
(back area ) 2kW
MASSAGE PUMP 3
(front area) 2kW
L1
N
PE
R120
R119
R118
R94
PE
RELAY
30A/250VAC
RELAY
30A/250VAC
RELAY
30A/250VAC
RELAY
30A/250VAC
+
~
~
_
Transformer
N
L
HEATER
RELAY
16A/250VAC
MASSAGE PUMP 1
2-SPEED 2,1/0,48kW
(filtration & massage)
(center area)
RELAY
16A/250VAC
FLUX
VAR
PUMP
COMP
TANK
LEVEL
TEMP
PROBE
ASTREL
PROGRAMMING
KEY
HI/LI
PROBE
AUX
KEYPAD
VAR
BLOWER
630mAT
LEVEL
SENSE
RTC
1 23 4
ON
2AT
MAIN
KEYPAD
RELAY
5A/250VAC
2AT
5AT
6,3AT 6,3AT
RELAY
16A/250VAC
RELAY
16A/250VAC
RELAY
16A/250VAC
RELAY
5A/250VAC
SD
INTERFACE
TSC 9
KEYPAD
I2C
BUS
Water level
sensor
N PE
L
LIGHT
KEYPAD TSC4
RELAY
16A/250VAC
OZONE
BLOWER
N PE
CIRC
PUMP
L
N PE
L
PUMP 1
N PE
COMP
TANK
L/LO N PE
L
PUMP 1
N PE
L/HI N PE
20AT
AUX
20AT
L
KEYPAD TSC3
Left Speaker
MENU
IPod
Subwoofer
AMPLIFIER
Power
supply
12VDC
Right Speaker
VOLUME
REGULATOR
OZONE
GENERATOR
230V 50/60Hz
Multicolor
LED LAMP
2.9. Electrical scheme for SPA Waterspace - standard version
21
L/LO N PE
L1 L2 L3 N PE
PUMP 2
PUMP 2
INPUT VOLTAGE
Mains
400VAC 50Hz
12kW
2
Wire: 5 x 4mm
MASSAGE PUMP 2
(back area ) 2kW
MASSAGE PUMP 3
(front area) 2kW
R91
R90
R89
R88
L1
N
PE
R120
R119
R118
R94
PE
RELAY
30A/250VAC
RELAY
30A/250VAC
RELAY
30A/250VAC
+
~
~
_
Transformer
N
U2
U1
U0
L1
L2
L3
N
L1
L2
L3
N
Conductor
A2
A1
L
HEATER
RELAY
16A/250VAC
RELAY
30A/250VAC
RELAY
16A/250VAC
FLUX
VAR
PUMP
COMP
TANK
LEVEL
TEMP
PROBE
U2
U1
U0
ASTREL
LEVEL
SENSE
RTC
1 23 4
ON
2AT
2AT
MAIN
KEYPAD
RELAY
5A/250VAC
Flow sensor
Heater 6kW
6,3AT 6,3AT
temeperature
sensor
5AT
RELAY
16A/250VAC
RELAY
16A/250VAC
RELAY
16A/250VAC
RELAY
5A/250VAC
SD
INTERFACE
TSC 9
KEYPAD
I2C
BUS
AUX
KEYPAD
PROGRAMMING
KEY
HI/LI
PROBE
VAR
BLOWER
630mAT
Water level
sensor
LIGHT
KEYPAD TSC4
N PE
L
MASSAGE PUMP 1
2-SPEED 2kW
(filtration & massage)
(center area)
L/HI N PE
O
RELAY
16A/250VAC
OZONE
BLOWER
N PE
CIRC
PUMP
L
N PE
L
PUMP 1
N PE
COMP
TANK
22
L/LO N PE
L
PUMP 1
N PE
L/HI N PE
20AT
AUX
20AT
L
KEYPAD TSC3
Left Speaker
MENU
IPod
Subwoofer
AMPLIFIER
Power
supply
12VDC
Right Speaker
VOLUME
REGULATOR
OZONE
GENERATOR
230V 50/60Hz
Multicolor
LED LAMP
Electrical scheme for SPA Waterspace 3~400 V - option
Notes
......................................................................................................................................
......................................................................................................................................
......................................................................................................................................
......................................................................................................................................
......................................................................................................................................
......................................................................................................................................
......................................................................................................................................
......................................................................................................................................
......................................................................................................................................
......................................................................................................................................
......................................................................................................................................
......................................................................................................................................
......................................................................................................................................
......................................................................................................................................
......................................................................................................................................
......................................................................................................................................
......................................................................................................................................
......................................................................................................................................
......................................................................................................................................
......................................................................................................................................
23
Notes
......................................................................................................................................
......................................................................................................................................
......................................................................................................................................
......................................................................................................................................
......................................................................................................................................
......................................................................................................................................
......................................................................................................................................
......................................................................................................................................
......................................................................................................................................
......................................................................................................................................
......................................................................................................................................
......................................................................................................................................
......................................................................................................................................
......................................................................................................................................
......................................................................................................................................
......................................................................................................................................
......................................................................................................................................
......................................................................................................................................
......................................................................................................................................
......................................................................................................................................
24
GUARANTEE CONDITIONS
Our company, POOL-SPA Sp. z o.o., guarantees its products against all manufacturing or operational defects under the
conditions set out here.
After installing the Spa, please fi ll with installer in manual the card with the details requested to ensure validity of warranty. Please remember to get from sales agent confi rmation of purchasing date.
1. The product must be installed strictly in accordance with the installation instructions that come with the product, and
respecting all the measurements and indications given.
2. For the warranty to be operative, all work done during the warranty period must be carried out by a authorised service.
The list of authorized service is available by Your sales agent.
3. The warranty period. POOL-SPA Sp. z .o.o. provides a full guarantee for the Spa for a period of 2 years from the date
of installation. During this full guarantee period, any manufacturing or operating defect will be repaired at no cost to the
user (excluding the bulbs). If the product is installed in a country other than the country of acquisition, the period and
terms of the warranty will be restricted to the general warranty cover stipulated by regulations in the country concerned.
After 2 years from the date of installation, POOL-SPA Sp. z o.o. provides post-warranty payable service.
4. The warranty will not be valid in these cases:
a) a fault or faulty operation resulting from anomalies or non-compliance with the product-specific installation rules or
arising in the hydraulic, electrical or gas systems,
b) corrosion, scaling or abrasion caused by a lack of cleaning and/or maintenance, improper use, creless storage or ill
treatment, breakages, damage resulting from the use of water at temperatures of over 50oC, wear from abnormal usage, or any other cause not stemming from the appliance,
c) if the Spa, after use, is not secured by thermal cover against sun radiance,
d) if installation has been done by non-authorised service, or if non-original spare parts were used,
e) if it is found that the Spa has been in use for a period longer than the warranty period,
f) if used water do not fulfi ll conditions of DIN-19643/97 as well SIA-173.
5. In particular, POOL-SPA Sp. z o.o. declines all liability for any harm to people or damage to things that may have
resulted from any of the excluded causes specifi ed in the preceding section.
6. Any other demand stemming from grounds not specifi ed in the above sections is excluded unless the law of the land
expressly attributes liability.
Recommendations:
Before using the equipment, read carefully through the instructions included with the Spa.
POOL-SPA Sp. z o.o.
ul. Dąbskiego 35, 72-300 Gryfice
phone: +48 91 38 777 00 service phone: +48 91 38 777 48
fax. +48 91 38 777 01
e-mail: [email protected], www.poolspa.pl
25
Guarantee sheet number.................................
Product:
Dealer:
(sales date, sign
and stamp of saler)
Changing parts and carried out
repairs description
No
Notification
date
Repair
date
Repairs course notificies
Name of
service agent
Sign
and stamp
Installer:
(date, sign
and stamp)
26
Waterspace SPA
TECHNICAL PRODUCT SHEET
MODEL, FITTINGS
Waterspace SPA
FACTORY NUMBER
DATE OF PRODUCTION AND TESTING
NOMINAL POWER REQUIREMENTS
FUSING REQUIREMENTS
VOLTAGE / FREQUENCY
THERMAL PROTECTION
F
QUALITY CONTROL
27
POOL-SPA Sp. z o.o.
ul. Dąbskiego 35
72-300 Gryfice
tel. +48 91 38 777 00
fax +48 91 38 777 01
e-mail: [email protected]
www.poolspa.pl
POOL-SPA company has the policy of constant improvement of products and reserves the
right to introduce changes to the specification and colours without a prior notification. However, POOL-SPA makes all efforts to ensure that the specifications are updated on the date
of publishing.
18.05.2009
PI3000114