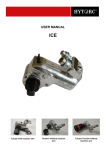
1
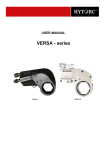
USER MANUAL HYTORC NUTTM 3-part tensioningnut Index 1. WELCOME AT HYTORC ................................................................................................ 3 2. GENERAL INFORMATION ............................................................................................. 3 3. SAFETY INSTRUCTION ................................................................................................. 3 4. PRINCIPAL OF THE HYTORC NUTTM .......................................................................... 5 5. HYTORC NUTTM INSTALLATION ................................................................................. 6 5.1 TENSIONING - TIGHTNING .............................................................................................................................. 6 ............................................................................................................................................................................ 8 5.2 DETENSIONEN - LOOSENING .......................................................................................................................... 8 6. LUBRICATION INSTRUCTIONS .................................................................................... 9 FOR MOR INFORMATION HYTORC Clamp BV | Platinawerf 8 - 6641 TL Beuningen - NEDERLAND | Tel: +31(0)24 - 3 660 660 | www.hytorc.nl HYTORC Benelux BVBA | Ysselaarlaan 65B - 2630 Aartselaar - BELGIË Version 1.04.2011 | Tel : +32(0)38 - 705 220 | www.hytorc-benelux.be 2 1. WELCOME AT HYTORC Thank you for buying HYTORC equipment. This user manual and safety instructions is designed to provide you with the basic knowledge required to operate and maintain your new HYTORC equipment. Please read this manual carefully and follow the instructions provided. If you still have any questions regarding HYTORC bolting equipment, please do not hesitate and call us at +31 (0) 24 3660 660 or contact us at [email protected]. You also find more information on our website www.hytorc.nl. 2. GENERAL INFORMATION Your purchase of HYTORC equipment entitles you to the following HYTORC services: Instructions to your employees by a HYTORC specialist within your organization Free annual inspection of your HYTORC equipment Free loaner equipment in case of failure under warranty If your HYTORC equipment cannot be repaired within 5 workdays, you get an equivalent free loaner tool 24-hour service World-wide warranty When you need help abroad? No problem! We help you! HYTORC equipment according to the newest technology A full year complete warranty Qualified work force employable for solutions at difficult challenges 3. SAFETY INSTRUCTION Warning: Your HYTORC equipment is a power tool, and as with any power tool, certain safety precautions should be observed to avoid accidents or personal injury. The following instructions will assist you. Read all instructions. Keep work area clean and well lit. Consider work area environment. Electrical Pumps should never be used in an atmosphere that can be considered potentially volatile. If there is any doubt, use an air pump. Note: Metal-to-metal contact can cause sparks, precautions should be taken. Avoid premature tool starting. The Pump Remote Control is for the TOOL OPERATOR only. Stay clear during operation. In most cases, the tool will allow “hands free” operation. If the tool must be held or steadied during operation, use alternative means of securing the tool to the application. FOR MOR INFORMATION HYTORC Clamp BV | Platinawerf 8 - 6641 TL Beuningen - NEDERLAND | Tel: +31(0)24 - 3 660 660 | www.hytorc.nl HYTORC Benelux BVBA | Ysselaarlaan 65B - 2630 Aartselaar - BELGIË Version 1.04.2011 | Tel : +32(0)38 - 705 220 | www.hytorc-benelux.be 3 Guard against electric shock. Ensure the pump is properly grounded and the proper voltage is being used. Store equipment properly. When not in use, tools and accessories should be properly stored to avoid deterioration. Use right tool. Do not force small tools or attachments to do the job of a larger tool. Do not use a tool for purposes not intended. Proper safety attire. When handling/operation hydraulic equipment use work gloves, hard hats, safety shoes and other applicable clothing. Use safety glasses with side covers. Moving equipment. Do not use hydraulic hoses, uni-swivels, pump power or remote cords as means of moving the equipment. Maintain your HYTORC equipment with care. For top performance, inspect tools, power pack and accessories for visual damage frequently and always prior to use. Always follow instruction for proper tool and pump maintenance. Refer to the Operations Maintenance Section in chapter 10 for further clarification. Stay alert! Watch what you are doing. Use Common sense. Do not use power equipment under the influence of any mood altering substances. Prior to operation: - Ensure that all hydraulic connections are securely connected and there is no leakage; - Verify that the hydraulic hoses are not kinked or otherwise damaged; - Ensure the square drive and its retainer are fully and securely engaged; - Be certain that all connectors, elbows, fitting and swivels are not bent, loose or damaged. Prior to use: - Check sockets for size, quality and flaws (do not use if questionable); - Cycle tool to ensure proper function; - Pressurize the system momentarily; if the tool tends to “ride up" or to “creep", stop and re-adjust to a more solid and secure position. Commentary: HYTORC pump units are exclusive for HYTORC tools and vice versa. If other equipment is connected to the pump, it can damage the pump unit. When another brand pump unit is used no flawless operation can be guaranteed. FOR MOR INFORMATION HYTORC Clamp BV | Platinawerf 8 - 6641 TL Beuningen - NEDERLAND | Tel: +31(0)24 - 3 660 660 | www.hytorc.nl HYTORC Benelux BVBA | Ysselaarlaan 65B - 2630 Aartselaar - BELGIË Version 1.04.2011 | Tel : +32(0)38 - 705 220 | www.hytorc-benelux.be 4 4. PRINCIPAL OF THE HYTORC NUTTM 1 The HYTORC NUTTM is a three part nut that replaces the standard nut. The Inner nut (1) fits on the thread of the stud. 2 The outer nut (2) turns with a trapezium thread and fine pitch over the inner nut. The washer (3) is connected with splines to the inner nut (1) . The washer can move in axial direction but not turning. By the special construction it is possible that the inner nut can move upwards without shear, reaction or torsion forces. The torque is transferred to stretch the bolt. There is no unknown friction between the stud and the nut. 3 Fig 1: Working HYTORC NUTTM Summarized : All frictions take place within the HYTORC NUTTM and are consistent and calibratable and do not take place between thread of the bolt and the surface of flanges! FOR MOR INFORMATION HYTORC Clamp BV | Platinawerf 8 - 6641 TL Beuningen - NEDERLAND | Tel: +31(0)24 - 3 660 660 | www.hytorc.nl HYTORC Benelux BVBA | Ysselaarlaan 65B - 2630 Aartselaar - BELGIË Version 1.04.2011 | Tel : +32(0)38 - 705 220 | www.hytorc-benelux.be 5 5. HYTORC NUTTM INSTALLATION 5.1 Tensioning - tightning The HYTORC NUTTM is ready for use and furnished with lubrication. Read chapter 6 – lubrication instructions, when the HYTORC NUTTM needs to be lubricated again. 1. Turn the NUT downwards at the stud, turn the inner nut tightly to the flange surface or the surface of the construction. The NUT needs to fit nicely en well on the thread of the stud. Turn the inner nut loose again for an 360 degrees turn. This is a bit dependable of the thread pitch. Fig 2: Preparation Fig 3: Hand tight fixing of the HYTORC NUTTM’s 2. The inner nut, when installed correctly, may come out not more than 1,5 mm (1/16”) above the top side of the outer nut. If the inner nut protrudes more than 1,5 mm above the outer nut, than hold the inner nut with your hand and turn the outer nut leftwards (anti clockwise) till the distance is reduced too max 1,5 mm from top side of the outer nut. Turn, after adjustment of the outer nut, the complete HYTORC NUTTM firmly against the flange surface or construction surface. Clarified: The washer of the NUT will adapt fully to the surface. THE INNER NUT HAS TO STAY FREE OF THE SURFACE BUT NOT MORE THAN 1,5 MM! Max. 1,5 mm Min. 0,5 mm Regard that the top side of the stud will not get stuck against the inner nut. If that happens, than shorten the stud or bolt or stick out the stud on the other side of the fixation! Fig 4: washer lies against the surface and the inner nut sticks out not more than 1,5 mm. Fig 4b : to long stud FOR MOR INFORMATION HYTORC Clamp BV | Platinawerf 8 - 6641 TL Beuningen - NEDERLAND | Tel: +31(0)24 - 3 660 660 | www.hytorc.nl HYTORC Benelux BVBA | Ysselaarlaan 65B - 2630 Aartselaar - BELGIË Version 1.04.2011 | Tel : +32(0)38 - 705 220 | www.hytorc-benelux.be 6 Good, this is 0,5 to 1,5 mm at the bottom side that relapses. 3. For the use of a wrench at the HYTORC NUTTM, convince yourself that the wrench and the NUT-drive are placed properly. The NUT drive needs to be installed like the photo shows to obtain the method of tensioning, at the other side of the wrench there is written „Tighten‟. The driver turns clockwise! Let the wrench operate to check if everything runs as it should be. You only need to repeat this step when you change the tool or the driver part. Other shaped HYTORC NUTTM‟s requires different NUT drivers but the working principle stays the same. 4. Refer to the conversion table delivered with the HYTORC NUTTM and adjust the pump pressure at the desired bolt load. It is restricted to place the NUT-drive at the NUT at the time of pump pressure adjustment. Turn the pressure regulation anti clockwise to adjust the pressure just below the desired final pressure. Keep the start/run button on the remote control pushed and turn slowly clockwise at the pressure regulator so that the pressure comes to the desired value. Assure yourself of the adjusted pressure by keep pushing the start/run button on the remote. All these adjustments can be different from pump to pump type. Fig 6: Avanti Dual with NUT-drive Fig 7 and 8: Adjustment pump pressure 5. To place the wrench with the NUT-drive on the HYTORC NUTTM , we have to position the inner splines of the NUT-drive in the splines of the HYTORC NUTTM . After that we have to turn the toothed driving ring of the NUT-drive clockwise by hand as far that the NUTdrive fits completely in the HYTORC NUTTM . With other types or shaped HYTORC NUTTM ‟s , the splines or teeth look different but the principal is the same! IMPORTANT: If the teeth do not joint completely than probably the stud is to long as shown in Fig 4b. Go back to chapter 2 for changing. Reposition the inner nut en check the possible too long stud. This last step is very important when using Turbine HYTORC NUTTM. When changing isn’t possible than use an extended NUT-drive. Fig 9: Teeth fits against each other FOR MOR INFORMATION HYTORC Clamp BV | Platinawerf 8 - 6641 TL Beuningen - NEDERLAND | Tel: +31(0)24 - 3 660 660 | www.hytorc.nl HYTORC Benelux BVBA | Ysselaarlaan 65B - 2630 Aartselaar - BELGIË Version 1.04.2011 | Tel : +32(0)38 - 705 220 | www.hytorc-benelux.be 7 6. Tension the HYTORC NUTTM by pushing the start/run button on the remote control repeatedly ; noting that you give the wrench enough time between the pushings at the run button to get back to its starting position. Repeat this action till the adjusted pump pressure is reached. To achieve the right bolt load in the stud we have to repeat the last stroke of the wrench and keep the start button pushed. We give the wrench some time to crawl to the final position and the desired pump pressure which equals the right bolt load. 7. Repeat step 5 and 6 till all bolts are completely and fully tensioned. Fig 10: Tensioningof the NUT’s with the remote control 5.2 Detensionen - loosening The HYTORC NUTTM can be detached easily and reused again. 1. Before you use the wrench on the NUT, assure yourself that the wrench and the driving axle or NUT-drive is connected as it should be. Check the wrench and NUT-drive by running it freely and be sure the rotation is anti-clockwise. You only repeat this step when there is a change of wrench or nut-drive. 2. In general to detension the bolts, the pump needs a higher pressure, referring to the conversion table delivered with the HYTORC NUTTM . Adjust the pump pressure a bit higher than the pressure you need to tension. Don‟t push the pressure to its highest possible level!! This can cause damage to the NUT-drive and HYTORC NUTTM‟s. 3. Remove the NUT-drive axle from the wrench. Place the NUT-drive to the NUT by position first the inner splines to the inner nut and after that turn the outer teeth of the drive and position this drive ring to the toothed outer nut. Be aware that both parts of the drive are well connected to the HYTORC NUTTM . Sometimes you need to turn the driver parts for better positioning. Position the wrench on top of the NUT-drive and install the retainer of the drive. On top of the wrench we should see „LOOSEN‟ written. 4. Use the pump pressure to detension the HYTORC NUTTM, until we can turn the NUT by hand. Adjust the pressure step by step to find the right value for loosening the NUT‟s. Now we noticed the “break loose” point we also can determine if the right lubrication product is used 5. Repeat step 3 and 4 till all bolts are detensioned. In some cases it is necessary to détension in more steps because of the high bolt load. We advise to this method for all of the last bolts at any construction. This releases the forces in the construction more equal. FOR MOR INFORMATION HYTORC Clamp BV | Platinawerf 8 - 6641 TL Beuningen - NEDERLAND | Tel: +31(0)24 - 3 660 660 | www.hytorc.nl HYTORC Benelux BVBA | Ysselaarlaan 65B - 2630 Aartselaar - BELGIË Version 1.04.2011 | Tel : +32(0)38 - 705 220 | www.hytorc-benelux.be 8 When corrosion makes it impossible to unscrew the NUT after detensioning, than use a hex/spline adapter. To use the hex/spline adapter, position the adapter like we did with the NUT-drive. Place a square drive hand tool wrench on top of the adapter and unscrew the HYTORC NUTTM from the bolt. Inner nut Bolt Outer nut Important: Before we will reuse the NUT‟s it is very important and necessary to clean all parts completely and provide new lubrication from top to bottom . please read the instructions in the next chapter . Washer Construction / flange Fig 11: Profile HYTORC NUTTM on bolt with NUT-drive and wrench 6. LUBRICATION INSTRUCTIONS De lubrication instructions of the HYTORC NUTTM: Use a clean stiff bristle brush. ATTENTION: At balanced HYTORC NUTTM ‟s you have to keep the parts of each NUT together !!! STEP 1: Regard that all thread and splines are free of dir tand grit. Lubricate the internal thread of the outer nut fully and completely to get a good coverage. Fig 12: the 3 parts of the NUT STEP 2: Lubricate the external thread of the inner nut entirely with a brush to get a complete coverage. STEP 3: Turn the inner nut section together with the outer nut section in a way that the splines at the outside of the inner nut stick out for placing the washer later. Be aware that the teeth of the outer nut are at the opposite of the splines of the inner nut. FOR MOR INFORMATION HYTORC Clamp BV | Platinawerf 8 - 6641 TL Beuningen - NEDERLAND | Tel: +31(0)24 - 3 660 660 | www.hytorc.nl HYTORC Benelux BVBA | Ysselaarlaan 65B - 2630 Aartselaar - BELGIË Version 1.04.2011 | Tel : +32(0)38 - 705 220 | www.hytorc-benelux.be 9 STEP 4: Turn the assembled parts upside down. Spread the waste lubricant to the bottom side of the outer nut and to the splines of the inner nut. Ad some more lubricant when there is not enough for the splines. STEP 5: Put some lubricant on the inside splines of the washer and at the top side, to get full coverage at these surfaces . STEP 6: Slide the washer on the assembled parts as shown in figure 13 and indicated with the arrows. The position of the inner nut and the washer needs to be even at the bottom side of both. Turn the outer nut in time you keep the washer tight to provide the wanted position of the complete nut. Follow the mounting instructions at chapter 5.1. At hot applications it is better to use graphite spray instead of grease lubricant. The graphite spray or powder is more resistant against high temperatures and grease (fat) particles can give a lot of resistant when dried or burned. Fig 13: Lubrication-and assemble-instructions FOR MOR INFORMATION HYTORC Clamp BV | Platinawerf 8 - 6641 TL Beuningen - NEDERLAND | Tel: +31(0)24 - 3 660 660 | www.hytorc.nl HYTORC Benelux BVBA | Ysselaarlaan 65B - 2630 Aartselaar - BELGIË Version 1.04.2011 | Tel : +32(0)38 - 705 220 | www.hytorc-benelux.be 10