1
www.activeon.com
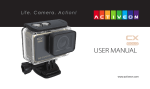
USER MANUAL
Table Of Contents
Names of each part
Operation & button description
Start the camera
LCD screen shot
Graphical icon description
Video recording
Photo shoot
Quick setup
User setup menu
Playback mode
Recharging battery
Connect ACTIVEON DX to smartphone
Transferring data to computer
Firmware Update
Features and specifications
Package Includes
1
2
3
4
5
8
8
9
11
15
18
18
21
22
23
24
ENGLISH
USER MANUAL
Please read this manual completely and thoroughly before use!
www.activeon.com
1. Names of each part
① Power / REC. / Select
② Setup / Quick setup / right
③ Mode / Zoom / Left
④ Internal MIC
④
⑤ Micro HDMI Port (Cable not included) ①
⑥ Mini USB Port
⑦ Speaker
⑧ Micro SD Slot (SD Card not included)
⑨ Li-ion battery slot
⑩ LED Indicator
② ③
⑩
⑤
⑥
⑨
⑦
⑧
1
2. Operation & button description
ACTIVEON DX is operated by three buttons (Button ⊙, SETUP, MODE)
Button (⊙) means 'POWER / REC. / SELECT'.
● Button (SETUP) means 'SETUP / QUICK SETUP / RIGHT'.
● Button (MODE) means 'MODE / ZOOM / LEFT'.
● The definition of each button is as below table.
●
●
Button
Description
Power On / Off
⊙
Press the POWER button and hold for 2 seconds
* If Auto Power off is set, the camera will automatically shut down in 3 minutes
REC Start / Stop
⊙
Press the (⊙) button to start video recording or photo shoot
Switch Mode
MODE
Quick Setup
SETUP
Press the (SETUP) button to change quick setup before recording
Enter Quick Setup
⊙
Press the (⊙) button to confirm to enter the quick setup menu
Function
2
when there is no operation.
Press the (MODE) button and hold for 2 seconds to switch modes
(Video, Photo, Playback)
Description
Function
Button
User Setup
SETUP
Press the (SETUP) button and hold for 2 seconds to enter user setup mode
Change setting
category
SETUP
Within user setup mode, press (SETUP) button to switch category
Enter Setting Menu
MODE
Within user setup mode, press (MODE) button to enter setting menu
in each category
Confirm setting menu
⊙
Within user setup mode, press (⊙) button to confirm setting menu
Zoom Mode
MODE
Press MODE button to enter zoom mode
Zoom-in
SETUP
Press SETUP button to zoom-in (max. 4x enlarge) 1x → 2x → 3x → 4x → 1x
3. Start the camera
1. Open the battery cover and insert ACTIVEON DX Li-ion battery.
2. Open the battery cover and insert Micro SD card. (The camera does not record when there is no Micro SD inside)
3. Press the shutter POWER (⊙) button and hold for two seconds.
The camera turns on and LCD monitor shows camera image.
3
4. LCD screen shot
Video screen
①
② ③
⑩
④
⑤
No.
Function
①
Current mode
②
③
④
⑥
⑦
⑧ ⑨
Photo screen
①
⑥
4
② ③
⑦
⑩
⑧ ⑨
④
⑤
Description
Shows current shooting mode
(video or photo)
WiFi
Shows WiFi connection status
Zoom
Shows current zoom level
Memory capacity
⑤
Battery
⑥
Recording option
⑦
Resolution
⑧
Image quality
⑨
WiFi Hotkey
⑩
Field of View (FOV)
Shows usable memory capacity in percentage (%)
Shows battery capacity status
While shooting video or photo, it shows current
recording option
While shooting video or photo, it shows resolution
and speed
While shooting video or photo, it shows image
quality
Shows WiFi connectivity (WiFi OFF/APP/RC/EXIT)
Shows the current Field of View (wide/medium/narrow)
For photos only use “wide”. Use any setting for videos.
5. Graphical icon description
Mode
Function
Current mode
ALL
WiFi
Zoom
Memory capacity
Battery
VIDEO
Recording
options
Description
Icons
Video Recording Mode
Photo Shooting Mode
WiFi signal activated
WiFi signal deactivated
Zoom level (Upto x4)
* Zoom function will be disabled during high speed recording
(720p 120fps / 480p 240fps)
Shows usable memory capacity in percentage (%)
Shows battery capacity status
Video recording starts and stops by Shutter REC(⊙) button only.
Record consecutive videos files of setup time continuously.
(1min / 5min / 10min / 30min) - maximum 4GB in each file
Press (⊙) button to stop.
Recording automatically stops in setup time.
Captures one image in setup time and save as time lapse
video file. (1sec / 3sec / 5sec / 10sec / 30sec)
Press (⊙) button to stop.
Loop Mode - When the available space on the memory
card gets below 10%, the oldest file on card will be deleted.
5
Mode
Function
Icons
Description
Full HD (1920x1080) 60fps / 30fps video recording
UXGA (1600x1200) 60fps / 30fps video recording
Real HD (1280x720) 60fps / 30fps video recording
Resolutions
Real HD (1280x720) 120fps high speed video recording
High speed recording file is played with 1/4 speed slow motion video.
* In high speed recording, camera zoom and audio recording will be disabled.
WVGA (848x480) 240fps high speed video recording
High speed recording file is played with 1/8 speed slow motion video.
* In high speed recording, camera zoom and audio recording will be disabled.
VIDEO
Super fine video image quality
* Use CLASS10 memory card only
Image quality
Fine video image quality
Normal video image quality
WiFi Hotkey
6
Shows WiFi connectivity (WiFi OFF/APP/RC/EXIT)
Mode
Function
Description
Icons
Single photo shooting
Captures each image of setup time and save as photo.
Press shutter REC. (⊙) button to stop.
(0.5sec / 1sec / 3sec / 5sec / 10sec / 30sec / 60sec)
Photo shoot
options
* In high speed time lapse mode (0.5sec/1sec), use CLASS10 memory only.
Burst photo shooting (11 photo images per second)
Self-timer photo
12MP (4000x3000) 4:3 ratio
Photo
Image Size
8.5MP (3648 x 2432) 3:2 ratio
7.2MP (3648 x 2052) 16:9 ratio
Super fine photo image quality ( * Use CLASS10 memory card only )
Image quality
Fine photo image quality
WiFi Hotkey
Shows WiFi connectivity (WiFi OFF/APP/RC/EXIT)
Normal photo image quality
7
6. Video recording
1.
2.
3.
4.
After the camera is turned on, press (⊙) button to start video recording.
When the camera starts to record, LED light blinks* and shows recording time on LCD.
Press (⊙) button to stop recording.
Without entering user setting menu, user can select video 'QUICK SETUP' before start recording.
(* If 'LED off' option is selected in user setup, LED light will not blink.)
7. Photo shoot
●
●
Press (MODE) button and hold for two seconds to change to photo camera mode.
Mode changes as
( video mode → photo mode → playback mode → video mode
) in turn.
1. Press (⊙) button to shoot photo.
2. In time lapse photo mode, press (⊙) button to stop photo shooting.
3. Without entering user setting menu, user can select photo 'QUICK SETUP' before start shooting.
8
8. Quick setup
●
Without entering user setting menu, user can adjust various quick setups in live screen.
1. Press (SETUP) button to select quick setup options on bottom of the screen.
2. Quick setup mode changes as
( recording option → resolution → image quality → wifi on/off → exit ) in turn.
3. Select the quick setup option and press (⊙) button to adjust setting option.
4. In setting option, press (SETUP) and (MODE) button to choose setting option.
5. Press (⊙) button to confirm setting option.
Quick setup screen
Operation
Video quick setup screen
Press (SETUP) button to go to quick setup
● Select recording options
● Use (SETUP) and (MODE) button to choose option
● Press (⊙) button to confirm setting option
●
●
9
Quick setup screen
Operation
Video quick setup screen
● Press (SETUP) button to go to quick setup
● Select video resolution and recording speed
● Use (SETUP) and (MODE) button to choose option
● Press (⊙) button to confirm setting option
●
Video quick setup screen
Press (SETUP) button to go to quick setup
● Select image quality
● Use (SETUP) and (MODE) button to choose option
● Press (⊙) button to confirm setting option
●
●
Video quick setup screen
Press (SETUP) button to go to quick setup
● Select WiFi connectivity
● Use (SETUP) and (MODE) button to choose option
● Press (⊙) button to confirm setting option
●
●
10
Quick setup screen
Operation
Photo quick setup screen
● Press (SETUP) button to go to quick setup
● Select photo shooting option
● Use (SETUP) and (MODE) button to choose option
● Press (⊙) button to confirm setting option
●
Photo quick setup screen
Press (SETUP) button to go to quick setup
Select image size
● Use (SETUP) and (MODE) button to choose option
● Press (⊙) button to confirm setting option
●
●
●
9. User setup menu
●
User can select basic settings and detailed setting options through user setup menu.
1. Press (SETUP) button and hold for 2 seconds to enter user setup menu.
2. User setup menu is divided into four categories (video, photo, effect, settings)
3. Press (SETUP) button to move category.
4. Press (MODE) button to enter the sub-menu.
5. Press (⊙) button to select and confirm setting option within sub-menu.
11
Function
Sub menu
Description
NTSC
PAL
1080p 60fps, 30fps
1080p 50fps, 25fps
1200p 60fps, 30fps
1200p 50fps, 25fps
720p 120fps, 60fps, 30fps
720p 100fps, 50fps, 25fps
480p 240fps
480p 200fps
Video
Resolution
Manual
Timer 1min, 5min, 10min, 30min
Recording
option
Time lapse 1sec, 3sec, 5sec, 10sec, 30sec
(captures each image of setup time and save as video file)
Multi file REC. 1min, 5min, 10min, 30min
(record consecutive video files of setup time)
Looping
Super Fine (*Use CLASS10 memory card only)
Photo
Image
quality
Auto rec
12
Fine
Normal
Off / 0sec / 5sec / 10sec
Function
Sub menu
Photo
Recording
option
Resolution
Image
quality
Effect
Time stamp
Aqua Mode
FOV
AE Metering
Description
Manual
Time lapse 0.5sec, 1sec, 3sec, 5sec, 10sec, 30sec, 60sec
(captures each image of setup time and save as photo)
Burst 11 photo images per second
Timer 5sec, 10sec
12M (4000 x 3000) 4:3
8.5M (3648 x 2432) 3:2
7.2M (3648 x 2052) 16:9
Super Fine (*Use CLASS10 memory card only)
Fine
Normal
On / Off . Shows current time in recorded file
On / Off .
When the camera is shooting underwater, select
'aqua scene on' to give more vivid color images in the scene
Wide lens angle
Medium lens angle
Narrow lens angle
Center / Average / Spot
13
Function
Sub menu
Settings
Mic. Volume
Buzzer
LED
WiFi
TV Out
TV OSD
Time
Format
Default Setting
Auto LCD Off
Auto Power Off
Info
14
Description
Off, 30%, 60%, 100%
Buzzer On / Off
LED On / Off
WiFi On / Off
NTSC / PAL
TV OSD On / Off
Set current time (YYYY/MM/DD HH:MM)
Yes / No.
Memory card format
Yes / No
Turn back all settings to default
Yes / No
LCD will automatically turn off in 30sec when there is
no operation
Yes / No
The camera will automatically turn off in 3min when there
is no operation.
Shows current firmware version
10. Playback mode
Press (MODE) button and hold for two seconds to change to playback mode.
Mode changes as
( video mode → photo mode → playback mode → video mode ) in turn.
● User can view recorded video or photo through LCD screen of the camera.
1. In playback mode, press (⊙) button to select the file type to playback( video or photo )
2. Thumbnail of recorded file will be displayed.
Press (SETUP) and (MODE) button to use control panel, and select the file by pressing (⊙) button.
3. While the file is playing, you can press (SETUP) and (MODE) button to use control panel and select the file by
pressing (⊙) button.
●
●
Operation
Playback mode
In playback mode, select the file type to playback
( video or photo )
Press (SETUP) and (MODE) button choose file type
● Press (⊙) button to select
●
●
15
Playback mode
Operation
Thumbnail of video files. Select the file to play
● Press (SETUP) and (MODE) button to use control panel
● Press (⊙) button to select
●
Video playback
Press (SETUP) and (MODE) button to use control panel
● Press (⊙) button to select
●
●
Thumbnail of photo files. Select the file to display.
Press (SETUP) and (MODE) button to use control panel
● Press (⊙) button to select
●
●
16
Operation
Playback mode
Photo playback
● Press (SETUP) and (MODE) button to use control panel
● Press (⊙) button to select
●
11. Recharging battery
LCD will show the low battery icon when the battery is too low and close to the cut off level.
The camera will save the file, if it is recording, and then turn off. Then, you must recharge your battery.
It will take about 3.5 hours for full charging by USB.
● You can use a Battery Charger (optional accessory) for quick charging.
It will take about 2.5 hour for full charging.
●
●
●
1.
2.
3.
4.
Turn off the camera.
Connect the camera USB port to your computer via USB cable.
Status LED will be turned on and battery recharging will be started.
LED will be turned off when it is fully charged.
17
12. Smartphone control
Utilizing WiFi function of ACTIVEON DX, user can control the camera through smartphone.
Compatible with iOS ver. 5.0 or better, Android OS Ginger Bread or better.
● Before connect the camera, download 'ACTIVEON APP' application from smartphone app store.
● Search for 'ACTIVEON APP' in iPhone App Store or Google Play Store
●
●
* While smartphone is connected to the camera, camera button operation will be disabled.
* Select all settings of the camera before connect to your smartphone.
* 'ACTIVEON APP' features will be upgraded through application update through your smartphone.
13. Connect ACTIVEON DX to smartphone(using ACTIVEON App)
Turn on 'WiFi APP'
function in ACTIVEON DX.
● Wait 1 min to activate WiFi
signal in the camera.
●
(For the first time connection)
●
●
18
WiFi signal is activated.
WiFi is ready to connect.
'ACTIVEON APP' is not
connected to ACTIVEON DX.
● Setup WiFi connection
between the camera and
the smartphone.
●
●
●
Enter 'Setup' of smartphone.
Select 'ACTV_xxxx' in WiFi
setting.
●
Default password is
'12345678'
Run 'ACTIVEON APP' application
in smartphone.
Click 'Connect' button in application to connect ACTIVEON DX.
● Smartphone screen will display
live screen of the camera.
●
●
19
●
Control the camera through the control panel of smartphone application.
① Live screen display
④ Viewer mode
Video/Photo viewer
Video/Photo download : User can select to
download video file size between original size
and reduced size.
⑤ User Settings
Change camera settings
Shows live screen display
② Video mode
Start / Stop video recording
③ Photo mode
Start / Stop photo shooting
Note: Timelapse or 240fps recording supports only original size.
Note:
1. Downloading will be cancelled when
telephone rings or application program is
closed.
2. While smartphone is connected to the
camera, the camera button operation will
be disabled.
3. 'ACTIVEON APP' features will be
upgraded through application update of
your smartphone.
4. It does not support 'live screen',
'preview' and 'reduced size file
downloading' in timelapse video or
recording speeds of 120 fps and up.
5. Live screen does not display when the
status of Time Stamp is on in the Setting.
Live Screen / REC. Mode
20
Mode Select
Viewer Mode
14. Transferring data to computer (compatible both in Windows & Mac OS)
If the camera is connected to a computer or Battery Charger while it is powered off, the camera
starts to recharge the battery.
● If the camera is connected to a computer while it is powered on, the camera changes
to file-transfer mode.
● While the camera is connected to a Battery Charger or Car charger for recharge, the camera
can record while it is recharging.
●
1.
2.
3.
4.
5.
6.
7.
8.
9.
Power on ACTIVEON DX.
Connect the camera to a computer via USB cable.
The camera LCD will display as 'USB Ready'.
Go to ‘my computer’ in PC.
Search ‘removable disc’.
Double click ‘removable disc’.
Double click ‘DCIM’ folder.
Open the folders to find video or photo file.
Copy and paste files to the computer.
21
15. Firmware Update (find the latest firmware in www.activeon.com)
You can always find the latest firmware updates of ACTIVEON products on the website.
www.activeon.com
● Firmware upgrade may not available if battery is too low.
Recharge up to two cells of battery gauge for proper upgrade.
●
1. Format the memory card, and copy firmware file to the root directory of Micro SD card.
2. Insert the Micro SD to ACTIVEON DX and turn on power.
3. Firmware upgrade will be automatically started as showing the updating status on the LCD screen.
4. When upgrade is completed, the camera shows 'F/W Updating 7/7 stage 100%' and automatically turns off.
( *Do NOT turn off the device or take out the battery during firmware upgrade. )
22
16. Features and specifications
"ACTIVEON DX" 1080p 60fps Action camera
FULL HD (1920 x 1080) resolution, 60fps recording
● 60m waterproof housing
● 12M Pixel high precision digital Image CMOS sensor
● 152° wide-angle field of view (FOV)
● Built in 2.0" LCD (320x240)
● Built in WiFi antenna
● Versatile recording resolution (1080p / 1200p / 720p / 480p)
● High speed slow motion recording (720p 120fps / 480p 240fps)
● Maximum 11 burst photo shoots in one second
● H.264 codec, saved as MP4 format
● Rechargeable Li-ion battery
● Battery running time : max. 120 minutes of continuous recording
(* recording time may vary, depends on environmental condition.)
● Recharging time : 3.5 hours by USB
2.5 hours by Battery Charger (Optional Accessory)
● Easy graphical user interface in LCD display
● Full line of mounting accessories
●
●
23
17. Package Includes
. ACTIVEON-DX
. Long connector
. Screw(x3)
24
Note: A microSD card is not included with the camera. A high-performance
microSD card is recommended for your ACTIVEON camera.
. Waterproof Housing
. Short connector
. Opened Backdoor
. 90° Pivot Connector (Short)
. Rechargeable Battery
. Flat Adhesive
Mount
. Extension Connector
. USB Cable
. Curved Adhesive
Mount
. 90° Pivot Connector (Long)
. Pouch