1
Solid State Timers and Controllers
4970
TIMING
ENDED
5100
TIMING
ENDED
START
STOP
START
STOP
A
B
C
4970 & 5100
Configurable Controllers
User's Manual
(including 4973 & 5103)
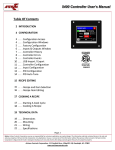
The 4970 and 5100 configurable controllers provide a level of flexibility
previously unavailable with products in it's class. These devices allows the
OEM to configure the products to suit numerous applications by providing the
ability to configure many operating parameters, including: time range, user's
adjustability within the time range, style of beeping and LED display activity at
the end of the timing cycle, power conservation, recovery from power loss
during timing, and alarming before the end of the timing cycle, all in one
controller.
The 4973 and 5103 models provide an input for a remote switch used to
start/pause/stop the timing cycle, all other configurations are identical
Part Number
Version 1.80
Operating Voltage
V
I S I T O U R W E B S I T E A T
: www.artisancontrols.com
© 2014 Artisan Controls
Corporation
Notice: Artisan Controls Corporation assumes no responsibility for customers applications or product design, it is the customers responsibility to analyze
their application and test the selected product to determine its suitability for use. The information and data contained herein is the sole and exclusive
property of Artisan Controls Corporation. Any duplication, misuse, or conversion of this information without the express written consent of Artisan
Controls Corporation is illegal and will result in damages including court costs and attorney fees being assessed against the party misusing this property
Tel: 973-598-9400 • Fax: 973-598-9410 • Toll Free: 800-457-4950
Artisan Controls Corporation, 111 Canfield Ave, Bldg B15-18, Randolph, New Jersey 07869, USA
Solid State Timers and Controllers
Table of Contents
Section 1 - Basic Configuration - Select the time range, backwards compatable with previous versions.
Section 2 - Advanced Configuration - Instructions for setting the other options in the controller
Section 3 - Timing Configuration - Setting the time range used and the adjustability within the range.
Section 4 - Notification Configuration - Set how the controller announces the end of the timing cycle.
Section 5 - Operation Configuration - Set the functioning of the output relay, recovery from power
interruption, and LED display power saving options.
Section 6 - Alarming Configuration - Alarm before the end of the timing cycle.
Section 7 - Configuration Example & Form- Worksheet for documenting your configuration
Section 8 - Controller Operation - Using the controller after configuration
Section 9 - Installation
Section 10 - Wiring
Version 1.80
V
I S I T O U R W E B S I T E A T
: www.artisancontrols.com
© 2014 Artisan Controls
Corporation
Notice: Artisan Controls Corporation assumes no responsibility for customers applications or product design, it is the customers responsibility to analyze
their application and test the selected product to determine its suitability for use. The information and data contained herein is the sole and exclusive
property of Artisan Controls Corporation. Any duplication, misuse, or conversion of this information without the express written consent of Artisan
Controls Corporation is illegal and will result in damages including court costs and attorney fees being assessed against the party misusing this property
Tel: 973-598-9400 • Fax: 973-598-9410 • Toll Free: 800-457-4950
Artisan Controls Corporation, 111 Canfield Ave, Bldg B15-18, Randolph, New Jersey 07869, USA
Solid State Timers and Controllers
Section 1 - Basic Configuration
The basic configuration for these controllers is to select the time range, this maintains backwards
compatability with previous versions of these controllers. To access the basic controller configuration, hold
the Down button, apply power, and release the button. The controller displays a single digit indicating the
time range:
Code
Timing Range
0
Seconds 0.01 to 99.99
1
Minutes:Seconds, 00:01 to 99:59
2
Seconds 1 to 9999
3
Hours:Minutes, 00:01 to 99:59
Use the up and down buttons to change to the desired range then turn the controller off. The other
default operating parameters shown below can be modified using the Advanced Configuration option in the
next section.
Timing is adjustable over the whole timing range
The internal alarm beeps 3 times per second for
5 seconds at the end of the timing cycle
The output relay is on during the timing cycle
The LED display is on continuously
The controller will resume the timing cycle if
power is interrupted during a timing cycle
The controller does not alarm before the end of
the timing cycle
If setting the timing range is all that is required you can skip to Section 3 for details about the
operation of the controller.
The firmware version of the controller can be displayed by pressing and holding both the up and
down arrows then applying powering to the controller.
Version 1.80
V
I S I T O U R W E B S I T E A T
: www.artisancontrols.com
© 2014 Artisan Controls
Corporation
Notice: Artisan Controls Corporation assumes no responsibility for customers applications or product design, it is the customers responsibility to analyze
their application and test the selected product to determine its suitability for use. The information and data contained herein is the sole and exclusive
property of Artisan Controls Corporation. Any duplication, misuse, or conversion of this information without the express written consent of Artisan
Controls Corporation is illegal and will result in damages including court costs and attorney fees being assessed against the party misusing this property
Tel: 973-598-9400 • Fax: 973-598-9410 • Toll Free: 800-457-4950
Artisan Controls Corporation, 111 Canfield Ave, Bldg B15-18, Randolph, New Jersey 07869, USA
Solid State Timers and Controllers
Section 2 - Advanced Configuration
To access the advanced controller configuration press and hold the Start/Stop button, apply power,
and release the button. The unit then displays the first configuration item which is the timing range showing
rA on the left side of the display. Pressing and releaseing the Start/Stop button again move to the next
configuration item which is the cycle adjustment type (full, partial, single value) indicated by the CA on the
display.Use the Start/Stop button to cycle through all the configuration items, and use the Up and Down
arrow buttons to change the value of each configuration item as required. The last item on the list is a
configuration check code which is calculated based on all the values of the configuration items and can be
used to verify the proper setting of the controller configuration.
The three time values are shown as - - - - which indicates that they are not used, the options which enable
their use are disabled. The time values are adjusted just like the time setting in normal operation, the Up and
Down buttons change the value, holding them down scrolls the value. All time values will wrap around at
either end of their range and are in the units selected for the time range
To reset the controller to its default values as shown below, press and hold the Up button while
applying power to access the self test and configuration reset. The controller displays - -:- - until the Up
button is released, after which it displays UP - -. Press the Up button and it displays - dn -, now press the
Down button. The unit then displays - - SS, press the Start/Stop button. After this button test, the controller
display scrolls through the digits 0 through 9, illuminating the LED above the display every other value. The
output relay is closed for ½ second, then the configuration memory is tested and reset back to the default
values above. Finally the controller resets and displays 0:05. This feature can also be used as a basic
controller test.
DEFAULT FACTORY CONFIGURATION:
Code
rA:00
CA:00
tI:01
------CE:00
EL:05
Ot:00
LP:00
Pr:00
AL:00
Ad:00
---0006
Version 1.80
V
Description
Timing in minutes:seconds
Time adjustable over full range
Time increments by 1
No time limiting or fixed timing
No time limiting
Triple beeps for EL secs @ end of cycle
Length of annunciation = 5 sec
Output relay on during timing
LED display on continuously
Continues timing cycle if power interrupted
Alarming disabled
Alarming disabled
Alarming disabled
Configuration check code
I S I T O U R W E B S I T E A T
: www.artisancontrols.com
© 2014 Artisan Controls
Corporation
Notice: Artisan Controls Corporation assumes no responsibility for customers applications or product design, it is the customers responsibility to analyze
their application and test the selected product to determine its suitability for use. The information and data contained herein is the sole and exclusive
property of Artisan Controls Corporation. Any duplication, misuse, or conversion of this information without the express written consent of Artisan
Controls Corporation is illegal and will result in damages including court costs and attorney fees being assessed against the party misusing this property
Tel: 973-598-9400 • Fax: 973-598-9410 • Toll Free: 800-457-4950
Artisan Controls Corporation, 111 Canfield Ave, Bldg B15-18, Randolph, New Jersey 07869, USA
Solid State Timers and Controllers
Section 3 - Timing Configuration
Timing Cycle Range Options
This is the primary option to be configured for any application. Use the Start/Stop button to display
the rA option code. Use the Up and Down buttons to set the timing range to rA00 for minutes and seconds
up to 99:59 (default), rA01 for hours and minutes up to 99:59, rA02 for seconds up to 9999, rA03 for
seconds up to 99.99, rA04 for minutes up to 9999, or rA05 for hours up to 9999.
Cycle Time Adjustment
If you need your users to have the ability to set any time within the full timing range you configured
above, leave this value at CA00 (default). With this value configured the following time values will display as
- - - - indicating that they are not available for this configuration.
If your application requires limiting the users time range, use the Up or Down button to set this
option to CA01, the press Start/Stop to access the first time value. Use the Up and Down buttons to set this
to the minimum time, then press Start Stop again and use the Up and Down buttons to set the next value to
the maximum time. Note: Be sure to set the first time less than second time.
Finally, you can prevent any time adjustments by the operator by setting this option to CA02. With
this option the first time is set for the fixed cycle time value, the second time value will display as - - - indicating that it is not used.
Timing Increment
This value is the amount that the time displayed changes when using the Up and Down arrows. The
default value is tI01 and can be set to any value up to tI99. Setting the value to tI15 will cause the time to
change in 15 second increments. The controller will always round off the current value to increments of this
value, for example if the lower limit is set to 1:10 by using the CA codes and the time increment is 15, the
will not allow times lower than 1:15 to be set.
Timing Cycle Range
rA:00
Minutes:Seconds, 00:01 to 99:59
rA:01
Hours:Minutes, 00:01 to 99:59
rA:02
Seconds 1 to 9999
rA:03
Seconds 0:01 to 99.99
rA:04
Minutes 1 to 9999
rA:05
Hours 1 to 9999
Cycle Time Adjustment
CA:00
Full time range available
CA:01
Adjustable between limits
CA:02
Timing fixed
Version 1.80
V
Time Adjustment Increment
tI:XX
Time increment value, default = 1
Lower Limit or Fixed Time
----
Disabled by code CA:00
XXXX
Displays Lower Time Limit for CA:01
XXXX
Displays Fixed Time for CA:02
Upper Limit Time
I S I T O U R W E B S I T E A T
----
Disabled by code CA:00 or CA:02
XXXX
Displays Upper Time Limit for CA:01
: www.artisancontrols.com
© 2014 Artisan Controls
Corporation
Notice: Artisan Controls Corporation assumes no responsibility for customers applications or product design, it is the customers responsibility to analyze
their application and test the selected product to determine its suitability for use. The information and data contained herein is the sole and exclusive
property of Artisan Controls Corporation. Any duplication, misuse, or conversion of this information without the express written consent of Artisan
Controls Corporation is illegal and will result in damages including court costs and attorney fees being assessed against the party misusing this property
Tel: 973-598-9400 • Fax: 973-598-9410 • Toll Free: 800-457-4950
Artisan Controls Corporation, 111 Canfield Ave, Bldg B15-18, Randolph, New Jersey 07869, USA
Solid State Timers and Controllers
Section 4 - Notification Configuration
Cycle End Notification and End Length
This option configures the length and type of the audible and visual indication thst the timing cycle is
complete.
The selected pattern can be set to end automatically after the configured End Length (default) or to
continue until the operator presses any of the three keys thereby acknowledging the end of the timing cycle.
The beeper can be configured to either emit triple beeps
once per second (default) or to turn on continuously. The
Length
Beeper
Display
LED display can be set to stay fully lit (default) or to
EL
Key Triple Cont Cont Flash
Code
flash twice per second.
CE00
X
X
X
See the table to the right for details on
CE01
X
X
X
configuring this option. Press the Up and Down buttons
CE02
X
X
X
to change this option to the desired value.
CE03
X
X
X
If the pattern selected uses the End Length,
CE04
X
X
X
press Start-Stop again to access the EL code, then use
CE05
X
X
X
the Up and Down arrows to configure the number of
CE06
X
X
X
seconds the end notification is to last up to 99 seconds,
CE07
X
X
X
setting this value to 00 turns the Cycle End Notification
EL = End Length configured for EL code
off.
Section 5 - Operation Configuration
Output Relay Type
The output relay of the 4970 can be configured to operate in several different modes. The default
mode (Ot00) is for the relay to be energized during the timing cycle for standard countdown timer operation.
The next two options allow the relay to be off during timing and to energize at the end of the cycle, this is
typically used to trigger other means of indicating that the timing cycle is ended. Option Ot01 turns the relay
on for the duration of the Cycle End Notification. Depending on the CE and EL configurations this can be
either the time defined in the EL parameter or until the operator presses a key. Option Ot02 turns the relay
on at the end of the timing cycle for one second regardless of the setting of the CE and EL values. Finally,
option Ot03 keeps the relay off always, generally used to conserve power.
LED Display Power
This option changes the operation of the LED display when the controller is left idle. Setting this to
LP00 leaves the display energized continuously as long as the controller has power applied (default).
If this option is changed to LP01 the controller dims the display after 1 minute of no button activity
when in the idle state. The display will stay at full brightness when either actively running a timing cycle or
when paused during a timing cycle. It is only when the timing cycle is fully complete does the 1 minute
countdown start. Once the display dims pressing any button restores the display to full brightness and
resets the 1 minute countdown.
Setting this option to LP02 will cause the display to turn off completely instead of dimming after the
1 minute countdown. This can provide significant power savings when the unit is power by 12V DC thereby
extend the life of battery and solar powered systems.
Version 1.80
V
I S I T O U R W E B S I T E A T
: www.artisancontrols.com
© 2014 Artisan Controls
Corporation
Notice: Artisan Controls Corporation assumes no responsibility for customers applications or product design, it is the customers responsibility to analyze
their application and test the selected product to determine its suitability for use. The information and data contained herein is the sole and exclusive
property of Artisan Controls Corporation. Any duplication, misuse, or conversion of this information without the express written consent of Artisan
Controls Corporation is illegal and will result in damages including court costs and attorney fees being assessed against the party misusing this property
Tel: 973-598-9400 • Fax: 973-598-9410 • Toll Free: 800-457-4950
Artisan Controls Corporation, 111 Canfield Ave, Bldg B15-18, Randolph, New Jersey 07869, USA
Solid State Timers and Controllers
Section 5 - Operation Configuration (cont)
Recovery From Power Interruption
When power is lost during a timing cycle, proper operation of the controller upon restoration of power
can be critical to many applications. This factory default for this option is Pr00 which enables the controller
to immediately return to the point in the timing cycle when power was lost. The time on the display when the
power was lost is restored and the output relay is energized allowing the controller to complete it's timing
cycle.
The next option is to have the controller restore the last known time as per the above option, but to
be placed into the pause mode with the relay off, thereby requiring the operator to press Start/Stop to
continue the interrupted timing cycle. Set this option to Pr01 in order select this power recovery mode.
The final option is code Pr02 which forces the controller to reset to the beginning of a new timing
cycle when power returns, needing Start/Stop to be pressed for a new timing cycle. This would be used for
applications which requires full timing cycles with no interruptions for proper operation.
Output Type
Ot:00
Output relay on during timing
Ot:01
Relay on for end notification length
Ot:02
Relay on for 1 second @ end
Ot:03
Relay always off
LED Display Power
LP:00
LED display always on
LP:01
Display dims after 1 minute in idle mode
LP:02
Display OFF after 1 minute in idle mode
Recovery from Power Interruption
Pr:00
Return to last time, output on, continue timing
Pr:01
Return to last time, output off, in pause mode
Pr:02
Return to full cycle time, ready for new cycle
Version 1.80
V
I S I T O U R W E B S I T E A T
: www.artisancontrols.com
© 2014 Artisan Controls
Corporation
Notice: Artisan Controls Corporation assumes no responsibility for customers applications or product design, it is the customers responsibility to analyze
their application and test the selected product to determine its suitability for use. The information and data contained herein is the sole and exclusive
property of Artisan Controls Corporation. Any duplication, misuse, or conversion of this information without the express written consent of Artisan
Controls Corporation is illegal and will result in damages including court costs and attorney fees being assessed against the party misusing this property
Tel: 973-598-9400 • Fax: 973-598-9410 • Toll Free: 800-457-4950
Artisan Controls Corporation, 111 Canfield Ave, Bldg B15-18, Randolph, New Jersey 07869, USA
Solid State Timers and Controllers
Section 6 - Alarming Configuration
The 4970 and 5100 controllers provide the ability to create alarms in order to inform the operator the
timing cycle is about to end. The Alarm Notification (AL) and the Alarm Duration (Ad) options are used to
configure the alarming parameters along with the Time Value .
The first step in configuring the alarming is to set the Alarm Notification option to a value other than
AL00 (default). This must be done first in order to be able to change the Alarm Duration and Time Value 1
options. Option AL01 uses the triple beep pattern of the beeper, AL02 turns the beeper on continuously,
AL03 again uses the triple beep pattern but adds LED display flashing, and finally option AL04 enables
continuous beeper operation with LED display flashing.
Once the alarm pattern is set, the next item to be set is for now long the controller alarms. Press
Start/Stop to display the Ad value and use the Up and Down arrows to change the last two digits to the
length of time in seconds you require the notification pattern to last. For example, setting this option to Ad10
will turn the alarming on for 10 seconds.
The final option to configure is when the alarming starts. Press Start/Stop again to access this time
value. The controller now displays the value which indicates at what time before the end of the cycle the
alarming should start. This value is based on the timing range selected. For example: setting this value to
1:00 when in range 01 (mm:ss) indicates that the alarming starts one minute before the end of the cycle,
but if you are in timing range 02 (hh:mm) you would have to set it to 0:01 to start the alarming pattern at 1
minute.
Alarming Notification
AL:00
No alarming enabled
AL:01
Triple beeping
AL:02
Continuous tone
AL:03
Triple beeping with display flash
AL:04
Continuous tone with display flash
Alarm Duration
Ad:00
Disabled by code AL:00
Ad:XX
Alarm length in seconds, 01 - 99
Alarm Time
----
Disabled by code AL:00
XXXX
Displays alarm time for AL:01-AL:04
Version 1.80
V
I S I T O U R W E B S I T E A T
: www.artisancontrols.com
© 2014 Artisan Controls
Corporation
Notice: Artisan Controls Corporation assumes no responsibility for customers applications or product design, it is the customers responsibility to analyze
their application and test the selected product to determine its suitability for use. The information and data contained herein is the sole and exclusive
property of Artisan Controls Corporation. Any duplication, misuse, or conversion of this information without the express written consent of Artisan
Controls Corporation is illegal and will result in damages including court costs and attorney fees being assessed against the party misusing this property
Tel: 973-598-9400 • Fax: 973-598-9410 • Toll Free: 800-457-4950
Artisan Controls Corporation, 111 Canfield Ave, Bldg B15-18, Randolph, New Jersey 07869, USA
Solid State Timers and Controllers
Section 7 - Configuration Example and Form
Configuration Example
The desired operation for this example is:1) the timing range is minutes and seconds (mm:ss), 2)
cycle times to be adjustable from 15 to 25 minutes in 15 second increments, 3) continuous tone with LED
display flashing at the end of the cycle until the operator to presses a key, 4) the output relay turns on until
the operator presses a key, 5) the LED will dim after 1 minute of inactivity, 6) interrupted timing cycles must
be manually continued for safety, 7) alarming is enabled triple beeps for 10 seconds, and finally 8) the
alarming starts 30 seconds before the end of the timing cycle. These are the configuration options to be set
to meet these requirements:
Code
rA:00
CA:01
tI:15
15:00
25:00
CE:07
LP:01
Pr:01
AL:01
Ad:10
00:30
Version 1.80
V
Description
Timing in minutes:seconds
Time adjustable between limits
Time adjustable in 15 second increments
Minimum adjustable time value
Maximum adjustable time value
Continous tone with LED flash until key press
LED displays goes dim after 1 minute
Recovers to interrupted cycle time in pause mode
Triple beep alarming
Alarming for 10 seconds maximum
Alarming starts 30 seconds before end
I S I T O U R W E B S I T E A T
: www.artisancontrols.com
© 2014 Artisan Controls
Corporation
Notice: Artisan Controls Corporation assumes no responsibility for customers applications or product design, it is the customers responsibility to analyze
their application and test the selected product to determine its suitability for use. The information and data contained herein is the sole and exclusive
property of Artisan Controls Corporation. Any duplication, misuse, or conversion of this information without the express written consent of Artisan
Controls Corporation is illegal and will result in damages including court costs and attorney fees being assessed against the party misusing this property
Tel: 973-598-9400 • Fax: 973-598-9410 • Toll Free: 800-457-4950
Artisan Controls Corporation, 111 Canfield Ave, Bldg B15-18, Randolph, New Jersey 07869, USA
Controller Configuration
Timing Cycle Range
Value
rA00
Minutes:Seconds, 00:01 to 99:59
rA01
Hours:Minutes, 00:01 to 99:59
rA02
Seconds 1 to 9999
rA03
Seconds 0.01 to 99.99
rA04
Minutes 1 to 9999
rA05
Hours 1 to 9999
(default)
Cycle Time Adjustment
CA00
Full time range available
CA01
Adjustable from Time Value 2 to Time Value 3
Timing fixed at Time Value 2
CA02
(default)
Timing Increment
tIXX
Timing change increment, tI01
(default)
Lower Limit or Fixed Time
----
Not used
XXXX
Low er Time Limit for CA 01 or Fixed Time for CA 02
(default)
Upper Limit
----
Not used
XXXX
Upper Time Limit for CA 01
(default)
Cycle End Notification
CE00
Triple beep for End Length
CE01
Triple beep until key pressed
CE02
Continuous tone for End Length
(default)
CE03
Continuous tone until key pressed
CE04
Triple beep for End Length, LED display flashing
CE05
Triple beep until key pressed, LED display flashing
CE06
Continuous tone for End Length, LED display flashing
CE07
Continuous tone until key pressed, LED display flashing
End Notification Length
ELXX
Notification @ cycle end in seconds, EL05
(default)
Output Relay Type
Ot00
R elay on during timing cycle
Ot01
Relay on for Cycle End Notification length
Ot02
Relay on for 1 second at end of timing cycle
Ot03
Relay always OFF
(default)
LED Display Power
LP00
LED display always on
LP01
Display dims after 1 minute in idle mode
LP02
Display OFF after 1 minute in idle mode
(default)
Recovery from Power Interruption
Pr00
Return to last time, output on, continue timing
Pr01
Return to last time, output off, in pause mode
Pr02
Return to full cycle time, ready for new cycle
(default)
Alarming Notification
AL00
Alarming disabled
AL01
Triple beeping
AL02
Continuous tone
AL03
Triple beeping with LED display flashing
AL04
Continuous tone w ith LED display flashing
(default)
Alarm Duration
Ad00
Alarming disabled
AdXX
Alarm length in seconds, 01 - 99
(default)
Alarm Time
----
Not used
XXXX
Alarm time for AL01 through A L04
(default)
Notes:
© 2014
Artisan Controls Corporation
Solid State Timers and Controllers
Section 8 - Controller Operation
Once the controller has been configured, apply power with no buttons pressed to operate the
controller normally. The controller is now in idle mode, ready for adjustment of the time (if configured as
such) and running of timing cycles. The first step is to set the cycle time
Setting the Cycle Time
The Up and Down arrows are used to set the time for the interval cycle. Pressing either the Up or
Down button once will change the time up or down by a single digit. Pressing and holding these buttons will
start continually changing the time, the longer the button is held the faster the time will change. If the time
value is increased past the upper limit it will wrap around to the lower limit and continue increasing. The
same holds true for decreasing the time below the lower limit, it will wrap around and start decreasing from
the upper limit. NOTE - 5100 & 5103 Only: To save the current time as one of the preset times, press and
hold the A, B, or C button for two seconds until the controller chirps twice
Running a Timing Cycle
To run a timing cycle, simply press and release the Start/Stop button (or remote switch for 4973/
5103). The output contacts switch and the time starts counting down on the LED display. The LED above the
display will start alternating on and off, and the colon will also alternate on the time display if you are in the
minutes:seconds or hours:minutes time ranges, the colon is not used when in either of the seconds ranges.
Once the display counts down to 0, the output contacts switch back to the off position, the LED
above the time display turns on continuously, and the beeper and/or LED display will start the end of cycle
alarming pattern selected. If the length of the end of cycle notification was configured to use the EL value,
after that configured time all of the beeper & display activity will stop and the display will change from 0
back to the initial cycle time and the LED turns off, the controller is back in idle mode. Pressing any buton
during this time will also stop the notification and return to the preset cycle time. If the length of the end of
cycle notification was set to wait for a key press, the beeper and display activity will continue until any of the
buttons are pressed, at that time the display agains returns to the initial cycle time and the beeper and LED
above the display turns off.
Pausing a Timing Cycle
When the controller is running a cycle, pressing the Up or Down buttons will have no affect on its
operation. Pressing the Start/Stop button will imdediately stop the time display at the current value and turn
the output contacts off. The controller is now in the pause mode. Pressing the Start/Stop button again will
energize the output contacts and continue the timing cycle. Pressing and holding the Start/Stop button for at
least 2 seconds will reset the display back to the beginning of a new timing cycle and put the controller into
idle mode. Pressing the Up or Down buttons while paused will adjust the current time up or down and set
this time as the default cycle time. NOTE - The remote switch is used instead of the Start/Stop switch on
the 4973 & 5103 models
Alarming During a Timing Cycle
If alarming has been enabled, once the alarm sounds the operator can press either the Up or
Down buttons to silence the alarm, the controller continues counting down in the timing cycle. Pressing the
Start/Stop button both silences the alarm and puts the controller into pause mode.
Version 1.80
V
I S I T O U R W E B S I T E A T
: www.artisancontrols.com
© 2014 Artisan Controls
Corporation
Notice: Artisan Controls Corporation assumes no responsibility for customers applications or product design, it is the customers responsibility to analyze
their application and test the selected product to determine its suitability for use. The information and data contained herein is the sole and exclusive
property of Artisan Controls Corporation. Any duplication, misuse, or conversion of this information without the express written consent of Artisan
Controls Corporation is illegal and will result in damages including court costs and attorney fees being assessed against the party misusing this property
Tel: 973-598-9400 • Fax: 973-598-9410 • Toll Free: 800-457-4950
Artisan Controls Corporation, 111 Canfield Ave, Bldg B15-18, Randolph, New Jersey 07869, USA
Solid State Timers and Controllers
Section 9 - Installation
5100
TIMING
Tighten mounting bracket to
3 inch-pounds maximum
ENDED
START
STOP
A
B
C
3.00 Sq.
2.50 MAX.
.093R Max.
2.63 Square Minimum
Panel Cutout Required
Version 1.80
V
I S I T O U R W E B S I T E A T
: www.artisancontrols.com
© 2014 Artisan Controls
Corporation
Notice: Artisan Controls Corporation assumes no responsibility for customers applications or product design, it is the customers responsibility to analyze
their application and test the selected product to determine its suitability for use. The information and data contained herein is the sole and exclusive
property of Artisan Controls Corporation. Any duplication, misuse, or conversion of this information without the express written consent of Artisan
Controls Corporation is illegal and will result in damages including court costs and attorney fees being assessed against the party misusing this property
Tel: 973-598-9400 • Fax: 973-598-9410 • Toll Free: 800-457-4950
Artisan Controls Corporation, 111 Canfield Ave, Bldg B15-18, Randolph, New Jersey 07869, USA
Solid State Timers and Controllers
Section 10 - Wiring
All terminals are 0.25" Q.D.
WIRING FOR
4970 & 5100
NC
NO
COM
Output
Relay
Operating Voltage
no polarity for DC
All terminals are 0.25" Q.D.
REMOTE
START
SWITCH
NO
WIRING FOR
4973 & 5103
Output
Relay
COM
Output
Relay
Contacts
Operating Voltage
NC
no polarity for DC
Version 1.80
V
I S I T O U R W E B S I T E A T
: www.artisancontrols.com
© 2014 Artisan Controls
Corporation
Notice: Artisan Controls Corporation assumes no responsibility for customers applications or product design, it is the customers responsibility to analyze
their application and test the selected product to determine its suitability for use. The information and data contained herein is the sole and exclusive
property of Artisan Controls Corporation. Any duplication, misuse, or conversion of this information without the express written consent of Artisan
Controls Corporation is illegal and will result in damages including court costs and attorney fees being assessed against the party misusing this property
Tel: 973-598-9400 • Fax: 973-598-9410 • Toll Free: 800-457-4950
Artisan Controls Corporation, 111 Canfield Ave, Bldg B15-18, Randolph, New Jersey 07869, USA