1
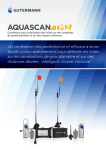
DX-200 – DIVER HELD MAGNETOMETER User Manual
AQUASCAN INTERNATIONAL LTD.
AQUASCAN HOUSE
HILL STREET
NEWPORT.
SOUTH WALES. UK
NP20 1LZ
UNDERSEA DETECTION EQUIPMENT
Tel: +44 1633 841117
Fax: +44 1633 254829
Email: [email protected]
Website : www.aquascan.co.uk
DX-200
DIVER HELD
MAGNETOMETER
.....
Operating Instructions
.....
This manual is copyright © 2009 Aquascan Int. Ltd, all rights reserved. This document must not be
replicated in whole or part without the prior express permission of Aquascan International Ltd.
Rev 5
18th Jan 2012
1
DX-200 – DIVER HELD MAGNETOMETER User Manual
Page/Contents
1.
Front
2.
Page of Contents
3.
Introduction
Applications
Example of appropriate use of the DX-200
4.
General comments
The DX-200 Equipment
6.
Initial Testing of your DX-200
Charging the batteries
8.
Underwater Operation
9.
Care and Maintenance
10.
Battery Care & Checking Battery Performance/Status
12.
Troubleshooting Guide
No Response from the DX-200 Module
Erratic Performance from the DX-200 Module
14.
DX-200 Specifications
15.
DX200 Accessories
17.
DX-200 Optional Accessories
18.
DX-200 Professional Kit
19.
Manufacturer Contact Information
20.
EC Declaration of Conformity
Product Guarantee – loose insert
2
DX-200 – DIVER HELD MAGNETOMETER User Manual
Introduction
The AQUASCAN name has been established for more than two decades and conveys
the message of underwater detection excellence using Proton Magnetometers and
Pulse Induction Metal Detectors (Aquapulse).
The newest addition to the AQUASCAN line of underwater detection equipment is
the AQUASCAN DX-200 DIVER HELD MAGNETOMETER.
The DX-200 is a hand-held gradient magnetometer, utilizing fluxgate technology. It
is ideally suited for an array of search applications, both on land or underwater.
Applications Wreckage – The DX-200 is the ideal tool for the location of buried ferrous wreck
material. There are unlimited applications in all types of archaeological wreck
investigation. It is the ideal diver-operated tool to locate items buried deep in
sediment. It allows accurate mapping of all buried ferrous material prior to seabed
disturbance. It can also detect the presence of some forms of ballast material, which
in many cases gives a magnetic response.
Pipes and Cables – The DX-200 is also ideal for locating and mapping pipes and
armoured cables buried in sediment. It can detect at burial depths of between 1 metre
and 7 metres, dependent on the diameter of the pipe or cable.
E.O.D & Security – There are unlimited applications in all types of underwater
investigation for the presence of ordinance, weapons etc.
Salvage – The DX-200 is a useful tool for the successful recovery of lost items either
in low visibility or where lost in soft sediment. It is the ideal tool to complement
surface operated searching. The tool most requested by users of boat-towed
magnetometers is a diver-held device to help pinpoint magnetometer targets located
with a conventional towed-magnetometer. The DX-200 fills this need extremely well.
Example of appropriate use of the DX-200
The following is an example of an application where the DX-200 might be utilised
with great success and great savings in time and effort.
A magnetometer target is found with a boat-towed system in 35 feet of water. The
visibility is minimal and, upon examination by a diver, the bottom is found to be flat
sand and no target could be detected within the range of a metal detector. The DX-200
is taken to the bottom by the diver, after the unit is switched on and set to Hi
sensitivity, the diver scans the identified area in a series of straight lines radiating out
from the initial seabed marker and notices an increase in the audio frequency in one
direction. Moving slowly in the direction where the audio output of the DX-200
increased, the diver notes where the peak response occurs; using the range switches to
3
DX-200 – DIVER HELD MAGNETOMETER User Manual
desensitise as necessary to note the point where the peak response occurs. The diver
next determines if a larger peak response can be on a line that intersects at 90 degrees
to the original search direction, this will assist in determine the exact centre of the
target and to an extent the size and shape of the target. The above described technique
using steady straight line searching and use of the range switches to reduce the
sensitivity where necessary to determine the true centre of the response will pay
dividends in terms of diver bottom time and in focussing any following excavation in
the most likely productive area.
General comments
The DX-200 is NOT a metal detector. It detects localised disturbances in the earth’s
magnetic field that are caused by the presence of ferrous material. The user should
note that other things can cause magnetic disturbances that will affect the DX-200
operation. These include electromagnetic fields produced by electrical and electronic
devices. Working around large industrial areas or under transformers and high
tension power lines will generally give the user problems with false readings. In the
water it is just important to be clear of any influence that may be generated by a large
steel vessel; and of course equipment on the diver such as a steel dive cylinder.
If you are searching for small items of debris, such as a cannonball, a pistol, a hand
tool; you will probably be more successful utilising a metal detector such as the
Aquascan AQ1B. The DX-200 is more suited towards larger items, which will cause
a larger magnetic deviation. The DX-200 is ideal for commercially searching for
buried UXO, pipes, cable and large ferrous debris. For archaeologists and wreck
hunters it is ideal for locating cannons, anchors, chains and other large ferrous items
that can confirm the presence of a buried wreck site. Large ferrous masses will be
detected at greater distances than smaller masses and will be noted to have a much
slower build up to the peak audible response.
The DX-200 Equipment
A standard AQUASCAN DX- 200 kit consists of the following items:
1.
2.
3.
4.
5.
6.
Sealed electronic unit
Bone conductor earphone (Bonephone) .
Sensor Probe with cable and plug.
Mains Battery charger (100-250v) with AC charging lead.
D-Ring mounting system.
Operating instructions.
4
DX-200 – DIVER HELD MAGNETOMETER User Manual
The Aquascan DX-200 Diver Held Magnetometer is a precision built instrument
using the latest Fluxgate magnetic sensors, and has been designed for both ease and
simplicity of use in the underwater environment, featuring three sensitivity settings
for use in pinpointing targets..
The unit is ruggedly built to withstand normal diving usage, but to get the best
trouble-free operation and long life, certain simple operation and maintenance
procedures must be followed. Read the instructions carefully before diving with your
DX-200.
5
DX-200 – DIVER HELD MAGNETOMETER User Manual
Initial Testing of your DX-200
Note: It is highly recommended that you familiarize yourself with the DX-200 on
land before taking it into the water. This section explains the basic functionality of
the DX-200 and how to use the controls. It is much easier to learn to operate the
unit without the challenges of limited visibility, restrictive dive equipment, currents,
etc. So, please take the time to perform this Initial Testing of your unit before
venturing into the water with it.
1.
Charging the batteries
The DX-200 is supplied only partially charged and will require a full 14 hours
charging duration to bring the unit to a fully charged status. Make sure the
DX-200 is in the OFF position. Plug the output lead from the charger into the
AUDIO & CHARGE socket on the control bulkhead. Please note that this can
only be inserted one way round due to the locating (polarising) pin. Screw
down the retaining collar. This should be good finger tightness only.
N.B. DO NOT ON ANY ACCOUNT PLUG THE CHARGER INTO THE PROBE
SOCKET AS DAMAGE MAY BE DONE TO THE ELECTRONICS
Ensure the charger is correctly connected to the Charge/Audio socket before
plugging the charger into the mains supply (100 – 250vAC). After running for
an hour or so the charger may get slightly warm to the touch. This is quite
normal.
N.B. THE TYPE OF CHARGERS SUPPLIED WITH THE DX-200 CHARGE AT
A REGULAR RATE FOR APPROXIMATELY 14 HOU HOURS AND THEN
GO INTO A TRICKLE CHARGE (MAINTENANCE) MODE. WHILE
CHARGING AT THE REGULAR RATE, THE GREEN LIGHT WILL BE
ON. ONCE THE CHARGER DROPS INTO TRICKLE CHARGE MODE,
THE LIGHT WILL GO OUT. THIS SHOULD NORMALLY TOP OFF THE
CHARGE IN THE BATTERY PACK AFTER A DAY OF WORK. BUT, IF
YOUR DX-200 IS FULLY DISCHARGED, YOU SHOULD WAIT UNTIL
THE LIGHT GOES OUT, THEN UNPLUG THE CHARGER FROM THE
MAINS AND PLUG IT BACK IN TO INITIATE ANOTHER REGULAR 6
HOUR CHARGE CYCLE.
The batteries will not be damaged by being left on charge for a longer period
than necessary due to the controlled charge current (14hr rate). If the batteries
become fully discharged - due to natural usage for the maximum operating
period or through the unit accidentally being left in the on state – the unit should
be fully recharged as soon as possible to avoid irreparable damage to the battery
cells (see above for charging from a discharged state).
N.B. DO NOT USE ANY OTHER BATTERY CHARGER THAN THE ONE
SUPPLIED AS DAMAGE TO THE BATTERY PACK MAY RESULT.
6
DX-200 – DIVER HELD MAGNETOMETER User Manual
When the charge period has elapsed, disconnect the AC supply to the charger
first, and then unplug the connector from the socket on the detector.
2. For initial testing on land, you will have to find a location where you can position
yourself at least 30 metres from any large ferrous objects in all directions. Get rid
of anything containing iron on your body or in your clothing – and leave your cell
phone at home. An empty farm field or park, or sports field is ideal for testing.
Park your car at the edge of the field (at least 20 metres from where you will be
testing), or find a location where there is some large ferrous target in one
direction only.
3. To prepare the DX-200 for use, plug the connector on the Sensor Probe into the
SENSOR socket and screw down the retaining collar. This should be good finger
tightness only.
N.B. DO NOT EVER USE PLIERS OR OTHER TOOLS TO TIGHTEN THE
PLUG COLLARS. THESE ARE DESIGNED TO BE USED FINGER TIGHT
WITH THE BLACK RUBBER BULKHEAD SEAL IN PLACE ON THE
PLUG PINS.
OVER-TIGHTENING, OR INSTALLING THE PLUG
WITHOUT THE RUBBER SEAL CAN PERMANENTLY DAMAGE THE
SOCKET, WHICH MAY CAUSE THE CONTROL UNIT TO FLOOD.
Note: This plug can only be inserted one way round due to the polarising pin.
4.
Plug the connector on the Bonephone (or headphone) lead into the PHONE &
CHARGE socket and screw down the collar as above. NB. For testing on land the
headphones – if available - are much easier to work with.
5.
Locate yourself to the centre of the testing area, hold the Sensor Probe at full
arm’s length from your body, pointing down at about 45 degrees, and switch the
unit on by rotating the POWER – SENSITIVITY control to the LO position. If a
continuous sound is heard immediately, the SET AUDIO control should be
rotated one way or the other until the audio threshold is reached; this is indicated
by a low frequency ticking sound in the Bonephone/Headphones. There is a
“centre point” where you will achieve the low frequency ticking sound, and
turning the SET AUDIO control either way from this point will result in an
increase in the audio output.
Note: The SET AUDIO control is a 10-turn potentiometer. Do not turn it past its
stop point in either direction or permanent damage will result. The audio threshold
should be somewhere in the middle of the 10 turns, so just start turning one way
until you either reach the audio threshold or the stop point of the control. If you
reach the stop point without finding the audio threshold, start turning the other way
until you do. Once you have found the audio threshold the first time you test the
unit, the SET AUDIO control should be in the near vicinity of the correct location
for future uses, so you will normally just need to tune it back and forth a few turns
unless someone has turned it away from this setting.
7
DX-200 – DIVER HELD MAGNETOMETER User Manual
6.
Once you achieve the audio threshold adjustment, turn the POWER SENSITIVITY control to HI. You will probably have to make minor
adjustments to the threshold setting when you switch to HI. Once you have the
threshold set to the low frequency ticking, you are ready to begin testing. Test the
operation of the DX-200 by turning slowly in a circle with the Sensor Probe
pointed down at about 45 degrees. As the Sensor Probe is pointing in the
direction of a target, you should hear an increase in the audio output. If you make
a full circle without noticing any change in the audio output, move 5 metres
closer to your target and complete the circle test again.
7.
Once you are able to detect an increase in the audio signal frequency or pitch, you
should be able to move the Sensor Probe back and forth in an arc and notice
where the highest audio output occurs, which should be as the probe is pointed
directly at the target. Using this technique, you can use a sweeping motion of the
probe to actually walk yourself to the target.
8.
As you get closer and closer to the target, the DX-200 will begin to have constant
audio output, so you will need to lower the sensitivity to be able to actually
pinpoint the target. Do this by changing the SENSITIVITY setting to MED.
And, then as you get even closer, change the setting to LO.
9.
If possible, experiment with several different targets of different sizes to get an
idea of how the unit behaves under different circumstances. Having performed
the above checks on land, you are now ready to use the Aquascan DX-200 in the
water.
Underwater Operation
NOTE: As explained above in the Land Test, you must be free of objects
containing ferrous materials. Steel dive tanks are probably out of the question.
Most Stainless Steel does not actually contain any iron, so it usually won’t interfere
with the operation of the DX-200. But check yourself carefully; something as small
as a set of keys can affect the operation of the unit and give you false readings.
Also, don’t try to operate the unit in the vicinity of a large steel vessel.
1.
The control unit of the DX-200 can be worn or carried in a number of ways; the
choice will be influenced by the conditions and diver preference. The most
obvious choice is worn clipped to any suitable location on the diver with the DRing mounting system provided with the unit. Other options include the quick
release belt harness; strapping it to the upper arm, or mounting it to the DX-200
Armsaver optional accessory (see section DX-200 Optional Accessories).
2.
The Bonephone should be placed under the hood. If no hood is worn, it can be
placed under the strap of the facemask or under a suitable neoprene headband.
Position the Bonephone so that it is on a bony part of the head close to the ear.
N.B. NEVER PLACE THE PHONE DIRECTLY OVER THE EAR AS THIS
COULD INTERFERE WITH PRESSURE EQUALISATION ON THE
EARDRUM.
8
DX-200 – DIVER HELD MAGNETOMETER User Manual
3.
Dive to the search area to be searched.
4.
Switch the unit on and rotate the SENSITIVITY control to HI. Hold the Sensor
Probe at full arm’s length in front of you and pointing down at about 45 degrees.
Rotate the SET AUDIO control to achieve the audio threshold point, keeping the
Sensor Probe at arms length and angled down at about 45 degrees.
5.
If you are trying to pinpoint a “hit” from a towed magnetometer, the standard
procedure is to start scanning around in a complete circle. If you detect even the
smallest change in audio in any given direction, move in that direction and repeat
the scan. Just as in the Land Test above, you should be able to guide yourself
right to the target by following the Sensor Probe and adjusting the
SENSITIVITY control down to MED and the LO as you get closer.
6.
If you are just doing a general search of an area, you will probably want to
establish some sort of grid and move in straight lines, scanning back and forth in
an arc to insure you cover the entire area to be searched.
Note: Different environmental conditions may make a small difference to the
threshold setting as you perform your search, which can be readjusted by the SET
AUDIO control knob.
Care and Maintenance
Proper care of your Aquascan DX-200 will be repaid by a long and trouble free life
and attention should be given to the following points: 1. After use, and before removing plugs, make sure that the unit is switched off,
and wash down with clean fresh water. NEVER use chemicals to clean your DX200 as these will damage o-rings and seals, which can cause them to fail and allow
the incursion of water into the control unit.
2. Remove the Sensor Probe and Bonephone/Headphones plugs from the
bulkhead sockets, and make sure the Rubber Seal is free from sand or other debris
(remove and clean if necessary). Dry off the plug pins and blow any moisture out
of the sockets. You can use a Q-Tip to clean and dry the sockets. Ikelite does not
recommend using silicone grease or any other material on the connectors. The
rubber seal provides adequate isolation of the connectors from the water. Use of
these type products tends to accumulate sand and other debris which can actually
interfere with the seal. Never utilize petroleum products such as Vaseline, since
these will harden the rubber seal making it non-functional. The rubber seal should
be replaced any time it becomes stiff, as this will interfere with its function.
Note: A dirty or corroded connection is the most common cause of poor
performance of underwater detection equipment. Keep your connectors clean
and dry between uses.
9
DX-200 – DIVER HELD MAGNETOMETER User Manual
1. Dry the DX-200, paying particular attention to the area around the plugs.
2. Clear any excess water present on the bulkhead by blowing or wiping with a
soft cloth.
3. Recharge the batteries if the total hours used is approaching 10.
4. Never leave your DX-200 lying in the hot sun, as this could raise the internal
temperature to the point where it may distort the case and harm the electronics.
This warning also applies to the Sensor Probe and headphones/Bonephone.
5. The electronic unit is sealed and pressure tested in the factory, no attempt
should be made to access the electronics. If any servicing is required, contact
your supplier who will advise you where to send the unit.
Battery Care & Checking Battery Performance/Status
The DX-200 internal battery pack is an 8-cell series NiMH AA size pack giving a
capacity of approximately 2800mA/Hrs. This capacity relates to an operational period
of between 10 and 12 hours from full charge. Note: self-discharge occurs naturally in
a rechargeable battery. During inactivity this self-discharge causes the battery to
slowly discharge itself over a period of months. To maintain maximum performance it
is important to charge your DX-200 before use.
Checking Battery Pack Performance
Note: For routine maintenance this should be carried out every three months.
The recommended procedure is as follows: 1.0
Connect the Sensor Probe to your DX-200 module.
1.1
Power on your DX-200 and leave it on overnight to fully discharge the battery.
1.2
Power off the DX-200 and disconnect the Sensor Probe.
1.3
Charge the DX-200 for at least 14 hours using the provided charger.
1.4
Once the DX-200 is fully charged, disconnect the charger.
1.5
Connect the Sensor Probe and Bonephone/Headphone to the DX-200 unit and
switch it on. Place the Sensor Probe away from any ferrous target and adjust
the SET AUDIO control to get a steady slow ticking sound if possible. This
may be difficult if you are inside a building due to the electronic noise and
many metal objects.
1.6
Make a note of the time.
10
DX-200 – DIVER HELD MAGNETOMETER User Manual
1.7
Confirm the functionality of the unit every 30 minutes - re-adjusting the tickover as necessary.
1.8
When it becomes impossible to set the threshold, or the audio ceases
altogether, this can be considered to be the end of charge status for the battery.
This should be in the range of 10 to 12 hours for a healthy battery pack.
1.9
If the performance becomes unacceptable after less than what you (the
operator) determine to be an acceptable minimal operational period, then the
DX-200 Battery Pack needs to be replaced.
Note: If your battery needs to be replaced please contact our technical support dept
to arrange for an installation of a replacement battery, or in the case of an
approved service agent please refer to the servicing data provided.
Please consider NiMH batteries as hazardous material and dispose of your old
battery pack in line with local guidelines.
11
DX-200 – DIVER HELD MAGNETOMETER User Manual
Troubleshooting Guide
Symptom:
No Response from DX-200 Module
Check the following:1.
Check that the battery has been charged – as the voltage drops below a
certain point, erratic behaviour will result. Further decrease in voltage
will result in total lack of functionality.
>If not, place DX-200 on charge and then re-test.
2.
Check that both Sensor Probe and Bonephone are correctly connected
3.
Try using an alternative Bonephone/AQ1B Headphones.
4.
Try using an alternative Sensor Probe if available.
5.
Check that both the Sensor Probe and Bonephone are in good
condition. Check by substitution if possible or by monitoring the
nominal resistance of Bonephone/Headphones. Connecting a good
quality multi-meter across the pins of the plug can check the resistance.
NB. It is good policy to firstly check the multi-meter’s reading with the
leads shorted together - this provides a measure of what residual
reading to take into account.
>See DX-200 Resistance Chart below: Item
Bonephone
Land Headphones
U/W Headphones
6.
Symptom:
Resistance (ohms)
5.4
15.0 (Minimum Volume)
10.5
There is no user test for the Sensor Probe other than visual mechanical
inspection. Inspect the connector and cable, looking for any signs of
damage that could allow ingress of water into the cable or connector.
If damage is found, contact your Aquascan agent for
servicing/replacement.
Erratic Performance from DX-200 Module
1.
First check as above.
2.
Check that the contacts of the bulkhead connectors are clean.
3.
Check that the connectors of the Sensor Probe and Bonephone are
clean. If necessary reduce the contact resistance by slightly prising the
gap in the male contacts, this will increase the firmness of the
connector on insertion.
12
DX-200 – DIVER HELD MAGNETOMETER User Manual
4.
Check for visible damage to Sensor Probe cable and connector, which
could have caused water ingress.
5.
Check that the male connector seals are in place and clean.
6.
If you are unable to determine the cause of the erratic behaviour,
contact your Aquascan agent for assistance.
13
DX-200 – DIVER HELD MAGNETOMETER User Manual
DX-200 – SPECIFICATIONS
MATERIALS & DIMENSIONS:
INSTRUMENT CASE
Housing material .......................... Machined uPVC
Housing Dia ................................................ 100mm
Overall length ............................................. 187mm
MAGNETOMETER PROBE
Probe housing.................................................. GRP
Probe Dia ..................................................... 25mm
Probe Length ............................................... 750mm
CABLE
Construction .............................. Twin core + shield
Diameter - .................................................... 4.5mm
Sheath................................................. Polyurethane
Length ............................................ 2m (approx 6ft)
POWER
Power .......... Internal Rechargeable NiMH battery
Charger .............................. Universal 100-250v AC
Charge time (from empty) ............................ 14Hrs
CONTROLS
Power ........ On/Off – Incorporated with Sensitivity
Sensitivity Switch .................Off/ Low/Med/High
Set Audio ......................................... Multi-turn Pot
WEIGHTS
Control Unit ..................................................... 1Kg
Probe & Cable ............................................... 0.7Kg
Basic outline of Case & Sensor Stem
14
DX-200 – DIVER HELD MAGNETOMETER User Manual
DX-200 - ACCESSORIES
AQ.4.061
DX-200 Bonephone – Fully waterproof
headphone that utilises an Ikelite underwater
connector to connect to the DX-200 Control
Module. The low profile module is normally
placed against the skull; below or behind the ear
whilst underwater, enabling the diver to clearly
hear the change in the Detector tone when metal
is sensed.
AQ.4.062
DX-200 Bonephone – with extending flex cable.
This version is in all other respects the same as
the AQ.4.061. The option of a flexible cable that
will extend and retract is preferred by some
divers; particularly in low visibility conditions to
minimise the risk of the cable fouling any
obstructions.
AQ.4.030
DX-200 Land Headphones – Rugged headphones
optional accessory for use above water; enabling
The DX-200 to be utilised as a powerful ferrous
metal land detector. The Headphones feature an
adjustable volume control and a comfortable fit
for the user.
AQ.4.031
DX-200 Underwater Headphones – Rugged
headphones for use underwater giving an
alternative to the Bonephone. These phones are
particularly useful in warm waters where a diving
hood is not normally worn, They also provide a
more powerful sound level that can enhance the
ability to sense even the most subtle changes in
the audible output.
15
DX-200 – DIVER HELD MAGNETOMETER User Manual
AQ.4.010
Battery Charger – Switched mode unit with 100v to
250v AC 50/60HZ input voltage range this unit is
used to recharge the internal battery pack of the
DX-200 Control Module. The charger can be
supplied with option of US, UK or European type
Power Connector in the form of a push-fit shoe or
as a conventional power lead.
DX-200 Control unit with standard D-Ring
harness
16
DX-200 – DIVER HELD MAGNETOMETER User Manual
DX-200 – OPTIONAL ACCESSORIES
Optional DX-200 Armsaver – probe extended
Optional DX-200 Armsaver – probe retracted
DX-200 Control Unit mounted in optional Armsaver
Close up of DX-200 Armsaver Probe connection
17
DX-200 – DIVER HELD MAGNETOMETER User Manual
DX-200 – PROFESSIONAL KIT
DX-200 Professional Kit - Case closed
DX-200 Professional Kit
Includes:
Optional Shipping/Carrying/Storage case for DX-200. Control Unit, Sensor
Probe, D Ring, Waist Belt, Charger, Bonephone, Underwater Headphones,
and Armsaver.
18
DX-200 – DIVER HELD MAGNETOMETER User Manual
Manufacturer Contact Information
If you should need to contact Aquascan International Limited for advice on your
purchase, to order further equipment or to arrange a repair, please use the following
contact information: -
Mailing Address:
Aquascan International Limited
Aquascan House
Hill Street
Newport
South Wales
NP20 1LZ
United Kingdom
Tel:
Fax:
+44 (0) 1633 841117
+44 (0) 1633 254829
E-mail:
Sales Enquiries: [email protected]
General Inquiries: [email protected]
Technical Support: [email protected]
Website:
www.aquascan.co.uk
Aquascan International Ltd.
19
DX-200 – DIVER HELD MAGNETOMETER User Manual
EC Declaration of Conformity
We hereby declare that the following equipment complies with the essential
requirements at the Electronic Compatibility Directive (89/336, 91/26 3 and 92/31).
This equipment should not be modified, without our approval, as this declaration will
lose its authority.
Equipment description: -
Diver Held Magnetometer.
Model: -
DX-200.
Manufacturer: -
Aquascan International Ltd .
Aquascan House
Hill Street
Newport,
NP20 1LZ
S. Wales.
Tel: +44 (0) 1633 841117/255645
Fax: +44 (0) 1633 254829
Email: [email protected]
Applicable directives : Group 1.
EN 55011 General Emission Standard Class A,
EN 50082 Generic Immunity Standard Part 2.
A technical construction file for this equipment is retained at the manufacturing base.
1st January 1996
Signed :- ..............................................…… Date :- ..........................................
J. R. WILLIAMS
Managing Director
Name :- ..................................................
Position :- .....................................
20