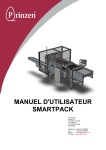
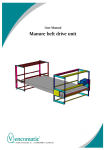
Download user manual ovoset
Transcript
USER MANUAL OVOSET Prinzen B.V. Weverij 18 7122 MS AALTEN P.O. Box 85 7120 AB AALTEN NEDERLAND Website: www.prinzen.com TABLE OF CONTENTS TABLE OF CONTENTS CHAPTER UM-OS-04-E/10-2012 BOOK INTRODUCTION I 1 SAFETY I 2 MACHINE DESCRIPTION I 3 OPERATION I 4 CLEANING I 5 PREVENTIVE MAINTENANCE I 6 ADJUSTMENTS I 7 SPARE PARTS I USER MANUAL OVOSET Page 3 of 89 TABLE OF CONTENTS INDEX INTRODUCTION ................................................................................................................................................9 LIABILITY ............................................................................................................................................. 11 GENERAL............................................................................................................................................. 11 COPYRIGHT ......................................................................................................................................... 11 GENERAL............................................................................................................................................. 12 SAFETY REGULATIONS .......................................................................................................................... 12 LEGAL REGULATIONS............................................................................................................................ 12 HOW TO USE THIS MANUAL?.................................................................................................................. 13 WHO SHOULD USE THIS MANUAL? ......................................................................................................... 13 MANUAL INFORMATION ......................................................................................................................... 13 SERIAL NUMBER ................................................................................................................................... 13 SYMBOLS............................................................................................................................................. 14 ADDRESS PRINZEN ............................................................................................................................... 14 EC-DECLARATION OF CONFORMITY FOR MACHINERY .............................................................................. 15 1. SAFETY..................................................................................................................................................17 GENERAL............................................................................................................................................. 18 SAFETY REGULATIONS .......................................................................................................................... 19 SAFETY PROVISIONS ............................................................................................................................ 21 EMERGENCY STOP BUTTON ............................................................................................................................................... 21 LOCKABLE DOOR .............................................................................................................................................................. 21 PROTECTIVE COVER .......................................................................................................................................................... 22 AIR PREPARATION ............................................................................................................................................................. 22 SAFETY INSPECTION PROCEDURE ......................................................................................................... 23 POSITIONS SAFETY DEVICES ................................................................................................................. 23 WARNING LABELS ................................................................................................................................. 24 2. MACHINE DESCRIPTION .....................................................................................................................27 SAFETY REGULATIONS .......................................................................................................................... 28 MACHINE DESCRIPTION......................................................................................................................... 29 OVOSET ........................................................................................................................................................................... 29 TECHNICAL SPECIFICATIONS .............................................................................................................................................. 30 UNIT DESCRIPTION ............................................................................................................................... 31 PACKER ........................................................................................................................................................................... 31 VACUUM HEAD .................................................................................................................................................................. 33 PACKING TABLE ................................................................................................................................................................ 34 OPTIONAL EGG PATTERN DEVICE ........................................................................................................................................ 35 OPTIONAL STAMPING UNIT ................................................................................................................................................. 36 3. OPERATION ..........................................................................................................................................37 SAFETY REGULATIONS .......................................................................................................................... 38 EXPLANATION OF THE OPERATION ......................................................................................................... 39 OPERATING PANEL ............................................................................................................................................................ 39 LOCAL BUTTONS ............................................................................................................................................................... 40 STARTING PRODUCTION .................................................................................................................................................... 41 RUNNING PRODUCTION ...................................................................................................................................................... 42 STOPPING PRODUCTION .................................................................................................................................................... 43 RESET PATTERN ............................................................................................................................................................... 44 START / STOP DELAY TIMERS ............................................................................................................................................. 45 CONVERSION ....................................................................................................................................... 46 GATE OPEN/CLOSE ............................................................................................................................................................ 46 TRAY CENTERING BAR ....................................................................................................................................................... 46 VACUUM HEAD .................................................................................................................................................................. 47 UM-OS-04-E/10-2012 USER MANUAL OVOSET Page 5 of 89 TABLE OF CONTENTS 4. CLEANING .............................................................................................................................................49 GENERAL............................................................................................................................................. 50 SAFETY REGULATIONS .......................................................................................................................... 50 CLEANING UTENSILS AND DETERGENTS ................................................................................................. 50 RECOMMENDED CLEANING AGENT ......................................................................................................... 51 GENERAL CLEANING PROCEDURE .......................................................................................................... 51 CLEANING INTERVAL ............................................................................................................................. 51 AFTER CLEANING ................................................................................................................................. 51 CLEANING COMPONENTS ...................................................................................................................... 52 CLEANING PHOTO SWITCHES ............................................................................................................................................. 52 CLEANING INSTRUCTIONS ..................................................................................................................... 53 PACKER ........................................................................................................................................................................... 53 INFEED CONVEYOR ........................................................................................................................................................................................................................ 53 DRIP TRAYS ................................................................................................................................................................................................................................... 53 ROLLER TRACK .............................................................................................................................................................................................................................. 53 CUP CONVEYOR............................................................................................................................................................................................................................. 53 SUCTION CUPS .............................................................................................................................................................................................................................. 53 VACUUM HEAD ............................................................................................................................................................................................................................... 54 SUCTION DUCTS ............................................................................................................................................................................................................................ 54 VACUUM HOSES............................................................................................................................................................................................................................. 55 VACUUM FILTER ............................................................................................................................................................................................................................. 55 STAMPING UNIT................................................................................................................................................................. PACKING TABLE ................................................................................................................................................................ 5. 55 56 PREVENTIVE MAINTENANCE .............................................................................................................57 GENERAL............................................................................................................................................. 58 SAFETY REGULATIONS .......................................................................................................................... 58 MAINTENANCE UTENSILS ...................................................................................................................... 58 RECOMMENDED LUBRICANTS ................................................................................................................ 59 GENERAL MAINTENANCE PROCEDURE ................................................................................................... 60 AFTER MAINTENANCE ........................................................................................................................... 60 MAINTENANCE COMPONENTS ................................................................................................................ 61 BEARINGS ........................................................................................................................................................................ 61 MOTORS AND REDUCTORS ................................................................................................................................................. 61 GEARS ............................................................................................................................................................................. 61 ROD ENDS ........................................................................................................................................................................ 61 PLAIN BEARINGS ............................................................................................................................................................... 62 CHAINS ............................................................................................................................................................................ 62 GUIDES ............................................................................................................................................................................ 62 AIR SUPPLY ...................................................................................................................................................................... 63 ROLLER TRACK ACCESS .................................................................................................................................................... 63 VACUUM VALVE................................................................................................................................................................. 64 STAMPING UNIT................................................................................................................................................................. 65 PREVENTIVE MAINTENANCE INSTRUCTIONS ............................................................................................ 66 DAILY PREVENTIVE MAINTENANCE ...................................................................................................................................... 66 WEEKLY PREVENTIVE MAINTENANCE ................................................................................................................................... 67 MONTHLY PREVENTIVE MAINTENANCE................................................................................................................................. 69 ½ YEARLY PREVENTIVE MAINTENANCE ............................................................................................................................... 71 YEARLY PREVENTIVE MAINTENANCE ................................................................................................................................... 73 6. ADJUSTMENTS.....................................................................................................................................75 GENERAL............................................................................................................................................. 76 SAFETY REGULATIONS .......................................................................................................................... 76 AFTER ADJUSTMENTS ........................................................................................................................... 76 COMPONENT ADJUSTMENTS ................................................................................................................. 77 PHOTO SWITCHES ............................................................................................................................................................. 77 PD30 DIFFUSE REFLECTIVE ........................................................................................................................................................................................................... 77 PA18 DIFFUSE REFLECTIVE ........................................................................................................................................................................................................... 77 PROXIMITY SWITCHES ....................................................................................................................................................... AIR PREPARATION ............................................................................................................................................................. SPEED CYLINDERS ............................................................................................................................................................ CYLINDER AIR CUSHIONING ................................................................................................................................................ VALVES ............................................................................................................................................................................ SWITCH ON A CYLINDER ..................................................................................................................................................... FREQUENCY INVERTERS .................................................................................................................................................... POWER SUPPLIES ............................................................................................................................................................. 78 79 79 79 80 80 81 82 OPERATION ADJUSTMENTS ................................................................................................................... 83 GATE BLOCKERS ............................................................................................................................................................... 83 START / STOP DELAY TIME ................................................................................................................................................. 83 ADJUSTMENTS ..................................................................................................................................... 84 INFEED BELT TENSION ....................................................................................................................................................... 84 Page 6 of 89 USER MANUAL OVOSET UM-OS-04-E/10-2012 TABLE OF CONTENTS MAIN DRIVE CHAIN TENSION ............................................................................................................................................... TRANSFER LEVER DRIVE CHAIN TENSION ............................................................................................................................. INFEED GATE EGG DETECTION ........................................................................................................................................... VACUUM HEAD POSITIONS ................................................................................................................................................. 7. 84 84 85 86 SPARE PARTS ......................................................................................................................................87 LIST WITH RECOMMENDED SPARE PARTS ............................................................................................... 89 UM-OS-04-E/10-2012 USER MANUAL OVOSET Page 7 of 89 INTRODUCTION INTRODUCTION UM-OS-04-E/10-2012 USER MANUAL OVOSET Page 9 of 89 INTRODUCTION CAUTION: This manual must be read by or to each person, before that person operates, cleans, repairs, supervises the operation of, or uses this machine in any way. PRECAUCIÓN: Este manual debe ser leído por cualquier persona encargada de hacer funcionar, limpiar, reparar, supervisar el funcionamiento o utilizar esta máquina, antes de llevar a cabo dichas operaciones. ATTENTION: Ce manuel doit être lu par, ou a, toute personne avant qu’elle ne mette en route, nettoie, répare, supervise le fonctionnement ou utilise cette machine, de quelque manière que ce soit. VORSICHT: Jeder, der diese Maschine bedienen, reinigen, reparieren, überwachen oder auf irgendeine Weise benutzen soll, muß vorher diese Hinweise lesen oder vorgelesen bekommen. ATTENTIE: Een ieder, die deze machine bedient, reinigt, repareert, controleert of op enige andere wijze gebruiken zal, dient vooraf deze bedieningsvoorschriften te lezen. CAUTELA: Il presente manuale deve essere letto da o ad ogni membro del personale prima che tale persona operi, pulisca, ripari, diriga il funzionamento o utilizzi la macchina in qualsiasi modo. AVISO: Este manual deve ser previamente lido por ou para cada pessoa antes de operar, limpar, reparar, supervisionar a operação ou utilizar este aparelho de alguma forma. ВНИМАНИЕ: Каждому, кто собирается работать с данной машиной, чистить, ремонтировать, проверять или использовать ее как-либо иначе, рекомендуется прежде ознакомиться с даннной инструкцией по эксплуатации. Page 10 of 89 USER MANUAL OVOSET UM-OS-04-E/10-2012 INTRODUCTION LIABILITY Prinzen BV cannot be held responsible for any costs, damage or personal injury if its system is not used in accordance with the instructions as described in this manual. The information provided in this manual is valid for the standard design of the system. Parts of your system may differ from this standard design. Since Prinzen BV is constantly improving its systems it may be possible that there are small differences between your system and this manual. Though this manual has been put together with the utmost care, Prinzen BV cannot accept any responsibility for costs, damage or personal injury arising from any fault and/or incompleteness in the content of this document. GENERAL This manual contains important information concerning safety, operation, adjustment, maintenance, cleaning and repair of the Prinzen BV system. For uncomplicated functioning of the system, read this manual carefully and work according to the directions in this manual. Beside the design and the used materials also the operation and maintenance have great impact on the functioning, the life span and the operational costs of our system. You, as the owner of the system, are responsible for the execution of maintenance according to the directions and the intervals in this manual. This manual will help you to gain knowledge to use the system as it should be used: Correct operated and excellent maintained. A Prinzen BV system meets the demands, mentioned in the European machine guideline (CE). COPYRIGHT Prinzen BV © This document contains confidential information and information protected by copyright of Prinzen BV. Reproduction or transmission of any part of this document to third parties, or the use thereof is only permitted after express written permission of Prinzen BV. All rights rest with Prinzen BV, Aalten, The Netherlands. Written by Visser Machine Services. UM-OS-04-E/10-2012 USER MANUAL OVOSET Page 11 of 89 INTRODUCTION GENERAL This manual contains important information concerning safety, operation, cleaning, maintenance and breakdown remedies. At all time this manual must be accessible for all personnel working with the system. Keep it in a permanent place, close to the system. When the manual is lost or damaged, order a new copy as soon as possible. The user of the system should read and understand the total user manual before operating, cleaning, maintaining and repairing the system. Never change the sequence of procedures as described in this manual. SAFETY REGULATIONS Before starting operation, cleaning, maintaining the system or before remedying breakdowns first read this chapter and chapter Safety. LEGAL REGULATIONS - - - All safety directions stated in this manual must be observed. Along with the safety regulations in this chapter the instructions of the qualified trade organization of your country must be observed to avoid accidents. Before starting to repair or maintain the machine always consult your safety manager to discuss if a work permit is required for this job. All safety devices in the machine and the safety indications mentioned in this manual are conditions to control the machine safely. The owner and his qualified personnel are in the end the ones responsible for the safe use of the machine. The owner is responsible for the ability of the qualified personnel to perform its duties according to the safety measures. Technical changes, which influence the safety working of the machine, may only be executed by the service department of Prinzen. Do not change controls, and/or PLC programs, without written permission from Prinzen because this may affect the safety of the machine. Only use genuine Prinzen parts or CE-certified parts for replacement. Prinzen cannot be held responsible for any consequential damages to the system or other installations that were caused by technical changes, unprofessional maintenance and repairs on our system, which were executed by the customer. Warranty becomes invalid when consequential damages to the system, caused by technical changes, unprofessional maintenance and repairs, were executed by the customer. DANGER! Failure to obey legal regulations may result in permanent personal injury or death. ATTENTION! Failure to obey legal regulations may result in damage to the system. Page 12 of 89 USER MANUAL OVOSET UM-OS-04-E/10-2012 INTRODUCTION HOW TO USE THIS MANUAL? The manual is constructed to provide a maximum amount of information with a minimum amount of searching. The key to easy reference is the Table of contents. WHO SHOULD USE THIS MANUAL? Owner: The owner (contractor, concern) is the person that owns or hires the machine and puts this machine into production. The owner must take care that the users of the system will read the manual. Operator: The operator is the person who operates the system as ordered by the owner. The operator must read the chapters Introduction, Safety, Machine description, Operation, Cleaning. Professional: A professional is someone who can assess the duties appointed to him on account of his education, knowledge and experience and who can assess the dangers attached, thereby avoiding these dangers. Maintenance engineer: The maintenance engineer is the professional who is deemed qualified by the owner to perform certain duties. The qualification only applies to those assigned duties. The maintenance engineer must read the total manual. MANUAL INFORMATION Machine type: Manual revision: Ovoset 04 (October 2012) SERIAL NUMBER Each machine has a unique serial number printed on the machine tag, which can be found in the electrical cabinet. Note down this serial number to have it available when contacting the Prinzen service department. ABCDE 3~N 50Hz 400/230V 3 x 995A AB1234 08-2010 UM-OS-04-E/10-2012 USER MANUAL OVOSET Page 13 of 89 INTRODUCTION SYMBOLS Symbols are used in the manual when special attention/caution is required while working on the system. The special symbols and their meaning are depicted in the below table. Symbol: Meaning: DANGER! This symbol is used when instructions should be followed to the letter. If not they may result in permanent personal injury or death. CAUTION! This symbol is used when instructions should be followed to the letter. If not they may result in permanent personal injury. ATTENTION! This symbol is used when instructions should be followed to the letter. If not they may cause damage to the system. NOTE! This symbol advises to use edible products and to work in a hygienically way. Disregarding this advice may cause illness. TIP! This symbol is used as a helpful hint to simplify the execution of certain tasks. ADDRESS PRINZEN Prinzen BV Weverij 18, 7122 MS AALTEN P.O. Box 85, 7120 AB AALTEN The Netherlands Telephone: Fax: E-mail: Website: Page 14 of 89 +31 (0)543 490060 +31 (0)543 476205 [email protected] www.prinzen.com USER MANUAL OVOSET UM-OS-04-E/10-2012 EC-DECLARATION EC-DECLARATION OF CONFORMITY FOR MACHINERY Concerning the machinery directives: Prinzen B.V. Weverij 18 7122 MS AALTEN The Netherlands 1 Herewith declares that we are the manufacturer of the egg-packing machine on which this declaration applies: Brand: Type: Serial number: Prinzen Ovoset 2 The machine is developed in compliance with the demands of the machinery directive 2006/42/EC (most recent). 3 The machine meets the provisions of the following directives: The low voltage equipment directive 2006/95/EC (most recent). The EMC-directive 2004/108/EC (most recent). 4 The machine is developed and constructed according the following standard: NEN-EN-IEC 60204-1: 2006 Electrical equipment of industrial machines. Signed in: Date: Aalten 19-10-2011 Signed by: G.J. van Eerden UM-OS-04-E/10-2012 USER MANUAL OVOSET Page 15 of 89 SAFETY 1. SAFETY UM-OS-04-E/10-2012 USER MANUAL OVOSET Page 17 of 89 SAFETY GENERAL Only persons meeting the following requirements are authorized to work with the system. These persons should be: - Skilled and specifically trained for their duties. - Familiar with the contents of this manual. - Familiar with the locations of the emergency stop buttons and other safety devices. - 18 years old or above. - Familiar with the national and regional regulations regarding safety. These persons should have reached the minimum legal age required to perform this work. These persons are NOT under influence of any drug, medicine or alcoholic drink. DANGER! Keep children and incompetent persons away from the system! The system is only to be used for the purpose it was designed for. See the chapter Machine description for details. Page 18 of 89 USER MANUAL OVOSET UM-OS-04-E/10-2012 SAFETY SAFETY REGULATIONS Do not use the system when safety devices have been removed. This system may contain sharp edged parts, moving parts and rotating parts. When protective covers are removed, sharp edges and pinch points may be exposed. Use extreme caution and avoid touching or striking these areas with your hands or body because they may cause injuries. Do not enter parts of your body or objects into openings in the system. This may lead to serious physical injury or damage to the system. It is dangerous to be in, on or under the system while it is operational. Loosely hanging clothing, wide sleeved clothing, ties, chains or rings are prohibited. Long hair should be worn tied back. Make sure that there is sufficient light around the machine. Do not touch or come near moving or rotating parts. Physical contact with these parts is dangerous. Do not stand or walk on any of the system parts. Do not work alone on the system. At least one other person should be present Before starting to clean, maintain or inspect the machine or before remedying breakdowns follow the steps mentioned below: - Switch off the machine and secure it against accidental switching on. - Post “Do not switch on” warning sign on the main switch: - Operate the nearest emergency stop button. - Make sure that no components are moving. Before switching on the machine, you must check the following: - All safety devices are in place and are functioning. - No other persons are in, underneath or above the system. - No tools or objects are in the system. - No other persons are at risk. Do not use water to clean electricity cabinets and other electronic components. For save and easy operation keep the area and floor around the machine clean, free of oil, grease or obstacles. Remove superfluous fat and greasing oil after greasing duties. When an extension cable is used for power supply, make sure that the cable diameter in relation to the length of the cable is correct. Make sure the cable is completely unrolled Manual activation of safety switches is forbidden. When the safety devices are put out of operation, the machine must first be switched off and secured against accidental switching on. Work inside the electrical cabinet may only be undertaken by skilled personnel like Prinzen service engineers or its dealer’s service engineers. Always switch off the main switch before opening electrical cabinets. After switching off the main switch, parts inside the electrical cabinet remain live for approximately 1 minute. The frequency inverters may hold a high voltage charge during this time. Do not touch parts inside the electrical cabinet as long as displays of frequency inverters are on. UM-OS-04-E/10-2012 USER MANUAL OVOSET Page 19 of 89 SAFETY Several parts inside the electrical cabinet maintain voltage even when the main switch is turned off (main switch, main power supply, terminals for egg collecting belts, etcetera). DANGER! Failure to obey safety regulations may result in permanent personal injury or death. ATTENTION! Failure to obey safety regulations may result in damage to the system. Page 20 of 89 USER MANUAL OVOSET UM-OS-04-E/10-2012 SAFETY SAFETY PROVISIONS Before operating the machine the safety devices must be checked for correct functioning. Repair or replace safety devices before using the system if they do not work properly. Never rely solely on safety devices. Always switch off the system and lock up the power source (1) before working on the machine. Safety devices are: 2. Emergency stop buttons 3. Lockable doors 4. Protective covers 1 EMERGENCY STOP BUTTON 2 To stop the machine in case of an emergency, the system has one or more emergency stop buttons (2). Only use the emergency stop button in case of an emergency. When the emergency stop button is pressed, the system stops immediately. The button stays mechanically locked so the machine cannot start until it is considered safe to do so. Release the emergency stop button by turning it clockwise. Do not release the emergency stop button when it is not certain why and by whom it was pressed. Personnel working with the system must know the positions of the emergency stop buttons. 2 LOCKABLE DOOR Lockable doors are doors that can only be opened with a key (3). The key should only be in possession of a supervisor. 3 UM-OS-04-E/10-2012 DANGER! Lockable doors safeguard dangerous machine areas. These doors are of utmost importance to operate the machine safely. Never operate the machine when doors are open or not locked because serious injury or death may occur! 3 USER MANUAL OVOSET Page 21 of 89 SAFETY PROTECTIVE COVER Protective covers (4) shield off dangerous moving parts. These covers cannot be removed without tools and should be attached to the system before starting to use it. DANGER! Protective covers safeguard dangerous machine areas. These covers are of utmost importance to operate the machine safely. Never operate the machine when protective covers are removed because serious injury or death may occur! 4 AIR PREPARATION ON OFF The system may be equipped with one or more air preparation units. The following parts may be present in these units: 10. Manual ON/OFF switch 11. Air pressure regulator With the manual ON/OFF switch it is possible to switch the air supply ON or OFF. Push the switch towards the regulator to switch the air supply ON. Push the switch away from the regulator to switch the air supply OFF. 11 10 DANGER! Switch the air supply OFF before starting to perform activities on the system. With the air pressure regulator it is possible to adjust the required air pressure for the system. Page 22 of 89 USER MANUAL OVOSET UM-OS-04-E/10-2012 SAFETY SAFETY INSPECTION PROCEDURE Before starting the machine all protective covers must be in place and doors should be locked. The emergency stop buttons should be operating. Trained personnel must check safety devices on a daily basis to assure proper operation. Check emergency stop buttons (2): 1. Start and stop the system. 2. Wait until the system has completely stopped and push an emergency stop button. 3. Push the start button, the machine should not start. 4. Release the emergency stop button and reset the emergency circuit. 5. Repeat the above steps 2, 3 and 4 for all emergency stop buttons. 6. Make sure that the machine does not start when any emergency stop button is pressed. If the machine operates when an emergency stop button is pressed, this machine is not safe to operate. Immediately call a qualified technician to repair this defective safety device. 2 POSITIONS SAFETY DEVICES See below picture for position of the safety devices. UM-OS-04-E/10-2012 USER MANUAL OVOSET Page 23 of 89 SAFETY WARNING LABELS The Prinzen system makes dangerous movements. The system also contains dangerous parts when they contact the body. The following labels are posted as a warning. Understand and remember the meaning of the warning labels. DANGER! Keep the warning labels clean. When labels become unclear, replace them. The flashlight label is used to warn for dangerous voltage inside a cabinet. Contacting parts inside this cabinet may result in permanent personal injury or death. This sign is used to warn for dangerous movements. Keep a safe distance to those parts. Disregarding this warning may result in permanent personal injury. These signs are used to warn for the danger of limbs being pulled in. Keep a safe distance to those parts. Disregarding this warning may result in permanent personal injury. Page 24 of 89 USER MANUAL OVOSET UM-OS-04-E/10-2012 SAFETY These signs are used to warn for crushing danger. Keep a safe distance to those parts. Disregarding this warning may result in permanent personal injury. This sign is used to warn for damaging the system during installation and start up of a new system. It is only used in systems with a roller track. To prevent roller shafts falling out of the roller track during transportation of the system, a tie wrap holds the transport chains of the roller shafts together. After installing the system remove the tie wrap. Disregarding this warning, not removing the tie wrap and starting the system, will result in damaging the system. ATTENTION! Not removing the tie wrap will damage the system! UM-OS-04-E/10-2012 USER MANUAL OVOSET Page 25 of 89 MACHINE DESCRIPTION 2. MACHINE DESCRIPTION UM-OS-04-E/10-2012 USER MANUAL OVOSET Page 27 of 89 MACHINE DESCRIPTION SAFETY REGULATIONS Before starting operation, cleaning, maintaining the system or before remedying breakdowns first read the chapters Introduction and Safety. Page 28 of 89 USER MANUAL OVOSET UM-OS-04-E/10-2012 MACHINE DESCRIPTION MACHINE DESCRIPTION The machine description gives information about the complete system. For more detailed information of this system see the Unit description in this chapter. OVOSET Use: The Ovoset is a designed to pack a random supply of eggs into a wide variety of trays with the pointed end downwards. Construction: The Ovoset consists of: 1 Packer 2 Packing table The following options are available for the Ovoset: 3 Egg pattern device 4 Stamping unit 4 2 3 1 CAUTION! Do not enter objects or body parts into the Ovoset when it is running production. ATTENTION! Do not enter objects or body parts into the Ovoset when it is running production. UM-OS-04-E/10-2012 Process: Eggs are entering the Ovoset on the packer that takes care of the pointed end downward setting, assembly of eggs into a fixed pattern and the transfer of those eggs to the tray on the packing table. An operator activates the transfer of eggs by pressing two-handed start buttons. Placing, repositioning and removal of trays is done manually by the operator. Safety: The security of the system is created through a balance between safety and workability: An optimal workable situation is created for the operating personnel but safety was kept in mind. Dangerous movements of the system are mostly protected with protective covers, but there are exceptions. On a lot of places in the system it is possible to sustain injuries. Read the safety instructions of the units in the chapter unit descriptions. USER MANUAL OVOSET Page 29 of 89 MACHINE DESCRIPTION TECHNICAL SPECIFICATIONS The construction of your system may differ slightly from the descriptions in this manual. Because of this the data in the technical specifications may be incorrect and/or incomplete for your system. For complete and exact data, see the lay-out drawing, the electrical drawings and the machine tag of your system. Electrical data: Connection voltage : 230V 1 phase + N + PE 50/60Hz Pre fuse : 16 Amp Power : 1,5 kW Maximum voltage deviation : 6% to +10% Electrical protection : IP55 A ground-fault circuit interrupter (earth leak protection) is not a necessity, but if required or present it should have a minimum leakage current of at least 300 mA. Pneumatic data: Nominal air consumption : 11 normal Liter/minute Air pressure : In between 8 and 10 bars The system air regulator reduces the air pressure to 6 bars. The supplied air should be clean, dry and according the requirements. Transport and Installation: Weight Ovoset Dimensions Ovoset: Product infeed height Tray table height : : : : ±340 kg 275 (l) x 140 (b) x 145 (h) cm. ± 90 cm ± 85 cm Environment: The climate around the machine must have a normal air moisture and a temperature in between 10ºC and 30ºC. During transport and storage the temperature of the system should remain in between 0°C and 45°C. The system is not suitable for outdoor use and should not be used in a surrounding containing items having a high flash point or an explosive nature. Environment consequences: Dismantling and disposal of the system must be carried out by a suitable disposal company, which has the required licenses and permits for the state or the country concerned. Dismantled materials should be sorted for disposal according to local rules and regulations that may apply. Separate all materials like oil and lubrication fluids and discharge them as chemical waste. Page 30 of 89 USER MANUAL OVOSET UM-OS-04-E/10-2012 MACHINE DESCRIPTION UNIT DESCRIPTION Use: The Packer is designed to receive a random supply of eggs and assemble these eggs into a fixed pattern and place them with the pointed end downwards into a tray. PACKER Construction: The packer consists of: 1 Infeed conveyor 2 Infeed gate 3 Main drive 4 Roller track 5 Cup conveyor 6 Transfer lever 7 Vacuum head 8 Vacuum system Attached to the packer are: 9 Electrical cabinet 10 Operating panel 7 9 20 8 6 3 5 4 2 10 22 23 1 21 UM-OS-04-E/10-2012 Process: Eggs are entering the packer on the infeed conveyor where the eggs may be graded. On this belt oversized-, misshapen-, cracked- or dirty eggs should be manually removed. Egg pressure control sensors (20) on the sides of the infeed conveyor prevent accumulation of eggs on the infeed conveyor. The eggs run into the infeed gates where they are detected (21). When all gates have detected an egg, the roller track moves one step forwards receiving the eggs from the gates in between 2 roller shafts on the roller track. Because of the shape of the rollers and their rotating movement, during each step forwards, the eggs move with their pointed ends more towards the outside of the rollers. At the main drive position, the egg lifters lift the eggs on the round end up while flaps are guiding the pointed end into the cups of the cup conveyor. A cup detection sensor (22) stops the system when remaining eggs are detected in between the roller track and the cup conveyor. The cup conveyor transports the eggs towards the transfer lever position until the first line of eggs is detected by the start transfer sensor (23). The transfer lever moves down and the vacuum head picks up the eggs and transports them towards an empty tray on the packing table. USER MANUAL OVOSET Page 31 of 89 MACHINE DESCRIPTION Safety: The packer is not completely secured with protective covers. Therefore be cautious with loosely hanging clothes and long hair, do not come too close to the packer and do not touch it when it is running production. Pay special attention to: - The infeed conveyor - The roller track - The cup conveyor - Flap shaft - Transfer lever with vacuum head Never touch these parts of the packer when it is running production. The cover above the flap shaft (transfer position of eggs from roller track to cup conveyor) doesn’t have a safety switch. With an open cover, the system remains running. The transfer lever with vacuum head makes unexpected fast and powerful movements. Never touch or come near this part when the packer is running production. CAUTION! The cover above the flap shaft is NOT a safety cover. Opening this cover does NOT stop the system. CAUTION! Keep distant to the transfer lever with vacuum head! It makes unexpected fast and powerful movements! CAUTION! Do not enter objects or body parts into the packer when it is running production. ATTENTION! Do not enter objects or body parts into the packer when it is running production. Page 32 of 89 USER MANUAL OVOSET UM-OS-04-E/10-2012 MACHINE DESCRIPTION Use: The vacuum head is designed to pick up eggs from the cup conveyor and place those eggs into the trays on the packing table. The vacuum head is available in 3 versions: Fixed vacuum head, Combination vacuum head and Zigzag vacuum head. VACUUM HEAD 5 4 6 Fixed vacuum head (1): The fixed vacuum head is used to place eggs into the common plastic or paper trays. Combination vacuum head (2): The combination vacuum head is used to place eggs into wider trays like trays with a width of 10 eggs. Zigzag vacuum head (3): The zigzag vacuum head is used to place eggs into trays with an offset cell pattern. 1 5 7 4 6 2 4 5 8 3 6 Construction: The vacuum head consists of: 4 Vacuum head holder 5 Vacuum hose connection 6 Suction cups 7 2 air controlled cylinders (combination) 8 Air controlled cylinder (zigzag) The vacuum head is attached to the transfer lever. Process: When eggs are detected at the transfer position, the vacuum head moves towards the eggs. The vacuum switches ON and the suction cups pick up the eggs. The vacuum head moves to the packing table above a tray. Here it waits until the operator presses twohanded start buttons. Then the vacuum head moves down to place the eggs into the tray while the vacuum changes into blow off. Above the cup conveyor, the combination vacuum head is in the center position. Above the packaging table it is able to move to the left or the right for filling both sides of a wider tray. Above the cup conveyor, the zigzag vacuum head is in the straight cell pattern position. Above the packaging table it is able to move into the offset cell pattern for filling the offset cell pattern trays. Safety: The vacuum head is not secured with protective covers. It makes unexpected fast and powerful movements. Never touch or come near this part when the packer is running production. CAUTION! Keep distant to the vacuum head! It makes unexpected fast and powerful movements! UM-OS-04-E/10-2012 USER MANUAL OVOSET Page 33 of 89 MACHINE DESCRIPTION Use: The packing table is designed to receive eggs into the manually placed trays. By attaching a particular tray centering bar to a dedicated position on the table it is possible to place the tray to the correct position for receiving eggs. PACKING TABLE Construction: The packing table consists of: 1 Two-handed start buttons 2 Table top with punched holes. 3 Tray centering bars The packing table is attached to the packer. 3 2 1 3 3 3 Process: The operator has to place an empty tray on the correct position on the table using the tray centering bar. After picking up eggs, the vacuum head moves above the tray and waits there until the operator presses the two-handed start buttons simultaneously. Then the vacuum head moves down to place the eggs into the tray and returns to the position above the cup conveyor of the packer. When a 30-er tray is filled, the operator has to remove the full tray and replace it with an empty tray. When other types of tray are used that have to be filled in more than 1 step, the operator has to turn or shift the tray to bring the next empty spaces of the tray underneath the vacuum head. Safety: The packing table is not secured with protective covers. The vacuum head that places the eggs into the trays on the packing table makes unexpected fast and powerful movements. Never touch or come near this part when the packer is running production. CAUTION! Keep distant to the vacuum head! It makes unexpected fast and powerful movements! Page 34 of 89 USER MANUAL OVOSET UM-OS-04-E/10-2012 MACHINE DESCRIPTION OPTIONAL EGG PATTERN DEVICE Use: The egg pattern device is designed for filling trays with an offset cell pattern (for example CASP). Construction: The egg pattern device consists of: 1 Bar 2 Blocking shafts 3 Air controlled cylinder The egg pattern device is placed above the infeed gates. Process: Trays with an offset cell pattern cannot be filled symmetrically and therefore, now and then, a pattern needs to be created to fill the complete tray automatically. Normally the bar is up. As soon as the egg pattern needs to be created, the bar with blocking shafts moves down after eggs have been detected in all infeed gates. The roller track moves 1 step forward receiving a full row of eggs. Now only the sensors (4) above the gates without blocking shafts are looking for eggs. As soon as those sensors are detecting eggs, the roller track moves 1 step forwards, receiving an incomplete row of eggs. Eggs blocked by the blocking shafts remain in the gates. Afterwards the bar with blocking shafts moves up. 1 2 3 Safety: The egg pattern device is secured with a protective cover. 4 UM-OS-04-E/10-2012 4 4 4 USER MANUAL OVOSET Page 35 of 89 MACHINE DESCRIPTION OPTIONAL STAMPING UNIT Use: The stamping unit is designed for coding eggs. Construction: The stamping unit consists of: 1 Shaft with stamps 2 Hinging frame 3 Drive mechanism The stamping unit is placed above the cup conveyor close to the transfer position of eggs from roller track to cup conveyor. Process: After a step forward of the roller track and the cup conveyor, the shaft with stamps moves down to code the row of eggs in the cup conveyor. 3 2 1 Safety: The cover above the stamping unit doesn’t have a safety switch. With an open cover, the system remains running. CAUTION! The cover above the stamping unit is NOT a safety cover. Opening this cover does NOT stop the system. ATTENTION! Do not enter objects or body parts into the stamping unit when it is running production. TIP! Do not store the stamps and ink into a room with a temperature below 12ºC. Below this temperature, the ink becomes syrupy resulting in bad coding on the eggs. Page 36 of 89 USER MANUAL OVOSET UM-OS-04-E/10-2012 OPERATION 3. OPERATION UM-OS-04-E/10-2012 USER MANUAL OVOSET Page 37 of 89 OPERATION SAFETY REGULATIONS Before starting operation, cleaning, maintaining the system or before remedying breakdowns first read the chapters Introduction and Safety. Page 38 of 89 USER MANUAL OVOSET UM-OS-04-E/10-2012 OPERATION EXPLANATION OF THE OPERATION OPERATING PANEL Emergency button: After pushing the red button, the complete system stops. Only use this button in case of emergencies. Start: By pressing the start button, the system starts to run. The light inside the button turns ON. DANGER! Although a lot of safety measures are built into the control of the system, Prinzen cannot guarantee that no dangerous situations will occur. Before you start the system, make sure no persons are in danger. This button is also used to remove all eggs out of the system. Normally all gates need to be filled with eggs before these eggs are transported towards the tray. When no more eggs are entering the system on the infeed conveyor, the system waits for eggs and the eggs on the roller track and cup conveyor remain on the system. When this start button is pressed for approximately 4 seconds, the system is set in to the clear mode. The eggs in the system are transported towards the vacuum head even though no eggs are detected at the gates. The vacuum head remains filling trays until all eggs are removed from the system. When all eggs are removed from the system, do not forget to press the start button to stop the clear mode. TIP! The last trays leaving the system may be only partially filled! Stop: By touching the stop button, you will stop the system. The system stops after finishing certain internal controlling cycles. Thus it may take some time before the system is completely stopped. This is the normal procedure to stop the system. Reset: After a breakdown, first the breakdown needs to be solved. During a breakdown, the light inside the reset button FLASHES. After solving the breakdown and pressing the reset button, the controller verifies if all breakdowns are solved. When this is the case, the light inside the reset button turns OFF. Now it is possible to start the system by pressing the start button again. UM-OS-04-E/10-2012 USER MANUAL OVOSET Page 39 of 89 OPERATION Tray selection switch: With this switch it is possible to select the tray type that the system should run. Indicator light: The system has no display to show error messages. Therefore the indicator light on the operating panel displays an error number. See the below table for the corresponding error message: Error number: 0 1 2 5 6 7 8 Error message Automatic program aborted Emergency button pressed Fault frequency inverter Roll cups motor runs too long Double egg or egg out of cup at roll cup Transfer motor runs too long Egg in cups LOCAL BUTTONS 1 2 1 Page 40 of 89 Two handed start buttons (1): These two buttons are present on the left and the right side of the packing table. When the transfer lever with vacuum head is ready to place eggs into a tray on the packing table it stops around 100 mm above the tray. After pressing both buttons simultaneously, the transfer lever with vacuum head moves down to place the eggs into the tray. Stamping unit selection switch (2): This switch is only present on systems that are equipped with the stamping unit. When stamping is switched to 0, the stamping unit is not used. Eggs leave the system without a code. When stamping is switched to 1, the stamping unit is used and eggs leave the system coded. 2 USER MANUAL OVOSET UM-OS-04-E/10-2012 OPERATION STARTING PRODUCTION Follow below steps to start up the system: 5 4 1 CAUTION! Make sure all protective covers are in place. Make sure no persons are in danger. 6 ATTENTION! Make sure no tools or other objects are present inside the system. ATTENTION! Before starting the system make sure maintenance is performed according to the maintenance instructions further on in this manual. 2 3 UM-OS-04-E/10-2012 1. Make sure all emergency buttons are released. 2. When the system uses compressed air, switch it ON. Check the main air pressure. Set it to 6 bars. 3. Switch on the main power by turning the main switch ON. 4. Set the tray selection switch to the appropriate tray type. 5. Push the reset button. 6. Push the start button to start the system. The light inside the button turns ON. 7. Now the system is running. USER MANUAL OVOSET Page 41 of 89 OPERATION RUNNING PRODUCTION While the system is running production, the operator continuously has to supply empty trays or turn, or shift trays to bring the next empty spaces of the tray underneath the vacuum head. 1 2 CAUTION! Keep distant to the vacuum head! It makes unexpected fast and powerful movements! Follow below procedure to assist the system: 1. Place an empty tray on the correct position on the packing table by pushing it against the tray centering bar. 2. When the vacuum head, with eggs in the suction cups, waits above the tray, press the two-handed start buttons a few seconds. 3. The eggs are placed in the tray after which the empty vacuum head returns to the cup conveyor. 4. As soon as the vacuum head has returned to the position above the cup conveyor for picking up the next eggs, remove the full tray and replace it with an empty one, or shift or turn the tray to bring the next empty spaces of the tray underneath the vacuum head. 5. When the vacuum head, with eggs in the suction cups, waits above the tray, press the two-handed start buttons again. 6. Repeat the above steps. 4 4 5 Page 42 of 89 USER MANUAL OVOSET UM-OS-04-E/10-2012 OPERATION STOPPING PRODUCTION Follow below steps to stop the system: 1. First wait until no more eggs are supplied on the egg-collecting conveyor. 2. Clear the system. Push the start button for 4 seconds. 3. Wait until all eggs are placed into the trays. No more eggs should be present inside the system. 4 2 TIP! The last trays leaving the system may be only partially filled. 6 8 4. Push the stop button. 5. Wait until all movements of the system are stopped. 6. Switch the system OFF. 7. Switch the air supply OFF. 8. Release the air through the outlet valve. 9. At the end of a production day clean the system. 7 UM-OS-04-E/10-2012 USER MANUAL OVOSET Page 43 of 89 OPERATION RESET PATTERN It is important not to disturb the filling sequence of trays with an offset cell pattern. Filling trays gets out of sequence when: - A half filled tray is removed instead of turned or shifted and a next empty tray is entered. - The tray selection switch is turned while there are still eggs inside the packer. - The emergency button is pressed while the roller track and cup conveyor are making a step forward. - The system is switched off (or power failure) while the roller track and cup conveyor are making a step forward. TIP! The sequence of filling trays remains active, even after switching OFF the system or pushing an emergency button. When the filling of trays is out of sequence, trays are not completely filled and eggs are placed beside the tray on the packing table or in the tray on top of other eggs. Follow below procedure to solve this: 1. Stop the egg collecting conveyor and wait until no more eggs are entering the packer. 2. Clear the system. Push the start button for 4 seconds. Now the packer starts to remove all the eggs from the system. 3. When no more eggs are present on the system (infeed conveyor, gates, roller track, cup conveyor and vacuum head) stop the system. 4. Turn the tray selection switch to a different tray type. 5. Turn the tray selection switch back to the appropriate tray type. 6. Place an empty tray on the correct position on the packing table. 7. Push the reset button. 8. Push the start button. Start running a tray with an offset cell pattern: - Before selecting the offset tray pattern with the tray selection switch, make sure no eggs are present on infeed gates, roller track, cup conveyor or vacuum head and an empty tray is present on the packing table. Stop running a tray with an offset cell pattern: - Clear the system when you want to stop operation. Push the start button for 4 seconds and make sure all eggs are removed from the system. Then turn the tray selection switch to a different tray type. Page 44 of 89 USER MANUAL OVOSET UM-OS-04-E/10-2012 OPERATION START / STOP DELAY TIMERS Infeed stop delay: The stop delay is the time between the egg pressure sensors detecting eggs and the stop of the egg-collecting conveyor. When this stop delay is too short, the egg-collecting conveyor stops too often. When this timer is too long, too many eggs enter the infeed conveyor causing too much pressure on the gates. Infeed start delay: The start delay is the time between the egg pressure sensors not longer detecting eggs and the restart of the egg-collecting conveyor. When this start delay is too short the eggcollecting conveyor stops and starts too often. Follow below sequence to change the timer: Follow below sequence to change the timers for stop delay and start delay: 1. Press the stop button to stop the machine. 2. Press and hold the stop button and the reset button simultaneously for at least 3 seconds to set the operating panel into the settings mode. 3. The indicator light starts blinking number 9. 4. Now all the timers are reset to their default settings! 5. The default stop delay is 3 seconds. 6. The default start delay is 1 second. 7. To change the stop delay, turn the tray selection switch to position 1. 8. To change the start delay, turn the tray selection switch to position 2. 9. Push the stop button to decrease the selected timer. One push is 0,5 seconds down. 10. Push the reset button to increase the selected timer. One push is 0,5 seconds up. Each time the reset button is pushed it starts to blink to confirm that you raised the timer. The maximum value is 9,5 seconds, so the reset button will not blink any more once you’ve reached this value. 11. Press the start button to leave the settings mode. 12. The indicator light stops blinking. UM-OS-04-E/10-2012 USER MANUAL OVOSET Page 45 of 89 OPERATION CONVERSION GATE OPEN/CLOSE 1 3 For some tray types it is necessary to run the system with 5 or 6 rows instead of 7. Depending on the tray type the system is going to fill, open (1) or close (2) the appropriate gate (probably the gate on the right side of the packer). 2 4 When the gate is opened place the pin (3) on the shaking fork. When the gate is closed place the guide (4) on the shaking fork. TRAY CENTERING BAR For several types of trays, Prinzen has dedicated tray centering bars. Among others, tray centering bars for the following trays are available: - 30-cell paper or plastic. - CASP 86. - CASP 96. - Petersime Place the appropriate tray centering bar (5) on its dedicated position into the punched holes (6) on the packing table. 6 6 5 5 Page 46 of 89 USER MANUAL OVOSET UM-OS-04-E/10-2012 OPERATION VACUUM HEAD 1 3 4 For several types of trays, Prinzen has dedicated vacuum heads. Among others the following vacuum heads are available: - Fixed vacuum head. - Combination vacuum head. - Zigzag vacuum head: Follow below procedure to convert the system to a different vacuum head: 1. Disconnect the vacuum hose. 2. In case the vacuum head is equipped with air cylinders (combination or zigzag vacuum head), disconnect the air hoses. 3. While supporting the vacuum head, loosen the knurled knobs and remove the vacuum head. 4. Place the required vacuum head underneath the transfer arm on the appropriate position and secure it to the arm with the knurled knobs. 5. Connect the vacuum hose to the vacuum head. 6. In case the vacuum head is equipped with air cylinders, connect the air hoses to the air supply. Connect the black hose to the black supply hose. Connect the blue hose to the blue supply hose. When more air supply hoses are present, the air supply hoses as well as the air hoses of the vacuum head are marked. 5 6 UM-OS-04-E/10-2012 USER MANUAL OVOSET Page 47 of 89 CLEANING 4. CLEANING UM-OS-04-E/10-2012 USER MANUAL OVOSET Page 49 of 89 CLEANING GENERAL Only personnel who are trained to perform cleaning duties on this system are allowed to clean it. When during cleaning duties questions arise regarding the condition of the system, consult your maintenance engineer. SAFETY REGULATIONS Read the chapters Introduction and Safety before starting operation, cleaning, maintaining the system or remedying breakdowns. CLEANING UTENSILS AND DETERGENTS In general we advise to have the following tools, cleaning utensils and detergents available during cleaning duties: - Padlock. - Vacuum cleaner. - Compressed air. - Plastic scraper. - Moistened cloth. - Water and neutral soap. - Lubricants. CAUTION! When using warm water to moisten a cloth, make sure the temperature of the water is below 45°C. Above this temperature it is possible to incinerate body parts. ATTENTION! Do not use abrasive cleaning detergents or utensils on non-longwearing parts. Do not use aggressive cleaning products. Use cleaning product with a PH value higher than 6. Do not use chlorinated cleaning agents. After cleaning with a cleaning product, rinse off with plenty of water. ATTENTION! The system is NOT designed for wet cleaning. Do NOT clean the system with water and certainly NOT with a high spraying pistol. Only use moistened cloths for cleaning. Do NOT clean bearings, printers, robots, electrical parts and pneumatic parts with water. NOTE! Use H1 classified lubricants. These lubricants are approved to use in the food processing industry. TIP! Prinzen uses Interflon Fin Food Lube Teflon spray and Griffon HR260 Silicone spray. Page 50 of 89 USER MANUAL OVOSET UM-OS-04-E/10-2012 CLEANING RECOMMENDED CLEANING AGENT Prinzen customers often use Hatchonet cleaning agent for hatcheries for cleaning their systems. The supplier of this cleaning agent is Cid lines. For safe and correct use of this cleaning agent, contact Cid lines. Visit their website to find a local dealer: www.cidlines.com. Prinzen recommends this cleaning agent instead of others but we cannot verify the correct use of it and thus we cannot guarantee a good cleaning result and avoiding negative influences of it on our systems. GENERAL CLEANING PROCEDURE Read the below general cleaning procedure to clean the system. For specific cleaning instructions see the cleaning instructions further on in this chapter. - See to it that all products (eggs, trays,..) are removed by letting the machine run empty. Switch off the system and secure it against accidental switching on. Clean the complete system with a vacuum cleaner, compressed air, a dry cloth and a plastic scraper. Remove persisting scrap with a moistened cloth. Clean the floor underneath and around the system. Check the condition of the cleaned parts during cleaning. CLEANING INTERVAL Remove all dirt inside and around the system after every 8 hours running production. Clean the system thoroughly after every 40 hours running production and afterwards lubricate the moving parts according to the preventive maintenance instructions further on in this manual. TIP! The cleaning advices and cleaning intervals described in this manual are general. For your specific products and production process the cleaning schedule may need alteration. During the first production months observe the contamination of the system and the influence of this contamination on the product quality and production process and (if necessary) change the cleaning methods and schedules. AFTER CLEANING When the cleaning duties are finished, follow steps below: - Consult your maintenance engineer in case of questions about the condition of parts. Blow dry the system, the system must be absolutely dry before putting it back into operation. Lubricate moving parts that have been cleaned. Remove excess grease after lubrication. Make sure all cleaning utensils are removed from the machine. UM-OS-04-E/10-2012 USER MANUAL OVOSET Page 51 of 89 CLEANING CLEANING COMPONENTS CLEANING PHOTO SWITCHES 1 Clean the lenses of the photo switches (1) with a moistened soft fluff-free cloth. 1 1 Page 52 of 89 USER MANUAL OVOSET UM-OS-04-E/10-2012 CLEANING CLEANING INSTRUCTIONS PACKER 4 3 1 INFEED CONVEYOR Clean the belt (1) with a plastic scraper and a moistened cloth or a brush. 2 DRIP TRAYS Remove the drip trays (2) from underneath the packer and clean them with water. ROLLER TRACK CAUTION! Wear eye protection during cleaning or parts of the packer with compressed air. Use compressed air to clean the roller track (3). Remove persisting scrap with a moistened cloth. CUP CONVEYOR Use compressed air to clean the cup conveyor (4). Remove persisting scrap with a moistened cloth. SUCTION CUPS To clean the suction cups (5), remove them from the vacuum head and let them soak in warm water (maximum 40ºC) until the dirt becomes soft (this may take a few hours). After this, rinse off the suction cups with water to clean them. Dry up the suction cups with compressed air before placing them back. CAUTION! Wear eye protection during cleaning or drying of the suction cups with compressed air. 5 UM-OS-04-E/10-2012 USER MANUAL OVOSET Page 53 of 89 CLEANING VACUUM HEAD In case a fixed vacuum head is used, it is possible to clean the inside of this vacuum head. Once a month it may be necessary to clean the inside of this vacuum head (10). 11 10 For this, remove the 4 wing nuts (11) and remove the vacuum head from the vacuum arm. Use compressed air to clean the inside of the vacuum head. In case of extremely contamination (cause by egg yolk) let the head soak in warm water (maximum 40ºC) until the dirt becomes soft (this may take a few hours). After this flush out the head with water or compressed air. Dry up the head with compressed air before placing it back. CAUTION! Wear eye protection during cleaning or drying of the vacuum head with compressed air. SUCTION DUCTS In case a zigzag vacuum head is used, it is possible to clean the inside of the suctions ducts. Once a month it may be necessary to clean the inside of all suction ducts (15). 16 15 17 On one side of a duct, remove the blind stop (16), and on the other side the air hose fitting (17). Use compressed air to clean the inside of the suction duct In case of extremely contamination (cause by egg yolk) let the duct soak in warm water (maximum 40ºC) until the dirt becomes soft (this may take a few hours). After this flush out the duct with water or compressed air. Dry up the duct with compressed air before placing it back. CAUTION! Wear eye protection during cleaning or drying of the suction duct with compressed air. TIP! Only clean the suctions ducts in case of extreme contamination. Page 54 of 89 USER MANUAL OVOSET UM-OS-04-E/10-2012 CLEANING VACUUM HOSES 20 In case of extremely contaminated vacuum head because of broken eggs it may be possible that egg yolk contaminates the vacuum head all the way into the vacuum hoses (20). In that case, remove the vacuum hoses from the vacuum head and flush them out with water. Dry up the hoses with compressed air before placing them back. Make sure to put each hose back on the same position as it was before the removal. CAUTION! Wear eye protection during cleaning or drying of the vacuum hoses with compressed air. TIP! Only clean the vacuum hoses in case of extreme contamination. VACUUM FILTER Remove the filter (25) and use compressed air to clean it. In case of extremely contaminated filters (cause by egg yolk) let the filter soak in warm water (maximum 40ºC) until the dirt becomes soft (this may take a few hours). After this flush out the filter with water or compressed air. Dry up the filter with compressed air before placing it back. 25 CAUTION! Wear eye protection during cleaning or drying of the filters with compressed air. STAMPING UNIT Clean the stamp heads (30) daily before and after use with lotion wipes. Clean extremely polluted stamp heads with warm water or spirit. Afterwards dry the stamp head at least 15 minutes. TIP! Depending on your specific production circumstances dab the stamps with lotion wipes before, during and after using them. 30 ATTENTION! Do not use cleaning detergents like thinners or benzene to clean the stamps. UM-OS-04-E/10-2012 USER MANUAL OVOSET Page 55 of 89 CLEANING PACKING TABLE Clean the packing table (35) and the tray centering bars (36) with a plastic scraper and a moistened cloth. 35 Page 56 of 89 36 USER MANUAL OVOSET UM-OS-04-E/10-2012 PREVENTIVE MAINTENANCE 5. PREVENTIVE MAINTENANCE UM-OS-04-E/10-2012 USER MANUAL OVOSET Page 57 of 89 PREVENTIVE MAINTENANCE GENERAL Only professionals who are familiar with the installation and its operation may perform maintenance, repairs and replacement of defective or worn out parts. When during maintenance questions arise regarding the condition of the system, consult your Prinzen dealer. In case of difficult or special repairs consult your Prinzen dealer. Inspections must be carried out before, during and after operation of the machine. Mechanical flaws, such as loose bolts and ball bearings must be repaired upon discovery. The operator is responsible for noticing and locating abnormal noises and other unusual signs indicating flaws. If the operator cannot locate the flaw, he must stop the installation and inform his superior. Take preventive actions against vermin as they may cause failures to the electrical cables and such. SAFETY REGULATIONS Before starting operation, cleaning, maintaining the system or before remedying breakdowns first read the chapters Introduction and Safety. MAINTENANCE UTENSILS In general we advise to have the following tools available for preventive maintenance of the Prinzen systems: - Padlock. - Lubricants. - Set of Allen keys. - Set of wrenches. - Set of screwdrivers. Page 58 of 89 USER MANUAL OVOSET UM-OS-04-E/10-2012 PREVENTIVE MAINTENANCE RECOMMENDED LUBRICANTS Prinzen uses Interflon Fin Food Lube Teflon spray and Griffon HR260 Silicone spray. See below table for alternative lubricants and their manufacturers. On the websites of the manufacturers you can find a local dealer for your desired lubricant. Component: Lubricant: Supplied in: Chains Rod ends Guides Bronze plain bearings Fin Food Lube Fin Lube TF Aerosol Aerosol www.interflon.com Interflon Yes No TF089 PTFE spray Aerosol www.griffon.nl Griffon No Klüberoil 4NH1 4-220N Klüberoil CM 1-220 Cassida PL (Cassida FL5) Gleitmo 985 Aerosol Aerosol Aerosol Aerosol www.klueber.com Klüber www.fuchs.com Fuchs HR260 Silicone spray Aerosol www.griffon.nl Griffon No UNISILKON M 2000 Aerosol www.klueber.com Klüber Yes www.fuchs.com Fuchs Yes No Plastic guides Plastic plain bearings Cassida Silicone fluid spray Aerosol Stabylan SI 210 Aerosol Brand: Food grade: ATTENTION! When you want to use different types of lubricants than the lubricants used by Prinzen, make sure that these lubricants do not form a harmful product when contacting the lubricants used by Prinzen. NOTE! Use H1 classified lubricants. These lubricants are approved to use in the food processing industry. NOTE! Residues of lubricant must be discharged as chemical waste. TIP! Prinzen uses Interflon Fin Food Lube Teflon spray and Griffon HR260 Silicone spray UM-OS-04-E/10-2012 USER MANUAL OVOSET Page 59 of 89 Yes No Yes No PREVENTIVE MAINTENANCE GENERAL MAINTENANCE PROCEDURE Before actually starting to maintain the system, first follow below steps: - See to it that all eggs are removed by letting the machine run empty. - Switch off the system and secure it against accidental switching on. - Perform the maintenance. - Check the condition of the system during maintenance. Perform the maintenance according the advices and intervals as described in the Preventive maintenance instructions further on in this chapter. TIP! The maintenance advices and intervals described in this manual are general. For your specific products and production process the maintenance schedule may need alteration. During the first production months observe the performance of the system and the influence of the maintenance and (if necessary) change the maintenance methods and schedules. AFTER MAINTENANCE When the maintenance duties are finished, ensure the following: - All fasteners are secure. All safety covers are in place and safety doors are closed. All tools are removed from the system. Excess lubricant is removed. The system is tested before starting production. Page 60 of 89 USER MANUAL OVOSET UM-OS-04-E/10-2012 PREVENTIVE MAINTENANCE MAINTENANCE COMPONENTS BEARINGS In the Prinzen systems normally bearings without a grease nipple are used. These bearings have a life time lubrication. No grease is needed. TIP! All bearings are sealed and lubricated for life and require no lubrication. MOTORS AND REDUCTORS In the Prinzen systems normally motorreductors with a lifetime lubrication are used. It is not needed to change the oil. TIP! All motors are provided with lifetime lubrication and require no lubrication. GEARS In the Prinzen systems normally plastic gears are used. These gears do not need lubrication. TIP! All gears are made from plastic and require no lubrication. ROD ENDS Rod ends need lubrication weekly. Apply Teflon spray after every 40 hours running production. Rod ends that are cleaned with water need to be lubricated directly after cleaning. UM-OS-04-E/10-2012 USER MANUAL OVOSET Page 61 of 89 PREVENTIVE MAINTENANCE PLAIN BEARINGS 2 1 In the Prinzen systems bronze (1) and plastic (2) plain bearings are used. Both types of plain bearings need lubrication weekly. Lubricate bronze plain bearings with teflon spray and plastic plain bearings with silicone spray. Do this after every 40 hours running production. Plain bearings that are cleaned with water need to be lubricated directly after cleaning. CHAINS 3 In the Prinzen systems different executions of chains are used: transport chains (3) and drive chains (4). Transport chains are chains that transport product carriers (for example egg grippers). Check those chains monthly for wear and tension and lubricate them every 200 hours running production with teflon spray. Drive chains are chains that transfer the rotating movement of one shaft to another. Normally these chains have a chain tensioner. Check those chains half yearly for wear and tension and lubricate them every 1200 hours running production with teflon spray. Chains that are cleaned with water need to be greased directly after cleaning. 4 GUIDES 6 5 Page 62 of 89 6 In the Prinzen systems several types of (linear) guides are used: Lubricate plastic guides (5) weekly with silicone spray. Do this after every 40 hours running production. Lubricate other guides (6) monthly with teflon spray. Do this after every 200 hours running production. Before lubricating clean the guides with a solvent and a soft cloth. Do not spray lubricant directly on the guides. Use a cloth to apply a film of lubricant on the guides. Guides that are cleaned with water need to be lubricated directly after cleaning USER MANUAL OVOSET UM-OS-04-E/10-2012 PREVENTIVE MAINTENANCE AIR SUPPLY The air supply coming into the Prinzen systems must be clean and dry. This air goes through a water separator (10) with filter that separates the liquids and the pollution, which has mixed with the air flowing through the air distribution pipes. The water separator needs manual drain-off. Check the regulator daily and drain-off the water if necessary (11). Check the filter inside the water separator half yearly and clean or replace it if necessary. 10 11 ROLLER TRACK ACCESS 2 For cleaning and maintenance purposes it is possible to remove the roller shafts from the bottom side of the roller track: 1. Push the transport chain towards the side of the system. 2. Push the roller shaft towards the other side of the system and remove it. 1 UM-OS-04-E/10-2012 USER MANUAL OVOSET Page 63 of 89 PREVENTIVE MAINTENANCE VACUUM VALVE VACUUM VALVE PARTS REPLACEMENT The revision kit for the vacuum valve (Prinzen article number: 6400700013) consists of the following parts: 2x Springs 4x O-ring 1 2 10 5 6 3 4 Follow below procedure to replace the springs and the O-rings: 1. Remove the 4 bolts that fasten the cover to the casing. 2. Remove the cover from the casing. 3. Remove the 4 screws of one of the spools. 4. Carefully remove the spool. 5. Replace the 2 O-rings. 6. Replace the spring. 7. Place the spool back in the reverse order of removal. 8. Repeat the above steps 4 to 7 for the other spool. 9. Place the cover back to the casing. 10. In case of vacuum loss apply sealant (mastic) in the seams between the cover and the casing. Page 64 of 89 USER MANUAL OVOSET UM-OS-04-E/10-2012 PREVENTIVE MAINTENANCE STAMPING UNIT INK REFILL Refill the stamps weekly with the special Prinzen ink: 1. Pull the stamps from the shaft en place them on a cloth. 2. Push the stamp completely down. 3. Fill the stamp to 15 mm below the rim with ink. 4. Place the stamp back on the shaft. 1 ATTENTION! Only use the special Prinzen stamp ink. It is especially developed for these stamps. STAMP HEAD REPLACEMENT The stamp head is a wear part. Replace it every 2 months: 5. Pull the stamps from the shaft. 6. Keep de topside of the stamp closed and compress the spring. 7. The stamp head pops off the bellow. 8. Clean the bellow with lotion wipes. 9. Place the new stamp head on a cloth and position the bellow above it. 10. Press the bellow into the stamp head. 11. Refill ink as described above. 12. Place the stamps back on the shaft. 6 6 9 UM-OS-04-E/10-2012 7 10 10 USER MANUAL OVOSET Page 65 of 89 PREVENTIVE MAINTENANCE PREVENTIVE MAINTENANCE INSTRUCTIONS DAILY PREVENTIVE MAINTENANCE 1 2 3 4 5 Daily Maintenance: Interval (hours): Observe for abnormal sounds, vibrations and heat Check complete air supply for leakage Drain off water separator air regulators Check the functionality of the emergency stop buttons Apply silicone spray into the guides and hinge points of the zigzag vacuum head. 4 2 3 5 Page 66 of 89 USER MANUAL OVOSET UM-OS-04-E/10-2012 h 8 8 8 8 8 PREVENTIVE MAINTENANCE WEEKLY PREVENTIVE MAINTENANCE 10 10 11 12 13 Weekly Maintenance: Interval (hours): Apply teflon spray on rod ends shaking fork (2x) Clean the transport shafts of the cups with a solvent and a soft cloth. Apply silicone spray on the shafts. Do not spray direct on the shafts but use a cloth to apply a film of lubricant on these shafts. Check the suction cups for damages Apply silicon spray to the horizontal movement guides of the combination vacuum head (2x) NOTE! Keep cups of cup conveyor free of lubricants to prevent contamination of the eggs. 11 13 12 UM-OS-04-E/10-2012 USER MANUAL OVOSET Page 67 of 89 h 40 40 40 40 PREVENTIVE MAINTENANCE 14 15 16 14 17 18 19 16 19 18 Weekly Maintenance: Interval (hours): Apply Teflon spray on rod end zigzag vacuum head Apply Teflon spray on rod end egg pattern device Apply silicone spray to the egg pattern device plain guides (2x) Apply teflon spray on rod ends stamping unit (4x) Apply silicon spray to the stamping unit plain bearings (2x) Refill the stamps with ink 15 17 Page 68 of 89 USER MANUAL OVOSET UM-OS-04-E/10-2012 h 40 40 40 40 40 40 PREVENTIVE MAINTENANCE MONTHLY PREVENTIVE MAINTENANCE 21 20 21 22 23 24 25 Monthly Maintenance: Interval (hours): Clean motor fans with compressed air Check the infeed conveyor belt tension Check the electrical wiring for damages Check the air hoses for damages Check the vacuum hose for damages Replace all the stamping heads (7x) h 200 200 200 200 200 400 20 CAUTION! Wear eye protection during cleaning of the motor fans with compressed air. 24 22 23 TIP! See the stamping unit paragraph for replacement procedure stamping heads. 25 UM-OS-04-E/10-2012 USER MANUAL OVOSET Page 69 of 89 PREVENTIVE MAINTENANCE 26 26 26 27 27 Monthly Maintenance: Interval (hours): Check the roller track transport chains for wear (2x) Apply Teflon spray on the roller track transport chains (2x) Check the cup conveyor transport chains for wear (2x) Apply Teflon spray on the cup conveyor transport chains (2x) TIP! Only lubricate the roller track transport chain. Make sure the black rubber supporting guides remain free of lubricants. Lubricant on the black rubber supporting guides causes malfunctioning of the rollers. TIP! Use the dedicated oil holes at both sides of the system to lubricate the cup conveyor transport chain and the roller track transport chains. 26 NOTE! Keep rollers on roller track free of lubricants to prevent contamination of the eggs. NOTE! Keep cups of cup conveyor free of lubricants to prevent contamination of the eggs. 27 27 Page 70 of 89 USER MANUAL OVOSET UM-OS-04-E/10-2012 h 200 200 200 200 PREVENTIVE MAINTENANCE ½ YEARLY PREVENTIVE MAINTENANCE 30 30 31 32 31 33 34 ½Yearly Maintenance: Interval (hours): Check all bearings for wear Check complete system for loose parts, bolts, nuts,..etc Check the filter inside the air regulator for contamination and clean or replace it if necessary Check the main drive chain for wear Apply Teflon spray on the main drive chain 33 33 34 33 TIP! When the red arrow on the chain tensioner becomes completely visible, replace the main drive chain. 32 UM-OS-04-E/10-2012 USER MANUAL OVOSET Page 71 of 89 h 1200 1200 1200 1200 1200 PREVENTIVE MAINTENANCE 35 35 35 ½Yearly Maintenance: Interval (hours): Check drive chain tension of the transfer lever Check the transfer lever drive chain for wear Apply Teflon spray on the transfer lever drive chain 35 Page 72 of 89 USER MANUAL OVOSET UM-OS-04-E/10-2012 h 1200 1200 1200 PREVENTIVE MAINTENANCE YEARLY PREVENTIVE MAINTENANCE 1 2 2 Yearly Maintenance: Interval (hours): Replace seals and springs in the vacuum valve (use replacement set) Replace vacuum filter 1 TIP! See the vacuum valve paragraph for replacement procedure vacuum valve seals and springs. 1 UM-OS-04-E/10-2012 USER MANUAL OVOSET Page 73 of 89 h 2400 2400 ADJUSTMENTS 6. ADJUSTMENTS UM-OS-04-E/10-2012 USER MANUAL OVOSET Page 75 of 89 ADJUSTMENTS GENERAL Only professionals who are familiar with the installation and its operation may perform adjustments. In case of difficult or special adjustments consult the Service Department of Prinzen. SAFETY REGULATIONS Before starting operation, cleaning, maintaining the system or before remedying breakdowns first read the chapters Introduction and Safety. AFTER ADJUSTMENTS When the adjustments are finished, ensure the following: - All fasteners are secure. All tools are removed from the system. All safety covers are in place and safety doors are closed. The system is tested before starting production. Page 76 of 89 USER MANUAL OVOSET UM-OS-04-E/10-2012 ADJUSTMENTS COMPONENT ADJUSTMENTS PHOTO SWITCHES 1 2 There are 3 types of photo switches: Diffuse reflective photo switch (1): This is a photo switch which transmits a light beam. An object is detected when the photo switch receives the light beam back because it reflects on the object. Retro reflective photo switch (2): This is s a photo switch which uses a reflector to receive its transmitted light beam back. An object is detected when it interrupts the light beam. Through beam photo switch (3): This photo switch consists of a transmitter and a receiver part. The transmitter sends a light beam to the receiver. An object is detected when it interrupts the light beam. 3 PD30 DIFFUSE REFLECTIVE Adjust the sensor according the below procedure: 1. Align the sensor to its correct position without the object it has to detect. The green LED should be ON. 2. Press and hold the teach button for 3 seconds until both LEDs are flashing. 3. Place the object you need to detect in front of the photo switch. 4. Press the teach button once. Now the sensor is adjusted. The yellow LED turns ON when an object is detected. PA18 DIFFUSE REFLECTIVE 4 5 UM-OS-04-E/10-2012 Follow below procedure to adjust the sensor: - Align the sensor to its correct position without the object it has to detect. The LED (4) should be OFF. - Turn the potentiometer (5) clockwise until the LED goes ON (B). - Place the object you need to detect in front of the photo switch, LED should remain ON. - Turn the potentiometer counter clock wise until the LED goes OFF (A). - Set the potentiometer in between A and B position (C). Now the sensor is adjusted. The LED turns ON when an object is detected. USER MANUAL OVOSET Page 77 of 89 ADJUSTMENTS PROXIMITY SWITCHES In the Prinzen systems, often Omron inductive sensors are used for controlling the positioning of moving parts. The distance between the tip of the sensor and the detectable parts must be 1 mm. Page 78 of 89 USER MANUAL OVOSET UM-OS-04-E/10-2012 ADJUSTMENTS AIR PREPARATION 1 Normally the Prinzen systems need an air pressure of approximately 6 bars (make sure your compressed air supply is between 8 and 10 bars). Adjust this air pressure with the air pressure regulator. Pull the knob (1) up and turn it to change the air pressure. Press the knob down to lock it again. On the air pressure regulator a manual ON/OFF switch (2) is positioned. See alongside pictures for the ON and the OFF positions. Switch the air supply OFF during maintenance activities. OFF 2 ON SPEED CYLINDERS 7 6 7 Some movements are controlled by aircylinders. These cylinders have speed restrictors (6) to adjust the speed of the ingoing and outgoing stroke of the cylinder. Normally the speed is adjusted with the outgoing air. When adjusting these speeds it should not influence the cycle time of the complete system but the cylinder movements should be smooth and gentle. 6 CYLINDER AIR CUSHIONING The movement of the piston rod of an air cylinder is stopped by an air cushion (7) on both sides of the cylinder. The air cushion absorbs the piston rod movement. The air of this cushion is released through the air cushioning screw. By adjusting this screw it is possible to stop the piston rod movement in a smooth and gentle way. A correct adjustment of this air cushioning extends the life span of the air cylinders. Adjust this screw in such a way that the air in the cushion is released slowly and the piston rod is stopped gently. UM-OS-04-E/10-2012 USER MANUAL OVOSET Page 79 of 89 ADJUSTMENTS VALVES In the system valves are positioned to control the air cylinders. Manual activation of these valves (controlling the cylinders) is possible by pressing on the manual-activating pin (8). CAUTION! Before manually activating valves, make sure no persons are in danger. Air cylinders immediately start to move. ATTENTION! When valves are manually activated, parts of the system immediately start to move. This may result in collision of parts which may damage the system. 8 SWITCH ON A CYLINDER 8 Page 80 of 89 When sensors are present on the cylinder to detect the piston position, these sensors should be adjusted properly. When only 1 sensor is used it is important to know if the ingoing or outgoing stroke of the piston rod has to be detected. Below the general adjustment instruction for the sensors on the air cylinders is stated: - Loosen up the connection of the sensor to the cylinder. - Move the sensor to the outside of the cylinder until the sensor goes OFF (A). - Move the sensor to the centre of the cylinder until the sensor goes OFF (B). - Move the sensor to the position in between position A and B (C). - Fasten the sensor again at position C. USER MANUAL OVOSET UM-OS-04-E/10-2012 ADJUSTMENTS FREQUENCY INVERTERS 1 6 5 7 4 3 2 9 8 ATTENTION! The parameters of the frequency inverters are factory set. We advise you to consult Prinzen before changing these parameters. CAUTION! Before manually controlling frequency inverters, make sure no persons are in danger. Motors immediately start to move. ATTENTION! When frequency inverters are manually controlled, parts of the system immediately start to move. This may result in collision of parts which may damage the system. TIP! After a frequency inverter has been controlled manually, the system may have lost its sequence and a reboot of the system may be necessary (power OFF and power ON). Changing parameter values: Follow below procedure to change parameters values: Press the up (1) or down (2) button until PAr is visualized on the display. Press the enter key (3) to display the parameters. Use the Reset button (4) to select a parameter digit. Repeat this step and next step until the parameter you want to view is displayed. Press the up (1) or down arrows (2) to change the parameter digit. Repeat this step and previous step until the parameter you want to view is displayed. Press the enter key (3) to display the parameter value. Use the Reset button (4) to select a parameter digit. Repeat this step and next step until the parameter value is changed. Press the up (1) or down (2) button to change the parameter digit. Repeat this step and previous step until the parameter is completely changed. Confirm the change with the enter key (3). Press the escape key (5) until the DRV LED (6) is ON and F..,.. is visible on the display. Manually controlling the inverter: In some situations it is easy to be able to run one of the motors by directly controlling it with its frequency inverter. Follow below procedure to manually control the inverter: - Make sure the system is stopped and no trays or eggs are on the part of the system that you want to control manually. - Set the inverter in the local controlled mode by pressing the LO/RE button (7) until the LED inside this button turns ON. - Press the RUN button (8) to start the inverter. The connected motor starts running now. - Press the STOP button (9) to stop the motor. - Set the inverter back in the remote controlled mode by pressing the LO/RE button (7) until the LED inside this button turns OFF. TIP! See the OMRON V1000 User manual for details about this frequency inverter. UM-OS-04-E/10-2012 USER MANUAL OVOSET Page 81 of 89 ADJUSTMENTS POWER SUPPLIES 11 The power supply switch (10) must always be set to 230 Vac, even when your local power supply has a different voltage. The power supplies are factory set. Do not change this setting (11). ATTENTION! The power supplies are factory set. Do not change the power supply switch and do not change setting of the potentiometer. 10 Page 82 of 89 USER MANUAL OVOSET UM-OS-04-E/10-2012 ADJUSTMENTS OPERATION ADJUSTMENTS GATE BLOCKERS 1 Gate blockers prevent the possibility of 2 smaller eggs entering 1 gate. When smaller eggs are produced keep all gate blockers in the infeed gates (1). When the produced eggs are becoming bigger remove every other gate blocker (2). As soon as most of the produced eggs are big and the infeed of eggs get stuck by the gate blockers, remove all gate blocker (3). 2 3 START / STOP DELAY TIME 4 UM-OS-04-E/10-2012 Check the start and stop timers for the eggcollecting conveyor. Eggs coming from the egg-collecting conveyor, arriving on the infeed belt of the Ovoset are detected by egg pressure sensors (4). When these sensors remain ON for a certain time (stop delay time), a signal is sent to the egg-collecting conveyor to stop supplying eggs. When these sensors no longer detect eggs for a certain time (start delay time) a signal is sent to the eggcollecting conveyor to supply eggs again. Adjust the delay times to get a smooth flow of eggs without too much starting and stopping of the egg-collecting conveyor. For adjustment of the timers see Start / Stop delay timers in the chapter Operation. USER MANUAL OVOSET Page 83 of 89 ADJUSTMENTS ADJUSTMENTS INFEED BELT TENSION 2 1 3 Adjust the tension of the belt in such a way that it won’t slip on the drive roller during start up and during normal production with full load. Loosen up the tensioning roller lock bolt (1). Turn the tensioning bolt (2) Clock Wise for more belt tension and Counter Clock Wise for less belt tension. Make the same adjustment on both sides of the conveyor! The distance between the lock bolt and the end of the conveyor (3) must be the same on both sides of the conveyor. ATTENTION! A too high belt tension may result in a damaged belt or wear on rollers and bearings. 10 11 13 12 MAIN DRIVE CHAIN TENSION The chain tensioner (10) of the main drive chain is spring loaded. Normally, the chain tensioner must be positioned towards the chain until the edge of the blue block is in between the 30 mm and 20 mm mark (11). 14 15 When the chain tension becomes too low (in between the 20 mm and 10 mm mark is visible), loosen up the fixation bolts (12) and move the complete tensioner towards the chain (13). To release the chain tension, take out the lock pin (14) from the rear of the tensioner, push the green chain tensioner in and place the lock pin into the lock hole (15). TRANSFER LEVER DRIVE CHAIN TENSION 16 Page 84 of 89 The drive chain tension of the transfer lever is adjustable with the position of the chain tensioner (16). USER MANUAL OVOSET UM-OS-04-E/10-2012 ADJUSTMENTS INFEED GATE EGG DETECTION 21 20 UM-OS-04-E/10-2012 The sensors detecting the eggs at the infeed gate are adjustable in height. Adjust this height when the machine is stopped. The distance between the tip of the sensor (20) and the roller (21) underneath the sensor should be approximately 95 mm. When the roller track is running the sensor should not detect the passing rollers of the roller track! For sensitivity adjustment of the sensor see adjustment of photo switches in this chapter. USER MANUAL OVOSET Page 85 of 89 ADJUSTMENTS VACUUM HEAD POSITIONS 1 The 4 stop positions of the transfer lever with vacuum head are determined by 4 cams detected by sensors. The cams are attached to the drive shaft of the transfer lever. 1. Wait position above cup conveyor. 2. Pick up eggs from cup conveyor. 3. Wait position above tray. 4. Place eggs in tray. The distance between the tip of the sensor and the cam must be 1 mm. 2 ATTENTION! Adjusting the vacuum head position sensors or cams may result in malfunctioning and even damage of the system. TIP! Normally these sensors and cams are factory set and do not need to be changed. 3 4 2 1 Page 86 of 89 3 4 USER MANUAL OVOSET UM-OS-04-E/10-2012 SPARE PARTS 7. SPARE PARTS UM-OS-04-E/10-2012 USER MANUAL OVOSET Page 87 of 89 SPARE PARTS LIST WITH RECOMMENDED SPARE PARTS Part number Recommended 4000200073 4000200074 4100300001 6200700012 6201100003 6201100014 6400400007 6400700013 7000100034 7000100036 8001000003 8001100036 8001100048 8001300004 8001600014 8001600015 8001600016 8001600017 8001600157 UM-OS-04-E/10-2012 10 10 10 1 4 5 1 1 2 2 1 1 1 1 1 1 1 1 1 Description Cup Chain block cup shafts Suction cup Valve MEH-5/2-1/8-P-B Vacuum tube Airflex PU61021 25mm (per meter) Air hose PEN 6x1 blue Replacement filter VTF01-118 Revision kit vacuum valve Transport chain roller track Transport chain cup conveyor Relay G2R-1-SN-24VDC Frequency inverter V1000 0,4/0,75kW EMC filter for frequency inverter V1000 DC power supply 24V/5A Sensor proximity E2A-M12LS04WP-B1 Photocell diffuse reflective PA18CSD04PASA Photocell receiver ET5505PPAP 1384 Photocell transmitter ET5505 1384 Photocell diffuse reflective PD30CNB15PP3335 USER MANUAL OVOSET Page 89 of 89


