1
Installation Manual
COPYRIGHT © 2012 IGE+XAO. All rights reserved
SEE Electrical Installation
Manual
V7R1
Installation Manual
COPYRIGHT © 2012 IGE+XAO. All rights reserved
Copyright
Copyright (c) May 2012 IGE-XAO. All rights reserved. No material of this manual, or any portion of it,
shall be reproduced, transcribed, saved or translated, under whatever form and by whatever means,
without the written authorization from IGE-XAO+XAO, 25-27 Victor Hugo bld, Immeuble Pythagore
31773 COLOMIERS CEDEX FRANCE.
Page 2
A. Installation of SEE Electrical V7R1
Installation Manual
COPYRIGHT © 2012 IGE+XAO. All rights reserved
CONTENTS
SEE ELECTRICAL INSTALLATION MANUAL .......................................................................................1
A
INSTALLATION OF SEE ELECTRICAL V7R1 .................................................................................5
A.1. HARWARE AND OPERATION SYSTEM .............................................................................................5
A.1.1. Minimal Configuration..........................................................................................................5
A.1.2. Recommended Configuration ..............................................................................................5
A.2. RIGHTS DURING INSTALLATION ......................................................................................................6
A.3. INSTALLATION PROCESS ...............................................................................................................6
B
LICENSING TYPES ........................................................................................................................ 11
B.1. LICENSE SEE ELECTRICAL WITH A DONGLE ................................................................................. 11
B.1.1. License with a Dongle - Introduction .................................................................................. 11
B.2. UNLOCKING WITH A NETWORK DONGLE – GENERAL ..................................................................... 13
B.2.1. Installation of the Dongle Software .................................................................................... 13
B.2.2. Installation of SEE Electrical per CAD Computer in the Network ....................................... 19
B.2.3. Programming the Dongle................................................................................................... 19
B.2.4. Additional Configuration, when running Several or Different Licence Managers in the
Network .......................................................................................................................................... 21
B.3. LICENSE WITH A SOFTWARE KEY - INTRODUCTION ....................................................................... 23
B.3.1. Different Network Cards Used during Softlock Licensing ................................................... 23
B.3.2. License with a Software Key ............................................................................................. 24
B.3.3. Licensing SEE Electrical via Local License Server ............................................................ 28
B.3.4. Licensing automatically the new version if an old version of the software is already installed
.......................................................................................................................................... 31
B.3.5. "Silent" licensing if using the "Remove the license when close the application" option ...... 31
B.3.6. Terminal Server Support ................................................................................................... 31
C INSTALLATION OF WORKSPACES, SYMBOLS AND TEMPLATES IN A NETWORK IF NO SEE
ELECTRICAL HAS BEEN INSTALLED BEFORE ................................................................................. 32
D
UPDATING FROM AN EXISTING SEE ELECTRICAL VERSION V5R1......................................... 33
E
UPDATING FROM AN EXISTING SEE ELECTRICAL VERSION V4R1 AND OLDER................... 35
E.1.
CONVERSION OF EXISTING USER DATA WHEN USING OLDER VERSIONS OF SEE ELECTRICAL ........ 35
F INSTALLATION OF WORKSPACES, SYMBOLS AND TEMPLATES IN A NETWORK IF OLDER
VERSION OF SEE ELECTRICAL HAS BEEN INSTALLED BEFORE .................................................. 36
G
USING V7R1 AND V5R1 IN PARALLEL ............................... ERROR! BOOKMARK NOT DEFINED.
G.1.
H
CUSTOMERS WITH SOFTLOCK AND VERSION V5R1 ...................... ERROR! BOOKMARK NOT DEFINED.
USING V4R1 AND V7R1 ................................................................................................................ 39
H.1. CUSTOMERS WITH SOFTLOCK AND VERSION V4R1 ...................................................................... 39
H.2. SIMULTANEOUS USE OF SEE ELECTRICAL V4R1 AND V7R1 ........................................................ 39
H.2.1. Softlock ............................................................................................................................. 39
H.2.2. Dongle............................................................................................................................... 39
A. Installation of SEE Electrical V7R1
Page 3
Installation Manual
COPYRIGHT © 2012 IGE+XAO. All rights reserved
Page 4
A. Installation of SEE Electrical V7R1
Installation Manual
COPYRIGHT © 2012 IGE+XAO. All rights reserved
A
INSTALLATION OF SEE ELECTRICAL V7R1
Install the version into an empty folder! It is not possible to overwrite an existing old version!
Depending on whether SEE Electrical was already installed, or not, follow the instructions
below in this chapter. There you will also find information about which parts of the SEE
Electrical software must be moved to a network directory, what is the procedure when SEE
Electrical data is used by several users or it is simply installed on a drive.
A.1. HARWARE AND OPERATION SYSTEM
A.1.1. MINIMAL CONFIGURATION
Windows XP SP3
Simple Core 1,9GHz processor
Live memory (RAM) : 1GB
Required free disk space: 10GB
A.1.2. RECOMMENDED CONFIGURATION
Windows XP SP3 or Vista SP2 or Seven
Dual Core processor
Live memory (RAM) : 4 GB
Required free disk space: 10 GB
Graphic card: Intel / Matrox / ATI any processor with internal memory not less than 1 GB and
minimum resolution 1024 x 768, strongly recommended Full HD
Note:
The machine must have a free USB 2 port for the dongle and a CD - ROM in case of installation from
a CD.
A. Installation of SEE Electrical V7R1
Page 5
Installation Manual
COPYRIGHT © 2012 IGE+XAO. All rights reserved
A.2. RIGHTS DURING INSTALLATION
When running the Operating System as Administrator or as a User, there are two possible
approaches:
The software must be installed with an administrator account. If the user logs on as main user
on the computer, then it is enough to enter the values one more time and close the licence
assistant. The licence will remain on the computer.
However, if the user logs on as "User with limited rights", the Administrator must give full access
and modification rights for the whole SEE Electrical main directory.
The user profile must keep the administrator rights during the installation. The administrator
rights can be removed again after the installation.
However, if the user works with the "User with limited rights" property, the administrator must give
full access and modification rights for the whole SEE Electrical main directory.
A.3. INSTALLATION PROCESS
Insert the CD of SEE Electrical that you have received from your local distributor or double click the
installation file.
The Welcome window appears.
Page 6
A. Installation of SEE Electrical V7R1
Installation Manual
COPYRIGHT © 2012 IGE+XAO. All rights reserved
▪
Click Next to proceed.
▪
Read carefully the User rights Concession agreement. Check the "I accept the terms in
the license agreement" option and click Next if you want to proceed.
▪
Insert the user name and the organization.
A. Installation of SEE Electrical V7R1
Page 7
Installation Manual
COPYRIGHT © 2012 IGE+XAO. All rights reserved
You can select who will use this software.
▪ Select the "Anyone who uses this computer" option to allow to all users access to the
program.
▪ Select the "Only for me" option to allow access only to the current user.
▪
Page 8
Click Next to proceed.
A. Installation of SEE Electrical V7R1
Installation Manual
COPYRIGHT © 2012 IGE+XAO. All rights reserved
▪
Select the type of installation.
"Complete" will install the typical parameters.
Note:
If you select "Custom" you can choose which parameter to install and also change the installation
directory.
A. Installation of SEE Electrical V7R1
Page 9
Installation Manual
COPYRIGHT © 2012 IGE+XAO. All rights reserved
▪
Choose an option and click Next.
▪ Click Install to begin the installation of the software.
▪ After the installation has been completed, click Finish to exit.
▪ Restart your computer if necessary.
▪ Unlock the software.
Depending on whether your version is protected with a Softlock or with a Dongle, you will find
more instructions for the unlocking procedure in the appropriately named file on your SEE
Electrical CD, in the DOCUMENTS\D\UNLOCKING subdirectory.
Important
If you use Windows Vista or Windows 7 and you want to link the shortcut to the project data in the
operating system, you must run the software only as Administrator.
To do this, right click the program icon of SEE Electrical and select Run as Administrator in the
pop-up menu. Confirm the security message with Allow und close the program again.
Page 10
A. Installation of SEE Electrical V7R1
Installation Manual
COPYRIGHT © 2012 IGE+XAO. All rights reserved
B
LICENSING TYPES
This chapter helps you to license SEE Electrical.
If you work with Administrator and User profiles, there are two procedures for installing and licensing:
The software must be installed, and the dongle programmed under the Administrator's account.
If the user must log on as main user on the computer, it is enough to fill in, and close the
License wizard.
If the user logs on as "User with limited rights", rights for full access or rights for editing the
main directory and all subdirectories of SEE Electrical must be given from the Administrator.
If you use the "Safe mode" or "Backup"-function, this has to be done also for the folders
'$projects" and "temp" in the SEE Electrical folder. (These folders are not generated on
installation, but are automatically generated on the first execution of the "Safe mode" or
"Backup"-functions.).
If Windows home version is used, it is not possible to enhance the rights for restricted users in
folders. In this case we recommend that you install the program in the folder "My files", because
here even users with restricted rights have enough rights.
The User profile must receive Administrator rights during the installation and programming of the
dongle. The Administrator rights can be removed after installing and licensing.
B.1. LICENSE SEE ELECTRICAL WITH A DONGLE
B.1.1. LICENSE WITH A DONGLE - INTRODUCTION
A Dongle (Hardlock) can be available as a single-position dongle or as a network dongle. In this
chapter you will find the instruction for licensing with a single-position dongle.
If you are not familiar with the program, we recommend, after licensing with a dongle, to work
through the Workspace Example 1 (in the User Manual) to get a general introduction into the
program.
If SEE Electrical must be used on several computers, license the software on all of the computers as
described below: However, the dongle must be programmed only once, and the plug connection can
be changed afterwards.
B.1.1.a.
▪
▪
PROGRAMMING OF THE DONGLE
Insert the dongle in the parallel or USB port of your PC.
After installing SEE Electrical, in the Windows Start menu, select Programs ➤ IGE-XAO
➤ SEE Electrical V7, and run the Program Dongle command.
B. Licensing Types
Page 11
Installation Manual
COPYRIGHT © 2012 IGE+XAO. All rights reserved
The following window appears:
▪
Press Protection key number in Decimal. The button changes into Protection key
number in Hexadecimal. The number on the right is your dongle number.
▪ Type the dongle license code given in your contract in the "Code" field.
If you need to work with an older version too, get in contact with your delivery department.
▪ Click Program. Your dongle is now programmed. You will receive a message that the
dongle is successfully programmed. If you don't receive this message, repeat the
procedure. If the programming of the dongle fails again, contact us.
B.1.1.b.
LICENSE SEE ELECTRICAL SOFTWARE (ON EACH COMPUTER REQUIRED)
If you start SEE Electrical for the first time, the License wizard appears. Enter your company data
here.
Select the type of protection used for your software: "My software is protected with a hardware
key".
After clicking on Finish, you can use SEE Electrical unlimited within your license.
If the dongle is disconnected, SEE electrical cannot work and is automatically closed!
▪
During the installation a PROTECTION:XML file is copied into the SEE Electrical folder.
<?xml version="1.0" encoding="UTF-8"?>
<?xml version="1.0" encoding="UTF-8" ?>
- <PROTECTION_PARAMETERS VERSION="1.0"
xmlns:xsi="http://www.w3.org/2001/XMLSchema-instance">
- <TYPE MERGE_LICENSE="NO" HARDWARE="YES" SERVER_SEARCH="NO">
<SERVER_INFO SERVER_NAME="" />
</TYPE>
</PROTECTION_PARAMETERS>
Edit the file with a XML editor and make sure, SERVER_SEARCH is "NO" in case a dongle
(but no network dongle ) is used.
Page 12
B. Licensing Types
Installation Manual
COPYRIGHT © 2012 IGE+XAO. All rights reserved
B.2. UNLOCKING WITH A NETWORK DONGLE – GENERAL
In this chapter you will find a description of unlocking the software with a network dongle.
If you are not familiar with the program, we recommend, after licensing with a dongle, to work
through the Workspace Example 1 (in the User Manual) to get a general introduction into the
program.
When SEE Electrical is used together with a network dongle, then the unlocking of the software on all
computers has to be accomplished as described below. However the dongle itself must be
programmed only once. The dongle software must be installed only once on the server.
B.2.1. INSTALLATION OF THE DONGLE SOFTWARE
Install the dongle software on a computer, which remains permanently in the network.
You need Administrator rights to run the procedure.
Proceed as follows:
▪
▪
Start the Aladdin License-Manager lmsetup_8.32.EXE from the SEE Electrical CD, folder
"\HLDRV\SERVER\8.32: The dongle must not be yet put to the computer.
To start the configuration you must first confirm the start window with Next.
B. Licensing Types
Page 13
Installation Manual
COPYRIGHT © 2012 IGE+XAO. All rights reserved
▪
▪
▪
Page 14
Accept the agreement.
Press Install.
Select how to install the NetHASP License Manager: "Service (nhsrvice.exe)" and quit the
window with Next.
B. Licensing Types
Installation Manual
COPYRIGHT © 2012 IGE+XAO. All rights reserved
▪
Enter the name of the folder where the program shortcut will be located later and press
Next.
▪
Select a program group to add HASP License Manager icon to:
B. Licensing Types
Page 15
Installation Manual
COPYRIGHT © 2012 IGE+XAO. All rights reserved
▪ Press Next.
The dongle drivers are installed after the installation of the License Manager.
In case the drivers installed on your system are newer than the drivers in the installation of
the License Manager, a message appears.
Page 16
B. Licensing Types
Installation Manual
COPYRIGHT © 2012 IGE+XAO. All rights reserved
In the next window, select "Yes" and press Finish.
The installation is complete.
▪
Copy the nhsrv.ini from the folder "\HLDRV\Server\820" on your CD into the folder
"System32" on the computer, where the License Manager is running. Remove the
attribute "Read only".
If you use a Windows 64 Bit System, you must copy the nhsrv.ini file from the
\HLDRV\Server\832 of your CD into the directory …\Windows\SysWOW64 directory.
▪ Restart your computer.
Notes about Windows 32 bit computers:
The following possibility for controlling the installation is available only for Windows 32Bit. For
Windows 64 Bit the icon in the taskbar does not exist.
▪ Control the complete installation of the Licence Manager by right clicking the
icon select
Show.
▪ In the "HASP License Manager for Win32" window, click the "ActivityLoc" menu item.
▪ Search for the following entry:
B. Licensing Types
.
Page 17
Installation Manual
COPYRIGHT © 2012 IGE+XAO. All rights reserved
Notes about Windows XP Windows Server, Vista und Windows 7:
If the License Manager is installed onto a Windows XP Service Pack 2 system, Windows Server,
Vista and Windows 7, the Port 475 will be automatically opened in the activated Windows Firewall.
To control the settings of the Windows Firewall, click START ➤ Settings ➤ Control panel ➤
Windows Firewall or START ➤ Control Panel ➤ Windows Firewall.
If the Control Panel is displayed by Categories, click the System and Security category to access
the Windows Firewall command. Then click the "Allow a programm to communicate through
Windows Firewall" option.
▪ Select the "HASP LM" entry.
The following window appears:
▪ Insert the necessary values.
If you are using a firewall of a different manufacturer, unlock the port 475 (UDP) for the Licence
Manager. Refer to the procedure in the documentation of your firewall.
Networks with different sub network addresses:
If the License manager is in another network segment than the computer where SEE Electrical runs,
then it must be ensured that the port 475 is routed into the respective network segment.
Check therefore the settings of your router and if necessary change the configuration.
Page 18
B. Licensing Types
Installation Manual
COPYRIGHT © 2012 IGE+XAO. All rights reserved
B.2.2. INSTALLATION OF SEE ELECTRICAL PER CAD COMPUTER IN THE NETWORK
▪
▪
Start the installation from the SEE Electrical CD-ROM and follow the installation
instructions (administrator rights are necessary to perform the installation).
During the installation a PROTECTION:XML file is copied into the SEE Electrical folder.
<?xml version="1.0" encoding="UTF-8"?>
<?xml version="1.0" encoding="UTF-8" ?>
- <PROTECTION_PARAMETERS VERSION="1.0"
xmlns:xsi="http://www.w3.org/2001/XMLSchema-instance">
- <TYPE MERGE_LICENSE="NO" HARDWARE="YES" SERVER_SEARCH="NO">
<SERVER_INFO SERVER_NAME="" />
</TYPE>
</PROTECTION_PARAMETERS>
▪
Edit the file with a XML Editor and, in case you use a network dongle, make sure that the
SERVER_SEARCH is set to "Yes". In this case add to the IP address of the server the
SERVER_INFO SERVER_NAME keyword between "".
▪ After the installation from the CD copy from the folder "\HLDRV\SERVER" the file
"NETHASP.INI" into the Windows folder. Open the file, and change the IP address in
such a way that the IP address belongs to the computer, on which will be placed later the
network dongle.
The entry looks for ex. In the following way:
NH_SERVER_ADDR=192.169.101.50
Guarantee before the change that the INI file is not write protected.
B.2.3. PROGRAMMING THE DONGLE
The programming of the dongle has to be done on one of the computers, where SEE Electrical is
already installed. You have to have administrator rights.
▪
▪
Plug in the dongle into the parallel and/or USB interface of your PC.
After the installation of SEE Electrical a start menu is available in Windows under
Programs ➤ IGE+XAO ➤ SEE Electrical V7 ➤ Program dongle.
▪ Click it.
The following dialog appears:
B. Licensing Types
Page 19
Installation Manual
COPYRIGHT © 2012 IGE+XAO. All rights reserved
▪
▪
Press Protection key number in decimal. The button changes in Protection key
number in hexadecimal. The number right to the button now indicates your dongle
number.
Enter in the field "Code" the release code for the dongle as it is in your copy.
If you need to work with an older version too, get in contact with your delivery department.
▪ Select Program. Your dongle is now programmed. You will receive a message that the
dongle is successfully programmed. If you don't receive this message, repeat the
procedure. If the programming of the dongle fails again, contact us.
▪ After successful programming plug the dongle in your License server.
Unlocking of SEE Electrical software (it is necessary on each computer)
When SEE Electrical is run the first time, the registration wizard is opened. Enter your company data
here.
▪
Select the type of protection used for your software: "My software is protected with a
hardware key".
After you click on Finish you can use SEE Electrical unrestricted within your license.
If the dongle is removed, SEE Electrical cannot work and is automatically closed!
Notes for Licence Manager and SEE Electrical on the same system
If the Licence Manager and SEE Electrical run on the same system, you must carry out on this
system the following additional configurations, which are deviating from the standard approach:
▪ On your computer, open Windows START menu ➤ Settings ➤ Control panel ➤ Services
and application ➤ Services.
▪ Right click on the "HASP License Manager" service and select Properties in the pop-up menu.
▪ Click the Log on tab and activate the "Allow service to interact with desktop" option.
▪ Confirm your modifications by OK.
Now follow the description in "Installation of SEE Electrical per CAD computer in the network" and
enter in the NETHASP.INI file for the IP address 127.0.0.1.
The entry must be modified as follows: NH_SERVER_ADDR=127.0.0.1
▪ Restart the computer.
Page 20
B. Licensing Types
Installation Manual
COPYRIGHT © 2012 IGE+XAO. All rights reserved
B.2.4. ADDITIONAL CONFIGURATION, WHEN RUNNING SEVERAL OR DIFFERENT
LICENCE MANAGERS IN THE NETWORK
If, in your network, you run several Licence Managers for different software products or if several
Licence Managers are available in the network, you must follow the following procedure.
Install on a CAD workstation the diagnostic program DiagnostiX from the CD. You will find the
program in the CD folder under …\HLDRV\HL_Diag\aksdiag32.exe.
After the installation you will find it under Windows START ➤ Programs ➤ Aladdin ➤ DiagnostiX
➤ Aladdin DiagnostiX.
▪ Start the program.
The following window appears:
▪
In the "Diagnostic Tools" tree structure on the left side, select the "HASP" entry.
B. Licensing Types
Page 21
Installation Manual
COPYRIGHT © 2012 IGE+XAO. All rights reserved
▪
Click on the "nethasp.ini" entry.
▪
Enable the "Customized .ini file" option and then the "Server IP" check box in the right
pane of the nethasp.ini Configuration window.
▪
▪
Click the
button.
In the new window, in the Available elements area, select the IP of the servers to be
used and the server names.
Press the ">" button and confirm your modifications with Apply.
Set the window folder (e. g. C:\Windows\) in the Select folder area.
Click the Create button.
▪
▪
▪
Page 22
B. Licensing Types
Installation Manual
COPYRIGHT © 2012 IGE+XAO. All rights reserved
B.3. LICENSE WITH A SOFTWARE KEY - INTRODUCTION
If you use a software key, the computer, where SEE Electrical must be licensed has to be connected
to the internet.
If you do not have the possibility to connect your computer to internet at least to license V7R1,
contact your dealer as you have to use a dongle in the future.
Hint:
The use of the software is allowed only within your contract and/or the License agreements
(displayed during the installation).
Attention:
If a new installation of SEE Electrical is needed later, the licensing procedure must be executed
again.
The releasing of the license must be made before uninstalling or reinstalling SEE Electrical, or before
reinstalling the operating system on this PC or changing the hard disk, etc.
It is required to free the license in order to register the SEE Electrical license again after an update.
After licensing, you can use SEE Electrical unlimited.
If you are not familiar with the program, we recommend to work through the Workspace Example 1
(in the User Manual) to receive a general introduction into the program.
B.3.1. DIFFERENT NETWORK CARDS USED DURING SOFTLOCK LICENSING
Before you start the licensing procedure, SeeProtectionConfig.exe can be used to define which
network card shall be used to calculate the Softlock (in case, for example, an internal network card is
present at the computer but a wireless networking key has to be used when licensing).
▪ Choose the one to use and press OK.
B. Licensing Types
Page 23
Installation Manual
COPYRIGHT © 2012 IGE+XAO. All rights reserved
B.3.2. LICENSE WITH A SOFTWARE KEY
By using this method of licensing, it is possible to enable an already installed license again (a license
can be used on a company PC and on a laptop alternately.)
The releasing of the license must be made before uninstalling or reinstalling of SEE Electrical,
or before reinstalling the operating system on this PC or exchanging the hard disk etc. It is
required to free the license in order to register the SEE Electrical license after an Update
again.
If SEE Electrical Version V7R1 and an older version are used on the same computer parallel,
the following particularities apply: you have to release the license for the version V5R1 before
you can license the version V7R1 and vice versa.
If you start SEE Electrical for the first time, the License wizard appears automatically.
▪
▪
Enter your company data here.
Select the type of protection used for your software: "My software is protected with a
software key or this is a trial version".
▪ Click Next.
The License wizard dialog box appears (see below).
If you don't register the license now, you can perform this by executing File menu ➤ System
Settings ➤ License tab. In this case, all the workspaces must be closed.
The following dialog box appears:
Page 24
B. Licensing Types
Installation Manual
COPYRIGHT © 2012 IGE+XAO. All rights reserved
Various data can appear in the dialog box.
▪
Enter the serial number as given in your certificate. Each serial number consists of 8
digits.
▪ If you need to define Proxy settings, refer to the chapter below.
▪ Press the License on Internet button. Make sure before that the Internet connection is
available.
You will come to the internet site where you can generate your license code.
▪
▪
Enter the licence password as given to you in your certificate. Upper and lower case is not
considered.
Click the Licence button. If the license request is correct, the following message appears:
If you possess several serial numbers of SEE Electrical, never licence one serial number
while another serial number is licensed on this PC. Otherwise, you will lose one license. If
one license is already available, you will receive a warning message.
▪ Close the dialog box.
▪ Click Finish in the License wizard, and then click OK.
After clicking on Finish, you can use SEE Electrical unlimited within your license.
B. Licensing Types
Page 25
Installation Manual
COPYRIGHT © 2012 IGE+XAO. All rights reserved
Free license again
By clicking the Free license button in the License my software over the Internet
dialog box, you can remove your license code from the PC where it was installed,
and then you can license SEE Electrical on another PC.
Before clicking the Free license button, enter your licence password again.
If you receive a message "Licence code(s) removed", the licence has been released
again.
Remove licence automatically when SEE Electrical is closed
It is possible to remove the license each time, when the program is closed. If you
want to do so, enable the setting "Remove the license when close the
application" in this window. Make sure you are connected to the internet.
If the setting is enabled, the system asks each time you close the program, if the
licence shall be removed. If you choose Yes, you have to licence again next time
you want to use the program.
Proxy settings
The Proxy settings button in the License Wizard dialogue to allow you a connection
by using proxy settings
Page 26
B. Licensing Types
Installation Manual
COPYRIGHT © 2012 IGE+XAO. All rights reserved
▪ Click the Proxy Settings button and enter the information in the dialogue that
appears:
▪ Enable "Use Proxy Server".
The input fields for IP address "Address" and port of the Proxy-server "Port" are
activated.
If you do not know the appropriate values, ask your network administrator.
If you use a Proxy server with authentication, you can switch the setting "Use Proxy
Authentication" and type the "User Name" and the "Password" used for this.
"Do not use proxy server for following addresses:"
You can click to select the Bypass proxy server for local addresses check box, if you
do not want the proxy server computer to be used when you connect to a computer
on the local network (this may speed up performance). For more information refer to
http://support.microsoft.com/kb/135982.
B. Licensing Types
Page 27
Installation Manual
COPYRIGHT © 2012 IGE+XAO. All rights reserved
Example:
Save your settings with OK.
B.3.3. LICENSING SEE ELECTRICAL VIA LOCAL LICENSE SERVER
If you work on a high security level and you do not have access to the Internet for your local network
or workstation, you can use the local license server. The use of a local license server offers the
possibility to borrow a license for a certain amount of days. This means that if your company has
several licenses the users can check out the license from the server. The license is then available on
the user's computer even if it is not connected to the company network. After the determined period
the license is blocked if the computer is not connected to the company's network.
Note:
The license available via the local license server is a softlock type license.
Page 28
B. Licensing Types
Installation Manual
COPYRIGHT © 2012 IGE+XAO. All rights reserved
Setup the local server
You have to possess Administrator right to setup the local server!
▪ Copy the SEE Electrical Server Manager files into an appropriate folder on the
server.
The necessary files are the following:
SEEServerManager.Exe
SEEProtectionService.Exe
SEEProtection.Dll
SEEProtection.Bat
UnregisterService.Bat
The files are located in the..\Tools\LocalServer folder of SEE Electrical after the
installation.
▪ After copying the files to the appropriate folder launch the SEEProtection.bat file
in order to register the SEEProtection.dll file. You need Administrator rights on
the server.
▪ If UAC (User Account Control) is disabled then you can just run
SEEProtection.bat.
▪ If UAC is enabled then you have to run SEEProtection.bat as Administrator. To
do this you have to start Command Prompt as Administrator. Go to Start ➤ All
Programs ➤ Accessories ➤ Command Prompt, right click and select "Run as
Administrator":
In Command Prompt go to the folder where SEEProtection.bat file is and run it from
there:
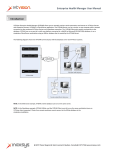
▪ Start the SEE Electrical Server Manager - SEEServerManager.exe
The License Server Manager window appears.
▪ Press the Settings button.
A new window appears.
Within this window you can see the Server IP Address and the Server ID. Please,
send them to your SEE Electrical dealer in order for him to generate the licensing
information about the server.
▪ Click Cancel and close the License Server Manager.
After the dealer has sent you the license file (<Name.LCS), please copy this file to
your server into the folder which contains the files for the local license server.
▪ Open the License Server Manager again and then open the Settings window.
▪ Press the
button in the "Server license file" field and load the <
Name.LCS file.
▪ Select the LOG file to use to write the protocol for the starts/stops of the license
server and the login/logout of the users too.
▪ With the Clear log file button you can delete all entries in the log file from time to
time to keep a better overview.
▪ Define the port to use.
For example you can use port 999. You can use any TCP/IP port number as long as
it is not used by any other service (for example port 80 is used for http protocol and
port 21 is used for FTP communication). Port 999 is free on windows operating
systems
▪ Save your settings by using the OK button.
B. Licensing Types
Page 29
Installation Manual
COPYRIGHT © 2012 IGE+XAO. All rights reserved
As soon as a license file is defined in the settings, the SEE Electrical License Server
Manager displays the serial numbers, the modules, the levels and the number of
licenses available in your license.
▪ To start the server, press the Start Server button.
You can see if the server is running or not in the "Current status" field.
▪ To stop the server, press the Stop Server button.
Inform the users that the local server is available and that they can license the SEE
Electrical on their local computers now.
You need to forward the information about the:
IP Address of the server ("Settings" window of the "License Server Window")
port to use ("Settings" window of the "License Server Window")
serial number to use (the serial number provided you by your SEE Electrical
dealer. It is also displayed in the of the "License Server Window" in the "Available
licenses" section)
pass key to use during the licensing process (the pass key provided you by your
SEE Electrical dealer)
When the users log in to the local license server, the number of the currently used
licenses currently will be updated in the "License Server Window" in the "Available
licenses" section.
Setup each computer for each single user
The license available via local license server is a softlock license.
▪ Choose the "License from Local Server" option if you want to use a local
server. (Before the local server can be addressed, it has to be prepared)
▪ Type your serial number.
▪ Click the License on local server button.
▪ Define the IP address and Server port of the server. For any additional
information, please contact your administrator.
▪ Type your password. (This is the password provided you by your distributor.)
If you want to borrow a license to be able to work without connection to a local
network for a certain amount of days, define the number of days you need to borrow
the license in the "Borrowed day(s)" field. A maximum of 90 days is possible.(If the
value in "Borrowed day(s)" field is empty, the PC must be connected directly to the
local license server to work with the software).
▪ Press the License button.
The modules in the License wizard window will be displayed in green or in blue (in
case you borrowed the license). If you borrowed the license, the number of days left
is also displayed.
Attention:
A license will be taken from the license server each time SEE Electrical is started. The license
will be transmitted to the license server (and thus will be available again) as soon as SEE
Electrical is closed (except it is borrowed).
If you have borrowed a license you have to "Free license" first, before a license can be taken
again.
Page 30
B. Licensing Types
Installation Manual
COPYRIGHT © 2012 IGE+XAO. All rights reserved
B.3.4. LICENSING AUTOMATICALLY THE NEW VERSION IF AN OLD VERSION OF THE
SOFTWARE IS ALREADY INSTALLED
If you install a new version on a computer that already has a previous version of SEE Electrical V6
build 16 or higher and the version is licensed via software key, the licensing of the new version is
done automatically.
B.3.5. "SILENT" LICENSING IF USING THE "REMOVE THE LICENSE WHEN CLOSE THE
APPLICATION" OPTION
If you use the "Remove the license when close the application" option, a new registry key License\General\AskToLicenseOnOpen – allows you to define if the program will ask you or not
about the licensing on the startup.
Value 1 - a message appears.
Value 0 - the message will not appear but the software will try to license automatically in case there
is a valid license code.
This new registry setting is useful when you try to open a project from the Windows Explorer or PDM
systems like Microsoft Share Point etc. Then it won't be possible to open a project if this message
appears, so you need to switch it off.
B.3.6. TERMINAL SERVER SUPPORT
SEE Electrical can be used in terminal server environments for licenses licensed via softlock (by
internet or local license server) or FlexLM. It is necessary to license each individual user.
The licensing algorithm detects if the software is used in such an environment and adds user name
to the licensing process. For example, if three users want to use the software in the same time you
will need three licenses..
Dongle protection cannot be used if the software is installed on terminal server. In case the software
is installed on terminal server (or remote desktop, that means in any case where RDP protocol used)
a message informs you in case protection by dongle is chosen.
B. Licensing Types
Page 31
Installation Manual
COPYRIGHT © 2012 IGE+XAO. All rights reserved
C
INSTALLATION OF WORKSPACES, SYMBOLS AND TEMPLATES IN A
NETWORK IF NO SEE ELECTRICAL HAS BEEN INSTALLED BEFORE
Copy the contents of the sub-directories ...\Projects, ...\Symbols and ...\Templates into the desired
network drive. Here rights must exist for writing, reading, modifying and creating files.
We recommend you to delete or rename the local directories ...\Projects, ...\Symbols and
...\Templates.
▪
▪
▪
▪
Page 32
Start SEE Electrical.
From the File menu press the System settings button
Open the Directories tab.
Enter the new directories.
C. Installation of Workspaces, Symbols and Templates in a Network if no
sEe Electrical Has Been Installed beforE
Installation Manual
COPYRIGHT © 2012 IGE+XAO. All rights reserved
D
UPDATING FROM AN EXISTING SEE ELECTRICAL VERSION V5R1
First secure your data!
A parallel installation of V5R1 and V7R1 versions of SEE Electrical is possible.
However, it should be noted that projects, page and project templates, type databases and symbol
libraries that have been opened with version V7R1, cannot be processed using an older version of
SEE Electrical.
Make sure that you have strictly removed all data.
▪
▪
▪
If you use a softlock, free the licence of V5R1 or of an older version before installing
V7R1.
Make a backup copy before the uninstallation/installation procedure.
Save the contents of the directories ...\Projects, ...\Symbols, ...\Templates.
Notes for the Symbols directory:
The "System.Ses" and "List of text placeholders.ses" files must not be applied because these files
are related to the version.
If you have not created any user defined cable symbols, we recommend you not to convert the
Cables.ses file because this file already exists in the V7R1.
The OGl files from the directory ...\Symbols is also related to the version and must not be saved.
Notes for the Templates directory:
Files to save:
Wires.msw (database of wire properties)
Translation.mdb (translation database)
Cables.mdb (user defined cable database)
If you have not created any user defined cable symbols, we do not recommend you to save the
Cables.mdb file.
All files with the endings *.tdw, *.txt, *.dat
The *.cds, *.LbL, *.Lbp, *.Lbv, *.Lst, *.Lsv, *.Lsp. files for the "Lists and labels" module
From …\Templates you must by no means save the SYSTEM.SEM file and the files with extension
EXT and RPT because these files relate to the version.
▪
If necessary, remove the old version of SEE Electrical.
D. Updating from an Existing SEE Electrical Version V5R1
Page 33
Installation Manual
COPYRIGHT © 2012 IGE+XAO. All rights reserved
The installation must be made in a new directory, you cannot install it over an existing version
of SEE Electrical. However, you can install the new version parallel to the old one or uninstall
the old version before installing the new one.
Before uninstalling check your backup!
Here is described the data transfer from the version V5R1.
Note:
If you transfer data from an older version of SEE Electrical than V5R1, you must convert the files.
You will find instructions for converting the data under "Conversion of data from V5R1 and older
version".
▪
Copy the saved data again into the proper directories.
If your data (projects, type database etc.) is processed for the first time with the new version
of SEE Electrical, you will have to fit it to the format of version V7R1. After this the data
cannot be used any more together with older versions of SEE Electrical!
Page 34
D. Updating from an Existing SEE Electrical Version V5R1
Installation Manual
COPYRIGHT © 2012 IGE+XAO. All rights reserved
E
UPDATING FROM AN EXISTING SEE ELECTRICAL VERSION V4R1
AND OLDER
E.1. CONVERSION OF EXISTING USER DATA WHEN USING OLDER VERSIONS OF SEE
ELECTRICAL
First secure your data!
Because data is now stored in an Access 2000 database, it is necessary to convert all the files that
have been based on an Access database in the past: projects, libraries, additional databases.
The Converter for old projects, symbols and additional databases (Wire database (WIRES.MSW),
Cable database (CABLES.MDB) and Translation database (TRANSLATION.MDB) - all in templates
directory), into Microsoft Access 2000 format is located in the SEE Electrical folder. Its name is
"CADdy2SEP.EXE". You will also find the converter in the Windows Start menu in the group "SEE
Electrical V7".
Please copy your old files in the directories used for SEE Electrical V7R1 (by default "…\projects,
…\symbols, …\templates") before starting the converter. The converter will replace them by files in
Access 2000 format. The old files are copied into a folder "Backup" beneath the folder where they
have been.
New file names:
Description
Old Name
New name
Folder (Default)
Workspaces
*.cpj
*.sep
…\projects
Cable
database
Cable.mdb
CableNew.mdb
…\templates
Wire database
Wires.msw
Wires.mdb
…\templates
Translation
database
Translation.mdb
TranslationNew.mdb
…\templates
Symbol
libraries
*.cps
*.ses
….\symbols
(The default settings for the converter are located in the master project "_Convert.c2s" in SEE
Electrical folder. If you want to add specific SQL-queries or add user defined project information texts
to all the converted projects, this master project can be changed. To do so, rename it to SEP as
extension, treat it as a normal project and rename it back).
E. Updating from an Existing SEE Electrical Version V4R1 and Older
Page 35
Installation Manual
COPYRIGHT © 2012 IGE+XAO. All rights reserved
F
INSTALLATION OF WORKSPACES, SYMBOLS AND TEMPLATES IN A
NETWORK IF OLDER VERSION OF SEE ELECTRICAL HAS BEEN
INSTALLED BEFORE
A parallel installation of V6R1 and V7R1 versions of SEE Electrical is possible.
However, it should be noted that projects, page and project templates, type databases and symbol
libraries that have been opened with version V7R1, cannot be processed using an older version of
SEE Electrical.
Therefore, we do not recommend you the parallel installation, if symbols, templates and projects are
stored on the network, unless a strict separation can be guaranteed!
▪
If you use a softlock, free the licence of SEE Electrical V5R1 or of an older version before
installing SEE Electrical V7R1.
All workstations must be changed simultaneously.
▪
▪
Make a backup before you perform an uninstall or reinstall:
Save the contents of the directories ...\Projects, ...\Symbols, ...\Templates in the network!
Notes for the Symbols directory:
The "System.Ses" and "List of text placeholders.ses" files must not be applied because these files
are related to the version.
If you have not created any user defined cable symbols, we recommend you not to convert the
Cables.ses file because this file already exists in the V6R1.
The OGl files from the directory ...\Symbols is also related to the version and must not be saved.
Notes for the Templates directory:
Files to save:
Wires.msw (database of wire properties)
Translation.mdb (translation database)
Cables.mdb (user defined cable database)
If you have not created any user defined cable symbols, we do not recommend you to save the
Cables.mdb file.
All files with the endings *.tdw, *.txt, *.dat
The *.cds, *.LbL, *.Lbp, *.Lbv, *.Lst, *.Lsv, *.Lsp. files for the "Lists and labels" module
From …\Templates you must by no means save the SYSTEM.SEM file and the files with extension
EXT and RPT because these files relate to the version.
Page 36
F. Installation of Workspaces, Symbols and Templates in a Network if
Older Version of see electrical Has Been Installed Before
Installation Manual
COPYRIGHT © 2012 IGE+XAO. All rights reserved
▪ If necessary, remove the old version of SEE Electrical.
The installation must be made in a new directory, you cannot install it over an existing version
of SEE Electrical. However, you can install the new version parallel to the old one or uninstall
the old version before installing the new one.
Before uninstalling check your backup!
Here is described the data transfer from the version V5R1.
Note:
If you transfer data from an older version of SEE Electrical than V5R1, you must convert the files.
You will find instructions for converting the data under "Conversion of data from V5R1 and older
version".
▪
Copy the saved data again into the proper directories.
If your data (projects, type database etc.) is processed for the first time with the new version
of SEE Electrical, you will have to fit it to the format of version V7R1. After this the data
cannot be used any more together with older versions of SEE Electrical!
F. Installation of Workspaces, Symbols and Templates in a Network if Older
Version of see electrical Has Been Installed Before
Page 37
Installation Manual
COPYRIGHT © 2012 IGE+XAO. All rights reserved
G
USING V7R1 AND V6R1 OR V5R1 IN PARALLEL
G.1. CUSTOMERS WITH SOFTLOCK AND VERSION V6R1 OR V5R1
It is possible to use SEE Electrical V6R1 and SEE Electrical V7R1 at the same time if your licence
code is the same. The procedure is the following:
▪ Remove, on the internet, the licence code for V6R1.
▪ Open SEE Electrical V7R1.
▪ Licence the product.
After you have licensed SEE Electrical V7R1, you have to license SEE Electrical V6R1 also.
It is not automatically licensed. After you can use the two versions parallel.
Note
You can remove the licence only for SEE Electrical V7R1. In this case the license for SEE Electrical
V6R1 is automatically removed.
Page 38
G. Using V7R1 and V6R1 or V5R1 in Parallel
Installation Manual
COPYRIGHT © 2012 IGE+XAO. All rights reserved
H
USING V4R1 AND V7R1
H.1. CUSTOMERS WITH SOFTLOCK AND VERSION V4R1
The software used for the protection had to be changed to improve support with MS Vista and
Windows 7. Additionally with the new protecting software it is not necessary any more to have
administrator rights to license or remove the license.
Because of the change of protection the licensing of the program by software in the future is only
possible, if the computer is connected to the internet while licensing.
If you have licensed by software the V4R1 and do not have the possibility to connect your computer
to the internet in order to license V7R1, please contact your dealer as you have to use a dongle.
Because of the new protection software, you have to put your V4R1 license to the database on the
internet before you can license the V7R1. For the installation you still need Administrator rights.
H.2. SIMULTANEOUS USE OF SEE ELECTRICAL V4R1 AND V7R1
H.2.1. SOFTLOCK
The licence for the version V4R1 has to be released before licensing the version V7R1and vice
versa.
You can find more info on how to execute this action in the chapter "License with a software key".
H.2.2. DONGLE
The dongle code given for your V7R1 is only valid for V7R1 and V6R1. You cannot use it to work
with an older version
If you need to work with V4R1 >= 148 too, contact your delivery department.
H. Using V4R1 and V7R1
Page 39
Installation Manual
COPYRIGHT © 2012 IGE+XAO. All rights reserved
Page 40
H. Using V4R1 and V7R1