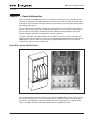
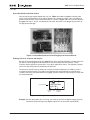
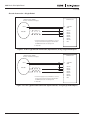
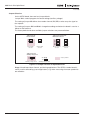
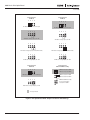
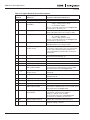
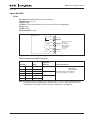
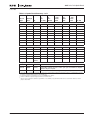
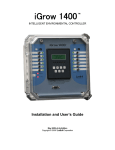
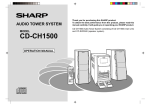
1
9000X Series Drives Option Board
User Manual
October 2005
Supersedes July 2005
MN04003001E
For more information visit: www.EatonElectrical.com
9000X Series Drive Option Board
October 2005
Important Notice – Please Read
The product discussed in this literature is subject to terms and conditions outlined in
Eaton Electrical Inc. selling policies. The sole source governing the rights and
remedies of any purchaser of this equipment is the relevant Eaton Electrical Inc.
selling policy.
NO WARRANTIES, EXPRESS OR IMPLIED, INCLUDING WARRANTIES OF FITNESS
FOR A PARTICULAR PURPOSE OR MERCHANTABILITY, OR WARRANTIES ARISING
FROM COURSE OF DEALING OR USAGE OF TRADE, ARE MADE REGARDING THE
INFORMATION, RECOMMENDATIONS AND DESCRIPTIONS CONTAINED HEREIN. In
no event will Eaton Electrical Inc. be responsible to the purchaser or user in contract,
in tort (including negligence), strict liability or otherwise for any special, indirect,
incidental or consequential damage or loss whatsoever, including but not limited to
damage or loss of use of equipment, plant or power system, cost of capital, loss of
power, additional expenses in the use of existing power facilities, or claims against
the purchaser or user by its customers resulting from the use of the information,
recommendations and descriptions contained herein.
The information contained in this manual is subject to change without notice.
Cover Photo: 9000X Drives
MN04003001E
For more information visit: www.EatonElectrical.com
i
9000X Series Drive Option Board
October 2005
Table of Contents
CHAPTER 1 — GENERAL INFORMATION . . . . . . . . . . . . . . . . . . . . . . . . . . . . . . . . . . .
Board Slots on the Control Board. . . . . . . . . . . . . . . . . . . . . . . . . . . . . . . . . . . . . .
Option Board Types . . . . . . . . . . . . . . . . . . . . . . . . . . . . . . . . . . . . . . . . . . . . . . . . .
Technical Data. . . . . . . . . . . . . . . . . . . . . . . . . . . . . . . . . . . . . . . . . . . . . . . . . . . . . .
Hardware Protections . . . . . . . . . . . . . . . . . . . . . . . . . . . . . . . . . . . . . . . . . . . . . . .
1-1
1-1
1-2
1-3
1-6
CHAPTER 2 — OPTION BOARD INSTALLATION . . . . . . . . . . . . . . . . . . . . . . . . . . . . . .
Control Wiring . . . . . . . . . . . . . . . . . . . . . . . . . . . . . . . . . . . . . . . . . . . . . . . . . . . . .
EMC Directive . . . . . . . . . . . . . . . . . . . . . . . . . . . . . . . . . . . . . . . . . . . . . . . . . . . . . .
Control Cable Grounding. . . . . . . . . . . . . . . . . . . . . . . . . . . . . . . . . . . . . . . . . . . . .
2-1
2-2
2-2
2-2
CHAPTER 3 — OPTA_ OPTION BOARDS . . . . . . . . . . . . . . . . . . . . . . . . . . . . . . . . . . . .
Option Board A1. . . . . . . . . . . . . . . . . . . . . . . . . . . . . . . . . . . . . . . . . . . . . . . . . . . .
Option Board A2. . . . . . . . . . . . . . . . . . . . . . . . . . . . . . . . . . . . . . . . . . . . . . . . . . . .
Option Board A3. . . . . . . . . . . . . . . . . . . . . . . . . . . . . . . . . . . . . . . . . . . . . . . . . . . .
Option Board A4 (SPX9000 Only) . . . . . . . . . . . . . . . . . . . . . . . . . . . . . . . . . . . . . .
Option Board A5 (SPX9000 Only) . . . . . . . . . . . . . . . . . . . . . . . . . . . . . . . . . . . . . .
Option Board A7 (SPX9000 Only) . . . . . . . . . . . . . . . . . . . . . . . . . . . . . . . . . . . . . .
Option Board A8. . . . . . . . . . . . . . . . . . . . . . . . . . . . . . . . . . . . . . . . . . . . . . . . . . . .
Option Board A9. . . . . . . . . . . . . . . . . . . . . . . . . . . . . . . . . . . . . . . . . . . . . . . . . . . .
Option Board AE. . . . . . . . . . . . . . . . . . . . . . . . . . . . . . . . . . . . . . . . . . . . . . . . . . . .
3-1
3-1
3-5
3-6
3-7
3-10
3-14
3-19
3-23
3-27
CHAPTER 4 — OPTB_ OPTION BOARDS . . . . . . . . . . . . . . . . . . . . . . . . . . . . . . . . . . . .
Option Board B1 . . . . . . . . . . . . . . . . . . . . . . . . . . . . . . . . . . . . . . . . . . . . . . . . . . . .
Option Board B2 . . . . . . . . . . . . . . . . . . . . . . . . . . . . . . . . . . . . . . . . . . . . . . . . . . . .
Option Board B4 . . . . . . . . . . . . . . . . . . . . . . . . . . . . . . . . . . . . . . . . . . . . . . . . . . . .
Option Board B5 . . . . . . . . . . . . . . . . . . . . . . . . . . . . . . . . . . . . . . . . . . . . . . . . . . . .
Option Board B8 . . . . . . . . . . . . . . . . . . . . . . . . . . . . . . . . . . . . . . . . . . . . . . . . . . . .
Option Board B9 . . . . . . . . . . . . . . . . . . . . . . . . . . . . . . . . . . . . . . . . . . . . . . . . . . . .
Option Board BB. . . . . . . . . . . . . . . . . . . . . . . . . . . . . . . . . . . . . . . . . . . . . . . . . . . .
4-1
4-1
4-3
4-5
4-7
4-8
4-10
4-11
CHAPTER 5 — OPTD_ ADAPTER BOARDS . . . . . . . . . . . . . . . . . . . . . . . . . . . . . . . . . .
Option Board D1. . . . . . . . . . . . . . . . . . . . . . . . . . . . . . . . . . . . . . . . . . . . . . . . . . . .
Option Board D2. . . . . . . . . . . . . . . . . . . . . . . . . . . . . . . . . . . . . . . . . . . . . . . . . . . .
Option Board D3. . . . . . . . . . . . . . . . . . . . . . . . . . . . . . . . . . . . . . . . . . . . . . . . . . . .
5-1
5-1
5-3
5-5
CHAPTER 6 — OPTION BOARDS — DETAIL SUMMARY . . . . . . . . . . . . . . . . . . . . . .
6-1
List of Figures
Figure 1-1: Board Slots on the Control Board . . . . . . . . . . . . . . . . . . . . . . . . . . . . .
Figure 1-2: Maximum Loads on +24V/EXT+24V Output . . . . . . . . . . . . . . . . . . . .
Figure 1-3: CMA Connected to GND with the Onboard Jumper . . . . . . . . . . . . . .
Figure 1-4: Positive Logic . . . . . . . . . . . . . . . . . . . . . . . . . . . . . . . . . . . . . . . . . . . . .
Figure 1-5: Negative Logic . . . . . . . . . . . . . . . . . . . . . . . . . . . . . . . . . . . . . . . . . . . .
Figure 1-6: Board Slot Guide to Prevent Plugging In of Incorrect Boards . . . . . .
Figure 1-7: Example of Function/Parameter Address Code . . . . . . . . . . . . . . . . . .
Figure 1-8: Example of Function/Parameter Programming . . . . . . . . . . . . . . . . . .
Figure 1-9: Board Parameter Value Editing Example . . . . . . . . . . . . . . . . . . . . . . .
Figure 2-1: Option Board Installation . . . . . . . . . . . . . . . . . . . . . . . . . . . . . . . . . . . .
Figure 2-2: Checking Option Board Installation . . . . . . . . . . . . . . . . . . . . . . . . . . .
Figure 2-3: Control Cable Grounding . . . . . . . . . . . . . . . . . . . . . . . . . . . . . . . . . . . .
Figure 3-1: Option Board A1 Wiring Diagram . . . . . . . . . . . . . . . . . . . . . . . . . . . . .
Figure 3-2: Option Board A1 Jumper Locations . . . . . . . . . . . . . . . . . . . . . . . . . . .
Figure 3-3: Option Board A1 Jumper Settings . . . . . . . . . . . . . . . . . . . . . . . . . . . .
Figure 3-4: Option Board A2 Wiring Diagram . . . . . . . . . . . . . . . . . . . . . . . . . . . . .
Figure 3-5: Option Board A2 Terminal Locations . . . . . . . . . . . . . . . . . . . . . . . . . .
Figure 3-6: Option Board A3 Wiring Diagram . . . . . . . . . . . . . . . . . . . . . . . . . . . . .
ii
For more information visit: www.EatonElectrical.com
1-1
1-4
1-5
1-6
1-6
1-7
1-7
1-8
1-9
2-1
2-1
2-2
3-2
3-2
3-3
3-5
3-6
3-6
MN04003001E
9000X Series Drive Option Board
October 2005
Figure 3-7: Option Board A3 Terminal Locations . . . . . . . . . . . . . . . . . . . . . . . . . .
Figure 3-8: Jumper Positions for Option Board A4 . . . . . . . . . . . . . . . . . . . . . . . .
Figure 3-9: Option Board A4 Terminal and Jumper Locations . . . . . . . . . . . . . . .
Figure 3-10: Option Board A4 Encoder Connection Using Differential Inputs . .
Figure 3-11: Option Board A4 Encoder . . . . . . . . . . . . . . . . . . . . . . . . . . . . . . . . . .
Figure 3-12: Jumper Positions for Option Board A5 . . . . . . . . . . . . . . . . . . . . . . .
Figure 3-13: Option Board A5 Terminal and Jumper Locations . . . . . . . . . . . . . .
Figure 3-14: HTL Type Encoder Connection (Open Source)
Using Single-Ended Inputs . . . . . . . . . . . . . . . . . . . . . . . . . . . . . . . . . . . . . . . .
Figure 3-15: HTL Type Encoder Connection (Open Collector)
Using Single-Ended Inputs . . . . . . . . . . . . . . . . . . . . . . . . . . . . . . . . . . . . . . . .
Figure 3-16: HTL Type Encoder Connection Using Differential Inputs . . . . . . . . .
Figure 3-17: Option Board A5 Encoder . . . . . . . . . . . . . . . . . . . . . . . . . . . . . . . . . .
Figure 3-18: Option Board A7 Terminal and Jumper Locations . . . . . . . . . . . . . .
Figure 3-19: Jumper Positions for Option Board A7 . . . . . . . . . . . . . . . . . . . . . . .
Figure 3-20: Connection of Encoder and Three OPTA7 Boards . . . . . . . . . . . . . .
Figure 3-21: Connection of Two Encoders to OPTA7 Board . . . . . . . . . . . . . . . . .
Figure 3-22: Option Board A8 Wiring Diagram . . . . . . . . . . . . . . . . . . . . . . . . . . .
Figure 3-23: Option Board A8 Terminal Locations . . . . . . . . . . . . . . . . . . . . . . . . .
Figure 3-24: Option Board A8 Jumper Locations and Settings . . . . . . . . . . . . . .
Figure 3-25: Option Board A9 Wiring Diagram . . . . . . . . . . . . . . . . . . . . . . . . . . .
Figure 3-26: Option Board A9 Terminal Locations . . . . . . . . . . . . . . . . . . . . . . . . .
Figure 3-27: Option Board A9 Jumper Locations and Settings . . . . . . . . . . . . . .
Figure 3-28: Option Board AE Terminal Locations . . . . . . . . . . . . . . . . . . . . . . . . .
Figure 3-29: Jumper Positions for Option Board AE . . . . . . . . . . . . . . . . . . . . . . .
Figure 3-30: HTL Type Encoder Connection (Open Source)
Using Single-Ended Inputs . . . . . . . . . . . . . . . . . . . . . . . . . . . . . . . . . . . . . . . .
Figure 3-31: HTL Type Encoder Connection (Open Collector)
Using Single-Ended Inputs . . . . . . . . . . . . . . . . . . . . . . . . . . . . . . . . . . . . . . . .
Figure 3-32: HTL Type Encoder Connection Using Differential Inputs . . . . . . . . .
Figure 4-1: Option Board B1 Terminal Locations . . . . . . . . . . . . . . . . . . . . . . . . . .
Figure 4-2: Jumper Positions for OPTB1 . . . . . . . . . . . . . . . . . . . . . . . . . . . . . . . .
Figure 4-3: Option Board B2 Wiring Diagram . . . . . . . . . . . . . . . . . . . . . . . . . . . .
Figure 4-4: Option Board B2 Terminal Locations . . . . . . . . . . . . . . . . . . . . . . . . . .
Figure 4-5: Option Board B4 Wiring Diagram . . . . . . . . . . . . . . . . . . . . . . . . . . . .
Figure 4-6: Option Board B4 Terminal Locations . . . . . . . . . . . . . . . . . . . . . . . . . .
Figure 4-7: Option Board B5 Wiring Diagram . . . . . . . . . . . . . . . . . . . . . . . . . . . .
Figure 4-8: Option Board B5 Terminal Locations . . . . . . . . . . . . . . . . . . . . . . . . . .
Figure 4-9: Option Board B8 PT-100 Connections . . . . . . . . . . . . . . . . . . . . . . . . .
Figure 4-10: Option Board B8 Jumper Selections . . . . . . . . . . . . . . . . . . . . . . . . .
Figure 4-11: Option Board B8 Terminal Locations . . . . . . . . . . . . . . . . . . . . . . . . .
Figure 4-12: Option Board B9 Wiring Diagram . . . . . . . . . . . . . . . . . . . . . . . . . . .
Figure 4-13: Option Board B9 Terminal Locations . . . . . . . . . . . . . . . . . . . . . . . . .
Figure 4-14: Option Board BB Jumper Selections . . . . . . . . . . . . . . . . . . . . . . . . .
Figure 4-15: Option Board BB Terminal Locations . . . . . . . . . . . . . . . . . . . . . . . . .
Figure 5-1: Option Board D1 Terminal Locations . . . . . . . . . . . . . . . . . . . . . . . . . .
Figure 5-2: Basic Connection Between Drives with D1 Option Board . . . . . . . . .
Figure 5-3: Option Board D2 Terminal Locations . . . . . . . . . . . . . . . . . . . . . . . . . .
Figure 5-4: Option Board D2 Jumper Selections . . . . . . . . . . . . . . . . . . . . . . . . . .
Figure 5-5: Connection Example for Drives with D2 Option Board . . . . . . . . . . .
Figure 5-6: Option Board D3 RS-232 Sub-D Connector and LED Location . . . . .
Figure 5-7: Option Board D3 Jumper Selections . . . . . . . . . . . . . . . . . . . . . . . . . .
MN04003001E
For more information visit: www.EatonElectrical.com
3-7
3-8
3-9
3-9
3-9
3-11
3-11
3-12
3-12
3-13
3-13
3-14
3-16
3-17
3-18
3-19
3-21
3-22
3-23
3-25
3-26
3-27
3-29
3-29
3-30
3-30
4-2
4-3
4-4
4-5
4-5
4-6
4-7
4-8
4-9
4-9
4-9
4-10
4-11
4-13
4-13
5-2
5-2
5-3
5-4
5-5
5-6
5-6
iii
9000X Series Drive Option Board
October 2005
List of Tables
Table 1-1: Technical Data . . . . . . . . . . . . . . . . . . . . . . . . . . . . . . . . . . . . . . . . . . . . . .
Table 2-1: Tightening Torques for Control Terminals . . . . . . . . . . . . . . . . . . . . . . .
Table 2-2: Control Cable Type Required to Meet the EU EMC Standards . . . . . . .
Table 3-1: OPTA_ Board Features . . . . . . . . . . . . . . . . . . . . . . . . . . . . . . . . . . . . . . .
Table 3-2: Option Board A1 Terminal Descriptions . . . . . . . . . . . . . . . . . . . . . . . . .
Table 3-3: Option Board A1 Parameters . . . . . . . . . . . . . . . . . . . . . . . . . . . . . . . . . .
Table 3-4: Option Board A2 Terminal Descriptions . . . . . . . . . . . . . . . . . . . . . . . . .
Table 3-5: Option Board A3 Terminal Descriptions . . . . . . . . . . . . . . . . . . . . . . . . .
Table 3-6: Option Board A4 Terminal Descriptions . . . . . . . . . . . . . . . . . . . . . . . . .
Table 3-7: Option Board A4 Technical Data . . . . . . . . . . . . . . . . . . . . . . . . . . . . . . .
Table 3-8: Option Board A4 Parameters . . . . . . . . . . . . . . . . . . . . . . . . . . . . . . . . . .
Table 3-9: Option Board A5 Terminal Descriptions . . . . . . . . . . . . . . . . . . . . . . . . .
Table 3-10: Option Board A5 Technical Data . . . . . . . . . . . . . . . . . . . . . . . . . . . . . .
Table 3-11: Option Board A5 Parameters . . . . . . . . . . . . . . . . . . . . . . . . . . . . . . . . .
Table 3-12: Option Board A7 Terminal Descriptions . . . . . . . . . . . . . . . . . . . . . . . .
Table 3-13: Option Board A7 Technical Data . . . . . . . . . . . . . . . . . . . . . . . . . . . . . .
Table 3-14: Option Board A8 Terminal Descriptions . . . . . . . . . . . . . . . . . . . . . . . .
Table 3-15: Option Board A8 Parameters . . . . . . . . . . . . . . . . . . . . . . . . . . . . . . . . .
Table 3-16: Option Board A9 Terminal Descriptions . . . . . . . . . . . . . . . . . . . . . . . .
Table 3-17: Option Board A9 Parameters . . . . . . . . . . . . . . . . . . . . . . . . . . . . . . . . .
Table 3-18: Option Board AE Terminal Descriptions . . . . . . . . . . . . . . . . . . . . . . . .
Table 3-19: Option Board AE Technical Data . . . . . . . . . . . . . . . . . . . . . . . . . . . . . .
Table 3-20: Option Board AE Parameters . . . . . . . . . . . . . . . . . . . . . . . . . . . . . . . . .
Table 4-1: OPTB_ Board Features . . . . . . . . . . . . . . . . . . . . . . . . . . . . . . . . . . . . . . .
Table 4-2: OPTB1 I/O Terminals . . . . . . . . . . . . . . . . . . . . . . . . . . . . . . . . . . . . . . . .
Table 4-3: Option Board B2 Terminal Descriptions . . . . . . . . . . . . . . . . . . . . . . . . .
Table 4-4: Option Board B4 I/O Terminals . . . . . . . . . . . . . . . . . . . . . . . . . . . . . . . .
Table 4-5: Option Board B5 I/O Terminals . . . . . . . . . . . . . . . . . . . . . . . . . . . . . . . .
Table 4-6: Option Board B8 I/O Terminals . . . . . . . . . . . . . . . . . . . . . . . . . . . . . . . .
Table 4-7: Option Board B9 I/O Terminals . . . . . . . . . . . . . . . . . . . . . . . . . . . . . . . .
Table 4-8: Encoder Properties . . . . . . . . . . . . . . . . . . . . . . . . . . . . . . . . . . . . . . . . . .
Table 4-9: I/O Terminals on Option Board BB, Terminal Block X6 . . . . . . . . . . . . .
Table 4-10: I/O Terminals on Option Board BB, Terminal Block X7 . . . . . . . . . . . .
Table 4-11: Option Board BB Parameters . . . . . . . . . . . . . . . . . . . . . . . . . . . . . . . .
Table 4-12: Option Board BB Monitored Values . . . . . . . . . . . . . . . . . . . . . . . . . . .
Table 4-13: Option Board BB Information Pages . . . . . . . . . . . . . . . . . . . . . . . . . .
Table 4-14: Option Board BB LED Status Indicators . . . . . . . . . . . . . . . . . . . . . . . .
Table 5-1: OPTD_ Board Features . . . . . . . . . . . . . . . . . . . . . . . . . . . . . . . . . . . . . . .
Table 5-2: Option Board D1 I/O Terminals . . . . . . . . . . . . . . . . . . . . . . . . . . . . . . . .
Table 5-3: Option Board D1 Device Count vs. Speed . . . . . . . . . . . . . . . . . . . . . . .
Table 5-4: Option Board D2 I/O Terminals . . . . . . . . . . . . . . . . . . . . . . . . . . . . . . . .
Table 5-5: Option Board D2 Device Count vs. Speed . . . . . . . . . . . . . . . . . . . . . . .
Table 5-6: Option Board D3 RS-232 Sub-D Connector Wiring . . . . . . . . . . . . . . . .
Table 5-7: Option Board D3 Status LEDs . . . . . . . . . . . . . . . . . . . . . . . . . . . . . . . . .
Table 6-1: Option Board Summary: 1 of 3 . . . . . . . . . . . . . . . . . . . . . . . . . . . . . . . .
Table 6-2: Option Board Summary: 2 of 3 . . . . . . . . . . . . . . . . . . . . . . . . . . . . . . . .
Table 6-3: Option Board Summary: 3 of 3 . . . . . . . . . . . . . . . . . . . . . . . . . . . . . . . .
iv
For more information visit: www.EatonElectrical.com
1-3
2-2
2-2
3-1
3-4
3-5
3-6
3-7
3-8
3-8
3-10
3-10
3-11
3-13
3-15
3-15
3-20
3-21
3-24
3-25
3-28
3-28
3-31
4-1
4-2
4-4
4-6
4-7
4-8
4-10
4-11
4-12
4-12
4-13
4-14
4-14
4-14
5-1
5-1
5-2
5-3
5-4
5-5
5-6
6-1
6-2
6-3
MN04003001E
9000X Series Drive Option Board
October 2005
Chapter 1 — General Information
The Cutler-Hammer® 9000X Series Drives from Eaton’s electrical business embody a wide
selection of expander and adapter boards to increase the number and type of control inputs
and outputs (I/O) and communication interfaces to provide the versatility required for today’s
demanding applications.
The input and output capability is designed with modularity in mind, comprised of option
boards, each having its own input and output configuration. The control unit is designed to
accept a total of five boards. The boards provide standard analog and digital inputs and
outputs, fieldbus capability, and application specific hardware.
The basic, expander and adapter boards are installed in board slots, which are part of the
control board. The I/O boards are usually interchangeable between different members of the
9000X Series of drives. However, these types of control boards differ from each other to
some extent, which may restrict their use.
Board Slots on the Control Board
Figure 1-1: Board Slots on the Control Board
The control board is located inside the control unit of the 9000X Series Drive. There are five
board slots, labeled A to E, on the control board: The usability of different option boards in
the various slots depends on the type of board. For more information see “Option Board
Types” on Page 1-2 and the option board descriptions on Pages 3-1 to 5-6.
MN04003001E
For more information visit: www.EatonElectrical.com
1-1
9000X Series Drive Option Board
October 2005
When the 9000X Series Drive is assembled at the factory, two standard basic boards (I/O
board and relay board) are installed in slots A and B. The three additional slots, C, D and E,
are available for different options, i.e. I/O expander boards, fieldbus boards and adapter
boards.
Option Board Types
The option boards are divided in four groups according to their characteristics: A, B, C and D.
OPTA_
●
Boards used for basic I/O; normally pre-installed at the factory
●
This board type uses slots A, B and C
See Pages 3-1 to 3-31 for a detailed description of the available boards of this type. Also see
Tables 6-1 to 6-3 on Pages 6-1 to 6-3.
OPTB_
●
Option boards used for I/O expansion
●
Normally installed in slots B, C, D and E
See Pages 4-1 to 4-14 for a detailed description of the available boards of this type. Also see
Tables 6-1 to 6-3 on Pages 6-1 to 6-3.
OPTC_
●
Fieldbus boards (e.g. Profibus or Modbus)
●
These boards are installed in slots D and E
The OPTC_ boards are not covered in this manual. Refer to the specific manual for the
fieldbus board of interest. Contact your Cutler-Hammer distributor for more information.
OPTD_
●
Adapter boards
●
Boards with fiber optic adapters, e.g. System Bus Fiber Optic Adapter Board
●
These boards are installed in slots D and E
See Pages 5-1 to 5-6 for a detailed description of the available boards of this type. Also see
Tables 6-1 to 6-3 on Pages 6-1 to 6-3.
1-2
For more information visit: www.EatonElectrical.com
MN04003001E
9000X Series Drive Option Board
October 2005
Technical Data
The data in Table 1-1 applies to the inputs and outputs of all the basic and expander boards.
Table 1-1: Technical Data
Description
Specification
Safety (all boards)
Standards
Complies with EN 50178, CUL and EN 60204-1
Isolation
Inputs/outputs galvanically isolated; Isolation voltage rating 500V
Input/output type
Analog inputs (AI), voltage
0 – ±10V, Ri ≥ 200 kΩ, single-ended; Resolution 10 bits/0.1%, accuracy
±1% of the full display (-10 – +10V joystick control)
Analog inputs (AI), current
0(4) – 20 mA, Ri = 250Ω, differential
Resolution 10 bits/0.1%, accuracy ±1% of the full display
Digital inputs (DI), DC voltage
controlled
24V: “0” ≤10V, “1” ≥18V, Ri > 5 kΩ
Digital inputs (DI), AC voltage
controlled
Control voltage 42…240V AC, “0”<33V, “1”>35V
Auxiliary voltage (output) (+24V) 24V (±15%), max. 250 mA (total load from all external +24V outputs),
max. 150 mA from any one board
Auxiliary voltage (input) (ext.
+24V)
24V DC (±10%, max. ripple voltage 100 mV rms), max. 1A
In special applications where PLC type functions are included in the
control unit the input can be used as an external auxiliary power
supply for control boards as well as I/O boards.
Reference voltage (output)
(+10Vref)
10V -0%, +2%, max. 10 mA
Analog output (AO), current
(mA)
0(4) – 20 mA, RL<500Ω, resolution 10 bits/0.1%, accuracy ≤±2%
Analog output (AO), voltage (V)
0(2) – 10V, RL ≥1 kΩ, resolution 10 bits, accuracy ≤±2%
Relay outputs (RO)
Switching capacity: 24V DC/8A
250V AC/8A
125V DC/0.4A
Min. switching load: 5V/10 mA
Continuous capacity: < 2A rms
Thermistor input (TI)
Rtrip = 4.7 kΩ (PTC type)
Encoder control voltage
(+5V/+12V/+15V/+24V)
See OPTA4, OPTA5, OPTA7 and OPTBB technical data Pages 3-7
to 3-17 and 4-11 to 4-14.
Encoder connections (inputs,
outputs)
See OPTA4, OPTA5, OPTA7 and OPTBB technical data Pages 3-7
to 3-17 and 4-11 to 4-14.
Environment (all boards)
Ambient operating temperature
MN04003001E
14 – 131° F (-10 – 55°C)
Storage temperature
-40 – 140° F (-40 – 60°C)
Humidity
<95%, no condensation allowed
Altitude
Maximum 3300 feet (1000 meters)
Vibration
0.5G at 9 – 200 Hz
For more information visit: www.EatonElectrical.com
1-3
9000X Series Drive Option Board
October 2005
Isolation
The control connections are isolated from the utility potential, and as shipped the I/O ground
is connected directly to the frame of the 9000X Series Drive. Digital inputs and relay outputs
are isolated from the I/O ground. For digital input arrangements, see “Digital Input Signal
Conversion”, Page 1-5.
Analog Inputs (mA/V)
The analog inputs of the I/O boards can be used as either current inputs or voltage inputs
(see the detailed description of each board). The signal type is selected with a jumper block
on the board. If the voltage input is used, you will need to define the voltage range with
another jumper block. The factory default value for the analog signal type is given in the
description of the board. For detailed information, see the description of the board of
interest.
Analog Outputs (mA/V)
Most of the expander boards with analog outputs can be configured for a current or voltage
output with a jumper. Some boards only provide an analog current output. For detailed
information, see the description of the board of interest.
Control Voltage (+24V/EXT+24V)
The control voltage output +24V/EXT+24V can be used in two ways. Typically, the +24V
control voltage is wired to the digital inputs through an external switch. The control voltage
can also be used to power up external equipment, such as encoders and auxiliary relays.
Note that the total combined load on all available +24V/EXT+24V output terminals must not
exceed 250 mA. The maximum load on the +24V/EXT+24V output per board is 150 mA. See
Figure 1-2.
Max.
150 mA
+24V
OUT
Max.
150 mA
+
+24V
OUT
Max.
150 mA
+
+24V
OUT
Max.
150 mA
Max.
150 mA
+
+24V
OUT
+
+24V
OUT
= Max. 250 mA
Figure 1-2: Maximum Loads on +24V/EXT+24V Output
1-4
For more information visit: www.EatonElectrical.com
MN04003001E
9000X Series Drive Option Board
October 2005
The +24V/EXT+24V outputs can be connected to an external +24V power supply to power up
the control board and the basic and expander boards. If an external power supply is
connected to the EXT+24V output, the control board, basic boards and expander boards
remain live even if the utility power is lost to the 9000X Series Drive as long as the external
+24V supply is available. This provides partial operation of the control logic (not the power
section of the 9000X Series Drive) and some alarms in a major power-loss situation. In
addition, the fieldbus links remain powered which enables the fieldbus, e.g. the Profibus
Master, to read valuable data from the 9000X Series Drive.
Note: The power section of the 9000X Series Drive cannot function if the utility is lost.
Requirements for an external 24V power supply:
●
output voltage +24V DC±10%, max. ripple voltage 100 mV rms
●
maximum current 1A
●
1A external fuse (no internal short circuit protection is provided on the control board
for the external 24V input)
Note: Analog outputs and inputs will not work with only external +24V supplied to the control
unit.
The +24V/EXT+24V output of an option board is short circuit protected on the board. Should
one of the +24V/EXT+24V outputs short, the other boards would remain powered because of
the individual board output protection.
Digital Input Signal Conversion
The active signal level depends on which potential the common input CMA (and CMB if
available) is connected to. The alternatives are +24V or Ground (0V). See Figures 1-3, 1-4 and
1-5.
The 24-volt control voltage and the ground for the digital inputs and the common input
(CMA) can be from either the internal +24V supply or an external source.
Three typical input signal connection examples are shown below.
If you use the internal +24V, the following connection can be used:
+24V/Ext+24V
DI1
DI2
DI3
GND
Jumper Setting:
= CMA Connected to GND
Figure 1-3: CMA Connected to GND with the Onboard Jumper
If CMA is connected to GND with the onboard jumper, the internal
+24V is used and the CMA terminal does not need to be wired externally.
MN04003001E
For more information visit: www.EatonElectrical.com
1-5
9000X Series Drive Option Board
October 2005
If you use an external +24V supply the following connections can be used:
External +24V
+24V/Ext+24V
DI1
DI2
DI3
GND
Ground
= CMA Isolated from GND
Jumper Setting:
Figure 1-4: Positive Logic
Positive logic with the external +24V when CMA is isolated from
GND with the onboard jumper. The input is active when the switch is closed.
Ground
+24V/Ext+24V
DI1
DI2
DI3
GND
External +24V
Jumper Setting:
= CMA Isolated from GND
Figure 1-5: Negative Logic
Negative logic with the external +24V when CMA is isolated from
GND with the onboard jumper. The input is active when the switch is closed
(0V is the active signal).
You can also use the positive and negative logic connections with the internal +24V supply.
Place the jumper block in the “CMA isolated from GND” position and wire the CMA terminal
as shown in Figures 1-4 and 1-5.
Hardware Protections
Terminal Block Keying
In order to avoid incorrect attachment of terminal blocks to boards, some terminal blocks as
well as the related terminal connectors on the board are uniquely keyed. For more
information, see the description of the individual board.
1-6
For more information visit: www.EatonElectrical.com
MN04003001E
9000X Series Drive Option Board
October 2005
Board Slot Guides and Allowed Slots
You cannot plug an option board into any slot. Tables 6-1 to 6-3 on Pages 6-1 to 6-3 show
which slots are allowed for which option boards. For reasons of safety, slots A and B have
guides to prevent the use of incorrect boards, as shown in Figure 1-6. If an incorrect board is
plugged into slots C, D or E, the board will not work, but there is no danger to personnel or
for equipment damage.
Figure 1-6: Board Slot Guide to Prevent Plugging In of Incorrect Boards
Defining Functions to Inputs and Outputs
Several of the option boards for the 9000X Series Drive provide flexibility in that a particular
I/O feature can be programmed to operate as one of multiple function choices. These
function choices appear as parameters in the drive application menu. The operator chooses
which function the particular parameter will become.
To connect a specific input or output to a certain function (parameter) an address code is
assigned to the parameter. The code is formed from the control board slot identification
number, into which the option board is plugged, and the respective input/output number. See
the example below.
READY
P.2.3.1.7
Function Name
I/Oterm
AI Ref Faul/Warn
DigOUT:B.1
Terminal
Type
Slot
Terminal
Number
Figure 1-7: Example of Function/Parameter Address Code
Example: For the application you are using, you want to connect the digital output function
Reference fault/warning to the digital output DO1 on the basic board OPTA1.
MN04003001E
For more information visit: www.EatonElectrical.com
1-7
9000X Series Drive Option Board
October 2005
●
First find the parameter associated with Reference fault/warning on the keypad. Press
the MENU button right once to enter the edit mode. On the value line, you will see the
I/O type on the left (DigIN, DigOUT, AnIN, AnOUT) and on the right, the present input/
output the function is connected to (B.3, A.2 etc.), or if not connected, a code 0.#.
●
While the value is blinking, hold down the Browser button up or down to select the
desired board slot and input/output number. The program will scroll the board slots
starting from 0 and proceeding from A to E and the I/O numbers from 1 to 10.
●
Once you have set the desired code, press the ENTER button once to confirm the
change.
READY
P.2.3.1.7
READY
P.2.3.1.7
I/Oterm
AI Ref Faul/Warn
DigOUT:0.0
READY
P.2.3.1.7
I/Oterm
AI Ref Faul/Warn
DigOUT:0.0
I/Oterm
AI Ref Faul/Warn
DigOUT:A.1
enter
Figure 1-8: Example of Function/Parameter Programming
CAUTION
Make certain that only one function is programmed to a given
output. If multiple functions are programmed to a single output,
function overruns will occur resulting in unintended operation.
Note: Inputs, unlike outputs, cannot be changed in the RUN state.
Option Board Related Parameters for OPTA_ Type Boards
Some of the input and output functions of certain OPTA_ type option boards are controlled
with their associated parameters. The parameters are used to set the signal ranges for analog
inputs and outputs, and values for the different encoder functions.
The board-related parameters can be edited in the Expander Board Menu of the control
keypad.
By entering the next lower menu level with the MENU button right, you can browse through
slots A to E with the Browser button up or down to see which expander boards are installed.
On the lowermost line of the display you also see the number of parameters associated with
the board. Edit the parameter value as shown below. For more information on the keypad
operation, see your 9000X Series Drive User’s Manual. Figure 1-9 is an example of this type
of menu structure.
1-8
For more information visit: www.EatonElectrical.com
MN04003001E
9000X Series Drive Option Board
October 2005
READY
READY
I/Oterm
I/Oterm
D:NXOPTC2
G1 G2
READY
M7.
READY
G7.3.
I/Oterm
Expander boards
G1 G5
C:NXOPTC1
G1 G2
Slave address
126
I/Oterm
P1
P4
READY
G7.3.1.1.
I/Oterm
V2
READY
G7.3.1.
I/Oterm
READY
G7.3.1.1.
Monitor
V1
I/Oterm
Slave address
126
CHANGE VALUE
enter
CONFIRM CHANGE
READY
I/Oterm
Baud rate
Auto
Figure 1-9: Board Parameter Value Editing Example
Note: Fieldbus boards (OPTC_) also have fieldbus related parameters. These boards are
described in the separate fieldbus board manuals.
MN04003001E
For more information visit: www.EatonElectrical.com
1-9
9000X Series Drive Option Board
October 2005
1-10
For more information visit: www.EatonElectrical.com
MN04003001E
9000X Series Drive Option Board
October 2005
Chapter 2 — Option Board Installation
Remove utility line and control power from the 9000X Series Drive. Install the option board in
the correct slot of the control board. To insert (and also to remove) the board, hold it in a
horizontally straight position to avoid twisting the connector pins. See Figure 2-1.
CAUTION
Option boards and fieldbus boards must not be installed, removed
or replaced while utility line or control power is applied to your
9000X Series Drive, to prevent board damage.
Figure 2-1: Option Board Installation
Make sure that the board (see Figure 2-2) fits tightly in the metal clamp and plastic groove. If
the board seems to be difficult to install in the slot, you should confirm that you are using
one of the allowed slots for the option board.
Figure 2-2: Checking Option Board Installation
Note: Check that the jumper settings on the board correspond to your needs. Finally, close
the control unit cover of the 9000X Series Drive and any other opened covers.
MN04003001E
For more information visit: www.cutler-hammer.eaton.com
2-1
9000X Series Drive Option Board
October 2005
Control Wiring
The control wires shall be at least AWG 20 (0.5 mm2) shielded cables. The maximum wire
size is AWG 14 (2.5 mm2) for the relay terminals and all terminals on A9 board and AWG 16
(1.5 mm2) for all other terminals.
The tightening torques for the option board terminals are listed in Table 2-1.
Table 2-1: Tightening Torques for Control Terminals
Tightening Torque
Terminal Screw
in./lbs.
Nm
Relay and thermistor terminals and others using an M3
screw
4.5
0.5
All other terminals using an M2.6 screw
1.8
0.2
EMC Directive
For electrical equipment installed in the European Union (EU), the EMC directive states that
the equipment must not disturb the environment and must be immune to other Electro
Magnetic Disturbances in the environment. Table 2-2 indicates the requirements for the
control wiring to meet this directive.
Table 2-2: Control Cable Type Required to Meet the EU EMC Standards
Cable Type
Level H
Level C Control Cable
4
4
Level H =
EN 61800-3, 1st environment
EN 50081-2
Level C = EN 50081-1
Also requires an external EMC filter between the 9000X Series Drive and the utility supply to meet the EMC requirements for the
input power wiring.
4 = Shielded cable equipped with compact low-impedance shield.
Control Cable Grounding
It is recommended that the control cables be grounded as shown in Figure 2-3. Strip the
cable insulation as required to allow attachment to the frame with the grounding clamp.
Figure 2-3: Control Cable Grounding
2-2
For more information visit: www.cutler-hammer.eaton.com
MN04003001E
9000X Series Drive Option Board
October 2005
Chapter 3 — OPTA_ Option Boards
OPTA_ option boards provide basic inputs and outputs (I/O) and are normally pre-installed at
the factory in slots A, B and C.
The typical Eaton 9000X Series Drive contains two boards installed in slots A and B. The board in
slot A (OPTA1, OPTA8 or OPTA9) has digital inputs, digital outputs, analog inputs and an analog
output. The board usually in slot B (OPTA2) has two form C relay outputs. As an alternative an
OPTA3 board can be used in slot B. In addition to the two relay outputs, this board has one
thermistor input. Table 3-1 illustrates the various OPTA_ boards and their features.
Table 3-1: OPTA_ Board Features
I/O
Board
Digital
Allowed Digital Input Output Analog
Slots
(DI)
(DO)
Input (AI)
Analog
Output
(AO)
OPTA1
A
1 (mA/V)
OPTA2
B
2 (NO/NC)
OPTA3
B
1 (NO/NC) 1
+ 1 NO
OPTA4
C
3 DI encoder
(RS-422) + 2
DI (qualifier
& fast input)
+5V/+15V/
+24V
(progr.)
OPTA5
C
3 DI encoder
(wide range)
+ 2 DI
(qualifier &
fast input)
+5V/+24V
(progr.)
OPTA7
C
6 (enc.)
2 (enc.)
OPTA8
A
6
1
2 (mA/V),
incl.
-10 – +10V
(decoupled
from GND)
1 (mA/V)
(decouple
d from
GND)
+10Vref
(decoupled
from GND)
+24V/
EXT+24V
OPTA9
A
6
1
2 (mA/V),
incl.
-10 – +10V
1 (mA/V)
+10Vref
+24V/
EXT+24V
OPTAE
C
3 DI encoder 2 (enc.)
(wide range)
6
1
2 (mA/V),
incl.
-10 – +10V
Relay
Output
(RO)
Thermistor
Input (TI)
Other
+10Vref
+24V/
EXT+24V
+15V/+24V
(progr.)
+15V/+24V
(progr.)
Option Board A1
OPTA1
Description: Standard I/O board with digital inputs/outputs and analog inputs/outputs
Allowed slots: A
Type ID: 16689
Terminals: Two terminal blocks; Screw terminals (M2.6) (see Figure 3-2)
Keying: Terminals #1 and #12
Jumpers: 4; X1, X2, X3 and X6 (see Figure 3-3)
Board parameters: Yes (see Table 3-3)
MN04003001E
For more information visit: www.EatonElectrical.com
3-1
9000X Series Drive Option Board
October 2005
Basic I/O Board A1
+10Vref
1
AI1+
2
GND
3
AI2+
4
AI2–
5
24Vout
6
GND
7
DIN1
8
DIN2
9
DIN3
10
24V
CMA
11
GND
24Vout
12
GND
13
DIN4
14
DIN5
15
DIN6
16
24V
CMB
17
GND
AO1+
18
0 (4)/20 mA
AO1–
19
RL 500
DO1
20
+ V +48V
I 50 mA
Input Reference
(Voltage)
Input Reference
(Current)
Control Voltage Output
Indicates Connections for Inverted Signals
Figure 3-1: Option Board A1 Wiring Diagram
Jumper X1 Jumper X2 Jumper X6
2
3
4
5
6
7
8
9 10
11 12 13 14 15 16 17 18 19 20
1
Jumper X3
Figure 3-2: Option Board A1 Jumper Locations
3-2
For more information visit: www.EatonElectrical.com
MN04003001E
9000X Series Drive Option Board
October 2005
Jumper Block X1:
AI1 Mode
A
B
C
D
AI1 Mode: 0...20 mA: Current Input
A
B
C
B
C
B
C
B
C
D
AI2 Mode: 0...20 mA: Current Input
A
B
C
D
AI2 Mode: Voltage Input; 0...10V
D
AI1 Mode: Voltage Input; 0...10V (Differential)
A
A
D
AI1 Mode: Voltage Input; 0...10V
A
Jumper Block X2:
AI2 Mode
A
B
C
D
AI2 Mode: Voltage Input; 0...10V (Differential)
A
D
B
C
D
AI1 Mode: Voltage Input; –10...10V
AI2 Mode: Voltage Input; –10...10V
Jumper Block X6:
AO1 Mode
Jumper Block X3:
CMA and CMB Grounding
A
B
C
D
CMB Connected to GND
CMA Connected to GND
AO1 Mode: 0...20 mA: Current Output
CMB Isolated from GND
CMA Isolated from GND
A
B
C
D
CMB and CMA Internally
Connected Together,
Isolated from GND
AO1 Mode: Voltage Output; 0...10V
= Factory Default
Figure 3-3: Option Board A1 Jumper Settings
MN04003001E
For more information visit: www.EatonElectrical.com
3-3
9000X Series Drive Option Board
October 2005
Table 3-2: Option Board A1 Terminal Descriptions
3-4
Terminal
Signal (Keypad Parameter
Reference)
1
+10Vref
Reference voltage
Maximum current 10 mA
2
AI1+
Analog input, voltage
(An.IN:A.1)
Default: 0 – +10V (Ri = 200 kΩ);
(-10V to +10V joystick control)
0 – 20 mA (Ri = 250Ω)
Select V or mA with jumper block X1 (Figure 3-3)
Resolution 0.1%; Accuracy ±1%
3
GND/AI1- Analog input common
Differential input if not connected to ground; allows
±20V differential mode voltage to GND
4
AI2+
Default: 0 – 20 mA (Ri = 250Ω)
0 – +10V (Ri = 200 kΩ);
(-10V to +10V joystick control)
Select V or mA with jumper block X2 (Figure 3-3)
Resolution 0.1%; Accuracy ±1%
5
GND/AI2- Analog input common
6
24Vout
24V control voltage
(bi-directional)
±15%, 250 mA (all boards total); 150 mA (max.
current from single board); short circuit protected;
Can be used as external power backup for the
control (and fieldbus); Galvanically connected to
terminal #12
7
GND
I/O ground
Ground for reference and controls; Galvanically
connected to terminals #13, 19
8
DIN1
Digital input 1 (Dig.IN:A.1)
Ri = min. 5 kΩ
9
DIN2
Digital input 2 (Dig.IN:A.2)
Ri = min. 5 kΩ
10 DIN3
Digital input 3 (Dig.IN:A.3)
Ri = min. 5 kΩ
11 CMA
Digital input common A for
DIN1, DIN2 and DIN3
Must be connected to GND or 24V of I/O terminals or
external 24V or GND. Default connected to GND.
Selection with jumper block X3. (Figure 3-3).
12 24Vout
24V control voltage
(bi-directional)
Same as terminal #6; Galvanically connected to
terminal #6
13 GND
I/O ground
Same as terminal #7; Galvanically connected to
terminals #7 & 19
14 DIN4
Digital input 4 (Dig.IN:A.4)
Ri = min. 5 kΩ
15 DIN5
Digital input 5 (Dig.IN:A.5)
Ri = min. 5 kΩ
16 DIN6
Digital input 6 (Dig.IN:A.6)
Ri = min. 5 kΩ
17 CMB
Digital input common B for
DIN4, DIN5 and DIN6
Must be connected to GND or 24V of I/O terminals or
external 24V or GND. Default connected to GND.
Select with jumper block X3. (Figure 3-3).
18 AO1+
Analog signal (+output)
(An.OUT:A.1)
Output signal range:
Current: 0(4) – 20 mA, RL max. 500Ω or
Voltage: 0 – 10V, RL >1 kΩ (default setting)
Selection with jumper block X6. (Figure 3-3)
Resolution: 0.1% (10 bits); Accuracy ±2%
Analog input (An.IN:A.2)
Description and Parameter Reference
Differential input if not connected to ground; allows
±20V differential mode voltage to GND
19 AO1-
Analog output common
Galvanically connected to terminals #7, 13
20 DO1
Digital output 1 (Dig.OUT:A.1)
Open collector output, maximum current = 50 mA,
maximum voltage = 48V DC
For more information visit: www.EatonElectrical.com
MN04003001E
9000X Series Drive Option Board
October 2005
Table 3-3: Option Board A1 Parameters
Number
Parameter
Min.
Max.
Default
Note
1
AI1 mode
1
5
3
1 = 0 – 20 mA
2 = 4 – 20 mA
3 = 0 – 10V
4 = 2 – 10V
5 = -10 – +10V
2
AI2 mode
1
5
1
1 = 0 – 20 mA
2 = 4 – 20 mA
3 = 0 – 10V
4 = 2 – 10V
5 = -10 – +10V
3
AO1 mode
1
4
1
1 = 0 – 20 mA
2 = 4 – 20 mA
3 = 0 – 10V
4 = 2 – 10V
Option Board A2
OPTA2
Description: Standard relay board with two relay outputs
Allowed slots: B
Type ID: 16690
Terminals: Two terminal blocks; Screw terminals (M3) (see Figure 3-5)
Keying: None
Jumpers: None
Board parameters: None
Basic Relay Board A2
RO1/1
21
RO1/2
22
RO1/3
23
RO2/1
24
RO2/2
25
RO2/3
26
RL
AC/DC
Switching:
8A / 24V DC
0.4A / 300V DC
2 kVA / 250V AC
Continuously
2 A rms
Figure 3-4: Option Board A2 Wiring Diagram
MN04003001E
For more information visit: www.EatonElectrical.com
3-5
9000X Series Drive Option Board
October 2005
Table 3-4: Option Board A2 Terminal Descriptions
Terminal
Signal
Keypad Parameter
Reference
21
RO1/1 Normally Closed (NC)
DigOUT:B.1
22
RO1/2 Common
23
RO1/3 Normally Open (NO)
Switching capacity: 24V DC/8A
250V AC/8A
125V DC/0.4A
Min. switching load: 5V/10 mA
Continuous capacity: < 2A rms
24
RO2/1 Normally Closed (NC)
DigOUT:B.2
25
RO2/2 Common
26
RO2/3 Normally Open (NO)
Switching capacity: 24V DC/8A
250V AC/8A
125V DC/0.4A
Min. switching load: 5V/10 mA
Continuous capacity: < 2A rms
Technical Information
21 22 23
24 25 26
Figure 3-5: Option Board A2 Terminal Locations
Option Board A3
OPTA3
Description: Relay board with two relay outputs and one thermistor input
Allowed slots: B
Type ID: 16691
Terminals: Three terminal blocks; Screw terminals (M3) (see Figure 3-7)
Keying: None
Jumpers: None
Board parameters: None
Relay Board A3
RO1/1
21
RO1/2
22
RO1/3
23
RO2/2
25
RO2/3
26
TI1+
28
TI1–
29
RL
Switching:
8A / 24V DC
8A / 250V AC
AC/DC
0.4A / 125V DC
Continuously
2 A rms
Figure 3-6: Option Board A3 Wiring Diagram
3-6
For more information visit: www.EatonElectrical.com
MN04003001E
9000X Series Drive Option Board
October 2005
Table 3-5: Option Board A3 Terminal Descriptions
Terminal
Function
Keypad Parameter
Reference
21
RO1/1 Normally Closed (NC)
DigOUT:B.1
22
RO1/2 Common
23
RO1/3 Normally Open (NO)
Switching capacity: 24V DC/8A
250V AC/8A
125V DC/0.4A
Min. switching load: 5V/10 mA
Continuous capacity: < 2A rms
25
RO2/2 Common
DigOUT:B.2
26
RO2/3 Normally Open (NO)
Switching capacity: 24V DC/8A
250V AC/8A
125V DC/0.4A
Min. switching load: 5V/10 mA
Continuous capacity: < 2A rms
28
TI1+
DigIN:B.1
Thermistor input; Rtrip = 4.7 kΩ (PTC)
29
TI1-
Technical Information
21 22 23
25 26
28 29
Figure 3-7: Option Board A3 Terminal Locations
Option Board A4 (SPX9000 Only)
OPTA4
Description: Encoder input board with a programmable control voltage for the encoder.
This board is for TTL type encoders (TTL, TTL(R)) providing input signal levels that meet the
RS-422 interface standard. Encoder inputs A, B and Z are not galvanically isolated. This board
also includes the qualifier input ENC1Q (meant to trace the Z-pulse in certain situations) and
a special/fast digital input DIC4 (used to trace very short pulses). These two inputs are used in
special applications.
TTL type encoders do not have an internal regulator and must use a supply voltage of
+5V±5%, whereas the TTL(R) type encoders have an internal regulator and can have a supply
voltage of +15V±10% (depending on the encoder manufacturer).
Allowed slots: C
Type ID: 16692
Terminals: One terminal block; Screw terminals (M2.6) (see Figure 3-9)
Keying: Terminal #3
Jumpers: 1; X4 (see Figure 3-8)
Board parameters: Yes (see Table 3-8)
MN04003001E
For more information visit: www.EatonElectrical.com
3-7
9000X Series Drive Option Board
October 2005
Table 3-6: Option Board A4 Terminal Descriptions
Terminal
Description and Parameter Reference
1
DIC1A+
Pulse input A
2
DIC1A-
3
DIC2B+
4
DIC2B-
5
DIC3Z+
6
DIC3Z-
7
ENC1Q
Reserved for future use
8
DIC4
Reserved for future use
9
GND
Ground for control and inputs ENC1Q and DIC4
10
+5V/+15V/
+24V
Control voltage (auxiliary voltage) output to encoder; Output voltage selectable
with jumper X4
Pulse input B; phase shift of 90 degrees as compared to pulse input A
Pulse input Z; one pulse per revolution
Table 3-7: Option Board A4 Technical Data
Function
Technical Information
Encoder control voltage, +5V/+15V/+24V
Control voltage selectable with jumper X4
Encoder input connections
Inputs A+, A-, B+, B-, Z+, Z-
Maximum input frequency ≤ 300 kHz
Inputs A, B and Z are differential
Encoder inputs are RS-422 interface compatible
Maximum load per encoder input Ilow = Ihigh ≈ 25 mA
Qualifier input ENC1Q
Maximum input frequency ≤ 10 kHz
Minimum pulse length 50 µS
Digital input 24V; Ri >5 kΩ
Digital input is single ended, connected to GND
Fast digital input DIC1
Jumper Selections
There is one jumper block on the OPTA4 board. Jumper block X4 is used to program the
control (auxiliary) voltage. Figure 3-8 shows the jumper selections and the default position.
Jumper Block X4:
Auxiliary Voltage Level
5V 15V 24V
5V 15V 24V
5V 15V 24V
Auxiliary Voltage +5V Auxiliary Voltage +15V Auxiliary Voltage +24V
= Factory Default
Figure 3-8: Jumper Positions for Option Board A4
3-8
For more information visit: www.EatonElectrical.com
MN04003001E
9000X Series Drive Option Board
October 2005
1
Jumper X4
2
3
4
5
6
7
8
9 10
Figure 3-9: Option Board A4 Terminal and Jumper Locations
Encoder Connection — Differential Inputs
5V/15V/24V from the OPTA4Board or from External Supply*
OPTA4- Board
+5V**
GND
Encoder
* If external supply is used, remember to connect
the ground of external supply to terminal #9 of
the OPTA4 and to the encoder ground.
** +5V/+15V/+24V
.
.
10
9
+5V/+15V/+24V
GND
1
2
DIC1A+
DIC1A–
3
4
5
6
7
8
DIC2B+
DIC2B–
DIC3Z+
DIC3Z–
ENC1Q
DIC1
.
.
Figure 3-10: Option Board A4 Encoder Connection Using Differential Inputs
Note: The encoder pulses are processed by the 9000X Series Drive as indicated in
Figure 3-11.
Output Signals
Clockwise, Seen from Shaft
360° el.
1 Period
90° el. (Channel Separation)
A
B
Figure 3-11: Option Board A4 Encoder
MN04003001E
For more information visit: www.EatonElectrical.com
3-9
9000X Series Drive Option Board
October 2005
Table 3-8: Option Board A4 Parameters
Parameter
Minimum
Maximum
Default
Pulse/revolution
1
65535
1024
Invert direction
0
1
0
0 = Yes
1= No
Reading rate 0
4
1
0 = No
1 = 1 mS
2 = 5 mS
3 = 10 mS
4 = 50 mS
Note
Time used to calculate the actual value of speed. Use the value 1 when in Closed Loop mode.
Option Board A5 (SPX9000 Only)
OPTA5
Description: Encoder input board with a programmable control voltage for an encoder.
This board is for HTL (High voltage Transistor Logic) type encoders (voltage output type
push-pull HTL, open collector output type HTL) providing input signal levels which are
dependent upon the supply voltage of the encoder. Encoder inputs A, B and Z are
galvanically isolated. This board also includes the qualifier input ENC1Q (meant to trace the
Z-pulse in certain situations) and a special/fast digital input DIC4 (used to trace very short
pulses). These two inputs are used in special applications.
The OPTA5 connections are similar to the OPTA4, but the encoder inputs A, B and Z have
different signal levels (voltage). The input levels are general wide range inputs, not
compatible with RS-422 levels. Inputs ENC1Q and DIC4 are identical for both boards.
Allowed slots: C
Type ID: 16693
Terminals: One terminal block; Screw terminals (M2.6) (see Figure 3-13)
Keying: Terminal #3
Jumpers: 1; X4 (see Figure 3-12)
Board parameters: Yes (see Table 3-11)
Table 3-9: Option Board A5 Terminal Descriptions
Terminal
Description and Parameter Reference
1
DIC1A+
Pulse input A (differential); Voltage range 10 – 24V
2
DIC1A-
3
DIC2B+
4
DIC2B-
5
DIC3Z+
6
DIC3Z-
Pulse input B; phase shift of 90 degrees as compared to pulse input A
(differential); Voltage range 10 – 24V
Pulse input Z; one pulse per revolution (differential); Voltage range 10 – 24V
7
ENC1Q
Reserved for future use
8
DIC4
Reserved for future use
9
GND
Ground for control and inputs ENC1Q and DIC4
10
+15V/+24V
Control voltage (auxiliary voltage) output to encoder; Output voltage selectable
with jumper X4
NOTE: The encoder inputs are wide range inputs that can be used with encoders rated for +15V or +24V.
3-10
For more information visit: www.EatonElectrical.com
MN04003001E
9000X Series Drive Option Board
October 2005
Table 3-10: Option Board A5 Technical Data
Function
Technical Information
Encoder control voltage, +15V/+24V
Control voltage selectable with jumper X4
Encoder input connections
Inputs A+, A-, B+, B-, Z+, Z-
Maximum input frequency ≤ 300 kHz
Inputs A, B and Z are differential
Qualifier input ENC1Q
Maximum input frequency ≤ 10kHz
Minimum pulse length 50 µS
Digital input 24V; Ri >5 kΩ
Digital input is single ended, connected to GND
Fast digital input DIC1
Jumper Selections
There is one jumper block on the OPTA5 board. Jumper block X4 is used to program the
control (auxiliary) voltage. Figure 3-12 shows the jumper selections and the default position.
Jumper Block X4:
Auxiliary Voltage Level
24V
24V
15V
15V
Auxiliary Voltage +24V Auxiliary Voltage +15V
= Factory Default
Figure 3-12: Jumper Positions for Option Board A5
The typical usage for this board is for closed loop vector control. The OPTA5 is used in
conventional industrial applications where the cable lengths between the 9000X Series Drive
and the connected encoder are relatively long.
Jumper X4
1
2
3
4
5
6
7
8
9 10
Figure 3-13: Option Board A5 Terminal and Jumper Locations
MN04003001E
For more information visit: www.EatonElectrical.com
3-11
9000X Series Drive Option Board
October 2005
Encoder Connection — Single Ended
15V/24V from the OPTA5Board or from External Supply*
+15V**
GND
Encoder
* If external supply is used, remember to connect
the ground of external supply to terminal #9 of
the OPTA5 and to the encoder ground.
** +15V/+24V
OPTA5- Board
.
.
10
9
+15V/+24V
GND
1
2
3
4
5
6
7
8
DIC1A+
DIC1A–
DIC2B+
DIC2B–
DIC3Z+
DIC3Z–
ENC1Q
DIC1
.
.
Figure 3-14: HTL Type Encoder Connection (Open Source) Using Single-Ended Inputs
15V/24V from the OPTA5Board or from External Supply*
+15V**
GND
Encoder
* If external supply is used, remember to connect
the ground of external supply to terminal #9 of
the OPTA5 and to the encoder ground.
** +15V/+24V
OPTA5- Board
.
.
10
9
+15V/+24V
GND
1
2
3
4
5
6
7
8
DIC1A+
DIC1A–
DIC2B+
DIC2B–
DIC3Z+
DIC3Z–
ENC1Q
DIC1
.
.
Figure 3-15: HTL Type Encoder Connection (Open Collector) Using Single-Ended Inputs
3-12
For more information visit: www.EatonElectrical.com
MN04003001E
9000X Series Drive Option Board
October 2005
15V/24V from the OPTA5Board or from External Supply
OPTA5- Board
+15V*
GND
Encoder
* +15V/+24V
.
.
10
9
+15V/+24V
GND
1
2
DIC1A+
DIC1A–
3
DIC2B+
4
5
6
7
8
.
.
DIC2B–
DIC3Z+
DIC3Z–
ENC1Q
DIC1
Figure 3-16: HTL Type Encoder Connection Using Differential Inputs
Note: The encoder pulses are processed by the 9000X Series Drive as indicated in
Figure 3-17.
Output Signals
Clockwise, Seen from Shaft
360° el.
1 Period
90° el. (Channel Separation)
A
B
Figure 3-17: Option Board A5 Encoder
Table 3-11: Option Board A5 Parameters
Parameter
Minimum
Maximum
Default
Pulse/revolution
1
65535
1024
Invert direction
0
1
0
0 = Yes
1 = No
Reading rate 0
4
1
0 = No
1 = 1 mS
2 = 5 mS
3 = 10 mS
4 = 50 mS
MN04003001E
Note
Time used to calculate the actual value of speed. Use the value 1 when in Closed Loop mode.
For more information visit: www.EatonElectrical.com
3-13
9000X Series Drive Option Board
October 2005
Option Board A7 (SPX9000 Only)
OPTA7
Description: Duplicate encoder board for 9000X drives. Encoder input board with programmable control voltage for the encoder.
The OPTA7 board is designed for HTL (High voltage Transistor Logic) type encoders (voltage
output type push-pull HTL, open collector output type HTL) which provide input signal levels
dependent on the supply voltage of the encoder. The encoder inputs A, B and Z are
galvanically isolated. The OPTA7 board also includes the qualifier inputs ENC1Q and ENC2Q
meant to trace positions in positioning applications.
The board can be used as both Master and Slave device. The encoder input signal is repeated
on the board and carried to the next device through the digital output.
Allowed slots: C
Type ID: 16695
Terminals: Two terminal blocks; Screw terminals (M2.6); Coding in terminals #3 and #14
Jumpers: 4; X4, X5, X15 and X16 (see Page 3-16)
Board parameters: None
Jumper X4
Jumper X5
Jumpers X15 and X16
Figure 3-18: Option Board A7 Terminal and Jumper Locations
3-14
For more information visit: www.EatonElectrical.com
MN04003001E
9000X Series Drive Option Board
October 2005
Table 3-12: Option Board A7 Terminal Descriptions
Terminal
Description and Parameter Reference
1
DIC1A+
Pulse input A (differential); Voltage range 10…24V
2
DIC1A–
3
DIC2B+
4
DIC2B–
5
DIC3Z+
6
DIC3Z–
7
ENC1Q
Qualifier input. Single-ended input with GND
8
ENC2Q
Qualifier input. Single-ended input with GND
9
GND
Ground for control and inputs ENC1Q and ENC2Q
10
+15V/+24V
Control voltage (auxiliary voltage) output to encoder;
Output voltage selectable with jumper X4.
11
DID1A+
Pulse input A (differential input), voltage range 10…24V
12
DID1A–
13
DID2B+
14
DID2B–
15
DID3Z+
16
DID3Z–
17
DOD1A+
18
DOD1A–
19
DOD2B+
20
DOD2B–
Pulse input B; phase shift of 90 degrees compared to Pulse input A
(differential); Voltage range 10…24V
Pulse input Z; one pulse per revolution (differential);
Voltage range 10…24V
Pulse input B; 90 degrees phase shift compared to the pulse input A
(differential input), voltage range 10…24V
Pulse input Z; one pulse per revolution (differential input), voltage range
10…24V
Pulse output A (differential), output voltage +24V. Pulse input DIC1A or
DID1A is internally repeated in the card and connected to the DOD1A
output.
Pulse output B (differential), output voltage +24V. Pulse input DIC2A or
DID2A is internally repeated in the card and connected to the DOD2A
output.
Note: Encoder inputs are wide range inputs that can be used with encoders using +15V
or +24V.
Table 3-13: Option Board A7 Technical Data
Function
Technical Information
Encoder control voltage, +15V/+24V
Control voltage selectable with jumper X4.
Encoder input connections, inputs
A+, A–, B+, B–, Z+, Z–
Max. input frequency ≤150 kHz
Inputs A, B and Z are differential
Qualifier input ENC1Q
Max. input frequency ≤10 kHz
Min. pulse length 50µS
Fast digital input DIC1
Digital input 24V; Ri>5 kΩ
Digital input is single-ended; connected to GND
Note: A high pulse frequency combined with a great cable capacitance places a considerable
load on the encoder. Apply therefore as low a voltage as possible for the encoder
supply, rather lower than 24V. The manufacturer also recommends to place jumper X4
to position +15V, if allowed in the voltage range specification of the encoder.
MN04003001E
For more information visit: www.EatonElectrical.com
3-15
9000X Series Drive Option Board
October 2005
Jumper Selections
On the OPTA7 board, there are four jumper blocks.
Jumper X4 is used to program the control voltage (auxiliary voltage).
The setting of jumper X5 defines the encoder channel (DIC/DID) used to carry the signal to
the repeater.
The setting of jumpers X15 and X16 is changed according to whether the board is used as a
Master or Slave device.
The factory default and other available jumper selections are presented below.
Jumper block X5:
Encoder channel
Channel DIC
selected
Jumper blocks X5 and X16:
Master/Slave function
Channel DID
selected
Master function
selected
Slave function
selected
Jumper blocks X4:
Auxiliary voltage level
24V
15V
24V
15V
Auxiliary voltage +24 V
=Factory default
Auxiliary voltage +15 V
Figure 3-19: Jumper Positions for Option Board A7
Usage: Closed Loop Vector Control, positioning applications. The OPTA7 encoder board is
mainly used in demanding system applications, e.g. when measuring the motor speed with
two encoders.
3-16
For more information visit: www.EatonElectrical.com
MN04003001E
9000X Series Drive Option Board
October 2005
Encoder Connection
The figures below present examples of a chain connection of several OPTA7 boards (Figure
3-20) and a connection of two encoders to the OPTA7 option board (Figure 3-21).
OPTA7
(Master)
10
9
+15V*
GND
+15V/+24V
GND
A+
Encoder
AB+
B-
* +15V/+24V
1
2
DIC1A+/DID1A+
DIC1A-/DID1A-
3
4
DIC2B+/DID2B+
DIC2B-/DID2B-
17
18
DOD1A+
DOD1A-
19
20
DOD2B+
DOD2BOPTA7
(Slave 1)
A+
A-
1
2
DIC1A+/DID1A+
DIC1A-/DID1A-
B+
3
4
DIC2B+/DID2B+
DIC2B-/DID2B-
B-
17
18
DOD1A+
DOD1A-
19
20
DOD2B+
DOD2BOPTA7
(Slave 2)
A+
AB+
B-
1
2
DIC1A+/DID1A+
DIC1A-/DID1A-
3
4
DIC2B+/DID2B+
DIC2B-/DID2B-
17
18
DOD1A+
DOD1A-
19
20
DOD2B+
DOD2B-
Figure 3-20: Connection of Encoder and Three OPTA7 Boards
MN04003001E
For more information visit: www.EatonElectrical.com
3-17
9000X Series Drive Option Board
October 2005
15V/24V from OPTA7
+15V*
GND
Encoder 1
10
9
A+
AB+
B-
A+
AEncoder 2
OPTA7
B+
BA+
AB+
B-
+15V/+24V
GND
1
2
DIC1A+
DIC1A-
3
4
DIC2B+
DIC2B-
.
.
.
11
12
DID1A+
DID1A-
13
14
DID2B+
DID2B-
17
18
DOD1A+
DOD1A-
19
20
DOD2B+
DOD2B-
* +15V/+24V
Figure 3-21: Connection of Two Encoders to OPTA7 Board
3-18
For more information visit: www.EatonElectrical.com
MN04003001E
9000X Series Drive Option Board
October 2005
Option Board A8
OPTA8
Description: I/O board similar to OPTA1 except that the analog inputs/outputs are
galvanically isolated.
Allowed slots: A
Type ID: 16696
Terminals: Two terminal blocks; Screw terminals (M2.6) (see Figure 3-23)
Keying: Terminals #1 and #12
Jumpers: 4; X1, X2, X3 and X6 (see Figure 3-24)
Board parameters: Yes (see Table 3-15)
Basic I/O Board A9
Jumper to
Ground Input
Jumper to
Ground Output
+10Vref
1
AI1+
2
GND
3
AI2+
4
AI2–
5
24Vout
6
GND
7
DIN1
8
DIN2
9
DIN3
10
24V
CMA
11
GND
24Vout
12
GND
13
DIN4
14
DIN5
15
DIN6
16
24V
CMB
17
GND
AO1+
18
0 (4)/20 mA
AO1–
19
RL 500
DO1
20
+ V +48V
I 50 mA
Input Reference
(Voltage)
Input Reference
(Current)
Control Voltage Output
Indicates Connections for Inverted Signals
Figure 3-22: Option Board A8 Wiring Diagram
MN04003001E
For more information visit: www.EatonElectrical.com
3-19
9000X Series Drive Option Board
October 2005
Table 3-14: Option Board A8 Terminal Descriptions
3-20
Terminal
Signal (Keypad Parameter
Reference)
1
+10Vref
Reference voltage
Maximum current 10 mA; Decoupled from the 9000X
Series Drive GND
2
AI1+
Analog input, voltage
(An.IN:A.1)
Default: 0 – +10V (Ri = 200 kΩ);
(-10V to +10V joystick control)
0 – 20 mA (Ri = 250Ω)
Select V or mA with jumper block X1 (Figure 3-24)
Resolution 0.1%; Accuracy ±1%
3
AI1(GND ISOL)
Analog input common
GND ISOL/Voltage input; Connected to GND ISOL
(selected with jumper)
4
AI2+
Analog input (An.IN:A.2)
Default: 0 – 20 mA (Ri = 250Ω)
0 – +10V (Ri = 200 kΩ);
(-10V to +10V joystick control)
Select V or mA with jumper block X2 (Figure 3-24)
Resolution 0.1%; Accuracy ±1%
5
AI2(GND ISOL)
Analog input common
GND ISOL/Voltage input; Connected to GND ISOL
(selected with jumper)
6
24Vout
24V control voltage
(bi-directional)
±15%, 250 mA (all boards total); 150 mA (max.
current from single board); short circuit protected;
Can be used as external power backup for the
control (and fieldbus); Galvanically connected to
terminal #12; Ext +24V DC supply can connect here
7
GND
I/O ground
Ground for reference and controls; Galvanically
connected to terminal #13
8
DIN1
Digital input 1 (Dig.IN:A.1)
Ri = min. 5 kΩ
9
Description and Parameter Reference
DIN2
Digital input 2 (Dig.IN:A.2)
Ri = min. 5 kΩ
10 DIN3
Digital input 3 (Dig.IN:A.3)
Ri = min. 5 kΩ
11 CMA
Digital input common A for
DIN1, DIN2 and DIN3
Must be connected to GND or 24V of I/O terminals or
external 24V or GND. Selection with jumper block
X3. (Figure 3-24). Default connected to GND.
12 24Vout
24V control voltage
(bi-directional)
Same as terminal #6; Galvanically connected to
terminal #6
13 GND
I/O ground
Same as terminal #7; Galvanically connected to
terminals #7
14 DIN4
Digital input 4 (Dig.IN:A.4)
Ri = min. 5 kΩ
15 DIN5
Digital input 5 (Dig.IN:A.5)
Ri = min. 5 kΩ
16 DIN6
Digital input 6 (Dig.IN:A.6)
Ri = min. 5 kΩ
17 CMB
Digital input common B for
DIN4, DIN5 and DIN6
Must be connected to GND or 24V of I/O terminals or
external 24V or GND. Selection with jumper block
X3. (Figure 3-24). Default connected to GND.
18 A01+
Analog signal (+output)
(An.OUT:A.1)
19 A01-
Analog output common
Output signal range:
Current: 0(4) – 20 mA, RL max. 500Ω or
Voltage: 0 – 10V, RL >1 kΩ – default
Selection with jumper block X6. (Figure 3-24)
Resolution: 0.1% (10 bits); Accuracy ±2%
20 DO1
Digital output 1 (Dig.OUT:A.1) Open collector, maximum current = 50 mA,
maximum voltage = 48V DC
For more information visit: www.EatonElectrical.com
MN04003001E
9000X Series Drive Option Board
October 2005
Table 3-15: Option Board A8 Parameters
Number
Parameter
Min.
Max.
Default
Note
1
AI1 mode
1
5
3
1 = 0 – 20 mA
2 = 4 – 20 mA
3 = 0 – 10V
4 = 2 – 10V
5 = -10 – +10V
2
AI2 mode
1
5
1
1 = 0 – 20 mA
2 = 4 – 20 mA
3 = 0 – 10V
4 = 2 – 10V
5 = -10 – +10V
3
AO1 mode
1
4
1
1 = 0 – 20 mA
2 = 4 – 20 mA
3 = 0 – 10V
4 = 2 – 10V
Jumper X1
Jumper X2 Jumper X6
2
3
4
5
6
7
8
9 10
11 12 13 14 15 16 17 18 19 20
1
Jumper X3
Figure 3-23: Option Board A8 Terminal Locations
MN04003001E
For more information visit: www.EatonElectrical.com
3-21
9000X Series Drive Option Board
October 2005
Jumper Block X1:
AI1 Mode
A
B
C
D
AI1 Mode: 0...20 mA: Current Input
A
B
C
B
C
B
C
B
C
D
AI2 Mode: 0...20 mA: Current Input
A
B
C
D
AI2 Mode: Voltage Input; 0...10V
D
AI1 Mode: Voltage Input; 0...10V (Differential)
A
A
D
AI1 Mode: Voltage Input; 0...10V
A
Jumper Block X2:
AI2 Mode
A
B
C
D
AI2 Mode: Voltage Input; 0...10V (Differential)
A
D
B
C
D
AI1 Mode: Voltage Input; –10...10V
AI2 Mode: Voltage Input; –10...10V
Jumper Block X6:
AO1 Mode
Jumper Block X3:
CMA and CMB Grounding
A
B
C
D
CMB Connected to GND
CMA Connected to GND
AO1 Mode: 0...20 mA: Current Output
CMB Isolated from GND
CMA Isolated from GND
A
B
C
D
CMB and CMA Internally
Connected Together,
Isolated from GND
AO1 Mode: Voltage Output; 0...10V
= Factory Default
Figure 3-24: Option Board A8 Jumper Locations and Settings
3-22
For more information visit: www.EatonElectrical.com
MN04003001E
9000X Series Drive Option Board
October 2005
Option Board A9
OPTA9
Description: Basic I/O board similar to the OPTA1 except that the I/O terminals are larger for
Size 14 wires using M3 screws.
Allowed slots: A
Type ID: 16697
Terminals: Two terminal blocks; Screw terminals (M3) (see Figure 3-26)
Keying: Terminals #1 and #12
Jumpers: 4; X1, X2, X3 and X6 (see Figure 3-27)
Board parameters: Yes (see Table 3-17)
Basic I/O Board A9
+10Vref
1
AI1+
2
GND
3
AI2+
4
AI2–
5
24Vout
6
GND
7
DIN1
8
DIN2
9
DIN3
10
24V
CMA
11
GND
24Vout
12
GND
13
DIN4
14
DIN5
15
DIN6
16
24V
CMB
17
GND
AO1+
18
0 (4)/20 mA
AO1–
19
RL 500
DO1
20
+ V +48V
I 50 mA
Input Reference
(Voltage)
Input Reference
(Current)
Control Voltage Output
Indicates Connections for Inverted Signals
Figure 3-25: Option Board A9 Wiring Diagram
MN04003001E
For more information visit: www.EatonElectrical.com
3-23
9000X Series Drive Option Board
October 2005
Table 3-16: Option Board A9 Terminal Descriptions
3-24
Terminal
Signal (Keypad Parameter
Reference)
1
+10Vref
Reference voltage
Maximum current 10 mA
2
AI1+
Analog input, voltage
(An.IN:A.1)
Default: 0 – +10V (Ri = 200 kΩ);
(-10V to +10V joystick control)
0 – 20 mA (Ri = 250Ω)
Select V or mA with jumper block X1 (Figure 3-27)
Resolution 0.1%; Accuracy ±1%
3
GND
Analog input common
Differential input if not connected to ground
allows ±20V differential mode voltage to GND
4
AI2+
Analog input (An.IN:A.2)
Default: 0 – 20 mA (Ri = 250Ω)
0 – +10V (Ri = 200 kΩ);
(-10V to +10V joystick control)
Select V or mA with jumper block X2 (Figure 3-27)
Resolution 0.1%; Accuracy ±1%
5
GND/ AI2-
Analog input common
Differential input if not connected to ground; allows
±20V differential mode voltage to GND
6
24Vout
24V control voltage
(bi-directional)
±15%, 250 mA (all boards total); 150 mA (max.
current from single board); short circuit protected;
Can be used as external power backup for the
control (and fieldbus); Galvanically connected to
terminal #12
7
GND
I/O ground
Ground for reference and controls; Galvanically
connected to terminals #13, 19
8
DIN1
Digital input 1 (Dig.IN:A.1)
Ri = min. 5 kΩ
9
DIN2
Digital input 2 (Dig.IN:A.2)
Ri = min. 5 kΩ
10 DIN3
Digital input 3 (Dig.IN:A.3)
Ri = min. 5 kΩ
11 CMA
Digital input common A for
DIN1, DIN2 and DIN3
Must be connected to GND or 24V of I/O terminal or
to external 24V or GND. Default connect to GND.
Select with jumper block X3. (Figure 3-27)
12 24Vout
24V control voltage
(bi-directional)
Same as terminal #6; Galvanically connected to
terminal #6
13 GND
I/O ground
Same as terminal #7; Galvanically connected to
terminals #7 & 19
14 DIN4
Digital input 4 (Dig.IN:A.4)
Ri = min. 5 kΩ
15 DIN5
Digital input 5 (Dig.IN:A.5)
Ri = min. 5 kΩ
16 DIN6
Digital input 6 (Dig.IN:A.6)
Ri = min. 5 kΩ
17 CMB
Digital input common B for
DIN4, DIN5 and DIN6
Must be connected to GND or 24V of I/O terminal or
external 24V or GND. Default connect to GND. Select
with jumper block X3. (Figure 3-27)
18 A01+
Analog signal (+output)
(An.OUT:A.1)
Output signal range:
Current: 0(4) – 20 mA, RL max. 500Ω or
Voltage: 0 – 10V, RL >1 kΩ – default
Selection with jumper block X6. (Figure 3-27)
Resolution: 0.1% (10 bits); Accuracy ±2%
19 A01-
Analog output common
Galvanically connected to terminals #7, 13
20 DO1
Digital output 1 (Dig.OUT:A.1) Open collector, maximum current = 50 mA,
maximum voltage = 48V DC
Description and Parameter Reference
For more information visit: www.EatonElectrical.com
MN04003001E
9000X Series Drive Option Board
October 2005
Table 3-17: Option Board A9 Parameters
Number
Parameter
Min.
Max.
Default
Note
1
AI1 mode
1
5
3
1 = 0 – 20 mA
2 = 4 – 20 mA
3 = 0 – 10V
4 = 2 – 10V
5 = -10 – +10V
2
AI2 mode
1
5
1
1 = 0 – 20 mA
2 = 4 – 20 mA
3 = 0 – 10V
4 = 2 – 10V
5 = -10 – +10V
3
AO1 mode
1
4
1
1 = 0 – 20 mA
2 = 4 – 20 mA
3 = 0 – 10V
4 = 2 – 10V
Jumper X1 Jumper X2 Jumper X6
2
3
4
5
6
7
8
9 10
11 12 13 14 15 16 17 18 19 20
1
Jumper X3
Figure 3-26: Option Board A9 Terminal Locations
MN04003001E
For more information visit: www.EatonElectrical.com
3-25
9000X Series Drive Option Board
October 2005
Jumper Block X1:
AI1 Mode
A
B
C
D
AI1 Mode: 0...20 mA: Current Input
A
B
C
B
C
B
C
B
C
D
AI2 Mode: 0...20 mA: Current Input
A
B
C
D
AI2 Mode: Voltage Input; 0...10V
D
AI1 Mode: Voltage Input; 0...10V (Differential)
A
A
D
AI1 Mode: Voltage Input; 0...10V
A
Jumper Block X2:
AI2 Mode
A
B
C
D
AI2 Mode: Voltage Input; 0...10V (Differential)
A
D
B
C
D
AI1 Mode: Voltage Input; –10...10V
AI2 Mode: Voltage Input; –10...10V
Jumper Block X6:
AO1 Mode
Jumper Block X3:
CMA and CMB Grounding
A
B
C
D
CMB Connected to GND
CMA Connected to GND
AO1 Mode: 0...20 mA: Current Output
CMB Isolated from GND
CMA Isolated from GND
A
B
C
D
CMB and CMA Internally
Connected Together,
Isolated from GND
AO1 Mode: Voltage Output; 0...10V
= Factory Default
Figure 3-27: Option Board A9 Jumper Locations and Settings
3-26
For more information visit: www.EatonElectrical.com
MN04003001E
9000X Series Drive Option Board
October 2005
Option Board AE
OPTAE
Description: Encoder input board with programmable control voltage for an encoder.
The OPTAE board is designed for HTL (High voltage Transistor Logic) type encoders (voltage
output type push-pull HTL, open collector output type HTL) which provide input signal levels
dependent on the supply voltage of the encoder. The encoder inputs A, B and Z are
galvanically isolated.
In addition, the board includes an Encoder Direction Signal and an Encoder Pulse Output
Signal. The Encoder Direction Signal value “1” indicates a backward motor direction and “0”
indicates a forward motor direction. The Encoder Pulse Output signal is produced from the
Encoder input signals (channel A) divided by the divider parameter (see Page 3-29).
Allowed slots: C
Type ID: 16709
Terminals: One terminal block; Screw terminals (M2.6); Coding in terminal #3
Jumpers: 1; X4 (see Page 3-29)
Board parameters: Yes
1
Jumper X4
2
3
4
5
6
7
8
9 10
Figure 3-28: Option Board AE Terminal Locations
MN04003001E
For more information visit: www.EatonElectrical.com
3-27
9000X Series Drive Option Board
October 2005
Table 3-18: Option Board AE Terminal Descriptions
Terminal
Description and Parameter Reference
1
DIC1A+
Pulse input A (differential); Voltage range 10…24V
2
DIC1A–
3
DIC2B+
4
DIC2B–
5
DIC3Z+
6
DIC3Z–
7
DO1
Encoder divider output. Encoder input signals are divided by divider
paramater (see parameter list on Page 3-31)
8
DO2
Encoder direction output. The signal value “1” means that the motor
direction is backward and “0” is forward
9
GND
Ground for control
10
+15V/+24V
Control voltage (auxiliary voltage) output to encoder;
Output voltage selectable with jumper X4.
Pulse input B; phase shift of 90 degrees compared to Pulse input A
(differential); Voltage range 10…24V
Pulse input Z; one pulse per revolution (differential);
Voltage range 10…24V
Note: Encoder inputs are wide range inputs that can be used with encoders using +15V
or +24V.
Table 3-19: Option Board AE Technical Data
Function
3-28
Technical Information
Encoder control voltage, +15V/+24V
Control voltage selectable with jumper X4.
Encoder input connections, inputs
A+, A–, B+, B–, Z+, Z–
Max. input frequency ≤150 kHz
Inputs A, B and Z are differential
Encoder divider output DO1
Encoder direction output DO2
Max. load voltage
Max. load current
Max. output freuency
For more information visit: www.EatonElectrical.com
60V DC
50 mA
≤300 kHz
MN04003001E
9000X Series Drive Option Board
October 2005
Jumper Selections
On the OPTAE board, there is one jumper block used to program the control voltage
(auxiliary voltage). The factory default and other available jumper selections are presented
below.
Jumper Block X4:
Auxiliary Voltage Level
24V
24V
15V
15V
Auxiliary Voltage +24V Auxiliary Voltage +15V
= Factory Default
Figure 3-29: Jumper Positions for Option Board AE
Usage: Closed Loop Vector Control. The OPTAE board is mainly used in conventional
industrial applications where encoder cable lengths are relatively long.
Encoder Connection — Single-Ended
15V/24V from the OPTAE
Board or from External Supply*
+
GND
Encoder
OPTAE Board
Twisted Pairs
with Own Shield
A+
GND
B+
GND
* If external supply is used, remember to connect
the ground of external supply to terminal #9 of
the OPTAE and to the encoder ground.
** +15V/+24V
.
.
10
9
+15V/+24V
GND
1
2
3
4
5
6
7
8
DIC1A+
DIC1A–
DIC2B+
DIC2B–
DIC3Z+
DIC3Z–
ENC1Q
DIC1
.
.
Figure 3-30: HTL Type Encoder Connection (Open Source) Using Single-Ended Inputs
Note: Grounding is to be connected only at the drive to avoid circulating current in the shield.
Isolate shield at the encoder.
Double shielded cable is recommended for encoder connection.
MN04003001E
For more information visit: www.EatonElectrical.com
3-29
9000X Series Drive Option Board
October 2005
15V/24V from the OPTAE
Board or from External Supply*
+
GND
Encoder
OPTAE Board
Twisted Pairs
with Own Shield
+
A–
+
B–
* If external supply is used, remember to connect
the ground of external supply to terminal #9 of
the OPTAE and to the encoder ground.
** +15V/+24V
.
.
10
9
+15V/+24V
GND
1
2
3
4
5
6
7
8
DIC1A+
DIC1A–
DIC2B+
DIC2B–
DIC3Z+
DIC3Z–
ENC1Q
DIC1
.
.
Figure 3-31: HTL Type Encoder Connection (Open Collector) Using Single-Ended Inputs
Note: Grounding is to be connected only at the drive to avoid circulating current in the shield.
Isolate shield at the encoder.
Double shielded cable is recommended for encoder connection.
Encoder Connection — Differential
15V/24V from the OPTAE
Board or from External Supply*
+15V**
GND
OPTAE Board
.
.
10
9
+15V/+24V
GND
1
2
3
4
5
6
7
8
DIC1A+
DIC1A–
DIC2B+
DIC2B–
DIC3Z+
DIC3Z–
ENC1Q
DIC1
Encoder
** +15V/+24V
.
.
Figure 3-32: HTL Type Encoder Connection Using Differential Inputs
3-30
For more information visit: www.EatonElectrical.com
MN04003001E
9000X Series Drive Option Board
October 2005
Table 3-20: Option Board AE Parameters
MN04003001E
Number
Parameter
Min.
Max.
Default
7.3.1.1
Pulse/
Revolution
1
65535
1024
7.3.1.2
Invert
Direction
0
1
0
0 = No
1 = Yes
7.3.1.3
Reading Rate
0
4
1
Time used to calculate
speed actual value. Note:
Use value 1 in Closed
Loop mode.
0 = No calculation
1 = 1 mS
2 = 5 mS
3 = 10 mS
4 = 50 mS
7.3.1.4
Divider Value
1
2048
64
Input pulses/
Divider = Divider Output
7.3.1.5
Hysteresis for 0
Direction Out
511
8
Number of pulses before
direction signal change
state
For more information visit: www.EatonElectrical.com
Note
3-31
9000X Series Drive Option Board
October 2005
3-32
For more information visit: www.EatonElectrical.com
MN04003001E
9000X Series Drive Option Board
October 2005
Chapter 4 — OPTB_ Option Boards
OPTB_ option boards are installed in slots B, C, D or E. These boards are used to increase the
number of control inputs and outputs. These boards may not be installed in slot A.
There are no board-related parameters for OPTB_ I/O expander boards, except for board
OPTBB.
Table 4-1: OPTB_ Board Features
I/O
Board
Allowed
Slots
Digital
Input
(DI)
Digital Analog
Output Input
(DO)
(AI)
OPTB1 B, C, D, E 6 Analog
Output
(AO)
Thermistor
Relay
Input
Output
42 – 240V
(RO)
(TI) (PT-100) AC Input Other
6
OPTB2 B, C, D, E
2
OPTB4 B, C, D, E
1
2
(Isolated (Isolated
mA)
mA)
OPTB5 B, C, D, E
+24V/
EXT+24V
3
OPTB8 B, C, D, E
3
OPTB9 B, C, D, E
OPTBB C
1
1
5
2
encoder
6 total selectable as an input or output.
Option Board B1
OPTB1
Description: I/O board with six bidirectional terminals, jumper selectable as either digital
inputs or digital outputs.
Allowed slots: B, C, D, E
Type ID: 16945
Terminals: One terminal block; Screw terminals (M2.6) (see Figure 4-1)
Keying: None
Jumpers: 2; X2 and X4 (see Figure 4-2)
Board parameters: None
MN04003001E
For more information visit: www.EatonElectrical.com
4-1
9000X Series Drive Option Board
October 2005
1
Jumper X4 Jumper X2
2
3
4
5
6
7
8
9 10
Figure 4-1: Option Board B1 Terminal Locations
Table 4-2: OPTB1 I/O Terminals
Keypad
Parameter
Reference
Technical Information
Digital input: 24V; Ri > 5 kΩ
Digital output: Open collector, <50 mA/48V
Terminal
Function
1
DIO1
DigIN: X.1
DigOUT: X.1
2
DIO2
DigIN: X.2
DigOUT: X.2
3
DIO3
DigIN: X.3
DigOUT: X.3
4
CMA
5
DIO4
DigIN: X.4
DigOUT: X.4
6
DIO5
DigIN: X.5
DigOUT: X.5
7
DIO6
DigIN: X.6
DigOUT: X.6
8
CMB
Common for DIO4 – DIO6.
Note: CMA is internally connected to GND with a
jumper by default.
9
GND
I/O ground; Ground for reference and controls
10
+24V
Control voltage output; Voltage for switches etc.;
max. current 150 mA; Short circuit protected.
Common for DIO1 – DIO3.
Note: CMA is internally connected to GND with a
jumper by default.
Digital input: 24V; Ri > 5 kΩ
Digital output: Open collector, <50 mA/48V
Note: This board can be installed in four different slots. The “X”: in the Keypad Parameter
Reference shall be replaced by the slot letter (B, C, D, or E) of the slot in which it is
installed. See “Defining Functions to Inputs and Outputs” on Page 1-7.
4-2
For more information visit: www.EatonElectrical.com
MN04003001E
9000X Series Drive Option Board
October 2005
Jumper Selections
There are two jumper blocks on the OPTB1 board. Jumper block X2 is used to define the
bidirectional terminal as either an input or an output. Jumper block X4 is used to connect the
common terminals CMA and CMB to GND. The factory default and the available jumper
selections are illustrated in Figure 4-2.
Jumper Block X2:
DIO Mode
Jumper Block X4:
CMA and CMB Connection to GND
CMA
DIO1
DIO1
CMB
DIO2
DIO2
DIO3
DIO3
CMA and CMB Connected to GND
CMA
CMB
DIO4
DIO4
DIO5
DIO5
DIO6
DIO6
DIO1 to DIO6 Mode OUT
CMA and CMB Floating
DIO1 to DIO6 Mode IN
= Factory Default
Figure 4-2: Jumper Positions for OPTB1
Option Board B2
OPTB2
Description: I/O expander board with a thermistor input and two relay outputs.
Allowed slots: B, C, D, E
Type ID: 16946
Terminals: Three terminal blocks; Screw terminals (M3) (see Figure 4-4)
Keying: None
Jumpers: None
Board parameters: None
MN04003001E
For more information visit: www.EatonElectrical.com
4-3
9000X Series Drive Option Board
October 2005
Option Board B2
RO1/1
21
RO1/2
22
RO1/3
23
RO2/2
25
RO2/3
26
TI1+
28
TI1–
29
RL
Switching:
8A / 24V DC
8A / 250V AC
AC/DC
0.4A / 125V DC
Continuously
2 A rms
Figure 4-3: Option Board B2 Wiring Diagram
Table 4-3: Option Board B2 Terminal Descriptions
Keypad
Parameter
Reference
Terminal
Function
21
RO1/1 Normally
Closed (NC)
22
RO1/2 Common
23
RO1/3 Normally
Open (NO)
25
RO2/2 Common
26
RO2/3 Normally
Open (NO)
28
TI1+
29
TI1-
Technical Information
DigOUT: X.1
Switching capacity: 24V DC/8A
250V AC/8A
125V DC/0.4A
Min. switching load: 5V/10 mA
Continuous capacity: < 2A rms
DigOUT: X.2
Switching capacity: 24V DC/8A
250V AC/8A
125V DC/0.4A
Min. switching load: 5V/10 mA
Continuous capacity: < 2A rms
DigIN: X.1
Thermistor input; Rtrip = 4.7 kΩ (PTC)
Note: This board can be installed in four different slots. The “X” in the Keypad Parameter
Reference shall be replaced by the slot letter (B, C, D, or E) of the slot in which it is
installed. See “Defining Functions to Inputs and Outputs” on Page 1-7.
4-4
For more information visit: www.EatonElectrical.com
MN04003001E
9000X Series Drive Option Board
October 2005
21 22 23
25 26
28 29
Figure 4-4: Option Board B2 Terminal Locations
Option Board B4
OPTB4
Description: I/O expander board with one galvanically isolated analog input and two
galvanically isolated analog outputs (standard signals are 0(4)…20 mA).
Allowed slots: B, C, D, E
Type ID: 16948
Terminals: One terminal block; Screw terminals (M2.6) (see Figure 4-6)
Keying: None
Jumpers: None
Board parameters: None
I/O Board B4
AI1+
1
AI1–
2
AO1+
3
0 (4)/20 mA
AO1–
4
RL 500
AO2+
5
0 (4)/20 mA
AO2–
6
RL 500
GND
7
GND
8
GND
9
24V
10
Input Reference
0 (4)/20 mA
RL = 250
Figure 4-5: Option Board B4 Wiring Diagram
MN04003001E
For more information visit: www.EatonElectrical.com
4-5
9000X Series Drive Option Board
October 2005
Table 4-4: Option Board B4 I/O Terminals
Terminal
Function
Keypad
Parameter
Reference
AnIN: X.1
0(4) —20 mA; Ri = 250Ω; galvanically isolated
Resolution 10 bits/0.1%; Accuracy ±1% of the full
display
AnOUT: X.1
0(4) —20 mA; RL <500Ω; Resolution 10 bits/0.1%;
Accuracy ≤ ±2% (galvanically isolated)
AnOUT: X.2
0(4) —20 mA; RL<500Ω; Resolution 10 bits/0.1%;
Accuracy ≤ ±2% (galvanically isolated)
1
AI1+
2
AI1–
3
AO1+
4
AO1–
5
AO2+
6
AO2–
7
GND
8
GND
9
GND
10
+24V
Technical Information
24V (±15%); Max. load 250 mA (total load from
EXT+24V outputs), max. 150 mA from one board.
See Figure 1-2 on Page 1-4.
In special applications where PLC type functions
are included in the control module, this output
can be used as an external auxiliary power
supply for control boards and I/O boards.
Note: This board can be installed in four different slots. The “X” in the Keypad Parameter
Reference shall be replaced by the slot letter (B, C, D, or E) of the slot in which it is
installed. See “Defining Functions to Inputs and Outputs” on Page 1-7.
1
2
3
4
5
6
7
8
9 10
Figure 4-6: Option Board B4 Terminal Locations
4-6
For more information visit: www.EatonElectrical.com
MN04003001E
9000X Series Drive Option Board
October 2005
Option Board B5
OPTB5
Description: Relay board with three relay outputs.
Allowed slots: B, C, D, E
Type ID: 16949
Terminals: Three terminal blocks; Screw terminals (M3) (see Figure 4-8)
Keying: None
Jumpers: None
Board parameters: None
Relay Board B5
RO1/1
22
RO1/2
23
RO2/1
25
RO2/2
26
RO3/1
28
RO3/2
29
Max. Current/Voltage
Switching:
8A / 24V DC
0.4A / 125V DC
8A / 250V AC
Continuously
2 A rms
Figure 4-7: Option Board B5 Wiring Diagram
Table 4-5: Option Board B5 I/O Terminals
Terminal
Signal
Keypad
Parameter
Reference
22
RO1/1
Common
DigOUT: X.1
23
RO1/2
Normally Open
25
RO2/1
Common
26
RO2/2
Normally Open
28
RO3/1
Common
29
RO3/2
Normally Open
DigOUT: X.2
Technical Information
Switching capacity: 24V DC/8A
250V AC/8A
125V DC/0.4A
Min. switching load: 5V/10 mA
Continuous capacity: < 2A rms
DigOUT: X.3
Note: This board can be installed in four different slots. The “X” in the Keypad Parameter
Reference shall be replaced by the slot letter (B, C, D, or E) of the slot in which it is
installed. See “Defining Functions to Inputs and Outputs” on Page 1-7.
MN04003001E
For more information visit: www.EatonElectrical.com
4-7
9000X Series Drive Option Board
October 2005
22 23
25 26
28 29
Figure 4-8: Option Board B5 Terminal Locations
Option Board B8
OPTB8
Description: Temperature measuring board with three PT-100 sensor (3-wire) inputs.
The measurable temperature range is -22 – 392°F (-30 – 200°C). Both 3-wire and 2-wire
elements can be used.
Allowed slots: B, C, D, E
Type ID: 16952
Terminals: One terminal block; Screw terminals (M2.6) (see Figure 4-11)
Keying: None
Jumpers: 1; X2 (see Figure 4-10)
Board parameters: None
Table 4-6: Option Board B8 I/O Terminals
Terminal
Function
Keypad
Parameter
Reference
1
R1 +
AnIN: X1
2
Rm1
PT-100 Input, -30 — 200°C, one sensor.
Accuracy < 1 °C.
Sensor current 10 mA
3
R1 –
4
R2 +
AnIN: X2
5
Rm2
PT-100 Input, -30 — 200°C, one sensor.
Accuracy < 1 °C.
Sensor current 10 mA
6
R2 –
7
R3 +
AnIN: X3
8
Rm3
PT-100 Input, -30 — 200°C, 1 — 3 sensors (see X2
jumper selections). Accuracy < 1 °C.
Sensor current 10 mA
9
R3 –
10
Technical Information
Not connected
Note: This board can be installed in four different slots. The “X” in the Keypad Parameter
Reference shall be replaced by the slot letter (B, C, D, or E) of the slot in which it
is installed. See “Defining Functions to Inputs and Outputs” on Page 1-7. Insulation
level 4 kV/√2 (DIN VDE 01 10-1). 2 kV in sensor and 2k V in option board.
4-8
For more information visit: www.EatonElectrical.com
MN04003001E
9000X Series Drive Option Board
October 2005
Connection of PT-100 sensors
One PT-100 sensor can be connected to each of the first two inputs (terminals 1 to 3 and
4 to 6) and up to three sensors to the third input (terminals 7 to 9). The sensors must be
connected in series with a two- or three-wire connection.
Connection of One Sensor
R+
Connection of Several Sensors
R+
R+
Rm
R+
Rm
R–
R–
3-Wire Connection
R–
2-Wire Connection
3-Wire Connection
R–
2-Wire Connection
Figure 4-9: Option Board B8 PT-100 Connections
Jumper Selections
Up to three PT-100 sensors can be connected to the third PT-100 input. Select the number of
sensors in use with jumper block X2:
1 2 3
1 Sensor
1 2 3
2 Sensors
1 2 3
3 Sensors
= Factory Default
Figure 4-10: Option Board B8 Jumper Selections
1
2
3
4
5
6
7
8
9 10
Jumper Block X2
Figure 4-11: Option Board B8 Terminal Locations
MN04003001E
For more information visit: www.EatonElectrical.com
4-9
9000X Series Drive Option Board
October 2005
Option Board B9
OPTB9
Description: I/O board with five 42 – 240V AC digital inputs and one relay output.
Allowed slots: B, C, D, E
Type ID: 16953
Terminals: One terminal block; Screw terminals (M2.6) (see Figure 4-13)
Keying: None
Jumpers: None
Board parameters: None
I/O Board B9
ACIN1
1
ACIN2
2
ACIN3
3
ACIN4
4
ACIN5
5
COMA
6
RO1/1
7
RO1/2
8
42 – 240V AC
Figure 4-12: Option Board B9 Wiring Diagram
Table 4-7: Option Board B9 I/O Terminals
Terminal
Function
Keypad
Parameter
Reference
1
ACIN1
DigIN: X1
Digital input, 42 – 240V AC (threshold 35V)
Control voltage: "0"<33V, "1">35V
2
ACIN2
DigIN: X2
Digital input, 42 – 240V AC (threshold 35V)
Control voltage: "0"<33V, "1">35V
3
ACIN3
DigIN: X3
Digital input, 42 – 240V AC (threshold 35V)
Control voltage: "0"<33V, "1">35V
4
ACIN4
DigIN: X4
Digital input, 42 – 240V AC (threshold 35V)
Control voltage: "0"<33V, "1">35V
5
ACIN5
DigIN: X5
Digital input, 42 – 240V AC (threshold 35V)
Control voltage: "0"<33V, "1">35V
6
COMA
7
RO1
Common
8
RO1
Normally Open
Technical Information
Digital input X1, X2, X3, X4, X5 common
DigOUT: X1
Switching capacity: 24V DC/8A
250V AC/8A
125V DC/0.4A
Min. switching load: 5V/10 mA
Continuous capacity: < 2A rms
Note: This board can be installed in four different slots. The “X” in the Keypad Parameter
Reference shall be replaced by the slot letter (B, C, D, or E) of the slot in which it is
installed. See “Defining Functions to Inputs and Outputs” on Page 1-7.
4-10
For more information visit: www.EatonElectrical.com
MN04003001E
9000X Series Drive Option Board
October 2005
1
2
3
4
5
6
7
8
Figure 4-13: Option Board B9 Terminal Locations
Option Board BB
OPTBB
Description: Absolute encoder board with inputs for an ENDAT type encoder, programmable
control voltage, fast digital inputs and simulation pulse output.
The output pulse is produced from sinusoidal input signals.
The galvanically isolated fast digital inputs are used to trace very short pulses.
Allowed slots: C
Type ID: 16962 – Main board
16963 – Secondary board mounted on the main board
Terminals: Two terminal blocks; Screw terminals (M2.6) (see Figure 4-15)
Keying: None
Jumpers: 1; X11 (see Figure 4-14)
Board parameters: Yes (see Table 4-11)
An absolute encoder is a type of encoder capable of specifying its absolute position. The
position data is retained even during a power failure or breakdown. The position data carried
by the absolute encoder can be used by the 9000X Series Drive for the control of a
synchronous motor.
Table 4-8: Encoder Properties
MN04003001E
Property
Technical Information
Encoder cable
Maximum length 330 feet (100 meters) — type equivalent to
Heidenhain cable
Encoder voltage
5V, 12V, 15V
Maximum current consumption 300 mA
Measuring steps per revolution
4.2 billion (maximum 32 bit)
Distinguishable revolutions
0 – 65535 (maximum 16 bit)
Signal periods per revolution
1 – 65535
For more information visit: www.EatonElectrical.com
4-11
9000X Series Drive Option Board
October 2005
ENDAT is a bi-directional synchronic serial interface for absolute encoders. For example, the
encoder position data can be read and encoder parameters can be set via the ENDAT
connection. It also forwards the messages related to the encoder functions. All ENDAT
connections are made on terminal block X6. This board uses ENDAT version 2.
Table 4-9: I/O Terminals on Option Board BB, Terminal Block X6
Terminal
Heidenhain
Color Code
Technical Data
1
DATA +
Gray
Data line 120 Ω/RS-485
2
DATA −
Pink
3
CLOCK +
Violet
4
CLOCK −
Yellow
5
A+
Green/black
6
A−
Yellow/black
Clock line 120 Ω/RS-485 (200 — 400 kHz)
1Vpp (±0.5V); impedance 120Ω; max. input 350 kHz
7
B+
Blue/black
8
B−
Red/black
9
GND
White/green
Input ground
10
Encoder voltage
Brown/green
Selectable encoder voltage: 5V, 12V and 15V
Maximum current consumption 300 mA
1Vpp (±0.5V); impedance 120Ω; max. input 350 kHz
Table 4-10: I/O Terminals on Option Board BB, Terminal Block X7
4-12
Terminal
Technical Data
1
SimA+
2
SimA–
Incremental pulse output A (differential), 0° (square wave,
signal level RS-422);
Impedance 120Ω; Input hysteresis –5 mV
3
SimB+
4
SimB–
5
Not used
6
Not used
7
FDIN1
Fast digital input 1; HTL; Minimum pulse length 50 µS
8
CMA
Common FDIN1
9
FDIN2
Fast digital input 2; HTL; Minimum pulse length 50 µS
10
CMB
Common FDIN2
Incremental pulse output B (differential), 0° (square wave,
signal level RS-422);
Impedance 120Ω; Input hysteresis –5 mV
For more information visit: www.EatonElectrical.com
MN04003001E
9000X Series Drive Option Board
October 2005
Jumper Selections
The OPTBB board has one jumper block which is used to program the control voltage
(auxiliary voltage). The factory default and the other jumper selections are shown in
Figure 4-14.
Jumper Block X11:
Auxiliary Voltage Level
5V
5V
5V
12V
12V
12V
15V
15V
15V
= Factory Default
Figure 4-14: Option Board BB Jumper Selections
1
2
3
4
5
X6
X7
6
7
8
9 10
Jumper Block X11
Main Board
Secondary Board
Figure 4-15: Option Board BB Terminal Locations
Table 4-11: Option Board BB Parameters
Parameter
Code Name
Min.
Max.
Default
Selections
Description
7.3.1.1
Reverse
0
1
0
0=No
1=Yes
Manually selectable rotation direction
7.3.1.2
Reading rate
0
4
1
0=Not used
1=1 mS
2=5 mS
3=10 mS
4=50 mS
Incremental pulse reading rate.
Note: Use value 1 in Closed Loop
mode.
7.3.1.3
Interpolation 0
1
0
0=No
1=Yes
If activated, the sinusoidal incremental
pulses are used to calculate the polar
angle in order to optimize the encoder
accuracy
MN04003001E
This is an example of Code for these parameters. The actual value of Code is application dependent.
For more information visit: www.EatonElectrical.com
4-13
9000X Series Drive Option Board
October 2005
Table 4-12: Option Board BB Monitored Values
Parameter
Code Monitored value
Unit
Description
7.3.2.1
Reverse
Hz
Motor speed in Hz calculated from encoder pulses
7.3.2.2
Encoder speed
rpm
Motor speed in rpm calculated from encoder pulses
7.3.2.3
Encoder position
7.3.2.4
Encoder revolution
7.3.2.5
Encoder fault
7.3.2.6
Encoder warning
7.3.2.7
Encoder messages
Absolute position of encoder read from ENDAT
Number of messages between encoder and OPTBB
This is an example of Code for these parameters. The actual value of Code is application dependent.
Table 4-13: Option Board BB Information Pages
Parameter
Code Information
7.3.3.1
Encoder type
7.3.3.2
Pulses/Revolution
7.3.3.3
Position bits
bit
Accurate position 1 – 1024 (10bit = 210 = 1024)
7.3.3.4
Revolution bits
bit
Accurate number of revolutions 1 – 1024 (10bit = 210 = 1024)
Unit
Description
0 = No encoder connected
1 – 4 = Incremental linear encoder
5 = Linear absolute encoder
6 = Unknown
7 = Linear absolute encoder
8 = Unknown
9 – 12 = Rotational incremental/angular encoder
13 = Absolute encoder (single turn)
14 = Unknown
15 = Absolute encoder (multi turn)
16 = Unknown
Sinusoidal pulses/revolution
This is an example of Code for these parameters. The actual value of Code is application dependent.
Table 4-14: Option Board BB LED Status Indicators
LED
Indication
Yellow OFF
Meaning
Option board not activated
ON
Option board in initialization state waiting for activation command from the
9000X Series Drive
Blinking fast
(once/sec)
Option board is activated and in the RUN state indicating that it is ready for
external communication
Blinking slow Option board is activated and in the FAULT state indicating an internal fault of
(once/5 sec) option board
Green
OFF
Option board not activated
ON
Encoder is being initialized
Board is reading encoder parameters
Blinking fast
(once/sec)
Encoder detected by option board
Board is receiving data from encoder
Blinking slow Encoder detected by option board
(once/5 sec) Board cannot read encoder data or data is invalid (CRC error, broken cable, etc.)
4-14
For more information visit: www.EatonElectrical.com
MN04003001E
9000X Series Drive Option Board
October 2005
Chapter 5 — OPTD_ Adapter Boards
The OPTD_ adapter boards do not provide any additional I/O but are used to connect the
9000X Series Drive to a communication bus (System Bus, SPI, CAN). Note that if you use any
of the major fieldbuses (Profibus, Modbus, etc.) for communication, you will need a
corresponding fieldbus board. For more information, see the specific fieldbus board manual.
Table 5-1: OPTD_ Board Features
I/O
Board
Allowed
Slots
Description
OPTD1
D, E
System Bus adapter board
OPTD2 (B), D, E
System Bus adapter board with interface to fast monitoring bus
OPTD3
D, E
RS-232 serial interface board
If this board is installed in slot B the System Bus is not available; only the Monitor Bus can be used.
Note: Do not plug two system bus adapter boards into the same control board in order to
avoid compatibility problems.
Option Board D1
OPTD1
Description: System Bus adapter board
Allowed slots: D, E
Type ID: 17457
Terminals: Double optical input and output terminals (see Figure 5-1)
Keying: None
Jumpers: None
Board parameters: None
Table 5-2: Option Board D1 I/O Terminals
Terminal
Technical Data
1
H1
System Bus optical input 1 (RX1)
Use 1-mm optical cable (e.g. Agilent HFBR-RUS500)
2
H2
System Bus optical input 2 (RX2)
Use 1-mm optical cable (e.g. Agilent HFBR-RUS500)
3
H3
System Bus optical output 1 (TX1)
Use 1-mm optical cable (e.g. Agilent HFBR-RUS500)
4
H4
System Bus optical output 2 (TX2)
Use 1-mm optical cable (e.g. Agilent HFBR-RUS500)
Note: When shipped, these board terminals are protected
with a rubber pin. Make sure that the pin remains
inserted in any unused terminals to prevent
misoperaton.
MN04003001E
For more information visit: www.EatonElectrical.com
5-1
9000X Series Drive Option Board
October 2005
Figure 5-1: Option Board D1 Terminal Locations
Basic Connection between 9000X Series Drives with the D1 Option Board
Connect the output 1 of Device 1 to the input 2 of Device 2 and the input of Device 1 to the
output 2 of Device 2. Note that in the end devices one terminal pair remains unused. See
Figure 5-2 for an example.
Table 5-3: Option Board D1 Device Count vs. Speed
Maximum number of
devices in line
Maximum speed achieved
(Mbit/sec)
3
12
6
6
12
3
24
1.5
Figure 5-2: Basic Connection Between Drives with D1 Option Board
5-2
For more information visit: www.EatonElectrical.com
MN04003001E
9000X Series Drive Option Board
October 2005
Option Board D2
OPTD2
Description: System Bus adapter board for 9000X Series Drives with single optical input and
output; Interface to fast monitor bus used by the NCSYSDRIVE PC software tool.
Allowed slots: (B), D, E; Note: If only the Monitor Bus (terminals 21 to 23) will be used, this
board can also be installed in slot B. The System Bus is then unavailable. In this situation
remove jumpers X5 and X6.
Type ID: 17458
Terminals: Single optical input and output; one screw (M3) terminal block (see Figure 5-3)
Keying: None
Jumpers: 4; X3, X4, X5 and X6 (see Figure 5-4)
Board parameters: None
Table 5-4: Option Board D2 I/O Terminals
Terminal
Technical Data
1
H1
System Bus optical input 1 (RX1)
Use 1-mm optical cable
(e.g. Agilent HFBR-RUS500) 2
H2
System Bus optical output 1/2 (TX1/TX2);
Selected with jumper X5
Use 1-mm optical cable
(e.g. Agilent HFBR-RUS500) 21
CAN_L
Monitor Bus negative data
22
CAN_H
Monitor Bus positive data
23
CAN_GND
Monitor Bus ground
Not available if this board is installed in slot B.
21 22 23
Figure 5-3: Option Board D2 Terminal Locations
MN04003001E
For more information visit: www.EatonElectrical.com
5-3
9000X Series Drive Option Board
October 2005
Jumper Selections
There are four jumper blocks on the OPTD2 board. The factory defaults and the other jumper
selections are shown in Figure 5-4.
Jumper Block X3:
CAN Grounding
Connected
to Shield
Jumper Block X4:
CAN Termination
Not Connected
to Shield
Terminated
Jumper Block X6*:
System Bus Input ON/OFF
Jumper Block X5*:
System Bus Output
Output TX1
Output TX2
= Factory Default
Not Terminated
ON
OFF
* If the board is placed in slot B,
the System Bus is not available.
Remove jumpers X5 and X6.
Figure 5-4: Option Board D2 Jumper Selections
Special Connection between 9000X Series Drives with the D2 Option Board
In this connection example, the leftmost device is the Master and the others are slaves.
The Master can send and receive data from the slaves. The slaves cannot communicate with
each other. Changing the Master is not possible, the first device is always the Master. See
Figure 5-5 for this example.
The OPTD2 board in the Master uses the default jumper selections, i.e. X6: 1-2, X5: 1-2. The
jumper positions for the slaves have to be changed from the default value to X6: 1-2, X5: 2-3.
Table 5-5: Option Board D2 Device Count vs. Speed
Maximum number of
devices in line
5-4
Maximum speed achieved
(Mbit/sec)
3
12
6
6
12
3
24
1.5
For more information visit: www.EatonElectrical.com
MN04003001E
9000X Series Drive Option Board
October 2005
Figure 5-5: Connection Example for Drives with D2 Option Board
Option Board D3
OPTD3
Description: RS-232 serial interface board. Galvanically decoupled.
Allowed slots: D, E
Type ID: 17459
Terminals: 9 pin female sub-D connector (see Figure 5-6)
Keying: None
Jumpers: 1; X3 (see Figure 5-7)
Board parameters: None
D3 Board Function
This board provides an alternate RS-232 port for the use of a second keypad or to connect a
PC when it is desired to keep the keypad installed in the control panel. The functions
available at this port are identical to those available from the control panel RS-232 port.
Table 5-6: Option Board D3 RS-232 Sub-D Connector Wiring
Terminal
Technical Data
1
2
TxD
Transmit data
3
RxD
Receive data
5
GND
Ground isolated
6
+9V
+9V isolated
4
7
8
9
MN04003001E
For more information visit: www.EatonElectrical.com
5-5
9000X Series Drive Option Board
October 2005
5
4
3
2
1
LED 2
LED 1
9
8
7
6
Jumper Block X3
Figure 5-6: Option Board D3 RS-232 Sub-D Connector and LED Location
Jumper Block X3:
Connector Connection to GND
Connected to GND
Through RC Filter
Connected Directly
to GND
= Factory Default
Figure 5-7: Option Board D3 Jumper Selections
Table 5-7: Option Board D3 Status LEDs
LED
5-6
Meaning When Lit
Green
LED 1
Receiving data
Red
LED 2
Transmitting data
For more information visit: www.EatonElectrical.com
MN04003001E
9000X Series Drive Option Board
October 2005
Chapter 6 — Option Boards — Detail Summary
Table 6-1: Option Board Summary: 1 of 3
Board
Type
Allowed
Slots ID
Digital
Input
(DI)
Digital
Output
(DO)
Analog
Input
(AI)
(mA/V)
Analog
Input
(AI)
(mA), isol.
Analog
Output
(AO)
(mA/V)
6
1
2
1
Analog
Output
(AO)
(mA), isol.
Basic Boards OPTA_
OPTA1
A
16689
OPTA2
B
16690
OPTA3
B
16691
OPTA4 C
16692
OPTA5 C
16693
OPTA7
C
16695
OPTA8
A
16696
6
1
2
1
OPTA9 A
16697
6
1
2
1
OPTAE A
16709
2
2
I/O Expander Boards OPTB_
OPTB1
BCDE
16945
OPTB4
BCDE
16948
OPTB5
BCDE
16949
OPTB8
BCDE
16952
OPTB9
BCDE
16953
OPTBB
C
16962
16963
6
6
1
2
I/O Expander Boards OPTD_
OPTD1
DE
17457
System Bus adapter board: 2 x fiber optic pairs
OPTD2 (B)DE
17458
System Bus adapter board: 1 x fiber optic pair and CAN bus adapter
(galvanically decoupled)
OPTD3
DE
17459
RS-232 serial interface board (galvanically decoupled)
MN04003001E
If a board can be inserted in more than one option slot, the bold letter indicates the default slot. This is not applicable if several
boards are installed which have the same default slot.
A special application is required for use in some 9000X Series Drives.
Similar to OPTA1 except has larger terminals for 2.5 mm2 wires.
If this board is installed in slot B the System Bus is not available; only the Monitor Bus can be used. In this situation, remove
jumpers X5 and X6.
Analog inputs AI1 and AI2, analog output AO1 and voltage reference +10Vref are galvanically decoupled (all are at the same
potential).
Bidirectional terminals which can be either digital inputs or outputs.
Analog input AI1 and analog outputs AO1 and AO2 are galvanically decoupled from each other and the other electronics.
For more information visit: www.EatonElectrical.com
6-1
9000X Series Drive Option Board
October 2005
Table 6-2: Option Board Summary: 2 of 3
Board
Type
Allowed
Slots Relay
Output
(no/nc)
ID
Relay
Output
(no)
+10Vref
Thermistor
Input
+24V/
(TI)
EXT+24V
42 – 240V
AC
Basic Boards OPTA_
OPTA1
A
16689
OPTA2
B
16690
2
1
OPTA3
B
16691
OPTA4
C
16692
OPTA5
1
1
2
1
C
16693
OPTA7
C
16695
OPTA8
A
16696
1
2
OPTA9
A
16697
1
2
OPTAE
A
16709
I/O Expander Boards OPTB_
OPTB1
BCDE
16945
OPTB4
BCDE
16948
OPTB5
BCDE
16949
OPTB8
BCDE
16952
OPTB9
BCDE
16953
OPTBB
C
16962
16963
1
3
1
5
I/O Expander Boards OPTD_
OPTD1
OPTD2
OPTD3
6-2
DE
17457
System Bus adapter board: 2 x fiber optic pairs
(B)DE
17458
System Bus adapter board: 1 x fiber optic pair and CAN bus adapter
(galvanically decoupled)
DE
17459
RS-232 serial interface board (galvanically decoupled)
If a board can be inserted in more than one option slot, the bold letter indicates the default slot. This is not applicable if several
boards are installed which have the same default slot.
A special application is required for use in some 9000X Series Drives.
Similar to OPTA1 except has larger terminals for 2.5 mm2 wires.
If this board is installed in slot B the System Bus is not available; only the Monitor Bus can be used. In this situation, remove
jumpers X5 and X6.
Analog inputs AI1 and AI2, analog output AO1 and voltage reference +10Vref are galvanically decoupled (all are at the same
potential).
For more information visit: www.EatonElectrical.com
MN04003001E
9000X Series Drive Option Board
October 2005
Table 6-3: Option Board Summary: 3 of 3
Board
Type
Allowed
Slots DI
(Enc.
10 – 24V)
ID
DI
(Enc.
RS-422)
Out
+ 5V/
+15V/
+24V
3
1
Out
+15V/
+24V
Out
+ 5V/
+12V/
+15V
PT-100
Basic Boards OPTA_
OPTA1
A
16689
OPTA2
B
16690
OPTA3
B
16691
OPTA4
C
16692
OPTA5
C
16693
3
1
OPTA7
C
16695
6
1
OPTA8
A
16696
OPTA9 A
16697
A
16709
OPTAE
3
I/O Expander Boards OPTB_
OPTB1
BCDE
16945
OPTB4
BCDE
16948
OPTB5
BCDE
16949
OPTB8
BCDE
16952
OPTB9
BCDE
16953
OPTBB
C
16962
16963
3
2
1
I/O Expander Boards OPTD_
OPTD1
OPTD2
OPTD3
MN04003001E
DE
17457
System Bus adapter board: 2 x fiber optic pairs
(B)DE
17458
System Bus adapter board: 1 x fiber optic pair and CAN bus adapter
(galvanically decoupled)
DE
17459
RS-232 serial interface board (galvanically decoupled)
If a board can be inserted in more than one option slot, the bold letter indicates the default slot. This is not applicable if several
boards are installed which have the same default slot.
A special application is required for use in some 9000X Series Drives.
Similar to OPTA1 except has larger terminals for 2.5 mm2 wires.
If this board is installed in slot B the System Bus is not available; only the Monitor Bus can be used. In this situation, remove
jumpers X5 and X6.
For more information visit: www.EatonElectrical.com
6-3
9000X Series Drive Option Board
October 2005
6-4
For more information visit: www.EatonElectrical.com
MN04003001E
Company Information
Eaton’s electrical business is a global leader in electrical control, power distribution, and
industrial automation products and services. Through advanced product development,
world-class manufacturing methods, and global engineering services and support,
Eaton’s electrical business provides customer-driven solutions under brand names such
as Cutler-Hammer®, Powerware®, Durant®, Heinemann®, Holec® and MEM®, which
globally serve the changing needs of the industrial, utility, light commercial, residential,
and OEM markets. For more information, visit www.EatonElectrical.com.
Eaton Corporation is a diversified industrial manufacturer with 2004 sales of $9.8 billion.
Eaton is a global leader in electrical systems and components for power quality, distribution
and control; fluid power systems and services for industrial, mobile and aircraft equipment;
intelligent truck drivetrain systems for safety and fuel economy; and automotive engine air
management systems, powertrain solutions and specialty controls for performance, fuel
economy and safety. Eaton has 56,000 employees and sells products to customers in more
than 125 countries. For more information, visit www.eaton.com.
Eaton Electrical Inc.
1000 Cherrington Parkway
Moon Township, PA 15108-4312
USA
tel: 1-800-525-2000
www.EatonElectrical.com
© 2005 Eaton Corporation
All Rights Reserved
Printed in USA
Publication No. MN04003001E/CPG
October 2005