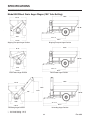
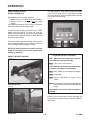
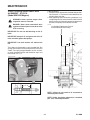
1
50 SERIES GRAIN AUGER WAGONS OPERATOR & PARTS MANUAL M0176 This manual is applicable to: Rev. 3/06 50 Series Grain Auger Wagons Model: 650 Serial Number: 505773 And On Model: 850 Serial Number: 505342 And On Model: 1050 Serial Number: 505000 And On Record the model number and serial number of your grain auger wagon along with date purchased below: Model Number Serial Number Date Purchased SERIAL NUMBER The serial number provides important information about your grain auger wagon and may be required to obtain the correct replacement part. The serial number plate is located near the right hand front corner of the Grain Auger Wagon frame. It is suggested that your serial number be recorded in the space provided above. Always provide the model number and serial number when ordering parts from your KINZE® Dealer or anytime correspondence is made with KINZE Manufacturing, Inc. D052604116 D040303100 Model 650 Model 850/1050 KINZE ®, the KINZE ® logo and Harvest Commander® are trademarks of KINZE Manufacturing, Inc. Rev. 3/06 TABLE OF CONTENTS TO THE OWNER . ......................................................................................................................1-1 WARRANTY ..............................................................................................................................1-2 INTRODUCTION .......................................................................................................................2-1 SPECIFICATIONS .....................................................................................................................3-1 SAFETY PRECAUTIONS Grain Auger Wagon..........................................................................................................4-1 Grain Auger Wagon Driveline...........................................................................................4-3 SAFETY WARNING SIGNS .......................................................................................................5-1 OPERATION Auger Inspection Cover ...................................................................................................6-6 Electronic Scale . ...........................................................................................................6-10 Electronic Scale Printing Options...................................................................................6-13 Grain Tank Clean Out Sweep...........................................................................................6-7 Horizontal Auger Indicator................................................................................................6-8 Hydraulic Flow Gate.........................................................................................................6-8 Initial Preparation Of The Machine...................................................................................6-1 PTO Shear Bolt/Overrunning Clutch Protection...............................................................6-9 PTO Torque Limiting/Overrunning Clutch Protection........................................................6-9 Tractor Preparation And Hookup......................................................................................6-1 Tractor Requirements.......................................................................................................6-1 Unloading The Auger Wagon............................................................................................6-4 Vertical Auger Fold...........................................................................................................6-5 Vertical Auger Work Light...............................................................................................6-15 LUBRICATION Drive Belts And Pulleys....................................................................................................7-1 Gearbox Oil Level.............................................................................................................7-2 Grease Fittings/Lubrication Locations..............................................................................7-3 Horizontal Auger Bearings................................................................................................7-1 Wheel Bearings................................................................................................................7-1 MAINTENANCE Axle Adjustment (Row Crop Wagon)..............................................................................8-16 Axle Adjustment (Sof-Trak Wagon).................................................................................8-17 Axle Adjustment (Sof-Tred Wagon).................................................................................8-17 Axle Adjustment (Wheel Wagon)....................................................................................8-17 Data Downloader Troubleshooting..................................................................................8-23 Driveline Inspection........................................................................................................8-10 Electronic Scale . ...........................................................................................................8-18 Electronic Scale Troubleshooting....................................................................................8-20 End Wheel/Mid Wheel Bearing Replacement (Sof-Trak Wagon)....................................8-23 Gearbox..........................................................................................................................8-13 Horizontal Auger Replacement.......................................................................................8-13 Inside Tire Repair Or Removal (Row Crop Wagon)........................................................8-15 Lower Vertical Auger Replacement.................................................................................8-12 Mounting Bolts And Hardware..........................................................................................8-1 Preparation For Storage.................................................................................................8-25 Tire Pressure....................................................................................................................8-3 Torque Values Chart.........................................................................................................8-1 Track Alignment (Sof-Trak Wagon).................................................................................8-14 Track Tension (Sof-Trak Wagon).....................................................................................8-14 Upper Vertical Auger Replacement................................................................................8-11 V-Belt Tension Adjustment And Alignment........................................................................8-4 V-Belt Replacement..........................................................................................................8-6 Vertical Auger Counter Balance Valves............................................................................8-2 Wheel Bearing Replacement (Wheel, Row Crop And Sof-Tred Wagons)......................8-24 Wheel Nuts.......................................................................................................................8-3 Wiring Diagram.................................................................................................................8-2 PARTS LIST INDEX ................................................................................................................... P1 PARTS SECTION NUMERICAL INDEX . ......................................................................................a Rev. 3/06 50 Series Grain Auger Wagon PREDELIVERY/DELIVERY CHECKLIST TO THE DEALER Predelivery service includes assembly, lubrication, adjustment and test. This service ensures that the wagon will be delivered to the customer ready for field use. PREDELIVERY CHECKLIST After the wagon has been completely assembled, use the following checklist and inspect the wagon. Check off each item as it is found satisfactory or after proper adjustment is made. Wheel nuts are torqued to 350 ft. lbs. Axles are adjusted from shipping position to desired operating position. (If Applicable) Tires are inflated to specified PSI air pressure. (If Applicable) All grease fittings have been lubricated and gearbox oil level checked. Check to be sure all safety decals are correctly located and legible. Replace if damaged. Check to be sure all reflective decals are correctly located. Check to be sure SMV decal is in place and shipping cover removed. Check to be sure safety/warning lights are working properly. Test run the augers. Do not operate tractor PTO above 750 PTO RPM with the augers empty. See page 6-3. Check driveline. See “Driveline Inspection” in Operation Section. V-belts are aligned and properly tensioned. Check track alignment. See “Track Alignment” in Maintenance Section. (If Applicable) Check to be sure safety screens over horizontal auger are in place and properly secured. Auxiliary safety chains are properly installed and hardware is torqued to specification. Paint all parts scratched in shipment. Reposition shipping tie down plate. (850 Only - If Applicable) This wagon has been thoroughly checked and to the best of my knowledge is ready for delivery to the customer. (Signature Of Set-Up Person/Dealer Name/Date) OWNER REGISTER Name Delivery Date Street Address Model No. City, State/Province Dealer Name ZIP/Postal Code Dealer No. Serial No. Rev. 3/06 DELIVERY CHECKLIST At the time the wagon is delivered, the following checklist is to be used as a reminder of very important information which should be conveyed directly to the customer. Check off each item as it is fully explained to the customer. Advise the customer that the durability and longevity of this or any other machine is dependent on regular maintenance as directed in the Operator & Parts Manual. Tell the customer about all safety precautions that must be observed while using this wagon. Advise the customer of the specified tractor requirement for use with this wagon. Check axle spacing with customer to be sure axle is adjusted from shipping position to desired operating width. (If Applicable) Along with the customer check to be sure all the reflective decals and the SMV sign are clearly visible with the auger wagon attached to the tractor. Check to be sure the safety/warning lights are in working condition. Tell the customer to check and follow federal, state/provincial and local regulations before towing on a road or highway. Along with the customer check to be sure the hitch height when attached to the tractor is sufficient to prevent severe bends in PTO U-joint angles. Check to be sure PTO is correct length for making turns and operating on uneven terrain. Give the Operator & Parts Manual to the customer and explain all operating adjustments. Complete Warranty And Delivery Report form. To the best of my knowledge this machine has been delivered ready for field use and customer has been fully informed as to proper care and operation. (Signature Of Delivery Person/Dealer Name/Date) AFTER DELIVERY CHECKLIST The following is a list of items we suggest to check during the first season of use of the equipment. Check with the customer as to the performance of the wagon. Review with the customer the importance of proper maintenance and adherence with all safety precautions. Check for parts that may need to be adjusted or replaced. Retorque all wheel nuts to 350 ft. lbs. Check to be sure all safety shields and screens are in place. Check to be sure all safety decals, reflective decals and the SMV sign are correctly located and that decals are legible. Replace if damaged or missing. Check to be sure safety/warning lights are properly installed and working properly. Check to be sure recommended lubrication procedures are being followed. (Signature Of Follow-Up Person/Dealer Name/Date) RETURN THIS COMPLETED FORM TO KINZE® IMMEDIATELY, along with Warranty And Delivery Report. Retain photocopy of this form at dealership for After Delivery Check. Tear Along Perforation Rev. 3/05 TO THE OWNER KINZE Manufacturing, Inc. would like to thank you for your patronage. We appreciate your confidence in KINZE® equipment. Your KINZE® 50 Series Grain Auger Wagon has been carefully designed to provide dependable operation in return for your investment. This manual has been prepared to aid you in the operation and maintenance of the Grain Auger Wagon. It should be considered a permanent part of the machine and remain with the machine when you sell it. It is the responsibility of the user to read and understand the Operator & Parts Manual in regards to safety, operation, lubrication and maintenance prior to operation of this equipment. It is the user’s responsibility to inspect and service the machine routinely as directed in the Operator & Parts Manual. We have attempted to cover all areas of safety, operation, lubrication and maintenance; however, there may be times when special care must be taken to fit your conditions. Throughout this manual the symbol and/or the words NOTE, IMPORTANT, CAUTION, WARNING or DANGER are used to call your attention to important information. The definition of each of these terms follows: NOTE: Indicates a special point of information or addresses a machine adjustment. IMPORTANT: Indicates information which, if not heeded, could result in damage to the machine. CAUTION: Indicates a potentially hazardous situation which, if not avoided, may result in minor or moderate personal injury. WARNING: Indicates a potentially hazardous situation which, if not avoided, could result in death or serious personal injury. DANGER: Indicates an imminently hazardous situation which, if not avoided, will result in death or serious personal injury. WARNING: Some photos in this manual may show safety covers or shields removed for visual clarity. NEVER OPERATE the machine without all safety covers and shields in place. NOTE: Some photos in this manual may have been taken of prototype machines. Production machines may vary in appearance. NOTE: Some photos and illustrations in this manual may show optional attachments installed. Contact your KINZE® Dealer for purchase of optional attachments. DANGER: Because of load capacities on bridges and roads and because the machine is not equipped with brakes, the machine is not intended for hauling loads on public roadways. It is the operator’s responsibility to be aware of and follow federal, state/provincial and local regulations in this regard. 1-1 Rev. 3/05 WARRANTY The KINZE® Limited Warranty for your new machine is stated on the back of the retail purchaser’s copy of the Warranty And Delivery Report form. Additional copies of the Limited Warranty can be obtained through your KINZE® Dealer. Warranty, within the warranty period, is provided as part of KINZE’s support program for registered KINZE® products which have been operated and maintained as described in this manual. Evidence of equipment abuse or modification beyond original factory specifications will void the warranty. Normal maintenance, service and repair is not covered by KINZE® warranty. To register your KINZE® product for warranty, a Warranty And Delivery Report form must be completed by the KINZE® Dealer and signed by the retail purchaser, with copies to the Dealer, to the retail purchaser and to KINZE Manufacturing, Inc. Registration must be completed and sent to KINZE Manufacturing, Inc. within 30 days of delivery of the KINZE® product to the retail purchaser. KINZE Manufacturing, Inc. reserves the right to refuse warranty on serial numbered products which have not been properly registered. If service or replacement of failed parts which are covered by the Limited Warranty are required, it is the user’s responsibility to deliver the machine along with the retail purchaser’s copy of the Warranty And Delivery Report to the KINZE® Dealer for service. KINZE® warranty does not include cost of travel time, mileage, hauling or labor. Any prior arrangement made between the Dealer and the retail purchaser in which the Dealer agrees to absorb all or part of this expense should be considered a courtesy to the retail purchaser. KINZE ® warranty does not include cost of travel time, mileage, hauling or labor. 1-2 Rev. 3/04 INTRODUCTION This manual has been written to cover KINZE® 50 Series Harvest Commander® Grain Auger Wagons. The information used in this manual was current at the time of printing. However, due to KINZE’s continual attempts to improve its product, possible production changes may cause your machine to appear slightly different in detail. KINZE Manufacturing, Inc. reserves the right to change specifications or design without notice and without incurring obligation to install the same on machines previously manufactured. Right hand (R.H.) and left hand (L.H.), as used throughout this manual, are determined by facing in the direction the machine will travel when in use, unless otherwise stated. D04210615a D04210613 Model 650 Wagon Shown With Vertical Auger In Unloading Position Model 650 Wagon Shown With Vertical Auger In Transport/Field Folded Position D061002108a LF051203-102a Model 850 Sof-Tred Wagon Shown With Vertical Auger In Unloading Position 2-1 Model 1050 Sof-Tred Wagon Shown With Vertical Auger In Unloading Position Rev. 3/06 INTRODUCTION D061002113a D061002112a Model 1050 Sof-Tred Wagon Shown With Vertical Auger In Shipping/Transport Folded Position Model 1050 Sof-Tred Wagon Shown With Vertical Auger In Field Folded Position LF1121101104a LF030503102 Row Crop Option - Model 1050 Wagons Wheel Option - Model 850 Wagons 1050softtred 1050trak Sof-Trak Option - Model 1050 Wagons Sof-Tred Option - Model 850 And 1050 Wagons (Model 1050 Shown) 2-2 Rev. 3/04 SPECIFICATIONS MODEL 650 WHEEL GRAIN AUGER WAGON SPECIFICATIONS - See Pages 3-2 And 3-3 MODEL 850 WHEEL GRAIN AUGER WAGON SPECIFICATIONS - See Pages 3-4 And 3-5 MODEL 850 SOF-TRED GRAIN AUGER WAGON SPECIFICATIONS - See Pages 3-6 And 3-7 MODEL 1050 ROW CROP GRAIN AUGER WAGON SPECIFICATIONS - See Pages 3-8 And 3-9 MODEL 1050 SOF-TRED GRAIN AUGER WAGON SPECIFICATIONS - See Pages 3-10 And 3-11 MODEL 1050 SOF-TRAK GRAIN AUGER WAGON SPECIFICATIONS - See Pages 3-12 And 3-13 OPTIONS • Hydraulic Flow Gate Package - Dealer-Installed (All Models) • Electronic Scale Package - Factory Or Field-Installed (Models 650 And 850 Wheel, Model 1050 Row Crop, Models 850 And 1050 Sof-Tred And Model 1050 Sof-Trak Wagons) • Dot Matrix Roll Printer - For Use With Electronic Scale Option • Memory Downloader Kit - For Use With Electronic Scale Option • Data Down Loader Kit - For Use With Electronic Scale Option 3- Rev. 3/05 SPECIFICATIONS (WGN199/WGN198) Model 650 Wheel Grain Auger Wagon (108" Axle Setting With 30.5" x 32" Tires) 11' 0" 17' 0" 9' 10" 15' 11" *9' 0" 24' 4" **11' 6" Shipping/Transport/Field Folded Auger Position Shipping/Transport/Field Folded Auger Position 11' 0" 17' 0" 15' 4" 5' 6" 12' 5" (SEE NOTE) 9' 10" 15' 11" *9' 0" 24' 4" **11' 6" Unloading Auger Position Unloading Auger Position * 120" Axle Setting - 10' 0" 108" Axle Setting - 9' 0" (Shown) ** 120" Axle Setting - 12' 6" With 30.5" x 32" Tires - 12' 0" With 24.5" x 32" Tires 108" Axle Setting - 11' 6" With 30.5" x 32" Tires (Shown) - 11' 0" With 24.5" x 32" Tires NOTE: 5' 6" dimension is with 24.5" x 32" tires at 108" setting. Will vary with tire sizes and axle setting. 3- Rev. 3/05 SPECIFICATIONS Total Capacity* 700 Bushels Bushels/Minute - Average* 300 Bushels/Minute Vertical Auger (Diameter - Flighting Design/Pitch) 16" - Full Tilt/Full Pitch L.H. Flighting - 16" - Thickness ⅜" (Raw Material/Pre-Formed) Tube - Vertical Auger 18" O.D. - 10 Gauge Bearings (Vertical Auger) 2" Horizontal Auger - Front Half (Diameter/Pitch) 14" - Full Pitch L.H. Horizontal Auger - Rear Half (Diameter/Pitch) 14" - ⅔ Pitch L.H. Flighting - 14" - Thickness ⅜" (Raw Material/Pre-Formed) Bearings (Horizontal Auger) Cast Iron Hubs W/Tapered Roller Bearings Gearbox Cast Iron - 90°/5 Pitch Cut Gears - 2:1 Ratio Drive Belt (1) 4-Band, Multi-Strand V-Belt Drive Pulleys 4 Grooves - 7 ½" Drive/15" Driven PTO - 1000 RPM 120 HP Rated With 4-Lobe Overrunning Clutch - U-Joint With 516" Shear Bolt PTO Yoke 1 ⅜"-21 Spline Or 1 ¾"-20 Spline Tires (2) 24.5" x 32", 16 Ply, R-3 Or 30.5" x 32", 16 Ply, R-1 Or R-3 Rims (2) 21" x 32" Or (2) 27" x 32" Spindle/Hub (2) 3 ¾" (High Strength Alloy)/10 Bolt Hitch Clevis Single Or Double Clevis Swivel Jack Single-Speed, 10,000 Lb. Rated Weight - Empty (With 24.5" x 32" Tires) 8533 Lbs. Hitch Weight - Empty 2200 Lbs. Hitch Weight - Loaded 3400 Lbs. Transport Safety Chain (1) ⅝" - 60,000 Lb. Rated * Approximate with 15% moisture corn. Capacity and bushels/minute will vary with moisture content of grain and/or PTO RPM. 3- Rev. 3/06 3/05 SPECIFICATIONS (WGN174j/WGN174g/WGN174k/WGN174h/WGN174l/WGN174i) Model 850 Wheel Grain Auger Wagon (108" Axle Setting) 18' 6" 12' 0" 10' 10" *9' 0" 17' 1 ½" 26' 1" **11' 6" Shipping/Transport Auger Position Shipping/Transport Auger Position 18' 6" 12' 6" 10' 10" *9' 0" 17' 1 ½" 26' 1" **11' 6" Field Folded Auger Position Field Folded Auger Position 18' 6" 12' 0" 16' 9" 7' 0" 13' 6" 10' 10" *9' 0" 17' 1 ½" 26' 1" **11' 6" Unloading Auger Position * 120" Axle Setting - 10' 0" ** 120" Axle Setting - 12' 6" Unloading Auger Position 3- Rev. 3/06 3/05 SPECIFICATIONS Total Capacity* 850 Bushels Bushels/Minute - Average* 375 Bushels/Minute Vertical Auger (Diameter - Flighting Design/Pitch) 18" - Full Tilt/Full Pitch L.H. Flighting - 18" - Thickness ⅜" (Raw Material/Pre-Formed) Tube - Vertical Auger 20" O.D. - 7 Gauge Bearings (Vertical Auger) 2" Horizontal Auger - Front Half (Diameter/Pitch) 15" - Full Pitch L.H. Horizontal Auger - Rear Half (Diameter/Pitch) 15" - ⅔ Pitch L.H. Flighting - 15" - Thickness ⅜" (Raw Material/Pre-Formed) Bearings (Horizontal Auger) Cast Iron Hubs W/Tapered Roller Bearings Gearbox Cast Iron - 90°/2" - 4 Pitch Cut Gears - 2:1 Ratio Drive Belts (2) 3-Band, Multi-Strand V-Belts Drive Pulleys 6 Grooves - 7 ½" Drive/15" Driven PTO - 1000 RPM 150 HP Rated With 4-Lobe Overrunning Clutch - U-Joint With 12mm Shear Bolt PTO Yoke 1 ⅜"-21 Spline Or 1 ¾"-20 Spline Tires (2) 30.5" x 32", 16 Ply, R-1 Or R-3 Rims (2) 27" x 32" Spindle/Hub (2) 3 ¾" (High Strength Alloy)/10 Bolt Hitch Clevis Bolt-On Single Clevis, Double Clevis Or Single Clevis Swivel Jack Single-Speed, 10,000 Lb. Rated Weight - Empty 13,102 Lbs. Hitch Weight - Empty 3450 Lbs. Hitch Weight - Loaded 5200 Lbs. Transport Safety Chains (2) ½" - 40,500 Lb. Rated * Approximate with 15% moisture corn. Capacity and bushels/minute will vary with moisture content of grain and/or PTO RPM. 3- Rev. 3/06 3/05 SPECIFICATIONS (WGN174m/WGN174g/WGN174n/WGN174h/WGN174o/WGN174i) Model 850 Sof-Tred Grain Auger Wagon 18' 6" 12' 0" 10' 10" *9' 0" 17' 1 ½" 26' 1" *12' 7" Shipping/Transport Auger Position Shipping/Transport Auger Position 18' 6" 12' 6" 10' 10" *9' 0" 17' 1 ½" 26' 1" *12' 7" Field Folded Auger Position Field Folded Auger Position 18' 6" 12' 0" 16' 9" 6' 5" 13' 6" 10' 10" *9' 0" 17' 1 ½" *12' 7" 26' 1" Unloading Auger Position Unloading Auger Position * Wide Setting Not Recommended 3- Rev. 3/06 3/05 SPECIFICATIONS Total Capacity* 850 Bushels Bushels/Minute - Average* 375 Bushels/Minute Vertical Auger (Diameter - Flighting Design/Pitch) 18" - Full Tilt/Full Pitch L.H. Flighting - 18" - Thickness ⅜" (Raw Material/Pre-Formed) Tube - Vertical Auger 20" O.D. - 7 Gauge Bearings (Vertical Auger) 2" Horizontal Auger - Front Half (Diameter/Pitch) 15" - Full Pitch L.H. Horizontal Auger - Rear Half (Diameter/Pitch) 15" - ⅔ Pitch L.H. Flighting - 15" - Thickness ⅜" (Raw Material/Pre-Formed) Bearings (Horizontal Auger) Cast Iron Hubs W/Tapered Roller Bearings Gearbox Cast Iron - 90°/2" - 4 Pitch Cut Gears - 2:1 Ratio Drive Belts (2) 3-Band, Multi-Strand V-Belts Drive Pulleys 6 Grooves - 7 ½" Drive/15" Driven PTO - 1000 RPM 150 HP Rated With 4-Lobe Overrunning Clutch - U-Joint With 12mm Shear Bolt PTO Yoke 1 ⅜"-21 Spline Or 1 ¾"-20 Spline Tires (2) 66/43.00 - 25, 16 Ply, R-1 Rims (2) 36" x 25" Spindle/Hub (2) 3 ¾" (High Strength Alloy)/10 Bolt Hitch Clevis Bolt-On Single Clevis, Double Clevis Or Single Clevis Swivel Jack Single-Speed, 10,000 Lb. Rated Weight - Empty 14,006 Lbs. Hitch Weight - Empty 3450 Lbs. Hitch Weight - Loaded 5200 Lbs. Transport Safety Chains (2) ½" - 40,500 Lb. Rated * Approximate with 15% moisture corn. Capacity and bushels/minute will vary with moisture content of grain and/or PTO RPM. 3- Rev. 3/06 3/05 SPECIFICATIONS (WGN155a/WGN155b/WGN155c/WGN155d/WGN155e/WGN155f) Model 1050 Row Crop Grain Auger Wagon (30" Row Spacing) 12' 0" 12' 0" 22' 6" 10' 11" *30" **12' 0" *30" ***11' 9 ½" 19' 11" 30' 9" 480/80R42 Tires Shipping/Transport Auger Position 520/85R38 Tires Shipping/Transport Auger Position 12' 8" 520/85R38 Or 480/80R42 Tires Shipping/Transport Auger Position 22' 6" 12' 8" 10' 11" *30" **12' 0" 19' 11" *30" ***11' 9 ½" 520/85R38 Tires Field Folded Auger Position 30' 9" 520/85R38 Or 480/80R42 Tires Field Folded Auger Position 480/80R42 Tires Field Folded Auger Position 16' 10" 12' 0" 10' 11" 13' 7" 13' 7" 520/85R38 Tires Unloading Auger Position 22' 6" 6' 10 ¼" 6' 9" *30" **12' 0" 16' 10" 12' 0" *30" ***11' 9 ½" 480/80R42 Tires Unloading Auger Position 19' 11" 30' 9" 520/85R38 Or 480/80R42 Tires Unloading Auger Position * Rims Reverse To Provide Wide Row Spacing ** 40" Axle Setting - 15' 2" ***40" Axle Setting - 14' 11 ½" NOTE: Axle setting can be set infinitely from 30" to 40" rows. 3- Rev. 3/05 SPECIFICATIONS Total Capacity* 1050 Bushels Bushels/Minute - Average* 500-600 Bushels/Minute Vertical Auger (Diameter - Flighting Design/Pitch) 20" - Full Tilt/Full Pitch L.H. Flighting - 20" - Thickness 716" (Raw Material/Pre-Formed) Tube - Vertical Auger 22" O.D. - 7 Gauge Bearings (Vertical Auger) 2" Horizontal Auger - Front Half (Diameter/Pitch) Prior To Serial No. 505142 - 16" - Full Pitch L.H./ Serial No. 505142 And On - 17" - Full Pitch L.H. Horizontal Auger - Rear Half (Diameter/Pitch) Prior To Serial No. 505142 - 16" - ⅔ Pitch L.H./ Serial No. 505142 And On - 17" - ⅔ Pitch L.H. Flighting - 16"/17" - Thickness ⅜" (Raw Material/Pre-Formed) Bearings (Horizontal Auger) Cast Iron Hubs W/Tapered Roller Bearings Gearbox HD Cast Iron - 90°/3.5" - 4 PitchCut Gears - 2:1 Ratio Drive Belts (2) 4-Band, Multi-Strand V-Belts Drive Pulleys 8 Grooves - 7 ½" Drive/15" Driven PTO - 1000 RPM Prior To Serial No. 505142 220 HP Rated With 4-Lobe Overrunning Clutch - U-Joint With 12mm Shear Bolt/ Serial No. 505142 And On 220 HP Rated With 4-Lobe Overrunning And Torque Limiting Clutches PTO Yoke Prior To Serial No. 505142 - 1 ⅜"-21 Spline Or 1 ¾"-20 Spline/ Serial No. 505142 And On - 1 ¾"-20 Spline Only Tires (4) 520/85R38, R-1 (20.8" x 38") Or (4) 480/80R42, R-1 (18.4" x 42") Rims WH18A x 38" With 20.8" x 38" Tire Or WH16A x 42" With 18.4" x 42" Tire Spindle/Hub (4) 4 ½"/10 Bolt Hitch Clevis Bolt-On Single Clevis, Double Clevis Or Single Clevis Swivel Jack 2-Speed, 10,000 Lb. Rated Weight - Empty 19,741 Lbs. (38" Tires) Or 19,678 Lbs. (42" Tires) Hitch Weight - Empty 3420 Lbs. Hitch Weight - Loaded 5140 Lbs. Transport Safety Chains (2) ½" - 40,500 Lb. Rated * Approximate with 15% moisture corn. Capacity and bushels/minute will vary with moisture content of grain and/or PTO RPM. 3- Rev. 3/06 3/05 SPECIFICATIONS (WGN155g/WGN155h/WGN155i/WGN155j/WGN155k/WGN155l) Model 1050 Sof-Tred Grain Auger Wagon 12' 0" 22' 6" 10' 11" 8' 0" 12' 2" 19' 11" 30' 9" Shipping/Transport Auger Position Shipping/Transport Auger Position 12' 8" 22' 6" 10' 11" 19' 11" 8' 0" 12' 2" 30' 9" Field Folded Auger Position Field Folded Auger Position 22' 6" 12' 0" 16' 10" 13' 7" 8' 0" 12' 2" 10' 11" 19' 11" 6' 8" Unloading Auger Position 30' 9" Unloading Auger Position 3-10 Rev. 3/05 SPECIFICATIONS Total Capacity* 1050 Bushels Bushels/Minute - Average* 500-600 Bushels/Minute Vertical Auger (Diameter - Flighting Design/Pitch) 20" - Full Tilt/Full Pitch L.H. Flighting - 20" - Thickness 716" (Raw Material/Pre-Formed) Tube - Vertical Auger 22" O.D. - 7 Gauge Bearings (Vertical Auger) 2" Horizontal Auger - Front Half (Diameter/Pitch) Prior To Serial No. 505142 - 16" - Full Pitch L.H./ Serial No. 505142 And On - 17" - Full Pitch L.H. Horizontal Auger - Rear Half (Diameter/Pitch) Prior To Serial No. 505142 - 16" - ⅔ Pitch L.H./ Serial No. 505142 And On - 17" - ⅔ Pitch L.H. Flighting - 16"/17" - Thickness ⅜" (Raw Material/Pre-Formed) Bearings (Horizontal Auger) Cast Iron Hubs W/Tapered Roller Bearings Gearbox HD Cast Iron - 90°/3.5" - 4 Pitch Cut Gears - 2:1 Ratio Drive Belts (2) 4-Band, Multi-Strand V-Belts Drive Pulleys 8 Grooves - 7 ½" Drive/15" Driven PTO - 1000 RPM Prior To Serial No. 505142 220 HP Rated With 4-Lobe Overrunning Clutch - U-Joint With 12mm Shear Bolt/ Serial No. 505142 And On 220 HP Rated With 4-Lobe Overrunning And Torque Limiting Clutches PTO Yoke Prior To Serial No. 505142 - 1 ⅜"-21 Spline Or 1 ¾"-20 Spline/ Serial No. 505142 And On - 1 ¾"-20 Spline Only Tires (2) 1250/45-32, 16 Ply, R-1 Bias (76" x 50" x 32") Rims DH44 x 32" One Piece, Drop Center, 20 Bolt Spindle/Hub (2) 4 ½" (High Strength Alloy)/20 Bolt Hitch Clevis Bolt-On Single Clevis, Double Clevis Or Single Clevis Swivel Jack 2-Speed, 10,000 Lb. Rated Weight - Empty 18,461 Lbs. Hitch Weight - Empty 3420 Lbs. Hitch Weight - Loaded 5140 Lbs. Transport Safety Chains (2) ½" - 40,500 Lb. Rated * Approximate with 15% moisture corn. Capacity and bushels/minute will vary with moisture content of grain and/or PTO RPM. 3-11 Rev. 3/06 3/05 SPECIFICATIONS (WGN155m/WGN155n/WGN155o/WGN155p/WGN155q/WGN155r/WGN155s/WGN155t/WGN155u) Model 1050 Sof-Trak Grain Auger Wagon (108" Axle Setting) 12' 0" 12' 0" 22' 6" 10' 10" *9' 0" **12' 0" *9' 0" ***11' 0" 36" Sof-Trak Shipping/Transport Auger Position 24" Sof-Trak Shipping/Transport Auger Position 30' 9" 24" Or 36" Sof-Trak Shipping/Transport Auger Position 12' 8" 12' 8" 22' 6" 10' 10" *9' 0" **12' 0" *9' 0" 36" Sof-Trak Field Folded Auger Position 24" Sof-Trak Field Folded Auger Position 12' 0" 24" Or 36" Sof-Trak Field Folded Auger Position 22' 6" 12' 0" 16' 9" 16' 9" 13' 6" 13' 6" *9' 0" **12' 0" 30' 9" ***11' 0" 6' 9" 36" Sof-Trak Unloading Auger Position 10' 10" 6' 9 1/2" *9' 0" ***11' 0" 30' 9" 24" Sof-Trak Unloading Auger Position 24" Or 36" Sof-Trak Unloading Auger Position * 120" Axle Setting - 10' 0" ** 120" Axle Setting - 13' 0" *** 120" Axle Setting - 12' 0" 3-12 Rev. 3/05 SPECIFICATIONS Total Capacity* 1050 Bushels Bushels/Minute - Average* 500-600 Bushels/Minute Vertical Auger (Diameter - Flighting Design/Pitch) 20" - Full Tilt/Full Pitch L.H. Flighting - 20" - Thickness 716" (Raw Material/Pre-Formed) Tube - Vertical Auger 22" O.D. - 7 Gauge Bearings (Vertical Auger) 2" Horizontal Auger - Front Half (Diameter/Pitch) Prior To Serial No. 505142 - 16" - Full Pitch L.H./ Serial No. 505142 And On - 17" - Full Pitch L.H. Horizontal Auger - Rear Half (Diameter/Pitch) Prior To Serial No. 505142 - 16" - ⅔ Pitch L.H./ Serial No. 505142 And On - 17" - ⅔ Pitch L.H. Flighting - 16"/17" - Thickness ⅜" (Raw Material/Pre-Formed) Bearings (Horizontal Auger) Cast Iron Hubs W/Tapered Roller Bearings Gearbox HD Cast Iron - 90°/3.5" - 4 Pitch Cut Gears - 2:1 Ratio Drive Belts (2) 4-Band, Multi-Strand V-Belts Drive Pulleys 8 Grooves - 7 ½" Drive/15" Driven PTO - 1000 RPM Prior To Serial No. 505142 220 HP Rated With 4-Lobe Overrunning Clutch - U-Joint With 12mm Shear Bolt/ Serial No. 505142 And On 220 HP Rated With 4-Lobe Overrunning And Torque Limiting Clutches PTO Yoke Prior To Serial No. 505142 - 1 ⅜"-21 Spline Or 1 ¾"-20 Spline/ Serial No. 505142 And On - 1 ¾"-20 Spline Only Hitch Clevis Bolt-On Single Clevis, Double Clevis Or Single Clevis Swivel Jack 2-Speed, 10,000 Lb. Rated Track Width 24" Or 36" Track Overall Length 153" Track Contact Length 108" End Wheels 2 Sets Per Track - 36 ½" Diameter Cast Iron Segmented Mid Wheels 4 Per Track - 16" Diameter Steel Weight - Empty 24" Tracks 22,991 Lbs. Or 36" Tracks 24,101 Lbs. Hitch Weight - Empty 3420 Lbs. Hitch Weight - Loaded 5140 Lbs. Transport Safety Chains (2) ½" - 40,500 Lb. Rated * Approximate with 15% moisture corn. Capacity and bushels/minute will vary with moisture content of grain and/or PTO RPM. 3-13 Rev. 3/06 3/05 SPECIFICATIONS 3-14 Rev. 3/05 SAFETY PRECAUTIONS GRAIN AUGER WAGON Because of load capacities on bridges and roads and because the wagon is not equipped with brakes, the wagon is not intended for hauling loads on public roadways. It is the operator’s responsibility to be aware of and follow federal, state/provincial and local regulations in this regard. Safe and careful operation of the tractor and auger wagon at all times will contribute significantly to the prevention of accidents. Since a large portion of accidents occur as a result of fatigue or carelessness, safety practices should be of utmost concern. Read and understand the instructions provided in this manual and on the warning signs. Review these instructions frequently! Listed below are other safety suggestions that should become common practice. Always follow federal, state/provincial and local regulations regarding a safety chain when towing farm equipment on a public highway. Only a safety chain (not an elastic or nylon/plastic tow strap) should be used to retain the connection between the towing and towed machines in the event of separation of the primary attaching system. At all times keep children off and out of the auger wagon. Never permit any persons other than the operator to ride on the tractor and never permit persons to ride on or in the wagon at any time. Always use adequate lights or safety warnings when transporting the wagon on public roads and after dark. Check with local law enforcement agencies for specific requirements. Always keep hands, feet and clothing away from moving parts. Always make certain U-joint yokes are securely locked on tractor and implement shaft before operating wagon. Be aware of bystanders, particularly children! Always look around to make sure it is safe to start the engine of the towing vehicle or move the auger wagon. This is particularly important with higher noise levels and quiet cabs, as you may not hear people shouting. Do not wear loose-fitting clothing which may catch in moving parts. Always wear protective clothing, substantial shoes and suitable hearing and eye sight protectors applicable for the situation. Before operation, be sure there are no tools lying on or in the auger wagon. Make certain tractor is in safe operating condition with adequate braking capabilities, especially when operating on uneven terrain. Be especially observant of the operating area and terrain. Watch for holes, rocks or other hidden hazards. Always inspect the area prior to operation. DO NOT operate near the edge of drop-offs or banks or on steep slopes as overturn may result. Operate up and down (not across) intermediate slopes. Avoid sudden starts and stops. Be extra careful when working on inclines. Never operate the auger wagon without PTO driveline guards, tractor master shield and implement shields in place. Make certain PTO driveline guards turn freely and are properly attached. Pick the levelest possible route when transporting across fields. Use a tractor equipped with a roll-overprotective-system and fasten your seat belt prior to starting the engine. Do not allow anyone to stand between the tongue or hitch and the towing vehicle when backing up to the auger wagon. 4-1 Rev. 4/02 3/05 SAFETY PRECAUTIONS GRAIN AUGER WAGON Store the auger wagon in an area away from human activity. DO NOT permit children to play in or around the stored unit. Allow for unit length when making turns. Make sure the parked machine is on a hard, level surface.Wheel chocks may be needed to prevent unit from rolling. Never transport or load grain into Row Crop wagon with outer wheels removed. Always make certain there is adequate overhead clearance before folding or unfolding the unloading auger. Before applying pressure to the hydraulic system, make sure all connections are tight and that hoses and fittings have not been damaged. Hydraulic fluid escaping under pressure can have sufficient force to penetrate skin, causing injury or infection. Always fold unloading auger to down position before transporting wagon. Windows give only a limited view of what is behind the wagon. Always check carefully, including blind spots, before backing or turning the wagon. Rim and tire servicing can be dangerous. Explosive separation of tire and rim parts can cause serious injury or death. Do not attempt to mount a tire unless you have the proper equipment and experience to perform the job. This should only be done by persons properly trained and equipped to do the job. Always maintain the correct tire pressure. Do not inflate the tires above the recommended pressure. When inflating tires, use a clip-on air chuck and extension hose long enough to allow you to stand to one side and NOT in front of or over the tire assembly. Use a safety cage to enclose the tire and rim assembly when inflating. Inspect tires and wheels daily. Do not operate with low pressure, cuts, bubbles, damaged rims or missing lug bolts and nuts. Limit towing speed to 15 MPH when empty and 10 MPH when loaded. Always drive at a safe speed relative to local conditions and ensure your speed is low enough for an emergency stop to be safe and secure. Keep speed to a minimum. Reduce speed prior to turns to avoid the risk of overturning. Avoid sudden uphill turns on steep slopes. Always keep the tractor in gear to provide engine braking when going downhill. Do not coast. This machine has been designed and built with your safety in mind. Do not make any alterations or changes to this machine. Any alteration to the design or construction may create safety hazards. Be a safe and courteous driver. Always yield to oncoming traffic in all situations, including narrow bridges, intersections, etc. Always disengage PTO, shutoff tractor engine and remove the ignition key before: 1. Leaving tractor seat. 2. Lubricating the auger wagon. 3. Cleaning out debris. 4-2 Rev. 3/05 SAFETY PRECAUTIONS GRAIN AUGER WAGON DRIVELINE Never step across any driveline. The area between the tractor and the PTO-driven implement is a DANGER zone. This can be one of the most dangerous places on your farm for you, your family and your employees. Do not attach drivelines with bolts or pins which are longer than recommended. They can not only catch loose clothing, boot-laces or a pant cuff, but while spinning rapidly, they can cause serious bodily injury. Almost every driveline accident happens during the day and near the farmyard. Certain operating conditions are particularly dangerous: • If your equipment is missing guards or shields. • If you are not paying attention. • If children are playing near where you are working. • If you are operating a stationary piece of equipment. • If you are wearing loose-fitting clothes. • If you are tired or in a hurry to get finished. Do not use the tractor drawbar, PTO or wagon tongue as a step. Most driveline accidents happen when drivelines are operated without shields/guards or they are improperly maintained. Never operate the auger wagon without PTO driveline guards, tractor master shield and implement shields in place. Make certain PTO driveline guards turn freely and are properly attached. Heed all safety warnings in this manual and on the safety warning signs. Review these warnings frequently! Exercise extreme caution when operating machinery. Do not remove the PTO driveline guard or expose guarded parts to the driveline by cutting or enlarging the grease access holes. Never permit any persons other than the operator to ride on the tractor and never permit persons to ride on or in the wagon at any time. Never operate the wagon with PTO driveline guards in a damaged condition. At all times keep children off of and out of auger wagons. You have an obligation to keep children away. There is NO reason for any child to be near operating equipment. Always make certain U-joint yokes are securely locked on tractor and implement shaft before operating wagon. If the elderly are assisting with farm work, their physical limitations need to be recognized and accommodated. This machine has been designed and built with your safety in mind. Do not make any alterations or changes to this machine. Any alteration to the design or construction may create safety hazards. Always keep hands, feet and clothing away from moving parts. Always disengage PTO, shutoff tractor engine and remove ignition key before: 1. Leaving tractor seat. 2. Lubricating the auger wagon. 3. Cleaning out debris. 4-3 Rev. 3/05 SAFETY PRECAUTIONS 4-4 4/02 SAFETY WARNING SIGNS The “WARNING” signs illustrated on these pages are placed on the machine to warn of hazards. The warnings found on these signs are for your personal safety and the safety of those around you. OBSERVE THESE WARNINGS! • Keep these signs clean so they can be observed readily. Wash with soap and water or cleaning solution as required. • Replace “WARNING” signs should they become damaged, painted over or if they are missing. • Check the reflective decals and SMV sign periodically. Replace if they show loss of any of their reflective property. • When replacing decals, clean the machine surface thoroughly using soap and water or cleaning solution to remove all dirt and grease. NOTE: Style and locations of SMV sign, reflective decals and safety/warning lights conform to ANSI/ASAE S279.12 DEC 02 and ANSI/ASAE S276.5 FEB 03. D052902104a Part No. G7100-259 Amber Reflective Decal (Qty. 8 on Models 650 And 850/Qty. 10 on Model 1050 - Four Located On Each Side Of Grain Tank On 650 And 850; - Five Located On Each Side Of Grain Tank On 1050) Part No. G7100-259 Amber Reflective Decal (Qty. 6 - Three Located On L.H. Side Of Wagon Frame - Three Located On R.H. Side Of Wagon Frame) Model 1050 Sof-Tred Wagon Shown D052902104a Part No. G7100-259 Amber Reflective Decal (Qty. 2 - One Located On L.H. Side And One Located On R.H. Side Of Front Of Grain Tank) Model 1050 Sof-Tred Wagon Shown 5- Part No. G7100-259 Amber Reflective Decal (Qty. 2 - One Located On Each Side Of Hitch) 3/05 Rev. 3/06 SAFETY WARNING SIGNS D051702204 Part No. G7100-259 Amber Reflective Decal (Qty. 6 - Three Located On L.H. Side And Three Located On R.H. Side Of Sof-Trak Frame) LF121101106a Part No. G7100-162 Row Crop Wagon Only (Qty. 2 - One On Each Side Of Wagon Above Wheels) Part No. G7100-259 Amber Reflective Decal (Qty. 2 - One Located On Front L.H. And One Located On Front R.H. Side Of Row Crop Axle) 5- Rev. 3/06 SAFETY WARNING SIGNS Part No. G7100-36 SMV Sign Part No. G7100-282 Part No. G7100-142 D120701114a Part No. G7100-258 Red Reflective Decal (Qty. 6 - Rear-Facing In Transport) Part No. G7100-260 Orange Reflective Decal (Qty. 6 - Rear-Facing In Transport) Part No. G7100-258 Red Reflective Decal (Qty. 2 - One Located On Rear L.H. Row Crop Wagon Shown Side And One Located On Rear R.H. Side Of Row Crop Axle) Part No. G7100-260 Orange Reflective Decal (Qty. 2 - One Located On Rear L.H. Side And One Located On Rear R.H. Side Of Row Crop Axle) D041802102 DANGER NEVER TRANSPORT WAGON OR LOAD WAGON WITH GRAIN WITH OUTER WHEELS REMOVED! THE TWO OUTER WHEELS ON ROW CROP WAGONS ARE REMOVED TO ALLOW NARROWER WIDTH FOR TRUCK SHIPMENT. USING EXTREME CAUTION, UNLOAD WAGON IN LEVEL AREA. DO NOT UNFOLD UPPER VERTICAL AUGER. TIPPING MAY OCCUR BECAUSE OF NARROW WHEEL BASE. INSTALL OUTER WHEELS IMMEDIATELY! 7100-281 D040902205 Part No. G7100-281 Row Crop Wagon Only (Temporary Shipping Warning) Part No. G7100-175 5- Rev. 3/06 SAFETY WARNING SIGNS Part No. G7100-117 Part No. G7100-81 Part No. G7100-46 D052902103a Part No. G7100-302a Part No. G7100-142 Model 1050 Shown Part No. G7100-112 D040302107 Part No. G7100-120 Part No. G7100-80 Model 1050 Shown 5- Rev. 3/04 SAFETY WARNING SIGNS D051702206a Part No. G7100-80 Part No. G7100-82 Model 1050 Shown Part No. G7100-90 Part No. G7100-296 D031103104 Part No. G7100-67 D040302104 GUARD MISSING Model 1050 Shown 5- Part No. G7100-86 Rev. 3/05 SAFETY WARNING SIGNS D052504203 Part No. G7100-67 Model 650 Shown D052604113 Part No. G7100-302a Model 650 Shown 5- Rev. 3/05 OPERATION The following information is general in nature and was written to aid the operator in preparing the tractor and auger wagon for use and to provide general operating procedures. TRACTOR PREPARATION AND HOOKUP INITIAL PREPARATION OF THE MACHINE IMPORTANT: If the auger wagon is attached to some tractor models with a clevis hitch (hammer strap style) drawbar, the hammerstrap may need to be removed to prevent damage to the PTO assembly. 1. Slide tractor drawbar in as far as possible and still allow PTO shaft to have sufficient clearance to prevent damage to driveline components when making sharp turns and operating over uneven ground. Lubricate the auger wagon per the lubrication information in this manual prior to initial operation and at prescribed intervals thereafter. Make sure all tires have been properly inflated prior to each use. Check drive V-belts for proper tension and alignment. Torque all wheel lug nuts to specified torque. (WGN117a) Tractor Shield PTO Assembly Wagon Shield TRACTOR REQUIREMENTS Consult your dealer for information on horsepower requirements and tractor compatibility. Two remote hydraulic outlets (SCV) are required on all sizes. A third remote hydraulic outlet is required if the auger wagon is equipped with the Hydraulic Flow Gate Option. A 12 volt DC electrical system is required on all sizes to operate safety/warning lights, auger-mounted work light or the optional electronic scale system. IMPORTANT: If the auger wagon is attached to a tractor with an offset in the drawbar, be certain the offset is in the down position to prevent damage to the PTO assembly. (WGN116) Tractor Shield 6- PTO Assembly Wagon Shield Rev. 3/06 4/02 OPERATION 2. Connect auger wagon to tractor hitch. Irregardless of hitch option (single clevis, double clevis or single clevis swivel), use a high quality hitch pin of sufficient length and strength and secure pin with a locking device. D072104102 Recommended hitch pin diameter: Single Clevis, Single Clevis Swivel Or Double Clevis Swivel Pin recommended and supplied by the tractor manufacturer. (Max. 2") Double Clevis Min. 1 ⅜" (Max. 1 ½") Double Clevis Swivel Hitch (Model 650) D052504237 NOTE: The single clevis hitch (850/1050 only) can be turned over for an additional 1 ½" hitch height adjustment. (Recommended mounting bolt torque - 380 ft. lbs.) 46331-94a Single Clevis Swivel Hitch (Model 650) Mounting Bolts Single Clevis Hitch (Model 850/1050) NOTE: The PTO must remain disconnected and positioned as far to the right of the wagon hitch as possible until the parking jack is raised. 49735-16 D061202113 Double Clevis Hitch (Model 850/1050) D041102101a Single Clevis Swivel Hitch (Model 850/1050) 6- Rev. 4/02 3/05 OPERATION 3. Remove jack handle from storage location. D061804100 5.Position jack handle as shown below. Use the jack handle to rotate the jack enough to allow removal of the L-pin. D061102112 L-Pin Model 650 Shown Model 1050 Shown D061102109 6.Rotate parking jack to the horizontal storage position to prevent damage to jack in uneven operating conditions. Install L-pin to lock the jack in the raised position. Return jack handle to storage location. D061102111 L-Pin Model 1050 Shown 4.Raise the jack fully. D052504237 Model 1050 Shown L-Pin Located To Lock Jack In Lowered Position Model 650 Shown D061102116a 7. Attach wagon PTO connecting yoke to tractor PTO shaft. Be sure spring loaded yoke pin engages groove in tractor PTO shaft. Check that slip tube grease fitting is visible through hole of outer tube. IMPORTANT: Ensure tractor drawbar is adjusted to prevent severe bends in PTO U-joint angles and to allow sufficient clearance between tractor drawbar/hitch pin and PTO shaft. 8. Attach quick disconnect fitting to ends of hydraulic hoses to match tractor hydraulic ports. (ISO couplers are included as standard equipment.) Connect hydraulic hoses to tractor ports in a sequence which is both familiar and comfortable to the operator. DANGER: Before applying pressure to the hydraulic system, make sure all connections are tight and hoses and fittings have not been damaged. Hydraulic fluid escaping under pressure can have sufficient force to penetrate skin, causing injury or infection. Model 1050 Shown IMPORTANT: Always wipe hose ends to remove any dirt before connecting couplers to tractor ports. 6- Rev. 4/02 3/05 OPERATION 9. Connect the seven terminal breakaway connector for the lighting system on the wagon to the seven pin connector on the tractor. If your tractor is not equipped with the SAE Standard 7 terminal connector, obtain through your local tractor supply dealer. Check to be sure clearance lights, signal lights and auxiliary work light are working properly. DANGER: Because of load capacities on bridges and roads and because the machine is not equipped with brakes, this machine is not intended for hauling loads on public roadways. It is the operator’s responsibility to be aware of and follow federal, state/provincial and local regulations in this regard. DANGER: Windows give only a limited view of what is behind the wagon. The use of a rear-view mirror is recommended to aid the operator in seeing behind the wagon. Always check carefully, including blind spots, before backing or turning the wagon. IMPORTANT: Do not operate tractor PTO above 750 PTO RPM with the augers empty. WARNING: Wide loads or loads with a high center of gravity may cause instability or rollover when operating on hillsides or in rough terrain. 10. The auxiliary attaching system (transport safety chain) provided with your wagon should be used to ensure the connection is retained between the wagon and tractor in the event of a hitch pin/drawbar failure. The safety chain is to be attached as shown in the following photos. The attaching hardware should be torqued to 840 ft. lbs. IMPORTANT: Be sure the auxiliary attaching system is of sufficient strength and length and correctly attached. Also be aware of PTO clearance. D040303200 D052604113 Model 650 UNLOADING THE AUGER WAGON Unloading speed will vary with the moisture content of the grain and the PTO speed. If equipped with optional Hydraulic Flow Gate Package, the amount of opening on the grain flow control gate may also impact unloading speed. 1. After checking to see that there are no power lines or other obstacles in the way, fold the unloading auger into the unloading position. The cylinder should be fully extended to lock the upper and lower auger sections in place. Check the speed at which the auger folds and if necessary adjust the tractor flow control. If the auger folds too fast it could damage the hinge assembly or force the spring loaded bearing at the upper end of the vertical auger out of adjustment. DANGER: Care must be taken when operating wagon and/or folding unloading auger around power lines. DANGER: Stand clear when folding auger. IMPORTANT: The elbow in the rod end of the auger fold hydraulic cylinder is a restrictor-type elbow to control folding speed. Do not replace with any other type elbow fitting. 2. With tractor idling, engage PTO. 3. Engage horizontal auger belt drive. Model 850/1050 4. Increase tractor RPM to the desired speed. (Not to exceed 1000 PTO RPM.) 6- Rev. 4/02 3/06 OPERATION IMPORTANT: If the auger wagon is being unloaded on the move, disengage PTO before making any sharp turns. To fold the auger to the shipping/transport position on 850/1050 wagons, the auger stand must be lowered. Use the hydraulic cylinder to remove weight of the auger from the auger stand. Standing on the L.H. side of the wagon, rotate the handle slightly to remove pressure from the hold pin. Remove locking (lynch) pin. Rotate the hold pin to the horizontal position and remove the hold pin. Rotate the handle clockwise to lower the auger stand. Reinstall hold pin and rotate pin to the vertical locked position. Reinstall locking (lynch) pin. 5. As grain flow slows, reduce tractor RPM to idle. IMPORTANT: Do not operate tractor PTO above 750 PTO RPM with the augers empty. 6. When grain flow stops, disengage horizontal auger belt drive. D040902112 7. Disengage PTO. Auger Stand IMPORTANT: If wagon is used around power lines, buildings, trees or other obstacles, or if the wagon is being used in rough field conditions, the unloading auger should be folded to the field folded position after unloading. VERTICAL AUGER FOLD Hold Pin In Vertical Locked Position DANGER: Stand clear when folding auger. The upper section of the 850/1050 vertical auger has one operating, or unloading position, and two folded positions; shipping/transport folded or field folded. Handle The upper section of the 650 vertical auger has one operating, or unloading position, and one field folded or shipping/transport position. D040902111 Auger Stand Lowered A hydraulic cylinder, with a remote-mounted counter balance valve assembly, “locks” the auger in any position on the 850 or 1050. Hold Pin In Horizontal Position D04120638 Counter Balance Valve Assembly 6- Rev. 4/02 3/06 OPERATION AUGER INSPECTION COVER DANGER: Never open inspection cover while PTO and/or augers are running. D052504107 50 Series Grain Auger Wagons are equipped with an inspection cover at the bottom of the vertical auger that is used for clean out purposes. The inspection cover should be removed any time total clean out of the wagon is required, such as when changing crops, to preserve grain identity, or in preparation for storage. At the end of each season or after extended use, the inspection cover should be removed and the auger chamber cleaned of all debris and accumulated grain to prevent rust and mold. Reinstall cover and tighten hardware evenly after clean out is complete. Model 650 D040302107 Model 850/1050 6- Rev. 4/02 3/05 OPERATION GRAIN TANK CLEAN OUT SWEEP DANGER: Never use clean out sweep while PTO and/or augers are running. D040902203 Cap Nut And Washer DANGER: Never remove dump door while PTO and/or augers are running. DANGER: Never work around PTO, gearbox or belt drive system or allow anyone else to do so while PTO is running. Rod Storage Cover Plate Model 650 Wagons remove the two lengths of extension rods from the storage location in front of the tire on the L.H. side of the wagon. Connect the two extension rods together and attach to the clean out sweep. Dump Door Model 850/1050 Wagons remove the nuts holding the rod storage cover plate and remove the two lengths of extension rods. Connect the two extension rods together and attach to the clean out sweep. ½" Cap Screw Applies To 850/1050 Wagons To access the grain tank clean out sweep, remove the cap nut and heavy washer at the bottom of the auger inspection cover. Remove the ½" cap screw on the underside of the clean out sweep. Set hardware aside. D052504146 Cap Nut And Washer Remove the auger inspection cover at the front of the wagon. Remove the ½" cap screw that secures clean out sweep and remove the dump door on the underside of the grain tank at the rear of the wagon. Attach extension rods and pull the clean out sweep as far back as possible then push it as far forward as possible. Repeat this procedure several times. Inspect the inside of the wagon to ensure clean out is complete. ½" Cap Screw Dump Door Reinstall auger inspection cover at front of wagon and dump door on underside of grain tank at rear of wagon. Store clean out sweep extension rods and reinstall and tighten all hardware. Applies To 650 Wagons D060804102 Extension Rods Storage Location Applies To 650 Wagons 6- Rev. 4/02 3/05 OPERATION HYDRAULIC FLOW GATE NOTE: The hydraulic flow gate is intended to set the volume of grain being fed into the horizontal auger. It is not intended as a grain shutoff device. Use belt drive to engage/disengage horizontal auger drive. Dealer-installed hydraulic flow gate options to control volume of grain to the horizontal auger are available for all 50 Series Grain Auger Wagons. Hydraulic flow gate options include doors to cover the horizontal auger, actuating linkage, mounting hardware and an externally-mounted 2" x 8" hydraulic cylinder with hoses. An indicator on the front wagon panel shows if the hydraulic flow gate is open or closed. To determine correct flow gate opening for the application: • Open the gate half way. • Engage PTO for the vertical auger at low RPM. • Engage belt drive clutch to start the horizontal auger. • Adjust flow gate to desired unloading rate. D050202109b NOTE: After desired unloading rate is set for the application, the gate should be left at that setting. The flow gate should not be opened and closed for each load. NOTE: Recommended initial flow gate position for rice would be half open. HORIZONTAL AUGER INDICATOR An indicator pointer on the front side of the belt housing allows the operator to see if the horizontal auger is engaged (ON) or disengaged (OFF). This indicator pointer is attached to the belt engagement linkage. It is recommended that the indicator be in the OFF position when the PTO in being engaged to reduce the start up torque requirement. As the belt tension is being disengaged (OFF) you will hear the linkage snap over center and release the belt tension. D050202110b D08230504 6- Rev. 4/02 3/06 OPERATION MODEL 650 WAGONS The shear bolt is located in the wagon half of the PTO assembly. One 516"-18 x 2" Grade 5 shear bolt and lock nut is used. PTO SHEAR BOLT/OVERRUNNING CLUTCH PROTECTION (Model 850 Wagons/Model 1050 Wagons Prior To Serial No. 505142) (WGN200) The shear bolt/overrunning clutch is designed to ensure driveline, gearbox and auger protection. Should the auger become obstructed, the yoke is designed to shear the connecting bolt before further damage can occur. The overrunning clutch allows the auger system to freewheel and protect the tractor and wagon against the possibility of shock damage from PTO brakeequipped tractors. 516"-18 x 2" Grade 5 Shear Bolt And Lock Nut NOTE: Always use identical quantity, size and grade of bolt for replacement. A spare shear bolt is stored in the holder at the top of the belt housing. Overrunning Clutch MODEL 850/1050 WAGONS The shear bolt is located in the wagon half of the PTO assembly. One M12-1.75 x 60 Grade 8.8 shear bolt and M12-1.75 nylon insert lock nut is used. D052504121 (WGN182) M12-1.75 x 60 Grade 8.8 Shear Bolt And M12-1.75 Nylon Insert Lock Nut Overrunning Clutch Applies To 650 Wagons PTO TORQUE LIMITING/OVERRUNNING CLUTCH PROTECTION D042803100 (Model 1050 Wagons Serial No. 505142 And On) The torque limiting and overrunning clutches are designed to ensure driveline and gearbox protection. Should the auger become obstructed, the torque limiting clutch is designed to disengage before damage can occur. The torque limiting clutch will reset automatically when the PTO RPM is reduced. The overrunning clutch allows the auger system to freewheel and protect the tractor and wagon against the possibility of shock damage from PTO brakeequipped tractors. Applies To 850/1050 (Prior To Serial No. 505142) Wagons (WGN183) Overrunning Clutch 6- Torque Limiting Clutch Rev. 4/02 3/06 OPERATION ELECTRONIC SCALE The 650 electronic scale option includes two weigh axles, one hitch weigh beam, a scale indicator console for tractor mounting and the required cables, brackets and hardware for mounting. (MODEL 650 WAGONS) Two methods may be used for weighing: 1. Weight of what is loaded onto the auger wagon. 2.Weight of what is unloaded from the auger wagon. The preferred method for most situations is to weigh what is unloaded from the auger wagon. D10170504 To measure what is being unloaded, press “TARE” before starting to unload. The scale will show the weight being unloaded as a negative value. Record this information, if desired, and press “NET/GROSS” to return to gross weight. To measure what is being loaded (For example when doing a field yield check.), press “ZERO” to zero balance the wagon before loading the wagon. Indicator On Tractor NOTE: The scale will be most accurate if the auger wagon is not moved and is on level ground while loading or unloading. Suggested Operation Procedures MODEL 650 WHEEL WAGONS D052504237a NOTE: Movement of the wagon will cause the scale indicator reading to fluctuate. Step 1 Press “ON” to turn scale on. NOTE: Allow one (1) minute for the scale to warm up (allow 5-10 minutes in cold weather). Step 2Press “ZERO” to zero balance the wagon. Step 3Load wagon. Step 4Prior to unloading the wagon, press “TARE”. Step 5Unload wagon. The negative reading on the scale indicator is pounds unloaded. Record weight. Hitch Weigh Beam D062504103 Repeat Steps 4 and 5 each time the wagon is unloaded. Consult scale manufacturer’s manual provided and the Maintenance Section of this manual for additional information. Weigh Axle 6-10 Rev. 4/02 3/06 OPERATION ELECTRONIC SCALE The 850 electronic scale option includes two weigh axles, one hitch weigh beam, a scale indicator console for tractor mounting and the required cables, brackets and hardware for mounting. (MODEL 850/1050 WAGONS) Two methods may be used for weighing: 1. Weight of what is loaded into the auger wagon. 2.Weight of what is unloaded from the auger wagon. The preferred method for most situations is to weigh what is unloaded from the auger wagon. D10170504 To measure what is being unloaded, press “TARE” before starting to unload. The scale will show the weight being unloaded as a negative value. Record this information, if desired, and press “NET/GROSS” to return to gross weight. To measure what is being loaded (For example when doing a field yield check.), press “ZERO” to zero balance the wagon before loading the wagon. NOTE: The scale will be most accurate if the auger wagon is not moved and is on level ground while loading or unloading. Indicator On Tractor MODEL 850 WHEEL/SOF-TRED WAGONS Suggested Operation Procedures D041102101a NOTE: Movement of the wagon will cause the scale indicator reading to fluctuate. Step 1Press “ON” to turn scale on. NOTE: Allow one (1) minute for the scale to warm up (allow 5-10 minutes in cold weather). Step 2Press “ZERO” to zero balance the wagon. Step 3 Load wagon. Step 4Prior to unloading the wagon, press “TARE”. Hitch Weigh Beam Step 5Unload wagon. The negative reading on the scale indicator is pounds unloaded. Record weight. D0403030103 Repeat Steps 4 and 5 each time the wagon is unloaded. Consult scale manufacturer’s manual provided and the Maintenance Section of this manual for additional information. Weigh Axle 6-11 Rev. 4/02 3/06 OPERATION MODEL 1050 WAGONS The 1050 electronic scale option includes two compression type load cells, one hitch weigh beam, a scale indicator console for tractor mounting and the required cables, brackets and hardware for mounting. D041102101a D10170504 Hitch Weigh Beam Indicator On Tractor D041002222 Suggested Operation Procedures NOTE: Movement of the wagon will cause the scale indicator reading to fluctuate. Step 1Press “ON” to turn scale on. NOTE: Allow one (1) minute for the scale to warm up (allow 5-10 minutes in cold weather). Step 2Press “ZERO” to zero balance the wagon. Step 3Load wagon. Compression Type Load Cell Step 4Prior to unloading the wagon, press “TARE”. D041002224 Step 5Unload wagon. The negative reading on the scale indicator is pounds unloaded. Record weight. Repeat Steps 4 and 5 each time the wagon is unloaded. Consult scale manufacturer’s manual provided and the Maintenance Section of this manual for additional information. Compression Type Load Cell 6-12 3/05 Rev. 4/02 3/04 OPERATION ELECTRONIC SCALE PRINTING OPTIONS Three printing options are available for use with the electronic scale with the print-ready indicator console. MEMORY DOWNLOADER OPTION D11309902 Memory Converter Cable Interface Cable The first option is a printer which is connected directly to the indicator console. The second option is the Memory Downloader Kit which stores the information in the downloader module for remote printing using any DOS IBM compatible PC and printer. The module will store up to 682 lines of load data. Using the memory converter cable, the printer can also be connected directly to the indicator. The third option is the Data Downloader Kit which stores information in the downloader module for remote printing using any computer and printer with Windows 98/2000 and Windows XP operating systems. The module will store up to 1600 lines (64K bytes) of load data. These printing options allow recording of load ID number, time, date and weight. PRINTER OPTION D11309903 3 ½" Diskette Downloader Module The Memory Downloader Kit option includes the following: 1. A memory converter cable to connect the indicator to the downloader module or a printer. 2. An interface cable to connect the downloader module to the computer serial port. 3. A downloader module which plugs into the memory converter cable to store information and into the interface cable to print information. 4. A 3 ½" program diskette. Consult the Operation & Installation Manual supplied with the memory downloader option for additional information. Included with the printer option, in addition to the printer, is a power cable and a data cable to connect the printer to the scale indicator. Consult the User’s Manual supplied with the printer for additional information. 6-13 Rev.4/02 3/06 OPERATION DATA DOWNLOADER (DDL) OPTION The Data Downloader (DDL) is used to store and transfer data between the indicator and computer. D042203104a Interface Cable System requirements are as follows: • Windows 98/2000/XP/NT Operating System • Serial Port • 32 Meg of RAM • Pentium 100 PC Or Higher • 100 Meg Of Free Disk • CD-Rom Drive CD 1. Insert Data Transfer Utilities software (DTU) into CD-Rom to load. 9-Pin D-Sub Connector 2. Connect the interface and module cables. Downloader Module 3. Connect the interface cable (9-pin D-sub connector) to the serial port on your computer. NOTE: Cable must be securely connected to a COM port to function. Module Cable 4. Connect the module cable to “Serial/J904” port on indicator. Press the “Print” key, when printing is complete remove the module cable only. The Data Downloader Kit option includes the following: 5. Fasten downloader module to interface cable. NOTE: To lock the downloader module to the interface cable, twist the fastener on the downloader module. 1. A module cable to connect the indicator to the downloader module. 2. An interface cable to connect the downloader module to the computer serial “com” port. 6. Follow the instructions included with the DTU software. 3. A downloader module which plugs into the memory converter cable to store information and into the interface cable to print information. To transfer data files to a Microsoft® Excel Spreadsheet (or comparable program): 4. A program CD. 1. Save the scale output to a text file (instructions included with DTU software). 2. With Microsoft® Excel open (a) Select “Data” file menu, select “Import External Data” and then “Import Data”. (b) Select the text file to be transferred. (c) Text import wizard will appear. (d) In original data type section select “delimited” and click the next button. (e) In delimiters section select the space check box and click the next button. (f) Click finish. 3. Import to either the “Existing Worksheet” or “New Worksheet” and click OK. 4. The text file will now appear in separate cells and columns. 6-14 Rev. 4/02 3/06 OPERATION VERTICAL AUGER WORK LIGHT The bolt pattern around the tip extension allows the work light to be repositioned on the top, front or bottom of the spout. NOTE: Fold the auger to the transport or storage position to be sure the work light does not hit the wagon. D05310587 6-15 4/02 Rev. 3/06 OPERATION 6-16 Rev. 3/06 4/02 LUBRICATION The following pages show the location of all lubrication points. Proper lubrication of all moving parts will help ensure efficient operation of your KINZE® 50 Series Grain Auger Wagon and prolong the life of friction producing parts. HORIZONTAL AUGER BEARINGS WHEEL BEARINGS (Wheel/Row Crop/Sof-Tred If bearings sound rough, the hub should be removed and the bearings inspected and replaced if necessary. If bearing replacement is not necessary, pump grease into hub until grease comes out through the seals. Wagons) 58619-23 Bearing hubs should be checked and lubricated annually. IMPORTANT: Remove any grease purged through grease seal on V-belt side of forward horizontal auger hub. See Maintenance Section of this manual if bearing replacement is necessary. DRIVE BELTS AND PULLEYS 10 Bolt Hub Shown Wheel bearings should be checked and lubricated annually. IMPORTANT: Keep all oil and grease off of the Vbelts and belt pulleys. D040302104 Raise wheel off the ground and remove the dust cap. Check for endplay in the bearings by moving the tire in and out. Rotate the tire to check for roughness in the bearings. If bearings sound rough, the hub should be removed and the bearings inspected and replaced if necessary. See “Wheel Bearing Replacement” in the Maintenance Section of this manual. If bearing replacement is not necessary, while the wheel is raised and the dust cap removed, pump grease into the hub until grease comes out through the bearing rollers. Replace dust cap. ENDWHEEL AND MIDWHEEL BEARINGS (Sof-Trak Wagon) 1050trak Model 1050 Wagon W/4-Band (2) V-Belts Shown D052604117 Bearings should be checked and lubricated annually or after every 1000 hours of use, whichever comes first. If bearings sound rough, the hub should be removed and the bearings inspected and replaced if necessary. If bearing replacement is not necessary, pump grease into the hub until grease comes out through the seals. See Maintenance Section of this manual if end wheel or mid wheel bearing replacement is necessary. Model 650 Wagon W/4-Band V-Belt Shown IMPORTANT: Do not use belt dressing on the Vbelts. See “V-Belt Tension Adjustment And Alignment” in Maintenance Section for additional information. 7- Rev. 4/02 3/06 LUBRICATION GEARBOX OIL LEVEL To check oil level, remove the 716" plug from fill/check plug hole on the gearbox shown below. Oil level should be even with fill/check plug hole. Use SAE 90 weight oil. Gearbox Oil Capacities: 650............................................................................. 1 ⅞ Gallons 850............................................................................ 3 ¼ Gallons 1050........................................................................... 4 ⅝ Gallons D040902103 (WGN212) Fill/Check Plug Oil Level Drain Plug Model 650 D052504131 (WGN213) Fill/Check Plug Oil Level Drain Plug Model 850/1050 7- Rev. 4/02 3/05 LUBRICATION GREASE FITTINGS Those parts equipped with grease fittings should be lubricated at the frequency indicated with an SAE multipurpose grease. Be sure to clean the fitting thoroughly before using grease gun. The frequency of lubrication recommended on the following pages is based on normal operating conditions. Severe or unusual conditions may require more frequent attention. NOTE: Disconnect PTO from tractor. Retract PTO assembly and rotate shield to expose grease fitting on PTO slide. (WGN200) Daily Shear Bolt/Overrunning Clutch (Model 650 Wagons) (WGN186/WGN185) Daily Shear Bolt/Overrunning Clutch (Model 850 Wagons/ Model 1050 Wagons Prior To Serial No. 505142) Torque Limiting/Overrunning Clutch (Model 1050 Wagons Serial No. 505142 And On) D041102101a D041002205 Annually Weekly Swivel Hitch (Qty. 1) Horizontal Auger Front Hub (Qty. 1) (Model 1050 Only) IMPORTANT: Extreme operating conditions such as dirt, temperature or speed may require more frequent lubrication. 7- Rev. 4/02 3/05 LUBRICATION D120701109 D01170319b Axle Mount (Qty. 4) - Model 1050 Only Vertical Auger Center Bearing (Qty. 1) D040302107 Weekly D040902113 Horizontal Auger Idler Pivot (Qty. 1) Vertical Auger Upper Bearing (Qty. 1) D052504214 D040902108a Daily Fold Linkage And Hinge (Qty. 5) (Model 850/1050 Wagons) Fold Linkage And Hinge (Qty. 3) (Model 650 Wagons) 58619-23 D04060607 Annually Wheel/Row Crop/Sof-Tred Wagons (10 Bolt Hub) Sof-Tred Wagons (20 Bolt Hub) Wheel Bearings (Qty. 1 Per Wheel Hub) Wheel Bearings (Qty. 1 Per Wheel Hub) IMPORTANT: Extreme operating conditions such as dirt, temperature or speed may require more frequent lubrication. 7- Rev. 4/02 3/06 LUBRICATION 1050trak Sof-Trak Wagon Weekly Axle (2 Per Side) Weekly Axle Pin (1 Per Side) Weekly *Mid Wheel Spindle Bolt (2 Per Mid Wheel Assembly)Weekly *End Wheel Spindle Bolt (2 Per End Wheel Assembly) * Pump grease into hub until grease comes out around the seals. D120701212a D120701212 Row Crop Wagon Daily Qty. 2 - Top And Bottom Qty. 4 - Both Ends Of Each Pin Qty. 2 Qty. 5 Qty. 5 Qty. 2 Qty. 2 - Top And Bottom Qty. 3 Prior To Serial No. 505442 Qty. 4 - One End Of Each Pin Serial No. 505442 And On IMPORTANT: Extreme operating conditions such as dirt, temperature or speed may require more frequent lubrication. Rev. 4/02 3/05 7- LUBRICATION 7- Rev. 4/02 3/05 MAINTENANCE MOUNTING BOLTS AND HARDWARE IMPORTANT: Over tightening hardware can cause as much damage as under tightening. Tightening hardware beyond the recommended range can reduce its shock load capacity. Before operating the machine for the first time, check to be sure all hardware is tight. Check all hardware again after approximately the first 50 hours of operation and at the beginning of each season thereafter. NOTE: Wheel nuts should be checked daily during the first 3 days of use and weekly thereafter.Torque to 350 ft. lbs. See “Wheel Nuts” in the Maintenance Section of this manual. All hardware used on the KINZE® wagon is Grade 5 (high strength) unless otherwise noted. If hardware must be replaced, be sure to replace it with hardware of equal size, strength and thread type. Refer to the torque values chart when tightening hardware. NOTE: Hardware to attach cast iron segments to end wheel hub on Sof-Trak wagons should be torqued to 220 ft. lbs. See “Wheel Nuts” in the Maintenance Section of this manual. TORQUE VALUES CHART - PLATED HARDWARE Bolt Diameter ¼" 516" ⅜" 716" ½" 916" ⅝" ¾" ⅞" 1" 1 ⅛" 1 ¼" 1 ⅜" 1 ½" Grade 2 Coarse Fine 50 In. Lbs. 8 Ft. Lbs. 15 Ft. Lbs. 25 Ft. Lbs. 35 Ft. Lbs. 50 Ft. Lbs. 70 Ft. Lbs. 130 Ft. Lbs. 125 Ft. Lbs. 190 Ft. Lbs. 265 Ft. Lbs. 375 Ft. Lbs. 490 Ft. Lbs. 650 Ft. Lbs. 56 In. Lbs. 9 Ft. Lbs. 17 Ft. Lbs. 27 Ft. Lbs. 40 Ft. Lbs. 60 Ft. Lbs. 80 Ft. Lbs. 145 Ft. Lbs. 140 Ft. Lbs. 205 Ft. Lbs. 300 Ft. Lbs. 415 Ft. Lbs. 560 Ft. Lbs. 730 Ft. Lbs. Grade 5 Coarse 76 In. Lbs. 13 Ft. Lbs. 23 Ft. Lbs. 37 Ft. Lbs. 57 Ft. Lbs. 80 Ft. Lbs. 110 Ft. Lbs. 200 Ft. Lbs. 320 Ft. Lbs. 480 Ft. Lbs. 600 Ft. Lbs. 840 Ft. Lbs. 1100 Ft. Lbs. 1450 Ft. Lbs. Fine 87 In. Lbs. 14 Ft. Lbs. 26 Ft. Lbs. 41 Ft. Lbs. 64 Ft. Lbs. 90 Ft. Lbs. 125 Ft. Lbs. 220 Ft. Lbs. 350 Ft. Lbs. 530 Ft. Lbs. 670 Ft. Lbs. 930 Ft. Lbs. 1250 Ft. Lbs. 1650 Ft. Lbs. Grade 8 Coarse 9 Ft. Lbs. 18 Ft. Lbs. 33 Ft. Lbs. 52 Ft. Lbs. 80 Ft. Lbs. 115 Ft. Lbs. 160 Ft. Lbs. 280 Ft. Lbs. 450 Ft. Lbs. 675 Ft. Lbs. 960 Ft. Lbs. 1360 Ft. Lbs. 1780 Ft. Lbs. 2307 Ft. Lbs. Fine 10 Ft. Lbs. 20 Ft. Lbs. 37 Ft. Lbs. 58 Ft. Lbs. 90 Ft. Lbs. 130 Ft. Lbs. 180 Ft. Lbs. 315 Ft. Lbs. 500 Ft. Lbs. 750 Ft. Lbs. 1075 Ft. Lbs. 1500 Ft. Lbs. 2030 Ft. Lbs. 2670 Ft. Lbs. NOTE: Unplated hardware and bolts with lock nuts should be torqued approximately ⅓ higher than the above values. Bolts lubricated prior to installation should be torqued to 70% of value shown in chart. GRADE 2 No Marks GRADE 5 3 Marks GRADE 8 6 Marks For metric conversion: Multiply inch pounds (In. Lbs.) by .113 to convert to newtons-meters (N•m). Multiply foot pounds (Ft. Lbs.) by 1.356 to convert to newtons-meters (N•m). 8- Rev. 4/02 3/05 MAINTENANCE WIRING DIAGRAM VERTICAL AUGER COUNTER BALANCE VALVES (Model 850/1050 Wagons) (WGN66c) D041102202 *Additional auxiliary work lights are available from KINZE® Repair Parts which may be wired into existing auxiliary light wires in the harness. The vertical auger work light is wired into the black terminal connector. Counter balance valves prevent the auger fold cylinder from extending or retracting without applied hydraulic pressure. If the valve(s) fail to lock the auger in position or fail to function properly, remove the valve(s) from the valve block and check for foreign material. Replace valve if found to be defective. The safety/warning lights standard on 50 Series Grain Auger Wagons meet ASAE standards. For the correct wiring harness to be wired into the lights on your tractor, check with the tractor manufacturer. WARNING: Release hydraulic pressure from the valve assembly before removing counter balance valves.To release hydraulic pressure, slowly loosen the hydraulic hoses coming into the valve block assembly from the cylinder. 69922-35 DANGER: Before applying pressure to the hydraulic system, make sure all connections are tight and hoses and fittings have not been damaged. Hydraulic fluid escaping under pressure can have sufficient force to penetrate skin, causing injury or infection. 8- Rev.4/02 3/05 MAINTENANCE WHEEL NUTS TIRE PRESSURE The wheels are attached to the hubs with press fit bolts through the hub flanges and wheel nuts. Upon any removal and installation of the wheel, clean threads with a wire brush and oil lightly to retard corrosion. Tire pressure should be checked prior to each use of the machine. Maintain tire pressures as follows: Minimum/Maximum 24.5" x 32", 16 Ply, R-3 (650 Wagon)............................................... 35 PSI/40 PSI 30.5" x 32", 16 Ply, R-1 Or R-3 (650/850 Wheel Wagon)............................. 35 PSI/40 PSI 66/43.00 - 25, 16 Ply, R-1 (850 Sof-Tred Wagon)................................ 35 PSI/40 PSI 1050/50R25 172 LI, R-1 (66" x 43" x 25") (850 Sof-Tred Wagon)................................ 35 PSI/40 PSI 520/85R38, R-1 (20.8" x 38") (1050 Row Crop Wagon)............................ 35 PSI/40 PSI 480/80R42, R-1 (18.4" x 42") (1050 Row Crop Wagon)............................ 35 PSI/40 PSI 1250/45-32, 16 Ply, R-1 Bias (76" x 50" x 32") (1050 Sof-Tred Wagon).............................. 25 PSI/35 PSI 58619-23 10 Bolt Hub Shown TORQUE PROCEDURE: DANGER: Rim and tire servicing can be dangerous. Explosive separation of tire and rim parts can cause serious injury or death. Torque wheel nuts to 350 ft. lbs. and retorque periodically thereafter as follows: a. Daily during first 3 days of use. b. Weekly thereafter. DANGER: The multipiece rims used on some Sof-Tred wagons require that specific procedures and safety instructions be followed in mounting and demounting of the tires. Do not attempt to mount a tire unless you have the proper equipment and experience to perform the job. This should only be done by persons properly trained and equipped to do the job. Always maintain the correct tire pressure. Do not inflate the tires above the recommended pressure. When inflating tires, use a clip-on air chuck and extension hose long enough to allow you to stand to one side and NOT in front of or over the tire assembly. Use a safety cage to enclose the tire and rim assembly when inflating. Inspect tires and wheels daily. Do not operate with low pressure, cuts, bubbles, damaged rims or missing wheel bolts and nuts. NOTE: On Sof-Trak machines equipped with cast iron segmented end wheels, torque the hardware which attaches the segments to the hub to 220 ft. lbs. Follow the torque procedure above. 1050trak Hardware That Attaches Segments 8- Rev. 4/02 3/06 MAINTENANCE V-BELT TENSION ADJUSTMENT AND ALIGNMENT - STYLE A (Model 850/1050 Wagons) V-Belt Alignment: 1.Pulleys must be aligned with the fixed idler position. Clearance of 2 ½" must be maintained between rear of belt pulleys and idler. 2.After tightening taper-lock bushing hardware, lay a straight edge across face of the drive and driven belt pulleys to ensure alignment between the grooves on the belts and pulleys and between the idler. WARNING: Never operate wagon when inspection cover is removed. DANGER: Never work around belt drive system or allow anyone else to do so while PTO is running. (A9296a) Lay Straight Edge Across Face Of Drive And Driven Belt Pulleys IMPORTANT: Do not use belt dressing on the Vbelts. IMPORTANT: Keep all oil and grease off of the Vbelts and multi-groove belt pulleys. IMPORTANT: Low belt tension will reduce belt life. 2 ½" The V-belts are tensioned by a spring-loaded idler. Two springs are used to maintain even pressure across the V-belts. The spring length between the flat washers on each threaded actuator rod should be equal and maintained at 3 ⅞"-4". D08290204/A9296 Model 1050 Wagon Shown 3 ⅞"-4" NOTE: Pulleys do not need to be loosened to remove/replace V-belts. NOTE: V-belts should be replaced as a matched pair. See “V-belt Replacement”. 8- Rev.4/02 3/06 MAINTENANCE V-BELT TENSION ADJUSTMENT AND ALIGNMENT - STYLE B (Model 650/850/1050 Wagons) V-Belt Alignment: 1.Pulleys must be aligned with the fixed idler position. Clearance of 2 ½" must be maintained between rear of belt pulleys and idler. 2.After tightening taper-lock bushing hardware, lay a straight edge across face of the drive and driven belt pulleys to ensure alignment between the grooves on the belts and pulleys and between the idler. WARNING: Never operate wagon when inspection cover is removed. DANGER: Never work around belt drive system or allow anyone else to do so while PTO is running. (A10199b) Lay Straight Edge Across Face Of Drive And Driven Belt Pulleys IMPORTANT: Do not use belt dressing on the Vbelts. IMPORTANT: Keep all oil and grease off of the Vbelts and multi-groove belt pulleys. IMPORTANT: Low belt tension will reduce belt life. 2 ½" The V-belts are tensioned by a spring-loaded idler. Two springs are used to maintain even pressure across the V-belts. Set spring tension at 2 ¾" as shown below. D02100438d Model 1050 Wagon Shown NOTE: Pulleys do not need to be loosened to remove/replace V-belts. NOTE: (If Applicable) V-belts should be replaced as a matched pair. See “V-belt Replacement”. 8- Rev. 4/02 3/06 MAINTENANCE V-BELT REPLACEMENT - STYLE A (Model 850/1050 Wagons) 5. Remove L.H. side cover. D08270217 NOTE: Drive and driven sheaves (pulleys) do not need to be loosened to remove/replace belts. NOTE: Wagon must be attached to a tractor to use hydraulic system in later steps. 1. Disconnect PTO shaft from tractor. 2. Remove the four hex head cap screws that secure upper front belt housing cover. Remove upper front cover. D08290208 6. Engage the “on demand” drive system by extending the hydraulic cylinder. D08270205 Idler Engaged 3. Remove hose clamp from PTO shaft cover. D08140204 7. Loosen two carriage bolts on belt slide to gain clearance for belt removal. D08140207 4. Remove the two hex head cap screws on the bottom of the lower front belt housing cover w/PTO shield and remove the cover. D08270218 D08140208 Belt Slide 8- Rev.4/02 3/06 MAINTENANCE 8. Collapse belt tension springs by tightening ⅝" nylon lock nuts. 12. Remove belts and install new belts. NOTE: V-belts should be replaced as a matched pair. D08270215 13. Reinstall idler assembly. 14. Install dump door. 15. Release belt engagement by loosening nylon lock nuts. D08270204 9. Remove dump door. D08290202a 16. Adjust belt slide to within ⅛" of belts when tight. D08270207 ⅛" 10. Remove two ⅝" bolts which secure the idler assembly to the lower auger housing. D08290207 NOTE: Slide must not contact belts during operation. 11. Slide idler assembly to the side for clearance to remove belt from lower pulley. D08270210 8- Rev. 4/02 3/05 MAINTENANCE 3. Remove hose clamp from PTO shaft cover. 17. Check and adjust belt tension. D08140204 IMPORTANT: Do not use belt dressing on the Vbelts. IMPORTANT: Keep all oil and grease off V-belts and belt pulleys. IMPORTANT: Low belt tension will reduce V-belt life. D08290204/A9296 4. Remove the two hex head cap screws on the bottom of the lower front belt housing cover w/PTO shield and remove the cover. D08270218 3 ⅞" - 4" NOTE: Drive and driven sheaves (pulleys) do not need to be loosened to remove/replace V-belts. 5. Remove tire shield, indicator and L.H. side cover. 18. Prior to wagon operation install all covers removed in previous steps. Cycle hydraulic cylinder, which was engaged in STEP 6, between extended and retracted positions to assure proper engagement/disengagement of belt tension idler. D01230416 V-BELT REPLACEMENT - STYLE B (Model 650/850/1050 Wagons) NOTE: Drive and driven sheaves (pulleys) do not need to be loosened to remove/replace belts. Indicator NOTE: Wagon must be attached to a tractor to use hydraulic system in later steps. 1. Disconnect PTO shaft from tractor. 6. Loosen two carriage bolts on belt slide to gain clearance for belt removal. 2. Remove the four hex head cap screws that secure upper front belt housing cover. Remove upper front cover. A10199 D08290208 8- Rev.4/02 3/06 MAINTENANCE 7. Remove linkage bolt. 12. Check and adjust spring dimension. D04120626 D04120625/A9296 Check Spring Adjustment When Disengaged 8. Push idler assembly away from belt. D02100429a 2 ¾" D04120615 516" Clearance When Engaged 9. Remove belts and install new belts. NOTE: 850/1050 V-belts should be replaced as a matched pair. 10. Reinstall linkage. 11. Adjust belt slide to within ⅛" of belts when tight. NOTE: Slide must not contact belts during operation. IMPORTANT: Do not use belt dressing on the Vbelts. A10199c IMPORTANT: Keep all oil and grease off V-belts and belt pulleys. ⅛" IMPORTANT: Low belt tension will reduce V-belt life. 13. Prior to wagon operation install all remaining parts in reverse order as removed in previous steps. 8- Rev. 4/02 3/06 MAINTENANCE DRIVELINE INSPECTION VERTICAL AUGER FOLD ADJUSTMENT (Model 650 Wagon) To ensure long life and dependable service from your auger wagon, the driveline should be inspected after approximately the first 20 loads, at the beginning of each season, and after every 150 loads or annually thereafter. Model 650 vertical auger fold is preset and should require no additional adjustment. However, adjustment may be necessary if the auger housing or cylinder are replaced. Remove inspection cover and proceed as follows: When properly adjusted, the folding linkage should “snap” over-center at the end of the extended stroke of the cylinder.This over-center action holds the unloading auger in position without the need for hydraulic pressure from the cylinder. Make a general inspection of driveline looking for loose hardware. Inspect belt alignment and tension. See “VBelt Tension Adjustment And Alignment” in the Maintenance Section of this manual. DANGER: Stand clear when folding auger. To adjust the folding linkage, loosen jam nut, remove pin from one end of linkage arm and rotate the arm in or out as required. Inspect the three cap screws in each belt pulley bushing and tighten evenly to torque specifications. D052504214 Inspect pulley drive keys making sure they are properly located and tight. Inspect all grease hoses for damage and proper routing. Lubricate all grease fittings. See Lubrication Section of this manual. Check gearbox oil level. Inspect bearings and seals in gearbox. Inspect PTO attaching hardware and safety shields. If the linkage arm is adjusted, the auger housing stop bracket (located on the grain tank and used when the auger is folded for transport) will need to be adjusted. Repair or replace worn or damaged parts. 8-10 Rev.4/02 3/05 MAINTENANCE UPPER VERTICAL AUGER REPLACEMENT (WGN211) Flange Bearing Model 1050 - Prior To Serial No. 505442 (WGN158) ½" ⅝" Hardware And Bearing Spindle Remove Hardware Model 1050 - Serial No. 505442 And On (WGN197a/A9297a) Sleeve Bolt Auger Drive Lug Onto Lower Portion Of Auger ½" Position the vertical auger in a horizontal position as illustrated. Remove ¾" hardware from center of bearing, ⅝" spring plate hardware and ⅝" spring mounting hardware. Remove spring plate, flange bearing and sleeve. Pull auger out of the bottom of the auger housing. Remove ⅝" hardware securing bearing spindle and remove bearing spindle. Install bearing spindle onto replacement auger. Install replacement auger inside auger housing. Locate auger with ½" (See Illustration) between bottom of hinge plate and end of auger assembly. Drive Lug Must Align With Auger Flighting As Shown Below Reinstall sleeve, flange bearing and spring plate. No additional auger timing is needed if drive lug, in lower portion of auger, is oriented properly. (If Applicable) 8-11 Rev. 4/02 3/06 MAINTENANCE LOWER VERTICAL AUGER REPLACEMENT (WGN151n) ¾" x 5" Cap Screw Drive Lug D042103206b Hanger Bearing Bracket ½" x 2" Round Key ⅝" x 2" Cap Screws Bullet Spindle ⅜" Hole Lower Vertical Auger Position the vertical auger in the shipping/transport folded position as shown. Remove ¾" x 5" cap screw at top of lower vertical auger and remove hanger bearing bracket components from auger. After removal of auger from tube, remove four ⅝" x 2" cap screws that attach bullet spindle to the top of the lower vertical auger. Install bullet spindle onto top of replacement auger aligning ⅜" hole in auger with ⅜" hole in bullet spindle. Position hanger bearing bracket components onto top of replacement auger. Torque ¾" x 5" cap screw at top of lower auger to 200 ft. lbs. Remove the four ½" x 1 ½" hanger bearing bracket carriage bolts at the upper end of the lower vertical auger. Carefully work the hanger bearing bracket loose from auger housing. Position a strap around the auger as shown below. Be sure the strap is tight against the auger center tube. Pull the auger and hanger bearing assembly out of the auger housing. IMPORTANT: Caution should be used not to bend the hanger bearing bracket. Lower replacement auger into lower auger housing and onto lower drive lugs. Position hanger bearing bracket with the split in the bracket in “up” position. Install four hanger bearing carriage bolts and nuts and tighten. D051303101a Drive lug should be positioned approximately 120° or 180° around from the end of the auger flighting as shown below. D042103206b Drive Lug End Of Auger Flighting 8-12 Rev. 4/02 3/06 MAINTENANCE HORIZONTAL AUGER REPLACEMENT GEARBOX D052504248a D052504131 Model 650 Wagon Model 650 Wagon Photo Shown With Gearbox Cover Removed D040303101a D040902103 Model 850/1050 Wagons Remove cap screws and lock nuts (8 on 650; 10 on 850/1050) that secure rear inspection cover and remove the inspection cover and bearing hub assembly. Model 850/1050 Wagons Photo Shown With Gearbox Cover Removed Pull the horizontal auger through the opening at the rear of the wagon. The hose coming from the upper hole in the gearbox is equipped with a relief fitting which acts as a breather. The lower hole on the gearbox is used to check oil level or to add oil. Oil level should be even with the plug hole. See “Gearbox Oil Level” in Lubrication Section of this manual for oil specifications and capacities. Install replacement horizontal auger with full pitch portion of auger to the front and half pitch portion of auger to the rear of the wagon. The auger pilot plate on the front of the auger has one 3 ⅜" pilot hole and four ¾" drive pin holes. The auger pilot plate at the rear of the wagon has one 2" pilot hole and three ¾" drive pin holes. A drain hole is located on the opposite side (bottom) of the gearbox. Check to ensure auger engages drive pins at front and rear. Check the rear spindle, hub and bearings for roughness or wear. Replace worn or damaged parts, readjust bearing preload. Assemble hub with spindle into the rear inspection cover. Reinstall inspection cover, making sure drive pins on rear bearing hub engage mating auger holes properly. Torque hardware to specifications. Timing of the horizontal auger is not required. 8-13 Rev. 4/02 3/06 MAINTENANCE TRACK ALIGNMENT (Sof-Trak Wagon) TRACK TENSION (Sof-Trak Wagon) 1050trak 1" Adjusting Bolt 1050trak 1 ¼" Spindle Bolt ¾" Cap Screws Sidebar ¾" Cap Screws Model 1050 Wagon With 36" Sof-Trak Shown Model 1050 Wagon With 36" Sof-Trak Shown When properly aligned, the track centering lugs should run centered between the end wheel segments as the lugs enter the end wheels when the tracks are rotated. Proper track alignment is important and should be checked daily to ensure maximum life of the tracks. There should be approximately 1" to 2" sag in the track at the midpoint between the front and rear end wheels. To check for proper tension, lay a straight edge across the complete length of the track. Measure the distance between the track and the straight edge at the midpoint. Misalignment may cause rubbing between the guide lugs on the track and the end wheel segments. NOTE:The centering lugs, on 36" tracks, may lightly touch the bottom of the channel in the top center of the track chassis. Alignment adjustment is made by loosening the four ¾" attachment cap screws on each sidebar and extending or retracting the sidebar(s) until proper alignment is obtained. Extending the sidebar (turning 1" adjusting bolt clockwise) closest to the end wheel showing evidence of misalignment or retracting the sidebar (turning the 1" adjusting bolt counterclockwise) on the end wheel on the opposite side will move the centering lugs away from the end wheel. Retighten the four ¾" cap screws on each sidebar. Torque attachment hardware to 220 ft. lbs. Tighten inside and outside sidebars equally. If adjustment is needed, loosen the four ¾" attachment cap screws on the inside sidebar and the four ¾" attachment cap screws on the outside sidebar on one end (front or rear) of the track assembly. Turn the 1" adjusting bolt on the end of each sidebar in or out equal amounts according to the adjustment needed. Retighten the four ¾" cap screws on each sidebar. Torque attachment hardware to 220 ft. lbs. For additional adjustment it may be necessary to repeat the above procedure on the opposite end of the track assembly. Sidebar 8-14 Rev.4/02 3/05 MAINTENANCE INSIDE TIRE REPAIR OR REMOVAL D073102102 (Row Crop Wagon) In order to repair or remove the inside tire on the Row Crop wagon, the complete tire/axle assembly on that side of the wagon must be removed. IMPORTANT: If there is grain in the wagon, it must be unloaded. Make sure the wagon is on level ground that is firm enough to support the weight of the wagon while the wagon is raised. Hitch the wagon to a tractor to stabilize the wagon fore and aft. D073102101a Place blocking under the wagon at the rear undercarriage/frame to support the wagon and lower the jack until the frame is supported by the blocking. The blocking must be placed in such a way as to give a wide base of support. D073102104 Place a hydraulic jack under the wagon undercarriage/ frame just ahead of the tire/axle assembly. Mark position of axle front and rear. Remove the eye bolts that secure the tire assemblies to the front and rear undercarriages. Raise the wagon until weight is removed from the assembly and there is enough clearance between the axle assembly and undercarriage so the tire/axle assembly can be raised slightly to remove. Remove the tire/axle assembly using a forklift or loader. IMPORTANT: Care must be taken to prevent pulling or pushing the wagon off the support blocking while removing and installing the assembly. D073102103 DANGER: Never work around or under the wagon with the tire/axle assembly removed. Remove wheel nuts and remove tire from hub. DANGER: Rim and tire servicing can be dangerous. Explosive separation of tire and rim parts can cause serious injury or death. After tire repair is completed, reinstall tire/wheel onto hub. Lubricate wheel nut threads. Install and torque wheel nuts to 350 ft. lbs. See “Wheel Nuts”. 8-15 (Continued) Rev. 4/02 3/05 MAINTENANCE (Continued From Preceding Page) NOTE: Below illustrations viewed from rear of wagon. Offsets in rims are exaggerated to show positioning. NOTE: Be sure tire is reinstalled with the offset in the rim to the same side as previously installed. RH050490(WGN17/WGN57) 30" 37 ½" Reposition tire/axle assembly under wagon at previously marked axle adjustment. Install eye bolts and cap screws. Torque 1 ½" eye bolts to 930 ft. lbs. and ⅞" hardware to 350 ft. lbs. NOTE: Retorque wheel nuts as follows: a. After 4 hours use. b. After 16 hours use. c. Weekly during season. Dual wheel installation with Dual wheel installation with offset in rims positioned offset in rims positioned outward for 30" row spacing. inward for wide row spacing. DANGER: Never transport Row Crop wagon, load Row Crop wagon with grain or unfold Row Crop wagon upper vertical auger with outer wheels removed. D120701101 AXLE ADJUSTMENT (1050 Row Crop Wagon) The tire/wheel spacing on Row Crop wagon can be set for 30" to 40" row spacings. Row spacing is determined by axle adjustment and tire rim position. DANGER: Never transport Row Crop wagon, load Row Crop wagon with grain or unfold Row Crop wagon upper vertical auger with outer wheels removed. Row Crop wagons are shipped with the outer wheel removed and the axle and inner wheel rims installed for 30" row spacing. For field operation with 30" row spacing, install the outer wheel assembly onto each side of the wagon with the offset in the rim to the outside as shown at right. Torque wheel nuts to 350 ft. lbs. NOTE: Measure from center of wagon to center of tire to ensure all tires are properly spaced. If wider row spacing is desired, remove the complete tire/axle assembly. Reverse the inner wheel so the offset in the rim is to the outside of the wagon as shown below. Follow the procedure described in “Inside Tire Repair Or Removal” for raising the wagon and removing the inside tire. Reposition tire/axle assembly outward from the 30" row spacing location to desired setting. Torque 1 ¼" eye bolts to 930 ft. lbs. and ⅞" hardware to 350 ft. lbs. Install outer wheels with offset in rim to the inside. Torque wheel nuts to 350 ft. lbs. Repeat procedure on opposite side of wagon. NOTE: 8-16 Retorque wheel nuts as follows: a. After 4 hours use. b. After 16 hours use. c. Weekly during season. Rev. 4/02 3/04 MAINTENANCE AXLE ADJUSTMENT (1050 Sof-Trak Wagon) The Sof-Trak wagon is factory assembled with the axle in the shipping position and must be extended to a 108" or 120" operating position. Adjustment holes in the center axle allow for the axle setting to be adjusted. (WGN13c) AXLE ADJUSTMENT (850/1050 Sof-Tred Wagons) Sof-Tred wagon stub axles may be moved inward for narrower width for shipping. After shipment and prior to use, always check to be sure the stub axles are extended to the tire center-to-center operating position shown below to provide adequate tire-tograin tank clearance. (WGN155v) 4 ⅝" MOUNTING LOCATION FOR SHIPPING ONLY 6 ⅛" 108" POSITION 108" - 850 Wagon 96" - 1050 Wagon (Shown) AXLE ADJUSTMENT (650/850 Wheel Wagons) 13 ⅝" 120" POSITION 1050 Wagon (WGN190) NOTE: Each axle stub has two holes. Remove the 1" x 12" cap screws on the center axle. Slide the axle stubs out approximately 1 ½" and reinstall cap screws in inner set of holes for 108" center-to-center axle setting. Slide axle stubs out approximately 9" and reinstall cap screws in outer set of holes for 120" centerto-center axle setting. Torque bolts to 480 ft. lbs. WARNING: Loads with a high center of gravity may cause instability or rollover when operating the wagon on hillsides or in rough terrain. 650/850 wheel wagons are factory assembled with the axle in the shipping position and must be extended to a 108" or 120" center-to-center tire operating position. Adjustment holes in the center axle allow for the axle width to be adjusted. (WGN189a) 11 ¼" 12 ¾" MOUNTING LOCATION FOR SHIPPING ONLY 108" POSITION 120" POSITION 18 ¾" (WGN189c) NOTE: Each axle stub has two holes. Remove the 1" x 12" cap screws on the center axle. Slide the axle stubs out approximately 1 ½" and reinstall cap screws in inner set of holes for 108" center-to-center axle setting. Slide axle stubs out approximately 7 ½" and reinstall cap screws in outer set of holes for 120" centerto-center tire setting. Torque bolts to 480 ft. lbs. 8-17 Rev. 4/02 3/05 MAINTENANCE ELECTRONIC SCALE ELECTRONIC SCALE (Model 650 Wheel Wagon) (Model 850 Wheel/Sof-Tred Wagons) The major elements of the electronic scale are the indicator, two 3 ¾" (high-strength) weigh axles, 2 ½" hitch weigh beam with sleeve, the junction box (j-box) and the battery power cable. The major elements of the electronic scale are the indicator, two 3 ¾" (high-strength) weigh axles, 3 ¾" hitch weigh beam, the junction box (j-box) and the battery power cable. (WGN52l) (WGN52m) L.H. Weigh Axle L.H. Weigh Axle Junction Box Junction Box R.H. Weigh Axle R.H. Weigh Axle Hitch Weigh Beam Indicator (On Tractor) Hitch Weigh Beam Indicator (On Tractor) Battery Power Cable Red (+) Black (-) Battery Power Cable Red (+) Black (-) For additional information see “Electronic Scale Troubleshooting” for step-by-step procedures for troubleshooting failures that may be encountered with the electronic scale. For additional information see “Electronic Scale Troubleshooting” for step-by-step procedures for troubleshooting failures that may be encountered with the electronic scale. The only tools required are as follows: Small Screwdriver (Straight Blade) No. 2 Phillips Screwdriver The only tools required are as follows: Small Screwdriver (Straight Blade) No. 2 Phillips Screwdriver 8-18 Rev. 4/02 3/06 MAINTENANCE ELECTRONIC SCALE (Model 1050 Row Crop/Sof-Tred/Sof-Trak Wagons) The major elements of the electronic scale are the indicator, two 50,000 lb. rated compression type load cells at the rear of the axle assembly, 3 ¾" hitch weigh beam, the junction box (j-box) and the battery power cable. (WGN52n) L.H. Axle Load Cell R.H. Axle Load Cell Junction Box Indicator (On Tractor) Hitch Weigh Beam Battery Power Cable Red (+) Black (-) For additional information see “Electronic Scale Troubleshooting” for step-by-step procedures for troubleshooting failures that may be encountered with the electronic scale. The only tools required are as follows: Small Screwdriver (Straight Blade) No. 2 Phillips Screwdriver 8-19 Rev. 4/02 3/06 MAINTENANCE ELECTRONIC SCALE TROUBLESHOOTING Yes Does the indicator come on? Is the reading on the indicator stable? If the display is unstable, or flashes “±”, disconnect the j-box cable from the indicator. Is the display still unstable? No Yes Stand on, or hang your weight over each load cell. Does the indicator respond to your weight when you stand or hang on the scale. Yes Does the scale weigh you correctly with your weight over any of the load cells? NOTE: Are the readings all positive? If not, the load cell is upside down. Yes No No Check j-box and all load cell cables for cuts or pinched/flat spots. Yes Your indicator is probably defective. Try another indicator to verify. NOTE : Be aware of electrical interference that might affect your scale such as: mobile phones, CB radios, radio towers, electrical motors, etc. Also make sure load cell cables are not tie strapped to hydraulic lines or the hydraulic reservoir. No Does the scale weigh you approximately the same over all 3 load cells? Yes The indicator is probably not set up and calibrated correctly. Check the decal on the bottom of the indicator. The decal shows for what type of load cells the indicator was calibrated. By pressing the “on” key while the indicator is already on, you will get the indicator’s “set-up” and “cal” numbers. Write these down and see if they compare to the set-up and calibration numbers on the indicator. Contact your dealer for further information. No Remove the cover from the j-box. Is there moisture in the j-box? Yes No Dry out your j-box. No Defective Indicator: If you suspect a bad indicator, the easiest way to check is to try another indicator. Even if the indicator is a different model, or is set-up for a different scale, it at least should come on. Poor Connection: Poor connections can be tricky. If in doubt, don’t just tighten the connection, take them apart and clean them first. Any connection with rust or paint should be sanded or wire brushed. Weak Battery: If you suspect the battery, try replacing it with another one. Don’t be fooled if using a voltmeter to test your battery. A weak battery may test good if checked when there is no load on the battery. Defective Power Cord: Make sure the power cord’s red wire is connected to the plus (+) positive side of the battery, and the black (-) negative wire is connected to the negative side of the battery. If using a multimeter to check for voltage, measure between pin 1 (pos) and pin 2 (neg). The meter should read between 10.5 and 14.5 volts DC. If using a tractor power cord, the black wire on the tractor power cord is positive and the white wire is negative. Look for loose connections. If you watch the indicator display while moving around the wires inside the j-box, and by pressing on the j-box printed circuit board, you will see if there is a loose connection or poor solder joint. Continued on top of next page. 8-20 Rev.4/02 3/05 MAINTENANCE ELECTRONIC SCALE TROUBLESHOOTING Continued from bottom of previous page. Fix or replace the j-box Yes Have you found a poor connection or a loose wire? No 1. Disconnect all the load cell wires from the terminal blocks inside the j-box. (You can leave the indicator on while connecting or disconnecting the load cell wires, you will not damage the load cells or indicator if wires are shorted during this step.) 2. Zero balance the indicator. (First press “Net/Gross” then “Zero”) The indicator should display “0”. 3. Connect one load cell back into one of the terminals in the j-box. NOTE: The reading you get for each load cell and how much weight is dependent on the size and type of load cell and how much weight is over each load cell. In general, the number should be a positive and be stable. NOTE: You are going to hook up the load cells to the j-box one at a time (meaning only one load cell connected at a time). The purpose of this is to get a reading for each load cell. Also, while performing this test, you should watch for any other symptoms such as erratic/unstable display, indicator flashing “±Range”, or a negative reading, etc. If the indicator reading should ever appear abnormal with any load cell connected, that load cell is probably defective. 4. Write down the indicator reading with the load cell connected. 6. Disconnect the first load cell and reconnect a second one. Write down the indicator reading for that load cell. Stand or hang your weight over the connected load cell. Write down how much the weight increased with your weight over the load cell. 7. Disconnect the second load cell and reconnect the third load cell. Also write down the indicator reading for that load cell. Stand or hang your weight over the connected load cell. Write down how much the weight increased with your weight over the load cell. NOTE: If the scale responded to your weight, that’s verification that the j-box is ok. If the scale did not respond to your weight, either that load cell or the j-box are defective. Try another load cell. If the scale still shows no response to your weight, the jbox is probably defective. 5. Stand or hang your weight over the connected load cell. Write down how much the weight increased with your weight over the load cell. (Don’t be alarmed by the reading, a scale with only one load cell connected will weigh heavy.) Do not expect the load cells to give you the same reading. It is common for each load cell to have a reading that is hundreds of pounds, maybe even thousands of pounds, different than the others, especially when one load cell is carrying more weight than the others. (Example: The axle load cells will be carrying more weight than the hitch weigh beam.) 8. A defective load cell will cause a reading that is either unstable, or makes the indicator flash “±Range”, or is more than three times greater, or less than the average of the others. Additionally, the readings of your weight over each load cell should be similar. (Probably 2-3 times your actual weight, but similar to each other.) Any differences in the readings could be an indication of a defective load cell or a structural problem. 8-21 Rev. 4/02 3/05 MAINTENANCE DATA DOWNLOADER TROUBLESHOOTING PROBLEM POSSIBLE CAUSE SOLUTION Warning no device match was found. Poor connection to cable. Check for proper connection to cable. Poor connection of cable to serial port Check for proper connection of cable to of computer. serial port of computer. Not connected to correct serial port. Check port setting in the DTU program to be sure DDL is on the correct serial port. Faulty DDL. Try another DDL. Other software installed that uses same If any other installed software that reserial port. quires a serial port is trying to run and there is only one serial port, the second software will not be able to run. If the DTU software had been loaded first and then the (eg. Palm Pilot) software, the Palm software could have a problem. This is a hardware allocation problem. For sites that need to run both, a second serial port must be added or you have to turn off all other software packages that may be using the 1 serial port. No such file or directory. File was not saved. Resave file. File saved as incorrect format. Save file as a text file (.txt). Data was not saved in a valid Windows Resave file in valid Windows file folder file folder and/or directory. and/or directory. Data will not transfer to PC. Poor connection to cable. Check for proper connection to cable. Poor connection of cable to serial port of Check for proper connection of cable to computer. serial port of computer. Some information is not listed. Dialog box and program locks up (not responding). Not connected to correct serial port. Check port setting in the DTU program to be sure DDL is on the correct serial port. 64K capacity of the DDL is filled. Check capacity. Information may of been overwritten. Resave file. Computer error. CRTL-ALT-DEL and end task, then restart computer. 8-22 Rev. 4/02 3/06 MAINTENANCE 2. Remove double nuts and slide spindle from hub. END WHEEL/MID WHEEL BEARING REPLACEMENT (Sof-Trak Wagon) 3. Remove bearings, seals and cups and discard. Clean and dry hub. 1. End Wheel Procedure: To remove an end wheel, position a jack at the axle and raise the side of the machine. Mark the position of both the inside and outside sidebars nearest the end wheel being serviced. Loosen the four ¾" cap screws and 1 ¼" spindle bolt on each sidebar. Loosen the 1" adjusting bolt on each sidebar. Remove the sidebars on the side next to the end wheel being serviced. Remove wheel cap screws and special washers that secure the nuts for front half of the end wheel segments and remove the segments. Remove end wheel. 4. Press in new bearing cups with thickest edge facing in. 5. Pack bearings with heavy duty wheel bearing grease thoroughly forcing grease between roller cone and bearing cage. Also fill the space between the bearing cups in the hub with grease. 6. Place inner bearing in place and install seal. 7. Clean spindle and install in hub. (WGN138d) 8. Install outer bearing, seal and stepped nut. Tighten stepped nut until there is some drag when the spindle is rotated. This assures that all bearing surfaces are in contact. Back off stepped nut ¼ turn or until there is only slight drag when rotating the hub. Install jam nut to lock against stepped nut. Outer Jam Outer Outer Inner Inner Inner Spindle Nut Seal Cup Cup Seal Spindle Bolt Bolt Washer Stepped Outer End Wheel Nut Bearing Hub 9. End Wheel Procedure: After the end wheel has been reinstalled and the segment hardware torqued to 220 ft. lbs., reinstall the sidebars. Extend sidebars to the previously marked positions and tighten all hardware. Torque ¾" cap screws to 220 ft. lbs. and 1 ¼" spindle bolt to 1360 ft. lbs. Check track alignment and track tension. Adjust if necessary. Spindle Inner Bearing Mid Wheel Procedure: To remove a mid wheel, position a jack at the axle and raise the side of the machine. Mark the position of both the inside and outside sidebars nearest the mid wheel being serviced. Loosen the four ¾" cap screws and 1 ¼" spindle bolt on each sidebar. Loosen the 1" adjusting bolt on each sidebar. Remove the sidebars on the side next to the mid wheel being serviced. Remove the end wheel (See end wheel procedure above) nearest the mid wheel being serviced. Drop the mid wheel to clear the track carriage and roll it to the closest end of the track for removal. If there is a mid wheel between the end wheel and the mid wheel being serviced, it must be removed also. Mid Wheel Procedure: Raise mid wheel assembly into position under the track carriage, install inner and outer spindle bolts and torque to 1360 ft. lbs. Install end wheel. Install the sidebars. Extend sidebars to the previously marked positions and tighten all hardware. Torque ¾" cap screws to 220 ft. lbs. and 1 ¼" spindle bolt to 1360 ft. lbs. Check track alignment and track tension. Adjust if necessary. NOTE: Retorque end wheel segment hardware as follows: a. After 4 hours use. b. After 16 hours use. c. Weekly during season. (WGN44a) Outer Jam Outer Outer Inner Inner Inner Spindle Nut Seal Cup Cup Seal Spindle Bolt Bolt Washer Stepped Outer Mid Wheel Nut Bearing Hub Spindle NOTE: Retorque end wheel segment hardware as follows: a. After 4 hours use. b. After 16 hours use. c. Weekly during season. NOTE: Each mid wheel and end wheel spindle bolt is equipped with a grease fitting (2 per assembly) for lubrication. Inner Bearing 8-23 Rev. 4/02 3/06 MAINTENANCE WHEEL BEARING REPLACEMENT Wheel/Row Crop Wagons Sof-Tred Wagons (Prior To Serial No. 506295) (Wheel/Row Crop/Sof-Tred Wagons) HTA002(WGN19a) NOTE: See “Inside Tire Repair Or Removal” section of this manual for instruction on tire removal/access to inner wheel hubs on Row Crop wagons. Cotter Pin Cap Seal Wheel Nut Washer Stud Bolt Hub Spindle Inner Bearing 1. Raise tire clear of ground and remove wheel. 2. Remove dust cap attachment hardware and remove cap from wheel hub. 3. Remove cotter pin, axle nut and 2" washer. Screw Dust Cap 4. Slide hub from axle spindle, using a hub puller if necessary. 5. Remove bearings and cups from hub and discard. Thoroughly clean and dry wheel hub. Outer Bearing Bearing Cups Seal Slotted Nut Sof-Tred Wagons (Serial No. 506295 And On) WGN216 6. Press in new bearing cups with thickest edges facing in. Inner Bearing 7. Pack bearing with heavy duty wheel bearing grease, thoroughly forcing grease between roller cone and bearing cage. Also fill the space between the bearing cups in the hub with grease. Inner Cup Hex Nut Hub Spindle Stub Bolt Seal Cotter Pin Washer Seal Slotted Nut 8. Place inner bearing in hub and press in new grease seal with lip pointing towards bearing. Dust Cap 9. Clean axle spindle and install hub. Inner Cup Bolt 10. Install outer bearing, 2" washer and slotted hex nut. Tighten slotted hex nut while rotating the hub until there is some drag. This ensures that all bearing surfaces are in contact. Back off slotted nut to nearest locking slot and install cotter pin. Check for endplay in bearings. 11. Fill dust cap half full of wheel bearing grease and install on hub with attachment bolts. 12. Lubricate wheel nuts and install wheel. Remove jack. Torque wheel nuts to 350 ft. lbs. NOTE: Wheel hubs on KINZE® wagons contain high strength ductile iron material. If hub replacement is required, replace with proper part. 8-24 Rev.4/02 3/06 MAINTENANCE PREPARATION FOR STORAGE Always store the machine in a dry sheltered area if possible. Remove all trash that may be wrapped on shafts and remove dirt that can draw moisture. Remove auger inspection cover at front of wagon and dump door on underside of grain tank at rear of wagon. Clean out all accumulated grain and debris from auger chamber. Wash machine inside and out. Lubricate machine at all lubrication points. If possible, remove weight from all tires, particularly if the unit is being stored outdoors. Repaint any areas where paint has been removed. This is particularly important in the inside of the grain tank. Rust in this area will shorten the life of the wagon as well as prevent grain from smoothly sliding to the bottom of the tank. Inspect the machine for parts that are in need of replacement and order during the “off” season. Coat exposed surface of all cylinder piston rods with grease or rust preventative spray. 8-25 Rev. 4/02 3/06 MAINTENANCE 8-26 Rev. 4/02 3/06