1
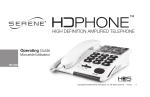
HIGH DEFINITION AMPLIFIED TELEPHONE
Operating Guide
Manuel de l’utilisateur
HD 40S
Copyright © 2008 Serene Innovations, Inc. All rights reserved.
06-08
!
Important safety Instructions
WARNING – When using telephone equipment or electric appliances, basic precautions should always be followed to reduce the risk
of fire, electrical shock and injury to persons, including the following:
1. Read all the instructions before using the appliance.
2. To reduce the risk of injury, close supervision is
necessary when an appliance is used near children.
3. Do not contact moving parts or any exposed metal
surface.
4. Only use attachments recommended or sold by the
manufacturer.
5. Do not use outdoors. Do not use near water, for
example, near a bath tub, wash bowl, kitchen sink or
laundry tub, in a wet basement or near a swimming
pool.
6. To disconnect, turn all controls to the off position,
then remove plug from outlet.
7.
Do not unplug by pulling on cord. To unplug, grasp
the plug, not the cord.
8. Unplug from outlet when not in use and before servicing or
cleaning.
9. Do not operate any appliance with a damaged cord or plug, or
after the appliance malfunctions or is dropped or damaged in
any manner. Return appliance to the nearest authorized service
facility for examination, repair, or electrical or mechanical
adjustment.
10. Use only the power cord and batteries indicated in the manual.
Do not dispose of batteries in fire. They may explode. Check
local codes for possible special disposal instructions.
11. Plug any power adapter to the socket-outlet that near the
equipment and should be easily accessible.
12. Avoid using any telephone product during an electrical storm.
There may be a remote risk of electric shock from lightning.
13. Do not use the telephone to report a gas leak in the vicinity of
the leak.
“SAVE THESE INSTRUCTIONS”
2
English
Package Contents
Your package includes all the items as shown here. If there
is anything missing, please contact our Customer Care
Department immediately. Note: Use only a class 2 power
adapter, 9 vdc, 300 ma
OUT VOL. Lo < 1 2 3 4> Hi
OUT AMPLIFY
IN VOL.
HD- 40S
Lo Batt
Connections
Connect your phone as shown. When
finished, lift handset to test. If you hear a
dial tone, your telephone is ready. If not,
check all connections again.
4
English
Wall Mounting
1
2
3
1. Slide out the handset hook, turn it upside down and reinsert. This hook keeps the
handset in place when wall mounted.
2. Fit the wall mount bracket into the base of the phone.
3. Connect the short phone cord. Align and put the mounting holes over the heads
of the wall plate screws (make sure the screw head protrude enough, if not, use a
screw driver to adjust) and slide the phone downward slightly to lock the phone in
place.
1
2
3
4
5
6
7
9
10
OUT AMPLIFY
OUT VOL. Lo <1 2 3 4> Hi
8
IN VOL.
HD-40S
Lo Batt
15
6
14
12
13
11
16
English
Feature Identification
1. Handset hook (for wall mounting use only).
10. Ringer Tone (to select a ring tone to suit your hearing).
2. One-touch memory dialing buttons.
11. Out Amplifier (button to manually turn the amplifier On or Off
3. Hold (press to put call on hold and to mute the handset, lift the
handset or a quick press of the hook switch releases the Hold).
4. Prog (press to program number into memory).
for out-going speech amplification. The ring around the button
will light up when the Amplifier is On).
12. 4-positions Out Volume Control to amplify, from low to high,
the out-going speech volume.
5. Pause (press this to put a pause in a string of dialing numbers when
13. In Volume Control to amplify the in-coming sound of the
6. Flash (press to switch between current call and the call waiting).
14. Amplify indicator (It lights up to indicate the handset amplifier
programming memory dialing; for example, between your long
distant service access number and the number you are dialing)
7.
Redial (This is a dual function button. It is a last number redial
button during normal usage. However, it becomes as a PAUSE
button during memory programming. Press this button inserts
a 2-second PAUSE into the phone number string. For example:
9 PAUSE 755 8222 dials 9 and then pause for 2-second before
dialing out rest of the phone number.)
8. Tone / Pulse (This slide switch selects tone dialing or pulse dialing.
Tone dialing is faster.)
9. Ringer Volume (to select a ringing volume level to suit your hearing).
handset. This amplifier is operational ONLY when the Outgoing Amplifier is turned Off .
is on.)
15. Call-on-hold visual indicator.
16. Out-going Amplifier Auto On/Off (On=the amplifier will come
on automatically and set at the previous amplification level
every time you lift the handset. Off=the amplifier will not come
on automatically; you must press the Out-going Amplifier to
turn on the amplifier).
Amplifying Outgoing Speach
Automatically
Amplifying Incoming
Sound
T
T
OU
OU
<1
<1
L.
Lo
VO
L.
L.
Lo
VO
L.
IN
VO
VO
IN
2
2
3
3
4>
4>
Hi
Hi
T
OU
OU
T
IF
IFY
PL
PL
AM
AM
Y
on the underside to the On position.
2. While on the phone, adjust the Out
Volume Control, from 1 (low ) to 4
(high) until the other party can hear
you clearly. This only needs to be done
8
0S
0S
1. Set the Amplifier Auto On/Off switch
-4
-4
HD
HD
1
2
the first time you use the phone, it will
return to the same setting every time
you use the phone.
3. To turn off the speech amplification (for
person with normal speech volume),
just press the Out Amplifier button.
1.
1
Slide this control until you hear
comfortably. This amplifier is
operationally ONLY when the Outgoing Amplifier is turned Off.
English
Amplifying Outgoing Speach Manually
OU
T
VO
IN
L.
L.
Lo
VO
<1
2
3
4>
Hi
OU
T
AM
PL
IFY
HD
-4
1. Set the Amplifier Auto On/Off to Off.
2. While on the phone, press the Out-going Amplifier
button to turn it On.
3.
Adjust the Out Volume Control if necessary until
the other party can hear you clearly.
2
0S
1
3
4. The Out Amplifier will turn off automatically when
you hang-up.
Programming Number for One-Touch Memory Dialing
1
3
2
4
1. Lift the handset, press PROG.
2. Dial the phone number you wish to save (maximum of 15
digits).
3. Press PROG again.
4. Press the memory button you wish to store the phone
number, then hang up the phone.
10
English
Insert Photo in Memory Button
1
2
3
Cut your photos using the template provided as a guide. Lift the transparent cover of
the memory button and insert the photo. Replace the cover when finished.
Troubleshooting
If you encounter any difficulties, please check the following before calling our Customer Care Department for assistance.
The phone does not ring or rings very soft when there is an incoming call
Check and make sure the ringer volume switch on the side of the phone is set to HI or MED. If this switch is set to LO,
the phone rings very soft.
No Dial Tone
12
1.
Check and make sure all the phone cords are connected properly and securely.
2.
Make sure the phone wall outlet is working properly by trying the phone with another phone wall outlet.
3.
If there is still no dial tone, there may be a problem with your phone line and you need to contact your telephone
company.
4.
If there is dial tone on another telephone in your house, there may be a problem with this phone and contact our
Customer Care Department for assistance.
English
Warranty Service Information
Your HD Phone comes with one-year limited warranty. We warrant during this warranty period, from the date of purchase, to the
original consumer, the HD Phone to be free from defects in materials and workmanship under intended home use. In the event
that HD Phone fails to function properly within one year of original purchase due to defects in materials or workmanship, return
the unit (freight prepaid) with proof of purchase (sales receipt or packing slip, no exceptions) to Serene Innovations. Serene
Innovations will either repair or replace the unit (with a refurbished unit or unit of equal condition) and return it to you (using UPS/
USPS ground shipping) at no cost to you if the unit is returned within 30 days of purchase. If the unit is returned after 30days of
purchase but within the warranty period, there will be a warranty handling charge of $9.95 for each return.
This warranty does not apply to any product that has been accidentally damaged, abused, misused or negligent, used
on electrical frequency or voltage other than marked on product and/or described in manual. Defects or errors caused by
unauthorized alterations, repairs, and/or tampering are also not covered by this warranty.
This Warranty gives you specific legal rights, and you may also have other legal rights that vary from states to states.
If a defect covered by this warranty should occur, promptly contact a Customer Care Representative by phone or log onto www.
sereneinnovations.com to obtain a Return Authorization Number (RAN) and shipping instructions before shipping the product
to us. Any shipment without a RAN will not be accepted and will be returned to you at your expense. Any authorized returned
product must be accompanied with proof of purchase and a brief explanation of the problem.
For out of warranty repaired and service, please contact our Customer Care Department for directions.
FCC Compliance
This equipment complies with Part 68 of the FCC
Rules. On the equipment is a label that contains,
among other information, the FCC registration
number and ringer equivalence number (REN)
for this equipment. If requested; this information
must be provided to your telephone company.
Your telephone company may make changes in
its facilities, equipment, operations or procedures
that could affect the proper functioning of
your equipment. If they do, you will be notified
in advance to give you an opportunity to
maintain uninterrupted telephone service.
If your home has specialty wired alarm equipment
connected to the telephone line, ensure the
installation of this equipment does not disable
your alarm equipment. If you have questions
about what will disable alarm equipment, consult
your telephone company or a qualified installer.
This equipment uses the following Universal Service
Order Codes (“USOC”) jacks: RJ-11. Connection
to the telephone network should be made by using
standard modular telephone jack type RJ11.
In the event this equipment should fail to operate
properly, disconnect the unit from the telephone
line. Try using another FCC approved telephone
in the same telephone jack. If the trouble persists,
call the telephone company repair service bureau.
This equipment is hearing aid compatible.
The REN is useful to determine the quantity of
devices you may connect to your telephone line
and still have all of those devices ring when your
telephone number is called. In most, but not all
areas, the sum of the RENs of all devices connected
to one line should not exceed five (5.0). To be
certain of the number of devices you may connect
to your line, as determined by the REN, you
should contact your local telephone company to
determine the maximum REN for your calling area.
If your telephone equipment causes harm to
the telephone network, the telephone company
may discontinue your service temporarily. If
possible, they will notify you in advance. But if
advance notice is not practical, you will be notified
as soon as possible. You will be informed of
your right to file a complaint with the FCC.
14
If the trouble does not persist and appears to be with
this unit, disconnect the unit from the telephone line
and discontinue use of the unit until it is repaired.
For repair or warranty information, please contact
Serene Innovations, Inc. at 562- 407 5400. Please
note that the telephone company may ask that you
disconnect this equipment from the telephone network
until the problem has been corrected or until you’re
sure that the equipment is not malfunctioning.
There are no user serviceable parts in this equipment.
This equipment may not be used on coin
service provided by the telephone company.
Connection to party lines is subject to state
tariffs. Contact the state public utility commission,
public service commission for information.
This device complies with Part 15 of FCC Rules.
Operation is subject to the following two conditions:
1. This device may not cause harmful interference, and
2. This device must accept any interference
received, including interference that
may cause undesired operation.
Operating Environment for Home or Office Use
Notice: This equipment has been tested and found
to comply with the limits of a Class B digital device,
pursuant to Part 15 of the FCC Rules. These limits
are designed to provide reasonable protection against
harmful interference in a residential installation. This
equipment generates, uses and can radiate radio
frequency energy and, if not installed and used in
accordance with the instructions, may cause harmful
interference to radio communications. However, there
is no guarantee that interference will not occur in a
particular installation, if this equipment does cause
harmful interference to radio or television reception,
English
which can be determined by turning the equipment
off and on, the user is encouraged to try to correct the
interference by one or more of the following measures:
• Reorient or relocate the receiving antenna.
• Increase the separation between
the equipment and receiver.
• Connect the equipment into an outlet
on a circuit different from that to which
the receiver is connected.
• Consult the dealer or an experienced
radio/TV technician for help.
Modification: Any modification not expressly
approved by the manufacturer of this device could
void the user’s authority to operate the device.
NOTICE: The Industry Canada label
identifies certified equipment.
This certification means that the equipment
meets telecommunications network protective,
operational and safety requirements as
prescribed in the appropriate Terminal Equipment
Technical Requirements document(s). The
Department does not guarantee the equipment
will operate to the user’s satisfaction.
Before installing this equipment, users should ensure
that it is permissible to be connected to the facilities
of the local telecommunications company. The
equipment must also be installed using an acceptable
method of connection. The customer should be aware
that compliance with the above conditions may not
prevent degradation of service in some situations.
Repairs to certified equipment should be coordinated
by a representative designated by the supplier.
Any repairs or alterations made by the user to this
equipment, or equipment malfunctions, may give
the telecommunications company cause to request
the user to disconnect the equipment. Users should
ensure for their own protection that the electrical
ground connections of the power utility, telephone
lines and internal metallic water pipe system, if
present, are connected together. This precaution
may be particularly important in rural areas.
The Class B digital apparatus meets all
requirements of the Canadian InterferenceCausing Equipment Regulation.
Cet appareil numberique de la Class B
respecte toures les exigencies du Reglement
sur le materiel brouilleur du Canada.
Caution: Users should not attempt to make such
connections themselves, but should contact
the appropriate electric inspections authority, or
electrician, as appropriate. The REN for this amplified
telephone as stated on the IC regulatory label located
on the bottom of the product is REN # 0.9B
NOTICE: The Ringer Equivalence Number (REN)
assigned to each terminal device provides an
indication of the maximum number of terminals
allowed to be connected to a telephone interface.
The termination on an interface may consist of
any combination of devices subject only to the
requirement that the sum of the Ringer Equivalence
Numbers of all the devices does not exceed 5.
Conseils de sécurité important
ATTENTION – Quand vous utilisez de l’équipement téléphonique ou des appareils ménagers, vous devriez suivre certaines règles de base de
sécurité pour réduire les risques d’incendies, de chocs électriques et blessures corporelles, incluant celles qui suivent;
1. Lire toutes les instructions avant d’utiliser un appareil.
2. Pour réduire les risques de blessure, la supervision d’un
adulte est nécessaire quand l’appareil est utilisé près
d’un enfant.
3. Ne pas touchez les pièces en mouvement ou une
surface métallique exposé.
4. N’utilisez que des attaches recommandé ou vendu par
le fabriquant.
5. Ne pas utilisez à l’extérieur. Ne pas utilisez près de l’eau
ou d’une source d’eau, près d’un bain, d’un bol à main,
d’un évier, bac à lessiver, dans un sous-sol humide ou
près d’une piscine par exemple.
6. Pour déconnecter, mettre tout les interrupteurs horstension, puis débrancher l’appareil du mur.
7.
16
Ne pas débrancher en tirant sur le fil. Tirez plutôt sur la
prise, non le fil.
8. Débrancher de la prise murale lorsque vous n’utilisez pas
l’appareil, ou avant l’entretien et nettoyage de l’appareil.
9. Ne pas utilisez un appareil qui a un fil ou une prise de
branchement endommagé, qui a connu une défaillance, qui a
été échappé ou qui a été endommagé de n’importe quelle façon.
Veuillez retourner l’appareil au service de réparation autorisé
près de chez vous pour une évaluation, réparation ou pour un
ajustement mécanique ou électrique.
10. Utilisez seulement les piles et la prise de branchements
mentionnés dans le livret d’instruction. Ne jetez pas des piles
dans le feu, car elles peuvent exploser. Recherchez plutôt des
organismes locaux sur la façon de disposez de vos piles.
11. Branchez le bloc d’alimentation dans une prise murale près de
l’appareil et qui est facilement accessible.
12. Évitez d’utiliser des appareils téléphoniques lors d’orages. Ils y a
danger d’électrocution par la foudre.
13. N’utilisez pas un téléphone près d’une fuite de gaz pour rapporter
cette fuite.
Français
Contenu de l’emballage
L’emballage devrait contenir tout les items
qui sont illustrés ici. Si quoi que ce soit est
manquant, contactez notre service d’aide à la
clientèle immédiatement.
OUT VOL. Lo < 1 2 3 4> Hi
OUT AMPLIFY
IN VOL.
HD- 40S
Lo Batt
Branchement
Branchez votre téléphone comme illustré
ci-dessous. Lorsque terminé, décrochez-le
combiné pour le tester. Si vous entendez
une tonalité, votre téléphone est prêt
pour l’utilisation. Sinon, vérifiez tous les
branchements.
18
Français
Montage Mural
1
2
3
1. Retirez le crochet du combiné, retournez-le (le bas vers le haut), puis réinsérez-le dans son
emplacement. Le crochet tien le combiné en place lorsque l’appareil est monté sur un mur.
2. Insérez le support mural dans la base du téléphone.
3. Branchez la ligne de téléphone. Alignez et placez les trous de montages au dessus des têtes
de vis de la plaque murale (Assurez vous que les têtes-de-vis ressortent assez des trous,
sinon utiliser un tournevis pour ajuster) et faite glisser vers le bas le téléphone pour verrouiller
le téléphone en place.
1
2
3
4
5
6
7
9
10
OUT AMPLIFY
OUT VOL. Lo <1 2 3 4> Hi
8
IN VOL.
HD-40S
Lo Batt
15
20
14
12
13
11
16
Français
Liste des spécifications
1. Crochet à combiné (Pour montage mural
seulement)
2. Touche d’appel rapide
3. «Hold» Touche de mise en attente (Appuyez
sur la touche pour mettre un appel en attente
et couper le son du combiné, décrochez le
combiné ou appuyer une fois rapidement sur
l’interrupteur du combiné, pour reprendre
l’appel en cours).
4. «Prog» Touche de mémorisation (Appuyez sur
cette touche pour mémoriser un numéro sur
une touche d’appel rapide.
5. Pause (appuyez sur cette touche pour insérer
une pause de composition dans une suite de
numéros lors de la programmation mémoire;
par exemple lorsque vous utilisez un code
d’appel interurbain et ensuite le numéro que
vous voulez rejoindre)
6. Ne pas utilisez à l’extérieur. Ne pas utilisez
près de l’eau ou d’une source d’eau, près
d’un bain, d’un bol à main, d’un évier, bac à
lessiver, dans un sous-sol humide ou près
d’une piscine par exemple.
7.
«Redial» Touche de recomposition (Ceci est
une touche à deux fonctions. Elle recompose
le dernier numéro composé si vous l’utiliser
en usage normal, et elle permet de faire une
pause lors de la programmation d’une touche
d’appel rapide. Par exemple : 9 PAUSE 7558222 composera le 9, puis fera une pause de
2 secondes avant de composer le reste du
numéro.
8. «Tone/Pulse» Tonalité/Pulsation (Ce curseur
permet de sélectionner la composition par
tonalité ou la composition par pulsation. La
composition par tonalité est plus rapide)
9. Curseur du volume de la sonnerie (Permet
d’ajuster le volume de la sonnerie à vos
besoins)
10. Curseur de la tonalité de la sonnerie (Permet
d’ajuste la tonalité de la sonnerie à vos
besoins)
11. Amplificateur de voix (appuyez sur
cette touche pour activer et désactiver
l’amplification de votre voix. Le cercle autour
de la touche s’allumera lors de l’activation de
cette fonction).
12. Contrôle de volume de l’amplificateur de
voix; interrupteur 4 positions, permettant
les réglages de bas (low) à élevé (high) de
l’amplification de votre voix
13. Contrôle du volume d’écoute, pour amplifier
le volume d’écoute du combiné. Cette
fonction est opérationnelle SEULEMENT si
l’amplificateur de voix est désactivé
14. Indicateur d’appel en attente
15. Marche/Arrêt automatique de l’amplification
(Marche : l’amplification s’activera
automatiquement et retourner au dernier
niveau d’ajustement activer sur votre appareil
à chaque fois que vous décrocherez le
combiné. Arrêt : l’amplification ne s’activera
pas de lui-même, vous devez appuyer
sur la touche Amplification pour activer
l’amplification).
16. Contrôle automatique de l’amplification (sous
le boitier)
(On= l’amplificateur s’activeras
automatiquement lorsque vous décrochez le
téléphone et garde en mémoire le réglage de
volume du dernier appel. Off=l’amplificateur
ne s’activeras pas automatiquement; vous
devez appuyer sur la touche Amplificateur de
voix pour activer la fonction).
De
Amplification Automatique De Votre Voix Amplification
L’écoute Au Combiné
T
T
OU
OU
L.
<1
<1
L.
Lo
VO
L.
Lo
VO
L.
IN
VO
VO
IN
2
2
3
3
4>
4>
Hi
Hi
T
OU
OU
T
IF
IFY
PL
PL
AM
AM
Y
l’interrupteur d’amplification de votre voix
sur la position ON.
2. Lors de votre premier appel, ajustez le
contrôle de volume de l’amplificateur
de voix entre 1 bas (low) et 4 élevé
(high) jusqu’à ce que votre interlocuteur
22
0S
0S
1. Sous le boitier du téléphone, réglez
-4
-4
HD
HD
1
2
vous entende bien. Vous n’aurez
qu’à faire ce réglage qu’une seule fois
puisque la fonction automatique garde
en mémoire vos réglages de volume
pour les appels suivants.
3. Pour désactiver l’amplification de la voix
(utilisateur ayant une voix forte), appuyez
sur la touche Amplificateur de voix.
1.
1
Ajustez cette glissière pour augmenter
le volume du combiné jusqu’à ce que
vous entendiez bien. Cette fonction
est opérationnelle SEULEMENT si
l’amplificateur de voix est désactivé.
Français
Amplifying Outgoing Speach Manually
OU
T
VO
IN
L.
L.
Lo
VO
<1
2
3
4>
Hi
OU
T
AM
PL
IFY
HD
-4
1.
Appuyez sur la touche Amplificateur de voix.
2.
Lors d’un appel, appuyez sur la touche Amplificateur de
voix pour l’activer.
3.
Ajustez le contrôle de volume de l’amplificateur de voix
jusqu’à ce que votre interlocuteur vous entende bien.
2
4.
0S
1
3
L’amplificateur de voix se désactivera lorsque
vous raccrochez le combiné.
Programmation des touches d’appel rapide
1
2
3
4
1. Décrochez le combiné et appuyez sur la touche PROG (Programmation)
2. Composez le numéro de téléphone que vous désirez sauvegarder (Maximum de 15 chiffres).
3. Appuyez sur la touche d’appel rapide sur laquelle vous désirez sauvegarder le numéro de
téléphone, puis raccrocher le combiné.
24
Français
Pour insérer des photos dans les touches d’appel rapide
1
2
3
Coupez vos photos selon le patron guide inclus. Soulevez le papier protecteur transparent de
la touche d’appel rapide et insérez la photo. Replacez le papier lorsque terminé
Guide de dépannage rapide
Si vous éprouvez des difficultés, veuillez consulter ce qui suit avant de contacter notre département de Service à la clientèle.
Le téléphone ne sonne pas ou sonne très faiblement lors d’un appel
Vérifiez que le volume de la sonnerie soit sur la position HI ou MED (Haut ou Moyen). Si le volume est placé à LO (bas), le téléphone
sonnera que très faiblement.
Aucune tonalité
26
1.
Vérifiez que tout les fils sont bien branchés au téléphone.
2.
Vérifiez que la prise de téléphone murale fonctionne bien en branchant le téléphone dans une autre prise murale.
3.
S’il n’y a aucune tonalité, il y a peut-être un problème avec votre ligne téléphonique et vous devrez contacter votre compagnie de
téléphone.
4.
S’il y a une tonalité sur un autre téléphone, il y a peut-être un problème avec votre appareil HD40P, contactez notre département de
Service à la clientèle pour de l’aide.
Français
Information sur la garantie de service
Votre téléphone HD et fourni avec une garantie limitée de un an. Nous garantissons que durant cette période, à partir de la date
d’achat, le propriétaire original du téléphone est protégé des défectuosités des pièces et mains d’œuvres, vous n’avez qu’à retourner
l’appareil (frais de transport prépayés) avec une preuve d’achat (reçu de magasin ou reçu de colis) à Serene Innovations. Serene
Innovations va soit remplacer ou réparer l’unité (avec des pièces neuves ou dans un état semblable) et vous le retourner (par UPS/
Poste livraison par lien terrestre) sans frais si l’appareil est retourné dans un délai de 30 jours à partir de la date d’achat. Si l’appareil
est retourné après les 30 jours, mais pendant la période de garantie, de frais de 9,95 $ seront appliqué a chaque retour.
Cette garantie ne s’applique pas aux produits ayant été endommagé accidentellement, sur utilisé, mal utilisé or utilisé de manière
négligente, utilisé sur un voltage ou une fréquence électrique différente qu’indiqué sur le produit ou décrit dans le manuel. Les
défectuosités et les erreurs causés par des modifications non autorisées, des réparations et/ou ouverture du boitier ne sont
également pas couvert par la garantie.
Cette Garantie vous donnes des droits légaux spécifiques, et vous posséder également d’autres droits, dépendant de l’état dans
lequel vous vivez.
Si une défectuosité couverte par cette garantie se produit, contactez rapidement un représentant de notre département de Service
à la clientèle par téléphone ou visitez le www.sereneinnovations.com pour obtenir un numéro d’autorisation de retour (NAR) ainsi que
les instructions d’envoie pour nous retourner le produit. Tous les envois sans numéro d’autorisation de retour ne seront pas accepter
et vous serons retournés à vos frais. Tous les produits autorisés pour un retour doivent être accompagnés par une preuve d’achat
et une brève explication du problème. Pour plus de renseignement sur des réparations et services hors garantie, contactez notre
département de Service à la clientèle.
Français
Le logo d’Industrie Canada identifie les
appareils qui ont été certifié.
Cette certification signifie que l’appareil
réponds aux demandes de sécurité,
d’opération et de protection des réseaux
de télécommunications, comme décrit
dans les documents concernant les
spécification techniques des équipements
terminaux appropriés. Le département
ne garantie pas que cet appareil va
répondre aux attentes de l’utilisateur.
Avant d’installer cet appareil, les utilisateurs
devraient s’assuré qu’ils ont la permission
de se connecter au réseau de la compagnie
de télécommunications. L’appareil doit
aussi être installé et connecté selon des
méthodes acceptables. Le client devrait
être savoir qu’être conforme avec les
conditions ci-dessus peut ne pas prévenir la
détérioration du service dans certain cas.
28
Les réparations effectuées sur un appareil
certifié devraient être effectué par un
représentant désigné par le détaillant.
Toutes réparations ou modifications
fait par l’utilisateur sur cet appareil,
ou mal fonctionnement de l’appareil
peut donner à la compagnie de
téléphone la nécessité de demander à
l’utilisateur de débrancher l’appareil.
Les utilisateurs devraient s’assuré, pour
leur propres protections, que les mises
à terre des sources de courants, lignes
téléphoniques et réseaux de plomberie
métalliques interne, si présentes,
soient toutes reliées entre elles.
Cette précaution est particulièrement
importante dans les régions rurales.
La class B des appareils numériques
réponds à tous les exigences des
règlements canadiens sur les appareils
causant de l’interférence.
Attention : Les utilisateurs ne devraient pas
tenter de faire des connections de mises
à terre par eux-mêmes, mais devraient
plutôt contacter un maître-électricien ou
une autre autorité compétente approprié.
Le REN pour ce téléphone amplifié,
comme définie dans le logo IC situé sous
le dessous d’appareil est REN # 0.9B
Note : L’indice de sonnerie équivalente (REN)
donner a chaque terminal donne un nombre
maximum de terminal permis de connexion
a une interface téléphonique. Le nombre
de terminal sur un ligne téléphonique peut
consister de n’importe quel montant, sujette
seulement à la limite REN maximum de 5.
Serene Innovations, Inc.
13421 Pumice Street
Norwalk, Ca. 90650
(562) 407-5400
www.sereneinnovations.com