1
GE
Security
NetworX Series
TM
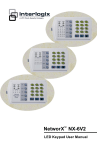
NX-1348E-ICON Icon keypad
User manual
g
imagination at work
NX-1348E-ICON User manual
Page 2
23/07/05
TABLE OF CONTENTS
TABLE OF CONTENTS ..................................................................................................................................................................3
INTRODUCTION ...........................................................................................................................................................................4
GLOSSARY OF TERMS ..................................................................................................................................................................5
EMERGENCY ACTIVATION KEYS ................................................................................................................................................6
ICON KEYPAD DISPLAY & LED’S................................................................................................................................................7
UNDERSTANDING THE ICONS ........................................................................................................................................................................................... 7
UNDERSTANDING THE LED’S ........................................................................................................................................................................................... 9
KEYPAD FUNCTIONS .................................................................................................................................................................10
ARMING YOUR SYSTEM IN THE “AWAY” MODE ...........................................................................................................................................................10
ARMING YOUR SYSTEM IN THE “STAY MODE”..............................................................................................................................................................10
USING THE QUICK ARM (OPTIONAL) .............................................................................................................................................................................11
CHANGING MODES WHILE SYSTEM ARMED ...................................................................................................................................................................11
DISARMING THE SYSTEM .................................................................................................................................................................................................11
CANCEL / ABORT FEATURE (OPTIONAL) ...................................................................................................................................................................11
BYPASSING ZONES ...........................................................................................................................................................................................................11
GROUP BYPASS.................................................................................................................................................................................................................12
UNBYPASSING ZONES ......................................................................................................................................................................................................12
TURNING THE DOOR CHIME ON AND OFF...................................................................................................................................................................12
ADDING AND CHANGING USER CODES .................................................................................................................................12
ASSIGNING USER CODE AUTHORITY LEVELS ........................................................................................................................13
OTHER KEYPAD FUNCTIONS ....................................................................................................................................................14
SETTING THE KEYPAD TONE ............................................................................................................................................................................................14
CHANGE PARTITION (OPTIONAL).....................................................................................................................................................................................14
VIEW ALARM MEMORY .....................................................................................................................................................................................................14
TEST FUNCTION (OPTIONAL)............................................................................................................................................................................................14
RESET FUNCTION..............................................................................................................................................................................................................14
SET SYSTEM DATE .............................................................................................................................................................................................................15
SETTING THE SYSTEM CLOCK ..........................................................................................................................................................................................15
SETTING THE KEYPAD BRIGHTNESS ................................................................................................................................................................................15
SERVICE MENU ...........................................................................................................................................................................16
KEYPAD CONTROL TONES (BEEPS)..........................................................................................................................................17
NX-1348E-ICON User manual
Page 3
23/07/05
INTRODUCTION
This manual is furnished to help you understand your security system and become proficient in its operation. All
users of your security system should read and follow the instructions in this booklet and, if possible, practice on the
keypad control while your professional installer is on site. Failure to do so could result in the security system not
working properly. Please keep this booklet in an accessible location for the life of the security system. If you do not
understand any part of this manual you should notify your installing company.
The SECURITY CONTROL can be turned on (ARMED) and off (DISARMED) by entering a 4 or 6 digit code into the
Keypad Control, which is similar to a telephone keypad. If your Security Control has been so programmed, you may
be able to turn on (ARM) your System by simply pressing the [STAY] or [EXIT] key. The system must always be
disarmed using a 4 or 6 digit code. The LED keypad includes up to 61 icons and a built-in electronic sounder. These
provide specific information relating to the status of the security system which is described in the booklet.
Understanding what the icons and sounds mean will help you easily operate your system.
Keep in mind, the level of security you will obtain with this system relates specifically with two major factors:
1.
2.
The quantity, quality and placement of security devices attached to this system.
The knowledge you have of the security system and how that knowledge is utilized in a weekly test of the
complete system.
You should be aware of the following facts when preparing a safety/security plan for your home/business.
Your security system is an electronic device and is subject to failure or malfunction. Do not rely on it as your
single source of security.
Your system should be tested weekly.
Your system will not work without power.
Warning devices will need to be loud enough, wired correctly, and properly placed to provide notification of an
alarm event.
Smoke and heat detectors may not detect heat and smoke in all situations.Use qualified security professionals
to install and maintain your security system.
It may be possible to arm the security system without the backup battery connected. Your periodic test should
be done with AC Power removed to verify the battery is connected and adequately charged.
Care should be taken to plug in and restrain the AC Transformer after testing.
Please read the following information and instructions carefully before operating your security control system.
NX-1348E-ICON User manual
Page 4
23/07/05
GLOSSARY OF TERMS
Abort Delay
Authority Level
Central Station
Chime Feature
Codes
Duress Code
Forced Arming
Function Code
Group Bypass
Instant/Delay
Master Code
Partitioned System
Perimeter
Quick Arm
User Code
NX-1348E-ICON User manual
An option that allows a delay in reporting to the central station.
The level of access an individual has when using an alarm panel.
The location where alarm data is sent during an alarm report.
An option that allows the keypad to sound a ding-dong
whenever an entry/exit door is opened.
Can be either User Codes (relating to a person) or Function Codes
(a toggle switch to turn specific functions on/off). NOTE: A
system may have either four-digit codes or six-digit codes, but
not a mixture of the two.
An option that allows a special code to be sent to the central
station that indicates the alarm system is being operated under
duress.
An option that allows the system to be turned on (ARMED) with
one or more zones open. A system that is ready to be “force
armed” will flash the ready icon. (Note: Those zones that are not
ready will not create an alarm.)
A Function Code is either a four (4) or six (6) digit code that has
been programmed by the installer to operate a device.
An option that allows the user to bypass multiple zones with a
single operation.
An option that allows an instant alarm condition for Entry/Exit
doors, or grants a delay to allow someone to enter/exit the
building without an alarm, or before entering a user code to
disarm.
A master arm/disarm code that can program other user codes.
A system divided into multiple areas in which its own user or
users control each area.
The outer edge of the protected area.
An option that allows you to turn on (ARM) the security system by
pressing either the [STAY] or [EXIT] key on the keypad control (for
ARMING only) as programmed by the installing company.
A four (4) or six (6) digit entry code used to arm or disarm the
system.
Page 5
23/07/05
EMERGENCY ACTIVATION KEYS
NOTES: You must hold these keys for 2 seconds to activate these functions. Your system may not be programmed
for these activation keys. You should press these keys only in an emergency situation that requires response by
emergency personnel. If your system is programmed for these functions, the following reports can be sent.
Fire Key – This key can activate the fire alarm when pressed for two seconds. If your system is connected to a
monitoring center, an emergency report could be sent to that center.
Auxiliary Emergency Key – This key can activate the auxiliary alarm when pressed for two seconds. If your system
is connected to a monitoring center, an emergency report could be sent to that center.
Police (Panic/Hold-Up) Key - This key can sound a local audible alarm when pressed for two seconds. If your
system is connected to a monitoring center, an emergency report could be transmitted to that center. NOTE: Some
Panic/Hold-Up alarms are programmed to be silent at the protected site while reporting an alarm to the monitoring
center. Check with your installing company to determine how your security system will respond to the Panic/HoldUp activation.
NX-1348E-ICON User manual
Page 6
23/07/05
ICON KEYPAD DISPLAY & LED’S
Understanding the icons
ARMED ICON
The armed icon is “on” when the system is armed. The armed icon is “off” when it is disarmed. The armed
icon will flash when there has been an alarm during the previous arm cycle.
FIRE ICON
A steady fire icon means a fire zone has been faulted. A rapidly flashing fire icon means that a fire zone is in a
trouble condition.
INSTANT ICON
The instant icon is “on” when there is no delay on your entry/exit door(s). Any time the instant icon is “on” and
the exit delay has expired, the opening of an entry/exit door will produce an immediate alarm. The instant icon
can be toggled on or off by pressing the [Stay] key while the system is armed. When the instant icon is “off”,
the entry/exit door(s) is delayed.
NX-1348E-ICON User manual
Page 7
23/07/05
LISTEN-IN ICON
Listen-in icon is on when an NX-534E audio module is active in listen-in mode.
POWER ICON
The power icon is on if the mains power is on. It will be off if there is no mains. The power icon will flash if the
System has a low battery condition.
READY ICON
The ready icon is “on” when the system is ready to arm and “flashes” if ready to force arm.
NOT READY ICON
The not ready icon is on when the system is not ready to arm because of a zone(s) being faulted.
ALARM ICON
The alarm icon is flashing when an alarm has occurred.
SILENCED ICON
The silenced icon appears after a code has been entered to silence the siren but the zone has not been
cleared.
TAMPER ICON
The tamper icon is on when a zone(s) is tampered. Press [r]–[2] and refer to the Service Menu section of this
manual for further instructions.
SERVICE ICON
The service icon is on when a tamper occurs or when the system requires service. Press [r]–[2] and refer to the
Service Menu section of this manual for further instructions.
TROUBLE ICON
The trouble icon is on when a dayzone(s) are faulted or when there is a trouble in the system.
ENTER CODE ICON
The enter code icon is on whenever a valid code should be entered on the keypad.
1.. 48 ZONE ICON
The zone icons are “off” when everything is normal. A zone icon will be “on” if the zone has been bypassed. If
a zone icon is “flashing”, that zone is in alarm or has been faulted. If a zone icon is “flashing” rapidly, it means
that the zone is in a trouble condition.
NX-1348E-ICON User manual
Page 8
23/07/05
Understanding the LED’s
STAY LED
The stay led is “on” when all interior (motion detector) zones are bypassed.
CHIME LED
The chime led is “on” when the chime feature is “on”; “off” otherwise.
EXIT LED
The exit led is “on” during the exit delay. Please note that the led will flash during the
last 10 seconds of the exit delay as a warning that the time is running out. (The user may
want to disarm the system if the exit led is flashing in order to prevent an alarm. The user
may then re-arm the system and exit before the delay expires.)
BYPASS LED
The bypass led is “on” when any zone in this keypad’s partition is bypassed. The zone(s)
that is bypassed will also be illuminated. If the bypass led is “off”, no zones are bypassed.
CANCEL LED
The cancel led will flash during an abort delay time. If a code is entered followed by the
[CANCEL] key while this led is flashing, all abortable reports will stop the communication
process. Note: The abort feature must be enabled. Entering a code followed by the
[CANCEL] key during or after an alarm report to the central station will cause the cancel
led to come on. It will stay on until the central station has received the cancel report.
Note: The cancel feature must be enabled.
NX-1348E-ICON User manual
Page 9
23/07/05
KEYPAD FUNCTIONS
Arming your system in the “AWAY” mode
AWAY is used when the user is away from the premise and wants the interior protected.
Step 1
Close all protected doors and windows.
• Ready icon will be on or flashing when all protected zones and sensors are secure. NOTE: If any
zones are bypassed, a sensor in that zone can be violated without affecting the ready icon.
• The security system will not arm if the not ready icon is on or flashing.
• If the power icon is off, you have no AC power. Restore power if possible. If not, contact your
installing company.
Step 2 Enter your 4 or 6 digit user code to arm the system.
• The armed icon and exit led will illuminate.
• You may now leave the building.
NOTE: The exit led will flash rapidly for the last 10 seconds of the exit delay as a warning to the user that the exit
time is about to expire. The user may wish to disarm and rearm the system if more time is needed.
Arming your system in the “STAY mode”
STAY is used when the user is inside the premise and wants protection around the perimeter.
Step 1 Close all protected doors and windows.
• Ready icon must be on or flashing when all protected zones and sensors are secure. NOTE: If any
zones are bypassed, a sensor in that zone can be violated without affecting the ready icon.
• The security system will not arm if the not ready icon is on or flashing.
• If the power icon is off, you have no AC power. Restore power if possible. If not, contact your
installing company for service.
Step 2 •
•
•
Step 3 •
•
•
Step 4 •
•
Enter your 4 or 6 digit user code.
If “Auto Bypass” is enabled, all interior zones will be bypassed if you do not leave through
designated entry/exit door. If Auto Bypass is enabled, omit Step 3.
When “Auto Instant” is enabled, if you do not leave through a designated entry/exit door the
instant icon will illuminate indicating that the entry/exit doors no longer have an entry delay. If
“Auto Instant” is enabled, omit Step 4.
Press the [STAY] key.
The stay led will illuminate indicating that all interior zones are bypassed. (All interior devices will
bypass automatically, giving the user freedom of movement within the interior area.)
The bypass led will illuminate if any zone(s) are bypassed. If any zone(s) have been bypassed
previously by the user, the icon(s) corresponding to the bypassed zone(s) will illuminate, alerting
the user that a zone(s) may be unprotected and can be faulted without an alarm.
To toggle from a “delayed entry” mode to an “Instant” mode, press the [STAY] key again.
The instant icon will illuminate indicating that the entry/exit doors have no entry delay.
NX-1348E-ICON User manual
Page 10
23/07/05
Using the Quick Arm (optional)
The Quick Arm feature may be used if it is enabled. Quick Arm will allow the user to arm the security system in the
AWAY mode by pressing the [EXIT] key, or arm in the STAY mode by pressing the [STAY] key. This feature is used for
ARMING ONLY, and will not disarm the security system. This is ideal for a maid or baby sitter code, etc.
Changing modes while system armed
Pressing the [STAY] key will turn on/off (toggle) a delay on entry/exit doors and turn on/off (toggle) the instant
icon.
(Optional) Press the [BYPASS] key at this time to turn on/off (toggle) all designated interior zones.
(Optional) When armed, pressing the [EXIT] key will start the exit delay, enabling you to leave the building.
IMPORTANT!
The instant icon needs to be off at this time if you plan on re-entering the building; otherwise you will create an
alarm. You may restore an entry delay by pressing the [STAY] key again.
Disarming the system
When you enter the protected area through one of the designated Entry/Exit doors, the keypad control will sound a
continuous tone for the duration of the entry delay time, or until you enter a valid code. The armed icon will go off
and the tone will stop. The security system is now DISARMED. If a valid code is not entered before the end of the
entry delay, an alarm will occur. (NOTE: If the armed icon is flashing during the entry delay, the alarm system
has been activated in your absence. Leave the building immediately and call your alarm company and/or the
police from a safe location.)
CANCEL / ABORT feature (optional)
The cancel led will flash during an abort delay time. If a code is entered followed by the [CANCEL] key while this led
is flashing, all abortable reports will stop the communication process. Entering a code followed by the [CANCEL] key
during or after an alarm report to the central station will cause the cancel led to come on. It will stay on until the
central station has received the cancel report.
Bypassing zones
If you wish to bypass one or more zones, this must be done while the system is in the disarmed state. The following
steps are used for bypassing zones:
Step 1
Step 2
Step 3
Step 4
Step 5
Step 6
Press the [BYPASS] key.
Enter user code, if required (optional). The bypass led flashes.
Enter 1 or 2 digits indicating the zone you wish to bypass, i.e. press the [1] key for zone 1, press [1]-[2] for
zone 12.
Press the [BYPASS] key again.
The corresponding zone icon will illuminate indicating the zone has been bypassed. Repeat steps 3 and 4
for any other zone(s) that need to be bypassed.
Press the [BYPASS] key again -or- press the [#] key to exit the Bypass Mode. The bypass led will stop
flashing upon exiting the Bypass Mode.
NX-1348E-ICON User manual
Page 11
23/07/05
Group bypass
By pressing the [BYPASS] key, followed by the [0] key, then the [BYPASS] key again, all zones that are designated as
group bypass zones will be bypassed. Press the [BYPASS] key again -or- press the [#] key to exit group bypassing.
Unbypassing zones
To manually unbypass zones, perform the bypassing procedure on a zone that is already bypassed. The
corresponding icon for that zone will go off when unbypassed. NOTE: All zones will automatically be unbypassed
each time the system is disarmed.
Turning the door chime ON and OFF
The door chime is turned on or off by pressing the [CHIME] key while the system is in the disarmed state. If the
chime is on the chime led will be illuminated. If the chime is off, the chime led will be off. Each press of the [CHIME]
key will toggle the chime feature on/off and produce a momentary ding-dong sound.
ADDING AND CHANGING USER CODES
Your system must be Disarmed to change user codes.
Step 1 Press [r]-[5]
Step 2 The Enter Code icon will display. Enter a [“Master Arm/Disarm” Code].
N For partitioned systems, someone changing the code of another person must have access to all or
more partitions than the user being changed.
Step 3 The Ready led will flash.
Step 4 Enter the 2-digit “user number”.
(Always enter 2 digits such as [0]-[3] for user 3.)
Step 5 The instant icon will flash and zone icons will illuminate specifying the first digit of the “user code”.
When all icons are all illuminated = code is blank; when all icons are off = “0”.
Use the [•] and [–] keys to view the next digit or enter new 4- or 6-digit “user code”.
While using the [•] and [–] keys, you can change any digit by entering a new digit. This will advance you
to the next digit.
To delete a user code, enter [r]-[r]-[r]-[r] for a 4-digit code, or [r]-[r]-[r]-[r]-[r]-[r] for a 6-digit code.
Step 6 The ready led will flash indicating you are back at Step 2 above. If the code is rejected, the sounder will
beep 3 times.
Step 7 If another “user code” needs to be programmed, return to Step 4.
Step 8 Press the [#] key while the ready led is flashing to exit the User Code Programming Mode.
NX-1348E-ICON User manual
Page 12
23/07/05
ASSIGNING USER CODE AUTHORITY LEVELS
Assign authority levels to users by following the steps below. Assign user codes before assigning authority levels.
Step 1 Press [r]-[6]-[“Master Arm/Disarm Code”].
N Someone changing the authority of another person can only add or remove partition authorization
for partitions to which they have access.
Step 2 The ready led will flash.
Step 3 Enter the 2 digit “user number” to be assigned authority (The ready led is constant and the instant icon will
flash).
Step 4 Icons illuminated indicate the authority levels assigned to this code. An explanation of the icons is listed in
the following table. You may toggle (turn on/off) the authority level by pressing the number for that
authority level.
ICON
1
2
3
4
5
6
7
8
AUTHORITY LEVELS IF ICON 8 IS OFF
Reserved (Note: Do not change if on.)
Arm Only
Arm Only After Closing Time
Master Arm/Disarm (can program other codes)
Arm/Disarm
Bypass Zones
Open / Close Reporting
If this icon is on, this code is programmed as a function
code. Do not change! Press [#] - [#] to exit.
Step 5 Press the [r] key. The ready led is on constant and instant icon is on constant. This moves you to the
partition enable. (The user has access in partitions that are illuminated.)
Step 6 The illuminated numbers indicate each partition where the user has access. To change any of the
partitions where the user has access, press numbers corresponding to areas where you want to give the
user access or deny access. (Example: If zone icon #2 is lit, then the user is assigned access to partition
#2. By pressing the [2] key, the icon will go off, denying access to partition #2. Refer to the following chart.
ICON
1
2
3
4
5
6
7
8
PARTITIONS ASSIGNED
Partition 1
Partition 2
Partition 3
Partition 4
Partition 5
Partition 6
Partition 7
Partition 8
Step 7 When the partitions are assigned, press the [r] key. This returns you to Step 2 previously mentioned. At
this point you may enter another user number to assign authority level. Repeat Steps 3 - 7 until you have
assigned authority levels to all user numbers.
Step 8 Press the [#] key to exit the Assigning Authority Level Program.
NX-1348E-ICON User manual
Page 13
23/07/05
OTHER KEYPAD FUNCTIONS
Setting the keypad tone
Step 1
Step 2
Step 3
Press [r]-[0]. Keypad is now in the “Adjust Tone” mode.
Pressing the [•] key will make the keypad sounder go to higher tones, pressing the [–] key will make the
keypad sounder go to lower tones.
When the desired tone is reached, press the [#] key to set this tone and exit from the “Adjust Tone” mode.
Change partition (optional)
Step 1
Step 2
Step 3
Step 4
Press [r]-[1].
Press a NUMBER key between 1 and 8 to change partitions momentarily.
If no other key is pressed, it will go back to its standard partition in ten seconds.
If another key is pressed, the system will remain in the new partition until no keys have been pressed for
60 seconds.
View alarm memory
Step 1
Step 2
Press [r]-[3]. The zone(s) that created the last alarm will be displayed along with the alarm icon flashing
on the keypad.
The ALARM MEMORY feature will flash those zones that created alarms and will display steady those
zones that were bypassed during the last alarm.
Test function (optional)
If programmed, this function will perform a battery test, communicator test, and/or a siren test. Alarms and reports
will not be sent, unless a communicator test is performed at which time a test signal will be sent.
Step 1
Step 2
Press [r]-[4]. The test will be performed as programmed.
If the siren test is performed, enter a user code to silence the siren.
Reset function
This function is used to reset Smoke Detectors and Zone Troubles. Your system must be Disarmed to use the Reset
function.
Step 1
Step 2
Press [r]-[7]. Resets have now been performed.
If the keypad begins beeping, the reset did not execute properly. Enter your code to silence the keypad.
Wait a few minutes and repeat step 2 to attempt another reset. If the keypad still beeps after repeated
attempts, please contact your installer.
NX-1348E-ICON User manual
Page 14
23/07/05
Set system date
Step 1
Step 2
Step 3
Press [r]-[9]-[6]. Enter Code icon will display.
Enter a [“Master Code”]. The service icon will appear flashing.
Enter the “Day of Week “
1=Sunday
3=Tuesday
5=Thursday
7=Saturday
2=Monday 4=Wednesday 6=Friday
Step 4
Enter the “Month Code”. Must always be two (2) digits.
01 = January
05 = May
09 = September
02 = February
06 = June
10 = October
03 = March
07 = July
11 = November
04 = April
08 = August
12 = December
Step 5
Enter the “Day Code”. Must always be two (2) digits.
Example: The 5th would be entered as [0]–[5].
Enter the last two digits of the “Year Code”.
Example: For 1997 enter [9]–[7].
The ready icon will appear.
Step 6
Setting the system clock
Step 1
Step 2
Step 3
Step 4
Press [r]-[9]-[7]. Enter Code icon will appear.
Enter a [“Master Code”]. Then the service icon will begin to flash.
Enter the “hour code” which must be two (2) digits. Note: The clock is a 24-hour clock. Refer to the
following table.
Enter the “minutes code” which must be two (2) digits. Then the ready icon will come on constant.
Example: 7 minutes after would be entered [0]–[7].
Time
Hour Code
12:00
00
Midnight
1:00 AM
01
2:00 AM
02
3:00 AM
03
4:00 AM
04
5:00 AM
6:00 AM
7:00 AM
05
06
07
Time
Hour Code
Time
Hour Code
8:00 AM
08
4:00 PM
16
9:00 AM
10:00 AM
11:00 AM
12:00
Noon
1:00 PM
2:00 PM
3:00 PM
09
10
11
5:00 PM
6:00 PM
7:00 PM
17
18
19
12
8:00 PM
20
13
14
15
9:00 PM
10:00 PM
11:00 PM
21
22
23
Setting the keypad brightness
Step 1
Step 2
Press [r]-[9]-[1].
Press the [•] and [–] scroll keys to leden or darken the illumination behind the buttons and the ICON
display. It is usually easier to set this adjustment in a darkened room.
NX-1348E-ICON User manual
Page 15
23/07/05
SERVICE MENU
The service icon will be “on” if the security system requires service.
If the service icon is “on”, press [r]-[2] to determine the service condition. If a zone(s) is tampered, the tamper icon
will flash and the zone icon(s) will be on. If a zone(s) is troubled, the trouble icon will flash and the zone icon(s) will be
on. If the service icon is flashing, one or more zone icon(s) will illuminate indicating what service(s) is required. Press
the [•] and [–] to scroll between tamper, trouble and other service conditions. Call your service provider
immediately for these problems. The following table provides a list of what each icon means in a service condition.
ICON
PROBLEM
1
SYSTEM FAULT - Press the [1] key. The zone icon(s) that is
illuminated corresponds to the system fault(s) below:
1Over Current Fault
5Expander Low Battery
2Siren Trouble
6Expander Box Tamper
3Box Tamper
7Expander Trouble
4Expander Power
8Ground Fault
Note: Faults 1 & 2 are global in nature and will affect all
partitions of a multi-partition system. Press the [#] key to
return to the 1 of 8 service icons.
2
RESERVED
3
ZONE LOW BATTERY - Press the [3] key. The zone icon(s) will
illuminate showing which zone(s) has a low battery. This only
applies to wireless zones. Press the [#] key to return to the 1 of 8
service icons.
4
ZONE LOSS OF SUPERVISION - Press the [4] key and the zone
icon(s) will illuminate showing which zone(s) has loss of
supervision. This only applies to wireless zones. Press [#] key to
return to the 1 of 8 service icons.
5
RESERVED
6
TELEPHONE LINE TROUBLE/LINE CUT – Press the [6] key. The
zone icon(s) will illuminate as they correspond to these service
conditions:
1-5 = Reserved
6 = Telephone Line Trouble / Line Cut
7 = Aux communication device failure
The service icon will remain lit until the trouble clears and a user
code is entered. * SEE NOTE AT END OF TABLE.
7
FAILURE TO COMMUNICATE - This icon will illuminate when
there is a failure to communicate between your system and the
central station. * SEE NOTE AT END OF TABLE.
8
LOSS OF SYSTEM TIME - This icon will illuminate when there has
been a loss of power and your system clock needs to be reset.
* SEE NOTE AT END OF TABLE.
#
EXIT - Press the [#] key to exit the Service Menu.
* NOTE to Icons 6,7,8: This fault is global in nature and will affect all
partitions of a multi-partition system.
NX-1348E-ICON User manual
Page 16
23/07/05
KEYPAD CONTROL TONES (BEEPS)
A sounder is built into the keypad. If programmed, your system keypad may sound for any of the following
reasons:
Beeps for all keypresses.
Sounds a continuous tone during the Entry delay time.
Pulses when a day zone is violated while the system is disarmed.
Pulses when a FIRE zone has a trouble condition.
Beeps 3 times for trying to arm with the “Not Ready” icon off, if “Force Arming” has not been selected.
Beeps for 1 second or emits a “ding-dong” sound for the “Chime” feature.
Beeps during an exit delay; beeps rapidly for the last 10 seconds of an exit delay; and beeps 1 second at the
end of the exit delay.
Pulses when the armed status changes and the AC power is off.
Pulses when the armed status changes and any zone(s) are bypassed.
Pulses when the armed status changes and a low battery is detected.
Pulses when the armed status changes and a Tamper condition is detected.
Beeps to indicate Telephone Line Cut, if selected.
Pulses when one or more of the following conditions are detected: Zone or Box Tamper, Low Battery, AC Power
Fail, or Expander trouble.
Beeps 3 times once every minute for Sensor/Zone Low Battery or Loss of Supervision. Entering a code will
silence the keypad for 12 hours.
Entering a valid code will silence the keypad sounder when it is pulsing. The arm/disarm state of your system will
not change when entering a code to silence a pulsing keypad sounder. Please contact your installer if a trouble
condition exists.
NX-1348E-ICON User manual
Page 17
23/07/05
SECURITY SYSTEM NOTES
Installing/Service Company _________________________________
For Service Call ___________________________________________
Central Station ____________________________________________
Duress Code ____________________
This system is
is not
partitioned.
EMERGENCY ACTIVATION KEYS (check if enabled)
Fire
Medical Emergency
PROGRAMMED FUNCTIONS
Abort Delay
Auto Bypass
Auto Instant
Battery Test
Cancel Alarm
Change Partitions
Chime
Communicator Test
Police
Forced Arming
Group Bypass
Quick Arm
Re Exit
Siren Test
ENTRY / EXIT DELAY TIMES
Exit Delay Time __________
Entry Delay Time _________
NX-1348E-ICON User manual
Secondary Exit Delay Time ________
Secondary Entry Delay Time _______
Page 18
23/07/05
ZONE DESCRIPTIONS
01 _________________________
02 _________________________
03 _________________________
04 _________________________
05 _________________________
06 _________________________
07 _________________________
08 _________________________
09 _________________________
10 _________________________
11 _________________________
12 _________________________
13 _________________________
14 _________________________
15 _________________________
16 _________________________
17 _________________________
18 _________________________
19 _________________________
20 _________________________
21 _________________________
22 _________________________
23 _________________________
24 _________________________
25 _________________________
26 _________________________
27 _________________________
28 _________________________
29 _________________________
30 _________________________
31 _________________________
32 _________________________
33 _________________________
34 _________________________
35 _________________________
36 _________________________
37 _________________________
38 _________________________
39 _________________________
40 _________________________
41 _________________________
42 _________________________
43 _________________________
44 _________________________
45 _________________________
46 _________________________
47 _________________________
48 _________________________
www.gesecurity.net
EMEA Distribution is a division of GE Security EMEA bvba
COPYRIGHT ©2005
© GE Security EMEA bvba. All rights reserved. GE Security EMEA bvba grants the right to reprint this manual for
internal use only. GE Security EMEA bvba reserves the right to change information without notice.