1
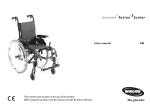
® ® I n v a c a r e Action Ver tic User guide This manual MUST be given to the user of the product. BEFORE using this product, read this manual and save for future reference. EN Foreword The information contained in this manual is subject to change without notice. Some information is submitted under copyright – all rights reserved. Any information in this document cannot be photocopied or duplicated without prior written authorization by Invacare. As the European and world's leading manufacturer of wheelchairs, Invacare endeavours to supply a wide range of wheelchairs to meet all the needs of the user in everyday life. Final selection of the Action Vertic is based upon prior trial in order to obtain part or full reimbursement. The user, with the assistance of a multi-disciplinary team of qualified health advisors as well as a registered distributor, will find out if the product is perfectly adapted. Intendant use - Your wheelchair is especially designed to be used inside. It is intended for active adults who wish to position themselves vertically during the day for medical or professional reasons. This product complies with the European CE EN93/42 directives relative to medical products of Class 1, EMC (NF EN6060-2 et CEI 60335-2) and meets the NF mark standard (NF EN ISO 14971 & NF EN 12182). The launch date of this product is started in the CE declaration of conformity. - The Action Vertic is designed to be used for short periods as well as permanently, in everyday life or at work. - It is important that you comply with the vertical positioning protocol (duration, frequency, posture, maximum verticality angle,…) which has been prescribed by your physical therapist. Safety Information on Electromagnetic Interference This electric vehicle was successfully tested in accordance with International standards as to its compliance with Electromagnetic Interference (EMI) Regulations. However, electromagnetic fields, such as those generated by radio and television transmitters, and cellular phones, can influence the functions of electric vehicles. Also, the electronics used in our vehicles can generate a low level of electromagnetic interference, which however will remain within the tolerance permitted by law. For these reasons we ask you to please observe the following precautions: WARNING: Danger of malfunction due to electromagnetic interference! − Do not switch on or operate portable transceivers or communication devices (such as radio transceivers or cellular phones) when the vehicle is switched on! − Avoid getting near strong radio and television transmitters! − In case the vehicle should be set in motion unintentionally, switch it off immediately! − Adding electrical accessories and other components or modifying the vehicle in any way can make it susceptible to electromagnetic interference. Keep in mind that there is no sure way to determine the effect such modifications will have on the overall immunity of the electronic system! − Report all occurrences of unintentional movement of the vehicle, or release of the electric brakes to the manufacturer! Stamp of the Distributor Introduction Dear Customer Thank you for purchasing an Invacare wheelchair. This model was designed to provide you with all the benefits and features to meet your needs. Only quality components were selected for your wheelchair based upon rigorous inspections during the entire manufacturing process. This manual describes the operating limits of your wheelchair, maintenance operations and adjustments that you or your assistant can make. However, all the repairs (except for inner tubes) as well as some adjustments, require specific technical training and, therefore, must be performed by your distributor. Please read carefully the operating instructions in this user guide before first use of your wheelchair . This product was supplied by Invacare® manufacturer with respect to the environment. It is in conformity with 2002/96/CE directive relative to electric and electronic equipment waste management. This product may contain substances which might damage the environment if they are disposed of in inappropriate places and places non conform to national regulation. The symbol showing a crossed out waste bin is affixed on this product in order to encourage you to recycle it at selective collection structures (please contact your municipal authorities / local government). Please be ecologically responsible and recycle this product at the end of use. TABLE OF CONTENTS A. GENERAL GUIDELINES 1. Safety and operating limits 1.1. Reaching an object from the chair 1.2. Transferring to other seats 1.3. Tilting 1.4. Tilting, Kerbs 1.5. Slopes 1.6. Stairways 1.7. Vertical positioning 2 Page 3 5 6 6 7 7 7 2. Operating instructions 2.1. Folding and Unfolding the wheelchair10 2.2. Wheelchair propulsion10 3. Safety inspection and maintenance 3.1. Performance control11 3.2. General inspection 11 4. Battery recharging13 4.1. instructions 13 4.2. Battery charge 13 4.3. Battery maintenance instructions13 5. Transportation 14 6. Summary of warranty terms14 6.1. Standard terms 14 6.2. Limitation of liability 15 7. Operating instructions for optimal safety15 B. DESCRIPTION OF YOUR WHEELCHAIR 1. Presentation 1.1. Introduction 1.2. General description Page 16 16 2. Adjustments 2.1. Seat elements 17 2.1.1 Depth adjustable seat 17 2.1.2 Tension adjustable seat upholstery 18 2.1.3 Height adjustable backrest 18 2.1.4 Tension adjustable backrest upholstery 18 2.1.5 footrests 19 2.1.6 Armrests 19 2.1.7 Straps and posture belts 20 2.2. Frame 21 2.2.1 Side frame 21 2.2.2 Stand up mechanism 21 2.3. Rear wheel 22 2.3.1 Wheels 22 2.3.2 Handrims 22 2.3.3 Quick release axles 22 2.4. Castors 23 2.4.1 Wheels 23 2.5. Brakes 23 2.5.1 Manual brakes 23 2.6. Options and accessories 24 2.6.1 Push handle 24 2.6.2 Anti-tippers 24 2.6.3 Work tray 24 2.7. Table of light/sound signals signification 25 2.8. Specifications and tools 25 2.8.1 Standard wheelchair specification 25 2.8.2 Tools for adjustment (not supplied) 26 2.8.3 After sale and disposal 26 2.9. Dimensions (ISO) 27 A GENERAL GUIDELINES 1. Safety and operating limits For a safe operation of your wheelchair, the following parameters should be observed : - Stability and balance Your wheelchair has been designed to provide the stability you need during normal daily activities. Any movement in the wheelchair will have an impact on the position of the centre of gravity, which may lead to the wheelchair tipping and a fall. To improve your safety when you move a lot or you transfer your weight from one place to another, we recommend using seat belts. - Weight distribution (figure 1) Many actions cause the user of a wheelchair to reach out, lean over or move about within the wheelchair and outside it. These movements cause a change to normal balance, centre of gravity (G) and weight distribution of the wheelchair. 1 - Weight Limit The maximum recommended weight of the user is 115kg. However, the level of activity is an essential factor. For example, an active user who weighs 75 kg may subject the wheelchair to more stress than a user who weighs 100 kg. To this purpose, we recommend that you consult your retailer when choosing the model of wheelchair based upon your daily life style. 1.1. Reaching an object from the chair The limitations on reaching out from a wheelchair indicated in the following diagrams have been calculated based on a representative sample of wheelchair users: - Only the arms should be extended beyond the seat of the wheelchair. (figure 2). - The body and head should remain within the boundaries of the seat. (figure 3). 2 3 3 1.1.1 Leaning forward 1.1.2 Leaning backward Do not extend your chest over the armrest (figure 4). In order to reach an object in front of you, you must lean and bend down ; therefore, you must use the castors as a tool (pointing them forward) to maintain stability and balance. An accurate alignment of the wheels is essential for your safety (figure 5). Position the wheelchair as close as possible to the desired object so that you can simply pick it up by stretching your arm while sitting in the chair in a normal position. In any case, do not lean backwards because you may cause the chair to tip (figures 6 and 7). 4 4 5 6 7 1.2.Transferring to other seats sideways (figures 8 & 9) This may be done without assistance provided that you are sufficiently mobile and have a strong enough torso. - Move the wheelchair as close as possible to the seat to which you would like to sit, with the castors pointed forward. Lock the wheels by applying the brakes. Swing the armrest pad backwards on the side you would like to move to. Move the weight of your body towards the seat (figure 8) - Front transfer is possible by leaning on the two armrests to lift yourself up ; however it is not recommended as the slight flexibility of armrests may cause momentary instability and possibly lead to a fall. - While moving from the wheelchair to the seat, your body will have little or no support. Where possible use a transfer board during transfers (figure 9). 8 9 Warning : - Position yourself as close as possible to the place where you wish to sit. - When transferring, position yourself as far back as possible in the seat to prevent breaking screws, damaging the seat upholstery or causing the wheelchair to tip forward. - Lock the two brakes ; they should not be used in any case as support for transfers. - Never stand on the footrests when you are getting in or out of the wheelchair (figure 10). 5 10 6 1.3.Tilting (balancing on the rear wheels) 1.4. Tilting, Kerbs For greater safety, this operation must be performed by an attendant. The attendant should be aware of the required physical effort and use appropriate positioning in order to relieve the strain on his/her back (keep a straight back and bend your knees during this operation). To tilt the wheelchair, the attendant must firmly grab the handles making sure both are properly fixed. Warn the occupant in the wheelchair before tilting it and remind him / her to lean backwards and make sure that both feet and hands of the user are clear of the wheels. To get on the pavement : - Method 1 (figure 11) The attendant positions the wheelchair in front of the pavement facing forward. Attendant tilts the wheelchair backwards until the castors reach the pavement; attendant pushes the wheelchair forward until the rear wheels are against the kerb and again pushes the wheelchair until the rear wheels climb over the kerb. - Method 2 (figure 12) In this case, the attendant stays on the pavement and moves the wheelchair in a backwards position with the rear wheels against the kerb. The attendant tilts the wheelchair backwards until it is balanced and pulls the wheelchair with a steady movement until the rear wheels climb over the kerb ; then he / she lowers the castors, while making sure that the chair is far enough on the pavement so that the castors do not fall into empty space. Place a foot on the footstep tube and move continuously until the chair reaches the equilibrium point. At this stage, the assistant will feel a difference in weight distribution, which usually occurs at approximately 30°. At this point, the wheelchair can get over the obstacle easily. Finally, the attendant slowly and gradually lowers the front down to the ground, while firmly holding the handles. Warning : - Be aware of detachable parts such as armrests or legrests : they must NEVER be used as lifting supports as they may be inadvertedly released, resulting in possible injury to the user and / or attendant. - Do not lower the wheelchair suddenly, even if it is several centimetres from the ground, as this may result in injury of the user. To get off the pavement : 11 12 The attendant positions the wheelchair facing forward on the pavement and tilts it backwards until it is balanced, then he/she pushes the wheelchair forward until the rear wheels touch the road after getting over the obstacle; then, he / she gradually lowers the castors to the ground. 1.5. Slopes It is recommended to avoid using ramps with a slope higher than 7°. The wheelchair risks tipping over in the event of spinning or side movement (figure 13). 1.6. Stairways Because this is a difficult movement, we recommend using two attendants, one in front of the wheelchair and one behind the wheelchair. Warning : we recommend that users over 125 kg in weight do not use this operation ! Upward slopes (figure 14) : Lean the upper body forward and move the wheelchair forward with short quick pushes on the hand rims to maintain speed and direction control. If you want to rest, apply both brakes when stopping. Downward slopes (figure 15) : Lean backward cautiously and let the hand rims slide in your hands. Be ready to react at any moment to control speed and direction. 13 Warning : - Avoid turning suddenly and never try to climb and descend a ramp diagonally (figure 16). 14 7 To climb stairways (figure 17) : After tilting the wheelchair to the point of equilibrium, one assistant (at the back) holds the wheelchair up against the first step grasping the handles firmly to lift. The second assistant, lifts the wheelchair above the stairs, while holding firmly a fixed part of the frame, and holds 15 16 it while the first assistant takes a step and repeats the operation. The wheelchair must not be lowered until the last step has been passed and the chair is clear of the stairs. To descend stairways : Same operation as above, however, in reverse order. Warning : - Do not attempt to lift the wheelchair by any removable parts (such as armrests, legrests or footrests). - Avoid using an escalator which may lead to serious injury in the event of a fall. 8 1.7.Vertical positioning Battery autonomy make it possible to stand up and sit down about 150 times (depending on user’s weight) before recharging. Warning : You should not use the raising/lowering mechanism when the charger is connected, unless batteries are at very low capacity and cannot drive lowering operation. Please comply with the vertical positioning protocol which has been prescribed by your physical therapist. It is essential that your Action Vertic is perfectly adapted to your morphology, all necessary adjustments are described in § B 2.1. Always make sure that the ground where you want to stand up is perfectly level and firm, without any obstacle or object which might damage stability of the wheelchair and safety of the user. 17 18 19 Operate both manual brakes to block rear wheels. Make sure that the four slings used to hold the body during vertical positioning are in place and well adjusted , see § B 2.1.7. Straps and posture belts Make sure that no obstacle or person (a child for instance) prevents the raising or lowering as there is a risk of serious injury in case of body jamming in moving mechanical devices. Be careful not to hit an obstacle with the raising / lowering knob, as the possibility of the switch breaking could cause an overly long blockage in the vertical position. Make sure you always have the possibility to call for assistance in case of a problem when standing up (mobile phone or alarm necklace / bracelet at hand). 1.7.1. Standing up (photos 20 & 21) After applying the above safety measures, you can stand up : position your forearms on armrest tubes and operate button (A) upwards ; stand up progressively (in stages) until the prescribed vertical angle. The persons around you and yourself will be advised that you are using the stand up function by a long beep (1 tone). 1.7.2. Sitting down (photo 22) Keep your forearms on the armrest tubes and switch button (A) down ; go down progressively (in stages) to the initial seating position (beeping will stop). Note : After no use during 30 minutes, 1 tone warns you of the setting in a stand-by mode. A 20 21 22 9 2. Operating instructions 2.1. Folding and unfolding of stand-up wheelchair 2.1.1. Folding : - To reduce the wheelchair bulk for transport or putting away, first loosen both threaded pins (A) to stop without forcing (risk of loss of the nut), then position the two armrest pads parallel to the backrest, pull the backrest upwards and fold it on the seat. - Rear wheels also are removable : push on the central knob of the quick release wheel axle (see § B-2.3.3.) 10 2.1.2. Unfolding : - Follow the same instruction in reverse order, by first positioning rear wheels. - Then put the backrest in initial position. A 23 24 Warning : Push on the backrest (downwards) before re-tightening both treaded pins (A) to make sure the backrest is well positioned. Warning : Check that quick release axles are well locked in their housing, as there is a risk of a serious fall if not the case. 2.2. Wheelchair propulsion Wheelchair propulsion is provided by the handrims mounted on the wheels. The handrims can be adjusted based upon your height to allow you to hold them properly, and various accessories can be added to improve the grip (anti-slip plastic coated, etc.) Qualified medical and paramedical staff will be able to provide you with advice regarding the propulsion which is best adapted to your disability. 3. Safety inspection and maintenance 3.2. General inspection 3.1. Performance control Your distributor, who has the required technical expertise, is responsible for any wheelchair repair. We recommend that you take the wheelchair to your retailer at least once a year for a complete inspection. Regular maintenance allows the identification and replacement of defective and worn parts, which improves the daily operation of your wheelchair. As the user, you will be the first to notice the possible operational defects of your wheelchair. The following table indicates the easiest troubleshooting symptoms to identify and the preliminary inspection that you can perform. In the event that the symptoms persist after adjusting the pressure in the tyres and tightening screws and nuts, please consult your retailer. The inner tubes of the wheels are the only components that you can repair yourself (see § B-2.3). Depending on use (once a week to once a month), regularly lubricate the different articulations of the stand up mechanism with fluid oil (same type as for a sewing machine) or 3 in 1 type oil spray equipped with precision tip (see § B 2.2.2.) The wheelchair swerves to the right The wheelchair swerves to the left The wheelchair turns or moves slowly The castors lift Creaking and clinking Play in the wheelchair Inspections Make sure that pressure in the pneumatic tyre is correct (cf. § B-2.3) Make sure that the bolts are tight Check the adjustment on the fork angle Make sure that the 2 castors come in contact with the ground at the same time Regular inspections to be performed by you or your assistants : a. General Make sure that the wheelchair folds and unfolds easily. Make sure that the wheelchair moves in a straight line. (no resistance or deviation) b. Manual brakes Make sure that the manual brakes do not touch the moving tyres. Make sure that the manual brakes operate easily. Make sure that the joints are not worn and do not have excessive play. c. Vertical positioning system Check the raising / lowering mechanism for any play or jamming in articulations (lubricate if necessary, see § B-2.2.2). d. Skirtguard/armrest upholstery Make sure that all the fittings are properly tightened. e. Armrest tubes Make sure that armrest tubes are securely tightened and that there is no play or jamming in articulations (lubricate if necessary, see § B-2.2.2) 11 12 f. Armrest tube foam Make sure that armrest tube foam is in good condition g. Seat and backrest upholstery Make sure that the upholstery is in good condition. h. Rear wheels Make sure that the wheel nuts and precision bearings are tight. Make sure that the wheels are parallel to the frame. i. Handrims Check for rough patches. j. Spokes Make sure that the spokes are not distorted, loose or broken. k. Castors Make sure that the axle is tight by turning the wheel the wheel must gradually come to a stop. l. Fork/steering tube Make sure that all the fittings are well tightened. m. Pneumatic and solid tyres Check the pressure of the pneumatic tyres (value indicated on the sidewall) check the wear of the solid tyre tread. n. Batteries Maintenance-free batteries are protected inside a box equipped with a light load indicator (green = full load charge; orange = low load charge, use is still possible; red = empty, battery to be recharged ASAP, see following page § 4 Battery recharging). o. Maintenance Make sure that electric connections are well in place, that cables are not cut or crushed. Warning : Do not use any product to clean parts except for the upholstery which can be washed with soap and water only. Make sure you dry the wheelchair if it is wet (e.g. after washing it or going out in the rain). Avoid riding on wet areas as well as gravel, grass, etc. (warning: sand and sea water particularly damage ball bearings). When using the wheelchair inside, we recommend using solid tyre castors, especially when riding on carpet. Do not expose the wheelchair to a temperature higher than 40°C (e.g. in a vehicle). 4. Battery recharging 4.1. Instructions a. The usual time to charge at the full capacity the batteries is 5 hours if they are at a low load level state (the orange leds has just disappeared on the battery box). b. Before first use, new batteries should be charged for 8 hours . c. Recharge at least for 8 hours if batteries are completely unloaded (red light bars). Warning : Don’t let in charge the batteries more than 10 hours, this can damage the batteries and reduce definitively their load level capacity. d. Ambient temperature during recharging should be between 10°C and 30°C. e. Recharging time is longer if temperature is below 10°C. 4.2. Battery charge Warning : - Always use the charger (HP 1202N2) supplied with the wheelchair as there is a risk of explosion or destruction of batteries if poor quality or incompatible charger is used. -Always protect the charger against humidity as there is a risk of electrocution and destruction of the charger if it is wet. -Do not use the charger if it has been dropped or damaged as there is a risk of short-circuit and electrocution. -Only use an extension lead if it is absolutely necessary as there is a risk of fire or injury if a damaged one is used. If there is no other choice, make sure the extension lead is in good condition and compatible with the charger power. • Connect the charger (A) to the battery box (photo 25): the charge plug is located on the upper face, under the plug protection (B) (photo 26) • Plug the charger into the mains, it starts automatically and the red light on top of the charger turns orange. • When charging is finished (the warning light on top of the charger is green), first unplug the charger from the mains and then the charge plug from the battery box. Red flashing = low charge load capacity; orange flashing = tension of batteries in low or overheating. Warning : Do not use the raising / lowering mechanism when the charger is plugged unless battery load capacity is too low for lowering operation. 25 A 26 B 13 4.3. Battery maintenance instructions 6. Summary of warranty terms Warning : Don’t let in charge the batteries more than 10 hours, this can damage the batteries and reduce definitively their load level capacity. 6.1. Standard Invacare terms and conditions Only store batteries when they are completely charged. Batteries can be stored at a temperature from -40°C to +65°C. If batteries are stored for more than 4 weeks, they should be recharged once a month. This is to keep their full charge and prevent any deterioration by spontaneous discharge. 14 5. Transportation Warning : This wheelchair was not designed nor tested to be used as a seat in a vehicle ; it is necessary to move the user to a vehicle seat adapted to human transport. The Action Vertic is equipped with batteries which are not considered as « dangerous equipment ». This classification conforms to the following regulations: - Regulation on dangerous goods road transport (GGVS) - Regulation on dangerous goods railway transport - Regulation on dangerous goods air freight (IATA/DGR) Two persons are required to raise the wheelchair, for example to put it into a car, as the heaviest part is about 27 kg in weight (see § 2.1. Folding / Unfolding). Make sure you are well positioned in order to relieve your back. This is to certify that your manual wheelchair is warranted by Invacare for a period of 2 years for the frame and crossbars, all others parts 2 years also but subject to the following conditions : - If a defect or fault is discovered the supplier / dealer from whom the appliance was purchased should be notified immediately. - The manufacturer will not accept responsibility for damage caused by misuse or non-observance of the instructions set out in the user manual. - During the period of warranty, any parts that have become defective due to faulty workmanship or materials, will be renewed or repaired without charge by the Invacare dealer/ supplier. - The warranty will be forfeited should any unauthorised alteration be made to the equipment. - The Purchaser’s statutory rights under the Consumer Protection Act are not affected. 6.2. Limitation of liability 7. Operating instructions for optimal safety This warranty does not extend to the consequential costs resulting from fault clearance, in particular freight and travel costs, loss of earnings, expenses, etc. - Maximum user’s recommended weight : 115 kg. - Do not attempt to reach objects if you have to move forward in the seat. - Do not attempt to pick up objects from the floor by reaching down between your knees. - Do not lean over the top of the upholstery back to reach objects located behind you : this may cause you to tip over - Always engage both manual brakes simultaneously. - Manual brakes are parking brakes : they must not be used in any case to slow down the wheelchair or as support during transfers. - Do not tilt the wheelchair (down kerbs or steps) without using an assistant. - Do not carry in the stairways or escalator, user sited in the wheelchair whith only one attendant; this may cause serious injury. - Do not use the wheelchair unless it has the proper tyre pressure as indicated on the side wall of the tyre. - Do not overinflate the tyres : this may cause the tyres to explode and cause bodily harm. - Do not expose the wheelchair to a temperature higher than 40°C. - To avoid injury, keep your fingers away from mobile parts (swing in armrests, foldable backrest, vertical positioning system, manual brakes), and maintain good posture before lifting the wheelchair. - Do not use the wheelchair in humid environment and outside under the rain. Invacare shall not be liable for : - Natural wear and tear. - Inappropriate or incorrect use. - Defective assembly or setting-up by the purchaser or third parties. - Defective or neglectful treatment use of unsuitable spares. 15 B. DESCRIPTION OF YOUR WHEELCHAIR 1.2. General description (see photo) 1. PRESENTATION Your wheelchair is made of various parts and this manual describes only the main parts. We recommend that you become acquainted with the following terms in order to better understand your wheelchair operation : 1.1. Introduction Your wheelchair has been factory set before you purchased it. However, it must be specifically adapted to your needs. The following detailed paragraphs describe the various functions and possible adjustments as well as available options. You can make some adjustments yourself, while others can be made only by your dealer. 16 Important: based upon the selected model or options, your new Action Vertic wheelchair may be equipped with all of the components or options which are described in the following pages. ® This is a warning symbol ; you must imperatively follow the instructions that are provided in these paragraphs to prevent personal injuries as well as injuries to people around you ! This is an information symbol about possibility to contact your Dealer for more information. The seat consists of the seat and backrest upholstery, the backrest and armrests. This unit is designed to provide optimal comfort. The swing-away footrest support or legrest : this is the supporting part between the frame and the footrest which swivels to facilitate transfers and can be removed during transport. The footrest consists of an adjustable tube and the footplate which supports the foot. The folding frame consists of side frames and a folding system including the seat rails. These parts constitute the frame, which is the supporting component of the wheelchair and its strength is well tested (checked at 115 kg). The steering tube is the connection between frame and castors ; it allows the adjustment of the seat angle. The rear wheel consists of the wheel, axle and handrim. The rear wheels ensure the rear stability and allow the propulsion of the wheelchair using the handrims. They are mounted on the multiple adjustment wheel support brackets. The castor consists of the front wheel and the fork. The castors provide front contact with the ground and determine the steering by the direction of the forks. 2. Adjustments and maintenance The manual brake is a parking brake. The two manual brakes are used to secure the wheelchair when stationary. Always perform the necessary adjustments before the user sits down the wheelchair in order to prevent any injury. Backrest upholstery Chest strap Backrest Armrest tube Rear wheel Posture belt Rear wheel support Seat upholstery Rear wheel axle Knee support 2.1. Seat elements 2.1.1. Depth adjustable seat (photo) First loosen the 4 screws (A) (6 mm hexagonal key) located on the actuator back supports in order to facilitate the backrest supports sliding. Loosen the two external (B) and internal (C) screws sideways (4 mm hexagonal key), then simultaneously slide the two support tubes forwards or backwards (based upon user’s morphology) to the preset holes. Re-tighten the 4 screws (B & C) sideways. Adjustable footrest tube Handrim Manual brake One-piece footplate Frame Steering tube A C Calf pad Front wheel 1 B 2 17 Make sure the 4 screws on the actuator back supports (A) are re-tightened, as there is a risk of vertical positioning system dysfunction if the supports slide on the chassis tubes. 2.1.2. Tension adjustable seat upholstery (photo 3) It allows to adjust the depth and curvature based upon user’s morphology. First disassemble one armrest panel by loosening the 2 screws and the supports (4 mm hexagonal key and 10 mm key) , position the upholstery, if needed, according to the depth adjustment (see above §) then adjust Velcro fasteners (B) in order to stretch or slacken them in width. Reposition the armrest panel (A) and securely tighten fastening screws. 18 2.1.3. Height adjustable backrest (photos 4 & 5) For height adjustment, first take the backrest upholstery off, slightly loosen the screw (A) with a 3 mm hexagonal key, adjust to the desired height based upon the preset holes, tighten without forcing. Reposition the backrest upholstery according to the new height. 2.1.4. Tension adjustable backrest upholstery (Photo 5) It allows to adjust the curvature of the backrest to the user’s morphology and body posture. Lift the flap and adjust the Velcro straps in order to stretch or slacken them. Reposition the flap. Check the quality and positioning of Velcro fasteners. Check the quality and positioning of Velcro straps. B A C A B 3 4 5 2.1.5. Footrest (height, angle and depth adjustment of the onepiece footplate) (photo 6) 2.1.6. Armrests (height adjustment and foam removing) (photo 7) - Remove the two screws (A & B) sideways (4 mm hexagonal key), adjust to the desired height, reposition the screws in the preset holes and firmly tighten sideways. - Loosen the two screws (A) (5 mm hexagonal key) of each armrest tube support to make their sliding on the backrest tubes easier, slide the armrest tube supports upwards or downwards based upon the user’s morphology. Firmly retighten the two fastening screws (A) sideways. - The foam tubular coating of the armrest tube is subject to wear. To replace it, remove it and perfectly clean the tube, coat the tube and the inside of the new tubular foam coating with very soapy water, slide the foam coating forwards on the tube to its front end. - For angle adjustment, loosen screws (A & B), adjust to the desired angle by positioning screw (B) in one of the 3 threads and firmly re-tighten the screws (A & B) sideways. - Remove the two screws (A & B) sideways to position the one-piece footplate forwards or backwards, reposition the screws in the preset holes and tighten firmly. Wait at least for 24 hours for the soapy water to be completely evaporated before using your stand up wheelchair again. A B 6 A 7 19 2.1.7. Straps and posture belts Check that the two buckles are well fastened to their supports ; make sure that Velcro fasteners are well positioned and perfectly overlap. 2.1.7.1. Chest strap (photos 8 & 9) Ideally, it is positioned at the base of the chest with the cushion (A) well centered. For height adjustment, fasten the Velcro fastener to the rear part of the seat (under the flap) ; for tension adjustment, make sure the ribcage is not compressed based upon user’s morphology Check that Velcro fasteners are in place and make sure they perfectly overlap. 20 2.1.7.2. Knee support (photo 9) Ideally it is positioned at the base of kneecaps with the cushion (B) well centered on legs ; tension adjustment helps to hold legs during vertical positioning, if knee slipping is felt when standing up, go back to sitting position and re-tighten the strap (C) progressively. A A B Belt with buckle fastening (photo 10) : to fasten the buckle, insert part (A) in part (B), to open the buckle, press part (C). Depending on user’s corpulence, pull one or the other of the extremities of the strap passing through part (B) and adjust part (D) according to free length. Check that the belt does not go into the rear wheel spokes. When in a vehicle, the posture belt should not be used as a safety belt. C B D B C 8 2.1.7.3. Posture belt C 9 A 10 2.1.7.4. Calf strap (photo 11) According to the position of the one-piece footplate (forwards or backwards), tension adjustment should perfectly keep the feet centered : adjust the strap with Velcro slings (A) in order to stretch or slacken it. Check that Velcro fasteners are in place and make sure they perfectly overlap. 2.2. Frame Note : the adjustments and positioning must be performed by a professional technician upon agreement by a prescribing physician. Please consult with you dealer In « Active » position, it is necessary to use anti-tippers to avoid any risk of tipping backwards when you drive on a slope. 2.2.2. Stand up mechanism The raising / lowering mechanism does not need any particular adjustment or maintenance, just regularly make sure that : 2.2.1. Side frames Side frames are mainly designed to fix fork tubes for the front wheels and multi-adjustable wheel attachments for the rear wheels. The rear wheels attachments allow two positions in length and five in depth : Active = forward for easier driving Standard = delivered in series, stable up to 10° slope Amputee = backward for increased stability - Electrical connections are in place and cables cannot be crushed or cut during raising or lowering operation. - Depending on use (once a week to once a month), regularly lubricate the different articulations of the stand up mechanism with fluid oil (same type as for a sewing machine) or 3 in 1 type oil spray equipped with precision tip. A A A 11 12 21 Do not touch the side gas actuators as there is a risk of serious injury ; if you notice any oil leakage please consult with your dealer. 2.3. Rear wheels They provide the wheelchair propulsion, they are made of anodized aluminium. Handrims are constantly in contact with your hands. Make sure that they are not damaged ! 2.3.1. Wheels The 24" (610 mm) rear wheels are spoked wheels equipped with thin tread pneumatic tyres. 22 2.3.2. Handrims A flat tyre (photo 13) must be removed in order to be repaired. Remove the rim assembly (tyre and inner tube), repair or replace the inner tube, reinsert in the tyre and reposition the assembly on the rim. Comply with the inflation pressure specified on the sidewall of the tyre. 2.3.3. Quick release axles Depress the button (A) and insert the axle in the wheel hub. Position the assembly in the bearing (B) of the multiple adjustable wheel mounting until it locks in place. The locking balls (C) must rise above the bearing. No significant side clearance is allowed. To reduce clearance as much as possible (photo 15), remove the axle and adjust the nut using a 24 mm key ; then block the axle with an 11mm open-end key. Make sure that the axle and the locking balls are clean. A B 13 A 14 B C 15 To prevent falls, it is essential that the button (A) and the locking balls (C) are disengaged providing a perfect lock of the rear wheels. The quick release axle is a precision part, take care of shocks and clean regularly to ensure the good mechanism operation. 2.4. Castors 2.4.1. Wheels The 6" front wheels are equipped with supple solid tyres. 2.5. Brakes 2.5.1 Manual brakes The manual brakes (photo 16) are designed to secure the wheelchair during long stops. They are not intended to slow down the wheelchair or to be used as support during a transfer. They must be operated simultaneously. A B X 16 X 16A In order to brake, push the handle (A) forward. The handle folds back to facilitate transfers. Draw as a preliminary the handle upwards ! Once the brakes are engaged, the wheelchair should not move at all. Note : brake adjustments are based upon the diameter and type of the wheels. After repairing a flat tyre or in the event of wear of the pneumatic or solid tyre, you may need to adjust the brake(s). To adjust the brake(s), loosen the two screws (B) and slide the brake assembly to obtain the following distance value between the wheel and the brake shoe in unlocked position (photo 16A) Solid tyre X = 4 mm, Pneumatic tyre X = 4 mm Firmly tighten the screws (B) after adjustment. Keep your fingers away from movable parts to prevent injuries ! 23 2.6. Options and accessories 2.6.3. Work tray 2.6.1. Push handles (photo 17) It is positioned on the armpads ; fasten it to the armrest tubes (on the painted tubes to the back of the armpads) using Velcro fasteners. Release the quick tightening handles (A), slide the tray forward or backward inside the aluminium gutters based upon the user’s build and retighten the quick tightening handles (A). Take off the cap which shuts the backrest tube, insert the handle into the tube, position the screw in the preset hole (A), firmly retighten screw and nut sideways (4 mm Allen key and 10 mm spanner). 2.6.2. Anti-tippers (photo 18) 24 The tray reduces the access to the raising-lowering knob. They prevent back tipping which ensures safety when driving on slopes or crossing obstacles. Insert the anti-tipper small wheel into the frame vertical tube, position the screw in the preset hole (A), firmly retighten screw and nut sideways (4 mm Allen key and 10 mm spanner). Do not place heavy (> 5 kg) or instable objects, containers with very hot and corrosive liquids on the tray, which may cause serious injury if they fall. The anti-tippers must not be used without the 24" rear wheels nor be used as transfer wheels while the user is sitting on the wheelchair. This is to prevent any fall which may cause serious injuries. A A E 17 B 18 19 C 2.7. Light/sound signals signification 2.8. Specifications and tool 2.8.1. Standard wheelchair specifications Light bars on the battery box Battery load level (Leds) All the green leds re lighted 100% of the batteries load level The first 3 green leds disappears 90-95% of the batteries load level The orange leds disappear, no leds anymore lighted, the noise alerting the batteries is empty starts 5-10% of the batteries load level Maximum user weight : 115 kg Seat width : 38/43/48 cm Seat depth : 41-46 cm / 46-51 cm Floor/seat height : 50 cm Rear wheel : 24" (610 mm) pneumatic tyre Castors : 6" (150 mm) solid tyre Parking brake : Manual brake with indexed brake shoe Backrest :Fixed and folding Armrests : Tubular & swing away Seat upholstery : Black nylon Frame : Aluminium, epoxy coated Wheelchair average weight : 30 kg Electrical fittings: 24 V fuse T2A/250V Batteries: NI-MH 24 V 3.8 Ah Battery charger: 100-240 V AC 50/560 Hz 1.0 A 25 Electrical actuator: Linak 4500 N IP 65 protection 150 times Authorized storage temperature: -40° C to +65° C Authorized ambient temperature: -20° C to +40° C 2.8. 2. Tools for adjustments and regular maintenance (not supplied) Function Tool 26 Seating (depth) 4 mm Allen key Backrest (height) 3 mm Allen key Brake 5 mm Allen key Footrest tube 4 mm Allen key Footplate 4 mm Allen key Armrests (height) 6 mm Allen key Skirt guard 4 mm Allen key and 10 mm open end wrench Castor 13 mm open end wrench (X 2) Quick release axle 19 mm open end wrench & 11 mm open end wrench 2.8.3. After sale and disposal recommendations • It is compulsory to use original Invacare® spare parts which you can buy from any Invacare® dealer. • For any repair, please contact your local dealer who is in charge of returning your wheelchair to Invacare® after sales department. • Disposal : electric parts must be disposed of as electric components through recycling. Batteries must be disposed of in an authorized disposal place. Metal and plastic parts can be disposed of through recycling (use of scrap). The metal parts can be disposed of for scrap metal through recycling. Plastic parts are disposed of as plastic scrap. Disposal must be carried out in accordance with respective national and local regulations. Please apply to your municipal authorities / local government for details about local disposal companies. 2.9. Dimension specifications (ISO) Seat effective width (mm) Overall width (mm) Width of folded wheelchair (mm) Total height (mm) Height from ground to back seat (mm) Height from ground to front seat (mm) Backrest height (mm) Wheelchair height when backrest is folded (mm) 435 625 N/A 790/960 Backrest height including headrest (mm) Overall length (mm) Length without footrest (mm) Distance between front wheel and rear wheel (mm) 460 Backrest angle ( 0° ) 500 Bracket angle ( 0° ) 350/500 Distance between footrest and seat (mm) 630 Distance between armrest and backrest (mm) Fixed armrest height (mm) N/A Maximum obstacle height (mm) Adjustable armrest height (mm) 150/230 Maximum down slope ( 0° ) 23 Notched armrest height (mm) N/A Maximum up slope ( 0° ) 7 600 Maximum lateral super elevation ( 0° ) 16 Removable parts Wheels 4/75 Overall weight when empty ( kg ) 30,5 500 User's maximum weight ( kg ) 115 390/470 Turning circle (mm) 810 Weight of the heaviest removed part ( kg ) 27,2 370 Cushion thickness (mm) N/A Seat material Fire class Nylon:M4 EN 1201 1/2 N/A 915/1040 N/A Rear wheel diameter (mm) 410/475 Handrim diameter (mm) 0 Seat plane angle (0°) 75 Height without rear wheel (mm) 530 35 27 28 Manufacturer : Invacare France Operations SAS - Route de Saint Roch - 37230 Fondettes - France ® Invacare Australia Pty Ltd. 1 lenton Place, North Rockes NSW 2151 Australia (61) 2 8839 5333 Fax (61) 2 8839 5353 ® Invacare n.v. Autobaan 22 8210 Loppem (Brugge) Belgium & Luxemburg +32 (50) 831010 Fax +32 (50) 831011 ® Invacare A/S Sdr. Ringvej 37 2605 Brøndby Danmark (kundeservice) +45 - (0) 3690 0000 Fax (kundeservice) +45 - (0) 3690 0001 ® Invacare GmbH Alemannenstraße 10, D-88316 Isny Deutschland +49 (0) 75 62 7 00 0 Fax +49 (0) 75 62 7 00 66 ® Invacare European Distributor Organisation Kleiststraße 49, D-32457 Porta Westfalica Deutschland +49 (0) 31 754 540 Fax +49 (0) 57 31 754 541 ® Invacare SA c/Areny s/n Poligon Industrial de Celrà 17460 Celrà (Girona) España +34 - (0) 972 - 49 32 00 Fax +34 - (0) 972 - 49 32 20 ® Invacare Poirier SAS Route de St Roch F-37230 Fondettes France +33 - (0) 2 47 62 64 66 Fax +33 - (0) 2 47 42 12 24 ® Invacare Mecc San s.r.l. Via dei Pini, 62 I-36016 Thiene (VI) Italia +39 - (0) 445-380059 Fax +39 - (0) 445-380034 ® Invacare Ireland Ltd Unit 5 Seatown Business Campus, Seatown Rd, Swords, County Dublin Ireland (353) 1 8107084 Fax (353) 1 8107085 ® Invacare NZ 4 Westfield Place Mt.Wellington Auckland New Zealand (kundeservice) +64 - 22 57 95 10 Fax (kundeservice) +64 - 22 57 95 01 ® Invacare AS Grensesvingen 9 0603 Oslo Norge (kundeservice) +47 - 22 57 95 10 Fax (kundeservice) +47 - 22 57 95 01 ® Invacare PORTUGAL Lda Rua Estrada Velha, 949 4465-784 Leça do Balio Portugal ® +351-225105946 Fax +351-225105739 Invacare AB Fagerstagatan 9 163 91 Spånga Sverige (kundtjänst) +46 - (0) 8 761 70 90 Fax (kundtjänst) +46 - (0) 8 761 81 08 ® Invacare B.V. Celsiusstraat 46 NL-6716 BZ Ede Nederland +31 - (0) 318 - 69 57 57 Fax +31 - (0) 318 - 69 57 58 ® Invacare Ltd Pencoed Technology Park, Pencoed, Bridgend CF35 5AQ United Kingdom Customer service +44 - (0) 1656 - 776222 Fax +44 - (0) 1656 - 776220 ® 29 Manufacturer Invacare France Operations SAS Route de Saint Roch 37230 Fondettes France ® 1510207-EN C 2015/09/30 Making Life's Experiences Possible TM