1
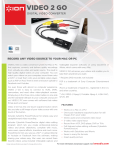
USB Video/Audio Capture
Device for PC and Mac
Quick Installation Guide
Introduction
The USB Video/Audio Capture Device for PC and
Mac captures your videos from VCRs, camcorders
and more, and converts them to DVDs.
Features and Benefits
•
•
•
•
•
USB 2.0 Plug and Play
Supports PC and Mac computers
Supports External A/V/S-Video inputs
Supports VCD/DVD/SVCD authoring
One-touch snapshot button to capture still
images
Serial Number Sticker
For future product return or exchange, this serial
number is required. Please keep it for your
reference.
04-0774A
1
System Requirements
•
•
•
PC or Mac computer with an available USB
2.0 port and soundcard
Windows ® 7 (32-/64-bit) / Vista (32-/
64-bit) / XP (32-/64-bit)
Mac OS X 10.5.x - 10.7.x
Package Contents
•
•
•
•
•
•
2
USB Video/Audio Capture Device
A/V Fan-out cable
USB extension cable
CyberLink PowerDirector Software CD
Driver CD
Quick installation guide
Layout
Snapshot
button
USB connector
(to computer)
USB port (to
fan out cable)
Figure 1: Capture Device Layout
A/V Fan Out Cable
S-Video
Video In
USB connector (to
capture device)
Audio L/R
Figure 2: A/V Fan Out Cable
Note: When using the S-Video
connection, you must also connect Audio
L/R to record sound.
3
Windows Installation
Windows 7 (32-/64-bit)
1.
2.
3.
4.
Boot up Windows. Insert the capture device
into an available USB port of your computer.
Insert the driver CD.
At the AutoPlay box: Click Open folder to
view files, then double click Setup.
If the AutoPlay box doesn't start: Click Start,
in Start Search, type D:\setup.exe, then
press Enter. (Change D: to match your
CD/DVD-ROM drive letter)
At the User Account Control, click Yes.
(Skip this step is not prompted.)
At Hi Vision USB DVD Maker Setup
Wizard, click Start.
Note: If the capture device is not plugged
into the computer or improperly detected
by the computer, the installation will stop.
If this occurs, insert the capture device or
move the capture device to a different USB
port and start again.
4
5.
6.
7.
Wait while the files are copied to the hard
disk. Depending on your system hardware
this may take several minutes to complete.
Do not interrupt this process.
Click OK to complete the driver installation.
Connect your source device (VCR, CDROM, DVD, etc) to the capture device's
video inputs and turn it on.
Note: Connect your source device to either
the Composite (Red, White, Yellow)
connectors OR S-Video (S-Video, Red,
White) connectors, see Layout on page 3
for more information.
8.
Next, go to CyberLink Power Director
Installation on page 10 and install the
video capture software to complete the
installation.
Windows Vista (32-/64-bit)
1.
2.
Boot up Windows. Insert the capture device
into an available USB port of your computer.
At the Found New Hardware Wizard, click
Cancel.
5
3.
4.
5.
Insert the driver CD.
At the AutoPlay box: Click Open folder to
view files, then double click Setup.
If the AutoPlay box doesn't start: Click Start,
in Start Search, type D:\setup.exe, then
press Enter. (Change D: to match your
CD/DVD-ROM drive letter)
At the User Account Control, click Allow.
(Skip this step is not prompted.)
At Hi Vision USB DVD Maker Setup
Wizard, click Start.
Note: If the capture device is not plugged
into the computer or improperly detected
by the computer, the installation will stop.
If this occurs, insert the capture device or
move the capture device to a different USB
port and start again.
6.
7.
6
Wait while the files are copied to the hard
disk. Depending on your system hardware
this may take several minutes to complete.
Do not interrupt this process.
Click OK to complete the driver installation.
8.
Connect your source device (VCR, CDROM, DVD, etc) to the capture device's
video inputs and turn it on.
Note: Connect your source device to either
the Composite (Red, White, Yellow)
connectors OR S-Video (S-Video, Red,
White) connectors, see Layout on page 3
for more information.
9.
Next, go to CyberLink Power Director
Installation on page 10 and install the
video capture software to complete the
installation.
Windows XP (32-/64-bit)
1.
2.
3.
4.
Boot up Windows. Insert the USB Capture
Device into an available USB port.
At the Found New Hardware Wizard, click
Cancel.
Insert the driver CD.
Click Start, Run. Type D:\setup.exe, click
OK. (Change D: to match your CD-ROM
drive letter)
7
5.
At Hi Vision USB DVD Maker Setup
Wizard, click Start.
Note: If the capture device is not plugged
into the computer or improperly detected
by the computer, the installation will stop.
If this occurs, insert the capture device or
move the capture device to a different USB
port and start again.
6.
7.
8.
Wait while the files are copied to the hard
disk. Depending on your system hardware
this may take several minutes to complete.
Do not interrupt this process.
Click OK to complete the driver installation.
Connect your source device (VCR, CDROM, DVD, etc) to the capture device's
video inputs and turn it on.
Note: Connect your source device to either
the composite (Red, White, Yellow)
connectors OR S-Video (S-Video, Red,
White) connectors, see Layout on page 3
for more information.
8
9.
Next, go to CyberLink Power Director
Installation on page 10 and install the
video capture software to complete the
installation.
To Verify Windows Installation
1.
2.
3.
Right click Computer or My Computer,
then click Manage.
For Windows 7 / XP: Click Device Manager.
For Windows Vista: Click Continue, then
click Device Manager.
Double click Sound, video and game
contollers.
USB Audio Device and USB Capture
Device should be displayed.
9
CyberLink PowerDirector Installation (For
Windows only)
Make sure the Capture Device is plugged into the
system and verify that it's properly installed, by
following the steps in section Verify Windows
Installation located on page 9, before installing
PowerDirector software.
1.
2.
3.
4.
5.
6.
7.
8.
9.
10
Insert the PowerDirector software CD.
For Windows 7 / Vista: At the AutoPlay box,
click Run AutoRun.exe.
For Windows XP: Go directly to step 2.
Click Cyberlink Power Director 8 Install.
Click Yes, Allow, or Continue. (Skip this
step is not prompted)
Select your language, then click OK.
Wait while InstallShield Wizard configures
your system.
At Welcome..., click Next.
At License Agreement, click Yes.
Type in your name and company, click
Next.
At Choose Destination Location, click Next.
10.
11.
12.
13.
At Select Program Folder, click Next.
At Setup will Install..., click Next.
Wait while the driver files are copied to the
hard disk. Depending on your system
hardware it may take several minutes to
complete. Do not interrupt this process.
At InstallShield Wizard Complete, click
Finish to complete the software installation.
CyberLink PowerDirector
Introduction
CyberLink PowerDirector is a digital video editing
program that lets you create professional looking
videos and photo slideshows, complete with
music, special effects, transitions and much more.
You can then output your video to a file or burn
it to a disc complete with stylish menus.
11
PowerDirector Modes
•
•
•
•
Capture: Captures media in a variety of
formats, from a variety of sources
Edit: Edit your production by adding video
and photos to the timeline, then add
transitions, effects, titles and much more
Produce: Output your created video to a
file, camcorder, or upload it to YouTube or
Facebook
Create Disc: Create and burn your video to
a disc, complete with professional looking
disc menu
Figure 3: Power Director Interface
12
Comprehensive Users Manual
A comprehensive user's manual is located on the
PowerDirector software CD. You will need Adobe
Acrobat Reader installed in order to view the
users manual. We suggest you read this manual
to become familiar with the operation and features
of the software. Follow the directions below to
open the manual.
1.
2.
Insert the Power Director installation CD
into you CD-ROM drive.
At the AutoRun screen click CyberLink
Power Director 8 Manual.
13
3.
Select the appropriate users manual and
double click on it to open.
Starting PowerDirector
Double click the CyberLink PowerDirector icon
located on the desktop or double click the shortcut
located in the CyberLink PowerDirector folder
in the start menu. Important: When starting the
program for the first time you will be prompted
to register the software. Enter your name and
email address at this time. You will only need to
do this one time.
Note: The screen resolution must be at
1024x768 or higher in order for
PowerDirector to work properly.
14
PowerDirector Workspace
The workspace is where you will spend most of
your time within PowerDirector, so getting used
to the features it has to offer is helpful.
15
Mac Installation
These steps taken from OS X 10.5.8, will be
similar if not identical for OS X 10.6 and 10.7.
1.
2.
3.
4.
5.
6.
16
Insert the Capture Device into an available
USB port of the computer.
Insert the driver CD.
Double click the Drivers disk icon located
on the desktop.
Double click the Video Glide for Mac folder.
Double click Video Glide OS X 1.4.8.dmg.
Double click Video Glide OS X 1.4.8.pkg.
7.
Click Continue.
8.
9.
At Welcome screen, click Continue.
At License Agreement, click Continue, then
click Agree.
Click Install.
Type in your password, then click OK.
At Install Succeeded, click Restart.
Connect your source device (VCR, CDROM, DVD, etc) to the capture device's
video inputs and turn it on.
Note: Connect your source device to either
the Composite (Red, White, Yellow)
connectors OR S-Video (S-Video, Red,
White) connectors, see Layout on page 3 for
more information.
10.
11.
12.
13.
17
VideoGlide for Mac OS X
VideoGlide for Mac OS X allows you to preview
and capture video from various video sources.
1.
2.
Start Finder.
Select Applications, click VideoGlide,
double click VideoGlide Capture.
NOTE: The first time you start VideoGlide
you will be prompted to enter a serial
number. This serial number is located on
the outside of the Driver CD sleeve. Please
type in this number and press OK to
continue.
18
3.
Click Digitizers, then click VideoGlide.
4.
Click Record, then click Video Settings.
19
5.
Click Source, select Composite (Red, White,
Yellow) or S-Video (S-Video, Red, White),
to match your source device's connection.
6.
Click Record, then click Sound Settings.
20
7.
Click Source, then select USB 2861 Device,
then click OK.
8.
VideoGlide is ready for use.
21
Snapshot Button
The snapshot button captures during video
preview mode only. Press the button once to save
the image currently displayed on the video
preview screen. The snapshot button does not
work when video is being captured.
Troubleshooting
•
•
•
•
•
22
If the Capture Device is not detected by the
operating system, insert it into a different
USB port
If you get no sound/image during capture,
make sure your sound card is operating
properly. Reinstall the soundcard drivers if
necessary
For the best performance, update the drivers
for your soundcard
Disable the computer's sleep mode while
video capturing and editing
Disable screen savers and any open
programs while video capturing and editing
Technical Support and Warranty
QUESTIONS? SIIG’s Online Support has answers! Simply visit our web site at
www.siig.com and click Support. Our online support database is updated daily with
new drivers and solutions. Answers to your questions could be just a few clicks away.
You can also submit questions online and a technical support analysts will promptly
respond.
SIIG offers a 5-year manufacturer warranty with this product. This warranty covers the
original purchaser and guarantees the product to be free of any defects in materials or
workmanship for five (5) years from the date of purchase of the product.
SIIG will, at our discretion, repair or replace (with an identical product or product
having similar features and functionality) the product if defective in materials or
workmanship. This warranty gives you specific legal rights, and you may also have other
rights which vary from state to state. Please see our web site for more warranty details.
If you encounter any problems with this product, please follow the procedures below.
A) If it is within the store's return policy period, please return the product to the store
where you purchased from.
B) If your purchase has passed the store's return policy period, please follow the steps
below to have the product repaired or replaced.
Step 1: Submit your RMA request.
Go to www.siig.com, click Support, then RMA to submit a request to SIIG RMA or
fax a request to 510-657-5962. Your RMA request will be processed, if the product
is determined to be defective, an RMA number will be issued.
Step 2: After obtaining an RMA number, ship the product.
•
Properly pack the product for shipping. All accessories that came with the
original package must be included.
•
Clearly write your RMA number on the top of the returned package. SIIG will
refuse to accept any shipping package, and will not be responsible for a product
returned without an RMA number posted on the outside of the shipping
carton.
•
You are responsible for the cost of shipping to SIIG. Ship the product to the
following address:
SIIG, Inc.
6078 Stewart Avenue
Fremont, CA 94538-3152, USA
RMA #:
•
SIIG will ship the repaired or replaced product via Ground in the U.S. and
International Economy outside of the U.S. at no cost to the customer.
23
About SIIG, Inc.
Founded in 1985, SIIG, Inc. is a leading manufacturer of IT connectivity
solutions (including Serial ATA and Ultra ATA Controllers, FireWire, USB,
and legacy I/O adapters) that bridge the connection between Desktop/
Notebook systems and external peripherals. SIIG continues to grow by adding
A/V and Digital Signage connectivity solutions to our extensive portfolio.
SIIG products offer comprehensive user manuals, many user-friendly features,
and are backed by an extensive manufacturer warranty. High quality control
standards are evident by the overall ease of installation and compatibility of
our products, as well as one of the lowest defective return rates in the industry.
SIIG products can be found in computer retail stores, mail order catalogs,
through major distributors, system integrators, and VARs in the Americas and
the UK, and through e-commerce sites.
PRODUCT NAME
USB Video/Audio Capture Device for PC and Mac
FCC RULES: TESTED TO COMPLY WITH FCC PART 15, CLASS B
OPERATING ENVIRONMENT: FOR HOME OR OFFICE USE
FCC COMPLIANCE STATEMENT:
This device complies with part 15 of the FCC Rules. Operation is subject
to the following two conditions: (1) This device may not cause harmful
interference, and (2) this device must accept any interference received,
including interference that may cause undesired operation.
THE PARTY RESPONSIBLE FOR PRODUCT COMPLIANCE
SIIG, Inc.
6078 Stewart Avenue
Fremont, CA 94538-3152, USA
Phone: 510-657-8688
USB Video/Audio Capture Device for PC and Mac is a trademark of SIIG, Inc. SIIG and the
SIIG logo are registered trademarks of SIIG, Inc. Microsoft and Windows are registered
trademarks of Microsoft Corporation. All other names used in this publication are for
identification only and may be trademarks of their respective owners.
February, 2012
Copyright © 2012 by SIIG, Inc. All rights reserved.